key VAUXHALL COMBO 2016 Owner's Guide
[x] Cancel search | Manufacturer: VAUXHALL, Model Year: 2016, Model line: COMBO, Model: VAUXHALL COMBO 2016Pages: 189, PDF Size: 4.47 MB
Page 101 of 189

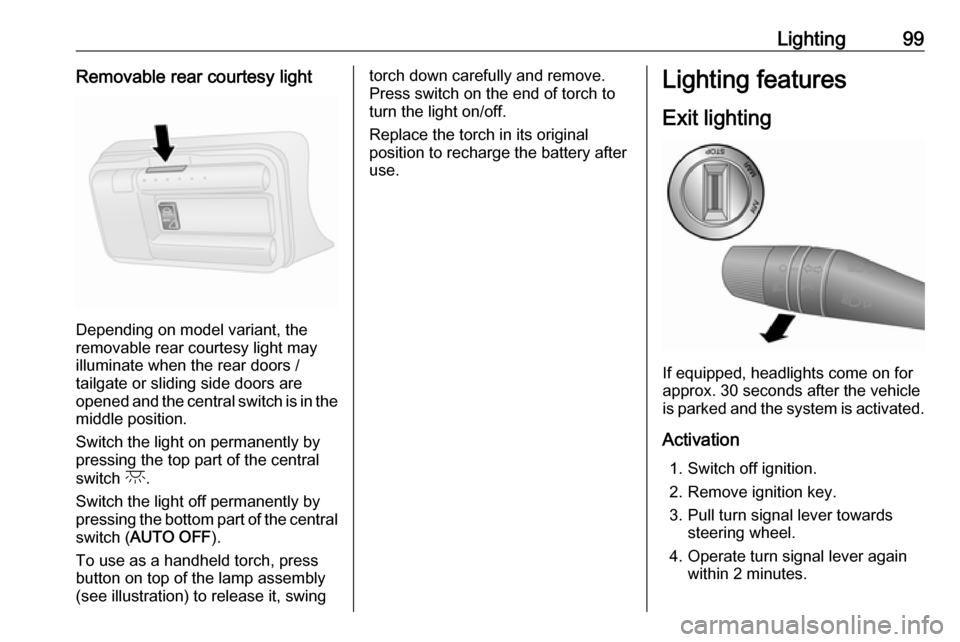
Lighting99Removable rear courtesy light
Depending on model variant, the
removable rear courtesy light may
illuminate when the rear doors /
tailgate or sliding side doors are
opened and the central switch is in the middle position.
Switch the light on permanently by pressing the top part of the central
switch c.
Switch the light off permanently by pressing the bottom part of the central
switch ( AUTO OFF ).
To use as a handheld torch, press
button on top of the lamp assembly
(see illustration) to release it, swing
torch down carefully and remove.
Press switch on the end of torch to
turn the light on/off.
Replace the torch in its original
position to recharge the battery after
use.Lighting features
Exit lighting
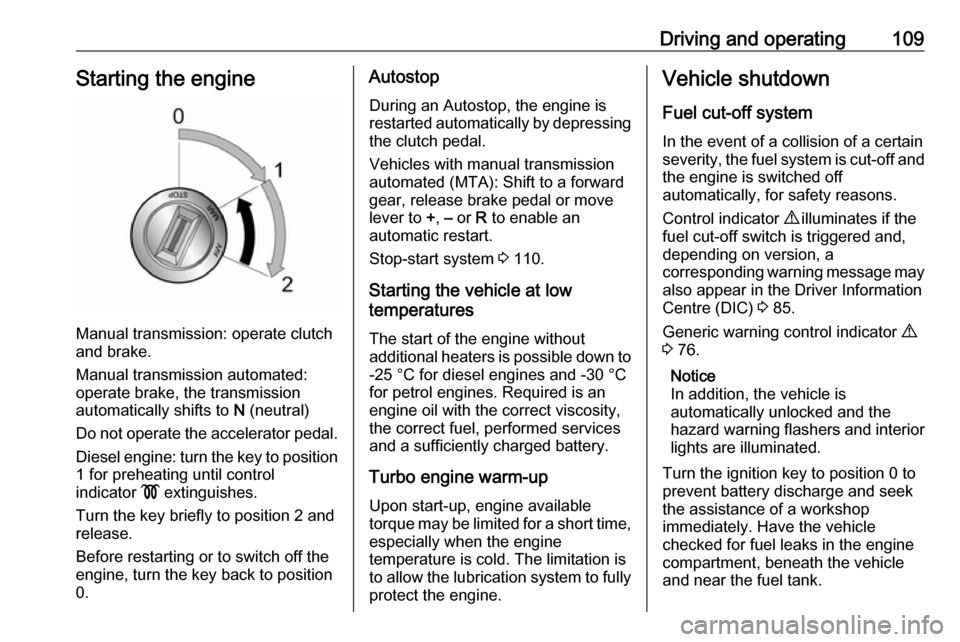
If equipped, headlights come on for
approx. 30 seconds after the vehicle
is parked and the system is activated.
Activation 1. Switch off ignition.
2. Remove ignition key.
3. Pull turn signal lever towards steering wheel.
4. Operate turn signal lever again within 2 minutes.
Page 111 of 189

Driving and operating109Starting the engine
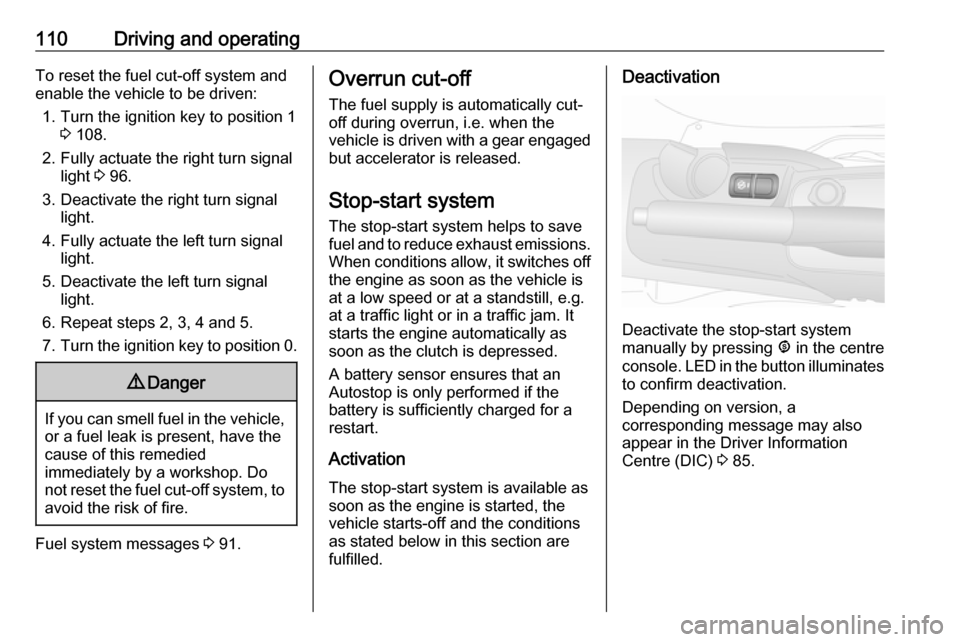
Manual transmission: operate clutch
and brake.
Manual transmission automated: operate brake, the transmission
automatically shifts to N (neutral)
Do not operate the accelerator pedal. Diesel engine: turn the key to position1 for preheating until control
indicator ! extinguishes.
Turn the key briefly to position 2 and release.
Before restarting or to switch off the engine, turn the key back to position
0.
Autostop
During an Autostop, the engine is
restarted automatically by depressing
the clutch pedal.
Vehicles with manual transmission
automated (MTA): Shift to a forward
gear, release brake pedal or move
lever to +, – or R to enable an
automatic restart.
Stop-start system 3 110.
Starting the vehicle at low
temperatures
The start of the engine without
additional heaters is possible down to -25 °С for diesel engines and -30 °C
for petrol engines. Required is an engine oil with the correct viscosity,
the correct fuel, performed services
and a sufficiently charged battery.
Turbo engine warm-up
Upon start-up, engine available
torque may be limited for a short time, especially when the engine
temperature is cold. The limitation is
to allow the lubrication system to fully protect the engine.Vehicle shutdown
Fuel cut-off system In the event of a collision of a certain
severity, the fuel system is cut-off and
the engine is switched off
automatically, for safety reasons.
Control indicator 9 illuminates if the
fuel cut-off switch is triggered and, depending on version, a
corresponding warning message may
also appear in the Driver Information
Centre (DIC) 3 85.
Generic warning control indicator 9
3 76.
Notice
In addition, the vehicle is
automatically unlocked and the
hazard warning flashers and interior lights are illuminated.
Turn the ignition key to position 0 to
prevent battery discharge and seek
the assistance of a workshop
immediately. Have the vehicle
checked for fuel leaks in the engine
compartment, beneath the vehicle
and near the fuel tank.
Page 112 of 189

110Driving and operatingTo reset the fuel cut-off system and
enable the vehicle to be driven:
1. Turn the ignition key to position 1 3 108.
2. Fully actuate the right turn signal light 3 96.
3. Deactivate the right turn signal light.
4. Fully actuate the left turn signal light.
5. Deactivate the left turn signal light.
6. Repeat steps 2, 3, 4 and 5.
7. Turn the ignition key to position 0.9Danger
If you can smell fuel in the vehicle,
or a fuel leak is present, have thecause of this remedied
immediately by a workshop. Do
not reset the fuel cut-off system, to avoid the risk of fire.
Fuel system messages 3 91.
Overrun cut-off
The fuel supply is automatically cut-
off during overrun, i.e. when the
vehicle is driven with a gear engaged
but accelerator is released.
Stop-start system The stop-start system helps to save
fuel and to reduce exhaust emissions. When conditions allow, it switches off
the engine as soon as the vehicle is
at a low speed or at a standstill, e.g.
at a traffic light or in a traffic jam. It
starts the engine automatically as
soon as the clutch is depressed.
A battery sensor ensures that an
Autostop is only performed if the
battery is sufficiently charged for a
restart.
Activation
The stop-start system is available as
soon as the engine is started, the
vehicle starts-off and the conditions
as stated below in this section are
fulfilled.Deactivation
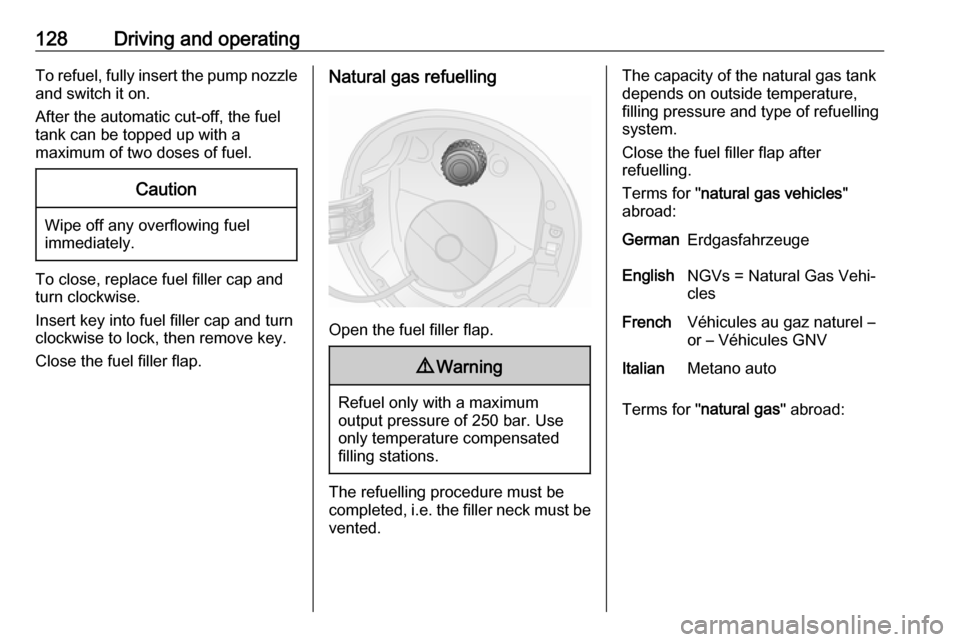
Deactivate the stop-start system
manually by pressing ^ in the centre
console. LED in the button illuminates
to confirm deactivation.
Depending on version, a
corresponding message may also
appear in the Driver Information
Centre (DIC) 3 85.
Page 114 of 189

112Driving and operatingRestarting the engine
Manual transmission
The selector lever must be in neutral
to enable an automatic restart.
Depress the clutch pedal to restart the
engine.
Manual transmission automated
If the lever is in position N, select
another gear, otherwise release the
brake pedal or move the lever to +, –
or R to enable an automatic restart.
If an electrical accessory, e.g. a
portable CD player, is connected to
the power outlet, a brief power drop
during the restart may be noticeable.
Restarting the engine with the key When one of the following conditions
occurs during an Autostop, the
engine will need to be restarted
manually using the key.
● the driver's seat belt is unfastened and the driver's door
is opened
● three minutes have elapsed since the engine was switched offIn this event, control indicator ^
flashes in the DIC in conjunction with
a warning chime. Depending on
version, a corresponding message
may also appear in the DIC 3 85.
Fault
If control indicator Æ illuminates in the
instrument cluster, there is a fault in
the stop-start system 3 84.
Depending on version, 9 will
illuminate as an alternative if control
indicator Æ is not present. A warning
message may also be displayed in
the DIC 3 85.
Generic warning 9 3 76.
Seek the assistance of a workshop.
Parking9 Warning
● Do not park the vehicle on an
easily ignitable surface. The
high temperature of the
exhaust system could ignite the
surface.
● Always apply parking brake without pressing release
button. Apply as firmly as
possible on a downhill slope or
uphill slope. Depress brake
pedal at the same time to
reduce operating force.
● Switch off the engine. Turn the ignition key to position 0 and
remove it. Turn the steering
wheel until the steering wheel
lock is felt to engage.
● If the vehicle is on a level surface or uphill slope, engage
first gear before switching off
the ignition. On an uphill slope,
turn the front wheels away from
the kerb.
If the vehicle is on a downhill
slope, engage reverse gear
before switching off the ignition. Turn the front wheels towardsthe kerb.
Lock the vehicle 3 21 and activate the
anti-theft locking system 3 26 .
Page 129 of 189

Driving and operating127A slight loss of power and torque can
be expected in petrol operation. You
must therefore adapt your driving
style (e.g. during overtaking
manoeuvres) and vehicle loads (e.g.
towing loads) accordingly.
Every six months run the petrol tank
down until control indicator §
illuminates and then refuel. This is
necessary to maintain fuel quality as
well as system function necessary for
petrol operation.
Fill the tank completely at regular
intervals to prevent corrosion in the
tank.
Refuelling
Fuel filler flap is located at left rear side of vehicle.9 Danger
Before refuelling, switch off engine
and any external heaters with
combustion chambers. Switch off
any mobile phones.
Follow the operating and safety
instructions of the filling station
when refuelling.9 Danger
Fuel is flammable and explosive.
No smoking. No naked flames or
sparks.
If you can smell fuel in your
vehicle, have the cause of this
remedied immediately by a
workshop.
Caution
In case of misfuelling, do not
switch on ignition.
Release the fuel filler flap by pulling
the flap by hand.
Insert key into fuel filler cap and turn
anticlockwise to unlock.
To remove fuel filler cap, rotate
anticlockwise.
Caution
To avoid damage, do not attempt
to operate the sliding side door
when the fuel filler flap is open.
Notice
Depending on model, the sliding
side door may be fitted with a safety system that prevents the door from
being opened fully when the fuel
filler flap is open.
Sliding side door 3 23.
The fuel filler cap can be retained in
the bracket on the fuel filler flap.
Page 130 of 189

128Driving and operatingTo refuel, fully insert the pump nozzle
and switch it on.
After the automatic cut-off, the fuel
tank can be topped up with a
maximum of two doses of fuel.Caution
Wipe off any overflowing fuel
immediately.
To close, replace fuel filler cap and
turn clockwise.
Insert key into fuel filler cap and turn
clockwise to lock, then remove key.
Close the fuel filler flap.
Natural gas refuelling
Open the fuel filler flap.
9 Warning
Refuel only with a maximum
output pressure of 250 bar. Use
only temperature compensated
filling stations.
The refuelling procedure must be
completed, i.e. the filler neck must be
vented.
The capacity of the natural gas tank depends on outside temperature,
filling pressure and type of refuelling
system.
Close the fuel filler flap after
refuelling.
Terms for " natural gas vehicles "
abroad:GermanErdgasfahrzeugeEnglishNGVs = Natural Gas Vehi‐
clesFrenchVéhicules au gaz naturel –
or – Véhicules GNVItalianMetano auto
Terms for " natural gas " abroad:
Page 186 of 189

184GGauges ......................................... 70
General information ...................130
Generic warning .............76, 91, 109
Glovebox ..................................... 57
Gross Vehicle Weight ...................62
H Halogen headlights ....................140
Hand brake ................................. 119
Hazard warning flashers ..............95
Headlamp washer......................... 67
Headlight flash ............................. 94
Headlight range adjustment ........95
Headlights..................................... 94 Headlights when driving abroad ..95
Head restraint adjustment .............8
Head restraints ............................ 32
Heated mirrors ............................. 28
Heated rear window ..................... 31
Heating ........................................ 37
Heating and ventilation system . 101
High beam ............................. 84, 94
Hill start assist ...................... 80, 120
Horn ....................................... 13, 65
I
Identification plate .....................170
Ignition switch positions .............108
Immobiliser ............................ 27, 83
Indicators ...................................... 70Information displays...................... 85
Initial drive information.................... 6 Installing seats .............................. 39
Instrument cluster ........................70
Instrument panel fuse box .........148
Instrument panel illumination .....145
Instrument panel illumination control ...................................... 97
Instrument panel overview ........... 10
Instrument panel storage ..............56
Interior care ............................... 166
Interior lighting ........................ 85, 97
Interior lights ........................ 97, 144
Interior mirrors .............................. 29
Introduction .................................... 3
ISOFIX child restraint systems ....55
J
Jump starting ............................. 161
K Kerb weight................................... 62Key number .................................. 19
Keys ............................................. 19
Keys, locks ................................... 19
L
Language ..................................... 85
Lashing eyes ......................... 61, 62
Light switch .................................. 94
Load compartment ................25, 58Load compartment cover .............58
Load compartment grille ...............61
Load compartment lighting ...........98
Loading ............................. 35, 37, 39
Loading information .....................62
Lock cylinders ............................... 19
Low engine oil level .....................83
Low fuel ....................................... 83
Lumbar support ............................ 34
M
Malfunction indicator light ............78
Manual adjustment ......................27
Manual anti-dazzle ......................29
Manual mode ............................. 117
Manual transmission .................. 114
Manual transmission automated 115
Manual windows ..........................29
Mirror adjustment ........................... 8
Misted light covers .......................97
Multifunction display .....................85
N
Natural gas ................................. 178
New vehicle running-in ..............108
Number plate light .....................143
O Object detection systems ...........124
Odometer ..................................... 70
Oil, engine .......................... 168, 171