lock VAUXHALL COMBO 2016 Owner's Guide
[x] Cancel search | Manufacturer: VAUXHALL, Model Year: 2016, Model line: COMBO, Model: VAUXHALL COMBO 2016Pages: 189, PDF Size: 4.47 MB
Page 59 of 189

Storage57Glovebox
Pull lever to open the glovebox cover.Depending on version, the glovebox
may be lockable.
The glovebox should be closed whilst
driving.
CupholdersCupholders are located in the console
between the front seats.
The cupholders can also be used to
hold the portable ashtray unit 3 70.
Overhead console
Store only lightweight items such as
paperwork or maps in the overhead
console.
Underseat storage
Pull the loop on the seat cushion to
gain access to the storage area.
Page 63 of 189

Storage61To remove, lift the front part of the
parcel shelf by releasing it from the
front retainers ( 1) on both sides.
Lift the rear part of the parcel shelf by
releasing it from the rear retainers ( 2
and 3) on both sides.
Installing
Refit the parcel shelf by engaging in
front and rear retainers on both sides.
Lashing eyes VanThe lashing eyes are designed to
secure items against slippage, e.g.
using lashing straps or a luggage net.
Combo Tour
Load compartment grille Depending on version, the load
compartment area can be increased
by opening the load compartment
partition on the front passenger side
(where fitted).
● Fold down the front passenger seat. Refer to "Seat folding"
3 35.
● From inside the load
compartment, release the pin (1)
on the rear of the partition to
unlock, then swing open the
partition door over the folded
front passenger seat.
● Insert the pin in the slot (2) on the
backrest of the folded front
passenger seat to lock in
position.
9 Warning
The load compartment partition
must always be locked in either
position during driving. Otherwise
Page 66 of 189

64Instruments and controlsInstruments and
controlsControls ....................................... 65
Steering wheel adjustment ........65
Steering wheel controls .............65
Horn ........................................... 65
Windscreen wiper/washer .........66
Rear window wiper/washer .......66
Headlamp washer .....................67
Outside temperature ..................67
Clock ......................................... 67
Power outlets ............................. 68
Cigarette lighter ......................... 69
Ashtrays .................................... 70
Warning lights, gauges and indi‐ cators ........................................... 70
Instrument cluster ......................70
Speedometer ............................. 70
Odometer .................................. 70
Trip odometer ............................ 70
Tachometer ............................... 71
Fuel gauge ................................ 71
Fuel selector .............................. 72
Engine coolant temperature gauge ....................................... 72
Service display .......................... 73Transmission display .................73
Control indicators ......................73
Generic warning ........................76
Turn signal ................................. 77
Seat belt reminder .....................77
Airbag and belt tensioners .........77
Airbag deactivation ....................78
Charging system .......................78
Malfunction indicator light ..........78
Brake system ............................. 79
Brake pad wear ......................... 79
Antilock brake system (ABS) .....79
Transmission ............................. 79
Upshift ....................................... 80
Hill start assist ........................... 80
Ultrasonic parking assist ...........80
Electronic Stability Control ........80
Engine coolant temperature ......81
Preheating ................................. 81
Diesel particle filter ....................81
Tyre pressure monitoring system ...................................... 82
Engine oil pressure ....................82
Change engine oil .....................82
Low engine oil level ...................83
Low fuel ..................................... 83
Drain fuel filter ........................... 83
Immobiliser ................................ 83
Stop-start system ......................84
Exterior light .............................. 84High beam................................. 84
Fog light ..................................... 84
Rear fog light ............................. 84
Cruise control ............................ 84
Door open .................................. 84
Information displays .....................85
Driver Information Centre ..........85
Vehicle messages ........................90
Warning chimes .........................90
Fuel system messages ..............91
Trip computer ............................... 91
Page 67 of 189

Instruments and controls65Controls
Steering wheel adjustment
Unlock lever, adjust steering wheel,
then engage lever and ensure it is
fully locked.
Do not adjust steering wheel unless
vehicle is stationary and steering
wheel lock has been released.
Steering wheel controls
The Infotainment system and a
connected mobile phone can be
operated via the controls on the
steering wheel.
Further information is available in the
Infotainment system manual.
Horn
Press j.
Page 69 of 189
Instruments and controls67Headlamp washer
With the headlights on, washer fluid is sprayed onto the headlights when the
windscreen washer is activated.
Notice
Washer fluid is not sprayed onto the
headlights if fluid level is too low.
Outside temperature Depending on version, outside
temperature may be shown
continuously in the Driver Information Centre (DIC) 3 85, or displayed in
the DIC by pressing TRIP on the end
of the wiper lever 3 91.9 Warning
The road surface may already be
icy even though the display
indicates a few degrees above 0
°C.
Clock
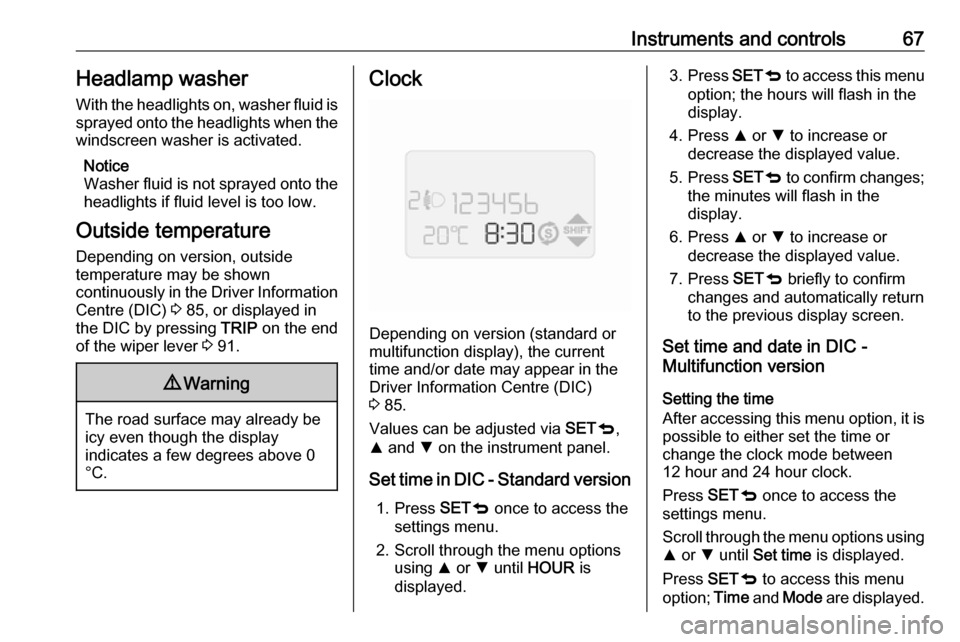
Depending on version (standard or
multifunction display), the current
time and/or date may appear in the
Driver Information Centre (DIC)
3 85.
Values can be adjusted via SETq,
R and S on the instrument panel.
Set time in DIC - Standard version 1. Press SETq once to access the
settings menu.
2. Scroll through the menu options using R or S until HOUR is
displayed.
3. Press SETq to access this menu
option; the hours will flash in the
display.
4. Press R or S to increase or
decrease the displayed value.
5. Press SETq to confirm changes;
the minutes will flash in the display.
6. Press R or S to increase or
decrease the displayed value.
7. Press SETq briefly to confirm
changes and automatically return to the previous display screen.
Set time and date in DIC -
Multifunction version
Setting the time
After accessing this menu option, it is possible to either set the time or
change the clock mode between
12 hour and 24 hour clock.
Press SETq once to access the
settings menu.
Scroll through the menu options using
R or S until Set time is displayed.
Press SETq to access this menu
option; Time and Mode are displayed.
Page 70 of 189
68Instruments and controlsTo set the time:1. Press R or S to select Time and
press SETq to access this
submenu option; the hours will flash in the display.
2. Press R or S to increase or
decrease the displayed value.
3. Press SETq to confirm changes;
the minutes will flash in the
display.
4. Press R or S to increase or
decrease the displayed value.
5. Press SETq briefly to confirm
changes and automatically return
to the previous display screen.
To change the clock mode between 12 hour and 24 hour clock:
1. Press R or S to select Mode and
press SETq to access this
submenu option; the display will
flash.
2. Press R or S to change clock
mode between 12h and 24h.
3. Press SETq briefly to confirm
changes and automatically return
to the previous display screen.Setting the date
1. Press SETq once to access the
settings menu.
2. Scroll through the menu options using R or S until Set date is
displayed.
3. Press SETq to access this menu
option; the year will flash in the
display.
4. Press R or S to increase or
decrease the displayed value.
5. Press SETq to confirm changes;
the month will flash in the display.
6. Press R or S to increase or
decrease the displayed value.
7. Press SETq to confirm changes;
the day will flash in the display.
8. Press R or S to increase or
decrease the displayed value.
9. Press SETq briefly to confirm
changes and automatically return
to the previous display screen.Power outlets
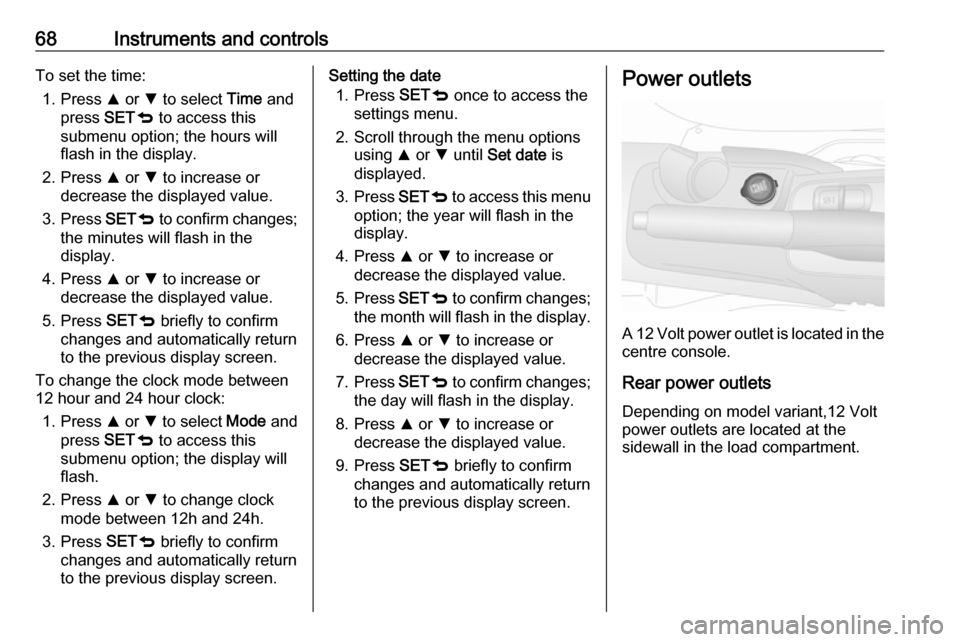
A 12 Volt power outlet is located in the
centre console.
Rear power outlets Depending on model variant,12 Volt
power outlets are located at the
sidewall in the load compartment.
Page 78 of 189
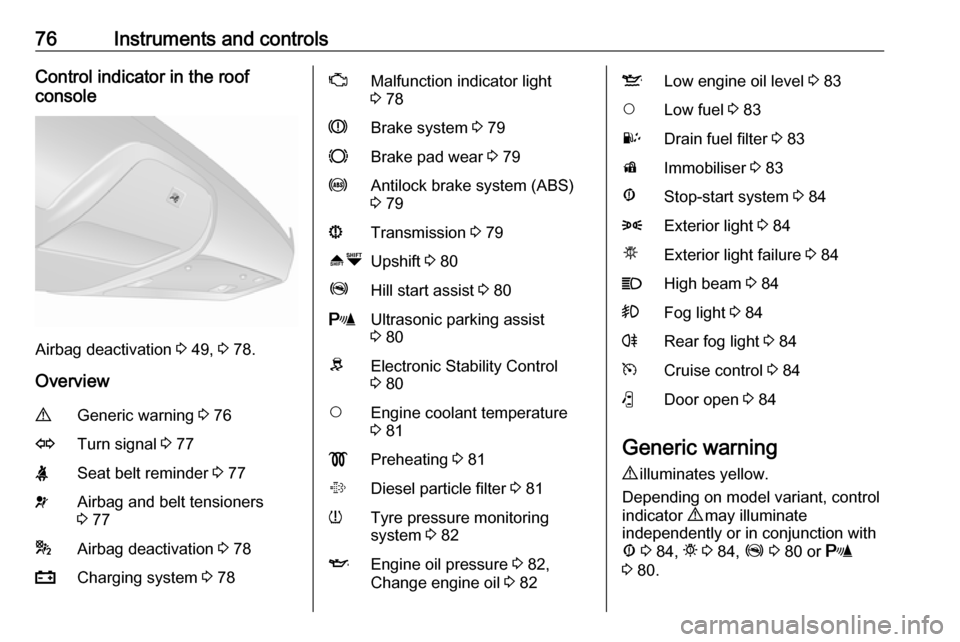
76Instruments and controlsControl indicator in the roof
console
Airbag deactivation 3 49, 3 78.
Overview
9Generic warning 3 76OTurn signal 3 77XSeat belt reminder 3 77vAirbag and belt tensioners
3 77*Airbag deactivation 3 78pCharging system 3 78ZMalfunction indicator light
3 78RBrake system 3 79FBrake pad wear 3 79uAntilock brake system (ABS)
3 79sTransmission 3 79[ ÒUpshift 3 80ZHill start assist 3 80rUltrasonic parking assist
3 80RElectronic Stability Control
3 80$Engine coolant temperature
3 81!Preheating 3 81%Diesel particle filter 3 81wTyre pressure monitoring
system 3 82IEngine oil pressure 3 82,
Change engine oil 3 82SLow engine oil level 3 83$Low fuel 3 83UDrain fuel filter 3 83dImmobiliser 3 83ÆStop-start system 3 848Exterior light 3 84µExterior light failure 3 84CHigh beam 3 84>Fog light 3 84rRear fog light 3 84mCruise control 3 84(Door open 3 84
Generic warning
9 illuminates yellow.
Depending on model variant, control
indicator 9 may illuminate
independently or in conjunction with
Æ 3 84, t 3 84, Z 3 80 or r
3 80.
Page 81 of 189

Instruments and controls79Flashes when the engine is
running
Fault that could lead to catalytic
converter damage. Ease up on the accelerator until the flashing stops.
Seek the assistance of a workshop
immediately.
Depending on version, a warning
message may also be displayed in
the Driver Information Centre (DIC)
3 85.
Brake system
R illuminates red.
Illuminates after the ignition is
switched on if the parking brake is
applied 3 119. A warning chime will
sound if a certain speed is exceeded
with the parking brake applied.
Illuminates when the parking brake is
released if the brake fluid level is too
low 3 137.9 Warning
Stop. Do not continue your
journey. Consult a workshop.
Illuminates if the brake vacuum servo
fails; the brake pedal becomes stiff
when pressed. The brake system
remains operational however,
assistance will be reduced. The
steering may also require
considerably more effort when
turning.
Depending on version, a warning
message may also be displayed in
the Driver Information Centre (DIC) 3 85.
Brake pad wear
F illuminates yellow.
The front brake pads are worn, seek
the assistance of a workshop
immediately.
Depending on version, a warning
message may also be displayed in
the Driver Information Centre (DIC)
3 85.
Antilock brake system
(ABS)
u illuminates yellow.Illuminates for a few seconds after the
ignition is switched on. The system is
ready for operation when the control
indicator extinguishes.
If the control indicator does not
extinguish after a few seconds, or if it illuminates while driving, there is a
fault in the ABS. The brake system
remains operational but without ABS
regulation.
If u illuminates together with R,
there is a fault in the braking system.
Depending on version, a warning
message may also be displayed in
the Driver Information Centre (DIC)
3 85. Seek the assistance of a
workshop immediately.
Antilock brake system 3 119.
Transmission
s illuminates red.
Illuminates for a few seconds after the ignition is switched on.
s illuminates during driving when a
fault is present in the transmission.
Page 84 of 189
82Instruments and controlsControl indicator % illuminates when
diesel particle filter is full. Start
cleaning process as soon as possible
to avoid damage to the engine.
Diesel particle filter 3 113, Stop-start
system 3 110.
Tyre pressure monitoring
system
w illuminates or flashes yellow.
Illuminates
Tyre pressure loss. Stop immediately
and check tyre pressure.
Control indicator w illuminates
together with a warning chime and, in
vehicles with Multifunction version of
the Driver Information Centre (DIC) 3 85, a corresponding message
also appears when a puncture or
severely under-inflated tyre is
detected.
Flashes
Fault in system. After several
seconds w illuminates continuously.
Consult a workshop.Depending on version, a
corresponding message also
appears in the DIC when a tyre
without a pressure sensor is mounted (e.g. spare wheel).
Tyre pressure monitoring system
3 151.
Engine oil pressure
I illuminates red.
Illuminates when the ignition is
switched on and extinguishes shortly
after the engine starts.
Illuminates when the engine is
running
Depending on version, a warning
message may also be displayed in
the Driver Information Centre (DIC) 3 85.Caution
Engine lubrication may be
interrupted. This may result in
damage to the engine and/or
locking of the drive wheels.
1. Depress clutch.
2. Select neutral gear (or move selector lever to N).
3. Move out of the flow of traffic as quickly as possible without
impeding other vehicles.
4. Switch off ignition.9 Warning
When the engine is off,
considerably more force is needed
to brake and steer. During an
Autostop the brake servo unit will
still be operational.
Do not remove key until vehicle is
stationary, otherwise the steering wheel lock could engage
unexpectedly.
Check oil level before seeking the
assistance of a workshop 3 135.
Change engine oil
Diesel engines with diesel particle filter
I flashes red.
Page 87 of 189
Instruments and controls85Information displays
Driver Information Centre
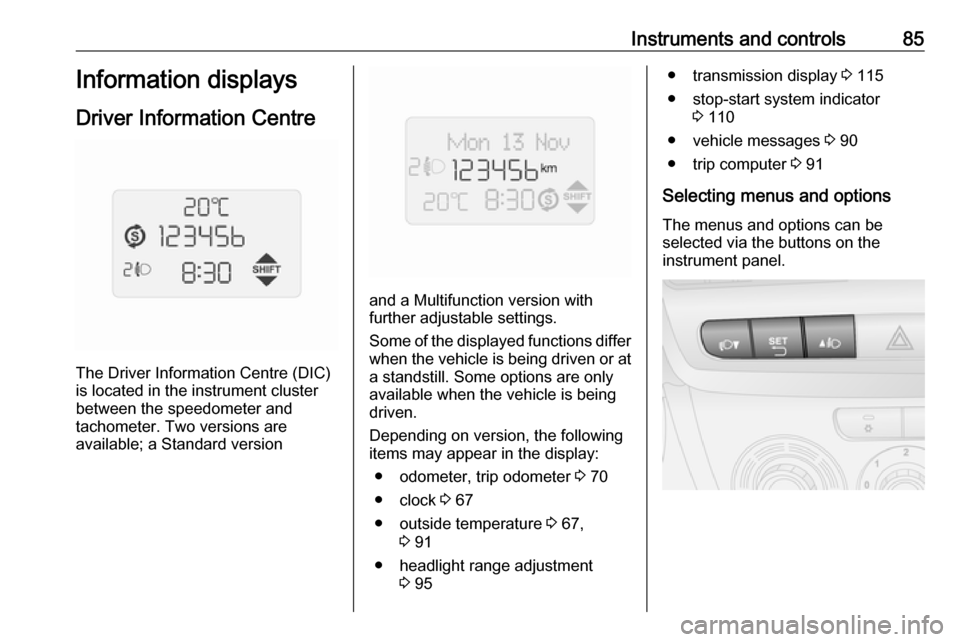
The Driver Information Centre (DIC)
is located in the instrument cluster
between the speedometer and
tachometer. Two versions are
available; a Standard version
and a Multifunction version with
further adjustable settings.
Some of the displayed functions differ
when the vehicle is being driven or at a standstill. Some options are onlyavailable when the vehicle is being
driven.
Depending on version, the following
items may appear in the display:
● odometer, trip odometer 3 70
● clock 3 67
● outside temperature 3 67,
3 91
● headlight range adjustment 3 95
● transmission display 3 115
● stop-start system indicator 3 110
● vehicle messages 3 90
● trip computer 3 91
Selecting menus and options
The menus and options can be
selected via the buttons on the
instrument panel.