remove VAUXHALL COMBO E 2019 Owner's Manual
[x] Cancel search | Manufacturer: VAUXHALL, Model Year: 2019, Model line: COMBO E, Model: VAUXHALL COMBO E 2019Pages: 281, PDF Size: 10.33 MB
Page 21 of 281

In brief19Stop-start system
If the vehicle is at a low speed or at astandstill and certain conditions are
fulfilled, an Autostop is activated.
An Autostop is indicated by control
indicator D.
Manual transmission: to restart the
engine, depress the clutch pedal
again. Control indicator D
extinguishes.
Automatic transmission: to restart the
engine, release the brake pedal.
Control indicator D extinguishes.
Stop-start system 3 147.
Parking9 Warning
● Do not park the vehicle on an
easily ignitable surface. The
high temperature of the
exhaust system could ignite the
surface.
● Always apply the parking brake.
● If the vehicle is on a level surface or uphill slope, engage
first gear or set the selector
lever to position P. On an uphill
slope, turn the front wheels
away from the kerb.
If the vehicle is on a downhill
slope, engage reverse gear or
set the selector lever to position
P . Turn the front wheels
towards the kerb.
● Close the windows.
● Switch off the engine.
● Remove the ignition key from the ignition switch or switch off
ignition on vehicles with power
button. Turn the steering wheel until the steering wheel lock is
felt to engage.
● Lock the vehicle with e on the
radio remote control.
Activate the anti-theft alarm
system 3 34.
● The engine cooling fans may run
after the engine has been
switched off 3 211.
Caution
After running at high engine
speeds or with high engine loads,
operate the engine briefly at a low load or run in neutral for
approx. 30 seconds before
switching off, in order to protect
the turbocharger.
Keys, locks 3 20.
Laying-up the vehicle for a long
period of time 3 210.
Page 23 of 281

Keys, doors and windows21Key with foldaway key section
Press button to extend. To fold the
key, first press the button.
Lock cylinders
Designed to free-wheel if they are forcefully rotated without the correct
key or if the correct key is not fully
inserted. To reset, turn cylinder with
the correct key until its slot is vertical, remove key then re-insert it. If the
cylinder still free-wheels, turn the key
through 180° and repeat operation.
Radio remote controlDepending on the version, the radio
remote control enables a operation of
the following functions:
● central locking system 3 24
● anti-theft locking system 3 34
● anti-theft alarm system 3 34
● tailgate unlocking 3 24
● power windows 3 40
● mirrors folding 3 37
● vehicle locator lighting 3 129
● peripheral lighting 3 129
The remote control has a range of up
to several metres, but may also be
much less due to external influences. The hazard warning flashers confirm
operation.
Handle with care, protect from
moisture and high temperatures and
avoid unnecessary operation.
Replacing battery in radio remote
control
Replace the battery as soon as the
range reduces.
Page 24 of 281

22Keys, doors and windows
Batteries do not belong in household
waste. They must be disposed of at
an appropriate recycling collection
point.
1. Remove the back cover from the remote control.
2. Extract the flat battery from its location.
3. Replace battery with a battery ofthe same type. Pay attention to
the installation position.
4. Clip the back cover in place.
Fault
If the central locking system cannot
be operated with the radio remote
control, the cause may be one of the
following:
● Fault in radio remote control.● Electronic key is out of reception range.
● The battery voltage is too low.
● Overload of the central locking system by operating at frequentintervals, the power supply is
interrupted for a short time.
● Interference from higher-power radio waves from other sources.
Manual unlocking 3 24.Electronic key system
Page 25 of 281

Keys, doors and windows23Depending on the version, the
electronic key system enables a
keyless operation of the following functions:
● central locking system 3 24
● tailgate unlocking
● ignition switching on and starting the engine 3 146
● headlight activation
The electronic key simply needs to be
on the driver's person.
Additionally, the electronic key
includes the functionality of the radio
remote control 3 21.
Handle with care, protect from
moisture and high temperatures and
avoid unnecessary operation.
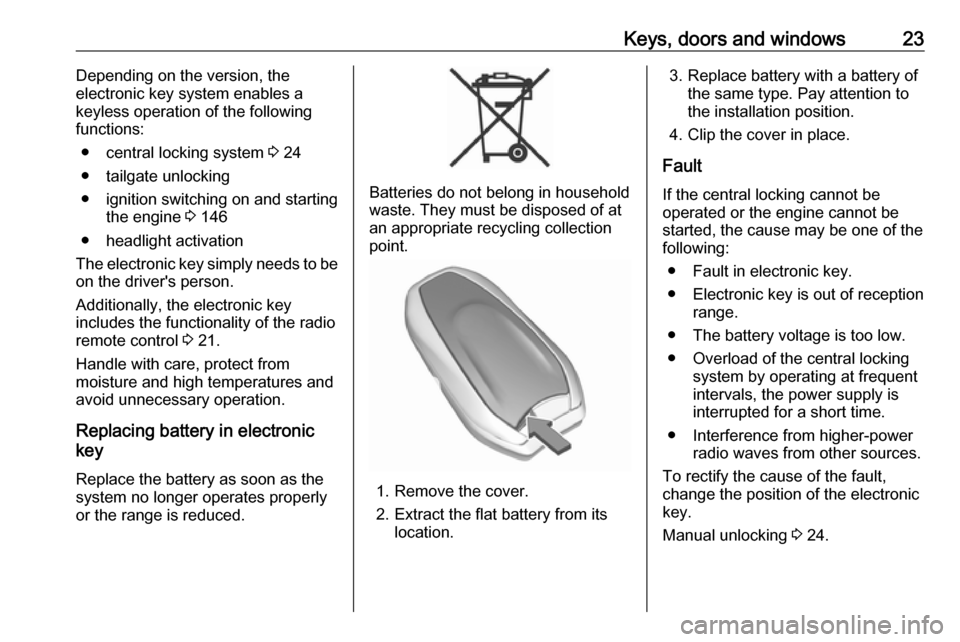
Replacing battery in electronic
key
Replace the battery as soon as the
system no longer operates properly
or the range is reduced.
Batteries do not belong in household
waste. They must be disposed of at
an appropriate recycling collection
point.
1. Remove the cover.
2. Extract the flat battery from its location.
3. Replace battery with a battery ofthe same type. Pay attention to
the installation position.
4. Clip the cover in place.
Fault
If the central locking cannot be
operated or the engine cannot be
started, the cause may be one of the
following:
● Fault in electronic key.
● Electronic key is out of reception range.
● The battery voltage is too low. ● Overload of the central locking system by operating at frequent
intervals, the power supply is
interrupted for a short time.
● Interference from higher-power radio waves from other sources.
To rectify the cause of the fault,
change the position of the electronic
key.
Manual unlocking 3 24.
Page 38 of 281

36Keys, doors and windowsNotice
If the vehicle is unlocked and no door is opened, the vehicle is
automatically relocked after 30
seconds. In this case, the anti-theft
alarm will be reactivated, too.
Alarm
When triggered, the alarm horn
sounds and the hazard warning lights flash simultaneously. The number
and duration of alarm signals are
stipulated by legislation.
The anti-theft alarm system can be
deactivated by pressing c, by
pressing on one of the front door
handles at the markings with
electronic key system. The LED of the
U button will extinguish and the turn
lights flash for a short time.
A triggered alarm, which has not been interrupted by the driver, will be
indicated by the rapid flashing of the
LED of the U button. If the ignition is
switched on, the flashing stops
immediately
If the vehicle's battery is to be
disconnected (e.g. for maintenance
work), the alarm siren must bedeactivated as follows: switch the
ignition on then off, then disconnect
the vehicle's battery within 15 s.
Locking the vehicle without
activation of the anti-theft alarm
Lock the vehicle by inserting and
turning the integrated key of the
remote control or the electronic key
system in the lock cylinder of the
driver's door.
Malfunction of the remote control
Unlock the vehicle by inserting and
turning the integrated key of the
remote control or the electronic key
system in the lock cylinder of the
driver's door.
Open the driver's door.
The horn of the anti-theft alarm will
sound.
Switch on ignition.
The horn will stop sounding and the status LED extinguishes.Immobiliser
The system is part of the ignition
switch and checks whether the
vehicle is allowed to be started with
the key being used.
The immobiliser is activated
automatically after the key has been
removed from the ignition switch.
Notice
Radio Frequency Identification
(RFID) tags may cause interference
with the key. Do not have it placed near the key when starting the
vehicle.
Notice
The immobiliser does not lock the doors. Always lock the vehicle after
leaving it 3 24 and switch on the anti-
theft alarm system 3 34.
Page 46 of 281

44Seats, restraintsSeats, restraintsHead restraints............................ 44
Front seats ................................... 45
Seat position .............................. 45
Seat adjustment ........................46
Seat folding ............................... 47
Armrest ...................................... 49
Heating ...................................... 49
Rear seats ................................... 50
Second row seats ......................50
Third row seats .......................... 51
Seat belts ..................................... 54
Three-point seat belt .................55
Airbag system .............................. 57
Front airbag system ...................60
Side airbag system ....................60
Curtain airbag system ...............61
Airbag deactivation ....................62
Child restraints ............................. 63
Child restraint systems ..............63
Child restraint installation locations ................................... 66Head restraints
Position9 Warning
Only drive with the head restraint
set to the proper position.
The upper edge of the head restraint
should be at upper head level. If this
is not possible for extremely tall
people, set to highest position, and
set to lowest position for small people.
Adjustment
Head restraints on front seats
Height adjustment
Pull the head restraint upwards or
press catch and push it downwards.
Removal
Press catch, pull the respective head
restraint upwards and remove.
Page 47 of 281

Seats, restraints45Head restraints on rear seats
Height adjustment
Pull the head restraint upwards or
push it downwards.
Removal
Press catch, pull the respective head
restraint upwards and remove.
Front seats
Seat position9 Warning
Only drive with the seat correctly
adjusted.
9 Warning
Never adjust seats while driving as
they could move uncontrollably.
9 Danger
Do not sit closer than 25 cm to the
steering wheel, to permit safe
airbag deployment.
9 Warning
Never store any objects under the
seats.
● Sit with buttocks as far back against the backrest as possible.
Adjust the distance between the
seat and the pedals so that legs
are slightly angled when pressing the pedals. Slide the front
passenger seat as far back as
possible.
● Set seat height high enough to have a clear field of vision on allsides and of all display
instruments. There should be at
least one hand of clearance
between head and the roof
frame. Your thighs should rest
lightly on the seat without
pressing into it.
Page 49 of 281

Seats, restraints47Push the lever, adjust inclination and
release the lever. Do not lean on
backrest when adjusting.
Seat height
Lever pumping motion
up:seat higherdown:seat lowerLumbar support
Turn the handwheel to suit personal
requirements.
Seat folding Depending on version, the front
passenger seat can be folded flat to the table position.
Folding single seat front
passenger side
Slide the front passenger seat as far
back as possible, to avoid contact
with the instrument panel during
folding.
Push head restraints down or remove it before folding backrest 3 44.
Depending on version, remove the
armrest 3 49.
Push lever, fold backrest fully
forwards and release the lever. Then
push the backrest down further until it
is completely flat.
Unfolding single seat front
passenger side
To restore the seat to the upright
position, pull up the backrest as far as
it will go.
Pull release levers and raise backrest
fully then release levers.
Page 51 of 281

Seats, restraints49Armrest
The armrest can be folded up.
To remove the armrest fold it up thenpush and turn it to the position shown
in the picture. Then pull off the
armrest from the backrest.
To fit the armrest engage it in the
backrest and fold the armrest
downwards.
Heating
Activate seat heating by pressing ß
for the respective front seat.
The LED in the button illuminates to
indicate activation.
Pressing ß once more deactivates
seat heating.
Seat heating is operational when
engine is running and during an
Autostop.
Stop-start system 3 147.
Page 52 of 281

50Seats, restraintsRear seats
Second row seats Depending on the equipment, the
rear seat backrest is divided into two or three parts. All parts can be folded
down.
Before folding rear seat backrests,
execute the following if necessary:
● Move front seats forward.
● Remove the load compartment cover 3 75.
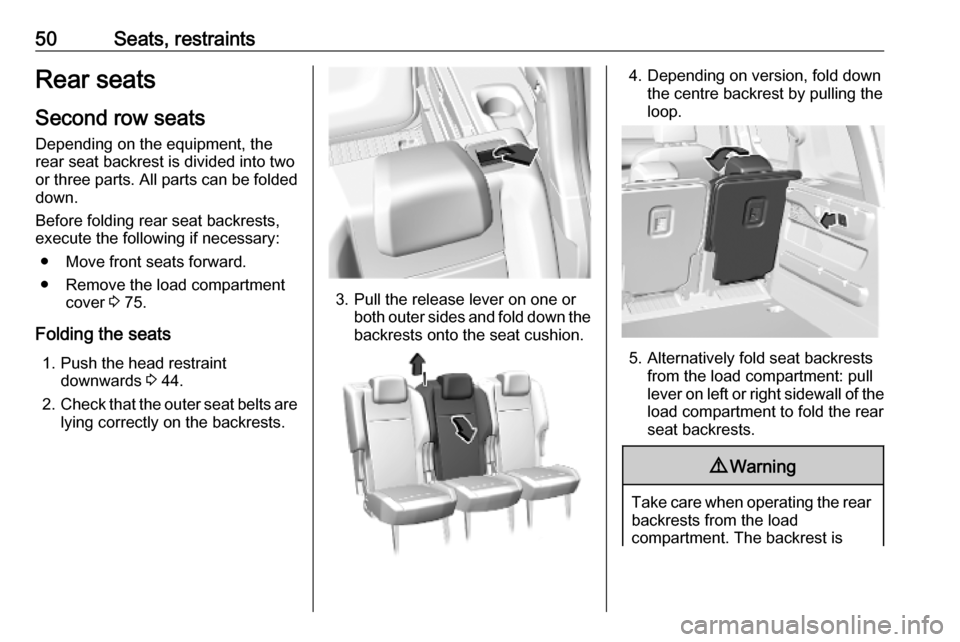
Folding the seats 1. Push the head restraint downwards 3 44.
2. Check that the outer seat belts are
lying correctly on the backrests.
3. Pull the release lever on one or both outer sides and fold down thebackrests onto the seat cushion.
4. Depending on version, fold down the centre backrest by pulling the
loop.
5. Alternatively fold seat backrests from the load compartment: pull
lever on left or right sidewall of the
load compartment to fold the rear
seat backrests.
9 Warning
Take care when operating the rear
backrests from the load
compartment. The backrest is