locking VAUXHALL CORSA 2017 User Guide
[x] Cancel search | Manufacturer: VAUXHALL, Model Year: 2017, Model line: CORSA, Model: VAUXHALL CORSA 2017Pages: 267, PDF Size: 7.82 MB
Page 67 of 267

Storage65
Insert the strap retainer and pull
tightly downwards as far as possible.
Press release lever and slide in wheel recesses all the way as far as they will
go.
Disengage the locking lever on the
diagonal support and fold both pedal crank recesses down.
9 Warning
Risk of pinching.
Swivel first the right clamping lever
( 1 ) forwards, followed by the left
clamping lever ( 2), until they can be
engaged in their respective recesses.
Page 69 of 267

Storage67Pull the release handle on both sides,
pull the backrest forwards to the
vertical position and engage.
When unlocking, a red marking
appears next to the release lever. The
backrest is properly engaged when
the red marks on both sides near the
release lever are no longer visible.
Folding down rear backrests
Remove load compartment cover as
necessary.
Push head restraints down by
pressing the catch.Guide the seat belts through side
supports to protect them against
damage. When folding the backrest, pull the seat belts along with it.
Split backrest
Pull the release handle on the
relevant side and fold it down onto the seat cushion.
Single-unit backrest
Pull the release handle on both sides
and fold it down onto the seat
cushion.If the vehicle is to be loaded via a rear
door, take the seat belt out of the seat
backrest guide and insert the latch
plate in the recess as shown in the
illustration.
To fold up, raise the backrest and
guide it into an upright position until it engages audibly.
Ensure that the seat belts of the
outboard seats are placed in the corresponding belt guides.
The backrest is properly engaged
when the red marks on both sides
near the release lever are no longer
visible.
Page 96 of 267

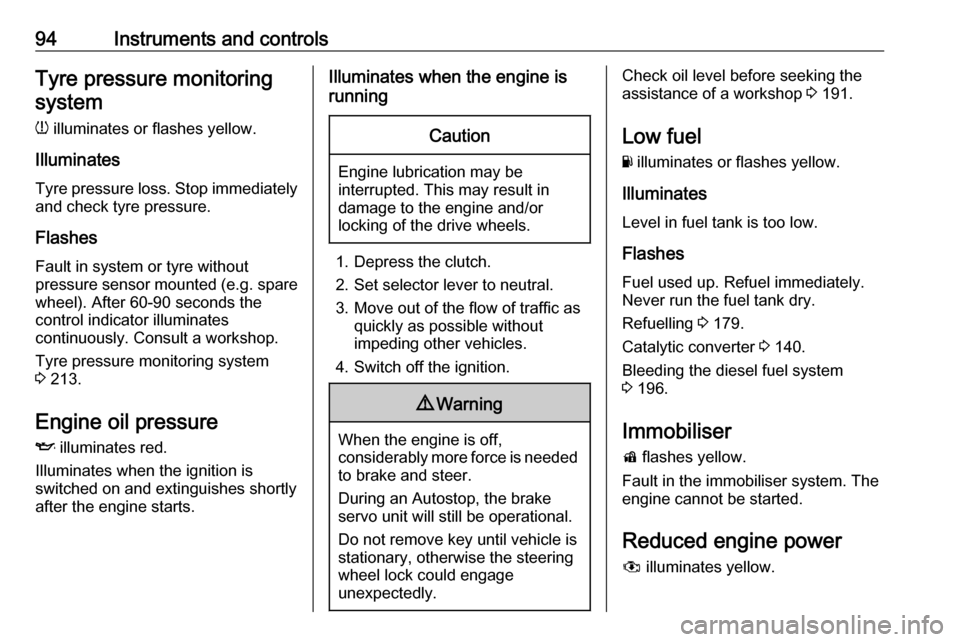
94Instruments and controlsTyre pressure monitoringsystem
w illuminates or flashes yellow.
Illuminates
Tyre pressure loss. Stop immediately
and check tyre pressure.
Flashes
Fault in system or tyre without
pressure sensor mounted ( e.g. spare
wheel). After 60-90 seconds the
control indicator illuminates
continuously. Consult a workshop.
Tyre pressure monitoring system3 213.
Engine oil pressure
I illuminates red.
Illuminates when the ignition is
switched on and extinguishes shortly
after the engine starts.Illuminates when the engine is
runningCaution
Engine lubrication may be
interrupted. This may result in
damage to the engine and/or
locking of the drive wheels.
1. Depress the clutch.
2. Set selector lever to neutral.
3. Move out of the flow of traffic as quickly as possible without
impeding other vehicles.
4. Switch off the ignition.
9 Warning
When the engine is off,
considerably more force is needed
to brake and steer.
During an Autostop, the brake
servo unit will still be operational.
Do not remove key until vehicle is stationary, otherwise the steeringwheel lock could engage
unexpectedly.
Check oil level before seeking the
assistance of a workshop 3 191.
Low fuel
Y illuminates or flashes yellow.
Illuminates
Level in fuel tank is too low.
Flashes
Fuel used up. Refuel immediately.
Never run the fuel tank dry.
Refuelling 3 179.
Catalytic converter 3 140.
Bleeding the diesel fuel system
3 196.
Immobiliser d flashes yellow.
Fault in the immobiliser system. The
engine cannot be started.
Reduced engine power
# illuminates yellow.
Page 107 of 267

Instruments and controls105Vehicle personalisation
The vehicle's behaviour can be
personalised by changing the settings in the Info-Display.
Some of the personal settings for
different drivers can be memorised
individually for each vehicle key.
Memorised settings 3 22.
Depending on vehicle equipment and
country-specific regulations, some of
the functions described below might
not be available.
Some functions are only displayed or
active when the engine is running.
Personal settings Graphic-Info-Display
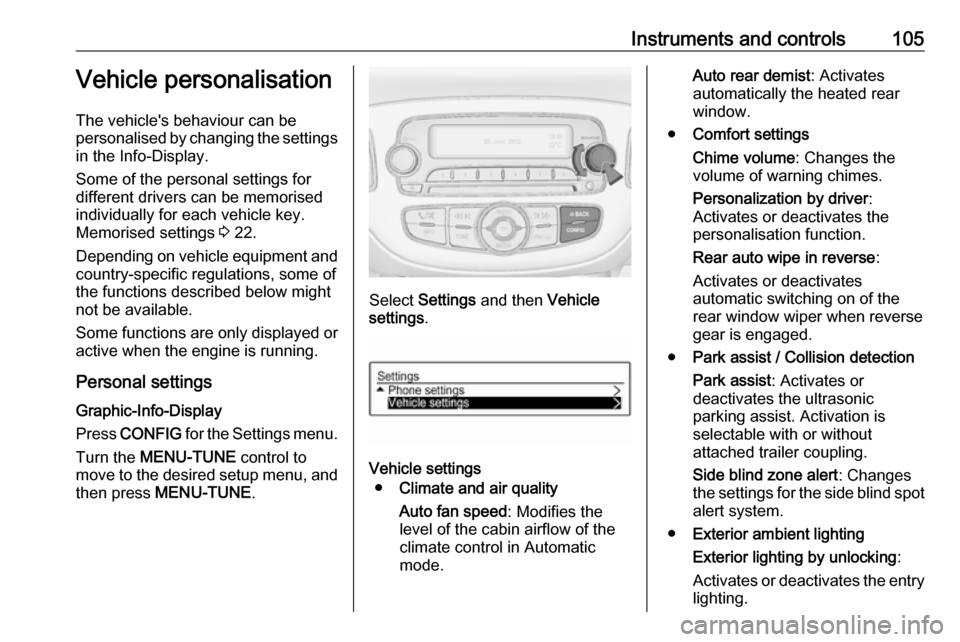
Press CONFIG for the Settings menu.
Turn the MENU-TUNE control to
move to the desired setup menu, and then press MENU-TUNE .
Select Settings and then Vehicle
settings .
Vehicle settings
● Climate and air quality
Auto fan speed : Modifies the
level of the cabin airflow of the
climate control in Automatic
mode.
Auto rear demist : Activates
automatically the heated rear
window.
● Comfort settings
Chime volume : Changes the
volume of warning chimes.
Personalization by driver :
Activates or deactivates the
personalisation function.
Rear auto wipe in reverse :
Activates or deactivates
automatic switching on of the
rear window wiper when reverse gear is engaged.
● Park assist / Collision detection
Park assist : Activates or
deactivates the ultrasonic
parking assist. Activation is
selectable with or without
attached trailer coupling.
Side blind zone alert : Changes
the settings for the side blind spot alert system.
● Exterior ambient lighting
Exterior lighting by unlocking :
Activates or deactivates the entry
lighting.
Page 108 of 267

106Instruments and controlsDuration upon exit of vehicle:
Activates or deactivates and
changes the duration of exit
lighting.
● Power door locks
Auto door lock : Activates or
deactivates the automatic door
locking function after switching on ignition.
Stop door lock if door open :
Activates or deactivates the door
locking function while a door is open.
Delayed door lock : Activates or
deactivates the delayed door
locking function. This menu
option is displayed with Stop door
lock if door open deactivated.
Central locking system 3 22.
● Remote locking, unlocking,
starting
Remote unlock feedback :
Activates or deactivates the
hazard warning flasher feedback
whilst unlocking.
Passive door unlock : Changes
the configuration to unlock onlythe driver's door or the whole
vehicle whilst unlocking.
Auto relock doors : Activates or
deactivates the automatic relock
function after unlocking without
opening the vehicle.
● Restore factory settings :
Resets all settings to the default settings.
Personal settings
Colour-Info-Display
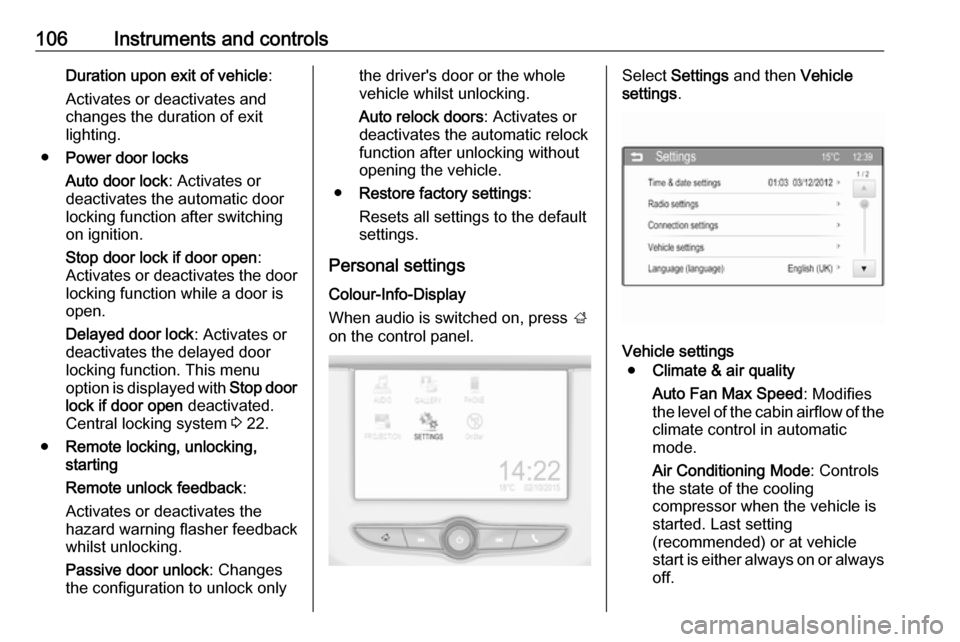
When audio is switched on, press ;
on the control panel.Select Settings and then Vehicle
settings .
Vehicle settings
● Climate & air quality
Auto Fan Max Speed : Modifies
the level of the cabin airflow of the climate control in automatic
mode.
Air Conditioning Mode : Controls
the state of the cooling
compressor when the vehicle is
started. Last setting
(recommended) or at vehicle
start is either always on or always
off.
Page 109 of 267

Instruments and controls107Auto Rear Defog: Automatically
activates heated rear window.
● Collision / Detection Systems
Park Assist : Activates or
deactivates the ultrasonic
parking assist. Activation is
selectable with or without
attached trailer coupling.
Side Blind Zone Alert : Activates
or deactivates side blind zone alert.
● Comfort and Convenience
Chime Volume : Changes the
volume of warning chimes.
Personalization By Driver :
Activates or deactivates the
personalisation function.
Auto Wipe in Reverse Gear :
Activates or deactivates
automatic switching on of the
rear window wiper when reverse gear is engaged.
● Lighting
Vehicle Locator Lights : Activates
or deactivates the entry lighting.Exit Lighting : Activates or
deactivates and changes the duration of exit lighting.
● Power Door Locks
Unlocked Door Anti Lock Out :
Activates or deactivates the door locking function while a door isopen.
Auto Door Lock : Activates or
deactivates the automatic door
locking function after switching on ignition.
Auto Door Unlock : Changes the
configuration to unlock only the driver's door or the whole vehicle after switching off ignition.
Delayed Door Lock : Activates or
deactivates the delayed door
locking function. This feature
delays the actual locking of the
doors until all doors are closed.
● Remote Lock, Unlock, Start
Remote Unlock Light Feedback :
Activates or deactivates the
hazard warning flasher feedback whilst unlocking.
Remote Door Unlock : Changes
the configuration to unlock onlythe driver's door or the whole
vehicle whilst unlocking.
Relock Remotely Unlocked
Doors : Activates or deactivates
the automatic relock function
after unlocking without opening
the vehicle.
Page 110 of 267

108Instruments and controlsTelematics service
OnStar OnStar is a personal connectivity and
service assistant with integrated
Wi-Fi hotspot. The OnStar service is
available 24 hours a day, seven days
a week.
Notice
OnStar is not available for all
markets. For further information,
contact your workshop.
Notice
In order to be available and
operational, OnStar needs a valid
OnStar subscription, functioning
vehicle electrics, mobile service and
GPS satellite link.
To activate the OnStar services and
set up an account, press Z and speak
with an advisor.Depending on the equipment of the vehicle, the following services areavailable:
● Emergency services and support
in the case of a vehicle
breakdown
● Wi-Fi hotspot
● Smartphone application
● Remote control, e.g. location of the vehicle, activation of horn and
lights, control of central locking system
● Stolen vehicle assistance
● Vehicle diagnostics
● Destination download
Notice
The OnStar module of the vehicle is
deactivated after ten days without an
ignition cycle. Functions requiring a
data connection will be available
again after switching on the ignition.OnStar buttons
Privacy button
Press and hold j until a message is
heard to activate or deactivate the
transmission of the vehicle location.
Press j to answer a call or to end a
call to an advisor.
Press j to access the Wi-Fi settings.
Service button
Press Z to establish a connection to
an advisor.
Page 122 of 267

120LightingDome light
Spotlight incorporated in the inside
mirror housing comes on when
headlights are switched on.
Dome light illuminates gear shifting
console indirectly.
Reading lights
Operated by pressing 2 for the left
and right side.
Lighting features
Entry lighting
Welcome lighting
The following lights are switched on
for a short time by unlocking the
vehicle with the radio remote control:
● headlights
● tail lights
● number plate lights
● instrument panel light
● interior lights
Some functions are only operable
when it is dark outside, to facilitate locating the vehicle.
Lighting switches off immediately
when the ignition key is turned to
position 1 3 133.
Activation or deactivation of this
function can be changed in the
Info-Display.
Vehicle personalisation 3 105.
The settings can be saved for the key being used 3 22.The following lights will additionally
switch on when the driver's door is
opened:
● illumination of all switches
● Driver Information Centre
Exit lighting
The following lights switch on if the
key is removed from the ignition
switch:
● interior lights
● instrument panel light (only when
it is dark)
They will switch off automatically after
a delay and will be activated again if
the driver's door is opened.
Path lighting Headlights, tail lights and number
plate lights illuminate the surrounding area for an adjustable time after
leaving the vehicle.
Page 146 of 267

144Driving and operatingCaution
It is not advisable to drive with thehand resting on the selector lever.
Gear shift indication 3 92.
Stop-start system 3 135.
Manual transmission
automated
The automated manual transmission permits manual gearshifting (manual
mode) or automatic gearshifting
(automatic mode), both with
automatic clutch control.
Manual shifting is possible by tapping the selector lever in manual mode.
Notice
When unlocking or opening a
vehicle door, a sound may be
audible caused by the hydraulic
system.Transmission display
In automatic mode, the driving
programme is indicated by D in the
Driver Information Centre.
In manual mode, M and the number
of the selected gear is indicated.
R indicates reverse gear.
N indicates neutral.
Starting the engine
To start the engine, depress the brake
pedal, if transmission is not in position N .
Page 150 of 267

148Driving and operatingBrakes
The brake system comprises two
independent brake circuits.
If a brake circuit fails, the vehicle can
still be braked using the other brake
circuit. However, braking effect is
achieved only when the brake pedal
is depressed firmly. Considerably
more force is needed for this. The
braking distance is extended. Seek the assistance of a workshop before
continuing the journey.
When the engine is not running, the
support of the brake servo unit
disappears once the brake pedal has been depressed once or twice.
Braking effect is not reduced, but
braking requires significantly greater
force. It is especially important to bear this in mind when being towed.
Control indicator R 3 92.
Antilock brake system
Antilock brake system (ABS)
prevents the wheels from locking.ABS starts to regulate brake pressure as soon as a wheel shows a tendency to lock. The vehicle remains
steerable, even during hard braking.
ABS control is made apparent
through a pulse in the brake pedal
and the noise of the regulation
process.
For optimum braking, keep the brake
pedal fully depressed throughout the
braking process, despite the fact that the pedal is pulsating. Do not reduce
the pressure on the pedal.
After starting-off the system performs
a self-test which may be audible.
Control indicator u 3 92.
Adaptive brake light
During full braking, all three brake
lights flash for the duration of ABS
control.Fault9 Warning
If there is a fault in the ABS, the
wheels may be liable to lock due
to braking that is heavier than
normal. The advantages of ABS are no longer available. During
hard braking, the vehicle can no longer be steered and may
swerve.
Have the cause of the fault remedied
by a workshop.