lock VAUXHALL CORSA F 2020 Owner's Guide
[x] Cancel search | Manufacturer: VAUXHALL, Model Year: 2020, Model line: CORSA F, Model: VAUXHALL CORSA F 2020Pages: 227, PDF Size: 18.77 MB
Page 70 of 227
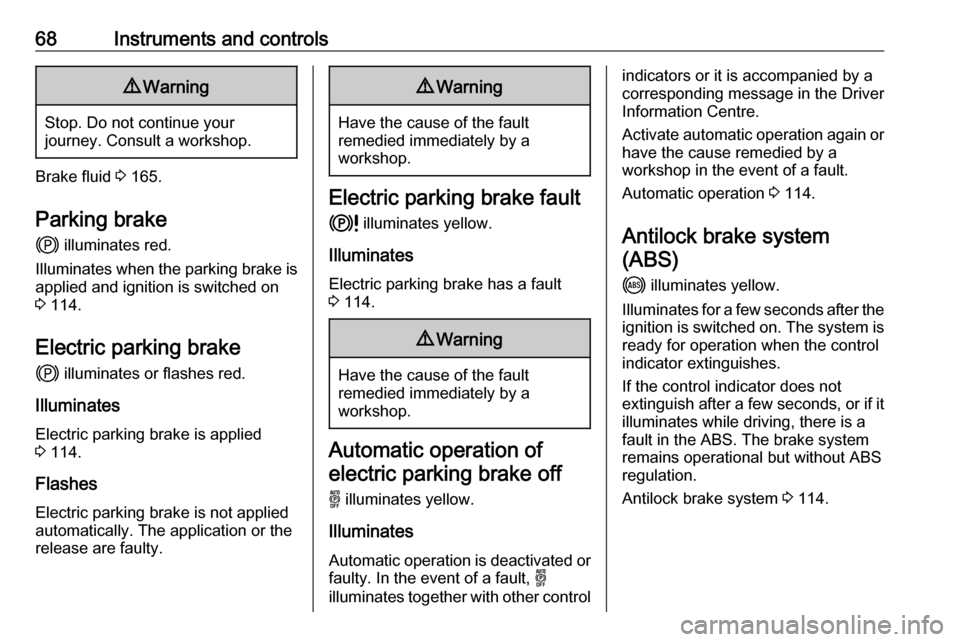
68Instruments and controls9Warning
Stop. Do not continue your
journey. Consult a workshop.
Brake fluid 3 165.
Parking brake j illuminates red.
Illuminates when the parking brake is
applied and ignition is switched on
3 114.
Electric parking brake j illuminates or flashes red.
Illuminates
Electric parking brake is applied
3 114.
Flashes
Electric parking brake is not applied
automatically. The application or the
release are faulty.
9 Warning
Have the cause of the fault
remedied immediately by a
workshop.
Electric parking brake fault
k illuminates yellow.
Illuminates
Electric parking brake has a fault
3 114.
9 Warning
Have the cause of the fault
remedied immediately by a
workshop.
Automatic operation of
electric parking brake off
o illuminates yellow.
Illuminates Automatic operation is deactivated or
faulty. In the event of a fault, o
illuminates together with other control
indicators or it is accompanied by a
corresponding message in the Driver
Information Centre.
Activate automatic operation again or have the cause remedied by a
workshop in the event of a fault.
Automatic operation 3 114.
Antilock brake system (ABS)
i illuminates yellow.
Illuminates for a few seconds after the ignition is switched on. The system is ready for operation when the control
indicator extinguishes.
If the control indicator does not
extinguish after a few seconds, or if it
illuminates while driving, there is a
fault in the ABS. The brake system
remains operational but without ABS
regulation.
Antilock brake system 3 114.
Page 72 of 227

70Instruments and controlsContinue driving until the control
indicator extinguishes.
Illuminates temporarily Start of saturation of the exhaust filter.
Start cleaning process as soon as
possible by driving at a vehicle speed
of at least 40 mph.
Illuminates constantlyIndication of a low additive level. Seek
the assistance of a workshop.
Exhaust filter 3 105.
AdBlue
u flashes or illuminates yellow.
Illuminates yellow The remaining driving range is
between 500 miles and 1500 miles.
Flashes yellow The remaining driving range is
between 0 and 500 miles.AdBlue level is low. Refill AdBlue
soon to avoid prevention of the
engine start. Up to 13 l of AdBlue can
be added.
AdBlue 3 106.
Deflation detection system q illuminates or flashes yellow.
Illuminates
Tyre pressure loss in one or more wheels. Stop immediately and check
tyre pressure.
Flashes
Fault in system. Consult a workshop.
Deflation detection system 3 179.
Engine oil pressure
T illuminates red.
Illuminates when the ignition is
switched on and extinguishes shortly after the engine starts.Illuminates when the engine is
runningCaution
Engine lubrication may be
interrupted. This may result in
damage to the engine and / or
locking of the drive wheels.
1. Select neutral gear.
2. Move out of the flow of traffic as quickly as possible without
impeding other vehicles.
3. Switch off ignition.
Page 73 of 227

Instruments and controls719Warning
When the engine is off,
considerably more force is needed
to brake and steer. During an
Autostop the brake servo unit will still be operational.
Do not remove key until vehicle is stationary, otherwise the steeringwheel lock could engage
unexpectedly.
Keep engine turned off and let the
vehicle be towed to a workshop.
Low fuel 2 illuminates yellow.
Level in fuel tank is too low.
Refuelling 3 156.
Bleeding the diesel fuel system
3 168.
Autostop n illuminates or flashes green.
Illuminates green
Engine is in an Autostop.
Flashes green
Autostop is temporarily unavailable,
or Autostop mode is invoked
automatically.
Stop-start system 3 102.
Exterior light
F illuminates green.
The exterior lights are on 3 79.
Low beam D illuminates green.
Illuminated when low beam is on.
High beam
A illuminates blue.
Illuminates when high beam is on,
during headlight flash 3 80.
High beam assist
B illuminates green.The high beam assist is activated
3 82.
LED headlights C illuminates and a warning
message is displayed in the Driver
Information Centre.
Seek the assistance of a workshop.
Front fog lights
G illuminates green.
The front fog lights are on 3 84.
Rear fog light H illuminates yellow.
The rear fog light is on 3 85.
Rain sensor y illuminates green.
Illuminated when rain sensor position on wiper lever is selected.
Windscreen wiper and washer 3 55.
Page 89 of 227

Lighting87Lighting features
Entry lighting Welcome lighting
Some or all of the following lights are
switched on for a short time by
unlocking the vehicle with the radio
remote control:
● headlights
● puddle lights
● interior lights
The number of activated lights
depends on the surrounding light
conditions.
The lighting switches off immediately
when the ignition is switched on.
Starting off 3 98.
This function can be activated or
deactivated in the vehicle
personalisation.
Vehicle personalisation 3 76.The following lights will additionally
switch on when the driver's door is
opened:
● illumination of some switches
● Driver Information Centre
● door pocket lights
Exit lighting The following lights are switched on
when the ignition is switched off:
● headlights
● interior lights
● centre console lighting
They will switch off automatically after
a delay. This function works only in
the dark.
Vehicle locator lighting
This function allows to locate the
vehicle, e.g., in weak lighting
conditions using the remote control.
The headlights come on and the turn
lights flash for 10 seconds.
Press b on the remote control.Peripheral lighting
Peripheral lighting allows you to
switch on the position lights, low
beam and number plate lighting using the remote control.
Press D on the remote control to
switch on peripheral lighting.
Press D a second time to switch off
peripheral lighting.
Battery discharge protection
To prevent discharge of the vehicle
battery when the ignition is switched
off, some interior lights are switched
off automatically after some time.
Page 90 of 227
88Climate controlClimate controlClimate control systems...............88
Heating and ventilation system . 88 Air conditioning system .............89
Electronic climate control system ...................................... 91
Auxiliary heater .......................... 95
Air vents ....................................... 95
Adjustable air vents ...................95
Fixed air vents ........................... 96
Maintenance ................................ 96
Air intake ................................... 96
Air conditioning regular operation .................................. 96
Service ...................................... 96Climate control systems
Heating and ventilation system
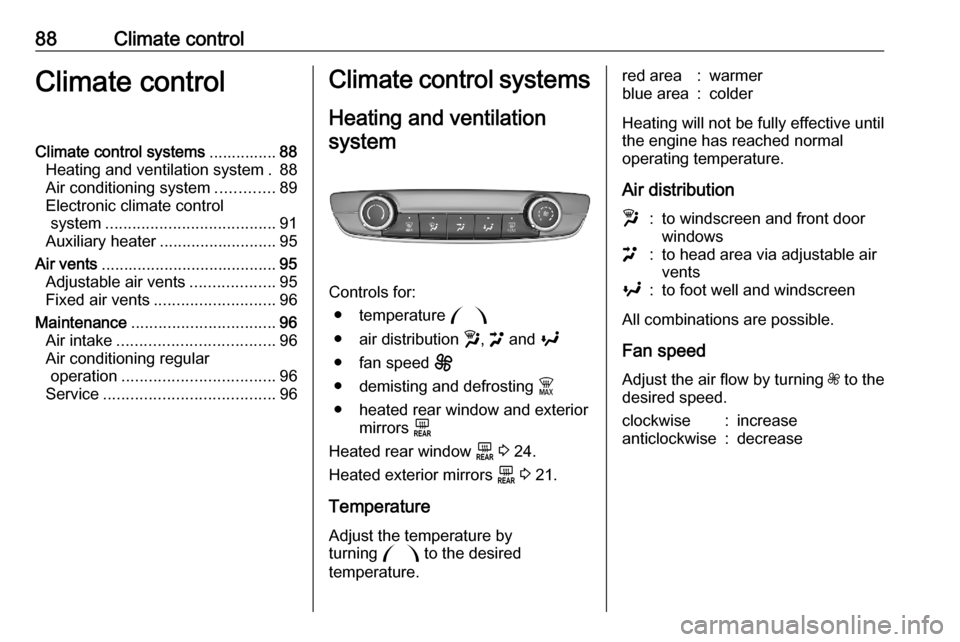
Controls for: ● temperature :
● air distribution w, > and y
● fan speed E
● demisting and defrosting $
● heated rear window and exterior mirrors f
Heated rear window f 3 24.
Heated exterior mirrors f 3 21.
Temperature
Adjust the temperature by
turning : to the desired
temperature.
red area:warmerblue area:colder
Heating will not be fully effective until the engine has reached normal
operating temperature.
Air distribution
w:to windscreen and front door
windows>:to head area via adjustable air
ventsy:to foot well and windscreen
All combinations are possible.
Fan speed
Adjust the air flow by turning Z to the
desired speed.
clockwise:increaseanticlockwise:decrease
Page 91 of 227
Climate control89Demisting and defrosting
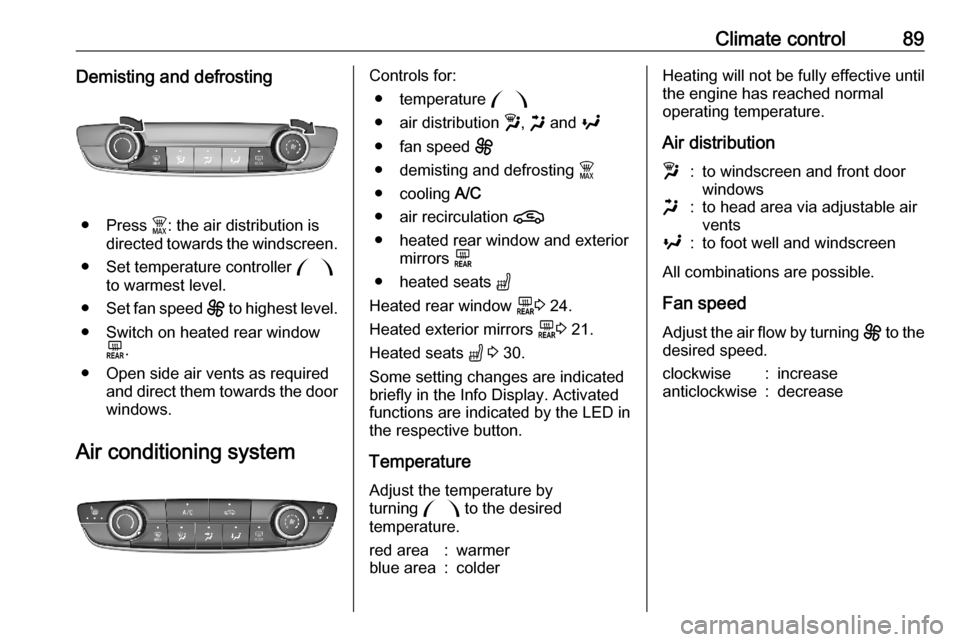
● Press $: the air distribution is
directed towards the windscreen.
● Set temperature controller :
to warmest level.
● Set fan speed E to highest level.
● Switch on heated rear window f.
● Open side air vents as required and direct them towards the doorwindows.
Air conditioning system
Controls for: ● temperature :
● air distribution w, x and y
● fan speed E
● demisting and defrosting $
● cooling A/C
● air recirculation n
● heated rear window and exterior mirrors f
● heated seats "
Heated rear window f3 24.
Heated exterior mirrors f3 21.
Heated seats " 3 30.
Some setting changes are indicated briefly in the Info Display. Activated
functions are indicated by the LED in
the respective button.
Temperature
Adjust the temperature by
turning : to the desired
temperature.red area:warmerblue area:colderHeating will not be fully effective until
the engine has reached normal
operating temperature.
Air distributionw:to windscreen and front door
windowsx:to head area via adjustable air
ventsy:to foot well and windscreen
All combinations are possible.
Fan speed
Adjust the air flow by turning E to the
desired speed.
clockwise:increaseanticlockwise:decrease
Page 94 of 227
92Climate controlClimate control settings menu
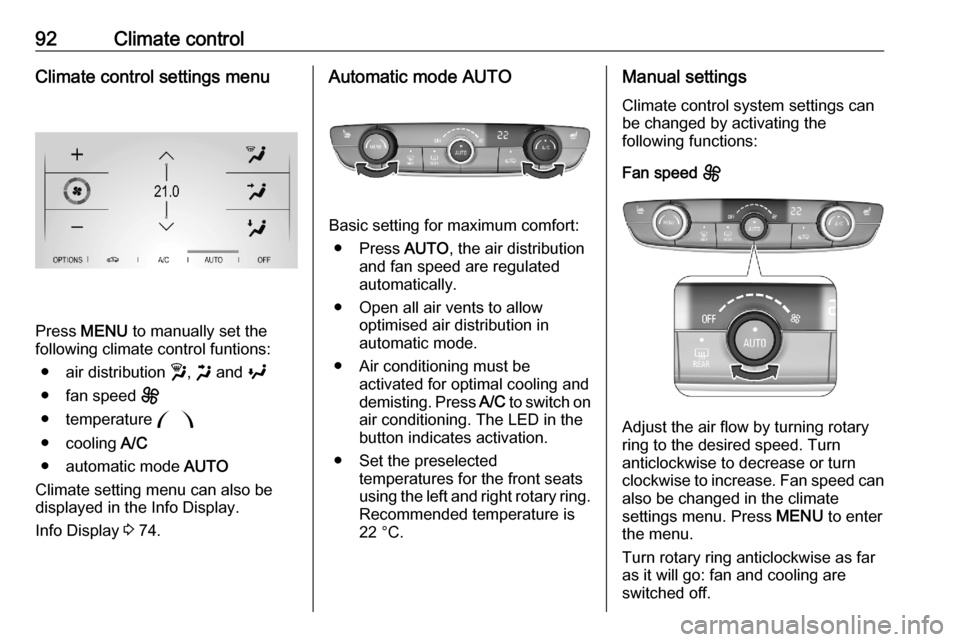
Press MENU to manually set the
following climate control funtions:
● air distribution w, x and y
● fan speed E
● temperature :
● cooling A/C
● automatic mode AUTO
Climate setting menu can also be displayed in the Info Display.
Info Display 3 74.
Automatic mode AUTO
Basic setting for maximum comfort:
● Press AUTO, the air distribution
and fan speed are regulated
automatically.
● Open all air vents to allow optimised air distribution in
automatic mode.
● Air conditioning must be activated for optimal cooling and
demisting. Press A/C to switch on
air conditioning. The LED in the
button indicates activation.
● Set the preselected temperatures for the front seats
using the left and right rotary ring. Recommended temperature is
22 °C.
Manual settings
Climate control system settings can
be changed by activating the
following functions:
Fan speed E
Adjust the air flow by turning rotary
ring to the desired speed. Turn
anticlockwise to decrease or turn
clockwise to increase. Fan speed can also be changed in the climate
settings menu. Press MENU to enter
the menu.
Turn rotary ring anticlockwise as far
as it will go: fan and cooling are
switched off.
Page 96 of 227
94Climate controlManual air recirculation n
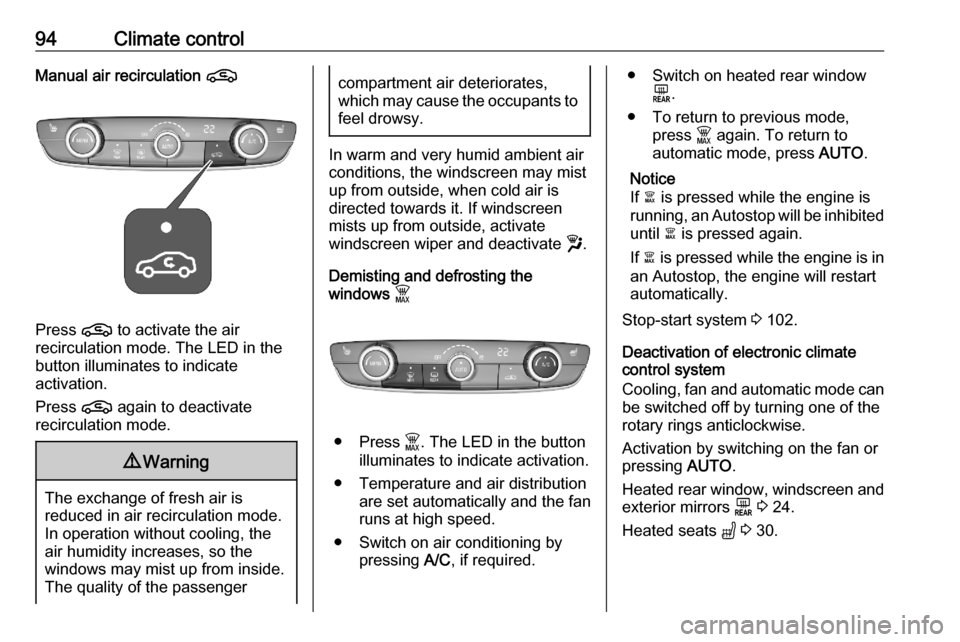
Press n to activate the air
recirculation mode. The LED in the
button illuminates to indicate
activation.
Press n again to deactivate
recirculation mode.
9 Warning
The exchange of fresh air is
reduced in air recirculation mode.
In operation without cooling, the
air humidity increases, so the
windows may mist up from inside.
The quality of the passenger
compartment air deteriorates,
which may cause the occupants to
feel drowsy.
In warm and very humid ambient air
conditions, the windscreen may mist
up from outside, when cold air is
directed towards it. If windscreen
mists up from outside, activate
windscreen wiper and deactivate w.
Demisting and defrosting the
windows $
● Press $. The LED in the button
illuminates to indicate activation.
● Temperature and air distribution are set automatically and the fan
runs at high speed.
● Switch on air conditioning by pressing A/C, if required.
● Switch on heated rear window
f.
● To return to previous mode, press $ again. To return to
automatic mode, press AUTO.
Notice
If à is pressed while the engine is
running, an Autostop will be inhibited until à is pressed again.
If à is pressed while the engine is in
an Autostop, the engine will restart
automatically.
Stop-start system 3 102.
Deactivation of electronic climate control system
Cooling, fan and automatic mode can
be switched off by turning one of the rotary rings anticlockwise.
Activation by switching on the fan or
pressing AUTO.
Heated rear window, windscreen and
exterior mirrors f 3 24.
Heated seats " 3 30.
Page 99 of 227

Driving and operating97Driving and
operatingDriving hints ................................. 98
Control of the vehicle .................98
Steering ..................................... 98
Starting and operating .................98
New vehicle running-in ..............98
Ignition switch positions .............98
Power button ............................. 99
Starting the engine ..................100
Overrun cut-off ........................ 102
Stop-start system ....................102
Parking .................................... 104
Engine exhaust .......................... 105
Exhaust filter ............................ 105
Catalytic converter ...................106
AdBlue ..................................... 106
Automatic transmission ..............109
Transmission display ...............109
Gear selection ......................... 110
Manual mode ........................... 111
Electronic driving programmes 111
Fault ........................................ 112
Interruption of power supply ....112
Manual transmission ..................113Brakes........................................ 114
Antilock brake system .............114
Parking brake .......................... 114
Brake assist ............................. 117
Hill start assist ......................... 117
Ride control systems .................117
Electronic Stability Control and Traction Control system .........117
Driver assistance systems .........119
Cruise control .......................... 119
Speed limiter ........................... 121
Adaptive cruise control ............123
Active emergency braking .......131
Forward collision alert .............134
Front pedestrian protection .....136
Parking assist .......................... 137
Advanced parking assist .........141
Side blind spot alert .................145
Panoramic view system ...........147
Rear view camera ...................150
Traffic sign assistant ................151
Lane keep assist .....................151
Driver alert ............................... 153
Fuel ............................................ 155
Fuel for petrol engines .............155
Fuel for diesel engines ............155
Refuelling ................................ 156
Trailer hitch ................................ 158
General information .................158Driving characteristics and
towing tips .............................. 158
Trailer towing ........................... 158
Page 101 of 227
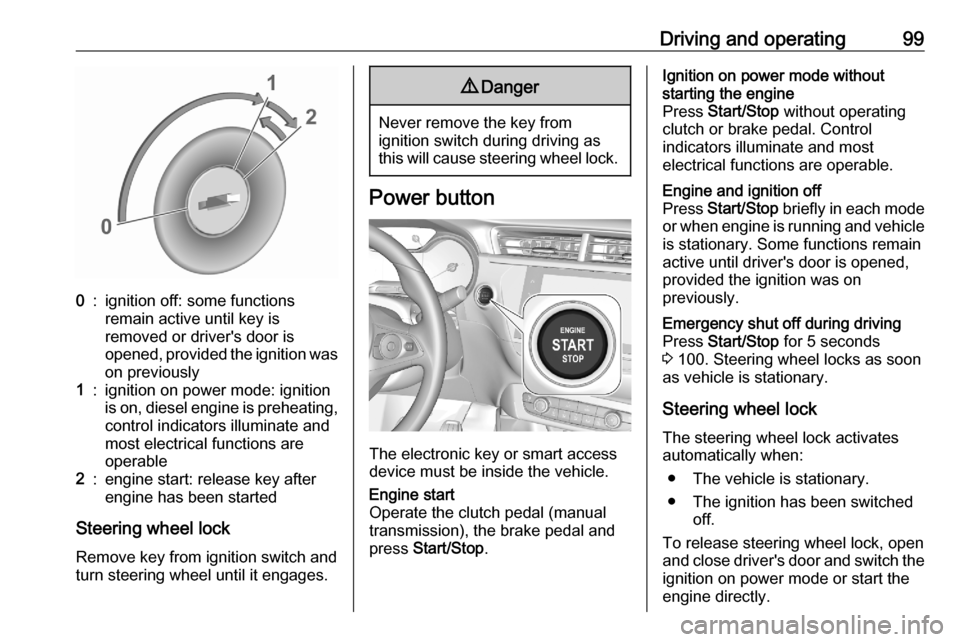
Driving and operating990:ignition off: some functions
remain active until key is
removed or driver's door is
opened, provided the ignition was
on previously1:ignition on power mode: ignition
is on, diesel engine is preheating, control indicators illuminate and
most electrical functions are
operable2:engine start: release key after
engine has been started
Steering wheel lock
Remove key from ignition switch and
turn steering wheel until it engages.
9 Danger
Never remove the key from
ignition switch during driving as
this will cause steering wheel lock.
Power button
The electronic key or smart access
device must be inside the vehicle.
Engine start
Operate the clutch pedal (manual
transmission), the brake pedal and
press Start/Stop .Ignition on power mode without
starting the engine
Press Start/Stop without operating
clutch or brake pedal. Control
indicators illuminate and most
electrical functions are operable.Engine and ignition off
Press Start/Stop briefly in each mode
or when engine is running and vehicle
is stationary. Some functions remain
active until driver's door is opened,
provided the ignition was on
previously.Emergency shut off during driving
Press Start/Stop for 5 seconds
3 100. Steering wheel locks as soon
as vehicle is stationary.
Steering wheel lock
The steering wheel lock activates
automatically when:
● The vehicle is stationary.
● The ignition has been switched off.
To release steering wheel lock, open
and close driver's door and switch the ignition on power mode or start the
engine directly.