rear VAUXHALL CORSA F 2020 Owner's Guide
[x] Cancel search | Manufacturer: VAUXHALL, Model Year: 2020, Model line: CORSA F, Model: VAUXHALL CORSA F 2020Pages: 227, PDF Size: 18.77 MB
Page 51 of 227
Storage49
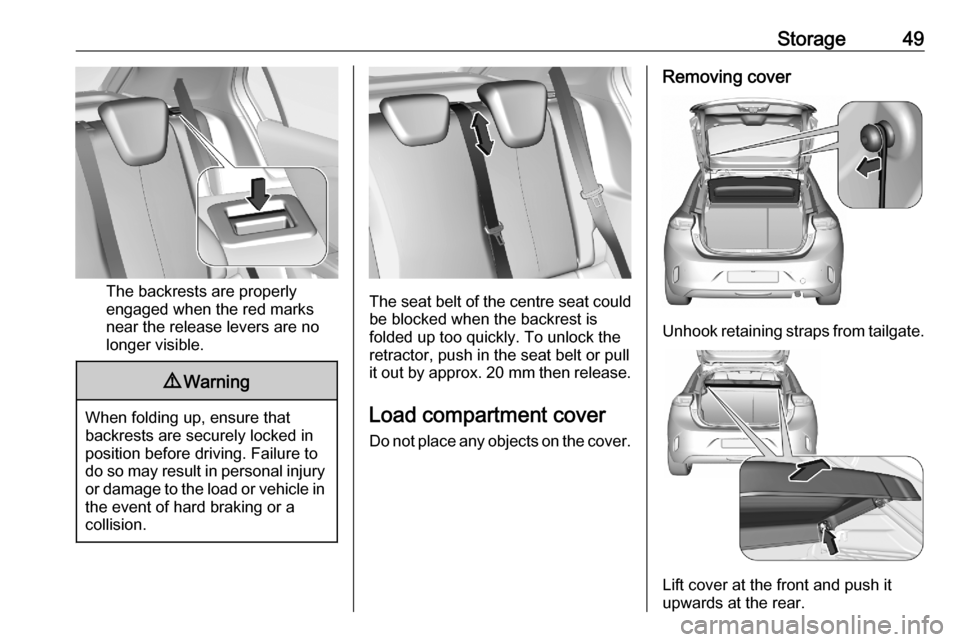
The backrests are properly
engaged when the red marks
near the release levers are no
longer visible.
9 Warning
When folding up, ensure that
backrests are securely locked in
position before driving. Failure to
do so may result in personal injury or damage to the load or vehicle in the event of hard braking or a
collision.
The seat belt of the centre seat could
be blocked when the backrest is
folded up too quickly. To unlock the
retractor, push in the seat belt or pull
it out by approx. 20 mm then release.
Load compartment cover
Do not place any objects on the cover.
Removing cover
Unhook retaining straps from tailgate.
Lift cover at the front and push it
upwards at the rear.
Page 52 of 227
50StorageRemove the cover.
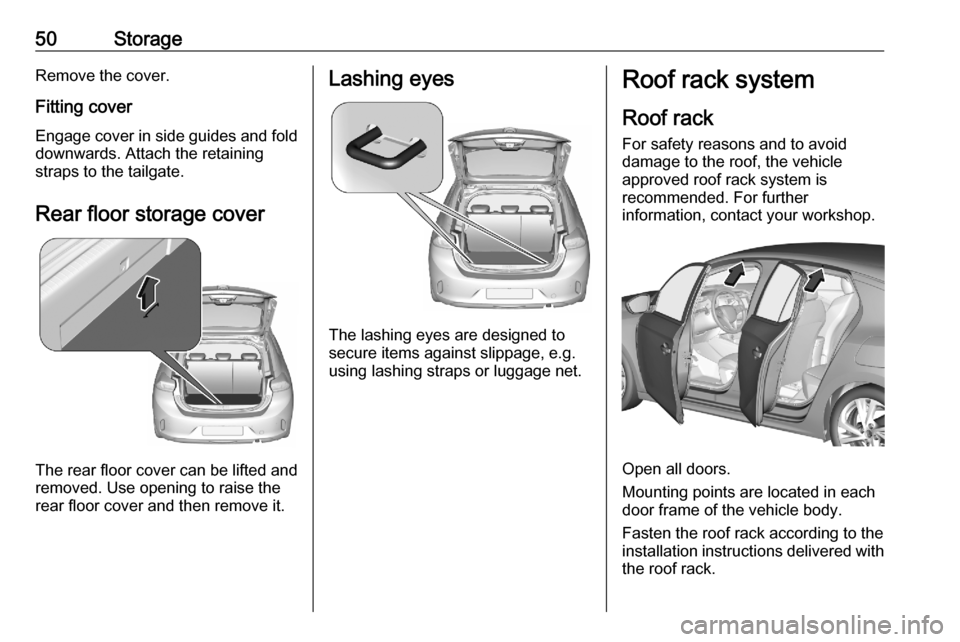
Fitting cover Engage cover in side guides and fold
downwards. Attach the retaining
straps to the tailgate.
Rear floor storage cover
The rear floor cover can be lifted and
removed. Use opening to raise the
rear floor cover and then remove it.
Lashing eyes
The lashing eyes are designed to
secure items against slippage, e.g.
using lashing straps or luggage net.
Roof rack system
Roof rack For safety reasons and to avoid
damage to the roof, the vehicle
approved roof rack system is
recommended. For further
information, contact your workshop.
Open all doors.
Mounting points are located in each
door frame of the vehicle body.
Fasten the roof rack according to the installation instructions delivered with the roof rack.
Page 55 of 227

Instruments and controls53Instruments and
controlsControls ....................................... 54
Steering wheel adjustment ........54
Steering wheel controls .............54
Heated steering wheel ...............54
Horn ........................................... 55
Windscreen wiper and washer ..55
Rear window wiper and washer ...................................... 57
Outside temperature ..................57
Clock ......................................... 58
Power outlets ............................. 58
Inductive charging .....................59
Cigarette lighter ......................... 60
Ashtrays .................................... 60
Warning lights, gauges and indi‐ cators ........................................... 61
Instrument cluster ......................61
Speedometer ............................. 62
Odometer .................................. 62
Trip odometer ............................ 62
Tachometer ............................... 63
Fuel gauge ................................ 63
Engine coolant temperature gauge ....................................... 63Engine oil level monitor.............64
Service display .......................... 64
Control indicators ......................65
Turn lights .................................. 65
Seat belt reminder .....................65
Airbag and belt tensioners .........66
Airbag deactivation ....................66
Charging system .......................66
Malfunction indicator light ..........67
Service vehicle soon .................67
Stop engine ............................... 67
System check ............................ 67
Brake and clutch system ...........67
Parking brake ............................ 68
Electric parking brake ................68
Electric parking brake fault ........68
Automatic operation of electric parking brake off ....................... 68
Antilock brake system (ABS) .....68
Gear shifting .............................. 69
Lane keep assist .......................69
Electronic Stability Control and Traction Control system ...........69
Engine coolant temperature ......69
Preheating ................................. 69
Exhaust filter .............................. 69
AdBlue ....................................... 70
Deflation detection system ........70
Engine oil pressure ....................70
Low fuel ..................................... 71Autostop.................................... 71
Exterior light .............................. 71
Low beam .................................. 71
High beam ................................. 71
High beam assist .......................71
LED headlights .......................... 71
Front fog lights ........................... 71
Rear fog light ............................. 71
Rain sensor ............................... 71
Active emergency braking .........72
Door open .................................. 72
Displays ....................................... 72
Driver Information Centre ..........72
Info Display ................................ 74
Vehicle messages ........................75
Warning chimes .........................76
Vehicle personalisation ................76
Telematics services .....................77
Vauxhall Connect ......................77
Page 59 of 227
Instruments and controls57Pull lever. Washer fluid is sprayed
onto the windscreen and the wiper
wipes a few times.
Washer fluid 3 165.
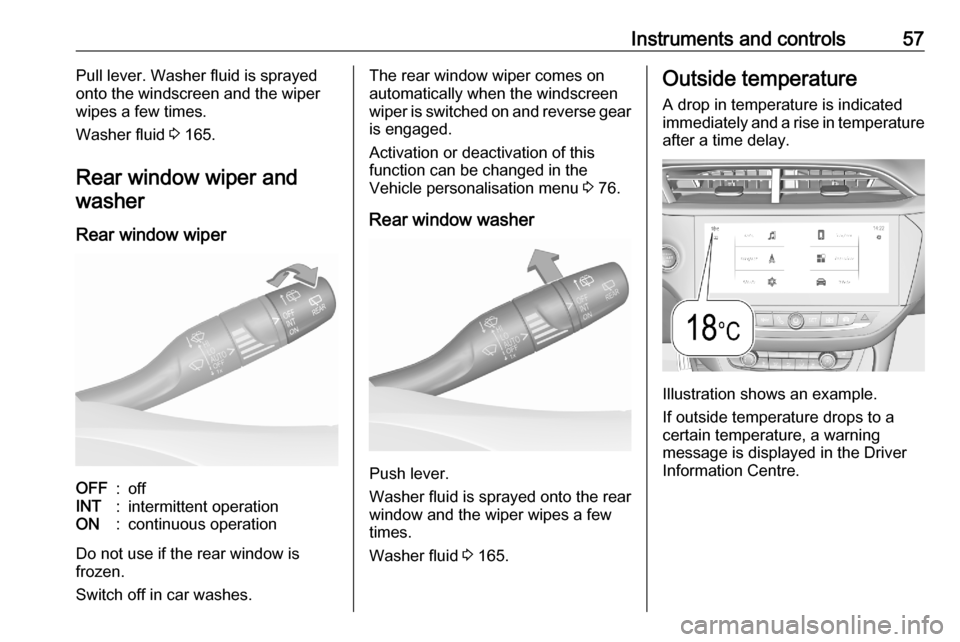
Rear window wiper and washer
Rear window wiperOFF:offINT:intermittent operationON:continuous operation
Do not use if the rear window is
frozen.
Switch off in car washes.
The rear window wiper comes on
automatically when the windscreen
wiper is switched on and reverse gear
is engaged.
Activation or deactivation of this
function can be changed in the
Vehicle personalisation menu 3 76.
Rear window washer
Push lever.
Washer fluid is sprayed onto the rear
window and the wiper wipes a few
times.
Washer fluid 3 165.
Outside temperature
A drop in temperature is indicatedimmediately and a rise in temperature
after a time delay.
Illustration shows an example.
If outside temperature drops to a
certain temperature, a warning
message is displayed in the Driver
Information Centre.
Page 61 of 227
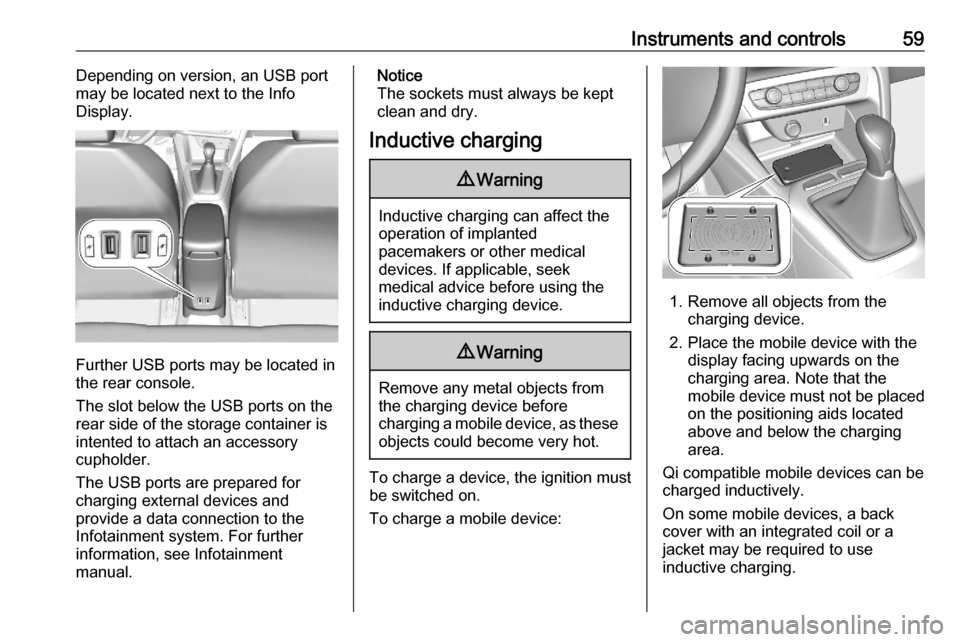
Instruments and controls59Depending on version, an USB port
may be located next to the Info
Display.
Further USB ports may be located in
the rear console.
The slot below the USB ports on the rear side of the storage container is
intented to attach an accessory
cupholder.
The USB ports are prepared for
charging external devices and
provide a data connection to the
Infotainment system. For further
information, see Infotainment
manual.
Notice
The sockets must always be kept
clean and dry.
Inductive charging9 Warning
Inductive charging can affect the
operation of implanted
pacemakers or other medical
devices. If applicable, seek
medical advice before using the
inductive charging device.
9 Warning
Remove any metal objects from
the charging device before
charging a mobile device, as these objects could become very hot.
To charge a device, the ignition must
be switched on.
To charge a mobile device:
1. Remove all objects from the charging device.
2. Place the mobile device with the display facing upwards on the
charging area. Note that the
mobile device must not be placed
on the positioning aids located
above and below the charging
area.
Qi compatible mobile devices can be
charged inductively.
On some mobile devices, a back
cover with an integrated coil or a
jacket may be required to use
inductive charging.
Page 63 of 227
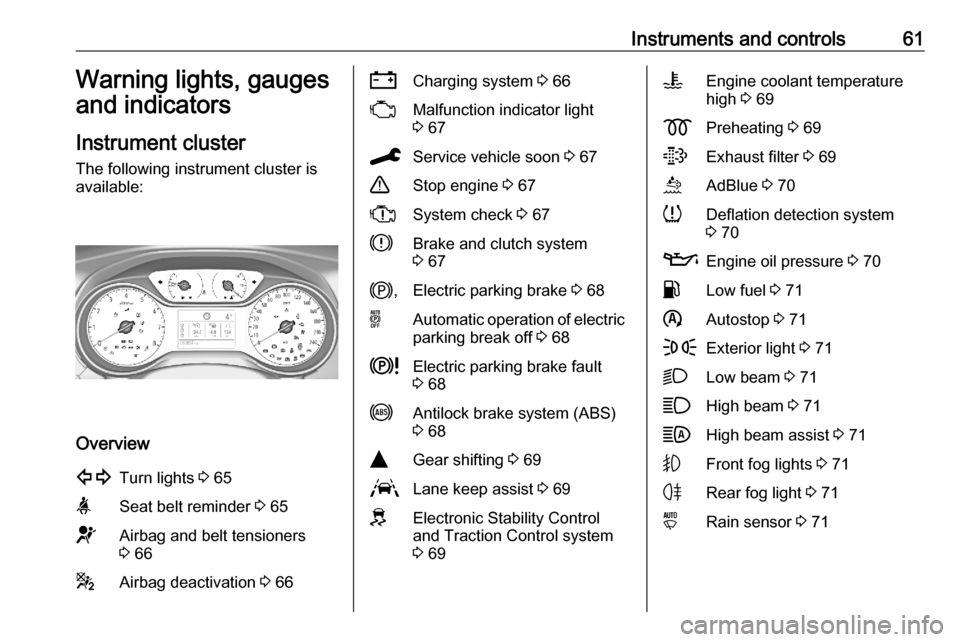
Instruments and controls61Warning lights, gauges
and indicators
Instrument cluster
The following instrument cluster is
available:
Overview
1Turn lights 3 65aSeat belt reminder 3 65dAirbag and belt tensioners
3 66gAirbag deactivation 3 66SCharging system 3 66WMalfunction indicator light
3 67CService vehicle soon 3 67+Stop engine 3 67XSystem check 3 67hBrake and clutch system
3 67j ,Electric parking brake 3 68oAutomatic operation of electric
parking break off 3 68kElectric parking brake fault
3 68iAntilock brake system (ABS)
3 68YGear shifting 3 69LLane keep assist 3 69JElectronic Stability Control
and Traction Control system
3 69VEngine coolant temperature
high 3 69zPreheating 3 69tExhaust filter 3 69uAdBlue 3 70qDeflation detection system
3 70TEngine oil pressure 3 70rLow fuel 3 71nAutostop 3 71FExterior light 3 71DLow beam 3 71AHigh beam 3 71BHigh beam assist 3 71GFront fog lights 3 71HRear fog light 3 71yRain sensor 3 71
Page 73 of 227
Instruments and controls719Warning
When the engine is off,
considerably more force is needed
to brake and steer. During an
Autostop the brake servo unit will still be operational.
Do not remove key until vehicle is stationary, otherwise the steeringwheel lock could engage
unexpectedly.
Keep engine turned off and let the
vehicle be towed to a workshop.
Low fuel 2 illuminates yellow.
Level in fuel tank is too low.
Refuelling 3 156.
Bleeding the diesel fuel system
3 168.
Autostop n illuminates or flashes green.
Illuminates green
Engine is in an Autostop.
Flashes green
Autostop is temporarily unavailable,
or Autostop mode is invoked
automatically.
Stop-start system 3 102.
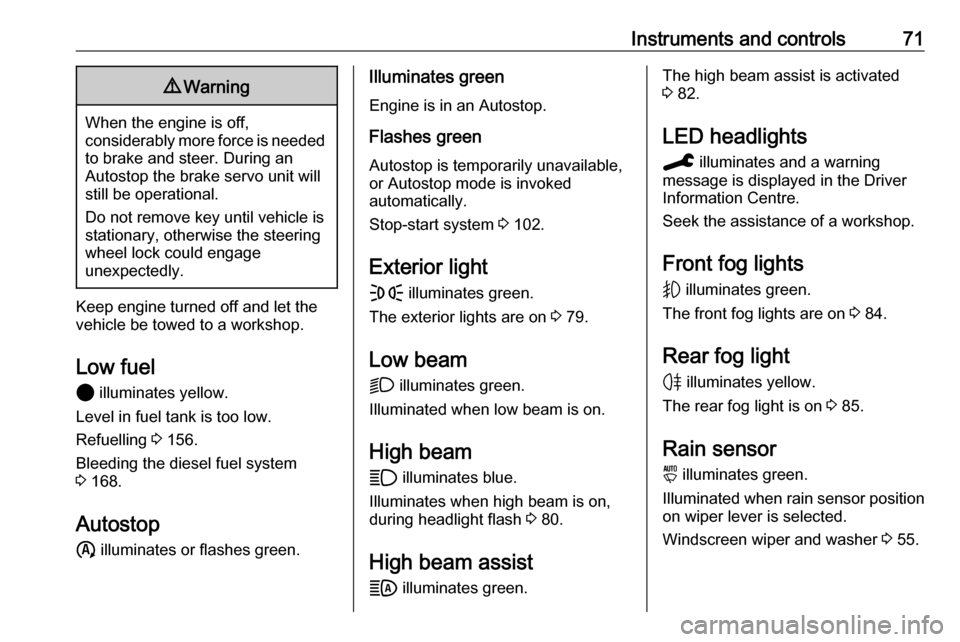
Exterior light
F illuminates green.
The exterior lights are on 3 79.
Low beam D illuminates green.
Illuminated when low beam is on.
High beam
A illuminates blue.
Illuminates when high beam is on,
during headlight flash 3 80.
High beam assist
B illuminates green.The high beam assist is activated
3 82.
LED headlights C illuminates and a warning
message is displayed in the Driver
Information Centre.
Seek the assistance of a workshop.
Front fog lights
G illuminates green.
The front fog lights are on 3 84.
Rear fog light H illuminates yellow.
The rear fog light is on 3 85.
Rain sensor y illuminates green.
Illuminated when rain sensor position on wiper lever is selected.
Windscreen wiper and washer 3 55.
Page 76 of 227
74Instruments and controlsDisplay of average speed. The
measurement can be reset at any
time.
Average fuel consumption
Display of average consumption. The measurement can be reset at any
time and starts with a default value.
Distance travelled
Displays the current distance for trip
2 since a certain reset.
The values of trip 2 page can be reset
by pressing SET / CLR for a few
seconds.
Digital speed page
Digital display of the instantaneous
speed.
Autostop time counter
A time counter calculates the time
spent in Autostop during a journey. It
resets to zero every time the ignition
is switched on.
Compass page
Displays the geographic direction of
driving.Blank page
No trip / fuel information is displayed.
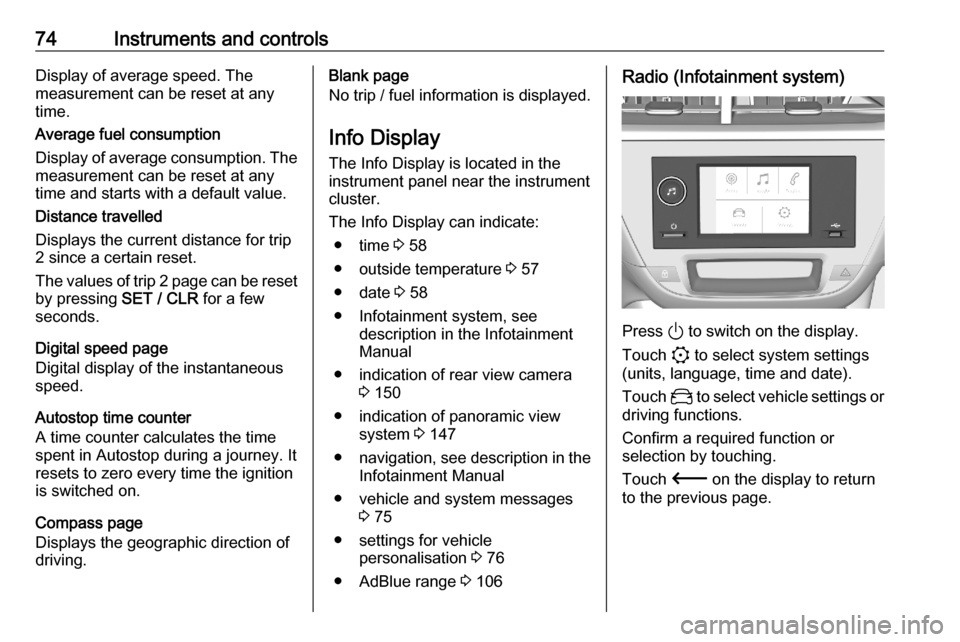
Info Display The Info Display is located in theinstrument panel near the instrument cluster.
The Info Display can indicate: ● time 3 58
● outside temperature 3 57
● date 3 58
● Infotainment system, see description in the Infotainment
Manual
● indication of rear view camera 3 150
● indication of panoramic view system 3 147
● navigation, see description in the
Infotainment Manual
● vehicle and system messages 3 75
● settings for vehicle personalisation 3 76
● AdBlue range 3 106Radio (Infotainment system)
Press ) to switch on the display.
Touch : to select system settings
(units, language, time and date).
Touch _ to select vehicle settings or
driving functions.
Confirm a required function or
selection by touching.
Touch 3 on the display to return
to the previous page.
Page 81 of 227
Lighting79LightingExterior lighting............................ 79
Light switch ................................ 79
Automatic light control ...............80
High beam ................................. 80
High beam assist .......................80
Headlight flash ........................... 81
Headlight range adjustment ......81
Headlights when driving abroad ...................................... 82
Daytime running lights ...............82
LED headlights .......................... 82
Hazard warning flashers ............84
Turn lights .................................. 84
Front fog lights ........................... 84
Rear fog light ............................. 85
Parking lights ............................. 85
Reversing lights .........................85
Misted light covers .....................85
Interior lighting ............................. 86
Instrument panel illumination control ....................................... 86
Interior lights .............................. 86
Reading lights ............................ 86
Sunvisor lights ........................... 86Lighting features..........................87
Entry lighting .............................. 87
Exit lighting ................................ 87
Vehicle locator lighting ..............87
Peripheral lighting ......................87
Battery discharge protection ......87Exterior lighting
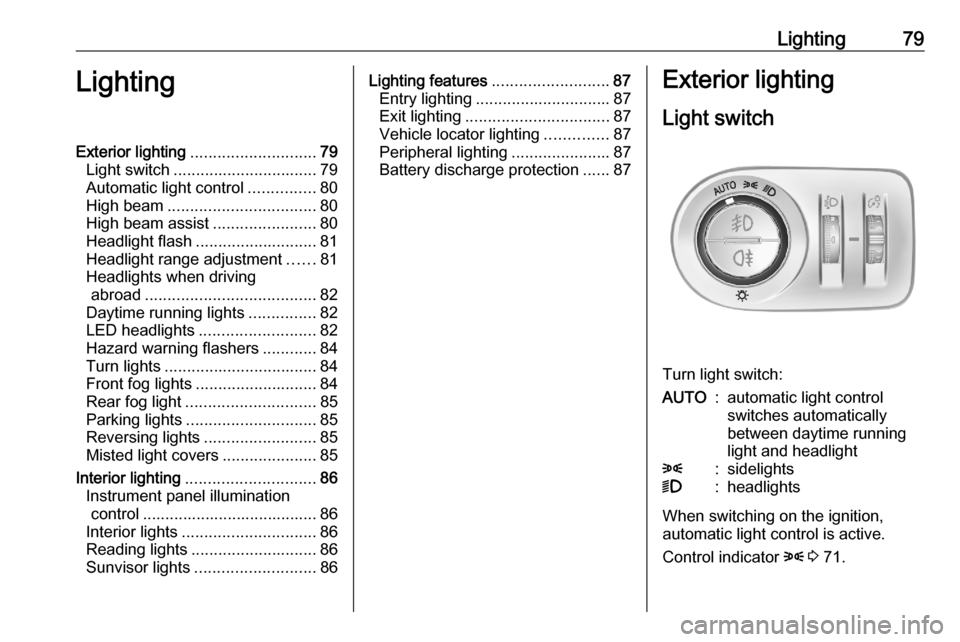
Light switch
Turn light switch:
AUTO:automatic light control
switches automatically
between daytime running
light and headlight8:sidelights9:headlights
When switching on the ignition,
automatic light control is active.
Control indicator 8 3 71.
Page 83 of 227
Lighting81High beam is switched on
automatically at a speed above
28 mph . High beam is switched off at
a speed below 22 mph, but high beam
assist remains active.
The green control indicator B
illuminates continuously when the
high beam assist is activated, the blue
A illuminates when high beam is
on.
Control indicator B 3 71, A
3 71.
Pushing left indicator lever once
switches on manual high beam
without high beam assist.
High beam assist switches
automatically to low beam when:
● Driving in urban areas.
● Camera detects heavy fog.
● Rear fog light is switched on.
● Oncoming vehicles are detected by the camera.
If there are no restrictions detected, the system switches back to high
beam.Deactivation
The system can be deactivated via
the vehicle settings menu in the Info
Display.
Info Display 3 74.
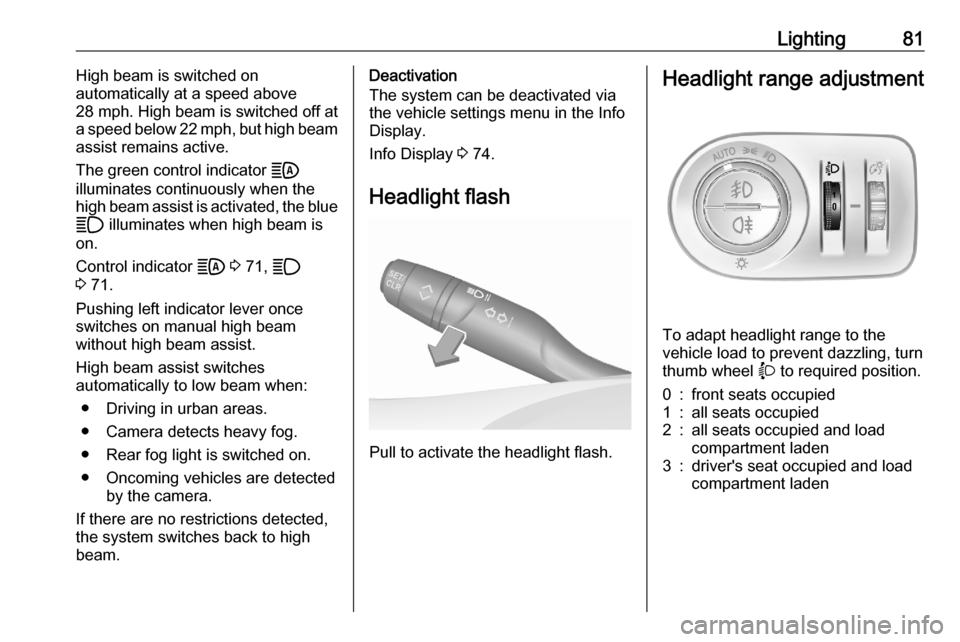
Headlight flash
Pull to activate the headlight flash.
Headlight range adjustment
To adapt headlight range to the
vehicle load to prevent dazzling, turn thumb wheel X to required position.
0:front seats occupied1:all seats occupied2:all seats occupied and load
compartment laden3:driver's seat occupied and load
compartment laden