rear VAUXHALL CORSA F 2020 Workshop Manual
[x] Cancel search | Manufacturer: VAUXHALL, Model Year: 2020, Model line: CORSA F, Model: VAUXHALL CORSA F 2020Pages: 227, PDF Size: 18.77 MB
Page 152 of 227
150Driving and operatingThe panoramic view system may not
operate properly when:
● The surrounding is dark.
● The sun or the beam of headlights is shining directly into
the camera lenses.
● Weather limits visibility, such as fog, rain, or snow.
● The camera lenses are blocked by snow, ice, slush, mud, dirt.
● The vehicle had an accident. ● There are extreme temperature changes.
Rear view camera
The rear view camera assists the
driver when reversing by displaying a view of the area behind the vehicle.
The view of the camera is displayed
in the Info Display.9 Warning
The rear view camera does not
replace driver vision. Note that
objects that are outside the
camera's field of view and the
parking assist sensors, e.g. below
the bumper or underneath the
vehicle, are not displayed.
Do not reverse or park the vehicle
using only the rear view camera.
Always check the surrounding of
the vehicle before driving.
Switching on
Rear view camera is automatically
activated when reverse gear is
engaged.
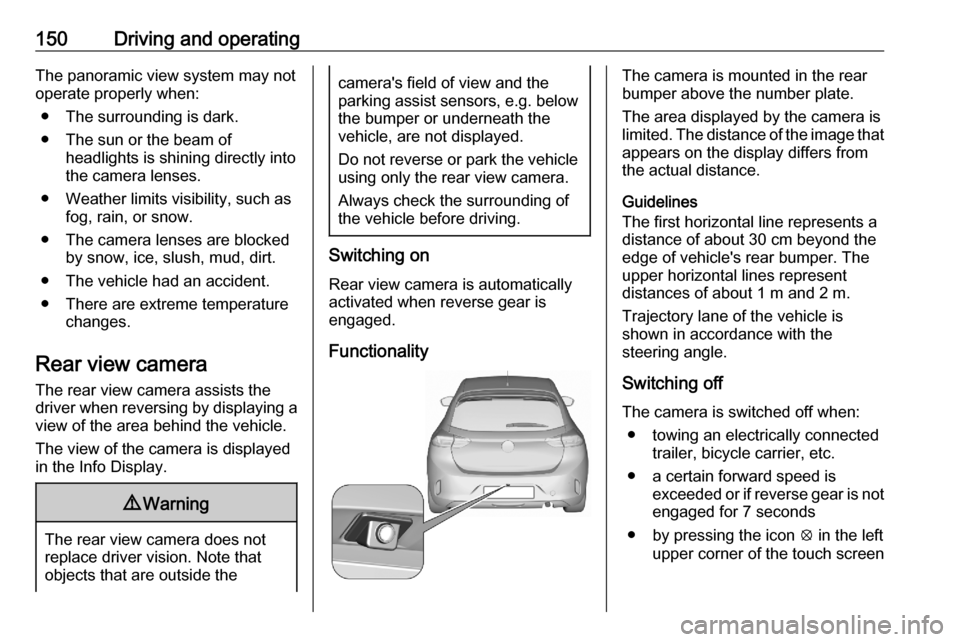
Functionality
The camera is mounted in the rear
bumper above the number plate.
The area displayed by the camera is
limited. The distance of the image that
appears on the display differs from
the actual distance.
Guidelines
The first horizontal line represents a
distance of about 30 cm beyond the
edge of vehicle's rear bumper. The
upper horizontal lines represent
distances of about 1 m and 2 m.
Trajectory lane of the vehicle is
shown in accordance with the
steering angle.
Switching off
The camera is switched off when: ● towing an electrically connected trailer, bicycle carrier, etc.
● a certain forward speed is exceeded or if reverse gear is not
engaged for 7 seconds
● by pressing the icon q in the left
upper corner of the touch screen
Page 153 of 227
Driving and operating151System limitationsThe rear view camera may not
operate properly when:
● the surrounding is dark
● the beam of headlights is shining
directly into the camera lenses
● weather limits visibility, such as fog, rain, or snow
● the camera lenses are blocked by snow, ice, slush, mud, dirt.Clean the lense, rinse with water,
and wipe with a soft cloth
● the vehicle is towing an electrically connected trailer,
bicycle carrier, etc.
● the vehicle had a rear end accident
● there are extreme temperature changes
Traffic sign assistant
The traffic sign assistant is an
extension of the speed limit
recognition available for speed
limiter, cruise control and adaptive
cruise control.
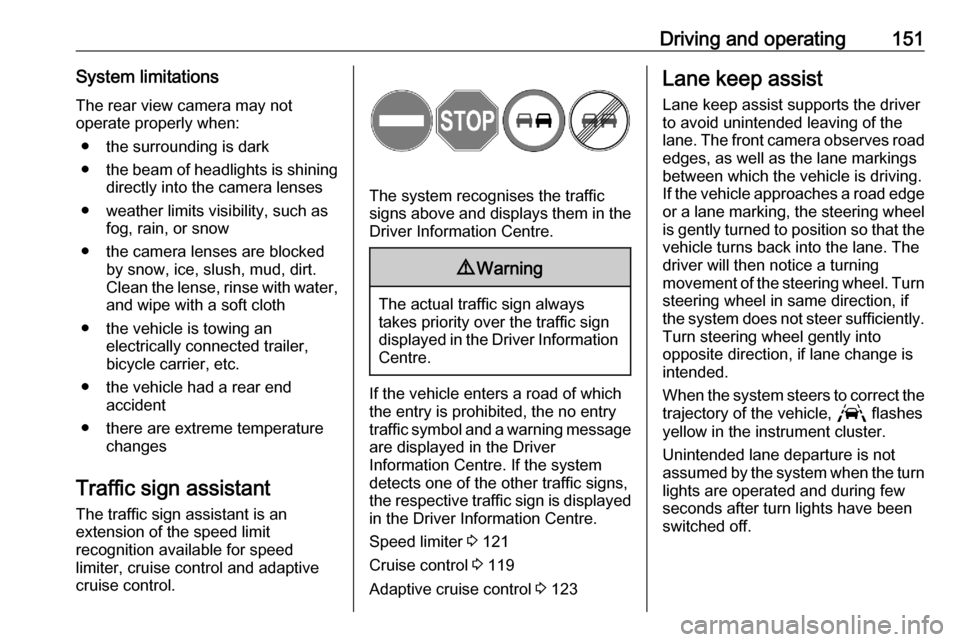
The system recognises the traffic signs above and displays them in the
Driver Information Centre.
9 Warning
The actual traffic sign always
takes priority over the traffic sign displayed in the Driver Information Centre.
If the vehicle enters a road of whichthe entry is prohibited, the no entry
traffic symbol and a warning message are displayed in the Driver
Information Centre. If the system
detects one of the other traffic signs,
the respective traffic sign is displayed
in the Driver Information Centre.
Speed limiter 3 121
Cruise control 3 119
Adaptive cruise control 3 123
Lane keep assist
Lane keep assist supports the driver
to avoid unintended leaving of the
lane. The front camera observes road
edges, as well as the lane markings
between which the vehicle is driving.
If the vehicle approaches a road edge or a lane marking, the steering wheel
is gently turned to position so that the
vehicle turns back into the lane. The
driver will then notice a turning
movement of the steering wheel. Turn steering wheel in same direction, if
the system does not steer sufficiently.
Turn steering wheel gently into
opposite direction, if lane change is
intended.
When the system steers to correct the trajectory of the vehicle, L flashes
yellow in the instrument cluster.
Unintended lane departure is not
assumed by the system when the turn lights are operated and during few
seconds after turn lights have been
switched off.
Page 159 of 227
Driving and operating157A label with symbols at the fuel filler
flap is indicating the allowed fuel
types. In Europe the pump nozzles of
the filling stations are marked with
these symbols. Refuel only the
allowed fuel type.Caution
In case of misfuelling, do not
switch on ignition.
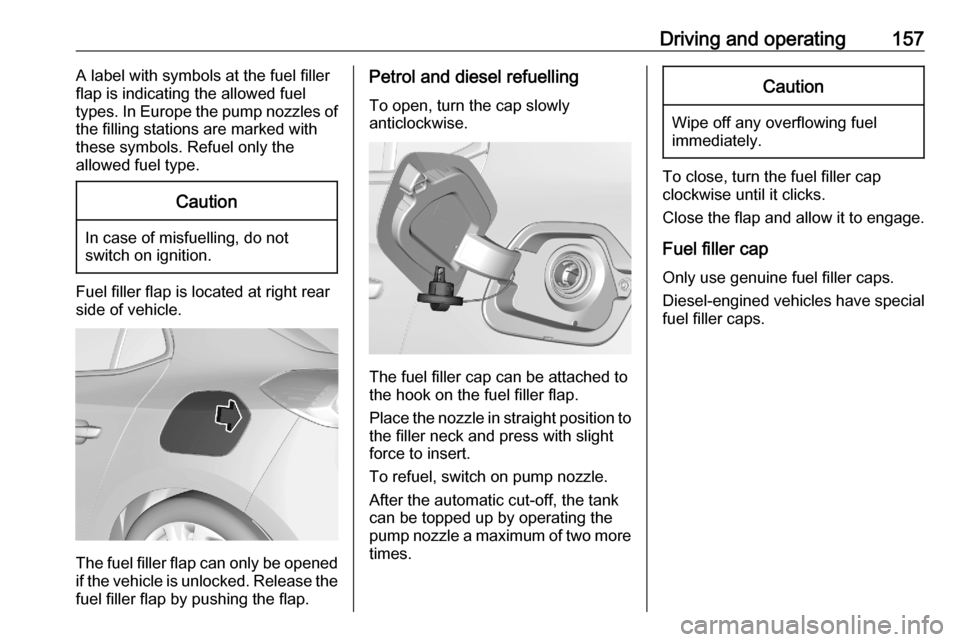
Fuel filler flap is located at right rear
side of vehicle.
The fuel filler flap can only be opened
if the vehicle is unlocked. Release the
fuel filler flap by pushing the flap.
Petrol and diesel refuelling
To open, turn the cap slowly
anticlockwise.
The fuel filler cap can be attached to
the hook on the fuel filler flap.
Place the nozzle in straight position to the filler neck and press with slight
force to insert.
To refuel, switch on pump nozzle.
After the automatic cut-off, the tank can be topped up by operating the
pump nozzle a maximum of two more
times.
Caution
Wipe off any overflowing fuel
immediately.
To close, turn the fuel filler cap
clockwise until it clicks.
Close the flap and allow it to engage.
Fuel filler cap
Only use genuine fuel filler caps.
Diesel-engined vehicles have special fuel filler caps.
Page 161 of 227

Driving and operating159The permissible gross train weight
must not be exceeded. This weight is
specified on the identification plate
3 201.
Vertical coupling load
The vertical coupling load is the load
exerted by the trailer on the coupling
ball. It can be varied by changing the
weight distribution when loading the
trailer.
The maximum permissible vertical
coupling load (55 kg) is specified on
the towing equipment identification
plate and in the vehicle documents.
Always aim for the maximum vertical
coupling load, especially in the case
of heavy trailers. The vertical coupling load should never fall below 25 kg.Rear axle load
When the trailer is coupled and the
towing vehicle fully loaded, the
permissible rear axle load (see
identification plate or vehicle
documents) may be exceeded by
60 kg , the gross vehicle weight rating
must not be exceeded. If the
permissible rear axle load is
exceeded, a maximum speed of
60 mph applies.
Page 168 of 227
166Vehicle care
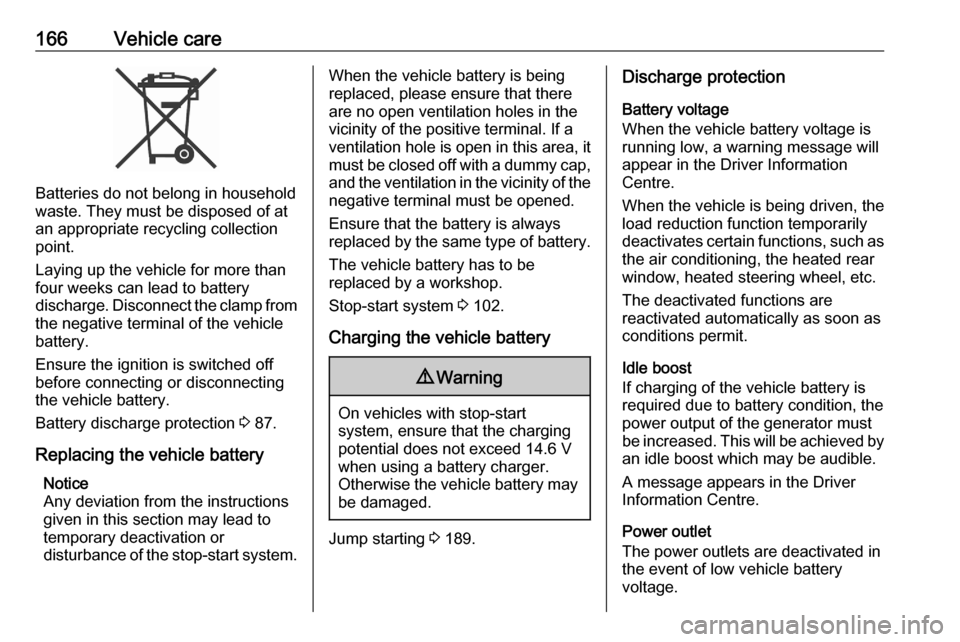
Batteries do not belong in household
waste. They must be disposed of at
an appropriate recycling collection
point.
Laying up the vehicle for more than
four weeks can lead to battery
discharge. Disconnect the clamp from the negative terminal of the vehicle
battery.
Ensure the ignition is switched off
before connecting or disconnecting
the vehicle battery.
Battery discharge protection 3 87.
Replacing the vehicle battery Notice
Any deviation from the instructions
given in this section may lead to
temporary deactivation or
disturbance of the stop-start system.
When the vehicle battery is being
replaced, please ensure that there
are no open ventilation holes in the
vicinity of the positive terminal. If a
ventilation hole is open in this area, it
must be closed off with a dummy cap, and the ventilation in the vicinity of the
negative terminal must be opened.
Ensure that the battery is always
replaced by the same type of battery.
The vehicle battery has to be
replaced by a workshop.
Stop-start system 3 102.
Charging the vehicle battery9 Warning
On vehicles with stop-start
system, ensure that the charging potential does not exceed 14.6 V
when using a battery charger.
Otherwise the vehicle battery may be damaged.
Jump starting 3 189.
Discharge protection
Battery voltage
When the vehicle battery voltage is
running low, a warning message will
appear in the Driver Information
Centre.
When the vehicle is being driven, the
load reduction function temporarily
deactivates certain functions, such as
the air conditioning, the heated rear
window, heated steering wheel, etc.
The deactivated functions are
reactivated automatically as soon as
conditions permit.
Idle boost
If charging of the vehicle battery is
required due to battery condition, the
power output of the generator must
be increased. This will be achieved by
an idle boost which may be audible.
A message appears in the Driver
Information Centre.
Power outlet
The power outlets are deactivated in
the event of low vehicle battery
voltage.
Page 170 of 227
168Vehicle careDiesel fuel system bleedingIf the tank has been run dry, the diesel
fuel system must be bled. Refuel at
least five lieter diesel. Switch on the
ignition for about 60 seconds and switch off again. Then crank the
engine. If the engine does not start
directly, repeat this process a few
times. If the engine then fails to start,
seek the assistance of a workshop.
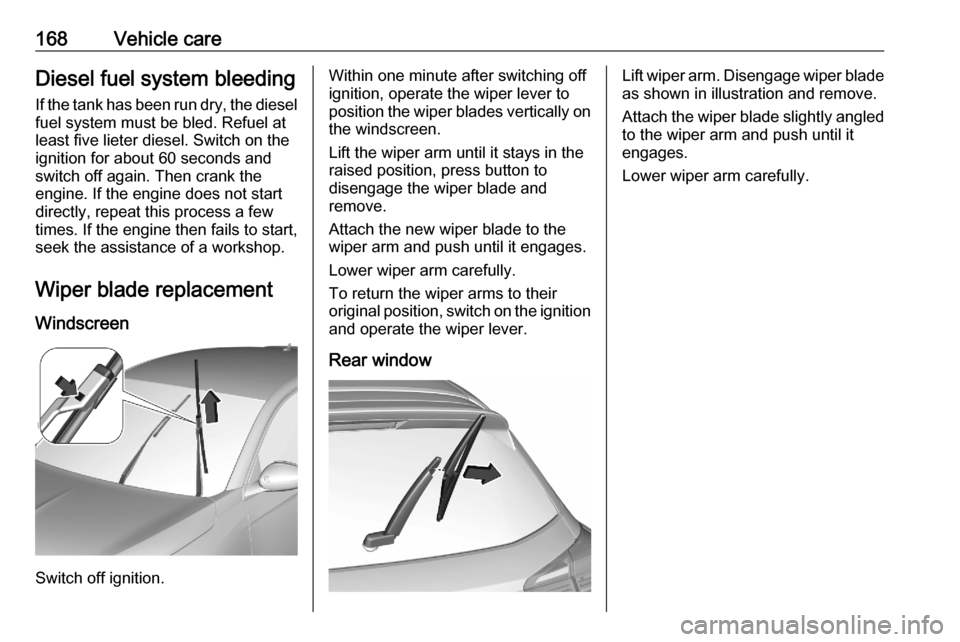
Wiper blade replacement
Windscreen
Switch off ignition.
Within one minute after switching off
ignition, operate the wiper lever to
position the wiper blades vertically on the windscreen.
Lift the wiper arm until it stays in the
raised position, press button to
disengage the wiper blade and
remove.
Attach the new wiper blade to the
wiper arm and push until it engages.
Lower wiper arm carefully.
To return the wiper arms to their
original position, switch on the ignition
and operate the wiper lever.
Rear windowLift wiper arm. Disengage wiper bladeas shown in illustration and remove.
Attach the wiper blade slightly angled
to the wiper arm and push until it
engages.
Lower wiper arm carefully.
Page 174 of 227
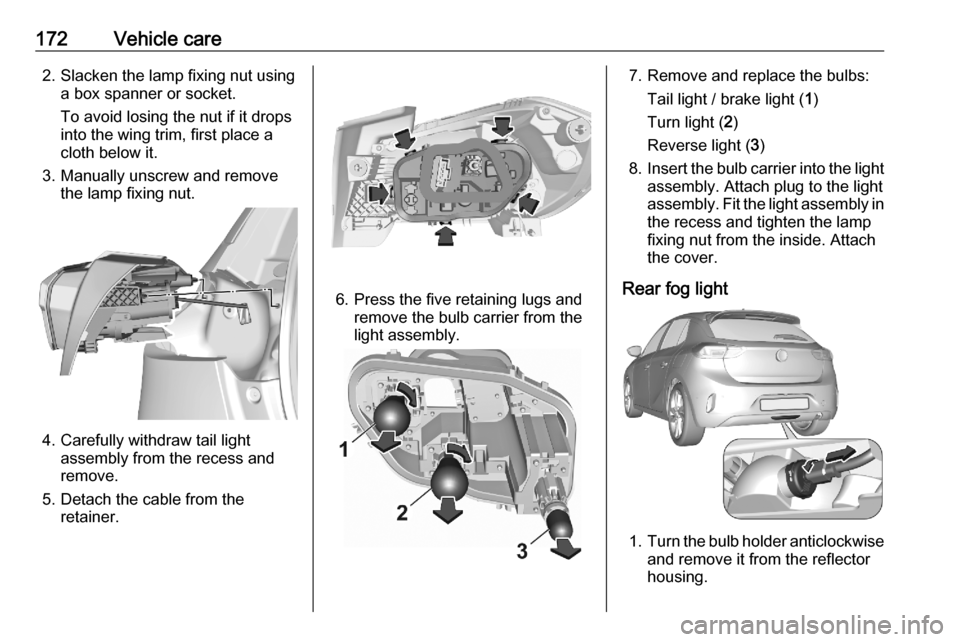
172Vehicle care2. Slacken the lamp fixing nut usinga box spanner or socket.
To avoid losing the nut if it drops
into the wing trim, first place a
cloth below it.
3. Manually unscrew and remove the lamp fixing nut.
4. Carefully withdraw tail lightassembly from the recess and
remove.
5. Detach the cable from the retainer.
6. Press the five retaining lugs andremove the bulb carrier from the
light assembly.
7. Remove and replace the bulbs:
Tail light / brake light ( 1)
Turn light ( 2)
Reverse light ( 3)
8. Insert the bulb carrier into the light
assembly. Attach plug to the light
assembly. Fit the light assembly in the recess and tighten the lamp
fixing nut from the inside. Attach
the cover.
Rear fog light
1. Turn the bulb holder anticlockwise
and remove it from the reflector
housing.
Page 177 of 227
Vehicle care175No.Circuit20Fuel pump22Automatic transmission25Fuse box (trailer)28Selective catalytic reduction
system29Windscreen wiper31Climate control system32Steering wheel
After having changed defective fuses,
close the fuse box cover and lock it.
If the fuse box cover is not closed
correctly, malfunction may occur.
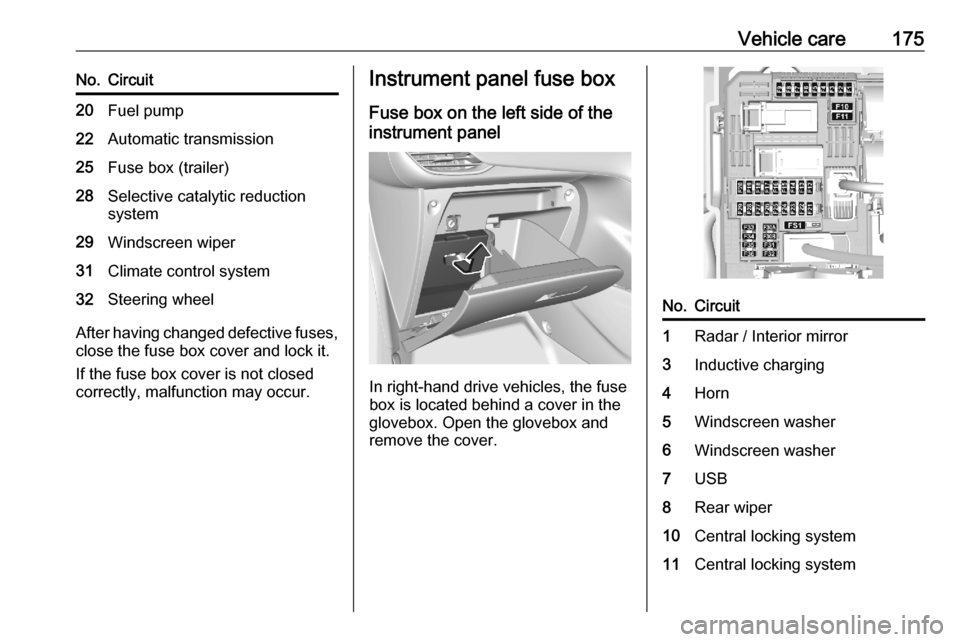
Instrument panel fuse box
Fuse box on the left side of the
instrument panel
In right-hand drive vehicles, the fuse
box is located behind a cover in the
glovebox. Open the glovebox and
remove the cover.
No.Circuit1Radar / Interior mirror3Inductive charging4Horn5Windscreen washer6Windscreen washer7USB8Rear wiper10Central locking system11Central locking system
Page 178 of 227
176Vehicle careNo.Circuit12Diagnostic connector module13Climate control system14Alarm / Vauxhall Connect17Instrument cluster21Power button / Anti-theft lockingsystem22Rain sensor / Light sensor /
Camera23Seatbelt reminder247" Touchscreen / Parking
assist / Rear view camera25Airbag27Anti-theft alarm system297" Touchscreen / Infotainment31Cigarette lighter / 12 V power
outlet32Heated steering wheelNo.Circuit33Climate control system / Auto‐
matic transmission34Parking assist / Exterior mirror
adjustment
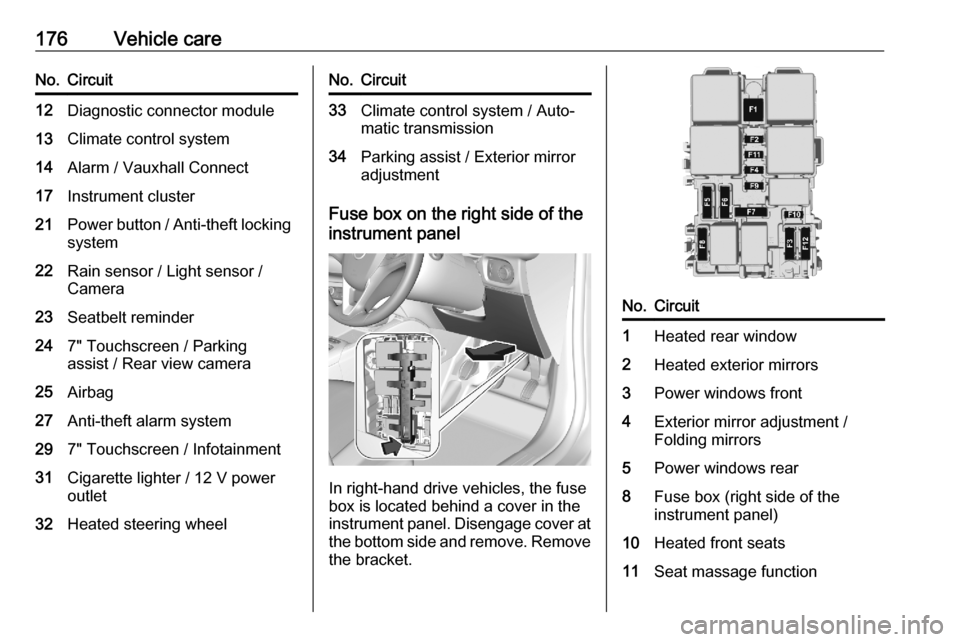
Fuse box on the right side of the
instrument panel
In right-hand drive vehicles, the fuse
box is located behind a cover in the
instrument panel. Disengage cover at
the bottom side and remove. Remove
the bracket.
No.Circuit1Heated rear window2Heated exterior mirrors3Power windows front4Exterior mirror adjustment /
Folding mirrors5Power windows rear8Fuse box (right side of the
instrument panel)10Heated front seats11Seat massage function
Page 182 of 227
180Vehicle care1. Always ensure that all four tyreshave correct tyre pressure
3 208.
2. Apply parking brake. 3. Initialise the system via the Info Display 3 74.
4. Reset is confirmed by pop-up indication.
After initialisation system
automatically calibrates to new tyre
pressures during driving. After longer
drive the system will adopt and
monitor new pressures.
Always check tyre pressure with cold
tyres.
System has to be reinitialised when: ● Tyre pressure has been changed
● Load condition has been changed
● Wheels have been swapped or exchanged
The system will not warn
instantaneously on a tyre blow out or a rapid deflation. This is due to
required calculation time.Tread depth
Check tread depth at regular
intervals.
Tyres should be replaced for safety
reasons at a tread depth of 2-3 mm
(4 mm for winter tyres).
For safety reasons, it is
recommended that the tread depth of
the tyres on one axle should not vary
by more than 2 mm.
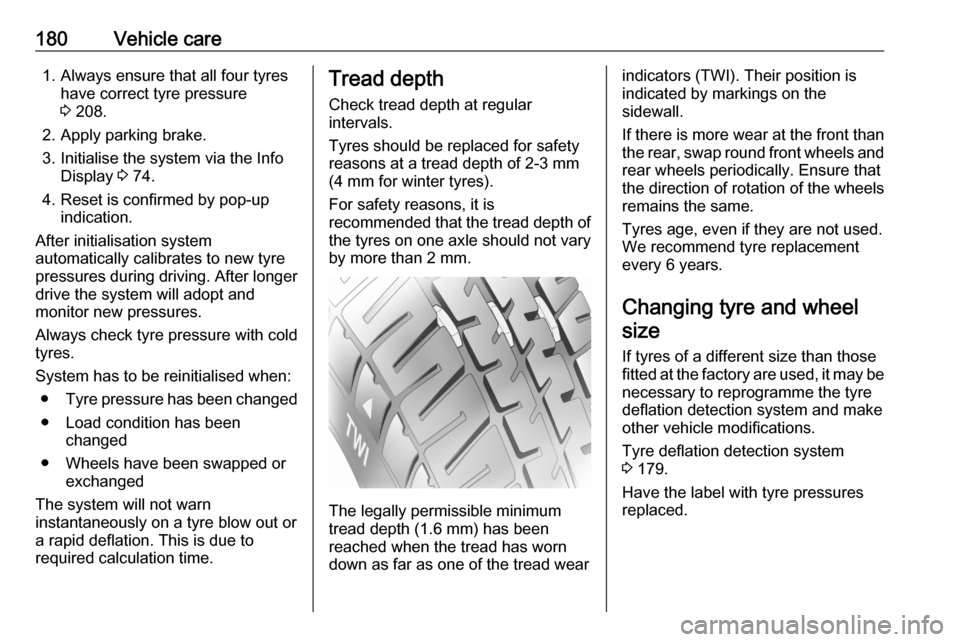
The legally permissible minimum
tread depth (1.6 mm) has been
reached when the tread has worn
down as far as one of the tread wear
indicators (TWI). Their position is
indicated by markings on the
sidewall.
If there is more wear at the front than
the rear, swap round front wheels and rear wheels periodically. Ensure that
the direction of rotation of the wheels
remains the same.
Tyres age, even if they are not used.
We recommend tyre replacement
every 6 years.
Changing tyre and wheel
size
If tyres of a different size than those
fitted at the factory are used, it may be necessary to reprogramme the tyre
deflation detection system and make
other vehicle modifications.
Tyre deflation detection system
3 179.
Have the label with tyre pressures
replaced.