Stop VAUXHALL CORSA F 2020 Service Manual
[x] Cancel search | Manufacturer: VAUXHALL, Model Year: 2020, Model line: CORSA F, Model: VAUXHALL CORSA F 2020Pages: 227, PDF Size: 18.77 MB
Page 142 of 227
140Driving and operatingDepending on which side of the
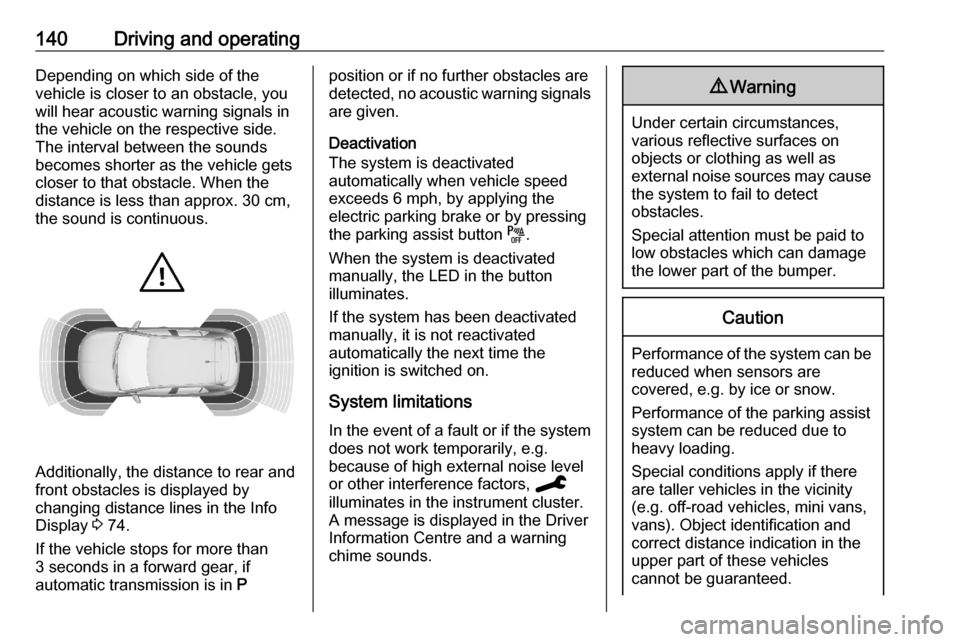
vehicle is closer to an obstacle, you will hear acoustic warning signals inthe vehicle on the respective side.
The interval between the sounds
becomes shorter as the vehicle gets
closer to that obstacle. When the
distance is less than approx. 30 cm,
the sound is continuous.
Additionally, the distance to rear and
front obstacles is displayed by
changing distance lines in the Info Display 3 74.
If the vehicle stops for more than
3 seconds in a forward gear, if
automatic transmission is in P
position or if no further obstacles are
detected, no acoustic warning signals
are given.
Deactivation
The system is deactivated
automatically when vehicle speed
exceeds 6 mph, by applying the
electric parking brake or by pressing
the parking assist button e.
When the system is deactivated
manually, the LED in the button
illuminates.
If the system has been deactivated
manually, it is not reactivated
automatically the next time the
ignition is switched on.
System limitations
In the event of a fault or if the system does not work temporarily, e.g.
because of high external noise level
or other interference factors, C
illuminates in the instrument cluster. A message is displayed in the Driver
Information Centre and a warning
chime sounds.9 Warning
Under certain circumstances,
various reflective surfaces on
objects or clothing as well as
external noise sources may cause the system to fail to detect
obstacles.
Special attention must be paid to
low obstacles which can damage
the lower part of the bumper.
Caution
Performance of the system can be reduced when sensors are
covered, e.g. by ice or snow.
Performance of the parking assist
system can be reduced due to
heavy loading.
Special conditions apply if there
are taller vehicles in the vicinity
(e.g. off-road vehicles, mini vans,
vans). Object identification and correct distance indication in the
upper part of these vehicles
cannot be guaranteed.
Page 144 of 227
142Driving and operating
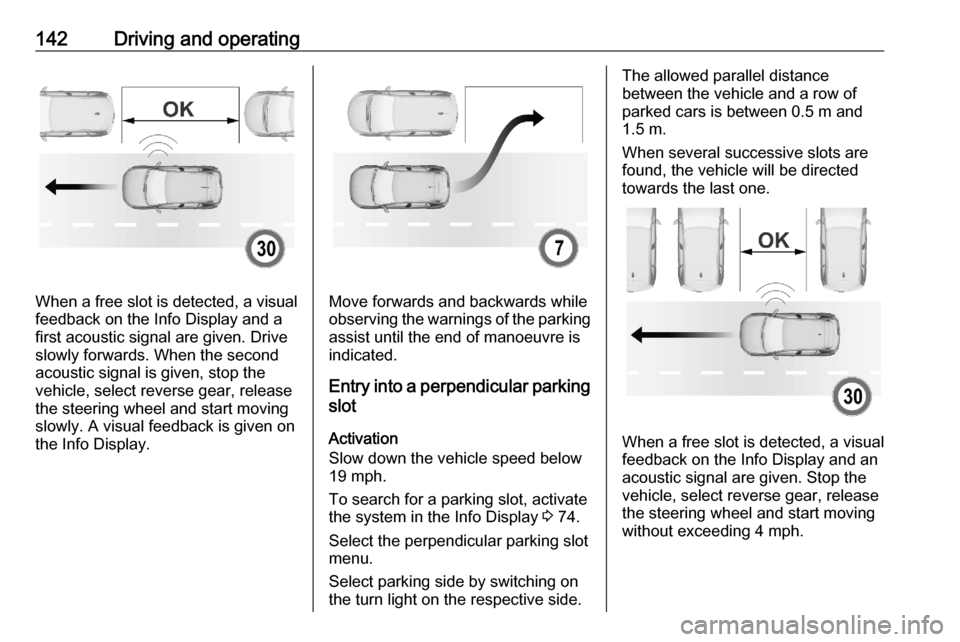
When a free slot is detected, a visual
feedback on the Info Display and a
first acoustic signal are given. Drive
slowly forwards. When the second
acoustic signal is given, stop the
vehicle, select reverse gear, release
the steering wheel and start moving
slowly. A visual feedback is given on
the Info Display.Move forwards and backwards while
observing the warnings of the parking
assist until the end of manoeuvre is
indicated.
Entry into a perpendicular parking
slot
Activation
Slow down the vehicle speed below 19 mph.
To search for a parking slot, activate
the system in the Info Display 3 74.
Select the perpendicular parking slot
menu.
Select parking side by switching on
the turn light on the respective side.
The allowed parallel distance
between the vehicle and a row of
parked cars is between 0.5 m and
1.5 m.
When several successive slots are found, the vehicle will be directed
towards the last one.
When a free slot is detected, a visual
feedback on the Info Display and an
acoustic signal are given. Stop the
vehicle, select reverse gear, release
the steering wheel and start moving
without exceeding 4 mph.
Page 145 of 227
Driving and operating143
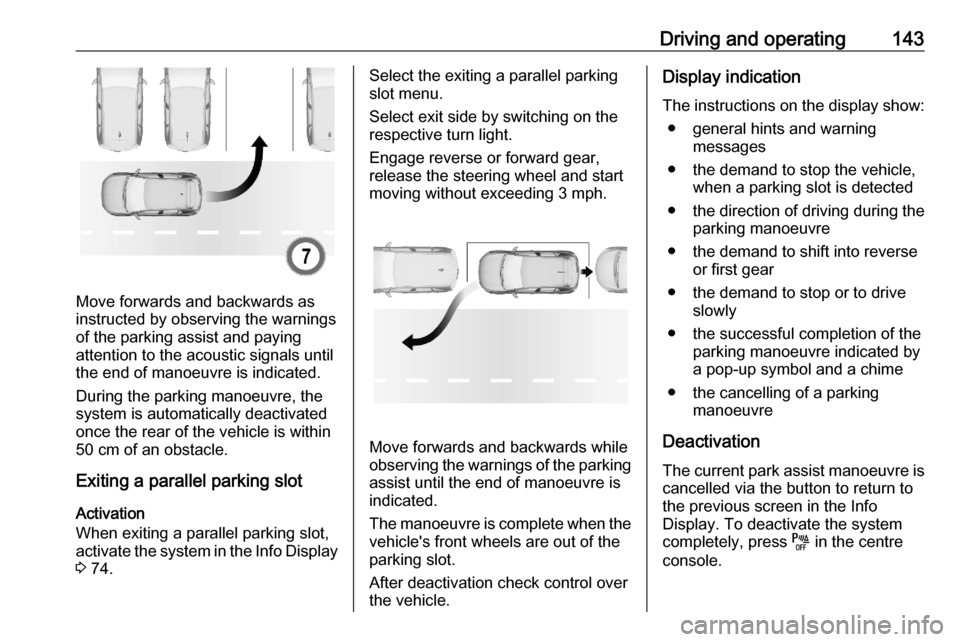
Move forwards and backwards as
instructed by observing the warnings of the parking assist and paying
attention to the acoustic signals until
the end of manoeuvre is indicated.
During the parking manoeuvre, the
system is automatically deactivated
once the rear of the vehicle is within
50 cm of an obstacle.
Exiting a parallel parking slot
Activation
When exiting a parallel parking slot,
activate the system in the Info Display 3 74.
Select the exiting a parallel parking
slot menu.
Select exit side by switching on the
respective turn light.
Engage reverse or forward gear,
release the steering wheel and start
moving without exceeding 3 mph.
Move forwards and backwards while
observing the warnings of the parking
assist until the end of manoeuvre is
indicated.
The manoeuvre is complete when the vehicle's front wheels are out of the
parking slot.
After deactivation check control over
the vehicle.
Display indication
The instructions on the display show: ● general hints and warning messages
● the demand to stop the vehicle, when a parking slot is detected
● the direction of driving during the
parking manoeuvre
● the demand to shift into reverse or first gear
● the demand to stop or to drive slowly
● the successful completion of the parking manoeuvre indicated bya pop-up symbol and a chime
● the cancelling of a parking manoeuvre
Deactivation
The current park assist manoeuvre is cancelled via the button to return to
the previous screen in the Info
Display. To deactivate the system
completely, press e in the centre
console.
Page 146 of 227
144Driving and operatingThe system is deactivated
automatically:
● if the ignition is switched off
● if stalling the engine
● if no manoeuvre is started within 5 minutes of selection of the type
of manoeuvre
● after a prolonged stop of the vehicle during a manoeuvre
● activating the turn light on the opposite side to that of the
manoeuvre
● if the electronic stability control is
triggered
● if the speed of the vehicle exceeds the stated limit
● when the driver interrupts movement of the steering wheel
● after ten manoeuvres to enter or exit a a parallel parking slot or
after seven manoeuvres to enter
a perpendicular parking slot
● by opening the driver's door
● if one of the front wheels encounters an obstacle
● parking manoeuvre successfully endedDeactivation by the driver or by the
system during manoeuvring will be indicated on the display. Additionally, a chime sounds.
The system is switched off
automatically when towing an
electrically connected trailer, bicycle
carrier, etc.
Contact your dealer to switch off the
system for a prolonged period.
Fault
In the event of a fault, a message is
displayed in the Colour Info Display,
accompanied by an acoustic signal.
In the event of a fault in the powersteering, C illuminates and a
message is displayed in the Driver
Information Centre.9 Warning
Under certain circumstances,
various reflective surfaces on
objects or clothing as well as
external noise sources may cause the system to fail to detect
obstacles.
Special attention must be paid to
low obstacles which can damage
the lower part of the bumper.Caution
Performance of the system can be reduced when sensors are
covered, e.g. by ice or snow.
Performance of the parking assist
system can be reduced due to
heavy loading.
Special conditions apply if there
are taller vehicles in the vicinity
(e.g. off-road vehicles, mini vans,
vans). Object identification and correct distance indication in the
upper part of these vehicles
cannot be guaranteed.
Objects with a very small reflection
cross-section, e.g. objects of
narrow size or soft materials, may
not be detected by the system.
Parking assist systems do not
detect objects outside the
detection range.
Page 156 of 227

154Driving and operating9Warning
The system cannot replace the
need for vigilance on the part of
the driver. Taking a break is
recommended as soon as feeling tired or at least every 2 hours. Do
not drive when feeling tired.
Activation or Deactivation
The system can be activated or
deactivated in the vehicle
personalisation 3 76.
The state of the system stays in
memory when the ignition is switched
off.
Driving time alert
The driver gets notified by a pop-up reminder symbol € in the Driver
Information Centre simultaneously
with an acoustic alert if the driver has
not taken a break after 2 hours of
driving at a speed above 40 mph. The alert is repeated hourly until the
vehicle is stopped, no matter how
vehicle speed evolves.
The counting of driving time alert is
reset when the ignition has been
switched off for a few minutes.
Driver drowsiness detection The system monitors the driver's level
of vigilance at speeds above 40 mph.
A camera at the top of the windscreen detects variations in trajectory
compared to the lane markings.
If the trajectory of the vehicle
suggests a certain level of
drowsiness or inattention by the
driver, the system triggers the first
level of alert. The driver is notified by
a message and an audible signal is
given.
After three first level alerts, the
system triggers a new alert with a message, accompanied by a more
pronounced audible signal.
In certain driving conditions (poor
road surface or strong winds), the
system may give alerts independent
of the driver's level of vigilance.The driver drowsiness detection is
reinitialised when the ignition has
been switched off for a few minutes or the speed remains below 40 mph for
a few minutes.
System limitations
In the following situations, the system
may not operate properly or even not operate at all:
● poor visibility caused by inadequate lighting of the
roadway, falling snow, heavy
rain, dense fog etc.
● dazzle caused by headlamps of an oncoming vehicles, low sun,
reflections on damp roads,
leaving a tunnel, alternating
shade and light etc.
● windscreen area in front of the camera covered by dirt, snow,
stickers etc.
● no lane markings detected or multiple lane markings due to
roadworks
● close vehicles ahead
● winding roads or narrow roads
Page 168 of 227
166Vehicle care
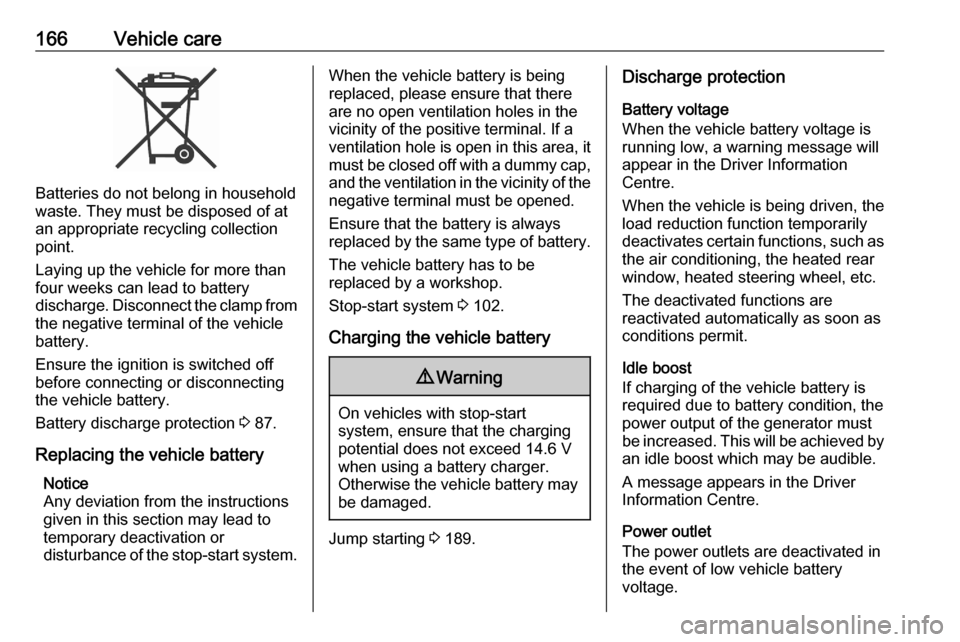
Batteries do not belong in household
waste. They must be disposed of at
an appropriate recycling collection
point.
Laying up the vehicle for more than
four weeks can lead to battery
discharge. Disconnect the clamp from the negative terminal of the vehicle
battery.
Ensure the ignition is switched off
before connecting or disconnecting
the vehicle battery.
Battery discharge protection 3 87.
Replacing the vehicle battery Notice
Any deviation from the instructions
given in this section may lead to
temporary deactivation or
disturbance of the stop-start system.
When the vehicle battery is being
replaced, please ensure that there
are no open ventilation holes in the
vicinity of the positive terminal. If a
ventilation hole is open in this area, it
must be closed off with a dummy cap, and the ventilation in the vicinity of the
negative terminal must be opened.
Ensure that the battery is always
replaced by the same type of battery.
The vehicle battery has to be
replaced by a workshop.
Stop-start system 3 102.
Charging the vehicle battery9 Warning
On vehicles with stop-start
system, ensure that the charging potential does not exceed 14.6 V
when using a battery charger.
Otherwise the vehicle battery may be damaged.
Jump starting 3 189.
Discharge protection
Battery voltage
When the vehicle battery voltage is
running low, a warning message will
appear in the Driver Information
Centre.
When the vehicle is being driven, the
load reduction function temporarily
deactivates certain functions, such as
the air conditioning, the heated rear
window, heated steering wheel, etc.
The deactivated functions are
reactivated automatically as soon as
conditions permit.
Idle boost
If charging of the vehicle battery is
required due to battery condition, the
power output of the generator must
be increased. This will be achieved by
an idle boost which may be audible.
A message appears in the Driver
Information Centre.
Power outlet
The power outlets are deactivated in
the event of low vehicle battery
voltage.
Page 181 of 227
Vehicle care179The driver is responsible for correct
adjustment of tyre pressure.9 Warning
If the pressure is too low, this can
result in considerable tyre warm-
up and internal damage, leading to tread separation and even to tyre
blow-out at high speeds.
9 Warning
For specific tyres the
recommended tyre pressure as
shown in the tyre pressure table may exceed the maximum tyre
pressure as indicated on the tyre.
Never exceed the maximum tyre
pressure as indicated on the tyre.
Temperature dependency
The tyre pressure depends on the
temperature of the tyre. During
driving, tyre temperature and
pressure increase. Tyre pressure
values provided on the tyre
information label and tyre pressure
chart are valid for cold tyres, which means at 20 °C.
The pressure increases by nearly
1.5 psi for a 10 °C temperature
increase. This must be considered
when warm tyres are checked.
Tyre deflation detectionsystem
The tyre deflation detection system
continually checks the rotation speed
of all four wheels and warns on low
tyre pressure condition once vehicle
is driving. This is achieved by
comparing tyre rolling circumference
with reference values and further
signals.
If a tyre loses pressure the control
indicator w illuminates and a warning
message is displayed in the Driver Information Centre.
Control indicator w 3 70.
In this case reduce speed, avoid
sharp cornering and strong braking.
Stop at next safe opportunity and
check tyre pressure.After adjusting tyre pressure initialise
system to extinguish the control
indicator and restart system.
If the failure continues to be
displayed, contact a workshop. The
system is inoperable when ABS or
ESC has a malfunction or a
temporary spare wheel is used. Once
the tyre has been refitted, check the
tyre pressure with cold tyres and
initialise the system.Caution
Deflation detection system warns
just about low tyre pressure
condition and does not replace
regular tyre maintenance by the
driver.
System initialisation
After tyre pressure correction or
wheel change, the system must be
initialised to learn new circumference
reference values:
Page 186 of 227
184Vehicle care
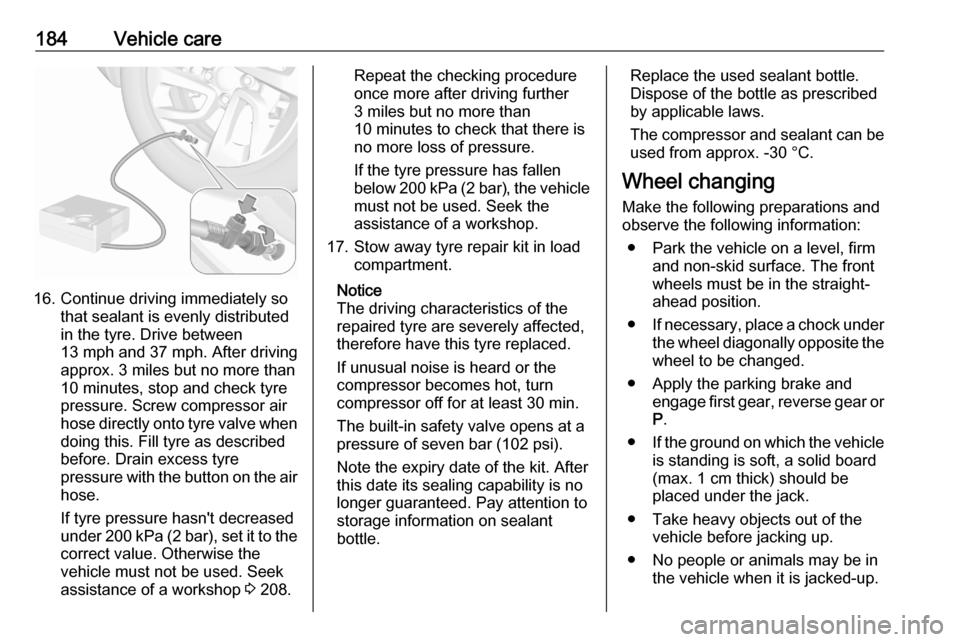
16. Continue driving immediately sothat sealant is evenly distributed
in the tyre. Drive between
13 mph and 37 mph. After driving
approx. 3 miles but no more than
10 minutes, stop and check tyre
pressure. Screw compressor air
hose directly onto tyre valve when
doing this. Fill tyre as described
before. Drain excess tyre pressure with the button on the air
hose.
If tyre pressure hasn't decreased under 200 kPa (2 bar), set it to the
correct value. Otherwise the
vehicle must not be used. Seek
assistance of a workshop 3 208.
Repeat the checking procedure
once more after driving further
3 miles but no more than
10 minutes to check that there is
no more loss of pressure.
If the tyre pressure has fallen
below 200 kPa (2 bar), the vehicle must not be used. Seek the
assistance of a workshop.
17. Stow away tyre repair kit in load compartment.
Notice
The driving characteristics of the repaired tyre are severely affected,
therefore have this tyre replaced.
If unusual noise is heard or the
compressor becomes hot, turn
compressor off for at least 30 min.
The built-in safety valve opens at a
pressure of seven bar (102 psi).
Note the expiry date of the kit. After
this date its sealing capability is no
longer guaranteed. Pay attention to
storage information on sealant
bottle.Replace the used sealant bottle. Dispose of the bottle as prescribed
by applicable laws.
The compressor and sealant can be used from approx. -30 °C.
Wheel changing
Make the following preparations and
observe the following information:
● Park the vehicle on a level, firm and non-skid surface. The front
wheels must be in the straight- ahead position.
● If necessary, place a chock under
the wheel diagonally opposite the wheel to be changed.
● Apply the parking brake and engage first gear, reverse gear or
P .
● If the ground on which the vehicle
is standing is soft, a solid board
(max. 1 cm thick) should be
placed under the jack.
● Take heavy objects out of the vehicle before jacking up.
● No people or animals may be in the vehicle when it is jacked-up.
Page 193 of 227
Vehicle care191Towing
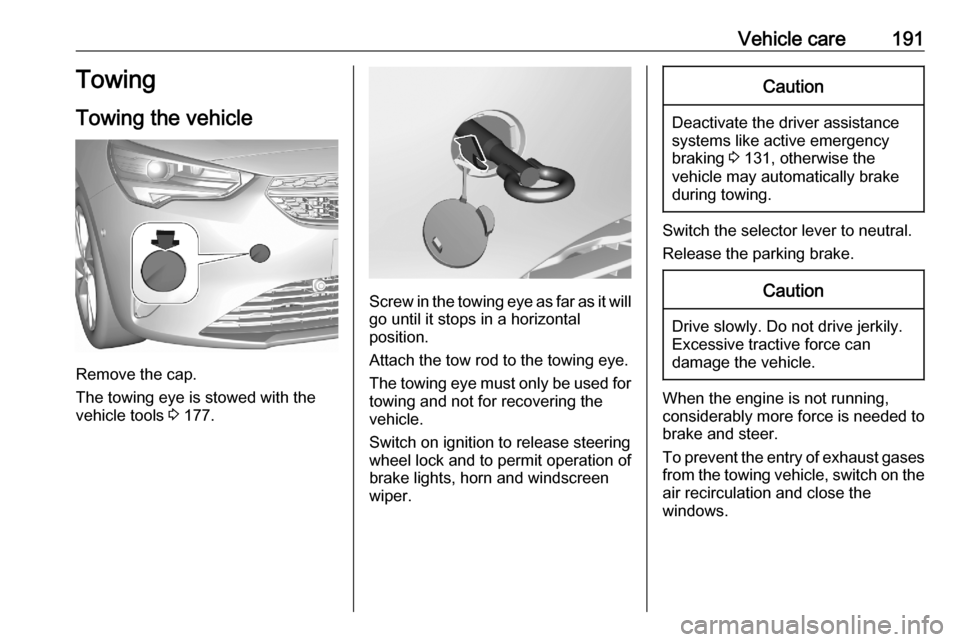
Towing the vehicle
Remove the cap.
The towing eye is stowed with the
vehicle tools 3 177.
Screw in the towing eye as far as it will
go until it stops in a horizontal
position.
Attach the tow rod to the towing eye. The towing eye must only be used for
towing and not for recovering the
vehicle.
Switch on ignition to release steering
wheel lock and to permit operation of
brake lights, horn and windscreen
wiper.
Caution
Deactivate the driver assistance
systems like active emergency
braking 3 131, otherwise the
vehicle may automatically brake during towing.
Switch the selector lever to neutral.
Release the parking brake.
Caution
Drive slowly. Do not drive jerkily.
Excessive tractive force can
damage the vehicle.
When the engine is not running,
considerably more force is needed to
brake and steer.
To prevent the entry of exhaust gases from the towing vehicle, switch on the
air recirculation and close the
windows.
Page 194 of 227
192Vehicle care
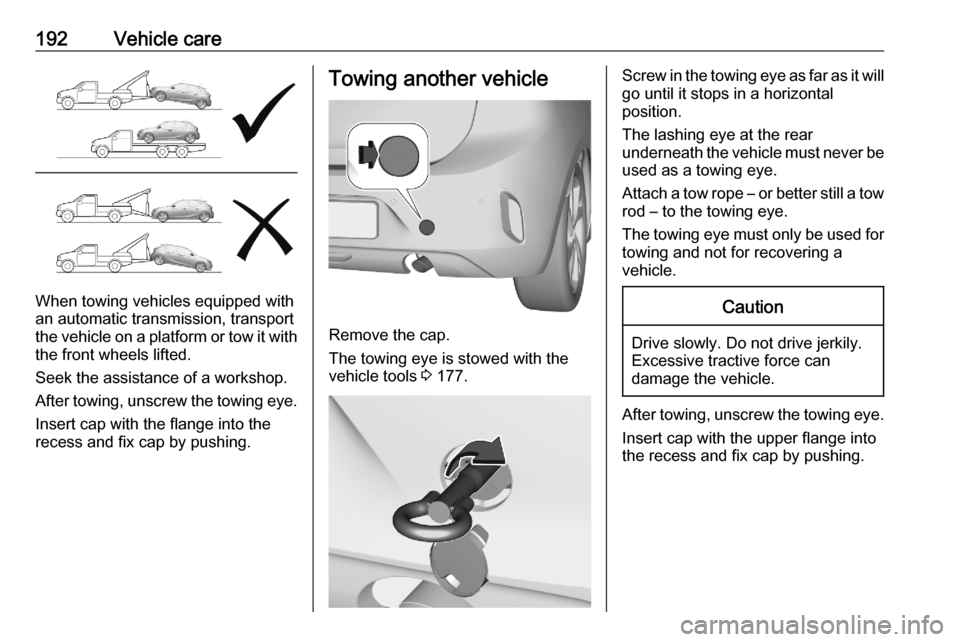
When towing vehicles equipped with
an automatic transmission, transport
the vehicle on a platform or tow it with
the front wheels lifted.
Seek the assistance of a workshop.
After towing, unscrew the towing eye.
Insert cap with the flange into the
recess and fix cap by pushing.
Towing another vehicle
Remove the cap.
The towing eye is stowed with the
vehicle tools 3 177.
Screw in the towing eye as far as it will
go until it stops in a horizontal
position.
The lashing eye at the rear
underneath the vehicle must never be used as a towing eye.
Attach a tow rope – or better still a tow
rod – to the towing eye.
The towing eye must only be used for towing and not for recovering a
vehicle.Caution
Drive slowly. Do not drive jerkily.
Excessive tractive force can
damage the vehicle.
After towing, unscrew the towing eye.
Insert cap with the upper flange into
the recess and fix cap by pushing.