Instruments VAUXHALL CORSA F 2020 Owner's Manual
[x] Cancel search | Manufacturer: VAUXHALL, Model Year: 2020, Model line: CORSA F, Model: VAUXHALL CORSA F 2020Pages: 227, PDF Size: 18.77 MB
Page 3 of 227

Introduction.................................... 2
In brief ............................................ 6
Keys, doors and windows ..............8
Seats, restraints ........................... 26
Storage ........................................ 46
Instruments and controls .............53
Lighting ........................................ 79
Climate control ............................. 88
Driving and operating ...................97
Vehicle care ............................... 160
Service and maintenance ..........196
Technical data ........................... 201
Customer information ................210
Index .......................................... 220Contents
Page 9 of 227

In brief71Power windows .....................22
2 Exterior mirrors .....................20
3 Side air vents ........................ 95
4 Turn lights, headlight
flash, low/high beam, high
beam assist ........................... 84
Exit lighting ........................... 87
Parking lights ........................ 85
Buttons for Driver
Information Centre ................72
5 Cruise control .....................119
Speed limiter ....................... 121
Heated steering wheel ..........54
6 Instruments .......................... 62
Driver Information Centre ...... 72
7 Infotainment controls
8 Windscreen wiper and
washer, rear wiper and
washer ................................. 55
9 Power button ......................... 99
10 Central locking system ..........11
11 Centre air vents .................... 9512Controls for Info-Display
operation ............................... 74
13 Anti-theft alarm system
status LED ........................... 18
14 Info-Display .......................... 74
15 Hazard warning flashers ......84
16 Glovebox .............................. 46
17 Climate control system .......... 89
18 USB charging port ................ 58
19 Power outlet .......................... 58
20 Parking assist / Advanced
parking assist .....................137
Lane keep assist .................151
Stop start system ................102
Electronic Stability Control and Traction Control ...........117
21 Manual transmission ..........113
Automatic transmission ......109
22 Manual parking brake ........114
Electric parking brake ........114
23 Ignition switch ....................... 98
24 Steering wheel adjustment ..54
25 Horn ..................................... 5526Fuse box ............................ 175
27 Bonnet release lever ..........162
28 Light switch .......................... 79
Headlight range
adjustment ........................... 81
Front/rear fog lights ..............84
Instrument illumination .........86
Page 29 of 227
Seats, restraints27Head restraints on rear seats
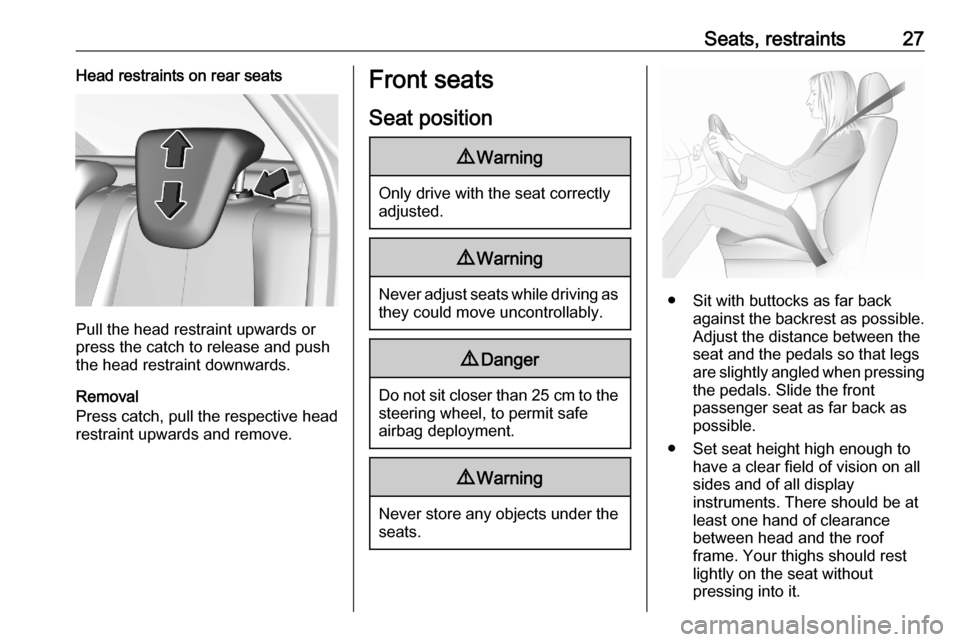
Pull the head restraint upwards or
press the catch to release and push the head restraint downwards.
Removal
Press catch, pull the respective head
restraint upwards and remove.
Front seats
Seat position9 Warning
Only drive with the seat correctly
adjusted.
9 Warning
Never adjust seats while driving as
they could move uncontrollably.
9 Danger
Do not sit closer than 25 cm to the
steering wheel, to permit safe
airbag deployment.
9 Warning
Never store any objects under the
seats.
● Sit with buttocks as far back against the backrest as possible.
Adjust the distance between the
seat and the pedals so that legs
are slightly angled when pressing the pedals. Slide the front
passenger seat as far back as
possible.
● Set seat height high enough to have a clear field of vision on allsides and of all display
instruments. There should be at
least one hand of clearance
between head and the roof
frame. Your thighs should rest
lightly on the seat without
pressing into it.
Page 55 of 227

Instruments and controls53Instruments and
controlsControls ....................................... 54
Steering wheel adjustment ........54
Steering wheel controls .............54
Heated steering wheel ...............54
Horn ........................................... 55
Windscreen wiper and washer ..55
Rear window wiper and washer ...................................... 57
Outside temperature ..................57
Clock ......................................... 58
Power outlets ............................. 58
Inductive charging .....................59
Cigarette lighter ......................... 60
Ashtrays .................................... 60
Warning lights, gauges and indi‐ cators ........................................... 61
Instrument cluster ......................61
Speedometer ............................. 62
Odometer .................................. 62
Trip odometer ............................ 62
Tachometer ............................... 63
Fuel gauge ................................ 63
Engine coolant temperature gauge ....................................... 63Engine oil level monitor.............64
Service display .......................... 64
Control indicators ......................65
Turn lights .................................. 65
Seat belt reminder .....................65
Airbag and belt tensioners .........66
Airbag deactivation ....................66
Charging system .......................66
Malfunction indicator light ..........67
Service vehicle soon .................67
Stop engine ............................... 67
System check ............................ 67
Brake and clutch system ...........67
Parking brake ............................ 68
Electric parking brake ................68
Electric parking brake fault ........68
Automatic operation of electric parking brake off ....................... 68
Antilock brake system (ABS) .....68
Gear shifting .............................. 69
Lane keep assist .......................69
Electronic Stability Control and Traction Control system ...........69
Engine coolant temperature ......69
Preheating ................................. 69
Exhaust filter .............................. 69
AdBlue ....................................... 70
Deflation detection system ........70
Engine oil pressure ....................70
Low fuel ..................................... 71Autostop.................................... 71
Exterior light .............................. 71
Low beam .................................. 71
High beam ................................. 71
High beam assist .......................71
LED headlights .......................... 71
Front fog lights ........................... 71
Rear fog light ............................. 71
Rain sensor ............................... 71
Active emergency braking .........72
Door open .................................. 72
Displays ....................................... 72
Driver Information Centre ..........72
Info Display ................................ 74
Vehicle messages ........................75
Warning chimes .........................76
Vehicle personalisation ................76
Telematics services .....................77
Vauxhall Connect ......................77
Page 56 of 227
54Instruments and controlsControlsSteering wheel adjustment
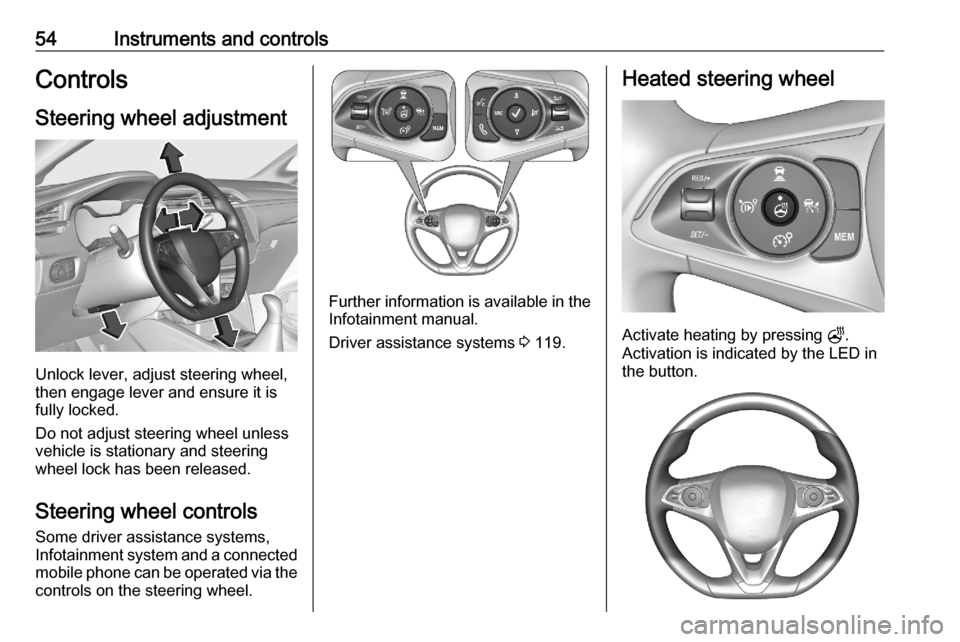
Unlock lever, adjust steering wheel,
then engage lever and ensure it is fully locked.
Do not adjust steering wheel unless
vehicle is stationary and steering
wheel lock has been released.
Steering wheel controls
Some driver assistance systems,
Infotainment system and a connected mobile phone can be operated via the
controls on the steering wheel.
Further information is available in the
Infotainment manual.
Driver assistance systems 3 119.
Heated steering wheel
Activate heating by pressing Z.
Activation is indicated by the LED in
the button.
Page 57 of 227
Instruments and controls55The recommended grip areas of the
steering wheel are heated quicker
and to a higher temperature than the
other areas.
Heating is operational when the
engine is running and during an
Autostop.
Stop-start system 3 102.
Horn
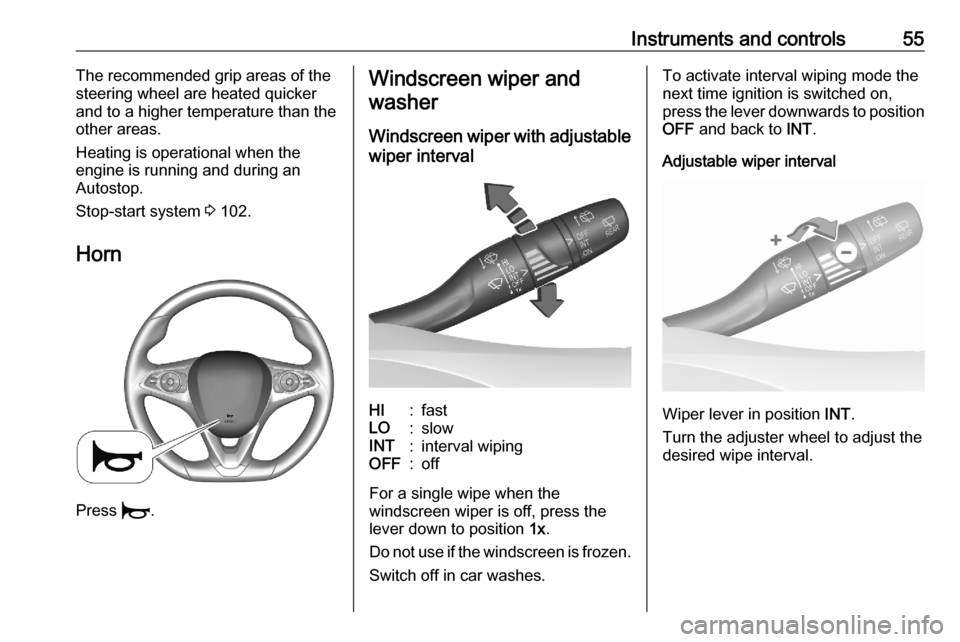
Press d.
Windscreen wiper and
washer
Windscreen wiper with adjustablewiper intervalHI:fastLO:slowINT:interval wipingOFF:off
For a single wipe when the
windscreen wiper is off, press the
lever down to position 1x.
Do not use if the windscreen is frozen.
Switch off in car washes.
To activate interval wiping mode the
next time ignition is switched on,
press the lever downwards to position
OFF and back to INT.
Adjustable wiper interval
Wiper lever in position INT.
Turn the adjuster wheel to adjust the
desired wipe interval.
Page 58 of 227
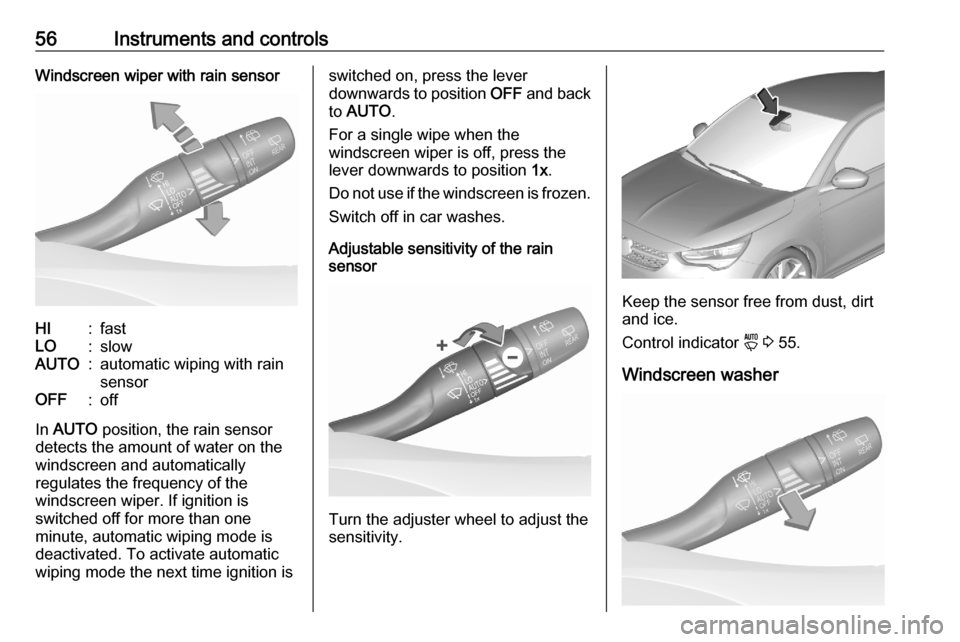
56Instruments and controlsWindscreen wiper with rain sensorHI:fastLO:slowAUTO:automatic wiping with rain
sensorOFF:off
In AUTO position, the rain sensor
detects the amount of water on the
windscreen and automatically
regulates the frequency of the
windscreen wiper. If ignition is
switched off for more than one
minute, automatic wiping mode is
deactivated. To activate automatic
wiping mode the next time ignition is
switched on, press the lever
downwards to position OFF and back
to AUTO .
For a single wipe when the
windscreen wiper is off, press the
lever downwards to position 1x.
Do not use if the windscreen is frozen. Switch off in car washes.
Adjustable sensitivity of the rain
sensor
Turn the adjuster wheel to adjust the
sensitivity.
Keep the sensor free from dust, dirt
and ice.
Control indicator y 3 55.
Windscreen washer
Page 59 of 227
Instruments and controls57Pull lever. Washer fluid is sprayed
onto the windscreen and the wiper
wipes a few times.
Washer fluid 3 165.
Rear window wiper and washer
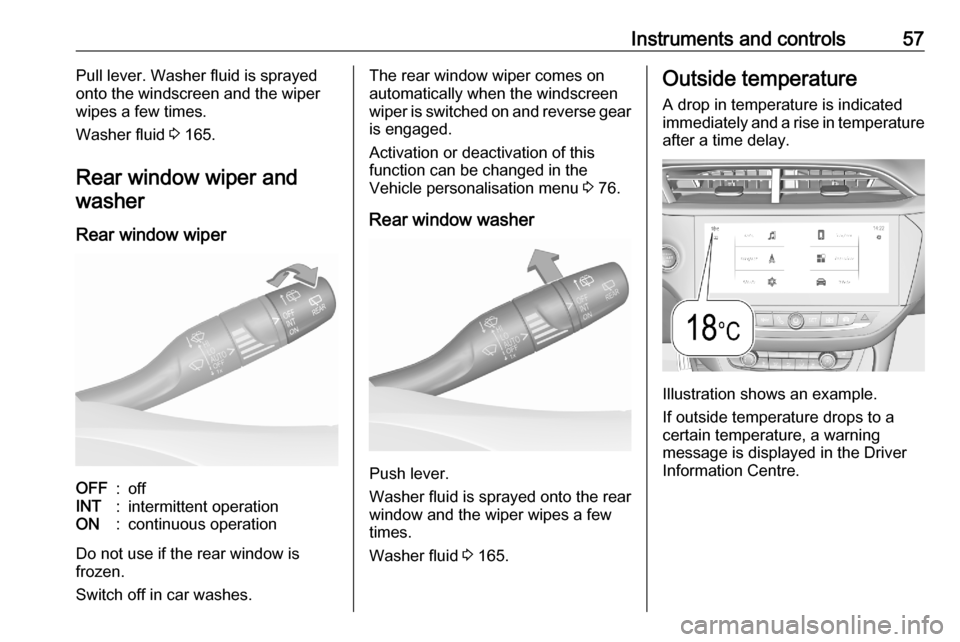
Rear window wiperOFF:offINT:intermittent operationON:continuous operation
Do not use if the rear window is
frozen.
Switch off in car washes.
The rear window wiper comes on
automatically when the windscreen
wiper is switched on and reverse gear
is engaged.
Activation or deactivation of this
function can be changed in the
Vehicle personalisation menu 3 76.
Rear window washer
Push lever.
Washer fluid is sprayed onto the rear
window and the wiper wipes a few
times.
Washer fluid 3 165.
Outside temperature
A drop in temperature is indicatedimmediately and a rise in temperature
after a time delay.
Illustration shows an example.
If outside temperature drops to a
certain temperature, a warning
message is displayed in the Driver
Information Centre.
Page 60 of 227
58Instruments and controls9Warning
The road surface may already be
icy even though the display
indicates a few degrees above 0
°C.
Clock
Date and time are shown in the Info
Display.
The adjustment of date and time is
described in the Infotainment Manual.
Info Display 3 74.
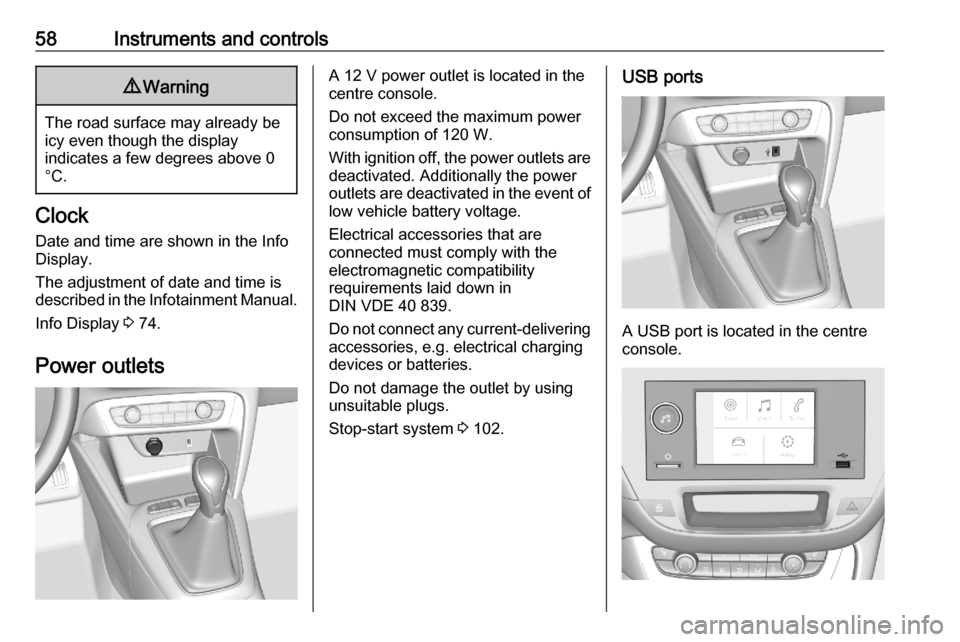
Power outlets
A 12 V power outlet is located in the
centre console.
Do not exceed the maximum power
consumption of 120 W.
With ignition off, the power outlets are
deactivated. Additionally the power
outlets are deactivated in the event of
low vehicle battery voltage.
Electrical accessories that are
connected must comply with the
electromagnetic compatibility
requirements laid down in
DIN VDE 40 839.
Do not connect any current-delivering
accessories, e.g. electrical charging
devices or batteries.
Do not damage the outlet by using
unsuitable plugs.
Stop-start system 3 102.USB ports
A USB port is located in the centre
console.
Page 61 of 227
Instruments and controls59Depending on version, an USB port
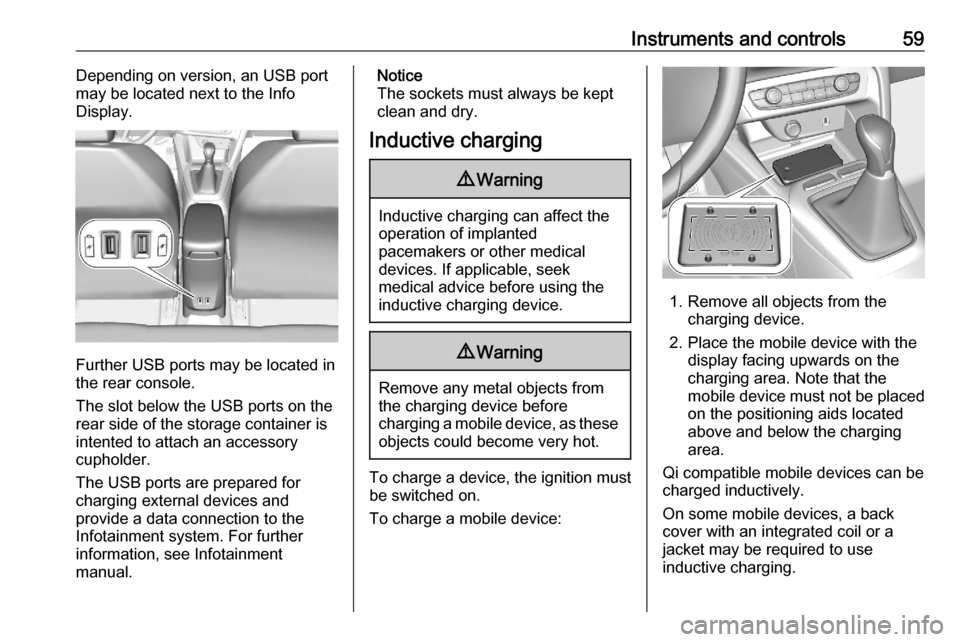
may be located next to the Info
Display.
Further USB ports may be located in
the rear console.
The slot below the USB ports on the rear side of the storage container is
intented to attach an accessory
cupholder.
The USB ports are prepared for
charging external devices and
provide a data connection to the
Infotainment system. For further
information, see Infotainment
manual.
Notice
The sockets must always be kept
clean and dry.
Inductive charging9 Warning
Inductive charging can affect the
operation of implanted
pacemakers or other medical
devices. If applicable, seek
medical advice before using the
inductive charging device.
9 Warning
Remove any metal objects from
the charging device before
charging a mobile device, as these objects could become very hot.
To charge a device, the ignition must
be switched on.
To charge a mobile device:
1. Remove all objects from the charging device.
2. Place the mobile device with the display facing upwards on the
charging area. Note that the
mobile device must not be placed
on the positioning aids located
above and below the charging
area.
Qi compatible mobile devices can be
charged inductively.
On some mobile devices, a back
cover with an integrated coil or a
jacket may be required to use
inductive charging.