VAUXHALL CROSSLAND X 2018 Repair Manual
Manufacturer: VAUXHALL, Model Year: 2018, Model line: CROSSLAND X, Model: VAUXHALL CROSSLAND X 2018Pages: 255, PDF Size: 7.57 MB
Page 61 of 255

Seats, restraints59Allow children to enter and exit the
vehicle only on the side facing away
from the traffic.
When the child restraint system is not
in use, secure the seat with a seat belt or remove it from the vehicle.
Notice
Do not affix anything on the child restraint systems and do not cover
them with any other materials.
A child restraint system which has
been subjected to stress in an
accident must be replaced.
Page 62 of 255

60Seats, restraintsChild restraint installation locations
Permissible options for fastening a child restraint system with a three-point seat belt
Weight class
On front passenger seat
On rear outboard seatsOn rear centre seat
activated airbagdeactivated airbagGroup 0: up to 10 kgXU 1,2U/L 3XGroup 0+: up to 13 kgXU1,2U/L 3XGroup I: 9 to 18 kgXU1,2U/L 3,4XGroup II: 15 to 25 kgU1,2XU/L 3,4XGroup III: 22 to 36 kgU1,2XU/L 3,4XU:universal suitability in conjunction with three-point seat beltL:suitable for particular child restraint systems of the 'specific-vehicle', 'restricted' or 'semi-universal' categories. The
child restraint system must be approved for the specific vehicle type (refer to the vehicle type list of the child restraint
system)X:no child restraint system permitted in this weight class1:move seat forwards as far as necessary and adjust seat backrest inclination as far as necessary to a vertical position to ensure that the belt runs forwards from the upper anchorage point2:move seat height adjustment upwards as far as necessary and adjust seat backrest inclination as far as necessaryto a vertical position to ensure that the belt is tight on the buckle side3:move the respective front seat ahead of the child restraint system forwards and the sliding rear seat backwards as far as necessary4:adjust the respective headrest as necessary or remove if required
Page 63 of 255

Seats, restraints61Permissible options for fitting an ISOFIX child restraint system with ISOFIX brackets
Weight classSize classFixture
On front passenger seatOn rear outboard
seatsOn rear centre
seatactivated airbagdeactivated airbagGroup 0: up to 10 kgGISO/L2XXXXFISO/L1XXXXEISO/R1XXIL 1XGroup 0+: up to 13 kgEISO/R1XXIL 1XDISO/R2XXIL1XCISO/R3XXIL1XGroup I: 9 to 18 kgDISO/R2XXIL1,2XCISO/R3XXIL1,2XBISO/F2XXIL, IUF 1,2XB1ISO/F2XXXIL, IUF1,2XAISO/F3XXIL, IUF 1,2XGroup II: 15 to 25 kgXXIL1,2XGroup III: 22 to 36 kgXXIL1,2X
Page 64 of 255

62Seats, restraintsIL:suitable for particular ISOFIX restraint systems of the 'specific-vehicle', 'restricted' or 'semi-universal' categories.
The ISOFIX restraint system must be approved for the specific vehicle type (refer to the vehicle type list of the child restraint system)IUF:suitable for ISOFIX forward-facing child restraint systems of universal category approved for use in this weight classX:no ISOFIX child restraint system approved in this weight class1:move the respective front seat ahead of the child restraint system forwards and the sliding rear seat backwards as
far as necessary2:adjust the respective headrest as necessary or remove if requiredISOFIX size class and seat deviceA – ISO/F3:forward-facing
child restraint
system for
children of
maximum size in
the weight class
9 to 18 kgB – ISO/F2:forward-facing
child restraint
system for smaller
children in the
weight class
9 to 18 kgB1 – ISO/F2X:forward-facing
child restraint
system for smaller
children in the
weight class
9 to 18 kgC – ISO/R3:rear-facing child
restraint system
for children of
maximum size in
the weight class
up to 18 kgD – ISO/R2:rear-facing child
restraint system
for smaller
children in the
weight class up to
18 kgE – ISO/R1:rear-facing child
restraint system
for young children
in the weight class
up to 13 kgF– ISO/L1:left lateral facing
position child
restraint system
(carry-cot)G – ISO/L2:right lateral facing
position child
restraint system
(carry-cot)
Page 65 of 255

Seats, restraints63Permissible options for fitting an i-Size child restraint system with ISOFIX bracketsOn front passenger seat
On rear outboard seatsOn rear centre seat
activated airbagdeactivated airbagi-Size child restraint systemsXXi - UXi - U:suitable for i-Size 'universal' forward and rearward facing child restraint systemsX:seating position not suitable for i-Size 'universal' child restraint systems
Page 66 of 255
64StorageStorageStorage compartments................64
Glovebox ................................... 64
Cupholders ................................ 64
Centre console storage .............65
Load compartment .......................65
Load compartment cover ...........68
Rear floor storage cover ............68
Lashing eyes ............................. 69
Warning triangle ........................70
First aid kit ................................. 70
Roof rack system .........................71
Roof rack ................................... 71
Loading information .....................71Storage compartments9Warning
Do not store heavy or sharp
objects in the storage
compartments. Otherwise, the
storage compartment lid could
open and vehicle occupants could be injured by objects being thrown
around in the event of hard
braking, a sudden change in
direction or an accident.
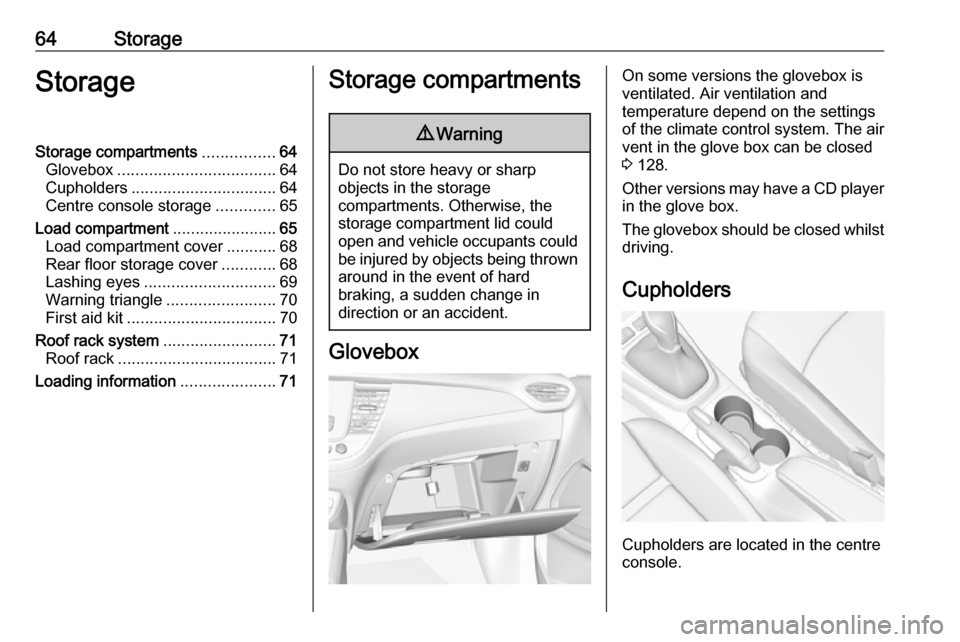
Glovebox
On some versions the glovebox is
ventilated. Air ventilation and
temperature depend on the settings
of the climate control system. The air
vent in the glove box can be closed
3 128.
Other versions may have a CD player
in the glove box.
The glovebox should be closed whilst driving.
Cupholders
Cupholders are located in the centre
console.
Page 67 of 255
Storage65
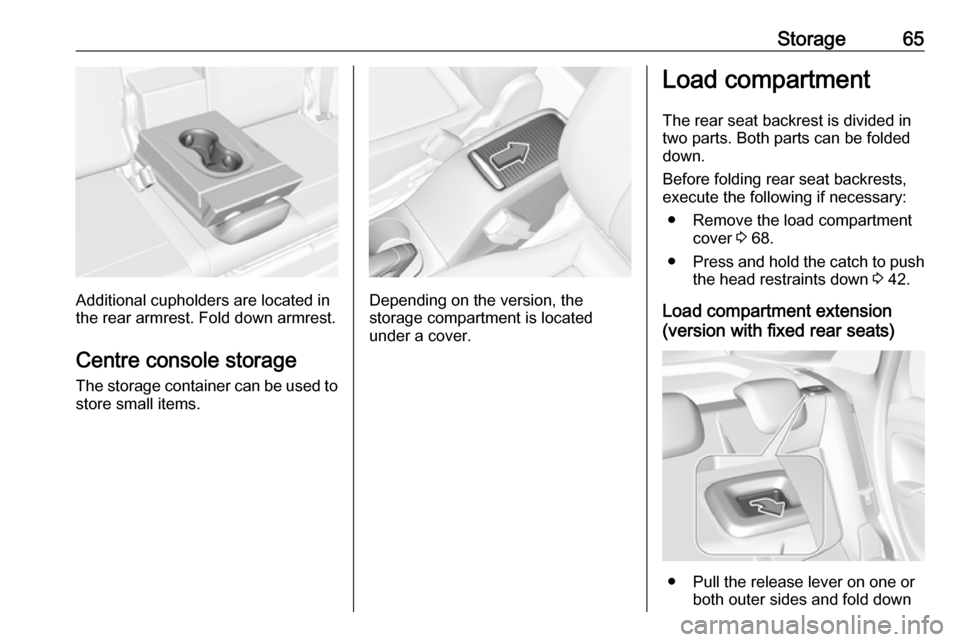
Additional cupholders are located in
the rear armrest. Fold down armrest.
Centre console storage
The storage container can be used to
store small items.Depending on the version, the
storage compartment is located
under a cover.
Load compartment
The rear seat backrest is divided in
two parts. Both parts can be folded
down.
Before folding rear seat backrests,
execute the following if necessary:
● Remove the load compartment cover 3 68.
● Press and hold the catch to push
the head restraints down 3 42.
Load compartment extension
(version with fixed rear seats)
● Pull the release lever on one or both outer sides and fold down
Page 68 of 255
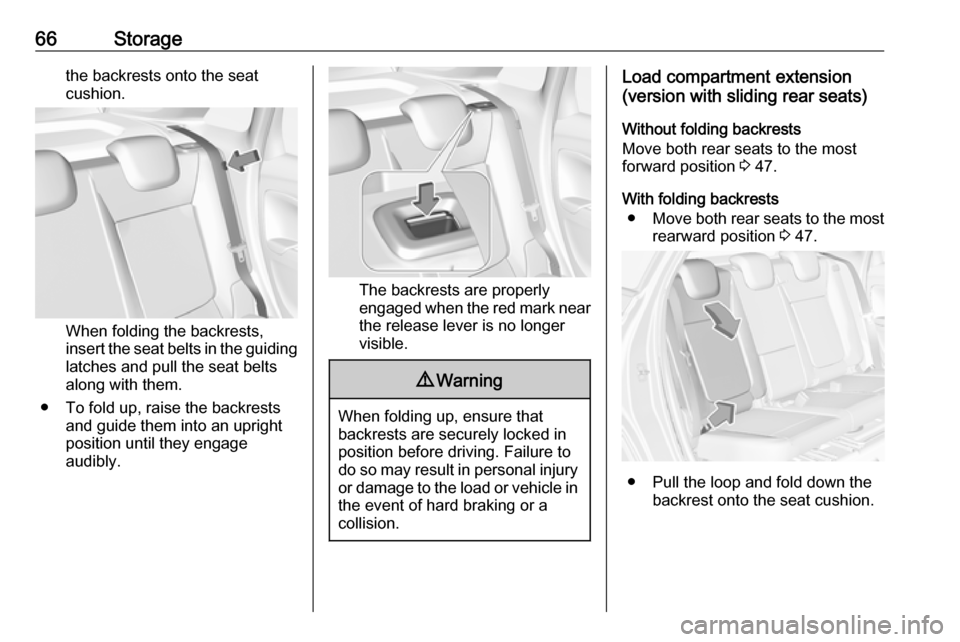
66Storagethe backrests onto the seat
cushion.
When folding the backrests,
insert the seat belts in the guiding
latches and pull the seat belts
along with them.
● To fold up, raise the backrests and guide them into an upright
position until they engage
audibly.
The backrests are properly
engaged when the red mark near the release lever is no longer
visible.
9 Warning
When folding up, ensure that
backrests are securely locked in
position before driving. Failure to
do so may result in personal injury or damage to the load or vehicle in the event of hard braking or a
collision.
Load compartment extension
(version with sliding rear seats)
Without folding backrests
Move both rear seats to the most
forward position 3 47.
With folding backrests ● Move both rear seats to the most
rearward position 3 47.
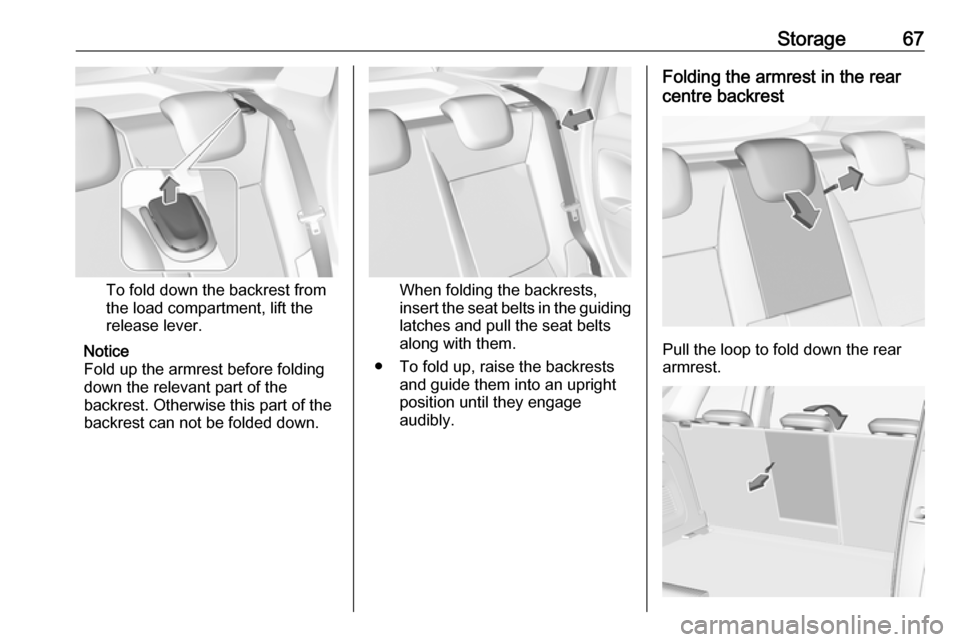
● Pull the loop and fold down the
backrest onto the seat cushion.
Page 69 of 255
Storage67
To fold down the backrest from
the load compartment, lift the
release lever.
Notice
Fold up the armrest before folding
down the relevant part of the
backrest. Otherwise this part of the backrest can not be folded down.When folding the backrests,
insert the seat belts in the guiding
latches and pull the seat belts along with them.
● To fold up, raise the backrests and guide them into an upright
position until they engage
audibly.
Folding the armrest in the rear
centre backrest
Pull the loop to fold down the rear
armrest.
Page 70 of 255
68StorageThe armrest can also be folded down
from the rear by pulling the loop.
Suitable for loading long, narrow
objects.
Ensure that the armrest engages
after folding up.
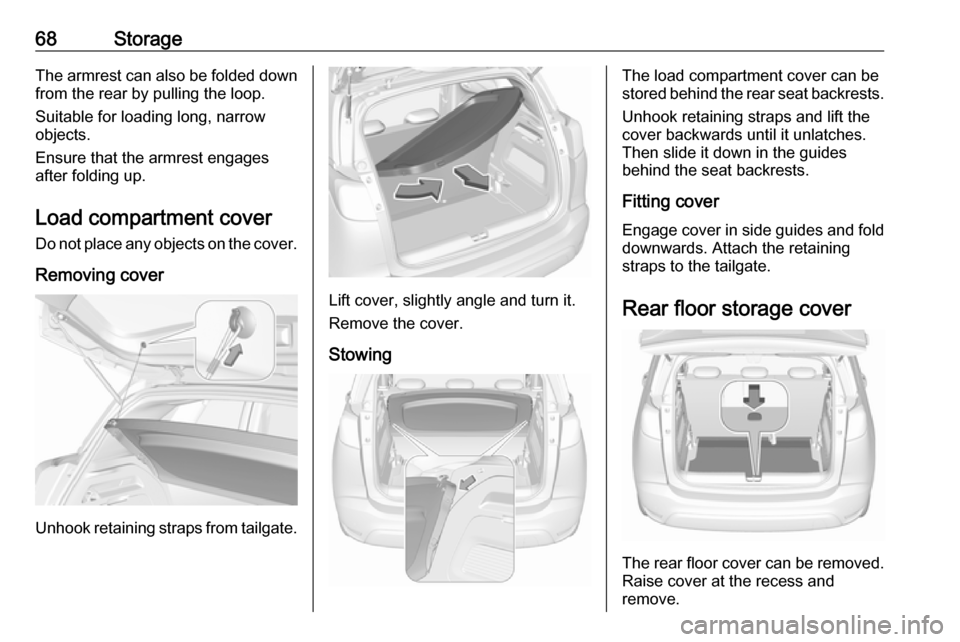
Load compartment cover
Do not place any objects on the cover.
Removing cover
Unhook retaining straps from tailgate.
Lift cover, slightly angle and turn it.
Remove the cover.
Stowing
The load compartment cover can be
stored behind the rear seat backrests.
Unhook retaining straps and lift the
cover backwards until it unlatches.
Then slide it down in the guides
behind the seat backrests.
Fitting cover Engage cover in side guides and fold downwards. Attach the retainingstraps to the tailgate.
Rear floor storage cover
The rear floor cover can be removed.
Raise cover at the recess and
remove.