instrument panel VAUXHALL CROSSLAND X 2019.75 Owner's Manual
[x] Cancel search | Manufacturer: VAUXHALL, Model Year: 2019.75, Model line: CROSSLAND X, Model: VAUXHALL CROSSLAND X 2019.75Pages: 247, PDF Size: 7.77 MB
Page 12 of 247
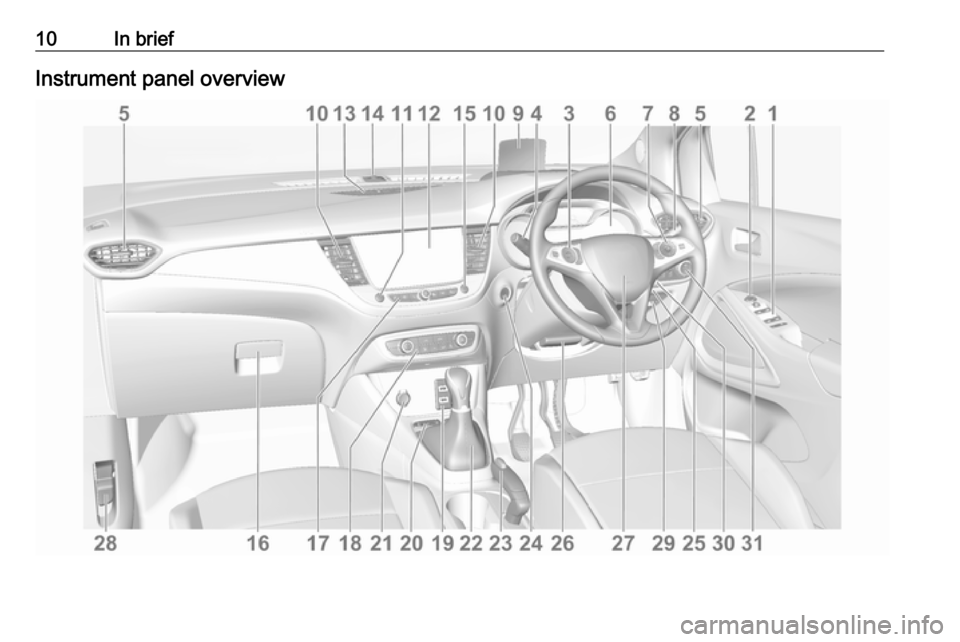
10In briefInstrument panel overview
Page 30 of 247
28Keys, doors and windows
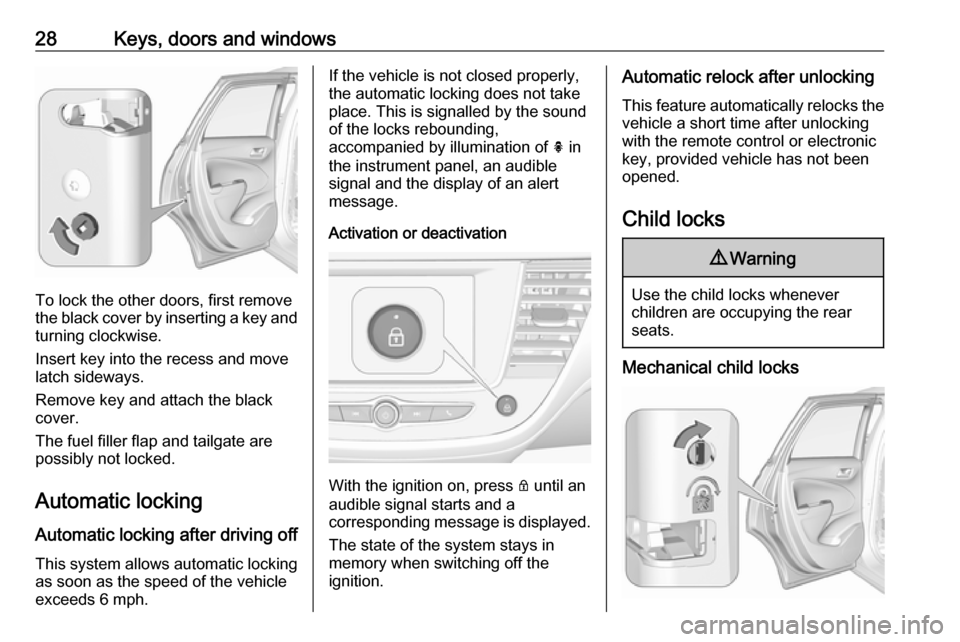
To lock the other doors, first remove
the black cover by inserting a key and turning clockwise.
Insert key into the recess and move
latch sideways.
Remove key and attach the black cover.
The fuel filler flap and tailgate are
possibly not locked.
Automatic locking Automatic locking after driving off This system allows automatic locking
as soon as the speed of the vehicle
exceeds 6 mph.
If the vehicle is not closed properly,
the automatic locking does not take
place. This is signalled by the sound
of the locks rebounding,
accompanied by illumination of h in
the instrument panel, an audible signal and the display of an alert
message.
Activation or deactivation
With the ignition on, press Q until an
audible signal starts and a
corresponding message is displayed.
The state of the system stays in
memory when switching off the
ignition.
Automatic relock after unlocking
This feature automatically relocks the
vehicle a short time after unlocking
with the remote control or electronic
key, provided vehicle has not been
opened.
Child locks9 Warning
Use the child locks whenever
children are occupying the rear
seats.
Mechanical child locks
Page 51 of 247
Seats, restraints49Airbag system
The airbag system consists of a
number of individual systems
depending on the scope of
equipment.
When triggered, the airbags inflate
within milliseconds. They also deflate
so quickly that it is often unnoticeable during the collision.9 Warning
The airbag system deploys in an
explosive manner, repairs must be performed by skilled personnel
only.
9 Warning
Adding accessories that change
the vehicle's frame, bumper
system, height, front end or side
sheet metal, may keep the airbag
system from working properly. The operation of the airbag system can
also be affected by changing any
parts of the front seats, seat belts,
airbag sensing and diagnostic
module, steering wheel,
instrument panel, inner door seals including the speakers, any of the
airbag modules, ceiling or pillar
trim, front sensors, side impact
sensors or airbag wiring.
Notice
The airbag systems and belt
pretensioner control electronics are
located in the centre console area.
Do not put any magnetic objects in
this area.
Do not affix any objects onto the
airbag covers and do not cover them with other materials. Have damagedcovers replaced by a workshop.
Each airbag is triggered only once.
Have deployed airbags replaced by
a workshop. Furthermore, it may be
necessary to have the steering
wheel, the instrument panel, parts of
the panelling, the door seals,
handles and the seats replaced.
Do not make any modifications to
the airbag system as this will
invalidate the vehicle operating
permit.
Control indicator v for airbag systems
3 82.
Child restraint systems on front
passenger seat with airbag
systems
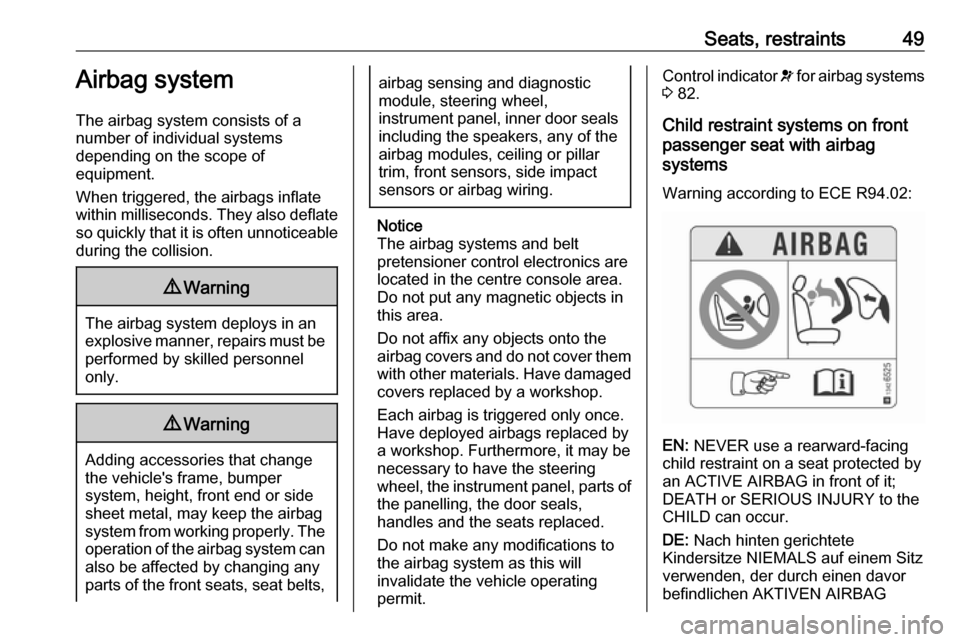
Warning according to ECE R94.02:
EN: NEVER use a rearward-facing
child restraint on a seat protected by
an ACTIVE AIRBAG in front of it;
DEATH or SERIOUS INJURY to the
CHILD can occur.
DE: Nach hinten gerichtete
Kindersitze NIEMALS auf einem Sitz
verwenden, der durch einen davor
befindlichen AKTIVEN AIRBAG
Page 54 of 247
52Seats, restraintsET: ÄRGE kasutage tahapoole
suunatud lapseturvaistet istmel, mille
ees on AKTIIVSE TURVAPADJAGA
kaitstud iste, sest see võib
põhjustada LAPSE SURMA või
TÕSISE VIGASTUSE.
MT: QATT tuża trażżin għat-tfal li
jħares lejn in-naħa ta’ wara fuq sit
protett b’AIRBAG ATTIV quddiemu;
dan jista’ jikkawża l-MEWT jew
ĠRIEĦI SERJI lit-TFAL.
GA: Ná húsáid srian sábháilteachta
linbh cúil RIAMH ar shuíochán a
bhfuil mála aeir ag feidhmiú os a
chomhair. Tá baol BÁIS nó GORTÚ
DONA don PHÁISTE ag baint leis.
Beyond the warning required by
ECE R94.02, for safety reasons a
forward-facing child restraint system
must only be used subject to the
instructions and restrictions in the
table 3 58.
The airbag label is located on both
sides of the front passenger sun visor.
Airbag deactivation 3 54.Front airbag system
The front airbag system consists of
one airbag in the steering wheel and
one in the instrument panel on the
front passenger side. These can be
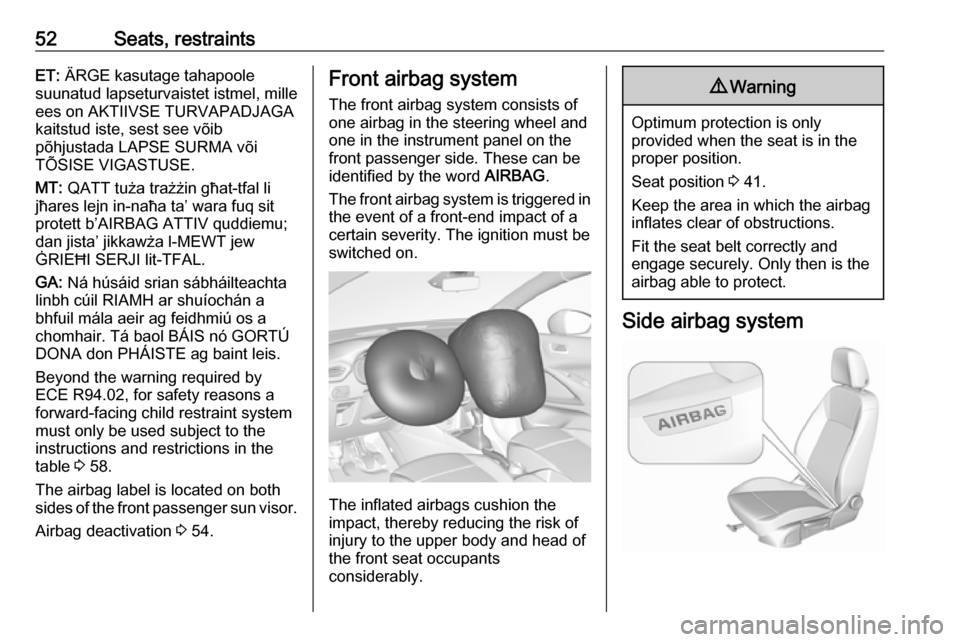
identified by the word AIRBAG.
The front airbag system is triggered in
the event of a front-end impact of a
certain severity. The ignition must be
switched on.
The inflated airbags cushion the
impact, thereby reducing the risk of
injury to the upper body and head of
the front seat occupants
considerably.
9 Warning
Optimum protection is only
provided when the seat is in the
proper position.
Seat position 3 41.
Keep the area in which the airbag
inflates clear of obstructions.
Fit the seat belt correctly and
engage securely. Only then is the
airbag able to protect.
Side airbag system
Page 56 of 247
54Seats, restraintsAirbag deactivation
The front passenger airbag system
must be deactivated for child restraint system on the passenger seat
according to the instructions in the
table 3 58. The side airbag and
curtain airbag systems, the belt
pretensioners and all driver airbag
systems will remain active.
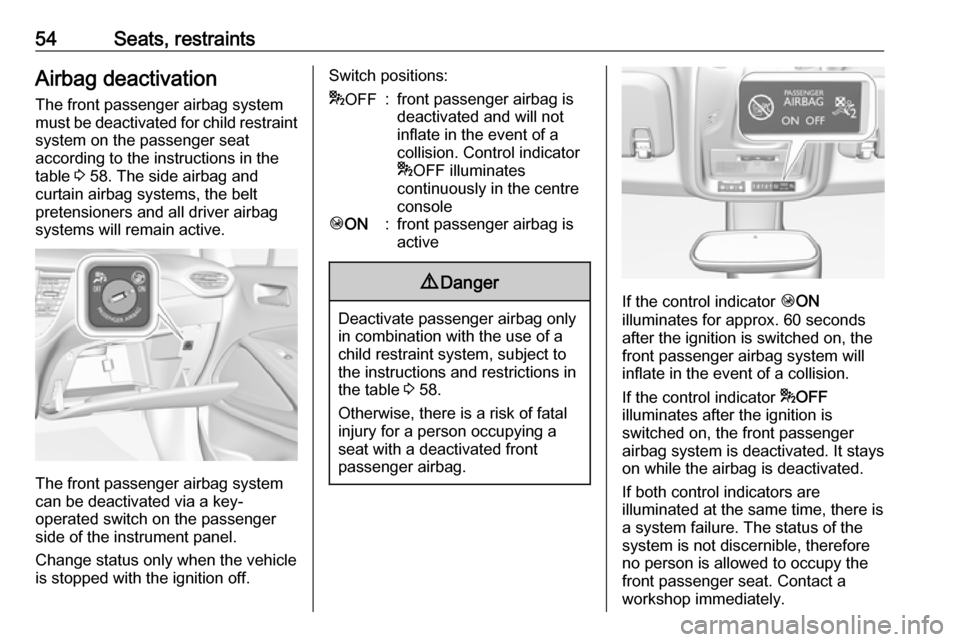
The front passenger airbag system
can be deactivated via a key-
operated switch on the passenger side of the instrument panel.
Change status only when the vehicle is stopped with the ignition off.
Switch positions:* OFF:front passenger airbag is
deactivated and will not
inflate in the event of a
collision. Control indicator
* OFF illuminates
continuously in the centre
consoleÓ ON:front passenger airbag is
active9 Danger
Deactivate passenger airbag only
in combination with the use of a
child restraint system, subject to
the instructions and restrictions in
the table 3 58.
Otherwise, there is a risk of fatal
injury for a person occupying a
seat with a deactivated front
passenger airbag.If the control indicator ÓON
illuminates for approx. 60 seconds
after the ignition is switched on, the
front passenger airbag system will
inflate in the event of a collision.
If the control indicator *OFF
illuminates after the ignition is
switched on, the front passenger
airbag system is deactivated. It stays
on while the airbag is deactivated.
If both control indicators are
illuminated at the same time, there is
a system failure. The status of the
system is not discernible, therefore
no person is allowed to occupy the
front passenger seat. Contact a
workshop immediately.
Page 70 of 247

68Storage● Do not place any objects on theload compartment cover or theinstrument panel, and do notcover the sensor on top of the
instrument panel.
● The load must not obstruct the operation of the pedals, parking
brake and gear selector, or
hinder the freedom of movement
of the driver. Do not place any
unsecured objects in the interior.
● Do not drive with an open load compartment.9Warning
Always make sure that the load in
the vehicle is securely stowed.
Otherwise objects can be thrown
around inside the vehicle and
cause personal injury or damage
to the load or car.
● The payload is the difference between the permitted gross
vehicle weight (see identification
plate 3 219) and the EC kerb
weight, refer to the EEC
Certificate of Conformity
provided with your vehicle or
other national registration
documents.
To calculate the payload, enter the data for your vehicle in the
weights table at the front of this
manual.
The EC kerb weight includes
weights for the driver (68 kg),
luggage (7 kg) and all fluids (fuel
tank 90% full).
Optional equipment and
accessories increase the kerb
weight.
● Driving with a roof load increases
the sensitivity of the vehicle to
cross-winds and has a
detrimental effect on vehicle
handling due to the vehicle's
higher centre of gravity.
Distribute the load evenly and
secure it properly with retaining
straps. Adjust the tyre pressure
and vehicle speed according to
the load conditions. Check and
retighten the straps frequently.
Do not drive faster than 75 mph.
The permissible roof load is
60 kg. The roof load is thecombined weight of the roof rack and the load.
Page 92 of 247

90Instruments and controlsThe values of trip 1 page can be reset
by pressing SET/CLR for a few
seconds.
Trip 2 page:
Average speed
Display of average speed. The
measurement can be reset at any
time.
Average fuel consumption
Display of average consumption. The measurement can be reset at any
time and starts with a default value.
Distance travelled
Displays the current distance for trip
2 since a certain reset.
The values of trip 2 page can be reset
by pressing SET/CLR for a few
seconds.
Digital speed page
Digital display of the instantaneous
speed.
Stop and Start time counter
A time counter calculates the time
spent in STOP mode during a
journey. It resets to zero every time
the ignition is switched on.Compass page
Displays the geographic direction of
driving.
Blank page
No trip/fuel information is displayed.
AdBlue Press M or CHECK repeatedly until
the AdBlue menu is shown.
AdBlue range
Indicates an estimate of the AdBlue
level. A message indicates whether
the level is sufficient or low.
3 129.
Info Display The Info Display is located in the
instrument panel near the instrument
cluster.
Depending on the vehicle
configuration the vehicle has a
● Graphic Info Display
or
● 7'' Colour Info Display with
touchscreen functionalityor
● 8'' Colour Info Display with
touchscreen functionality
The Info Display can indicate: ● time 3 74
● outside temperature 3 73
● date 3 74
● Infotainment system, see description in the Infotainment
manual
● indication of rear view camera 3 160
● indication of panoramic view system 3 158
● indication of parking assist instructions 3 149
● navigation, see description in the
Infotainment manual
● vehicle and system messages 3 93
● settings for vehicle personalisation 3 94
Page 94 of 247
92Instruments and controlsTouch required menu display icon or
a function.
Confirm a required function or
selection by touching.
Touch r on the display to exit a
menu without changing a setting.
For further information, see
Infotainment manual.Speech recognition
Description see Infotainment manual.
Vehicle personalisation 3 94.
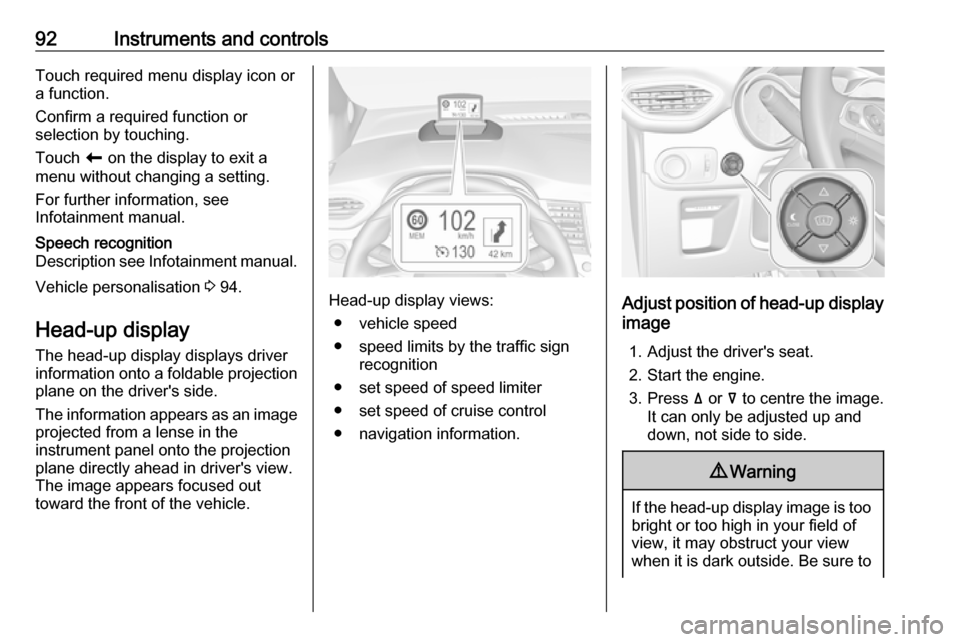
Head-up display
The head-up display displays driver
information onto a foldable projection plane on the driver's side.
The information appears as an image
projected from a lense in the
instrument panel onto the projection
plane directly ahead in driver's view.
The image appears focused out
toward the front of the vehicle.Head-up display views:
● vehicle speed
● speed limits by the traffic sign recognition
● set speed of speed limiter
● set speed of cruise control
● navigation information.Adjust position of head-up display
image
1. Adjust the driver's seat.
2. Start the engine.
3. Press ä or å to centre the image.
It can only be adjusted up and
down, not side to side.
9 Warning
If the head-up display image is too
bright or too high in your field of
view, it may obstruct your view
when it is dark outside. Be sure to
Page 95 of 247
Instruments and controls93keep the head-up display imagedim and placed low in your field of view.
Adjust brightness
The head-up display image will
automatically dim and brighten to
compensate for outside lighting.
Brightness can also be adjusted
manually as needed:
Press e to brighten the display. Press
æ to dim the display.
The image can temporarily light up
depending on angel and position of
sunlight.
Switching off
Press æ and hold to turn the head-up
display off.
Language Preferred language can be set in
vehicle personalisation menu 3 94.
Units Units can be changed in vehicle
personalisation menu 3 94.
Care of head-up display
Clean the projection plane of the
head-up display with a soft cloth
sprayed with glass cleaner. Wipe the
lens gently, then dry it.
System limitations Head-up display may not operate
properly when:
● The lens in the instrument panel is covered by objects or not
clean.
● Display brightness is too dim or bright.
● Image is not adjusted to the proper height.
● The driver wears polarised sunglasses.
If the head-up image is not correct for other reasons, contact a workshop.Vehicle messages
Messages are indicated in the Driver
Information Centre, in some cases
together with a warning chime.
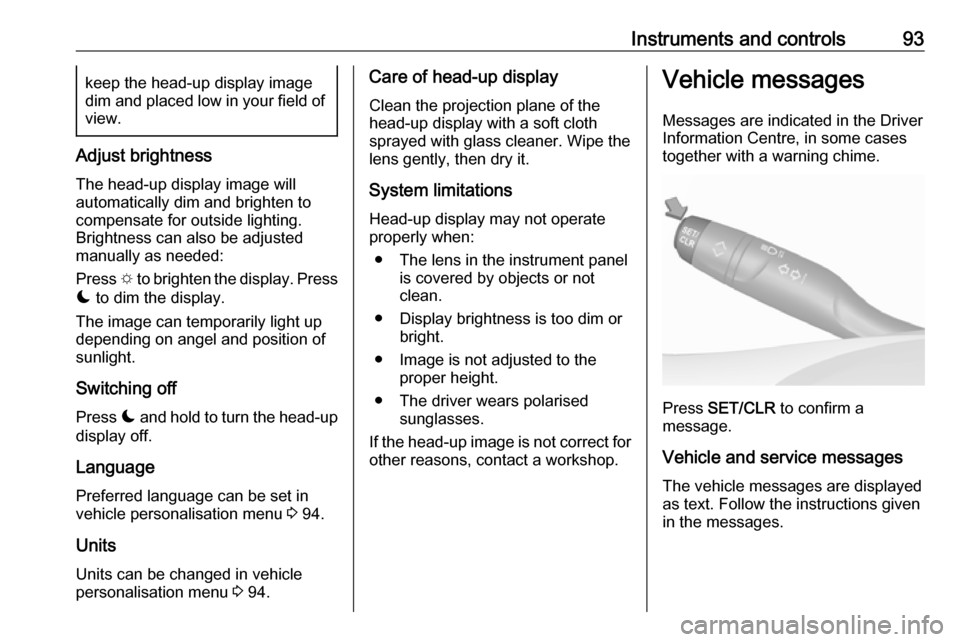
Press SET/CLR to confirm a
message.
Vehicle and service messages The vehicle messages are displayed
as text. Follow the instructions given
in the messages.
Page 101 of 247
Lighting99LightingExterior lighting............................ 99
Light switch ................................ 99
Automatic light control .............100
High beam ............................... 100
High beam assist .....................100
Headlight flash ......................... 101
Headlight range adjustment ....101
Headlights when driving abroad .................................... 102
Daytime running lights .............102
LED headlights ........................ 102
Hazard warning flashers ..........102
Turn lights ................................ 103
Front fog lights ......................... 103
Rear fog light ........................... 104
Parking lights ........................... 104
Reversing lights .......................104
Misted light covers ...................104
Interior lighting ........................... 105
Instrument panel illumination control ..................................... 105
Interior lights ............................ 105
Reading lights .......................... 105
Sun visor lights ........................ 106Lighting features ........................106
Centre console lighting ............106
Entry lighting ............................ 106
Exit lighting .............................. 106
Battery discharge protection ....107Exterior lighting
Light switch
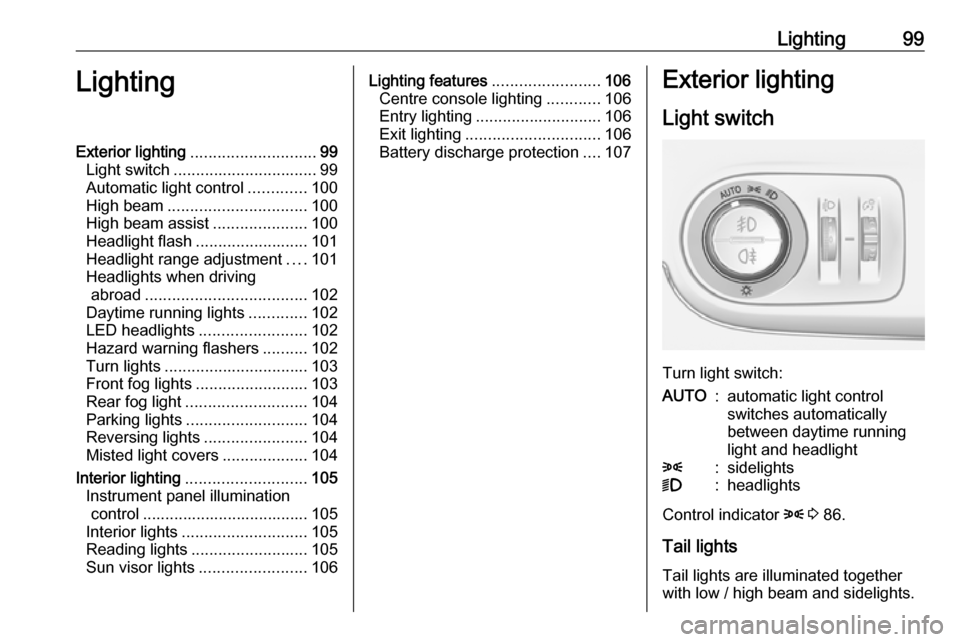
Turn light switch:
AUTO:automatic light control
switches automatically
between daytime running
light and headlight8:sidelights9:headlights
Control indicator 8 3 86.
Tail lights Tail lights are illuminated together
with low / high beam and sidelights.