Screen VAUXHALL CROSSLAND X 2020 User Guide
[x] Cancel search | Manufacturer: VAUXHALL, Model Year: 2020, Model line: CROSSLAND X, Model: VAUXHALL CROSSLAND X 2020Pages: 245, PDF Size: 21.85 MB
Page 74 of 245

72Instruments and controlsWindscreen wiper with rain
sensorHI:fastLO:slowAUTO:automatic wiping with rain
sensorOFF:off1x:single wipe
In AUTO position, the rain sensor
detects the amount of water on the
windscreen and automatically
regulates the frequency of the
windscreen wiper. If ignition is
switched off, automatic wiping mode
is deactivated. To activate automatic
wiping mode the next time ignition is
switched on, press the lever
downwards to position OFF and back
to AUTO .
Do not use if the windscreen is frozen. Switch off in car washes.
Adjustable sensitivity of the rain
sensor
Wiper lever in position AUTO.
Turn the adjuster wheel to adjust the
sensitivity of the rain sensor.
Make sure the sensor is not blocked
3 35, 3 10.
Control indicator < 3 71.
Windscreen washer
Pull lever. Washer fluid is sprayed
onto the windscreen and the wiper
wipes a few times.
Washer fluid 3 178.
Page 75 of 245
Instruments and controls73Rear window wiper and
washer
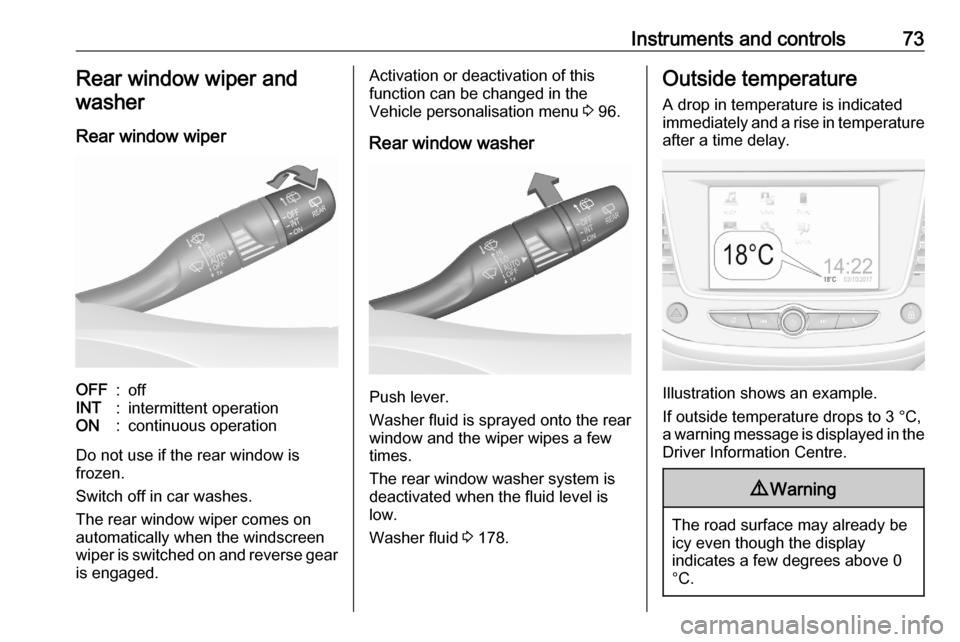
Rear window wiperOFF:offINT:intermittent operationON:continuous operation
Do not use if the rear window is
frozen.
Switch off in car washes.
The rear window wiper comes on
automatically when the windscreen
wiper is switched on and reverse gear
is engaged.
Activation or deactivation of this
function can be changed in the
Vehicle personalisation menu 3 96.
Rear window washer
Push lever.
Washer fluid is sprayed onto the rear
window and the wiper wipes a few
times.
The rear window washer system is
deactivated when the fluid level is
low.
Washer fluid 3 178.
Outside temperature
A drop in temperature is indicated
immediately and a rise in temperature
after a time delay.
Illustration shows an example.
If outside temperature drops to 3 °C,
a warning message is displayed in the Driver Information Centre.
9 Warning
The road surface may already be
icy even though the display
indicates a few degrees above 0
°C.
Page 90 of 245

88Instruments and controlsIlluminated when high beam is on or
during headlight flash 3 102.
High beam assist f illuminates green.
The high beam assist is activated
3 102.
Front fog lights
> illuminates green.
The front fog lights are on 3 105.
Rear fog light
ø illuminates yellow.
The rear fog light is on 3 106.
Rain sensor < illuminates green.
Illuminated when automatic wiping
with rain sensor is activated.
Windscreen wiper and washer 3 71.Cruise control
m illuminates in the Driver
Information Centre.
Cruise control 3 140.
Side blind spot alert
B illuminates green.
The system is active 3 158.
Active emergency braking m illuminates or flashes yellow.
Illuminates
The system has been deactivated or
a fault has been detected.
Additionally, a warning message is
displayed in the Driver Information
Centre.
Check the reason of the deactivation
3 147 and in case of a system fault,
seek the assistance of a workshop.Notice
m also illuminates if the seat belts
of the front passengers are not
fastened. In this case, active
emergency braking is deactivated.
Flashes
The system is actively engaged.
Depending on the situation, the
vehicle may automatically brake
moderately or hard.
Forward collision alert 3 145.
Front pedestrian protection 3 149.
Speed limiter
ß illuminates in the Driver
Information Centre.
Speed limiter 3 143.
Door open h illuminates red.
A door or the tailgate is open.
Page 93 of 245

Instruments and controls91After refuelling, the range is updated
automatically after a brief delay.
When the fuel level is low, a message
appears on the display and the
control indicator o in the fuel gauge
illuminates 3 87.
Instantaneous Fuel Consumption
Display of the instantaneous
consumption.
Trip 1 page:
Average speed
Display of average speed. The
measurement can be reset at any
time.
Average fuel consumption
Display of average consumption. The measurement can be reset at any
time and starts with a default value.
Distance travelled
Displays the current distance for trip
1 since the reset.
Trip odometer counts up to
9,999.9 miles without automatic
reset.The values of trip 1 page can be reset
by pressing SET/CLR for a few
seconds.
Trip 2 page:
Average speed
Display of average speed. The
measurement can be reset at any
time.
Average fuel consumption
Display of average consumption. The measurement can be reset at any
time and starts with a default value.
Distance travelled
Displays the current distance for trip
2 since a certain reset.
The values of trip 2 page can be reset
by pressing SET/CLR for a few
seconds.
Digital speed page
Digital display of the instantaneous
speed.
Stop and Start time counter
A time counter calculates the time
spent in STOP mode during a
journey. It resets to zero every time
the ignition is switched on.Compass page
Displays the geographic direction of
driving.
Blank page
No trip/fuel information is displayed.
AdBlue Press M or CHECK repeatedly until
the AdBlue menu is shown.
AdBlue range
Indicates an estimate of the AdBlue
level. A message indicates whether
the level is sufficient or low.
3 130.
Info Display The Info Display is located in theinstrument panel near the instrument
cluster.
Depending on the vehicle
configuration the vehicle has a
● Graphic Info Display
or
● 7'' Colour Info Display with
touchscreen functionality
Page 94 of 245
92Instruments and controlsor
● 8'' Colour Info Display with
touchscreen functionality
The Info Display can indicate: ● time 3 74
● outside temperature 3 73
● date 3 74
● Infotainment system, see description in the Infotainment
manual
● indication of rear view camera 3 162
● indication of panoramic view system 3 159
● indication of parking assist instructions 3 150
● navigation, see description in the
Infotainment manual
● vehicle and system messages 3 95
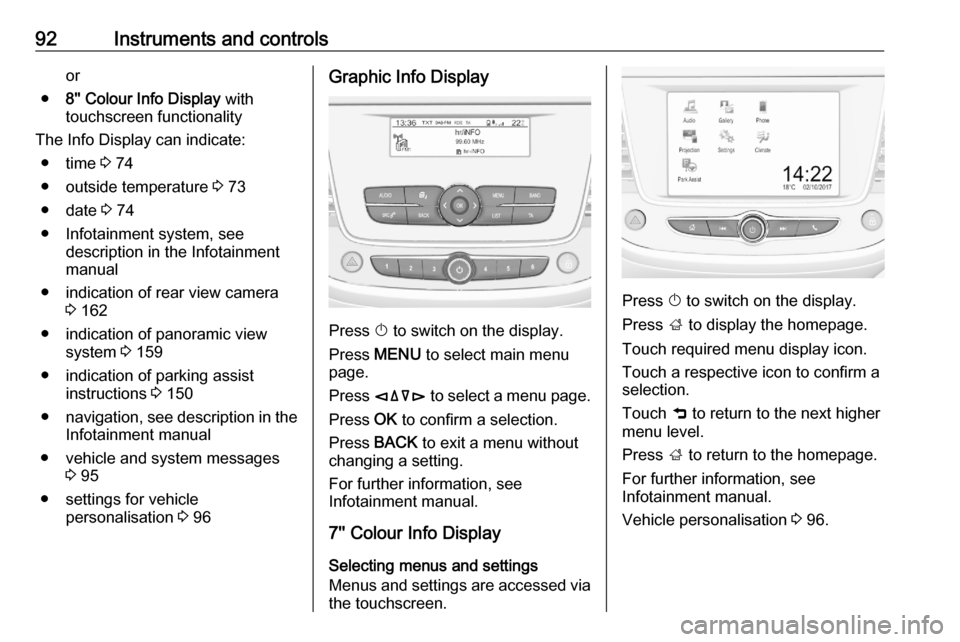
● settings for vehicle personalisation 3 96Graphic Info Display
Press X to switch on the display.
Press MENU to select main menu
page.
Press èäåé to select a menu page.
Press OK to confirm a selection.
Press BACK to exit a menu without
changing a setting.
For further information, see
Infotainment manual.
7'' Colour Info Display
Selecting menus and settings
Menus and settings are accessed via the touchscreen.
Press X to switch on the display.
Press ; to display the homepage.
Touch required menu display icon.
Touch a respective icon to confirm a
selection.
Touch 9 to return to the next higher
menu level.
Press ; to return to the homepage.
For further information, see
Infotainment manual.
Vehicle personalisation 3 96.
Page 95 of 245
Instruments and controls938'' Colour Info DisplaySelecting menus and settings
There are three options to operate the
display:
● via buttons below the display
● by touching the touchscreen
● via speech recognitionButton and touch operation
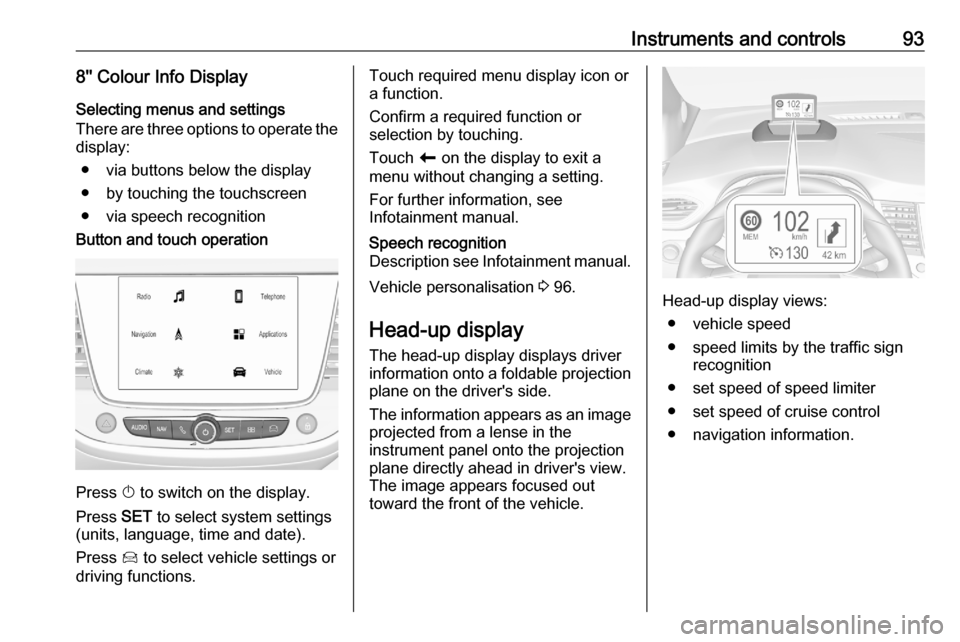
Press X to switch on the display.
Press SET to select system settings
(units, language, time and date).
Press Í to select vehicle settings or
driving functions.
Touch required menu display icon or
a function.
Confirm a required function or
selection by touching.
Touch r on the display to exit a
menu without changing a setting.
For further information, see
Infotainment manual.Speech recognition
Description see Infotainment manual.
Vehicle personalisation 3 96.
Head-up display
The head-up display displays driver
information onto a foldable projection plane on the driver's side.
The information appears as an image
projected from a lense in the
instrument panel onto the projection
plane directly ahead in driver's view.
The image appears focused out
toward the front of the vehicle.Head-up display views:
● vehicle speed
● speed limits by the traffic sign recognition
● set speed of speed limiter
● set speed of cruise control
● navigation information.
Page 104 of 245
102LightingAutomatic light control
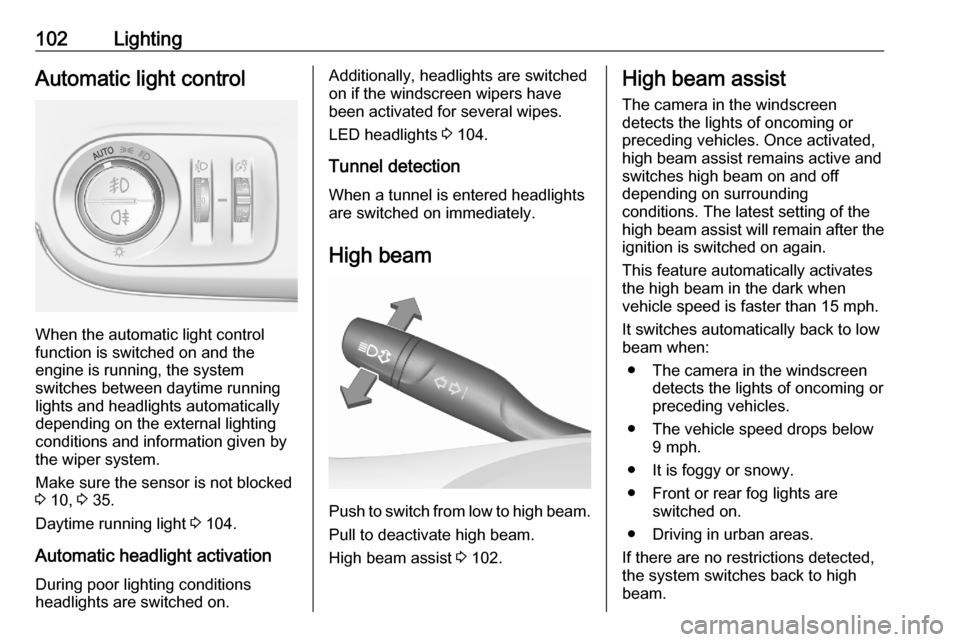
When the automatic light control
function is switched on and the
engine is running, the system
switches between daytime running
lights and headlights automatically
depending on the external lighting
conditions and information given by
the wiper system.
Make sure the sensor is not blocked
3 10, 3 35.
Daytime running light 3 104.
Automatic headlight activation During poor lighting conditions
headlights are switched on.
Additionally, headlights are switched
on if the windscreen wipers have
been activated for several wipes.
LED headlights 3 104.
Tunnel detection
When a tunnel is entered headlights
are switched on immediately.
High beam
Push to switch from low to high beam.Pull to deactivate high beam.
High beam assist 3 102.
High beam assist
The camera in the windscreen
detects the lights of oncoming or
preceding vehicles. Once activated,
high beam assist remains active and
switches high beam on and off
depending on surrounding
conditions. The latest setting of the
high beam assist will remain after the ignition is switched on again.
This feature automatically activates
the high beam in the dark when
vehicle speed is faster than 15 mph.
It switches automatically back to low
beam when:
● The camera in the windscreen detects the lights of oncoming or
preceding vehicles.
● The vehicle speed drops below 9 mph.
● It is foggy or snowy.
● Front or rear fog lights are switched on.
● Driving in urban areas.
If there are no restrictions detected,
the system switches back to high
beam.
Page 112 of 245
110Climate controlClimate controlClimate control systems.............110
Heating and ventilation system 110
Air conditioning system ...........111
Electronic climate control system .................................... 114
Auxiliary heater ........................118
Air vents ..................................... 119
Adjustable air vents .................119
Fixed air vents ......................... 119
Maintenance .............................. 120
Air intake ................................. 120
Air conditioning regular operation ................................ 120
Service .................................... 120Climate control systems
Heating and ventilation system
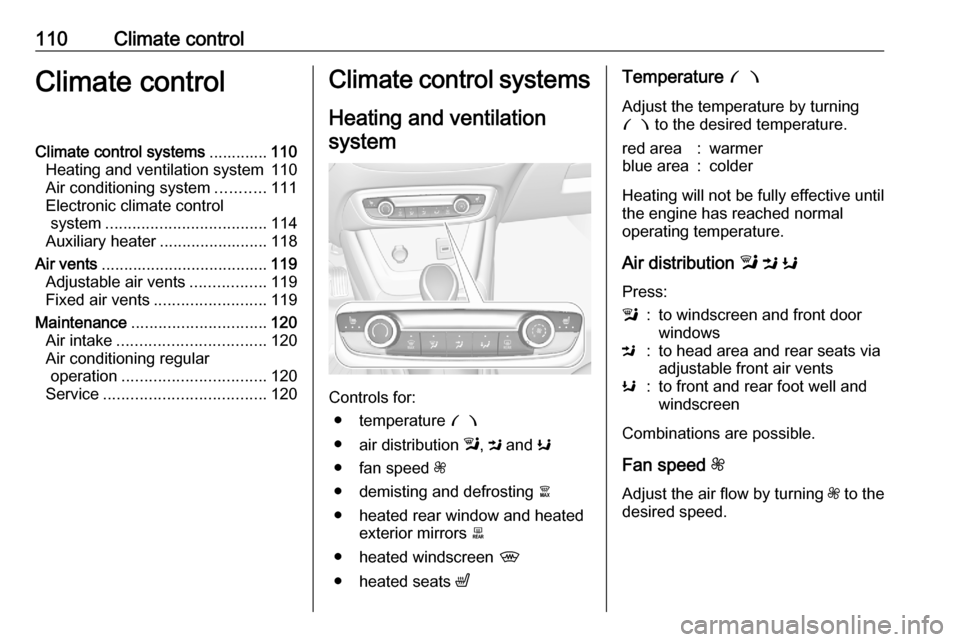
Controls for: ● temperature £
● air distribution l, M and K
● fan speed Z
● demisting and defrosting à
● heated rear window and heated exterior mirrors b
● heated windscreen ,
● heated seats ß
Temperature £
Adjust the temperature by turning
£ to the desired temperature.red area:warmerblue area:colder
Heating will not be fully effective until
the engine has reached normal
operating temperature.
Air distribution l M K
Press:
l:to windscreen and front door
windowsM:to head area and rear seats via
adjustable front air ventsK:to front and rear foot well and
windscreen
Combinations are possible.
Fan speed Z
Adjust the air flow by turning Z to the
desired speed.
Page 113 of 245
Climate control111Demisting and defrosting the
windows á
● Press á: the air distribution is
directed towards the windscreen.
● Set temperature controller £ to
warmest level.
● Set fan speed Z to highest level.
● Switch on heated rear window b.
● Open side air vents as required and direct them towards the doorwindows.
Heated rear window b 3 37.
Heated exterior mirrors b 3 34.
Heated windscreen , 3 38.
Heated seats ß 3 44.
Air conditioning system
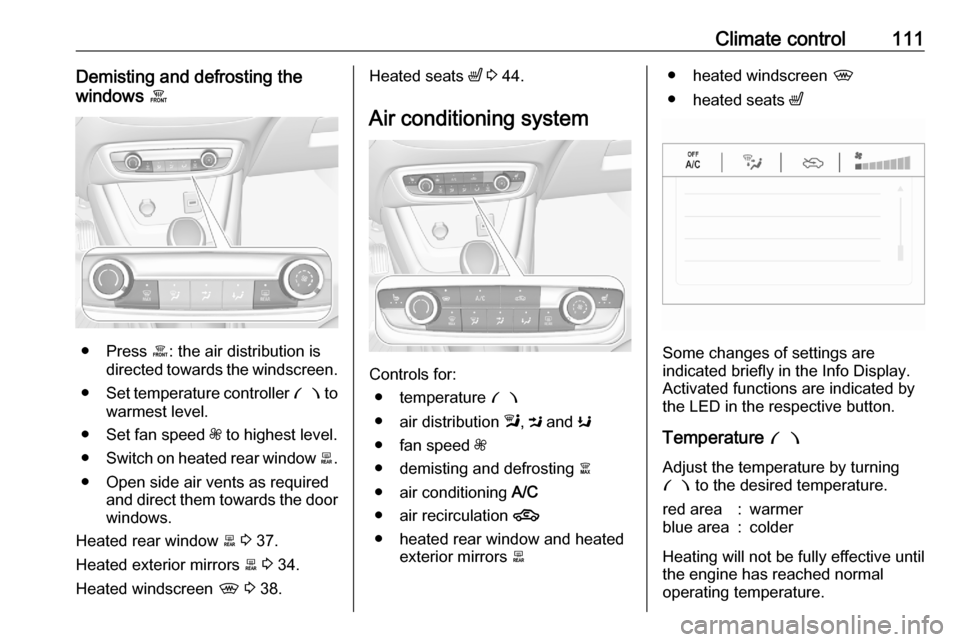
Controls for: ● temperature £
● air distribution l, M and K
● fan speed Z
● demisting and defrosting à
● air conditioning A/C
● air recirculation 4
● heated rear window and heated exterior mirrors b
● heated windscreen ,
● heated seats ß
Some changes of settings are
indicated briefly in the Info Display.
Activated functions are indicated by the LED in the respective button.
Temperature £
Adjust the temperature by turning £ to the desired temperature.
red area:warmerblue area:colder
Heating will not be fully effective until
the engine has reached normal
operating temperature.
Page 114 of 245
112Climate controlAir distribution l M K
Press:l:to windscreen and front door
windowsM:to head area and rear seats via
adjustable front air ventsK:to front and rear foot well and
windscreen
Combinations are possible.
Fan speed Z
Adjust the air flow by turning Z to the
desired speed.
Air conditioning A/C
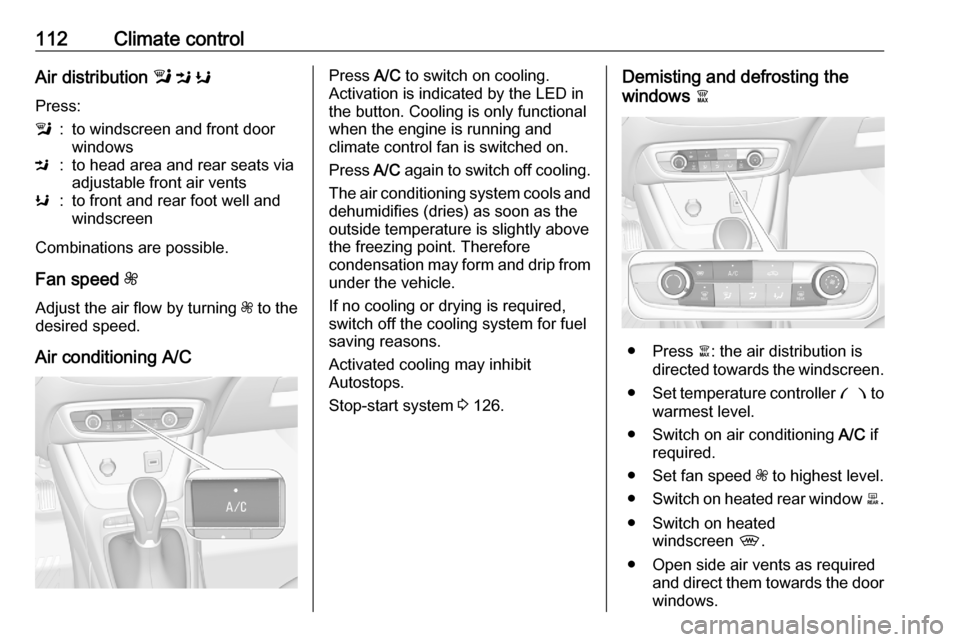
Press A/C to switch on cooling.
Activation is indicated by the LED in
the button. Cooling is only functional
when the engine is running and
climate control fan is switched on.
Press A/C again to switch off cooling.
The air conditioning system cools and
dehumidifies (dries) as soon as the
outside temperature is slightly above the freezing point. Therefore
condensation may form and drip from under the vehicle.
If no cooling or drying is required,
switch off the cooling system for fuel
saving reasons.
Activated cooling may inhibit
Autostops.
Stop-start system 3 126.Demisting and defrosting the
windows à
● Press à: the air distribution is
directed towards the windscreen.
● Set temperature controller £ to
warmest level.
● Switch on air conditioning A/C if
required.
● Set fan speed Z to highest level.
● Switch on heated rear window b.
● Switch on heated windscreen ,.
● Open side air vents as required and direct them towards the doorwindows.