display VAUXHALL CROSSLAND X 2020 Owner's Guide
[x] Cancel search | Manufacturer: VAUXHALL, Model Year: 2020, Model line: CROSSLAND X, Model: VAUXHALL CROSSLAND X 2020Pages: 245, PDF Size: 21.85 MB
Page 96 of 245
94Instruments and controls
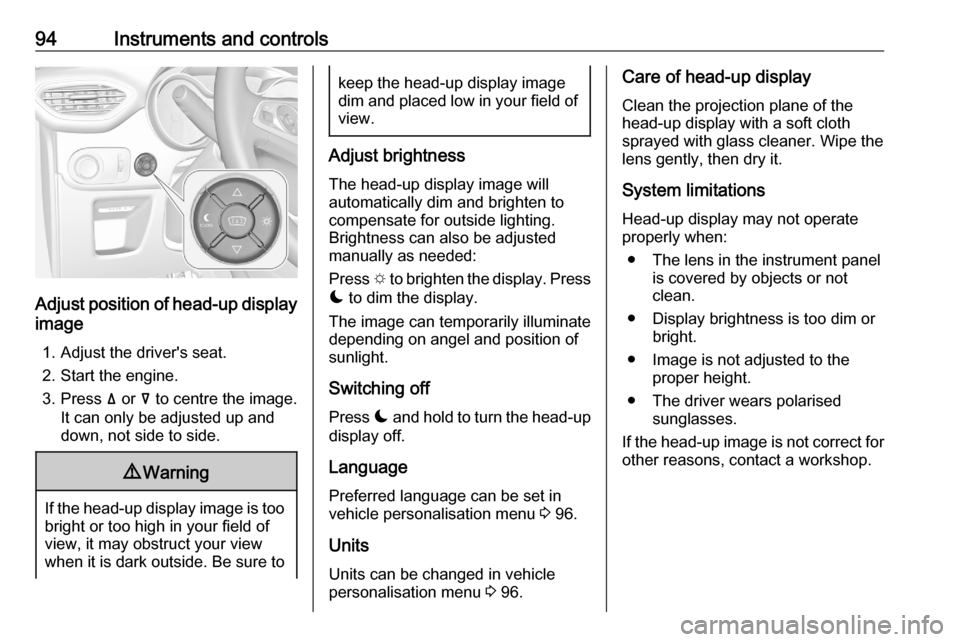
Adjust position of head-up display
image
1. Adjust the driver's seat.
2. Start the engine.
3. Press ä or å to centre the image.
It can only be adjusted up and
down, not side to side.
9 Warning
If the head-up display image is too
bright or too high in your field of
view, it may obstruct your view
when it is dark outside. Be sure to
keep the head-up display image dim and placed low in your field of
view.
Adjust brightness
The head-up display image will
automatically dim and brighten to compensate for outside lighting.
Brightness can also be adjusted
manually as needed:
Press e to brighten the display. Press
æ to dim the display.
The image can temporarily illuminate
depending on angel and position of
sunlight.
Switching off
Press æ and hold to turn the head-up
display off.
Language Preferred language can be set invehicle personalisation menu 3 96.
Units Units can be changed in vehicle
personalisation menu 3 96.
Care of head-up display
Clean the projection plane of the
head-up display with a soft cloth
sprayed with glass cleaner. Wipe the
lens gently, then dry it.
System limitationsHead-up display may not operate
properly when:
● The lens in the instrument panel is covered by objects or not
clean.
● Display brightness is too dim or bright.
● Image is not adjusted to the proper height.
● The driver wears polarised sunglasses.
If the head-up image is not correct for
other reasons, contact a workshop.
Page 97 of 245
Instruments and controls95Vehicle messages
Messages are indicated in the Driver
Information Centre, in some cases
together with a warning chime.
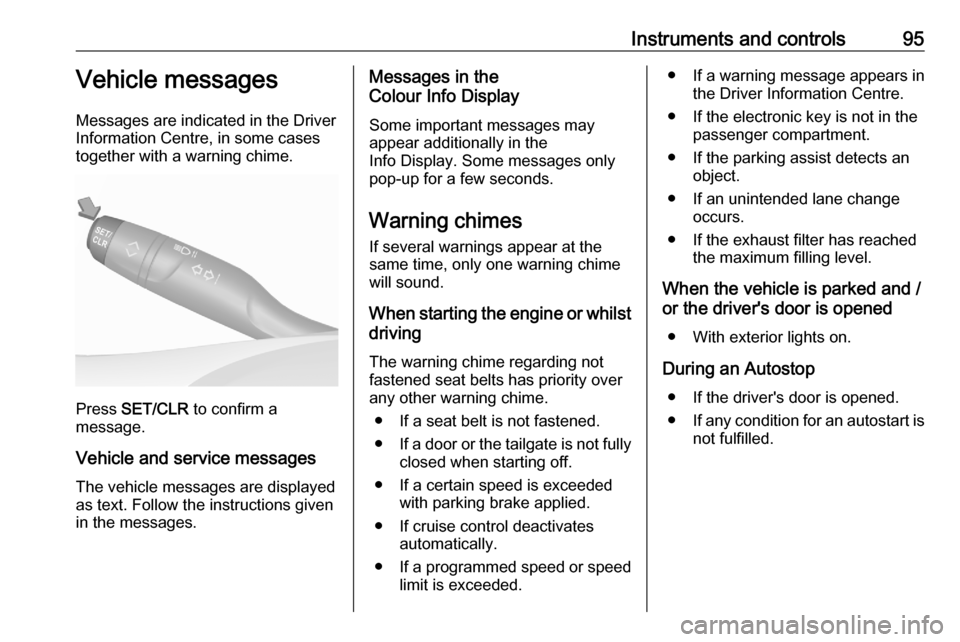
Press SET/CLR to confirm a
message.
Vehicle and service messages The vehicle messages are displayed
as text. Follow the instructions given
in the messages.
Messages in the
Colour Info Display
Some important messages may
appear additionally in the
Info Display. Some messages only
pop-up for a few seconds.
Warning chimes
If several warnings appear at the same time, only one warning chime
will sound.
When starting the engine or whilst driving
The warning chime regarding not
fastened seat belts has priority over
any other warning chime.
● If a seat belt is not fastened.
● If a door or the tailgate is not fully
closed when starting off.
● If a certain speed is exceeded with parking brake applied.
● If cruise control deactivates automatically.
● If a programmed speed or speed
limit is exceeded.● If a warning message appears in the Driver Information Centre.
● If the electronic key is not in the passenger compartment.
● If the parking assist detects an object.
● If an unintended lane change occurs.
● If the exhaust filter has reached the maximum filling level.
When the vehicle is parked and / or the driver's door is opened
● With exterior lights on.
During an Autostop ● If the driver's door is opened.● If any condition for an autostart is
not fulfilled.
Page 98 of 245
96Instruments and controlsVehicle personalisationThe vehicle's behaviour can be
personalised by changing the settings in the Info Display.
Some functions are only displayed or
active when the engine is running.
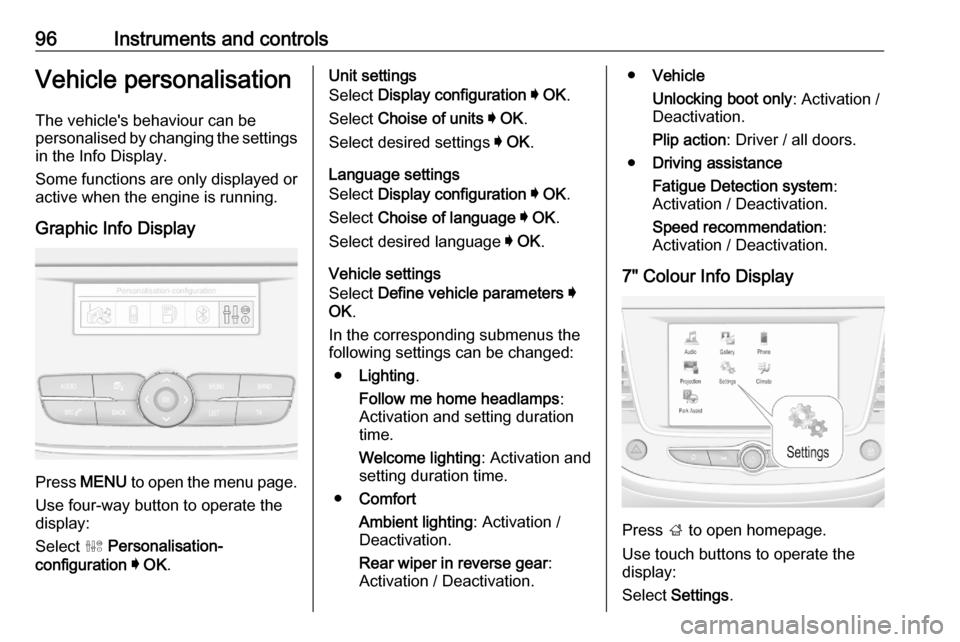
Graphic Info Display
Press MENU to open the menu page.
Use four-way button to operate the
display:
Select ˆ Personalisation-
configuration I OK .
Unit settings
Select Display configuration I OK .
Select Choise of units I OK .
Select desired settings I OK .
Language settings
Select Display configuration I OK .
Select Choise of language I OK .
Select desired language I OK .
Vehicle settings
Select Define vehicle parameters I
OK .
In the corresponding submenus the
following settings can be changed:
● Lighting .
Follow me home headlamps :
Activation and setting duration
time.
Welcome lighting : Activation and
setting duration time.
● Comfort
Ambient lighting : Activation /
Deactivation.
Rear wiper in reverse gear :
Activation / Deactivation.● Vehicle
Unlocking boot only : Activation /
Deactivation.
Plip action : Driver / all doors.
● Driving assistance
Fatigue Detection system :
Activation / Deactivation.
Speed recommendation :
Activation / Deactivation.
7" Colour Info Display
Press ; to open homepage.
Use touch buttons to operate the
display:
Select Settings .
Page 99 of 245
Instruments and controls97Unit settings
Select Units
Change units for Consumption and
Distance and Temperature .
Language settings
Select Language .
Change language by touching the
respective entry.
Vehicle settings
Select Vehicle .
In the corresponding submenus the
following settings can be changed:
● Collision / Detection Systems
Side Blind Spot Alert : Activates
or deactivates side blind spot
alert.
Drowsy Driver Alert : Activates or
deactivates the driver
drowsiness system.
Speed Limit Information :
Activates or deactivates the
speed limit information by traffic
sign recognition.
Rear View Camera Guidelines :
Activates or deactivates the rearview camera guidelines on the
Info Display.
● Comfort and Convenience
Auto Wipe in Reverse Gear :
Activates or deactivates
automatic switching on of the
rear window wiper when reverse gear is engaged.
● Lighting
Ambient Lighting : Activates or
deactivates the ambient lighting
and adjusts its brightness.
Welcome Lighting : Activates or
deactivates and changes the duration of welcome lighting.
Exit Lighting : Activates or
deactivates and changes the
duration of exit lighting.
● Remote Lock, Unlock, Start
Remote Door Unlock : Changes
the configuration to unlock the
driver's door only or all doors
when pressing O on the remote
control.
Unlock boot only : Activates or
deactivates unlocking the tailgateonly when pressing T on the
remote control.
8" Colour Info Display
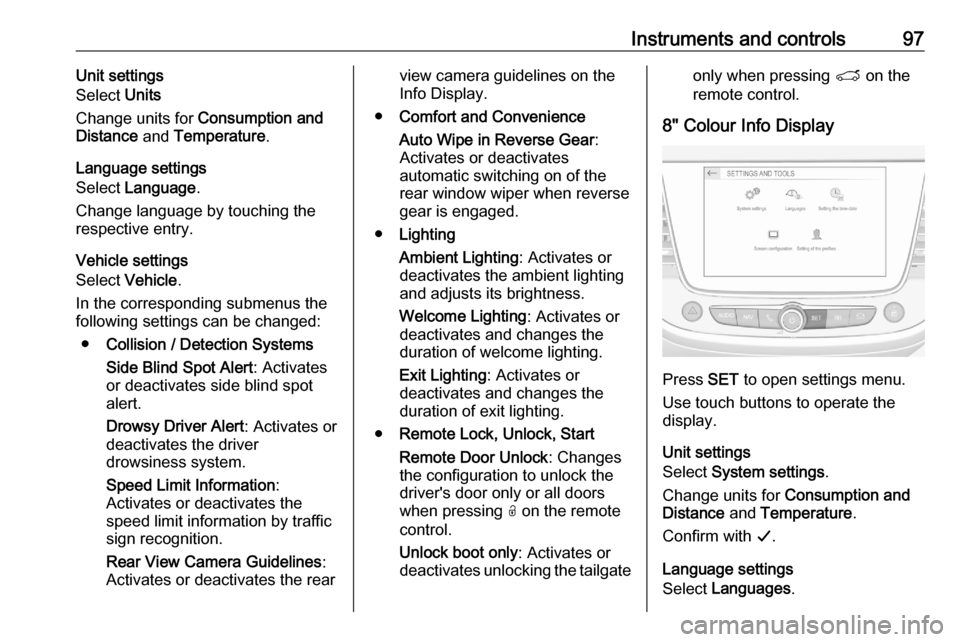
Press SET to open settings menu.
Use touch buttons to operate the
display.
Unit settings
Select System settings .
Change units for Consumption and
Distance and Temperature .
Confirm with G.
Language settings
Select Languages .
Page 106 of 245
104Lighting0:front seats occupied1:all seats occupied2:all seats occupied and load
compartment laden3:driver's seat occupied and load
compartment laden
Headlights when driving
abroad
Versions with uplevel LED: when
driving in countries where traffic
drives on the opposite side of the
road, the headlights do not have to be
adjusted.
All other versions: consult a
workshop.
Daytime running lights
Daytime running lights increases
visibility of the vehicle during daylight.
They are switched on automatically
during daytime when engine is
running.
The system switches between
daytime running lights and low beam automatically, depending on the
lighting conditions.
LED headlights
Eco-LED and uplevel LED headlights for low and high beam ensure bettervisibility under all conditions. Uplevel
LED headlights include the following
functions:
● cornering lights● high beam assist 3 102
● automatic headlight levelling
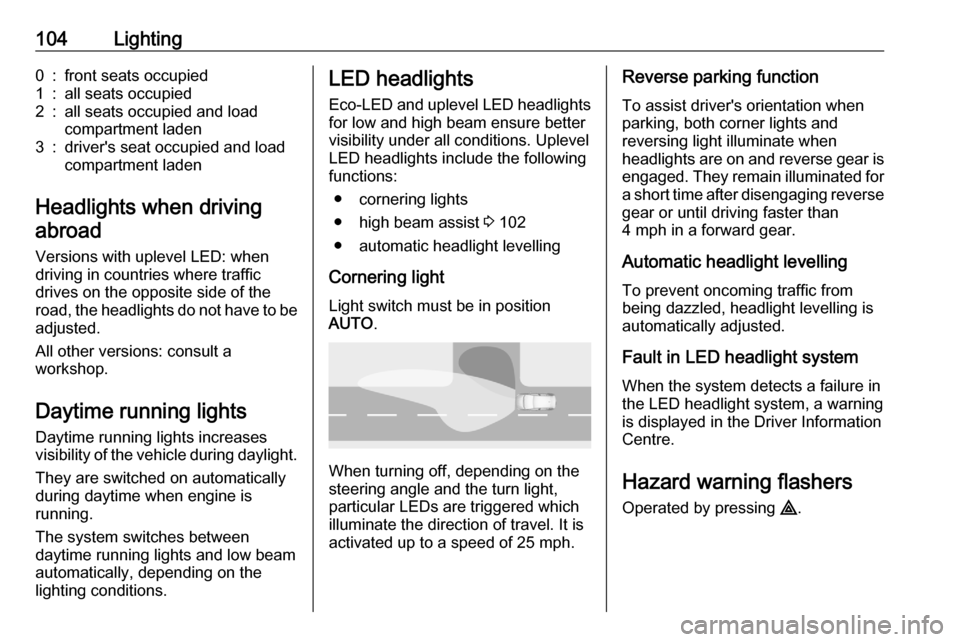
Cornering light Light switch must be in position
AUTO .
When turning off, depending on the
steering angle and the turn light, particular LEDs are triggered whichilluminate the direction of travel. It is
activated up to a speed of 25 mph.
Reverse parking function
To assist driver's orientation when
parking, both corner lights and
reversing light illuminate when
headlights are on and reverse gear is
engaged. They remain illuminated for
a short time after disengaging reverse gear or until driving faster than
4 mph in a forward gear.
Automatic headlight levelling
To prevent oncoming traffic from
being dazzled, headlight levelling is
automatically adjusted.
Fault in LED headlight system
When the system detects a failure in
the LED headlight system, a warning
is displayed in the Driver Information Centre.
Hazard warning flashers
Operated by pressing ¨.
Page 109 of 245
Lighting107Interior lighting
Instrument panel
illumination control
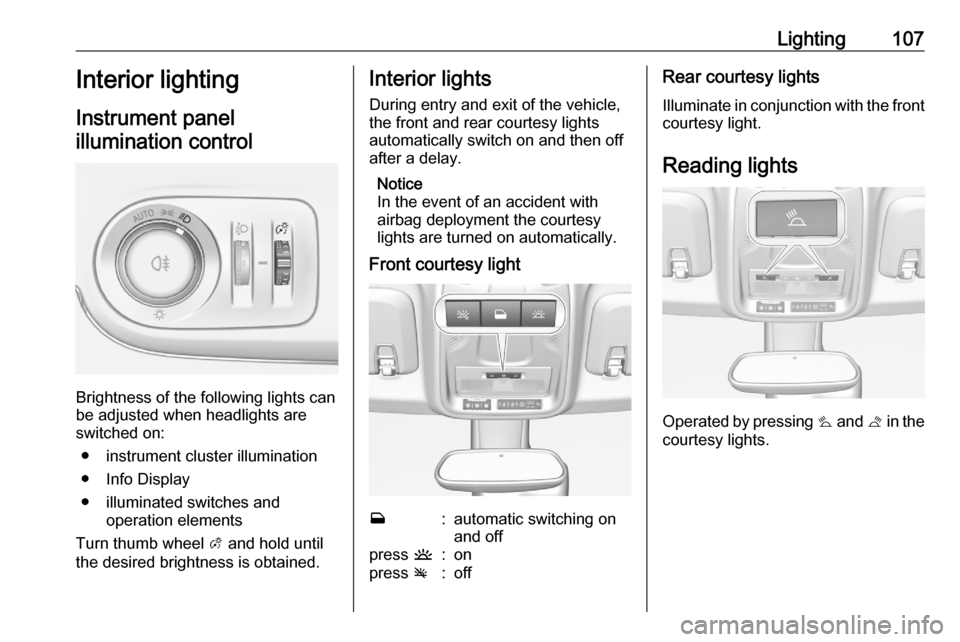
Brightness of the following lights can
be adjusted when headlights are
switched on:
● instrument cluster illumination
● Info Display
● illuminated switches and operation elements
Turn thumb wheel A and hold until
the desired brightness is obtained.
Interior lights
During entry and exit of the vehicle,
the front and rear courtesy lights
automatically switch on and then off
after a delay.
Notice
In the event of an accident with
airbag deployment the courtesy
lights are turned on automatically.
Front courtesy lightw:automatic switching on
and offpress u:onpress v:offRear courtesy lights
Illuminate in conjunction with the front courtesy light.
Reading lights
Operated by pressing s and t in the
courtesy lights.
Page 111 of 245

Lighting109Battery discharge protection
Vehicle battery state of charge
function
The function guarantees longest
vehicle battery life via a generator with controllable power output and
optimised power distribution.
To prevent discharge of the vehicle
battery when driving, the following
systems are reduced automatically in two stages and finally switched off:
● auxiliary heater
● heated rear window and heated mirrors
● heated seats
● fan
In the second stage, a message
which confirms the activation of the
vehicle battery discharge protection
will be displayed in the Driver
Information Centre.Switching off interior lights
To prevent discharge of the vehicle
battery when the ignition is switched off, some interior lights are switched
off automatically after some time.
Page 113 of 245
Climate control111Demisting and defrosting the
windows á
● Press á: the air distribution is
directed towards the windscreen.
● Set temperature controller £ to
warmest level.
● Set fan speed Z to highest level.
● Switch on heated rear window b.
● Open side air vents as required and direct them towards the doorwindows.
Heated rear window b 3 37.
Heated exterior mirrors b 3 34.
Heated windscreen , 3 38.
Heated seats ß 3 44.
Air conditioning system
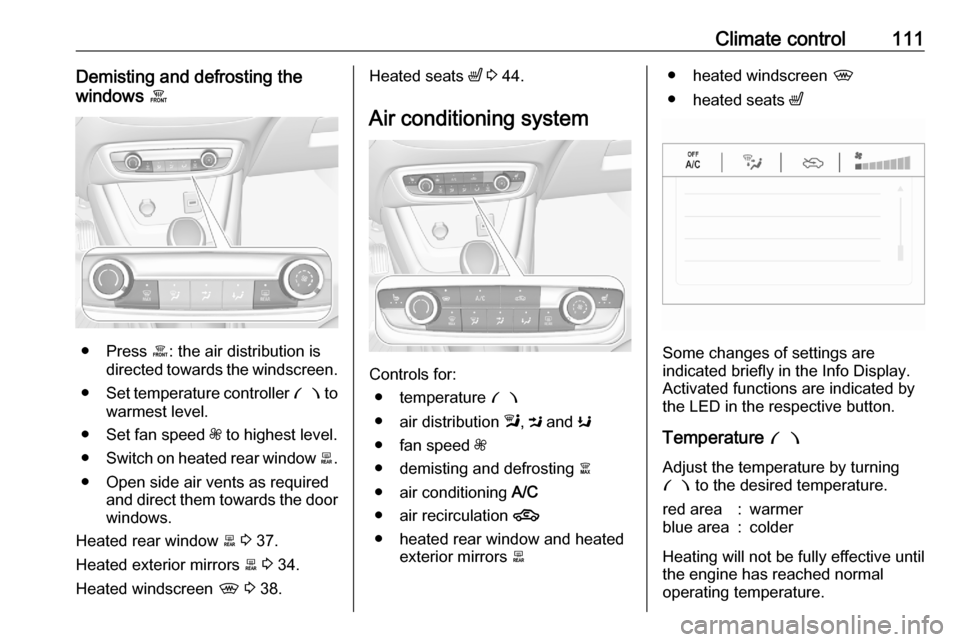
Controls for: ● temperature £
● air distribution l, M and K
● fan speed Z
● demisting and defrosting à
● air conditioning A/C
● air recirculation 4
● heated rear window and heated exterior mirrors b
● heated windscreen ,
● heated seats ß
Some changes of settings are
indicated briefly in the Info Display.
Activated functions are indicated by the LED in the respective button.
Temperature £
Adjust the temperature by turning £ to the desired temperature.
red area:warmerblue area:colder
Heating will not be fully effective until
the engine has reached normal
operating temperature.
Page 116 of 245
114Climate controlHeated seats ß 3 44.
Electronic climate control system
The dual zone climate control allows
different temperatures for driver side
and front passenger side.
In automatic mode, temperature, fan
speed and air distribution are
regulated automatically.
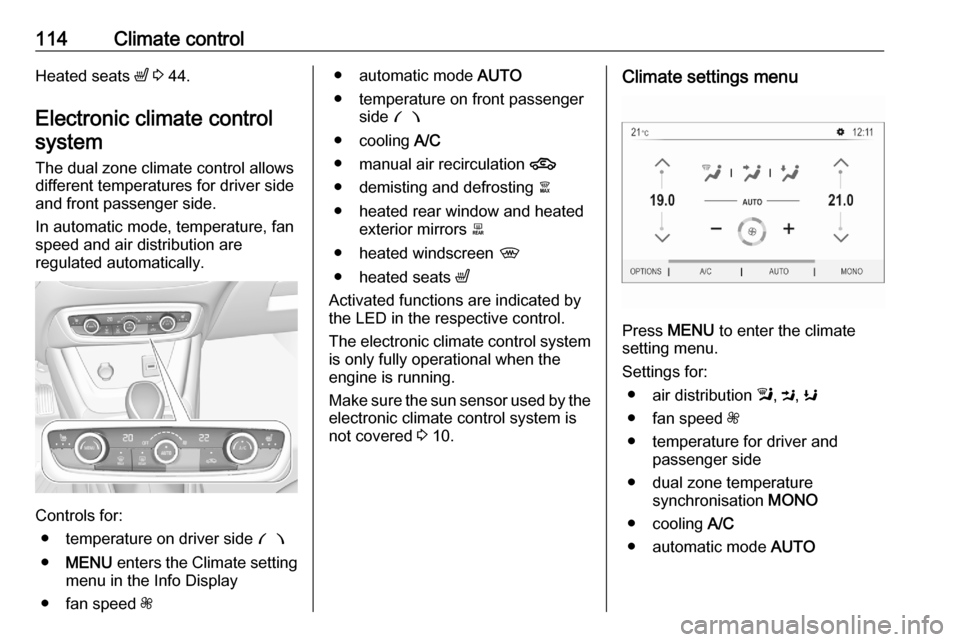
Controls for:
● temperature on driver side £
● MENU enters the Climate setting
menu in the Info Display
● fan speed Z
● automatic mode AUTO
● temperature on front passenger side £
● cooling A/C
● manual air recirculation 4
● demisting and defrosting à
● heated rear window and heated exterior mirrors b
● heated windscreen ,
● heated seats ß
Activated functions are indicated by the LED in the respective control.
The electronic climate control system
is only fully operational when the
engine is running.
Make sure the sun sensor used by the
electronic climate control system is
not covered 3 10.Climate settings menu
Press MENU to enter the climate
setting menu.
Settings for: ● air distribution l, M , K
● fan speed Z
● temperature for driver and passenger side
● dual zone temperature synchronisation MONO
● cooling A/C
● automatic mode AUTO
Page 117 of 245

Climate control115Climate setting menu can also be
displayed
● by pressing ! and then
selecting Climate on the 7''
Colour Info Display or
● by pressing Í and then selecting
Climate from the menu on the 8''
Colour Info Display.
Automatic mode AUTOBasic settings for automatic control
with maximum comfort:
● Press AUTO to start the cooling
automatically.
● Open all air vents to allow optimised air distribution in
automatic mode.
● Set the preselected temperatures for driver and front
passenger using the left and right
rotary knob. Recommended
temperature is 22 °C.
Temperature is indicated in
displays beside the controls and in the climate settings menu.
● Air recirculation mode 4 should
be deactivated. When
deactivated the LED in the button is not illuminated.
Manual settings
Climate control system settings can
be changed by activating the
following functions:Fan speed Z
Adjust the air flow by turning rotary
knob Z to the desired speed.
To return to automatic mode, press
AUTO .