sensor VAUXHALL GRANDLAND X 2020 Owner's Manual
[x] Cancel search | Manufacturer: VAUXHALL, Model Year: 2020, Model line: GRANDLAND X, Model: VAUXHALL GRANDLAND X 2020Pages: 283, PDF Size: 21.87 MB
Page 13 of 283

In brief111Power windows .....................39
2 Exterior mirrors .....................36
3 Side air vents ...................... 131
4 Turn lights, headlight
flash, low / high beam,
high beam assist .................117
Exit lighting ......................... 121
Parking lights ...................... 119
Buttons for Driver
Information Centre ..............100
5 Cruise control .....................159
Speed limiter ....................... 162
Heated steering wheel ..........80
6 Instruments .......................... 89
Driver Information Centre .... 100
7 Infotainment controls
8 Windscreen wiper and
washer, rear wiper and
washer ................................. 80
9 Power button ....................... 135
10 Air vents ............................. 131
11 Hazard warning flashers ....117
12 Info Display ........................ 10213Light sensor ........................ 113
Sun sensor .......................... 126
14 Central locking system ..........23
15 Glovebox .............................. 68
16 Controls for Info Display
operation ............................. 102
17 Climate control system ........ 123
18 USB charging port ................ 84
19 Power outlet .......................... 84
20 Parking assist, advanced
parking assist .....................176
Lane departure warning .....190
Eco button for stop-start
system ................................. 138
Electronic Stability Control
and Traction Control ...........156
Sport mode ......................... 158
21 Manual transmission ..........150
Automatic transmission ......147
22 Electric parking brake .........153
23 Selective ride control ..........157
24 Ignition switch .....................134
25 Steering wheel adjustment ..7926 Horn ..................................... 80
27 Storage ................................. 68
28 Bonnet release lever ..........213
29 Light switch ........................ 112
Headlight range
adjustment ......................... 114
Front / rear fog lights ..........118
Instrument illumination .......119
Page 15 of 283
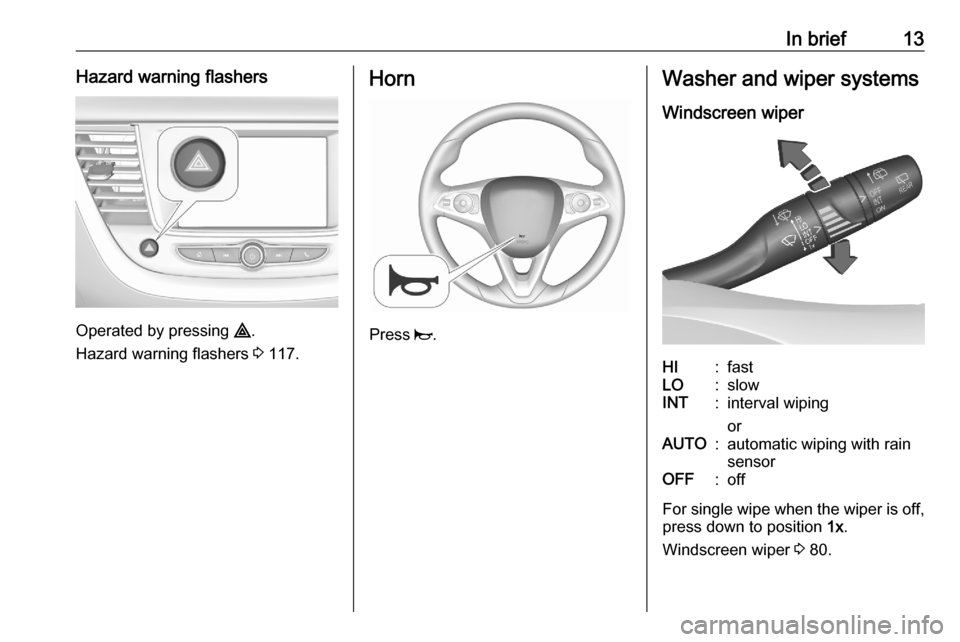
In brief13Hazard warning flashers
Operated by pressing ¨.
Hazard warning flashers 3 117.
Horn
Press j.
Washer and wiper systems
Windscreen wiperHI:fastLO:slowINT:interval wiping
orAUTO:automatic wiping with rain
sensorOFF:off
For single wipe when the wiper is off, press down to position 1x.
Windscreen wiper 3 80.
Page 32 of 283
30Keys, doors and windowsPower tailgate9Warning
Take care when operating the
power tailgate. Risk of injury,
particularly to children.
Keep a close watch on the
movable tailgate when operating.
Ensure that nothing becomes
trapped during operating and no
one is standing within the moving
area.
The power tailgate can be operated
by:
● Pressing P longer on the
electronic key.
● Hands-free operation with motion
sensor below the rear bumper.
● The tailgate button and T in the
open tailgate.
On vehicles with automatic
transmission, the tailgate can only be operated when the vehicle is
stationary and automatic
transmission in P.
The turn lights flash and a chime
sounds when the power tailgate is
operating.
Notice
Operating the power tailgate does
not operate the central locking
system. To open the tailgate with the
button on the electronic key, or with
the tailgate button or via hands-free
operation, it is not necessary to
unlock the vehicle. A precondition is
that the electronic key is outside the
vehicle, within a range of approx.
1 m of the tailgate.
Do not leave the electronic key in the load compartment.
Lock the vehicle after closing if it was
unlocked previously.
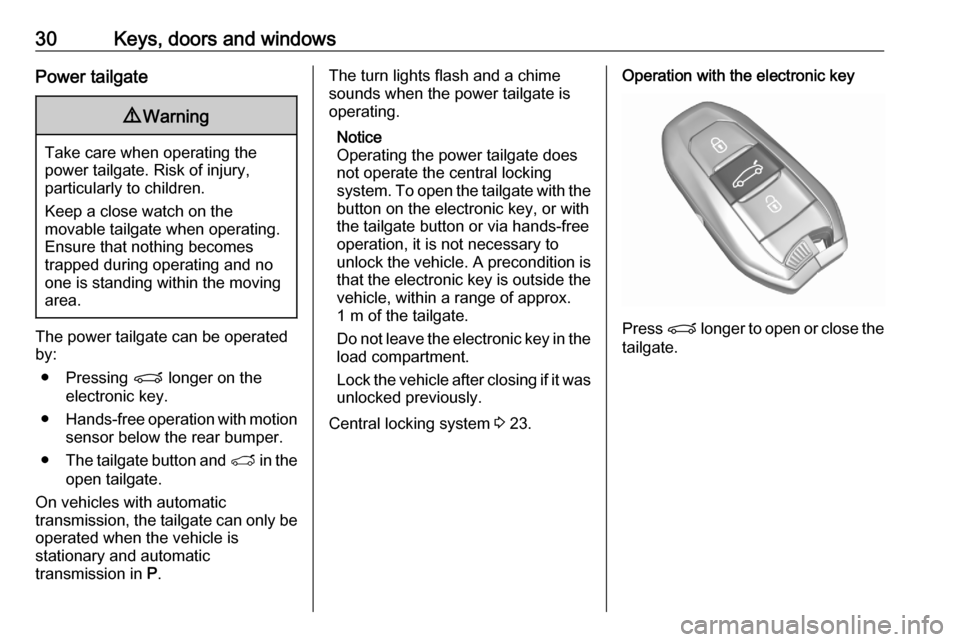
Central locking system 3 23.Operation with the electronic key
Press P longer to open or close the
tailgate.
Page 34 of 283
32Keys, doors and windows
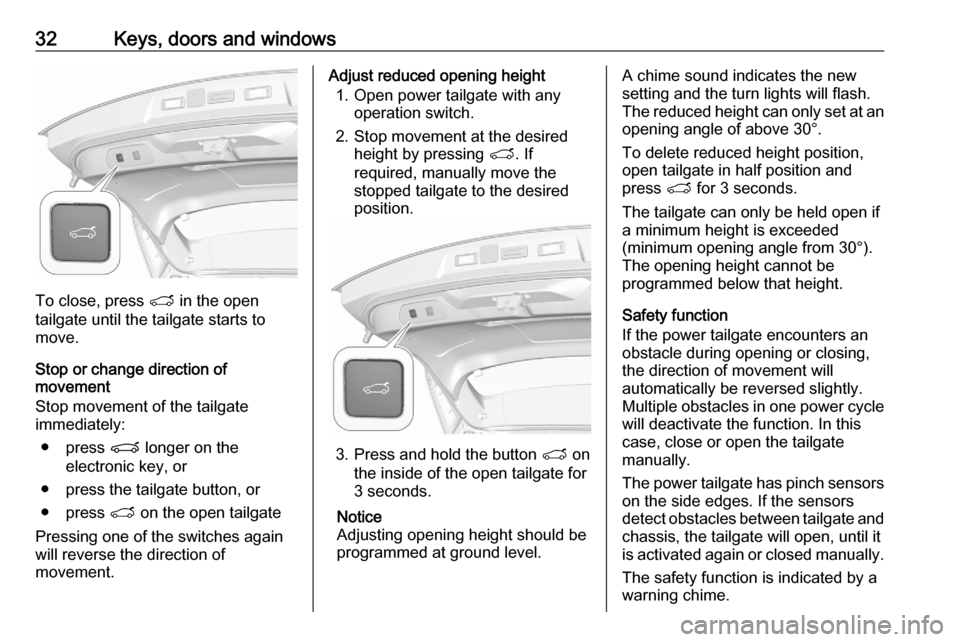
To close, press T in the open
tailgate until the tailgate starts to
move.
Stop or change direction of
movement
Stop movement of the tailgate immediately:
● press P longer on the
electronic key, or
● press the tailgate button, or
● press T on the open tailgate
Pressing one of the switches again
will reverse the direction of
movement.
Adjust reduced opening height
1. Open power tailgate with any operation switch.
2. Stop movement at the desired height by pressing T. If
required, manually move the
stopped tailgate to the desired
position.
3. Press and hold the button T on
the inside of the open tailgate for
3 seconds.
Notice
Adjusting opening height should be programmed at ground level.
A chime sound indicates the new
setting and the turn lights will flash.
The reduced height can only set at an
opening angle of above 30°.
To delete reduced height position,
open tailgate in half position and
press T for 3 seconds.
The tailgate can only be held open if a minimum height is exceeded
(minimum opening angle from 30°).
The opening height cannot be
programmed below that height.
Safety function
If the power tailgate encounters an
obstacle during opening or closing,
the direction of movement will
automatically be reversed slightly.
Multiple obstacles in one power cycle will deactivate the function. In this
case, close or open the tailgate
manually.
The power tailgate has pinch sensors
on the side edges. If the sensors
detect obstacles between tailgate and chassis, the tailgate will open, until it
is activated again or closed manually.
The safety function is indicated by a
warning chime.
Page 40 of 283
38Keys, doors and windowsInterior mirrors
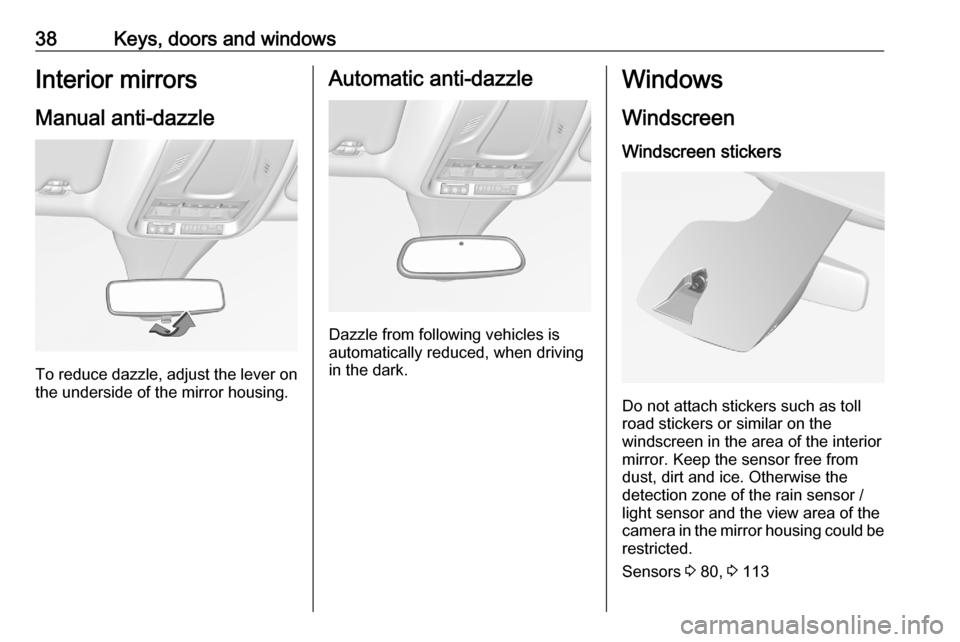
Manual anti-dazzle
To reduce dazzle, adjust the lever on the underside of the mirror housing.
Automatic anti-dazzle
Dazzle from following vehicles is
automatically reduced, when driving
in the dark.
Windows
Windscreen
Windscreen stickers
Do not attach stickers such as toll
road stickers or similar on the
windscreen in the area of the interior
mirror. Keep the sensor free from
dust, dirt and ice. Otherwise the
detection zone of the rain sensor /
light sensor and the view area of the
camera in the mirror housing could be
restricted.
Sensors 3 80, 3 113
Page 41 of 283
Keys, doors and windows39Windscreen replacementCaution
If the vehicle has a front-looking
camera sensor for the driver
assistance systems, it is very
important that any windscreen
replacement is performed
accurately according to Vauxhall
specifications. Otherwise, these systems may not work properly
and there is a risk of unexpected
behaviour and / or messages from these systems.
Power windows
9 Warning
Take care when operating the
power windows. Risk of injury,
particularly to children.
If there are children on the rear seats, switch on the child safety
system for the power windows.
Keep a close watch on the
windows when closing them.
Ensure that nothing becomes
trapped in them as they move.
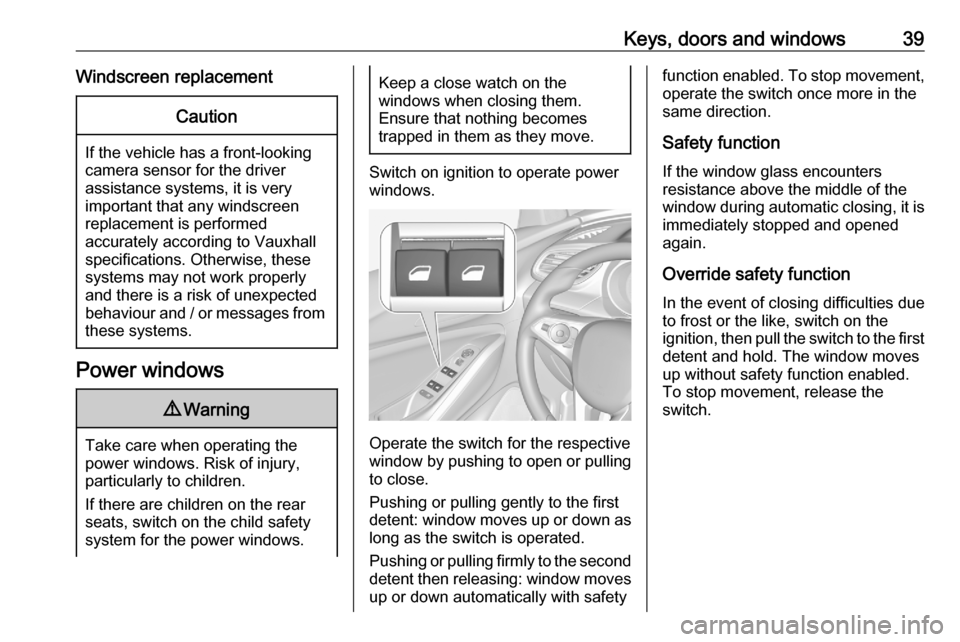
Switch on ignition to operate power
windows.
Operate the switch for the respective
window by pushing to open or pulling to close.
Pushing or pulling gently to the first
detent: window moves up or down as long as the switch is operated.
Pushing or pulling firmly to the second
detent then releasing: window moves
up or down automatically with safety
function enabled. To stop movement,
operate the switch once more in the
same direction.
Safety function
If the window glass encounters
resistance above the middle of the
window during automatic closing, it is
immediately stopped and opened
again.
Override safety function
In the event of closing difficulties due
to frost or the like, switch on the
ignition, then pull the switch to the first
detent and hold. The window moves
up without safety function enabled.
To stop movement, release the
switch.
Page 57 of 283
Seats, restraints55airbag sensing and diagnostic
module, steering wheel,
instrument panel, inner door seals including the speakers, any of the
airbag modules, ceiling or pillar
trim, front sensors, side impact
sensors or airbag wiring.
Notice
The airbag systems and belt
pretensioner control electronics are
located in the centre console. Do not put any magnetic objects in this
area.
Do not affix any objects onto the airbag covers and do not cover them with other materials. Have damaged
covers replaced by a workshop.
Each airbag is triggered only once.
Have deployed airbags replaced by
a workshop. Furthermore, it may be
necessary to have the steering
wheel, the instrument panel, parts of the panelling, the door seals,
handles and the seats replaced.
Do not make any modifications to
the airbag system as this will
invalidate the vehicle operating
permit.
Control indicator v for airbag systems
3 93.
Child restraint systems on front
passenger seat with airbag
systems
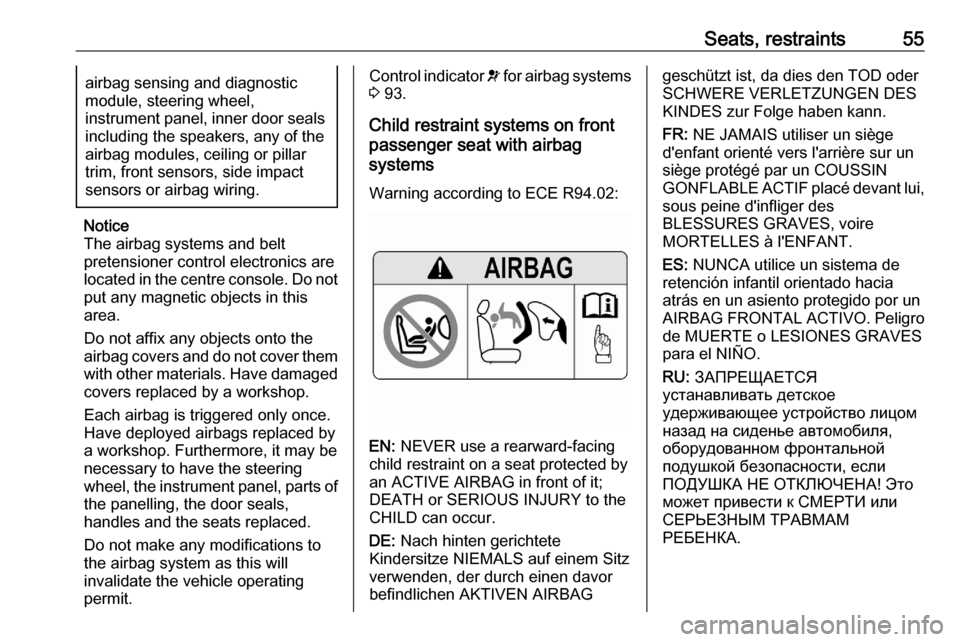
Warning according to ECE R94.02:
EN: NEVER use a rearward-facing
child restraint on a seat protected by
an ACTIVE AIRBAG in front of it;
DEATH or SERIOUS INJURY to the
CHILD can occur.
DE: Nach hinten gerichtete
Kindersitze NIEMALS auf einem Sitz
verwenden, der durch einen davor
befindlichen AKTIVEN AIRBAG
geschützt ist, da dies den TOD oder
SCHWERE VERLETZUNGEN DES
KINDES zur Folge haben kann.
FR: NE JAMAIS utiliser un siège
d'enfant orienté vers l'arrière sur un
siège protégé par un COUSSIN
GONFLABLE ACTIF placé devant lui,
sous peine d'infliger des
BLESSURES GRAVES, voire
MORTELLES à l'ENFANT.
ES: NUNCA utilice un sistema de
retención infantil orientado hacia
atrás en un asiento protegido por un
AIRBAG FRONTAL ACTIVO. Peligro de MUERTE o LESIONES GRAVES
para el NIÑO.
RU: ЗАПРЕЩАЕТСЯ
устанавливать детское
удерживающее устройство лицом
назад на сиденье автомобиля,
оборудованном фронтальной
подушкой безопасности, если
ПОДУШКА НЕ ОТКЛЮЧЕНА! Это
может привести к СМЕРТИ или
СЕРЬЕЗНЫМ ТРАВМАМ
РЕБЕНКА.
Page 78 of 283
76StorageVehicles without roof railing
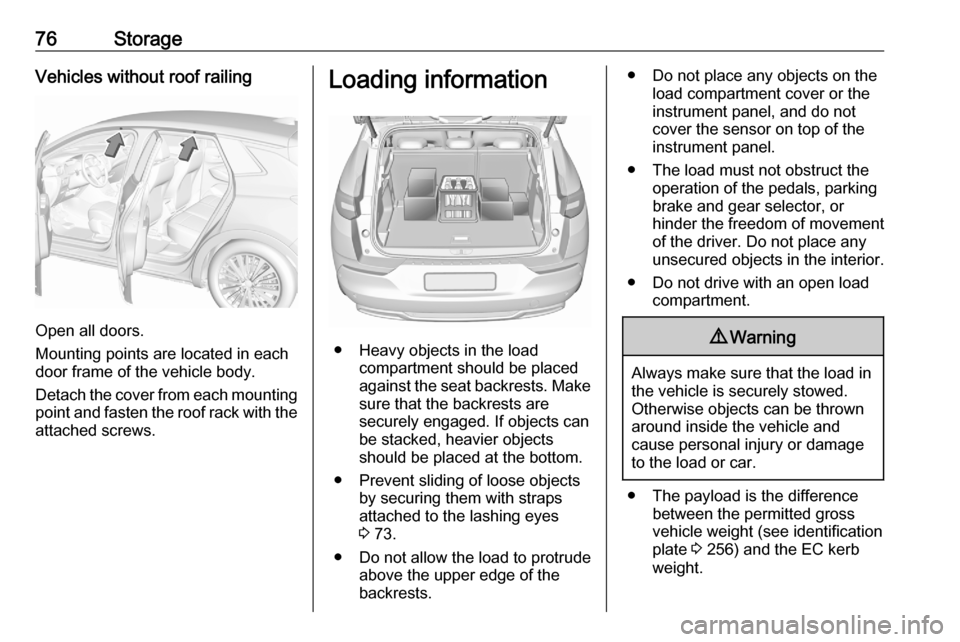
Open all doors.
Mounting points are located in each
door frame of the vehicle body.
Detach the cover from each mounting
point and fasten the roof rack with the attached screws.
Loading information
● Heavy objects in the load compartment should be placed
against the seat backrests. Make
sure that the backrests are
securely engaged. If objects can
be stacked, heavier objects
should be placed at the bottom.
● Prevent sliding of loose objects by securing them with straps
attached to the lashing eyes
3 73.
● Do not allow the load to protrude above the upper edge of the
backrests.
● Do not place any objects on the load compartment cover or theinstrument panel, and do notcover the sensor on top of the
instrument panel.
● The load must not obstruct the operation of the pedals, parking
brake and gear selector, or
hinder the freedom of movement of the driver. Do not place any
unsecured objects in the interior.
● Do not drive with an open load compartment.9Warning
Always make sure that the load in
the vehicle is securely stowed.
Otherwise objects can be thrown
around inside the vehicle and
cause personal injury or damage
to the load or car.
● The payload is the difference between the permitted gross
vehicle weight (see identification
plate 3 256) and the EC kerb
weight.
Page 80 of 283

78Instruments and controlsInstruments and
controlsControls ....................................... 79
Steering wheel adjustment ........79
Steering wheel controls .............79
Heated steering wheel ...............80
Horn ........................................... 80
Pedestrian safety alert ...............80
Windscreen wiper and washer ..80
Rear window wiper and washer ...................................... 82
Outside temperature ..................83
Clock ......................................... 83
Power outlets ............................. 84
Inductive charging .....................86
Cigarette lighter ......................... 87
Ashtrays .................................... 87
Warning lights, gauges and indi‐ cators ........................................... 87
Instrument cluster ......................87
Speedometer ............................. 89
Odometer .................................. 89
Trip odometer ............................ 89
Tachometer ............................... 89
Fuel gauge ................................ 90
Battery gauge ............................ 90Power indicator gauge ...............90
Engine coolant temperature gauge ....................................... 91
Engine oil level monitor .............91
Service display .......................... 91
Control indicators ......................92
Turn lights .................................. 92
Seat belt reminder .....................93
Airbag and belt tensioners .........93
Airbag deactivation ....................94
Charging system .......................94
Malfunction indicator light ..........94
Service vehicle soon .................94
Stop engine ............................... 94
System check ............................ 95
Hybrid system active .................95
Hybrid system fault ....................95
Brake and clutch system ...........95
Electric parking brake ................95
Electric parking brake fault ........95
Automatic operation of electric parking brake off ....................... 96
Antilock brake system (ABS) .....96
Gear shifting .............................. 96
Lane departure warning ............96
Lane keep assist .......................96
Electronic Stability Control and Traction Control system ...........96
Electronic Stability Control and Traction Control system off ......97Engine coolant temperature ......97
Preheating ................................. 97
Exhaust filter .............................. 97
AdBlue ....................................... 97
Deflation detection system ........98
Engine oil pressure ....................98
Low fuel ..................................... 98
Charge cord connected .............98
Autostop .................................... 98
Exterior light .............................. 98
Low beam .................................. 99
High beam ................................. 99
High beam assist .......................99
LED headlights .......................... 99
Front fog lights ........................... 99
Rear fog light ............................. 99
Rain sensor ............................... 99
Cruise control ............................ 99
Adaptive cruise control ..............99
Vehicle detected ahead .............99
Side blind spot alert ...................99
Active emergency braking .......100
Speed limiter ........................... 100
Door open ................................ 100
Displays ..................................... 100
Driver Information Centre ........100
Info Display .............................. 102
Vehicle messages ......................106
Warning chimes .......................106
Page 83 of 283
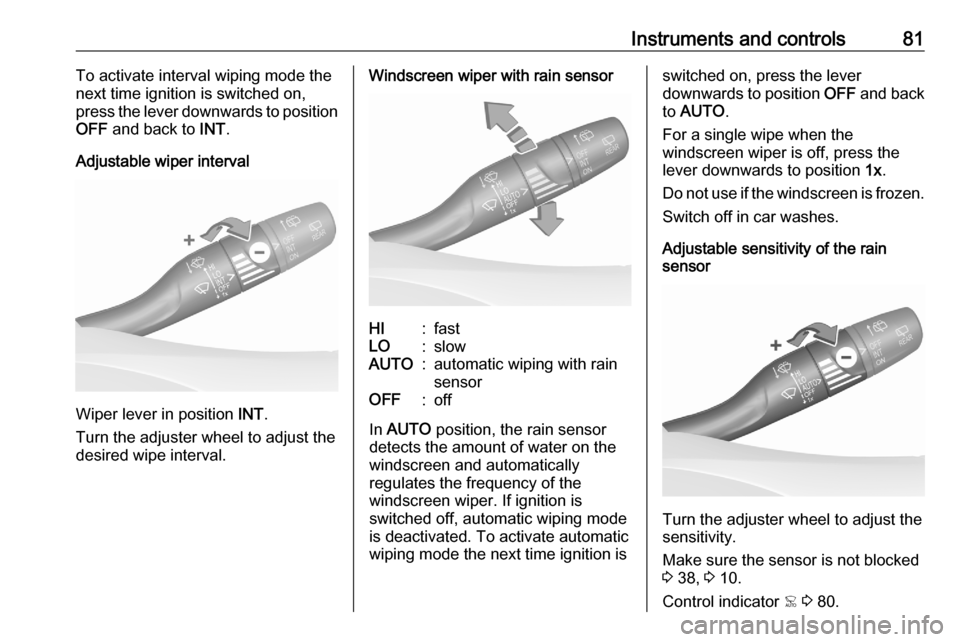
Instruments and controls81To activate interval wiping mode the
next time ignition is switched on,
press the lever downwards to position
OFF and back to INT.
Adjustable wiper interval
Wiper lever in position INT.
Turn the adjuster wheel to adjust the
desired wipe interval.
Windscreen wiper with rain sensorHI:fastLO:slowAUTO:automatic wiping with rain
sensorOFF:off
In AUTO position, the rain sensor
detects the amount of water on the
windscreen and automatically
regulates the frequency of the
windscreen wiper. If ignition is
switched off, automatic wiping mode
is deactivated. To activate automatic
wiping mode the next time ignition is
switched on, press the lever
downwards to position OFF and back
to AUTO .
For a single wipe when the
windscreen wiper is off, press the
lever downwards to position 1x.
Do not use if the windscreen is frozen. Switch off in car washes.
Adjustable sensitivity of the rain
sensor
Turn the adjuster wheel to adjust the
sensitivity.
Make sure the sensor is not blocked
3 38, 3 10.
Control indicator < 3 80.