USB VAUXHALL INSIGNIA 2014.5 Infotainment system
[x] Cancel search | Manufacturer: VAUXHALL, Model Year: 2014.5, Model line: INSIGNIA, Model: VAUXHALL INSIGNIA 2014.5Pages: 143, PDF Size: 2.57 MB
Page 6 of 143

6IntroductionIntroductionGeneral information.......................6
Theft-deterrent feature ...................7
Control elements overview ............8
Usage .......................................... 12General information
The Infotainment system provides
you with state-of-the-art in-car
infotainment.
Using the FM, AM or DAB radio
functions, you can register a great
number of stations on various
favourites pages.
You can even register music tracks,
telephone numbers, destination
addresses or tone settings on the
favourites pages.
You can connect external data
storage devices, e.g. iPod, USB
devices, or other auxiliary devices to
the Infotainment system as further
audio sources; either via a cable or
via Bluetooth.
The navigation system with dynamic
route planning will reliably guide you
to your destination, and, if desired,
automatically avoid traffic jams or
other traffic problems.
In addition, the Infotainment system is equipped with a Phone portal that
allows comfortable and safe use of
your mobile phone in the vehicle.Optionally, the Infotainment system
can be operated using controls on the steering wheel, a touch pad between
the front seats, or via the speech recognition system.
The well-thought-out design of the
control elements, the touch screen
and the clear displays enable you to
control the system easily and
intuitively.
Notice
This manual describes all options
and features available for the
various Infotainment systems.
Certain descriptions, including those
for display and menu functions, may not apply to your vehicle due to
model variant, country
specifications, special equipment or
accessories.
Page 13 of 143

Introduction13
External devices
Repeatedly press the MEDIA button
to activate the playback mode for a
connected external device (e.g. USB device, iPod or smartphone).
Find a detailed description on
connecting and operating external
devices 3 55.
Navigation
Press the ; button to display the
Home screen.
Tap on the NAV icon to display the
navigation map showing the area
around the current location.
Find a detailed description of the
navigation functions 3 62.
Phone
Press the ; button to display the
Home screen.
Select the PHONE icon.
If a connection to a paired mobile phone can be established, the main
menu of the phone mode is displayed.Find a detailed description of mobile
phone operation via the Infotainment
system 3 90.
If no connection can be established,
a corresponding message is
displayed. For a detailed description
of preparing and establishing a
Bluetooth connection between the Infotainment system and a mobile
phone 3 87.
Page 55 of 143
External devices55External devicesGeneral information.....................55
Playing audio ............................... 57
Playing movies ............................. 59
Using apps ................................... 60General information
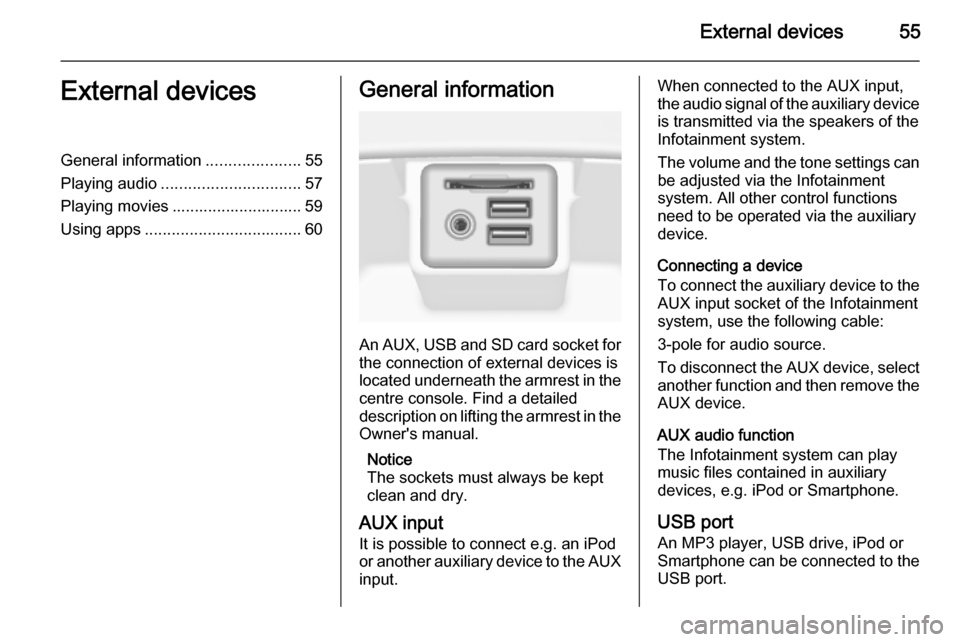
An AUX, USB and SD card socket for
the connection of external devices is
located underneath the armrest in the centre console. Find a detailed
description on lifting the armrest in the
Owner's manual.
Notice
The sockets must always be kept
clean and dry.
AUX input It is possible to connect e.g. an iPod
or another auxiliary device to the AUX
input.
When connected to the AUX input,
the audio signal of the auxiliary device is transmitted via the speakers of the
Infotainment system.
The volume and the tone settings can
be adjusted via the Infotainment
system. All other control functions
need to be operated via the auxiliary
device.
Connecting a device
To connect the auxiliary device to the AUX input socket of the Infotainment
system, use the following cable:
3-pole for audio source.
To disconnect the AUX device, select
another function and then remove the
AUX device.
AUX audio function
The Infotainment system can play
music files contained in auxiliary
devices, e.g. iPod or Smartphone.
USB port An MP3 player, USB drive, iPod or
Smartphone can be connected to the USB port.
Page 56 of 143
56External devices
When connected to the USB port, the
devices mentioned above can be
operated via the controls and menus
of the Infotainment system.
Notice
Not all MP3 players, USB drives,
iPod models or Smartphones are
supported by the Infotainment
system.
Connecting/disconnecting a device
Connect the USB device or iPod to
the USB port. For the iPod, use the
appropriate connection cable.
Notice
If a non-readable USB device or iPod is connected, a corresponding
error message will appear and the
Infotainment system will
automatically switch to the previous
function.
To disconnect the USB device or
iPod, select another function and then remove the USB storage device.Caution
Avoid disconnecting the device
during playback. This may
damage the device or the
Infotainment system.
USB audio function
The Infotainment system can play music files contained in USB storage
devices or iPod/iPhone products.
USB movie function
The Infotainment system can play
movies contained in USB storage
devices.
SD card
An SD card may be inserted in the SD
card slot.
When inserted, the SD card can be
operated via the controls and menus
of the Infotainment system.
Notice
Not all SD card types are supported
by the Infotainment system.
Inserting/removing an SD cardCaution
Never attempt to use an SD card
that has been cracked, deformed
or repaired using adhesive tape.
Doing so may damage the
equipment.
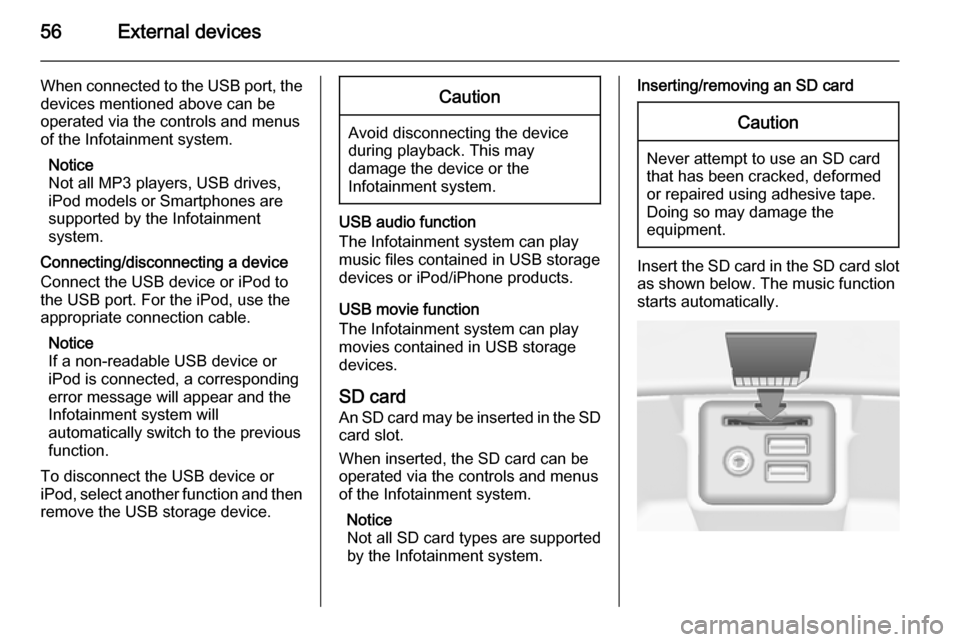
Insert the SD card in the SD card slot
as shown below. The music function
starts automatically.
Page 58 of 143
58External devices
Repeatedly press the MEDIA button
to activate the desired media source.
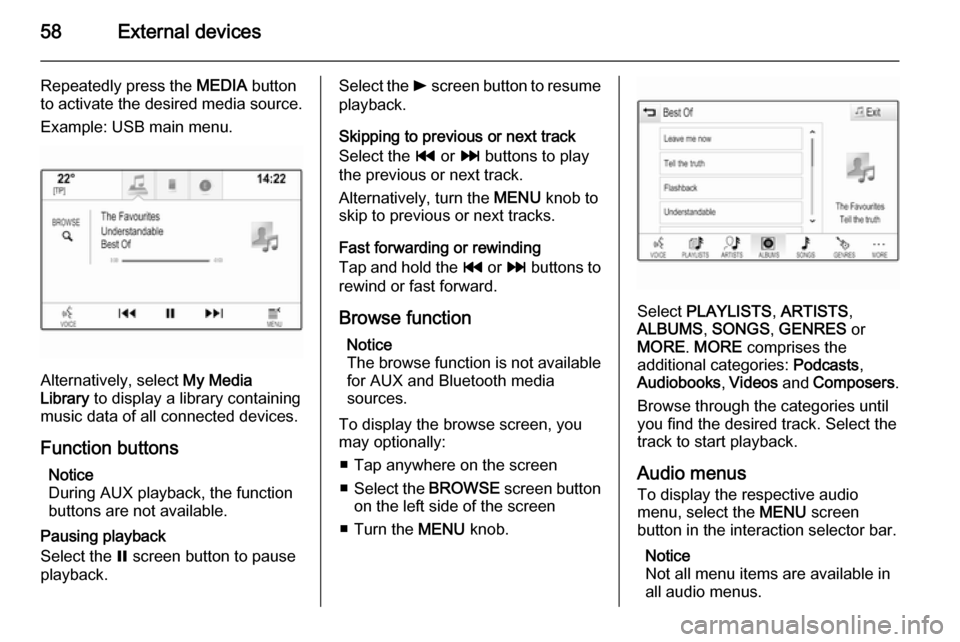
Example: USB main menu.
Alternatively, select My Media
Library to display a library containing
music data of all connected devices.
Function buttons Notice
During AUX playback, the function
buttons are not available.
Pausing playback
Select the = screen button to pause
playback.
Select the l screen button to resume
playback.
Skipping to previous or next track
Select the t or v buttons to play
the previous or next track.
Alternatively, turn the MENU knob to
skip to previous or next tracks.
Fast forwarding or rewinding
Tap and hold the t or v buttons to
rewind or fast forward.
Browse function Notice
The browse function is not available
for AUX and Bluetooth media
sources.
To display the browse screen, you may optionally:
■ Tap anywhere on the screen
■ Select the BROWSE screen button
on the left side of the screen
■ Turn the MENU knob.
Select PLAYLISTS , ARTISTS ,
ALBUMS , SONGS , GENRES or
MORE . MORE comprises the
additional categories: Podcasts,
Audiobooks , Videos and Composers .
Browse through the categories until
you find the desired track. Select the
track to start playback.
Audio menus
To display the respective audio
menu, select the MENU screen
button in the interaction selector bar.
Notice
Not all menu items are available in
all audio menus.
Page 59 of 143
External devices59
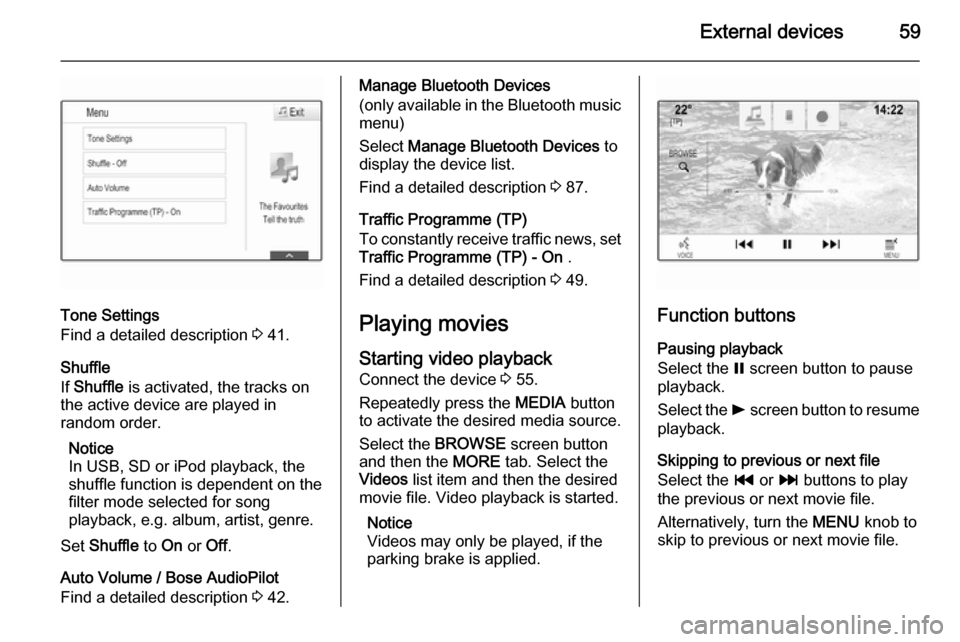
Tone Settings
Find a detailed description 3 41.
Shuffle
If Shuffle is activated, the tracks on
the active device are played in
random order.
Notice
In USB, SD or iPod playback, the shuffle function is dependent on the
filter mode selected for song
playback, e.g. album, artist, genre.
Set Shuffle to On or Off.
Auto Volume / Bose AudioPilot
Find a detailed description 3 42.
Manage Bluetooth Devices
(only available in the Bluetooth music
menu)
Select Manage Bluetooth Devices to
display the device list.
Find a detailed description 3 87.
Traffic Programme (TP)
To constantly receive traffic news, set Traffic Programme (TP) - On .
Find a detailed description 3 49.
Playing movies
Starting video playback
Connect the device 3 55.
Repeatedly press the MEDIA button
to activate the desired media source.
Select the BROWSE screen button
and then the MORE tab. Select the
Videos list item and then the desired
movie file. Video playback is started.
Notice
Videos may only be played, if the
parking brake is applied.
Function buttons
Pausing playback
Select the = screen button to pause
playback.
Select the l screen button to resume
playback.
Skipping to previous or next file
Select the t or v buttons to play
the previous or next movie file.
Alternatively, turn the MENU knob to
skip to previous or next movie file.
Page 68 of 143

68Navigation
Select Clear All to unselect all
categories.
Navigation data management
Select the MENU screen button in the
interaction selector bar and then
select the Personal Data list item.
A list of different data storage
locations of the navigation application is displayed.
Contacts list
Select Address Book to display the
respective submenu.Deleting all entries
To delete all entries in the contacts
list, select the Delete All Entries list
item. You are prompted with a
message.
Confirm the message to delete the
entire contacts list.Editing the contacts list
Select Edit Address Book to display
the contacts list.
Find a detailed description on editing the contacts list 3 32.Recent destinations list
Select Recent Destinations to display
the respective submenu.Deleting all destinations
To delete all entries in the recent
destinations list, select the Delete All
Destinations list item. You are
prompted with a message.
Confirm the message to delete the
entire recent destinations list.Deleting individual destinations
Select Delete Individual Destinations
to display the recent destinations list.
To delete a destination, select the ─
icon next to the respective
destination. You are prompted with a
message.
Confirm the message to delete the
destination.
Downloaded POIs
Select My POIs to display the
respective submenu.
POIs which were previously
downloaded to the system may be
deleted. The other POIs remain within
the system.
Deleting all downloaded POIs
To delete all entries in the contacts
list, select the Delete All My POIs list
item. You are prompted with a message.
Confirm the message to delete the
entire POIs list.Deleting categories
Select Delete Individual Categories to
display a list of POI categories.
To delete a category, select the ─ icon
next to the respective category. You
are prompted with a message.
Confirm the message to delete the
category.
Uploading destination data to a USB
device
For later use, e.g. in other cars, you
can store the vehicle contacts list and POIs previously downloaded (see
"Creating and downloading user
defined POIs" below) on a USB
device:
Select Upload Saved Locations .
Page 69 of 143
Navigation69
The contacts list and POI data is
stored on the connected USB device
in the folders "F:\myContacts"
respective "F:\myPOIs", where "F:\" is
the root folder of the USB device.
Notice
This function may only be carried out if a USB device with sufficient
storage space is connected.
Downloading contacts data
You can exchange your vehicle
contacts list data with Infotainment
systems in other cars:
To upload the data to a USB device,
see "Uploading navigation data to a
USB device" above.
Connect the USB device to the
Infotainment system of another car
3 55.
A message is displayed that prompts
you to confirm the download.
After confirmation, the contacts data
is downloaded to the Infotainment
system.
The downloaded contacts are then
selectable via the CONTACTS menu
3 32.Creating and downloading user
defined POIs (My POIs)
In addition to the predefined POIs
already stored in the Infotainment
system, you can create user defined
POIs that meet your personal
requirements. After creation, such
user defined POIs can be
downloaded to the Infotainment
system.
For each POI, you need to define the
GPS coordinates (longitude and
latitude values) of the respective
location and a descriptive name.
After downloading the POI data to the Infotainment system, you will find the
respective POIs as selectable
destinations in the My POIs menu,
see "Selecting a point of interest" in
chapter "Destination input" 3 70.
Creating a text file with POI data
Create a text file (e.g. by using a
simple text editor software) with an
arbitrary name and the file
extension .poi, e.g. "TomsPOIs.poi".
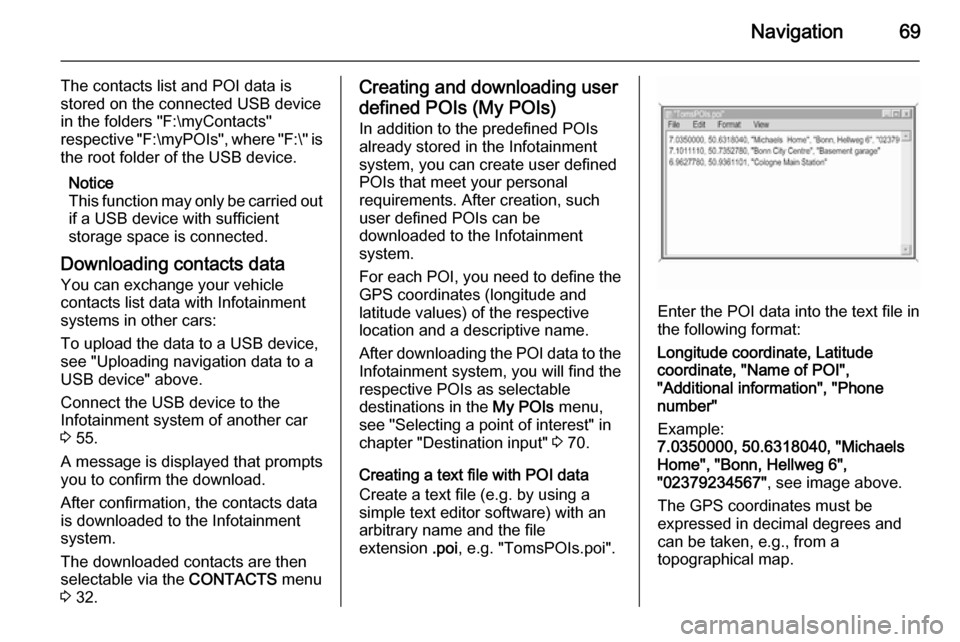
Enter the POI data into the text file in
the following format:
Longitude coordinate, Latitude
coordinate, "Name of POI",
"Additional information", "Phone
number"
Example:
7.0350000, 50.6318040, "Michaels
Home", "Bonn, Hellweg 6",
"02379234567" , see image above.
The GPS coordinates must be
expressed in decimal degrees and
can be taken, e.g., from a
topographical map.
Page 70 of 143
70Navigation
The additional information and phonenumber strings are optional.
The POI name and the additional
information string may not exceed 60 characters each. The phone number
string may not exceed 30 characters.
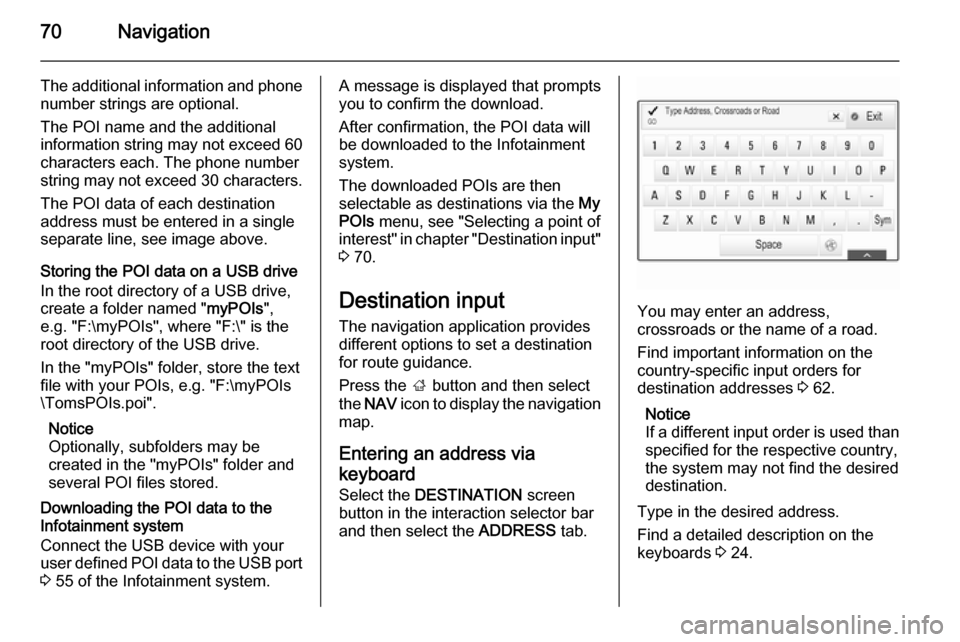
The POI data of each destination
address must be entered in a single
separate line, see image above.
Storing the POI data on a USB drive
In the root directory of a USB drive,
create a folder named " myPOIs",
e.g. "F:\myPOIs", where "F:\" is the
root directory of the USB drive.
In the "myPOIs" folder, store the text
file with your POIs, e.g. "F:\myPOIs
\TomsPOIs.poi".
Notice
Optionally, subfolders may be
created in the "myPOIs" folder and
several POI files stored.
Downloading the POI data to the
Infotainment system
Connect the USB device with your
user defined POI data to the USB port
3 55 of the Infotainment system.A message is displayed that prompts
you to confirm the download.
After confirmation, the POI data will
be downloaded to the Infotainment
system.
The downloaded POIs are then
selectable as destinations via the My
POIs menu, see "Selecting a point of
interest" in chapter "Destination input" 3 70.
Destination input The navigation application provides
different options to set a destination
for route guidance.
Press the ; button and then select
the NAV icon to display the navigation
map.
Entering an address via
keyboard Select the DESTINATION screen
button in the interaction selector bar
and then select the ADDRESS tab.
You may enter an address,
crossroads or the name of a road.
Find important information on the country-specific input orders for
destination addresses 3 62.
Notice
If a different input order is used than specified for the respective country,
the system may not find the desired
destination.
Type in the desired address.
Find a detailed description on the
keyboards 3 24.
Page 97 of 143

Frequently asked questions97
Audio?How can I change the audio
source?
! By pressing the
RADIO button
repeatedly, you can toggle through all available radio sources (AM/
FM/DAB). By pressing the MEDIA
button repeatedly, you can toggle
through all available media
sources (USB, SD card, iPod,
Bluetooth audio, CD, AUX).
Detailed description for radio 3 47,
CD 3 52, external devices 3 55.? How can I browse radio stations or
media music?
! To browse radio stations or media
music, such as playlists or albums, select the BROWSE screen button
on the audio screen.
Detailed description for radio 3 47,
CD 3 53, external devices 3 57.Other? I heard there are Apps available for
my Infotainment system. How can
I download them?
! New apps can be downloaded to
the system from the AppShop.
Press the ; button and then select
the Apps icon on the Home screen
to display the Apps main menu.
Make sure Bluetooth and
Tethering are enabled and
properly configured on the mobile
phone. First time, users need to
create a new account before apps
can be installed. Select the setup
wizard and follow the instructions.
Detailed description 3 60.? How can I improve the
performance of the voice
recognition?
! The voice recognition is designed
to understand naturally
pronounced voice commands.
Wait for the beep tone and speak
afterwards. Try to speak naturally,
not too fast or too loud.
Detailed description 3 80.? How can I improve the touch
screen's performance?
! The touch screen is pressure-
sensitive. Especially when doing
drag gestures, try to apply more
pressure with the finger.
Detailed description 3 15.