buttons VAUXHALL INSIGNIA 2014.5 Infotainment system
[x] Cancel search | Manufacturer: VAUXHALL, Model Year: 2014.5, Model line: INSIGNIA, Model: VAUXHALL INSIGNIA 2014.5Pages: 143, PDF Size: 2.57 MB
Page 9 of 143

Introduction9
1X knob .................................. 12
If switched off: short press:
switch power on
If switched on: short press: mute system; long press:
switch power off
Turn: adjust volume
2 Display/touch screen ............. 14
3 Home screen
(configurable) ........................ 21
4 MENU knob ........................... 15
Turn: mark screen buttons
or menu items; set
numeric values
Press: select/activate a
marked screen button or
menu item; confirm set
value; switch to different
setting option; open
application-specific menu
(if available)
5 ; button ............................... 15
Press: display Home screen6 BACK button......................... 15
Press: return to previous
screen/menu
7 v button
Radio: short press: skip to
next station; long press:
seek up ................................. 47
CD player / External
devices: short press: skip
to next track; long press:
fast forward ........................... 53
8 d button (if CD player equipped)
Press: eject disc ....................53
TONE button (if no CD
player equipped)
Press: display tone
settings menu ........................ 419 t button
Radio: short press: skip to
previous station; long
press: seek down ..................47
CD player / External
devices: short press: skip
to previous track; long
press: fast rewind ..................53
10 MEDIA button ........................ 12
Press: activate CD player
or external device
11 RADIO button ........................ 47
Press: activate radio or
change waveband
12 CD slot .................................. 53
Page 11 of 143
Introduction11
For a description of all other controls,
see Owner's manual.
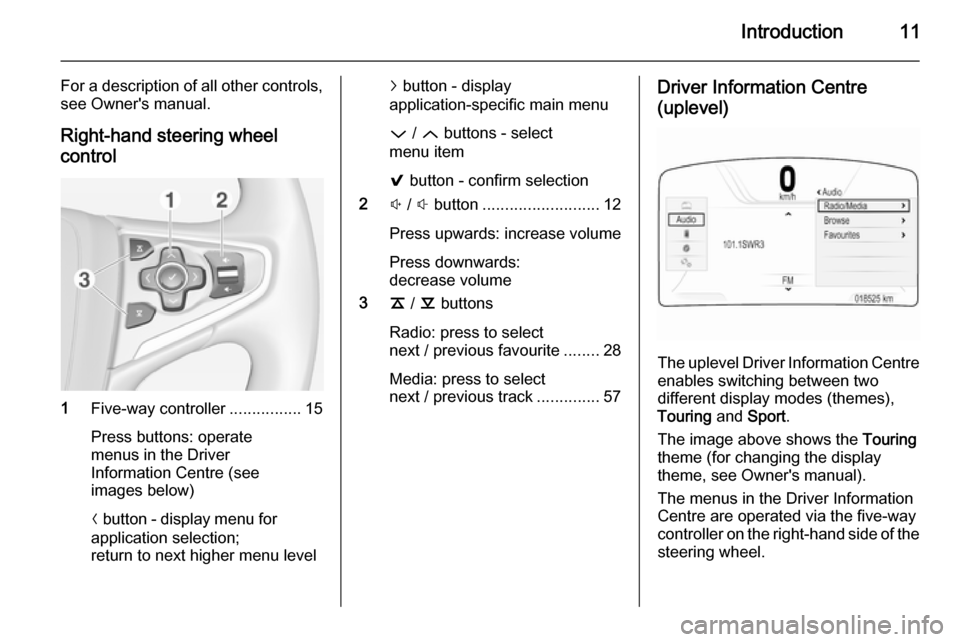
Right-hand steering wheel control
1 Five-way controller ................15
Press buttons: operate
menus in the Driver
Information Centre (see
images below)
N button - display menu for
application selection;
return to next higher menu level
j button - display
application-specific main menu
P / Q buttons - select
menu item
9 button - confirm selection
2 ! / # button .......................... 12
Press upwards: increase volume
Press downwards:
decrease volume
3 k / l buttons
Radio: press to select
next / previous favourite ........28
Media: press to select
next / previous track ..............57Driver Information Centre
(uplevel)
The uplevel Driver Information Centre enables switching between two
different display modes (themes),
Touring and Sport .
The image above shows the Touring
theme (for changing the display
theme, see Owner's manual).
The menus in the Driver Information Centre are operated via the five-way
controller on the right-hand side of the steering wheel.
Page 14 of 143
14Basic operationBasic operationDisplays....................................... 14
Controls ....................................... 15
Menu operation ............................ 21
Keyboards .................................... 24
Favourites .................................... 28
Contacts ....................................... 32
Touch operation overview ...........37
Tone settings ............................... 41
Volume settings ........................... 42
System settings ........................... 43Displays
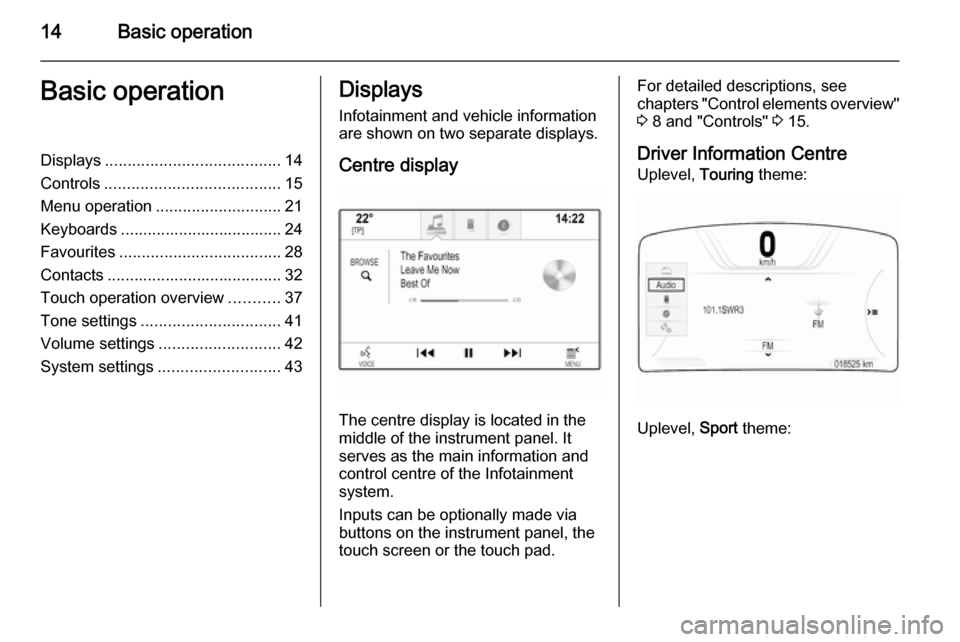
Infotainment and vehicle information
are shown on two separate displays.
Centre display
The centre display is located in the
middle of the instrument panel. It
serves as the main information and
control centre of the Infotainment
system.
Inputs can be optionally made via
buttons on the instrument panel, the
touch screen or the touch pad.
For detailed descriptions, see
chapters "Control elements overview"
3 8 and "Controls" 3 15.
Driver Information Centre Uplevel, Touring theme:
Uplevel, Sport theme:
Page 17 of 143
Basic operation17
item via the touch screen will be
described as "...select the...screen
button..." or "...select the...menu
item...".
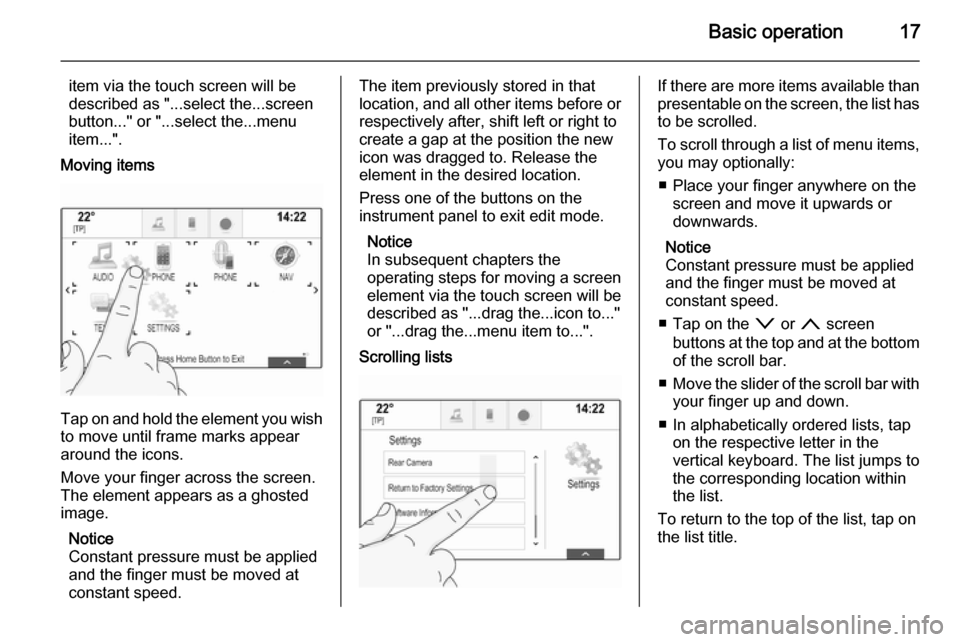
Moving items
Tap on and hold the element you wish to move until frame marks appear
around the icons.
Move your finger across the screen.
The element appears as a ghosted
image.
Notice
Constant pressure must be applied
and the finger must be moved at
constant speed.
The item previously stored in that location, and all other items before or respectively after, shift left or right to
create a gap at the position the new
icon was dragged to. Release the
element in the desired location.
Press one of the buttons on the
instrument panel to exit edit mode.
Notice
In subsequent chapters the
operating steps for moving a screen
element via the touch screen will be
described as "...drag the...icon to..."
or "...drag the...menu item to...".
Scrolling listsIf there are more items available than
presentable on the screen, the list has to be scrolled.
To scroll through a list of menu items, you may optionally:
■ Place your finger anywhere on the screen and move it upwards or
downwards.
Notice
Constant pressure must be applied
and the finger must be moved at
constant speed.
■ Tap on the o or n screen
buttons at the top and at the bottom
of the scroll bar.
■ Move the slider of the scroll bar with
your finger up and down.
■ In alphabetically ordered lists, tap on the respective letter in the
vertical keyboard. The list jumps to
the corresponding location within
the list.
To return to the top of the list, tap on
the list title.
Page 18 of 143
18Basic operation
Notice
In subsequent chapters the operating steps for scrolling a list via the touch screen will be described as
"...scroll to...list item...".
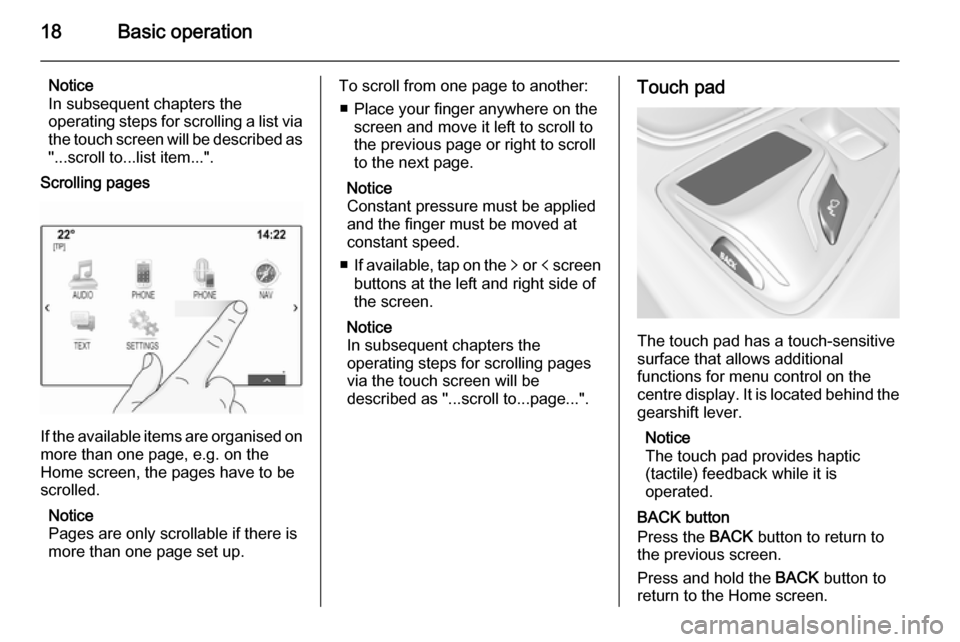
Scrolling pages
If the available items are organised on
more than one page, e.g. on the
Home screen, the pages have to be
scrolled.
Notice
Pages are only scrollable if there is more than one page set up.
To scroll from one page to another:
■ Place your finger anywhere on the screen and move it left to scroll to
the previous page or right to scroll
to the next page.
Notice
Constant pressure must be applied
and the finger must be moved at
constant speed.
■ If available, tap on the q or p screen
buttons at the left and right side of the screen.
Notice
In subsequent chapters the
operating steps for scrolling pages via the touch screen will be
described as "...scroll to...page...".Touch pad
The touch pad has a touch-sensitive
surface that allows additional
functions for menu control on the
centre display. It is located behind the gearshift lever.
Notice
The touch pad provides haptic
(tactile) feedback while it is
operated.
BACK button
Press the BACK button to return to
the previous screen.
Press and hold the BACK button to
return to the Home screen.
Page 20 of 143
20Basic operation
Scrolling pages
If the available items are organised on
more than one page, e.g. on the
Home screen, the pages have to be
scrolled.
Notice
Pages are only scrollable if there is
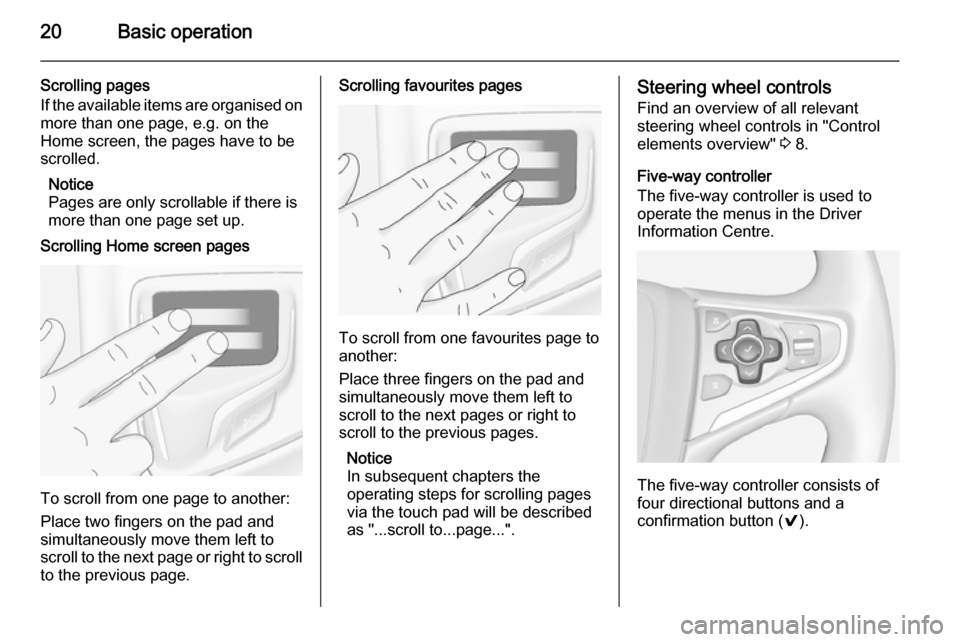
more than one page set up.Scrolling Home screen pages
To scroll from one page to another:
Place two fingers on the pad and simultaneously move them left to
scroll to the next page or right to scroll
to the previous page.
Scrolling favourites pages
To scroll from one favourites page to
another:
Place three fingers on the pad and
simultaneously move them left to
scroll to the next pages or right to
scroll to the previous pages.
Notice
In subsequent chapters the
operating steps for scrolling pages
via the touch pad will be described
as "...scroll to...page...".
Steering wheel controls
Find an overview of all relevant
steering wheel controls in "Control
elements overview" 3 8.
Five-way controller
The five-way controller is used to
operate the menus in the Driver
Information Centre.
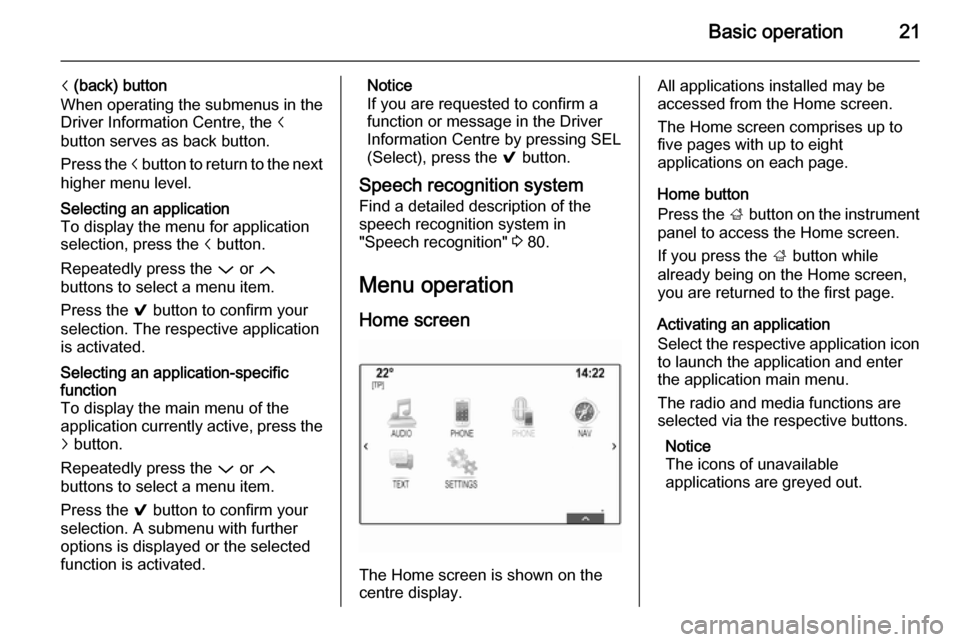
The five-way controller consists of
four directional buttons and a
confirmation button ( 9).
Page 21 of 143
Basic operation21
i (back) button
When operating the submenus in the
Driver Information Centre, the i
button serves as back button.
Press the i button to return to the next
higher menu level.Selecting an application
To display the menu for application
selection, press the i button.
Repeatedly press the P or Q
buttons to select a menu item.
Press the 9 button to confirm your
selection. The respective application
is activated.Selecting an application-specific
function
To display the main menu of the
application currently active, press the
j button.
Repeatedly press the P or Q
buttons to select a menu item.
Press the 9 button to confirm your
selection. A submenu with further
options is displayed or the selected
function is activated.Notice
If you are requested to confirm a
function or message in the Driver
Information Centre by pressing SEL
(Select), press the 9 button.
Speech recognition system Find a detailed description of the
speech recognition system in
"Speech recognition" 3 80.
Menu operation
Home screen
The Home screen is shown on the
centre display.
All applications installed may be
accessed from the Home screen.
The Home screen comprises up to
five pages with up to eight
applications on each page.
Home button
Press the ; button on the instrument
panel to access the Home screen.
If you press the ; button while
already being on the Home screen,
you are returned to the first page.
Activating an application
Select the respective application icon to launch the application and enter
the application main menu.
The radio and media functions are
selected via the respective buttons.
Notice
The icons of unavailable
applications are greyed out.
Page 22 of 143
22Basic operation
Scrolling pages
To scroll from one page to another:
■ Place your finger anywhere on the screen and move it left to scroll to
the previous page or right to scroll
to the next page.
■ Tap on the p or q screen buttons at
the left and right side of the screen.
■ Place two fingers anywhere on the touch pad and move them left toscroll to the previous page or right
to scroll to the next page.
Find a detailed description 3 15.
Notice
At the bottom right of the screen,
indication marks designate how
many Home screen pages may be
accessed and which page is
currently displayed.Personalising the Home screenEntering edit mode
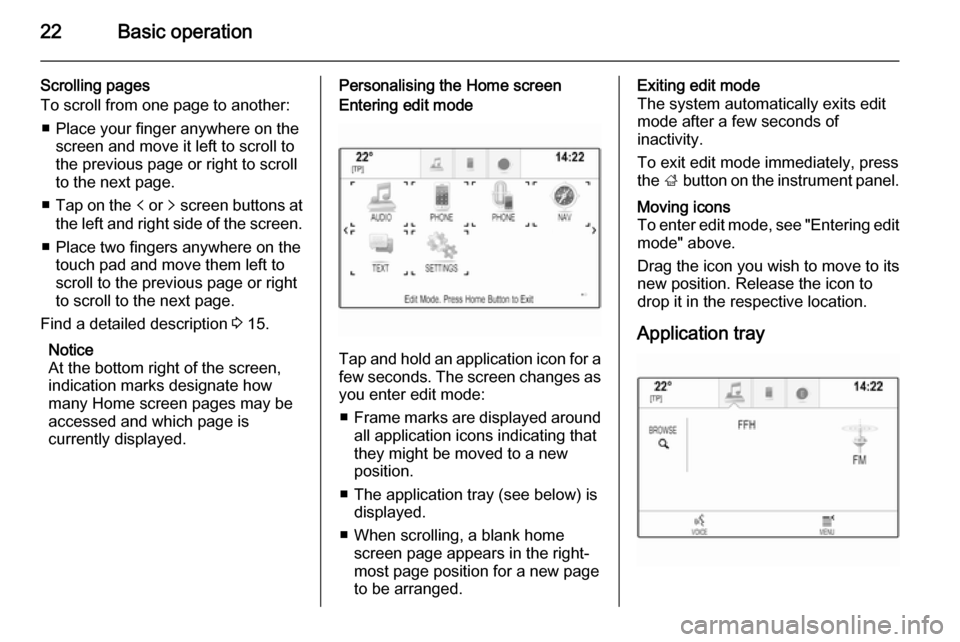
Tap and hold an application icon for a
few seconds. The screen changes as you enter edit mode:
■ Frame marks are displayed around
all application icons indicating that
they might be moved to a new
position.
■ The application tray (see below) is displayed.
■ When scrolling, a blank home screen page appears in the right-
most page position for a new page to be arranged.
Exiting edit mode
The system automatically exits edit
mode after a few seconds of
inactivity.
To exit edit mode immediately, press
the ; button on the instrument panel.Moving icons
To enter edit mode, see "Entering edit
mode" above.
Drag the icon you wish to move to its
new position. Release the icon to
drop it in the respective location.
Application tray
Page 24 of 143
24Basic operation
Via the interaction selector bar, you
may change the different views within one application or perform
application-specific actions, e.g. start
a speech recognition session.
Activating another tab
Select the respective screen button
on the interaction selector bar to
switch to another view or perform an
action.
Notice
If a function is currently not available in a menu, the respective icon on the
interaction selector bar is greyed
out.
Displaying the interaction selector bar
When interacting with the screen
buttons in the main menu, the
interaction selector bar is often
minimised.
To display the interaction selector
bar, select the n screen button at
the bottom of the screen.Messages
In the case of a system event, before
the execution of a system function, or due to an outside trigger, e.g.
incoming phone call, you may be
prompted with a message.
Select one of the available options.
If ignored, most of the messages are dismissed automatically after a
certain period of time. Alerts that are
not dismissed automatically remain
on the screen until they are
acknowledged or the trigger becomes
invalid.
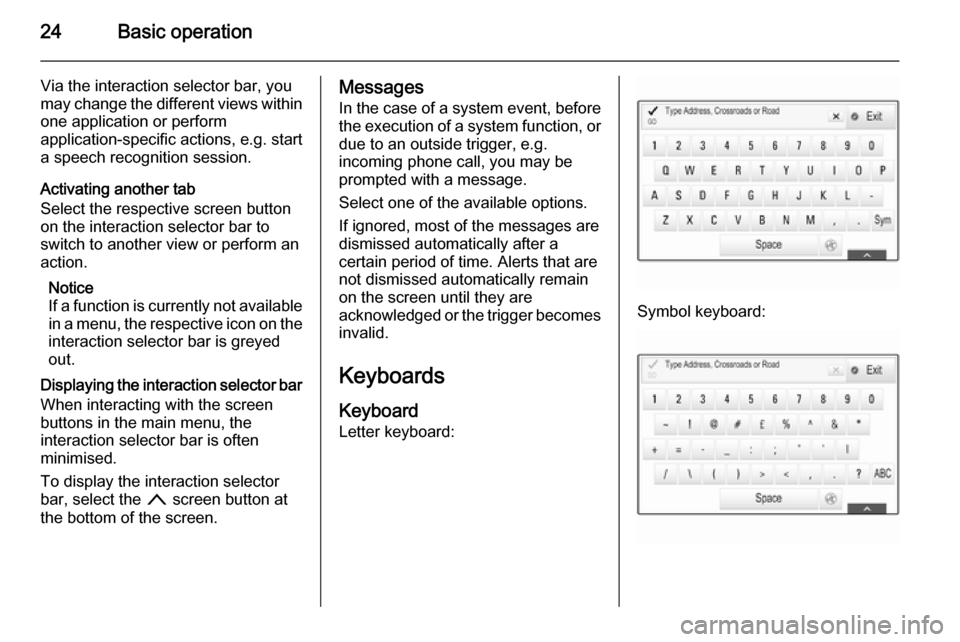
Keyboards KeyboardLetter keyboard:
Symbol keyboard:
Page 26 of 143
26Basic operation
If mixed case character recognition isavailable, additional Caps and Shift
screen buttons are displayed.
To activate the caps lock function and
capitalise all letters, select the Caps
screen button.
To deactivate the caps lock function,
the Caps screen button has to be
selected again.
To activate the shift function and
capitalise just one letter, select the
Shift screen button.
The function is automatically
deactivated after one letter has been
entered.
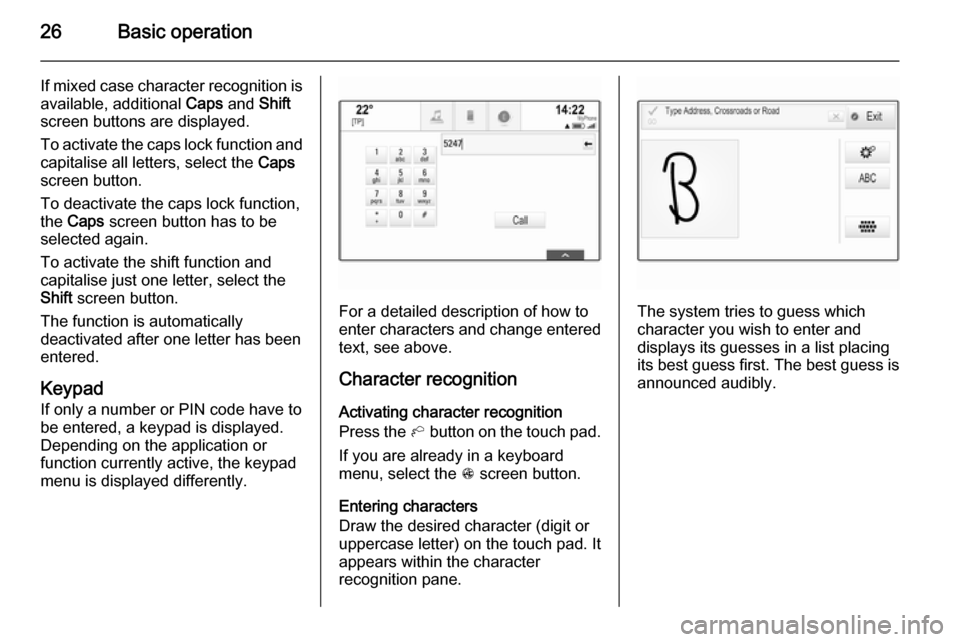
Keypad If only a number or PIN code have to
be entered, a keypad is displayed.
Depending on the application or
function currently active, the keypad
menu is displayed differently.
For a detailed description of how to
enter characters and change entered text, see above.
Character recognition Activating character recognition
Press the h button on the touch pad.
If you are already in a keyboard
menu, select the s screen button.
Entering characters
Draw the desired character (digit or
uppercase letter) on the touch pad. It
appears within the character
recognition pane.The system tries to guess which
character you wish to enter and
displays its guesses in a list placing
its best guess first. The best guess is
announced audibly.