manual VAUXHALL INSIGNIA 2014.5 User Guide
[x] Cancel search | Manufacturer: VAUXHALL, Model Year: 2014.5, Model line: INSIGNIA, Model: VAUXHALL INSIGNIA 2014.5Pages: 321, PDF Size: 8.98 MB
Page 33 of 321
Keys, doors and windows31
Adjust reduced opening height in
intermediate mode
1. Turn operation mode switch to 3/4 .
2. Open power tailgate with any operation switch.
3. Stop movement at the desired height by pressing any operation
switch. If required, manually move
the stopped tailgate to the desired
position.
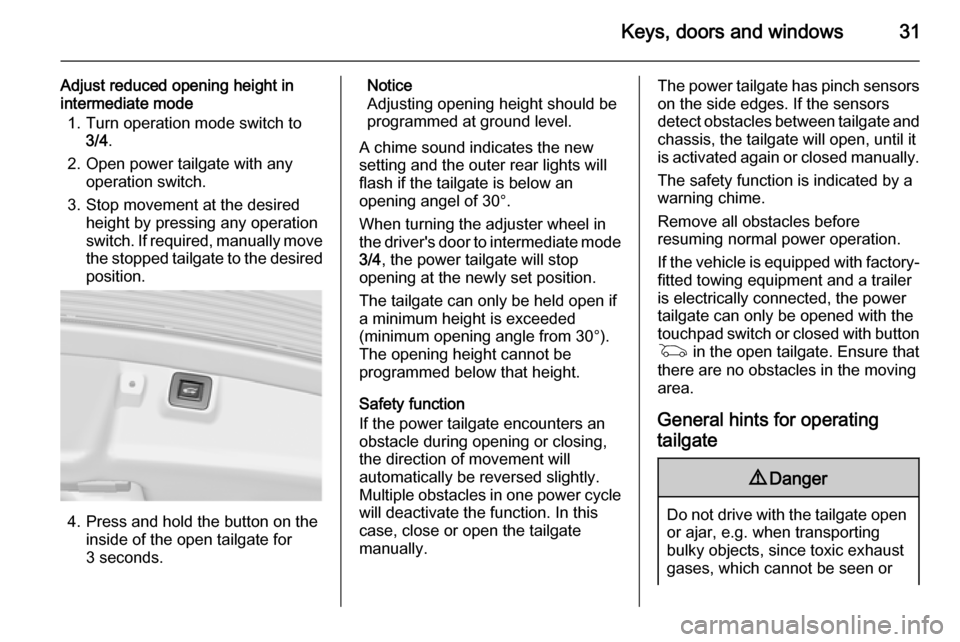
4. Press and hold the button on the
inside of the open tailgate for
3 seconds.
Notice
Adjusting opening height should be
programmed at ground level.
A chime sound indicates the new
setting and the outer rear lights will
flash if the tailgate is below an
opening angel of 30°.
When turning the adjuster wheel in
the driver's door to intermediate mode 3/4 , the power tailgate will stop
opening at the newly set position.
The tailgate can only be held open if a minimum height is exceeded
(minimum opening angle from 30°).
The opening height cannot be
programmed below that height.
Safety function
If the power tailgate encounters an
obstacle during opening or closing,
the direction of movement will
automatically be reversed slightly.
Multiple obstacles in one power cycle
will deactivate the function. In this
case, close or open the tailgate
manually.The power tailgate has pinch sensors
on the side edges. If the sensors
detect obstacles between tailgate and chassis, the tailgate will open, until it
is activated again or closed manually.
The safety function is indicated by a
warning chime.
Remove all obstacles before
resuming normal power operation.
If the vehicle is equipped with factory- fitted towing equipment and a trailer
is electrically connected, the power
tailgate can only be opened with the
touchpad switch or closed with button
G in the open tailgate. Ensure that
there are no obstacles in the moving
area.
General hints for operating
tailgate9 Danger
Do not drive with the tailgate open
or ajar, e.g. when transporting
bulky objects, since toxic exhaust
gases, which cannot be seen or
Page 34 of 321
32Keys, doors and windowssmelled, could enter the vehicle.
This can cause unconsciousness
and even death.Caution
Before opening the tailgate, check overhead obstructions, such as a
garage door, to avoid damage to
the tailgate. Always check the
moving area above and behind the
tailgate.
Notice
Power tailgate: If the lifters of the
open tailgate lose pressure, the
tailgate falls a bit and will then be
stopped by the system. Following
the tailgate will be power opened
and closed. During this the tail lights will flash and a chime will sound.
After closing, the tailgate may not be operated until it has been serviced
by a workshop.
Notice
The operation of the power tailgate
is disabled under low vehicle battery
conditions. In this case, the tailgate
can even not be operated manually.
Notice
With the power tailgate disabled and
all doors unlocked, the tailgate can
only be operated manually. In this
event, manually closing the tailgate
requires significantly greater force.
Notice
The installation of certain heavy
accessories onto the tailgate may
affect its ability to remain open.Vehicle security
Anti-theft locking system9 Warning
Do not use the system if there are
people in the vehicle! The doorscannot be unlocked from the
inside.
The system deadlocks all the doors.
All doors must be closed and the
electronic key must not remain in the
vehicle. Otherwise the system cannot
be activated.
If the ignition was on, the driver's door
must be opened and closed once so
that the vehicle can be secured.
Unlocking the vehicle disables the
mechanical anti-theft locking system.
This is not possible with the central
locking button in the passenger
compartment.
Page 38 of 321

36Keys, doors and windowsExterior mirrors
Convex shape
The convex exterior mirror contains
an aspherical area and reduces blind spots. The shape of the mirror makes
objects appear smaller, which will
affect the ability to estimate
distances.
Electric adjustment
Select the relevant exterior mirror by
switching the control to left mirror (L)
or right mirror (R). Then swivel the
control to adjust the mirror.
In position o no mirror is selected.
Folding mirrors
For pedestrian safety, the exterior
mirrors will swing out of their normal
mounting position if they are struck
with sufficient force. Reposition the mirror by applying slight pressure tothe mirror housing.
Electric folding
Switch control to o, then push the
control button c down. Both exterior
mirrors will fold.
Push the control down again - both
exterior mirrors return to their original position.
If an electrically folded mirror is
manually extended, pressing down
the control will only electrically extend
the other mirror.
Page 40 of 321

38Keys, doors and windowsInterior mirrors
Manual anti-dazzle
To reduce dazzle, adjust the lever on the underside of the mirror housing.
Automatic anti-dazzle
Dazzling by following vehicles at nightis automatically reduced by dimmingthe interior mirror.
Windows
Windscreen
Heat-reflecting windscreen The heat-reflecting windscreen has a
coating which reflects solar radiation.
Also data signals, e.g. from toll
stations, might be reflected.
The marked areas on the windscreen are not covered with the coating.
Devices for electronic data recording
and fee payment must be attached in
these areas. Otherwise data
recording malfunctions may occur.
Page 44 of 321

42Keys, doors and windows
Sunroof, 5-door Hatchback/
4-door Saloon
Open or close
Press switch p or r gently to the
first detent: sunroof is opened or
closed with safety function enabled
as long as the switch is operated.
Press switch p or r firmly to the
second detent and then release: the sunroof is opened or closed
automatically with safety function
enabled. To stop movement, operate
the switch once more.
Raise or close
Press switch q or r : sunroof is
raised or closed automatically with
safety function enabled.
If the sunroof is raised, it can be
opened in one step by pressing p.
Sunblind
The sunblind is manually operated.
Close or open the sunblind by sliding. When the sunroof is open, the
sunblind is always open.
Panoramaroof, Sports Tourer/
Country TourerOpen
Press switch p gently to the first
detent: sunroof is opened in the
spoiler position.
Press switch p firmly to the second
detent and then release: the sunroof
is opened automatically with safety
function enabled. To stop movement,
operate the switch once more.
Close
Press switch r gently to the first
detent: sunroof is closed from fully
open or spoiler position with safety
function enabled as long as the switch is operated.
Press switch r firmly to the second
detent and then release: the sunroof
is completely closed automatically
with safety function enabled. To stop
movement, operate the switch once
more.
Sunblind
The sunblind is power operated.
Page 54 of 321

52Seats, restraints
Safety function
If the driver's seat encounters
resistance during movement, the
recall may stop. After removing the
obstruction, press and hold the
appropriate power seat position
button for the memory item for
two seconds. Try recalling the
memory position again. If the recall
does not operate, consult a
workshop.
Overload
If the seat setting is electrically
overloaded, the power supply is
automatically cut-off for a short time.
Notice
After an accident in which airbags
have been deployed, the memorised settings for each position button willbe deactivated.Armrest
Push button and fold armrest
upwards. Under the armrest there is
a storage compartment.
Auxiliary devices, see Infotainment
system manual.
Heating
Adjust heating to the desired setting
by pressing button ß for the
respective seat one or more times.
The control indicator in the button
indicates the setting.
Prolonged use of the highest setting
for people with sensitive skin is not
recommended.
Seat heating is operational when engine is running and during an
Autostop.
Stop-start system 3 156.
Page 77 of 321
Storage75
Blind at the tailgate
To cover the load compartment
completely, mount the blind at four
fixing points on the inside of the
tailgate.
Rear floor storage cover
Sliding floor cover (FlexFloor) For a convenient setting of the load
compartment, the floor cover can be
pulled out.
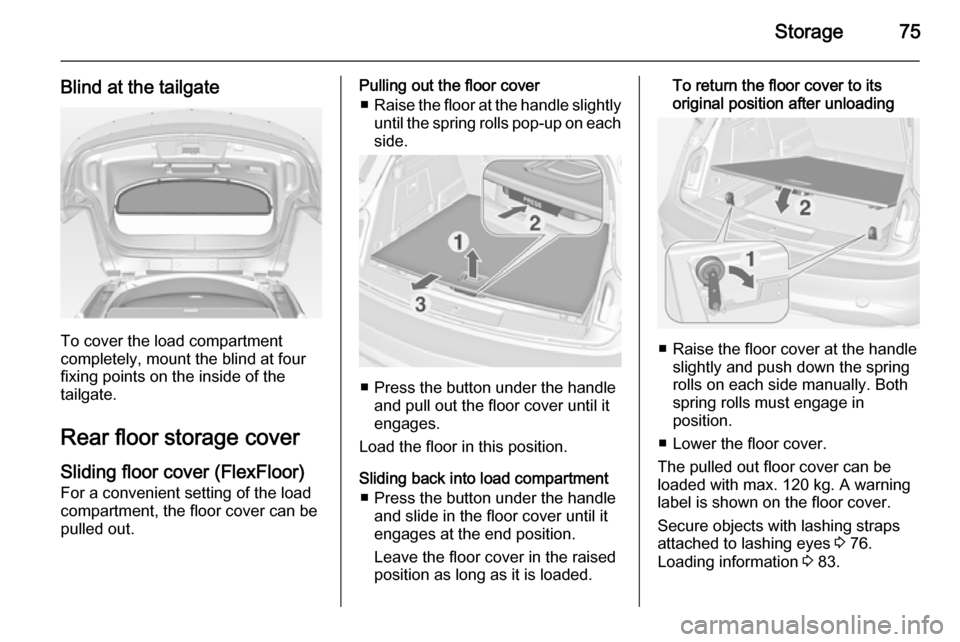
Pulling out the floor cover
■ Raise the floor at the handle slightly
until the spring rolls pop-up on each
side.
■ Press the button under the handle
and pull out the floor cover until it
engages.
Load the floor in this position.
Sliding back into load compartment ■ Press the button under the handle and slide in the floor cover until it
engages at the end position.
Leave the floor cover in the raised
position as long as it is loaded.
To return the floor cover to its
original position after unloading
■ Raise the floor cover at the handle slightly and push down the spring
rolls on each side manually. Both
spring rolls must engage in
position.
■ Lower the floor cover.
The pulled out floor cover can be
loaded with max. 120 kg. A warning
label is shown on the floor cover.
Secure objects with lashing straps
attached to lashing eyes 3 76.
Loading information 3 83.
Page 85 of 321
Storage83Loading information
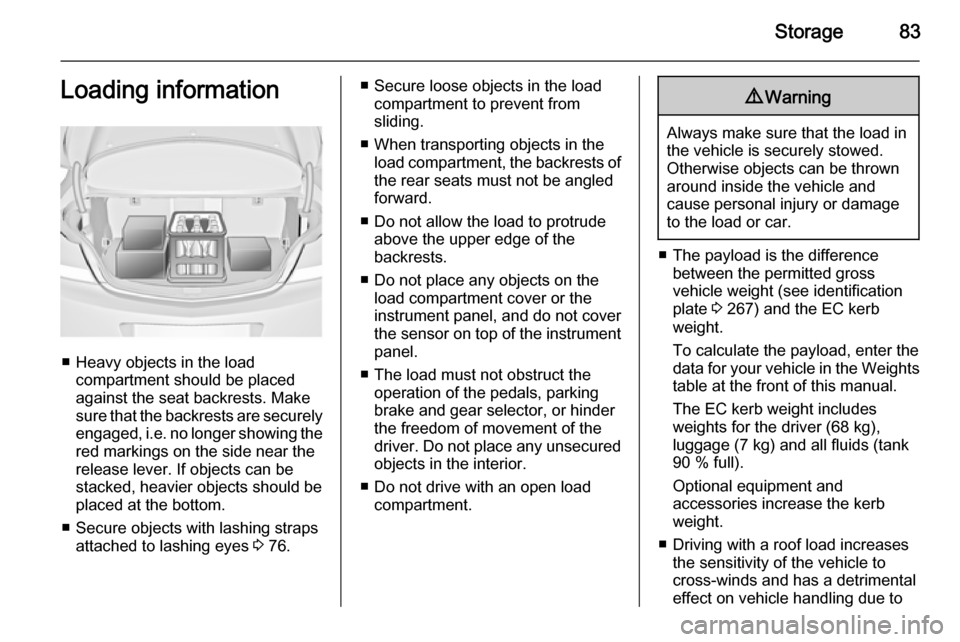
■ Heavy objects in the loadcompartment should be placedagainst the seat backrests. Make
sure that the backrests are securely engaged, i.e. no longer showing the
red markings on the side near the release lever. If objects can be
stacked, heavier objects should be
placed at the bottom.
■ Secure objects with lashing straps attached to lashing eyes 3 76.
■ Secure loose objects in the load
compartment to prevent from
sliding.
■ When transporting objects in the load compartment, the backrests of
the rear seats must not be angled
forward.
■ Do not allow the load to protrude above the upper edge of the
backrests.
■ Do not place any objects on the load compartment cover or theinstrument panel, and do not cover
the sensor on top of the instrument panel.
■ The load must not obstruct the operation of the pedals, parking
brake and gear selector, or hinder
the freedom of movement of the
driver. Do not place any unsecured objects in the interior.
■ Do not drive with an open load compartment.9 Warning
Always make sure that the load in
the vehicle is securely stowed.
Otherwise objects can be thrown
around inside the vehicle and
cause personal injury or damage
to the load or car.
■ The payload is the difference between the permitted gross
vehicle weight (see identification
plate 3 267) and the EC kerb
weight.
To calculate the payload, enter the
data for your vehicle in the Weights
table at the front of this manual.
The EC kerb weight includes
weights for the driver (68 kg),
luggage (7 kg) and all fluids (tank
90 % full).
Optional equipment and
accessories increase the kerb
weight.
■ Driving with a roof load increases the sensitivity of the vehicle to
cross-winds and has a detrimental
effect on vehicle handling due to
Page 87 of 321
Instruments and controls85Instruments and
controlsControls ....................................... 85
Warning lights, gauges and indi‐ cators ........................................... 94
Information displays ...................110
Vehicle messages ...................... 119
Vehicle personalisation ..............121Controls
Steering wheel adjustment
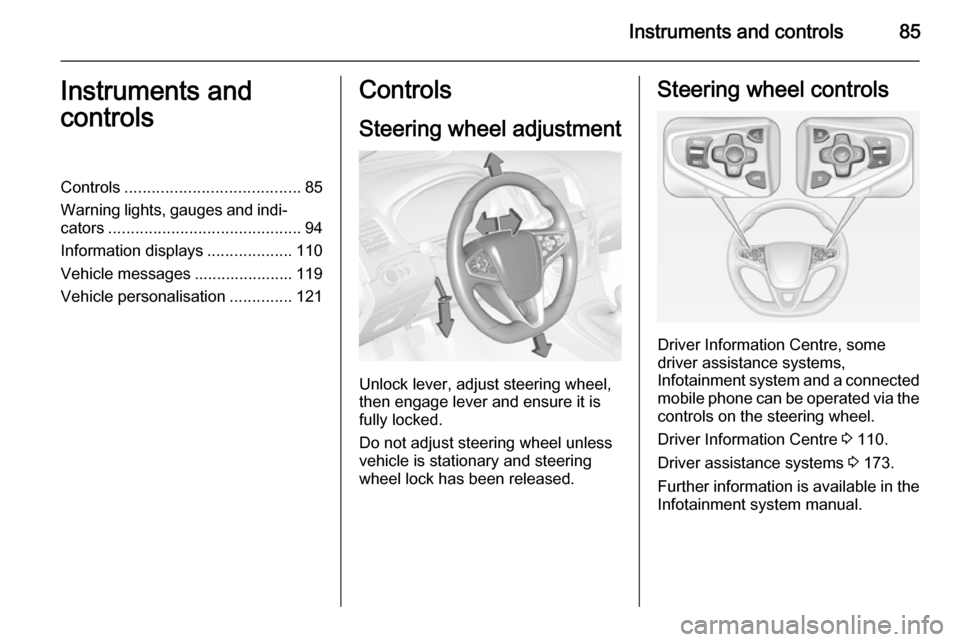
Unlock lever, adjust steering wheel,
then engage lever and ensure it is fully locked.
Do not adjust steering wheel unless
vehicle is stationary and steering
wheel lock has been released.
Steering wheel controls
Driver Information Centre, some
driver assistance systems,
Infotainment system and a connected
mobile phone can be operated via the controls on the steering wheel.
Driver Information Centre 3 110.
Driver assistance systems 3 173.
Further information is available in the
Infotainment system manual.
Page 92 of 321
90Instruments and controls
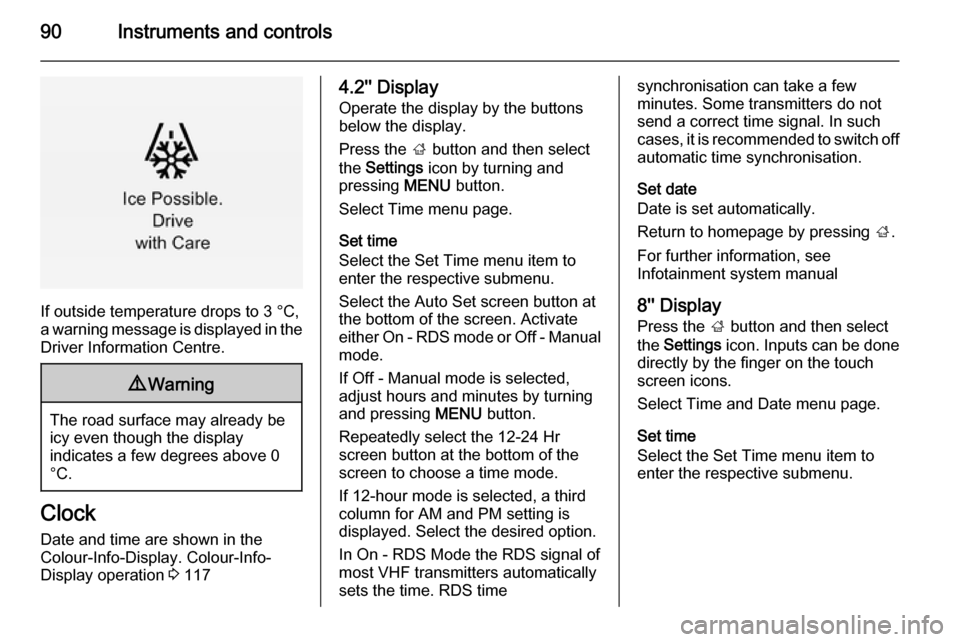
If outside temperature drops to 3 °C,
a warning message is displayed in the Driver Information Centre.
9 Warning
The road surface may already be
icy even though the display
indicates a few degrees above 0
°C.
Clock
Date and time are shown in the
Colour-Info-Display. Colour-Info-
Display operation 3 117
4.2'' Display
Operate the display by the buttons
below the display.
Press the ; button and then select
the Settings icon by turning and
pressing MENU button.
Select Time menu page.
Set time
Select the Set Time menu item to
enter the respective submenu.
Select the Auto Set screen button at
the bottom of the screen. Activate
either On - RDS mode or Off - Manual mode.
If Off - Manual mode is selected,
adjust hours and minutes by turning
and pressing MENU button.
Repeatedly select the 12-24 Hr
screen button at the bottom of the
screen to choose a time mode.
If 12-hour mode is selected, a third
column for AM and PM setting is
displayed. Select the desired option.
In On - RDS Mode the RDS signal of
most VHF transmitters automatically
sets the time. RDS timesynchronisation can take a few
minutes. Some transmitters do not
send a correct time signal. In such
cases, it is recommended to switch off
automatic time synchronisation.
Set date
Date is set automatically.
Return to homepage by pressing ;.
For further information, see
Infotainment system manual
8'' Display
Press the ; button and then select
the Settings icon. Inputs can be done
directly by the finger on the touch screen icons.
Select Time and Date menu page.
Set time
Select the Set Time menu item to
enter the respective submenu.