phone VAUXHALL INSIGNIA 2015.5 Infotainment system
[x] Cancel search | Manufacturer: VAUXHALL, Model Year: 2015.5, Model line: INSIGNIA, Model: VAUXHALL INSIGNIA 2015.5Pages: 141, PDF Size: 2.61 MB
Page 33 of 141

Basic operation33
■ in the vehicle contacts list: notesfield
■ for POI entries: information on business hours, menu (e.g.
restaurant), prices etc.
Notice
The data are ordered depending on
the application active, e.g. in the
phone application, the phone
numbers are displayed first.
Starting navigation
To start route guidance to a
destination, select one of the
addresses stored for the contact
chosen or the quick function icon next to the respective contact in the
contacts list. The destination details
view is displayed 3 58.
Initiating a phone call
To initiate a phone call, select one of
the phone numbers stored for the
contact or the quick function icon next
to the respective contact in the
contacts list. The outgoing call menu
is displayed 3 83.Adding new contacts
To add information from the
application menus to the vehicle
contacts list, open the respective
application.Navigation application
Select or enter a destination 3 66.
The destination details view is
displayed.
Select Save. A menu is displayed.Phone application
Select RECENT . Select w beside the
phone number you wish to add to the contacts list. A menu is displayed.
Select one of the options.
Create New Contact
A data category selection menu is
displayed.
Select the respective data category
for the information you wish to store,
e.g. work address or mobile phone.
The contact details view is displayed.
Notice
The data categories presented in the
new menu correspond to the
information you wish to store, e.g. if
the information to be stored is an
address, only address types are
presented in the list.
Complete the entry and select Save
to save the contact.Add to Existing Contact
The vehicle contacts list is displayed. Select the desired contact.
The contact details view is displayed with the information to be addedshown separately on the right side of
the screen.
Select the respective data category
for the information you wish to store,
e.g. work address or mobile phone.
Page 34 of 141
34Basic operation
If you choose an existing data
category, the existing information is
overwritten.
Select Save to save the new
information.
Editing contacts
To modify a contact, select the
desired contact entry in the vehicle
contacts list.
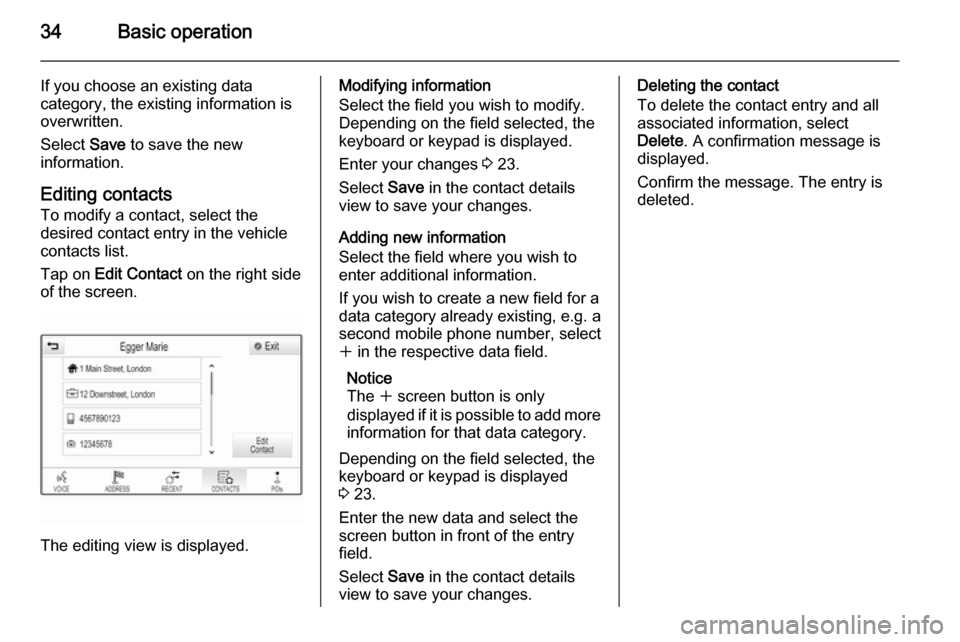
Tap on Edit Contact on the right side
of the screen.
The editing view is displayed.
Modifying information
Select the field you wish to modify.
Depending on the field selected, the
keyboard or keypad is displayed.
Enter your changes 3 23.
Select Save in the contact details
view to save your changes.
Adding new information
Select the field where you wish to
enter additional information.
If you wish to create a new field for a
data category already existing, e.g. a
second mobile phone number, select
w in the respective data field.
Notice
The w screen button is only
displayed if it is possible to add more information for that data category.
Depending on the field selected, the
keyboard or keypad is displayed
3 23.
Enter the new data and select the
screen button in front of the entry
field.
Select Save in the contact details
view to save your changes.Deleting the contact
To delete the contact entry and all
associated information, select
Delete . A confirmation message is
displayed.
Confirm the message. The entry is
deleted.
Page 38 of 141

38Basic operation
MenuActionTouch screenTouch padNavigation menuSending current audio
information to the Driver
Information Centre1 finger, move in the direction of the Driver
Information CentrePanning map1 finger, move across the screen2 fingers, move up, down,
left or rightCentring map1 finger, tap on a location on the map you wish it to centre aroundZoom in on the mapw screen button2 fingers, move apart
(spread)Zoom out on the map─ screen button2 fingers, move together
(pinch)Phone menuSending current audio
information to the Driver
Information Centre1 finger, move in the direction of the Driver
Information CentreCharacter
recognition
functionDraw character1 finger, move across the screen1 finger, move across the
padStart destination search2 fingers, press and hold on
the padClosing function2 fingers, press on the pad
Page 43 of 141
Basic operation43
Scroll through the list and select
Return to Factory Settings .
Restore Vehicle Settings
Select Restore Vehicle Settings to
restore all vehicle personalisation
settings. A warning message is
displayed.
Select Restore . The settings are
reset.
Clear All Private Data
Select Clear All Private Data to delete
the following data:
■ paired Bluetooth devices
■ stored phone books
■ vehicle contacts list
■ destination lists
■ favourites
A warning message is displayed.
Select Delete. The data is deleted.
Restore Radio Settings
Select Restore Radio Settings to
reset the following data:
■ tone settings
■ volume settings■ speech settings
■ application tray
■ contacts sources
A warning message is displayed.
Select Restore . The settings are
reset.
Software Information
Press ; and select the SETTINGS
icon.
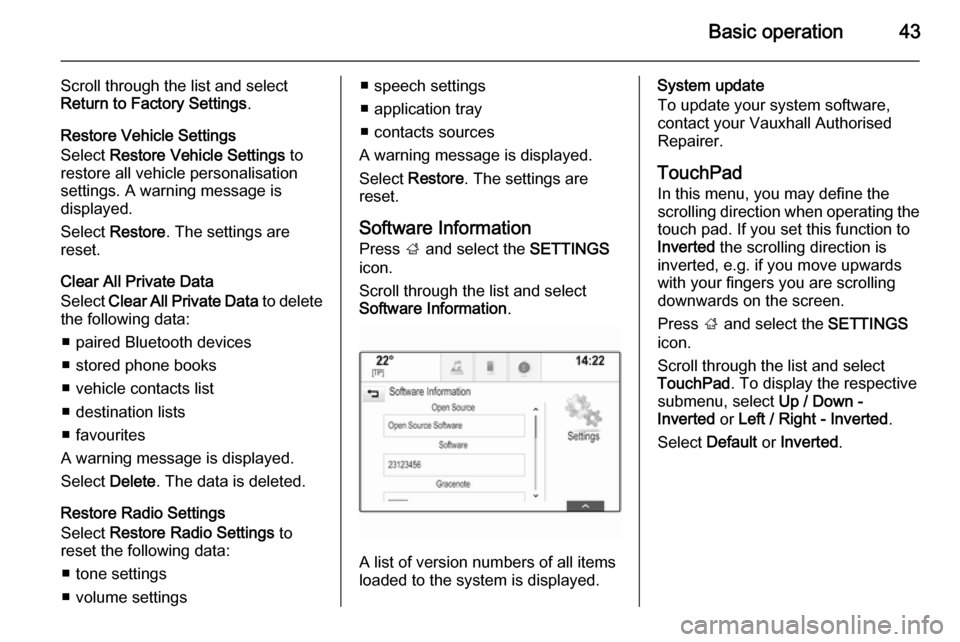
Scroll through the list and select
Software Information .
A list of version numbers of all items
loaded to the system is displayed.
System update
To update your system software,
contact your Vauxhall Authorised
Repairer.
TouchPad In this menu, you may define the
scrolling direction when operating the touch pad. If you set this function to
Inverted the scrolling direction is
inverted, e.g. if you move upwards with your fingers you are scrolling
downwards on the screen.
Press ; and select the SETTINGS
icon.
Scroll through the list and select
TouchPad . To display the respective
submenu, select Up / Down -
Inverted or Left / Right - Inverted .
Select Default or Inverted .
Page 52 of 141

52External devicesExternal devicesGeneral information.....................52
Playing audio ............................... 54
Playing movies ............................. 56General information
An AUX, USB and SD card socket for
the connection of external devices is
located underneath the armrest in the centre console. Find a detailed
description on lifting the armrest in the
Owner's manual.
Notice
The sockets must always be kept
clean and dry.
AUX input It is possible to connect e.g. an iPod
or another auxiliary device to the AUX
input.
When connected to the AUX input,
the audio signal of the auxiliary device is transmitted via the speakers of the
Infotainment system.
The volume and the tone settings can
be adjusted via the Infotainment
system. All other control functions
need to be operated via the auxiliary
device.
Connecting a device
To connect the auxiliary device to the AUX input socket of the Infotainment
system, use the following cable:
3-pole for audio source.
To disconnect the AUX device, select
another function and then remove the
AUX device.
AUX audio function
The Infotainment system can play
music files contained in auxiliary
devices, e.g. iPod or Smartphone.
USB port An MP3 player, USB drive, iPod or
Smartphone can be connected to the USB port.
Page 53 of 141

External devices53
When connected to the USB port, thedevices mentioned above can be
operated via the controls and menus
of the Infotainment system.
Notice
Not all MP3 players, USB drives,
iPod models or Smartphones are
supported by the Infotainment
system.
Connecting/disconnecting a device
Connect the USB device or iPod to
the USB port. For the iPod, use the
appropriate connection cable.
Notice
If a non-readable USB device or iPod is connected, a corresponding
error message appears and the
Infotainment system automatically
switches to the previous function.
To disconnect the USB device or
iPod, select another function and then
remove the USB storage device.Caution
Avoid disconnecting the device
during playback. This may
damage the device or the
Infotainment system.
USB audio function
The Infotainment system can play music files contained in USB storage
devices or iPod/iPhone products.
USB movie function
The Infotainment system can play
movies contained in USB storage
devices.
SD card
An SD card may be inserted in the SD
card slot.
When inserted, the SD card can be
operated via the controls and menus
of the Infotainment system.
Notice
Not all SD card types are supported
by the Infotainment system.
Inserting/removing an SD cardCaution
Never attempt to use an SD card
that has been cracked, deformed
or repaired using adhesive tape.
Doing so may damage the
equipment.
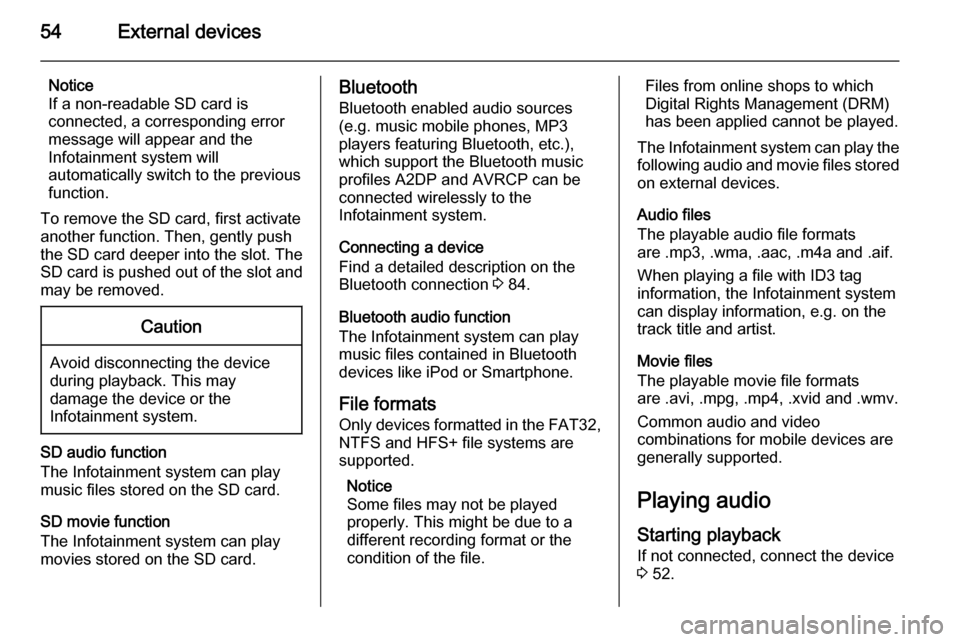
Insert the SD card in the SD card slot
as shown below. The music function
starts automatically.
Page 54 of 141
54External devices
Notice
If a non-readable SD card is
connected, a corresponding error
message will appear and the
Infotainment system will
automatically switch to the previous
function.
To remove the SD card, first activate
another function. Then, gently push
the SD card deeper into the slot. The
SD card is pushed out of the slot and
may be removed.Caution
Avoid disconnecting the device
during playback. This may
damage the device or the
Infotainment system.
SD audio function
The Infotainment system can play music files stored on the SD card.
SD movie function
The Infotainment system can play movies stored on the SD card.
Bluetooth
Bluetooth enabled audio sources
(e.g. music mobile phones, MP3
players featuring Bluetooth, etc.),
which support the Bluetooth music profiles A2DP and AVRCP can be
connected wirelessly to the
Infotainment system.
Connecting a device
Find a detailed description on the
Bluetooth connection 3 84.
Bluetooth audio function
The Infotainment system can play
music files contained in Bluetooth
devices like iPod or Smartphone.
File formats Only devices formatted in the FAT32,
NTFS and HFS+ file systems are
supported.
Notice
Some files may not be played
properly. This might be due to a
different recording format or the
condition of the file.Files from online shops to which
Digital Rights Management (DRM)
has been applied cannot be played.
The Infotainment system can play the following audio and movie files stored on external devices.
Audio files
The playable audio file formats
are .mp3, .wma, .aac, .m4a and .aif.
When playing a file with ID3 tag
information, the Infotainment system
can display information, e.g. on the
track title and artist.
Movie files
The playable movie file formats
are .avi, .mpg, .mp4, .xvid and .wmv.
Common audio and video
combinations for mobile devices are
generally supported.
Playing audio
Starting playback If not connected, connect the device
3 52.
Page 65 of 141
Navigation65
Notice
This function may only be carried out
if a USB device with sufficient
storage space is connected.
Downloading contacts data You can exchange your vehicle
contacts list data with Infotainment
systems in other cars:
To upload the data to a USB device,
see "Uploading navigation data to a
USB device" above.
Connect the USB device to the
Infotainment system of another car
3 52.
A message is displayed that prompts
you to confirm the download.
After confirmation, the contacts data
is downloaded to the Infotainment
system.
The downloaded contacts are then
selectable via the CONTACTS menu
3 31.Creating and downloading user
defined POIs (My POIs) In addition to the predefined POIs
already stored in the Infotainment
system, you can create user defined
POIs that meet your personal
requirements. After creation, such
user defined POIs can be
downloaded to the Infotainment
system.
For each POI, you need to define the
GPS coordinates (longitude and
latitude values) of the respective
location and a descriptive name.
After downloading the POI data to the Infotainment system, you will find the
respective POIs as selectable
destinations in the My POIs menu,
see "Selecting a point of interest" in
chapter "Destination input" 3 66.
Creating a text file with POI data Create a text file (e.g. by using a
simple text editor software) with an
arbitrary name and the file
extension .poi, e.g. "TomsPOIs.poi".Notice
Character encoding UTF-8
(Unicode) needs to be selected
when storing the text file. Otherwise
the POI data may not be imported
correctly to the system.
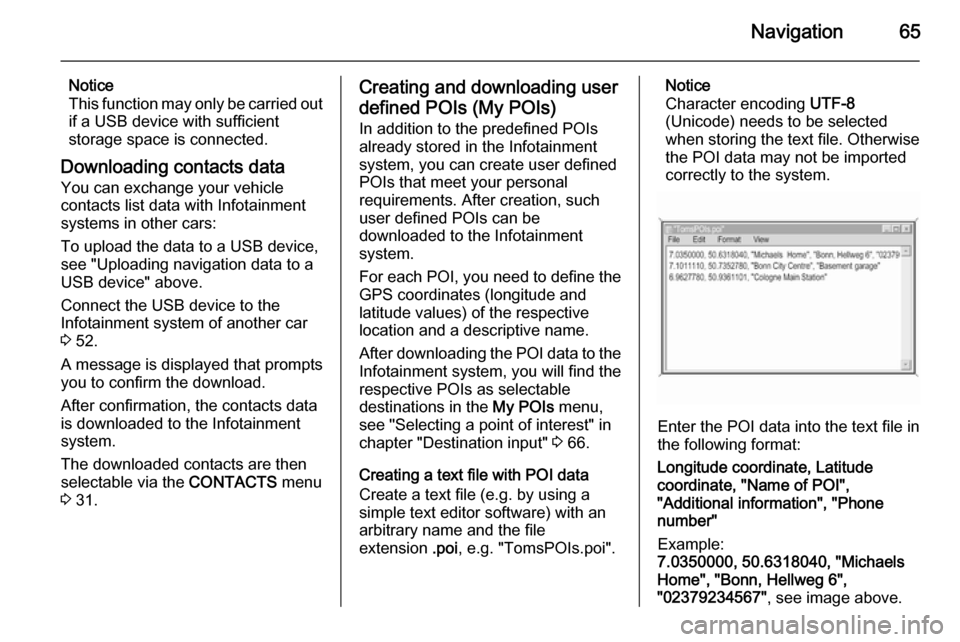
Enter the POI data into the text file in
the following format:
Longitude coordinate, Latitude
coordinate, "Name of POI",
"Additional information", "Phone
number"
Example:
7.0350000, 50.6318040, "Michaels
Home", "Bonn, Hellweg 6",
"02379234567" , see image above.
Page 66 of 141

66Navigation
The GPS coordinates must be
expressed in decimal degrees and
can be taken, e.g., from a
topographical map.
The additional information and phone number strings are optional. If, e.g.,
no additional information is required,
"" needs to be entered at the
respective position.
Example:
7.0350000, 50.6318040, "Michaels
Home", "", "02379234567" .
The POI name and the additional
information string may not exceed 60 characters each. The phone number
string may not exceed 30 characters.
The POI data of each destination
address must be entered in a single
separate line, see image above.
Storing the POI data on a USB drive
In the root directory of a USB drive,
create a folder named " myPOIs",
e.g. "F:\myPOIs", where "F:\" is the
root directory of the USB drive.
In the "myPOIs" folder, store the text
file with your POIs, e.g. "F:\myPOIs
\TomsPOIs.poi".Organising the POI data in several subfolders
Optionally you can organise the text
files in several randomly named
subfolders (max. depth of subfolder
structure: 2).
Examples: F:\myPOIs\AnnsPOIs or
F:\myPOIs\MyJourney\London,
where F:\ is the root directory of the
USB drive.
Notice
In a folder only subfolders or only
POI files may be stored. A mixture of
both will not be imported correctly to the system.
After downloading individual POI data
organised in that way to the
Infotainment system (see download
description further below), the My
POIs menu will show a list of
selectable submenus.
After selecting a submenu, further
submenus or the related list of
imported POI categories will be
displayed.Downloading the POI data to the
Infotainment system
Connect the USB device with your
user defined POI data to the USB port
3 52 of the Infotainment system.
A message is displayed that prompts
you to confirm the download.
After confirmation, the POI data will
be downloaded to the Infotainment system.
The downloaded POIs are then
selectable as destinations via the My
POIs menu, see "Selecting a point of
interest" in chapter "Destination input" 3 66.
Destination input
The navigation application provides
different options to set a destination
for route guidance.
Press ; and then select the NAV icon
to display the navigation map.
Page 71 of 141
Navigation71
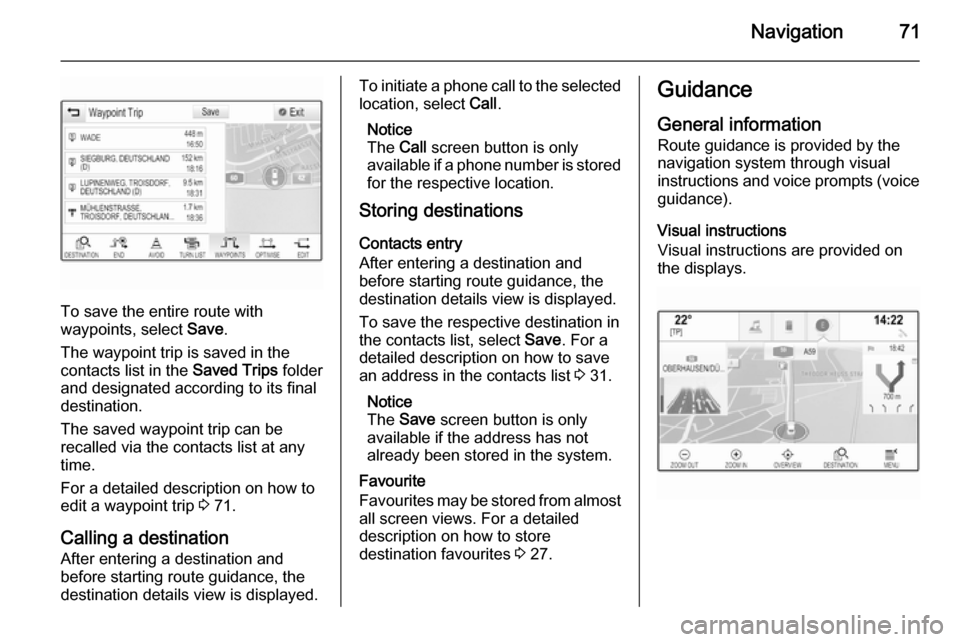
To save the entire route with
waypoints, select Save.
The waypoint trip is saved in the
contacts list in the Saved Trips folder
and designated according to its final
destination.
The saved waypoint trip can be
recalled via the contacts list at any
time.
For a detailed description on how to
edit a waypoint trip 3 71.
Calling a destination
After entering a destination and
before starting route guidance, the
destination details view is displayed.
To initiate a phone call to the selected location, select Call.
Notice
The Call screen button is only
available if a phone number is stored
for the respective location.
Storing destinations
Contacts entry
After entering a destination and
before starting route guidance, the
destination details view is displayed.
To save the respective destination in
the contacts list, select Save. For a
detailed description on how to save
an address in the contacts list 3 31.
Notice
The Save screen button is only
available if the address has not
already been stored in the system.
Favourite
Favourites may be stored from almost all screen views. For a detailed
description on how to store
destination favourites 3 27.Guidance
General information
Route guidance is provided by the
navigation system through visual
instructions and voice prompts (voice guidance).
Visual instructions
Visual instructions are provided on
the displays.