start stop button VAUXHALL INSIGNIA 2015.5 User Guide
[x] Cancel search | Manufacturer: VAUXHALL, Model Year: 2015.5, Model line: INSIGNIA, Model: VAUXHALL INSIGNIA 2015.5Pages: 331, PDF Size: 9.08 MB
Page 142 of 331

140Climate control
If no cooling or drying is required,
switch off the cooling system for fuel
saving reasons. Activated cooling
might inhibit Autostops.
Stop-start system 3 157.
Demisting and defrosting the
windows V
■
Press V: fan automatically
switches to higher speed, the air
distribution is directed towards the
windscreen.
■ Set temperature controller TEMP to
warmest level.
■ Switch on heated rear window Ü.
■ Open side air vents as required and
direct them towards the door
windows.
Notice
If V is pressed while the engine is
running, an Autostop will be inhibited
until V is pressed again.
If V is pressed while the engine is
in an Autostop, the engine will restart
automatically.
Stop-start system 3 157.
Maximum cooling
Briefly open the windows so that hot
air can disperse quickly.
■ Switch on cooling A/C.
■ Press M for air distribution.
■ Set temperature controller TEMP to
coldest level.
■ Set fan speed controller Z to
highest level.
■ Open all vents.Air recirculation system 4
Press 4 to activate air recirculation
mode. Activation is indicated by the
LED in the button.
Select air recirculation to assist in
cooling the interior or in blocking
outside odors or exhaust. When
recirculation is selected, a partial
ventilation to refresh the interior air
will occur every 10 minutes.
Press 4 again to deactivate
recirculation mode.
In warm and very humid ambient air
conditions, the windscreen might mist up from outside, when cold air is
directed to it. If windscreen mists up
from outside, activate windscreen
wiper and deactivate l.
Air distribution to l: Air recirculation
is deactivated.
Automatic climate control
system
In Automatic mode, temperature, fan
speed and air distribution are
regulated automatically.
Page 144 of 331
142Climate control
Setting of fan speed regulation in
automatic mode can be changed in
the vehicle personalisation menu in
the Colour-Info-Display.
Select the relevant setting in Settings,
I Vehicle in the Colour-Info-Display.
Colour-Info-Display 3 118.
Vehicle personalisation 3 122.
Temperature preselection
TEMP
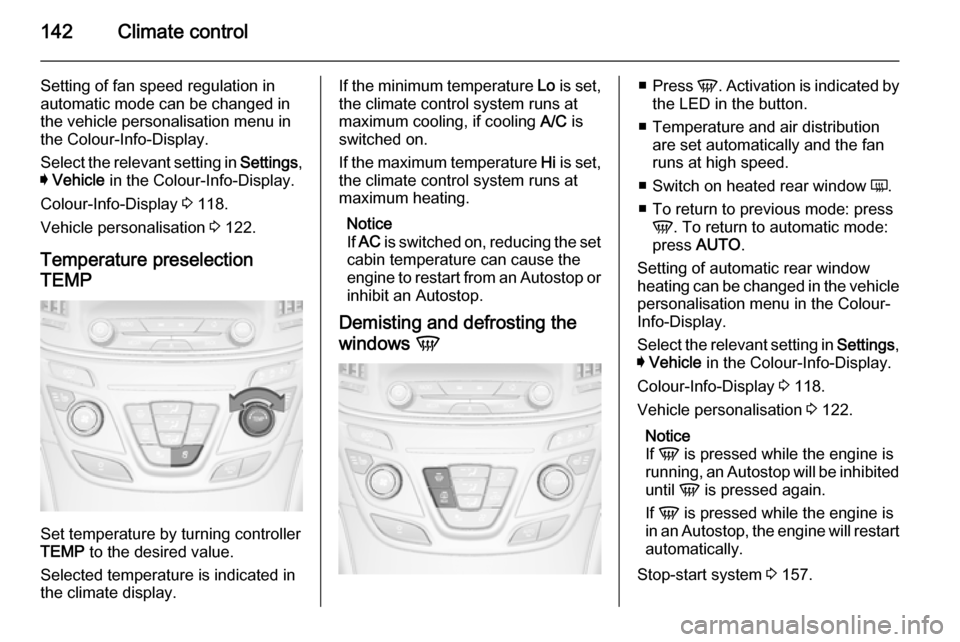
Set temperature by turning controller
TEMP to the desired value.
Selected temperature is indicated in
the climate display.
If the minimum temperature Lo is set,
the climate control system runs at maximum cooling, if cooling A/C is
switched on.
If the maximum temperature Hi is set,
the climate control system runs at
maximum heating.
Notice
If AC is switched on, reducing the set
cabin temperature can cause the
engine to restart from an Autostop or inhibit an Autostop.
Demisting and defrosting the
windows V■
Press V. Activation is indicated by
the LED in the button.
■ Temperature and air distribution are set automatically and the fan
runs at high speed.
■ Switch on heated rear window Ü.
■ To return to previous mode: press V . To return to automatic mode:
press AUTO .
Setting of automatic rear window
heating can be changed in the vehicle
personalisation menu in the Colour-
Info-Display.
Select the relevant setting in Settings,
I Vehicle in the Colour-Info-Display.
Colour-Info-Display 3 118.
Vehicle personalisation 3 122.
Notice
If V is pressed while the engine is
running, an Autostop will be inhibited
until V is pressed again.
If V is pressed while the engine is
in an Autostop, the engine will restart
automatically.
Stop-start system 3 157.
Page 148 of 331
146Climate control
Temperature preselection SR
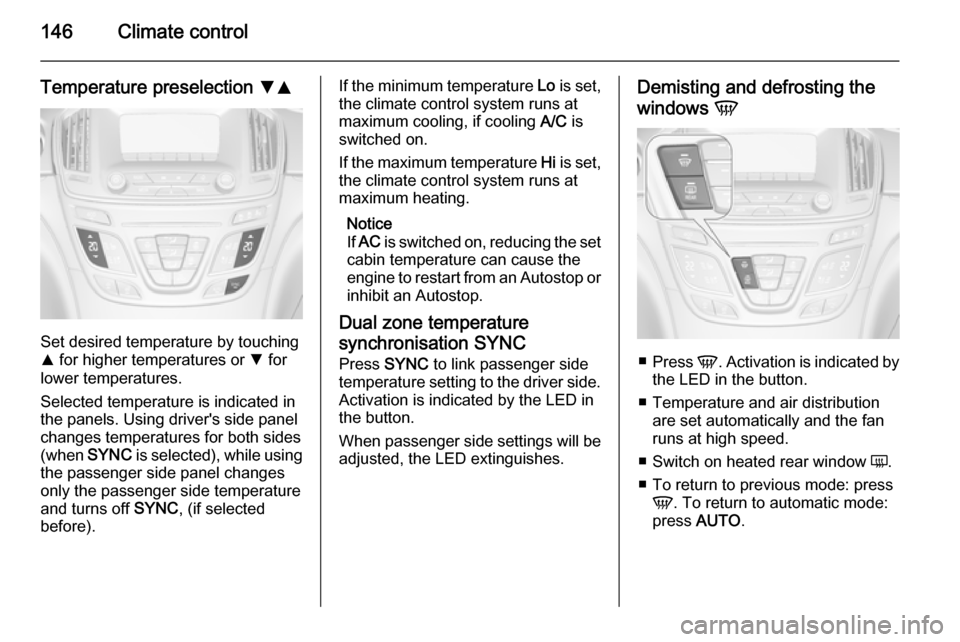
Set desired temperature by touching
R for higher temperatures or S for
lower temperatures.
Selected temperature is indicated in
the panels. Using driver's side panel
changes temperatures for both sides (when SYNC is selected), while using
the passenger side panel changes
only the passenger side temperature and turns off SYNC, (if selected
before).
If the minimum temperature Lo is set,
the climate control system runs at
maximum cooling, if cooling A/C is
switched on.
If the maximum temperature Hi is set,
the climate control system runs at maximum heating.
Notice
If AC is switched on, reducing the set
cabin temperature can cause the
engine to restart from an Autostop or
inhibit an Autostop.
Dual zone temperature
synchronisation SYNC
Press SYNC to link passenger side
temperature setting to the driver side.
Activation is indicated by the LED in
the button.
When passenger side settings will be adjusted, the LED extinguishes.Demisting and defrosting the
windows V
■
Press V. Activation is indicated by
the LED in the button.
■ Temperature and air distribution are set automatically and the fan
runs at high speed.
■ Switch on heated rear window Ü.
■ To return to previous mode: press V . To return to automatic mode:
press AUTO .
Page 149 of 331
Climate control147
Setting of automatic rear window
heating based on cool outside
temperatures can be changed in the
vehicle personalisation menu in the
Colour-Info-Display.
Select the relevant setting in Settings,
I Vehicle in the Colour-Info-Display.
Colour-Info-Display 3 118.
Vehicle personalisation 3 122.
Notice
If V is pressed while the engine is
running, an Autostop will be inhibited
until V is pressed again.
If V is pressed while the engine is
in an Autostop, the engine will restart
automatically.
Stop-start system 3 157.
Manual settings
Climate control system settings can
be manually adapted by using the air
distribution buttons and the fan speed controller as follows. Manual
changing of settings will deactivate
the automatic mode.Fan speed S
ZR
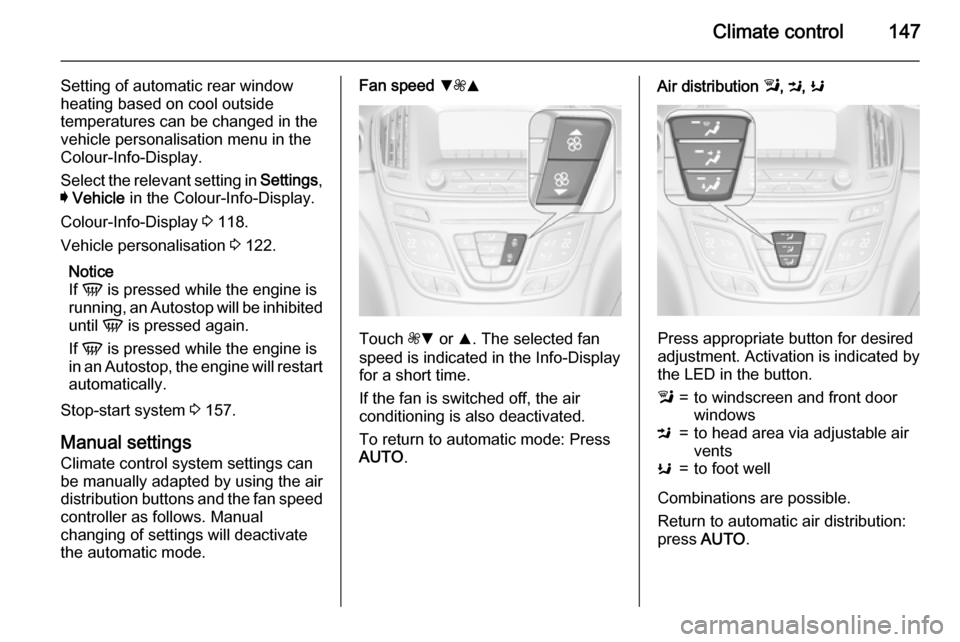
Touch ZS or R. The selected fan
speed is indicated in the Info-Display for a short time.
If the fan is switched off, the air
conditioning is also deactivated.
To return to automatic mode: Press AUTO .
Air distribution l, M , K
Press appropriate button for desired
adjustment. Activation is indicated by the LED in the button.
l=to windscreen and front door
windowsM=to head area via adjustable air
ventsK=to foot well
Combinations are possible.
Return to automatic air distribution:
press AUTO .
Page 156 of 331
154Driving and operating
Accessory power mode: press
Engine Start/Stop once without
operating clutch or brake pedal. The yellow LED in the button illuminates.
Steering wheel lock is released and
some electrical functions are
operable, ignition is off.
Ignition on power mode: press and
hold Engine Start/Stop for 6 seconds
without operating clutch or brake
pedal. The green LED in the button
illuminates, diesel engine is
preheating. Control indicators
illuminate and most electrical
functions are operable.
Engine start: operate clutch pedal
(manual transmission) or brake pedal
(automatic transmission) and press
Engine Start/Stop once more.
Release button after starting
procedure begins.
Ignition off: press Engine Start/Stop
briefly in each mode or when engine
is running and vehicle is stationary.
Some functions remain active until
driver's door is opened, provided the
ignition was on previously.Emergency shut off during driving: press Engine Start/Stop for longer
than 2 seconds or press twice briefly
within 5 seconds 3 155.
Steering wheel lock
The steering wheel lock activates
automatically when:
■ The vehicle is stationary.
■ The ignition has been switched off.
■ The driver's door is opened.
To release steering wheel lock, open
and close driver's door and switch on accessory mode or start the engine
directly.9 Warning
If the vehicle battery is discharged,
the vehicle must not be towed,
tow-started or jump-started as the
steering wheel lock cannot be
disengaged.
Operation on vehicles with
electronic key system in case of
failure
If either the electronic key fails or the
battery of the electronic key is weak,
the Driver Information Centre may
display No Remote Detected or
Replace Battery in Remote Key when
you try to start the vehicle.
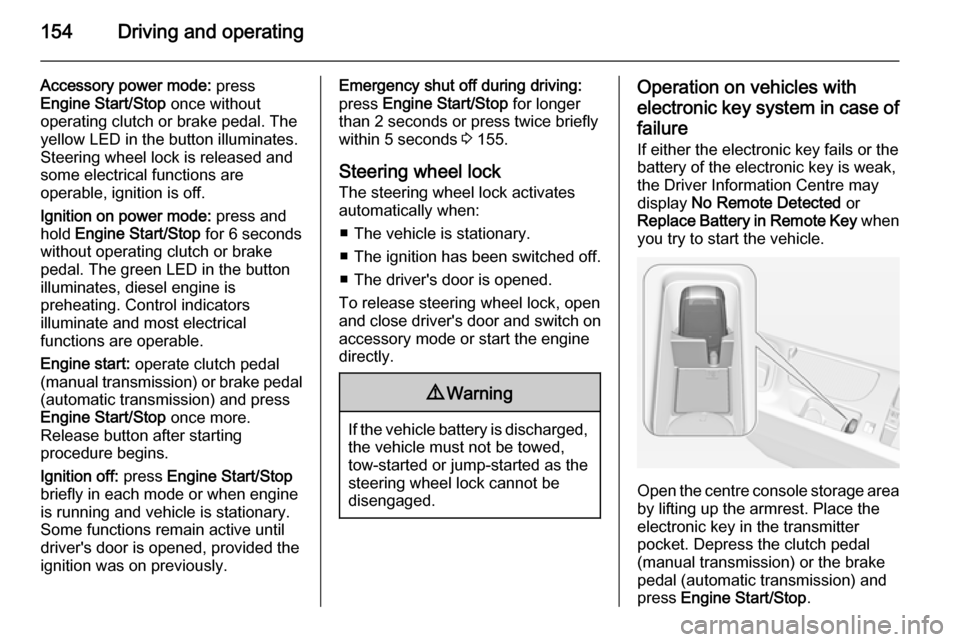
Open the centre console storage area by lifting up the armrest. Place the
electronic key in the transmitter
pocket. Depress the clutch pedal
(manual transmission) or the brake
pedal (automatic transmission) and
press Engine Start/Stop .
Page 157 of 331
Driving and operating155
To switch off the engine, press
Engine Start/Stop again. Remove the
electronic key from the transmitter
pocket.
This option is intended for
emergencies only. Replace the
electronic key battery as soon as
possible 3 22.
For unlocking or locking the doors see
fault in radio remote control unit or
electronic key system 3 23.
Retained power off
The following electronic systems can
work until the driver's door is opened
or for 10 minutes after the ignition is
switched off:
■ power windows
■ sunroof
■ power outletsStarting the engine
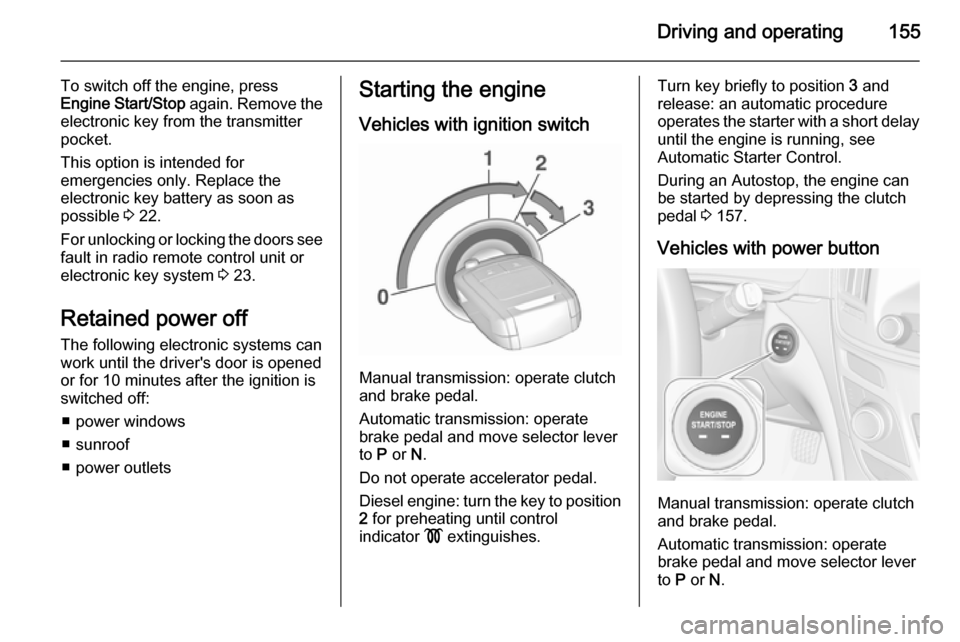
Vehicles with ignition switch
Manual transmission: operate clutch
and brake pedal.
Automatic transmission: operate
brake pedal and move selector lever
to P or N.
Do not operate accelerator pedal.
Diesel engine: turn the key to position 2 for preheating until control
indicator ! extinguishes.
Turn key briefly to position 3 and
release: an automatic procedure operates the starter with a short delay
until the engine is running, see
Automatic Starter Control.
During an Autostop, the engine can
be started by depressing the clutch
pedal 3 157.
Vehicles with power button
Manual transmission: operate clutch
and brake pedal.
Automatic transmission: operate
brake pedal and move selector lever
to P or N.
Page 159 of 331
Driving and operating157Stop-start system
The stop-start system helps to save
fuel and to reduce the exhaust
emissions. When conditions allow, it
switches off the engine as soon as the vehicle is at a low speed or at a
standstill, e.g. at a traffic light or in a
traffic jam. It starts the engine
automatically as soon as the clutch is
depressed. A battery sensor ensures
that an Autostop is only performed if
the vehicle battery is sufficiently
charged for a restart.
Activation The stop-start system is available assoon as the engine is started, the
vehicle starts-off and the conditions
as stated below in this section are
fulfilled.Deactivation
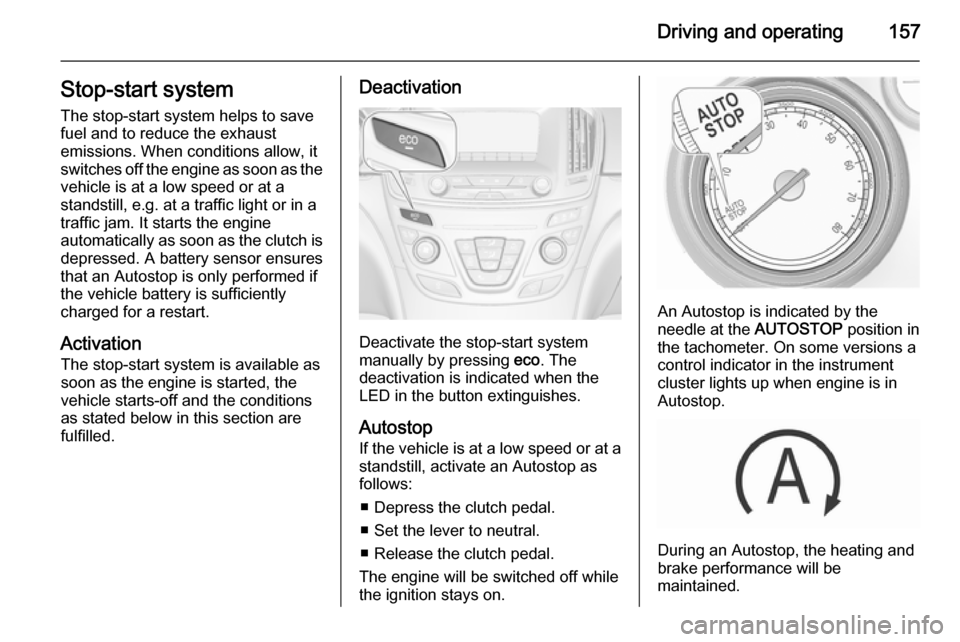
Deactivate the stop-start system
manually by pressing eco. The
deactivation is indicated when the
LED in the button extinguishes.
Autostop
If the vehicle is at a low speed or at a standstill, activate an Autostop as
follows:
■ Depress the clutch pedal.
■ Set the lever to neutral.
■ Release the clutch pedal.
The engine will be switched off while
the ignition stays on.
An Autostop is indicated by the
needle at the AUTOSTOP position in
the tachometer. On some versions a
control indicator in the instrument
cluster lights up when engine is in Autostop.
During an Autostop, the heating and
brake performance will be
maintained.
Page 161 of 331

Driving and operating159
■ The stop-start system is manuallydeactivated.
■ The bonnet is opened.
■ The driver's seat belt is unfastened
and the driver's door is opened.
■ The engine temperature is too low.
■ The charging level of the vehicle battery is below a defined level.
■ The brake vacuum is not sufficient.
■ The vehicle is driven at least at walking speed.
■ The climate control system requests an engine start.
■ The air conditioning is manually switched on.
If the bonnet is not fully closed, a warning message is displayed in the
Driver Information Centre.
If an electrical accessory, e.g. a
portable CD player, is connected to
the power outlet, a brief power drop during the restart might be noticeable.Parking9 Warning
■ Do not park the vehicle on an
easily ignitable surface. The
high temperature of the exhaust system could ignite the surface.
■ Always apply the parking brake.
Activate the manual parking
brake without pressing the
release button. Apply as firmly
as possible on a downhill slope
or uphill slope. Depress foot
brake at the same time to
reduce operating force.
For vehicles with electric
parking brake, pull switch m for
approx. one second.
The electric parking brake is
applied when control indicator
m illuminates 3 106.
■ Switch off the engine. ■ If the vehicle is on a level surface or uphill slope, engage
first gear or set the selector lever
to position P before removing
the ignition key. On an uphill
slope, turn the front wheels
away from the kerb.
If the vehicle is on a downhill
slope, engage reverse gear or
set the selector lever to position P before removing the ignition
key. Turn the front wheels
towards the kerb.
■ Close the windows and the sunroof.
■ Remove the ignition key. Turn the steering wheel until the
steering wheel lock is felt to
engage.
For vehicles with automatic
transmission, the key can only
be removed when the selector
lever is in position P.
■
Lock the vehicle with button e on
the radio remote control.
Page 198 of 331
196Driving and operating
Activation
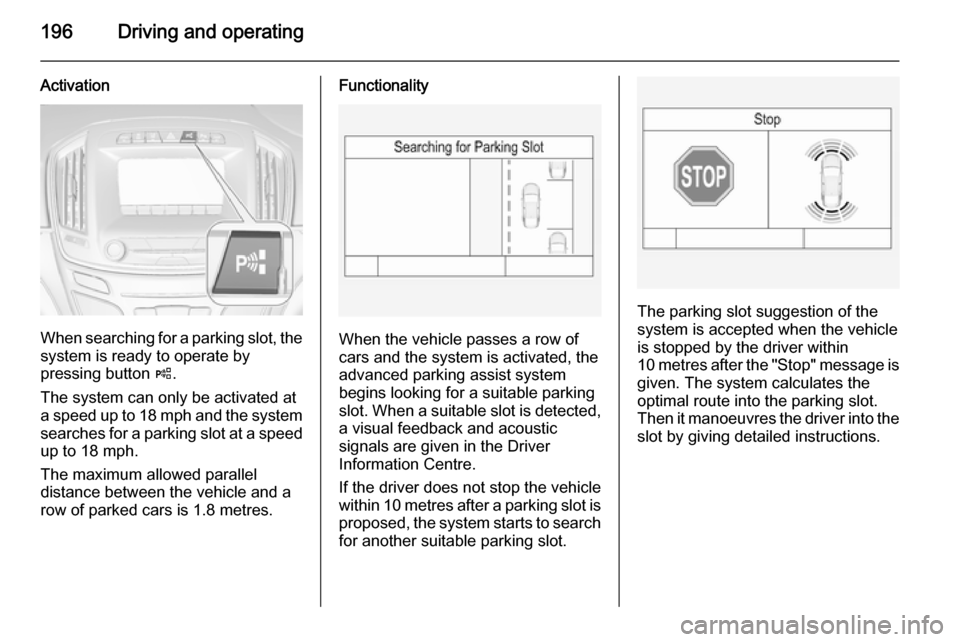
When searching for a parking slot, the
system is ready to operate by
pressing button (.
The system can only be activated at
a speed up to 18 mph and the system searches for a parking slot at a speed up to 18 mph.
The maximum allowed parallel
distance between the vehicle and a
row of parked cars is 1.8 metres.
Functionality
When the vehicle passes a row of
cars and the system is activated, the
advanced parking assist system
begins looking for a suitable parking
slot. When a suitable slot is detected, a visual feedback and acoustic
signals are given in the Driver
Information Centre.
If the driver does not stop the vehicle
within 10 metres after a parking slot is
proposed, the system starts to search
for another suitable parking slot.
The parking slot suggestion of the
system is accepted when the vehicle
is stopped by the driver within
10 metres after the "Stop" message is
given. The system calculates the
optimal route into the parking slot.
Then it manoeuvres the driver into the
slot by giving detailed instructions.
Page 258 of 331
256Vehicle care
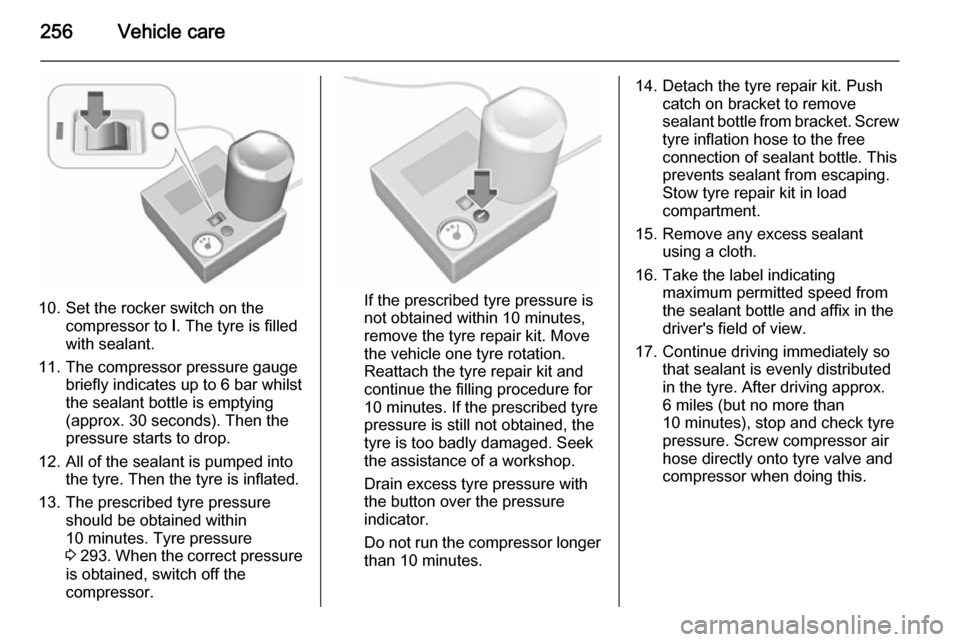
10. Set the rocker switch on thecompressor to I. The tyre is filled
with sealant.
11. The compressor pressure gauge briefly indicates up to 6 bar whilstthe sealant bottle is emptying
(approx. 30 seconds). Then the
pressure starts to drop.
12. All of the sealant is pumped into the tyre. Then the tyre is inflated.
13. The prescribed tyre pressure should be obtained within
10 minutes. Tyre pressure
3 293 . When the correct pressure
is obtained, switch off the
compressor.If the prescribed tyre pressure is
not obtained within 10 minutes,
remove the tyre repair kit. Move
the vehicle one tyre rotation.
Reattach the tyre repair kit and
continue the filling procedure for 10 minutes. If the prescribed tyre
pressure is still not obtained, the
tyre is too badly damaged. Seek
the assistance of a workshop.
Drain excess tyre pressure with
the button over the pressure indicator.
Do not run the compressor longer than 10 minutes.
14. Detach the tyre repair kit. Push catch on bracket to remove
sealant bottle from bracket. Screw
tyre inflation hose to the free
connection of sealant bottle. This
prevents sealant from escaping.
Stow tyre repair kit in load
compartment.
15. Remove any excess sealant using a cloth.
16. Take the label indicating maximum permitted speed from
the sealant bottle and affix in the
driver's field of view.
17. Continue driving immediately so that sealant is evenly distributedin the tyre. After driving approx.
6 miles (but no more than 10 minutes), stop and check tyre
pressure. Screw compressor air
hose directly onto tyre valve and
compressor when doing this.