start stop button VAUXHALL INSIGNIA 2015.5 Owner's Manual
[x] Cancel search | Manufacturer: VAUXHALL, Model Year: 2015.5, Model line: INSIGNIA, Model: VAUXHALL INSIGNIA 2015.5Pages: 331, PDF Size: 9.08 MB
Page 13 of 331

In brief11
1Power windows .....................39
2 Central locking system ..........23
3 Exterior mirrors .....................36
4 Light switch ........................ 126
Headlight range
adjustment ......................... 128
Front/rear fog lights ............132
Instrument illumination .......134
5 Side air vents ...................... 149
6 Turn and lane-change
signals, headlight flash,
low/high beam, high beam
assist ................................... 132
Exit lighting ......................... 136
Parking lights ...................... 133
Buttons for Driver
Information Centre ..............111
7 Cruise control .....................177
Speed limiter ....................... 179
Adaptive cruise control .......180
Forward collision alert .........1878Instruments ........................ 100
Driver Information Centre .... 111
9 Buttons for Driver
Information Centre ..............111
10 Windscreen wiper and
washer, headlight washer,
rear wiper and washer .........88
11 Centre air vents .................. 149
12 Sport/Tour mode ................174
Traction Control system .....172
Electronic Stability Control . 173
Hazard warning flashers ....132
Parking assist/Advanced
parking aid ......................... 193
Lane departure warning .....209
13 Anti-theft alarm system
status LED ........................... 33
14 Colour-Info-Display ............118
15 Glovebox .............................. 70
Fuse box ............................ 24516Control indicator for airbag
activation/deactivation .......105
Control indicator for front
passenger seat belt ...........104
17 Controls for Colour-Info-
Display operation ................118
18 CD-slot
19 Climate control system ........ 138
20 Electric parking brake .........170
21 Touchpad ............................ 118
22 Manual transmission ..........168
Automatic transmission ......164
23 Storage ................................. 70
24 Eco button for stop-start
system ................................. 157
Fuel selector button ............102
25 Ignition/Power switch ..........153
26 Horn ..................................... 87
27 Steering wheel adjustment ..86
28 Bonnet release lever ..........224
29 Storage compartment ...........71
Page 19 of 331

In brief17
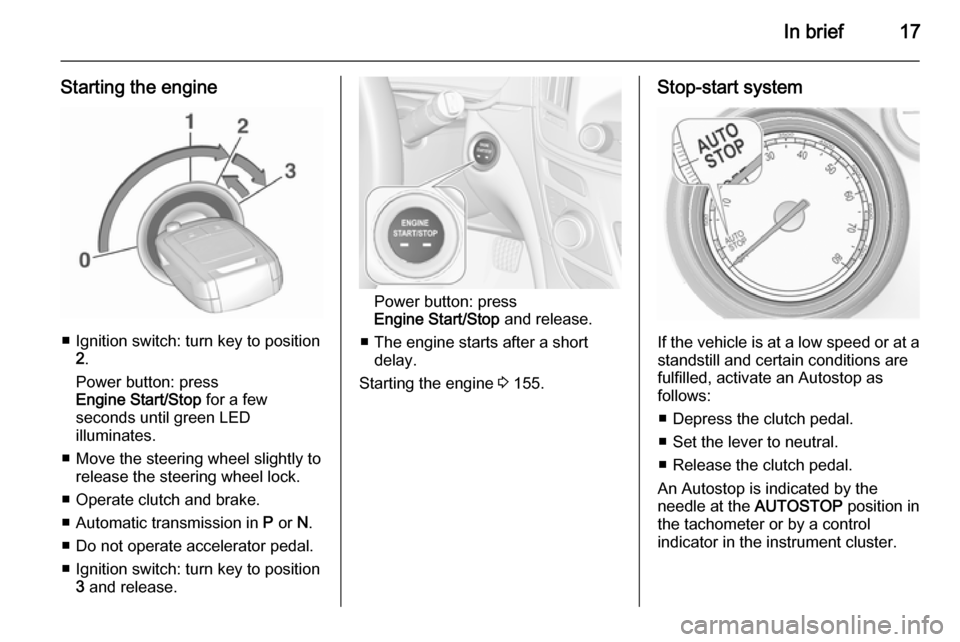
Starting the engine
■ Ignition switch: turn key to position2.
Power button: press
Engine Start/Stop for a few
seconds until green LED
illuminates.
■ Move the steering wheel slightly to release the steering wheel lock.
■ Operate clutch and brake.
■ Automatic transmission in P or N.
■ Do not operate accelerator pedal.
■ Ignition switch: turn key to position 3 and release.
Power button: press
Engine Start/Stop and release.
■ The engine starts after a short delay.
Starting the engine 3 155.
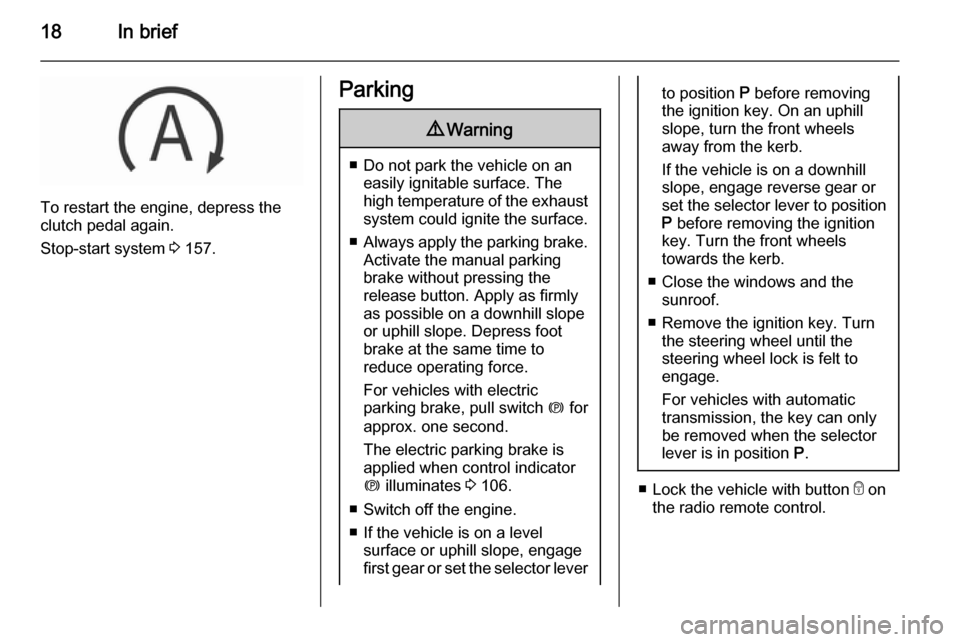
Stop-start system
If the vehicle is at a low speed or at a
standstill and certain conditions are
fulfilled, activate an Autostop as
follows:
■ Depress the clutch pedal.
■ Set the lever to neutral.
■ Release the clutch pedal.
An Autostop is indicated by the
needle at the AUTOSTOP position in
the tachometer or by a control
indicator in the instrument cluster.
Page 20 of 331

18In brief
To restart the engine, depress the
clutch pedal again.
Stop-start system 3 157.
Parking9 Warning
■ Do not park the vehicle on an
easily ignitable surface. The
high temperature of the exhaust system could ignite the surface.
■ Always apply the parking brake.
Activate the manual parking
brake without pressing the
release button. Apply as firmly
as possible on a downhill slope
or uphill slope. Depress foot
brake at the same time to
reduce operating force.
For vehicles with electric
parking brake, pull switch m for
approx. one second.
The electric parking brake is
applied when control indicator
m illuminates 3 106.
■ Switch off the engine. ■ If the vehicle is on a level surface or uphill slope, engage
first gear or set the selector lever
to position P before removing
the ignition key. On an uphill
slope, turn the front wheels
away from the kerb.
If the vehicle is on a downhill
slope, engage reverse gear or
set the selector lever to position P before removing the ignition
key. Turn the front wheels
towards the kerb.
■ Close the windows and the sunroof.
■ Remove the ignition key. Turn the steering wheel until the
steering wheel lock is felt to
engage.
For vehicles with automatic
transmission, the key can only
be removed when the selector
lever is in position P.
■
Lock the vehicle with button e on
the radio remote control.
Page 33 of 331

Keys, doors and windows31
To close, press G in the open
tailgate until the tailgate starts to
move.
Stop or change direction of
movement
Pressing x on radio remote control
or G on the tailgate or press on the
touchpad switch whilst the tailgate is
moving will stop the tailgate in the
current position. Pressing x or
G again will reverse the direction of
movement.
Operation modes
The power tailgate has three modes
of operation, which are controlled by
the switch in the driver's door. To
change the mode, turn the switch:
■ Normal mode MAX: Power tailgate
opens to full height.
■ Intermediate mode 3/4: Power
tailgate opens to a reduced height that can be adjusted.
■ Mode Off: Tailgate can only be
operated manually.
Adjust reduced opening height in
intermediate mode
1. Turn operation mode switch to 3/4 .
2. Open power tailgate with any operation switch.
3. Stop movement at the desired height by pressing any operation
switch. If required, manually move
the stopped tailgate to the desired
position.
4. Press and hold the button on the
inside of the open tailgate for
3 seconds.
Page 43 of 331

Keys, doors and windows41
Press c again for three seconds after
unlocking: windows will be opened.
Press e again for three seconds after
locking: windows will be closed.
Press any button to stop window
movement.
Folding mirrors 3 37.
Closing sunroof 3 42.
Confirmation
Complete opening or closing of the
windows is confirmed by the hazard
warning flashers.
Overload
If the windows are repeatedly
operated within short intervals, the window operation is disabled for
some time.
Initialising the power windows If the windows cannot be closed
automatically (e.g. after
disconnecting the vehicle battery), a
warning message is displayed in the
Driver Information Centre.
Vehicle messages 3 120.
Activate the window electronics for
each window as following:
1. Close doors.
2. Switch on ignition.
3. Pull switch to the second detent until the window starts to close
and hold pulled for additional
4 seconds.
4. Push switch to the second detent until the window starts to open
automatically.
5. Repeat for each window.Heated rear window
Operated by pressing Ü.
The LED in the button indicates
activation.
Heating works with the engine
running and is switched off
automatically after a short time.
Sun visors The sun visors can be folded down orswivelled to the side to prevent
dazzling.
Page 55 of 331

Seats, restraints53
memory position again. If the recall
does not operate, consult a
workshop.
Overload
If the seat setting is electrically
overloaded, the power supply is
automatically cut-off for a short time.
Notice
After an accident in which airbags
have been deployed, the memorised
settings for each position button will
be deactivated.
ArmrestPush button and fold armrest
upwards. Under the armrest there is
a storage compartment.
Auxiliary devices, see Infotainment
system manual.
Heating
Adjust heating to the desired setting
by pressing ß for the respective seat
one or more times. The control
indicator in the button indicates the
setting.
Prolonged use of the highest setting
for people with sensitive skin is not
recommended.
Seat heating is operational when
engine is running and during an
Autostop.
Stop-start system 3 157.
Ventilating
Adjust ventilation to the desired
setting by pressing A for the
respective seat one or more times.
The control indicator in the button
indicates the setting.
Ventilated seats are operational when
engine is running and during an
Autostop.
Page 89 of 331

Instruments and controls87Heated steering wheel
Activate heating by pressing *.
Activation is indicated by the LED in
the button.
The recommended grip areas of the
steering wheel are heated quicker
and to a higher temperature than the
other areas.
Heating is operational when the
engine is running and during an
Autostop.
Stop-start system 3 157.
Horn
Press j.
Page 117 of 331

Instruments and controls115
When the fuel level in the tank is low,
a message appears on the display
and the control indicator i or Y in the
fuel gauge illuminates.
When the tank has to be refuelled
immediately, a warning message
appears and remains on the display.
Additionally, the control indicator i
or Y in the fuel gauge flashes 3 109.
Fuel range LPG version
Display of approximate fuel range
available with the remaining fuel in
each respective fuel tank of Petrol
and LPG fuel, along with a total range
of both fuel types together. Switch
between the modes by pressing the SET/CLR button or 9.
Instantaneous fuel consumption
Display of the instantaneous
consumption.
On vehicles with LPG engines,
instantaneous consumption is
indicated for the currently selected
mode, LPG or Petrol.Remaining oil life
Indicates an estimate of the oil's
useful life. The number in % means the remaining of current oil life 3 102.
Tire pressure
Checks tyre pressure of all wheels
during driving 3 251.
Gasoline fuel level/LPG fuel level
Displays the fuel level for the fuel not
currently being used (Petrol or LPG).
A dedicated DIC cluster gauge shows the fuel level for the fuel currently
being used.
Timer
To start and stop press 9. To reset,
press > and confirm Reset.
Traffic sign assistant
Displays the detected traffic signs for
the current route section 3 205.
Following distance
Displays the distance in seconds to a preceding moving vehicle 3 190. If
Adaptive cruise control is active this
page shows the following distance
setting instead.Battery voltage
Displays the vehicle battery voltage.
Top consumers
List of top comfort consumers
currently switched on is displayed in
descending order. Fuel saving
potential is indicated. A switched-off
consumer disappears from the list
and the consumption value will be
updated.
During sporadic driving conditions,
the engine will activate the rear
window defog automatically to
increase the engine load. In this
event, the rear window defog is
indicated as one of the top
consumers, without activation by the
driver.
Economy trend
Displays the average consumption
development over a distance of
50 miles. Filled segments display the consumption in 5 mile steps and
shows the effect of topography or
driving behaviour on fuel
consumption.
Page 118 of 331

116Instruments and controls
Economy index
The current fuel consumption is
indicated on an economic scale. For
economical driving adapt your driving style to keep the indicator within the
Eco area. Indicator outside the Eco
area means higher fuel consumption.
On Baselevel display, the current consumption value is indicated.
Shift indication : On Baselevel display
the current gear is indicated inside an
arrow. The figure above recommends upshifting for fuel saving reasons.
Blank page
Shows a blank page without any
information.
Performance Menu Performance menu is only viewable
on Uplevel display.
The following list contains all possible Performance Menu pages. Some
may not be available for your
particular vehicle.
Press Q or P to select a page:
■ performance page
■ g-force indication■ friction bubble
■ acceleration and braking
■ lap timer
Depending on settings of the Uplevel
display, "Oil temperature", "Oil
pressure" or "Battery voltage" can be
also indicated left or right from the
speedometer.
Performace page
Indicates oil temperature in degrees
Celsius.
Indicates the oil pressure in kPa.
Indicates the current absolute amount of the turbo boost being added.
G-force indication
Indicates the force of vehicle
performance. The amount of positive/
negative longitudinal force and lateral force will be displayed. The g-force
value unit will be calculated and
displayed as a numerical value.Friction bubble
A four quadrant visual display,
indicative of the four corners of the
car, with a "bubble" showing where
the most inertia is being exerted on
the vehicle.
Acceleration and braking
Displays the percentage amount of
brake or accelerator pressure applied by the driver as a bar graph around
the outer perimeter of the DIC area.
The left side is for acceleration and
the right side is for braking.
Lap timer
The lap timer function measures the
time that has passed since the last
time the user started or stopped the lap timer through ignition cycles.
Timer values are displayed from
hours to tenths of a second. Start and
stop the timer by pressing 9 button.
Current and Previous lap times are displayed accurate to the tenth of a second. Gain or loss time is indicated
in ss.s format.
Page 124 of 331

122Instruments and controls
During an Autostop■ If the driver's door is opened.
Battery voltage When the vehicle battery voltage is
running low, a warning message will
appear in the Driver Information
Centre.
1. Switch off any electrical consumers which are not required
for a safe ride, e.g. seat heating,
heated rear window or other main consumers.
2. Charge the vehicle battery by driving continuously for a while or
by using a charging device.
The warning message will disappear
after the engine has been started
twice without a voltage drop.
If the vehicle battery cannot be
recharged, have the cause of the fault remedied by a workshop.Vehicle personalisation
The vehicle's behaviour can be
personalised by changing the settings in the Colour-Info-Display.
Some of the personal settings for
different drivers can be memorised
individually for each vehicle key.
Memorised settings 3 23.
Depending on vehicle equipment and
country-specific regulations some of
the functions described below might
not be available.
Some functions are only displayed or
active when the engine is running.
Personal settings Following the changing of personal
settings is described via the buttons
below the display. This is valid for
4.2'' as well as 8'' Colour-Info-Display.
Additionally, the 8'' display is operable
as a touchscreen and with the
touchpad between the front seats.
See description 'Colour-Info-Display'
3 118 and the Infotainment system
manual.
With active display, press ;.
Turn MENU to select Settings display
icon.
Press MENU to confirm.
The following settings can be
selected by turning and pressing the multifunction knob:
■ Time and Date
■ Sport Mode
■ Language (Language)
■ Valet Mode
■ Radio
■ Vehicle
■ Bluetooth