buttons VAUXHALL MOKKA 2014.5 Infotainment system
[x] Cancel search | Manufacturer: VAUXHALL, Model Year: 2014.5, Model line: MOKKA, Model: VAUXHALL MOKKA 2014.5Pages: 135, PDF Size: 3.02 MB
Page 91 of 135
Radio91
Press this button to turn the mutefunction on and off.
Listening to a radio or DAB
station
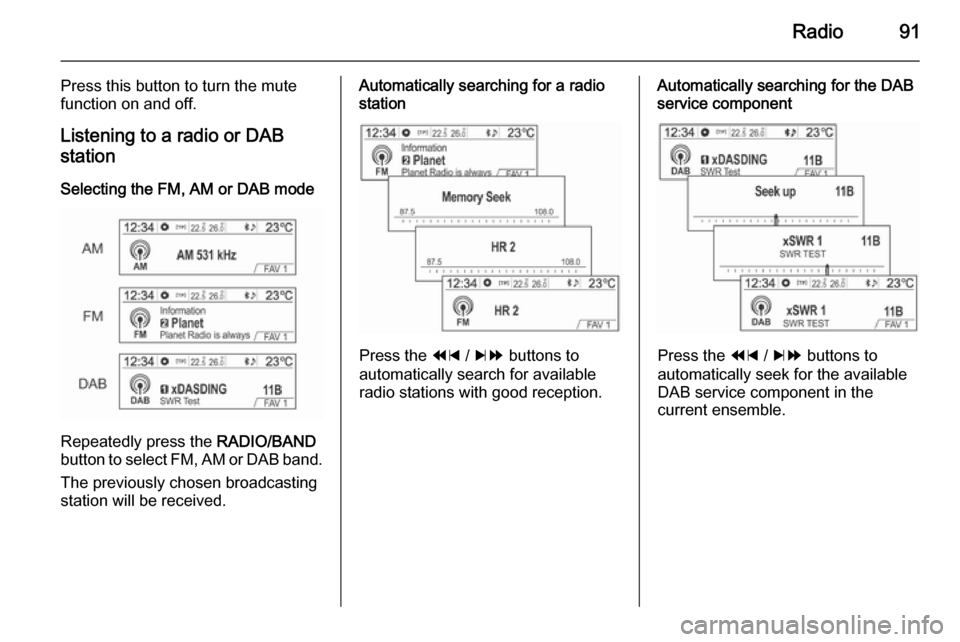
Selecting the FM, AM or DAB mode
Repeatedly press the RADIO/BAND
button to select FM, AM or DAB band.
The previously chosen broadcasting
station will be received.
Automatically searching for a radio
station
Press the 1 / 8 buttons to
automatically search for available
radio stations with good reception.
Automatically searching for the DAB
service component
Press the 1 / 8 buttons to
automatically seek for the available
DAB service component in the
current ensemble.
Page 92 of 135
92Radio
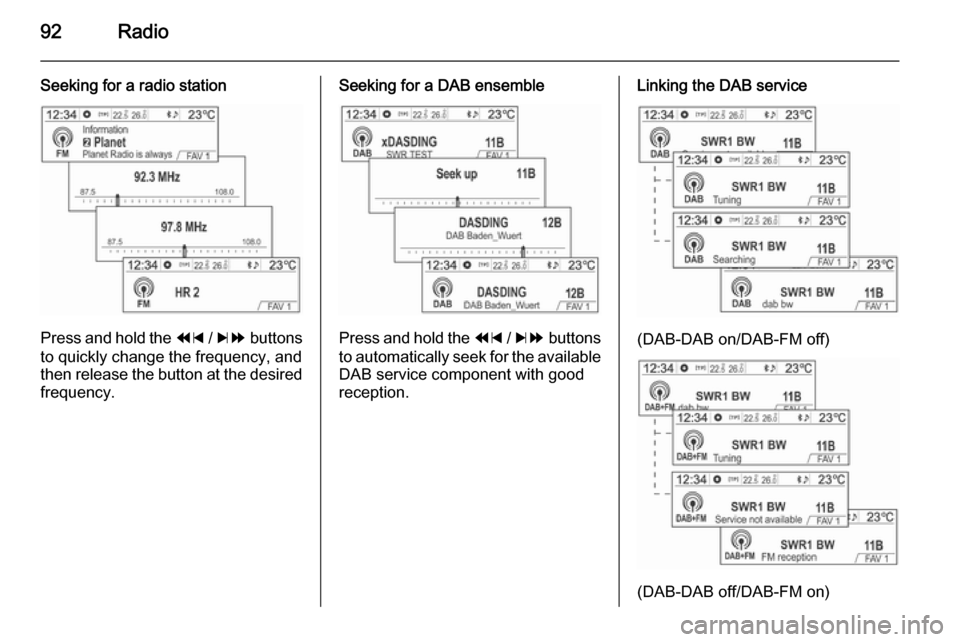
Seeking for a radio station
Press and hold the 1 / 8 buttons
to quickly change the frequency, and
then release the button at the desired
frequency.
Seeking for a DAB ensemble
Press and hold the 1 / 8 buttons
to automatically seek for the available DAB service component with good
reception.
Linking the DAB service
(DAB-DAB on/DAB-FM off)
(DAB-DAB off/DAB-FM on)
Page 94 of 135
94Radio
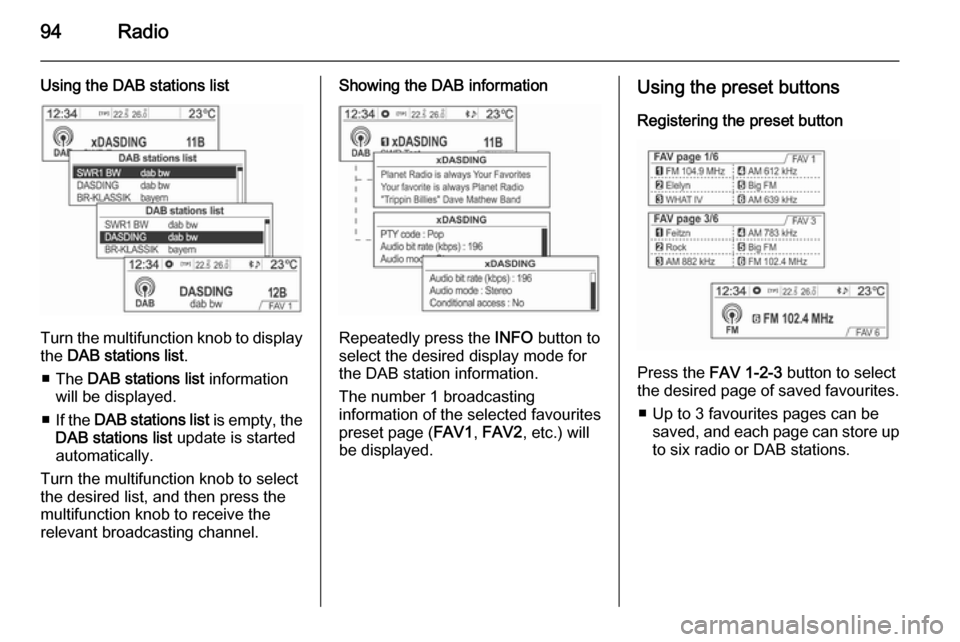
Using the DAB stations list
Turn the multifunction knob to displaythe DAB stations list .
■ The DAB stations list information
will be displayed.
■ If the DAB stations list is empty, the
DAB stations list update is started
automatically.
Turn the multifunction knob to select
the desired list, and then press the
multifunction knob to receive the
relevant broadcasting channel.
Showing the DAB information
Repeatedly press the INFO button to
select the desired display mode for the DAB station information.
The number 1 broadcasting
information of the selected favourites
preset page ( FAV1, FAV2 , etc.) will
be displayed.
Using the preset buttons
Registering the preset button
Press the FAV 1-2-3 button to select
the desired page of saved favourites.
■ Up to 3 favourites pages can be saved, and each page can store upto six radio or DAB stations.
Page 95 of 135
Radio95
■It is possible to setup the number of
favourites pages being used under
Settings → Radio settings → Radio
favourites → Max. number of
favourites pages .
■ If a new radio station is registered to one of the previously registered
1 ~ 6 preset buttons, its previous
content will be deleted and
replaced with the new radio or DAB station that is saved.
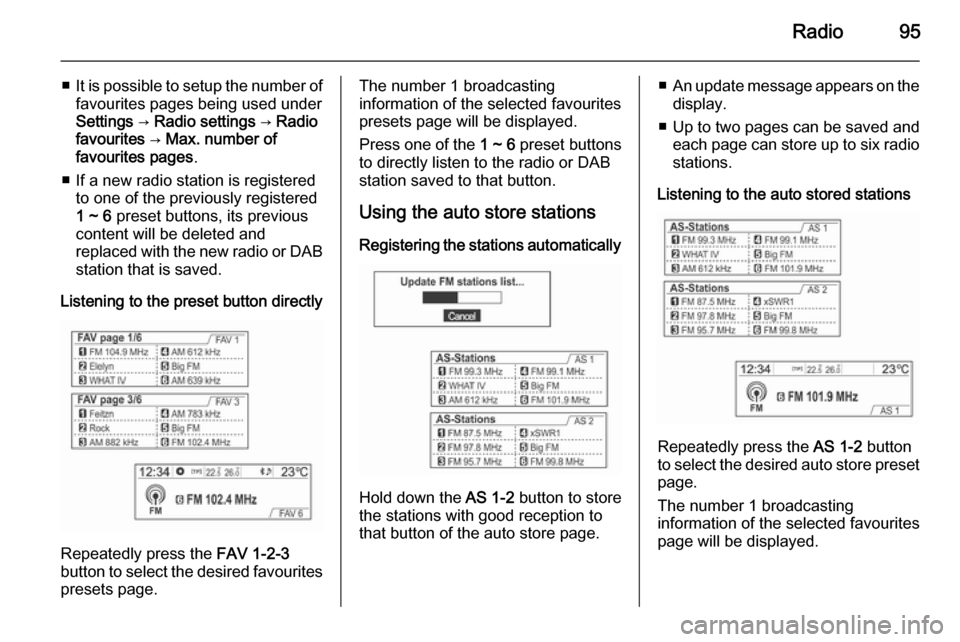
Listening to the preset button directly
Repeatedly press the FAV 1-2-3
button to select the desired favourites
presets page.
The number 1 broadcasting
information of the selected favourites
presets page will be displayed.
Press one of the 1 ~ 6 preset buttons
to directly listen to the radio or DAB
station saved to that button.
Using the auto store stations Registering the stations automatically
Hold down the AS 1-2 button to store
the stations with good reception to
that button of the auto store page.
■ An update message appears on the
display.
■ Up to two pages can be saved and each page can store up to six radio
stations.
Listening to the auto stored stations
Repeatedly press the AS 1-2 button
to select the desired auto store preset
page.
The number 1 broadcasting
information of the selected favourites
page will be displayed.
Page 96 of 135
96Radio
Press one of the 1 ~ 6 preset buttons
to directly listen to the radio station
saved to that button.
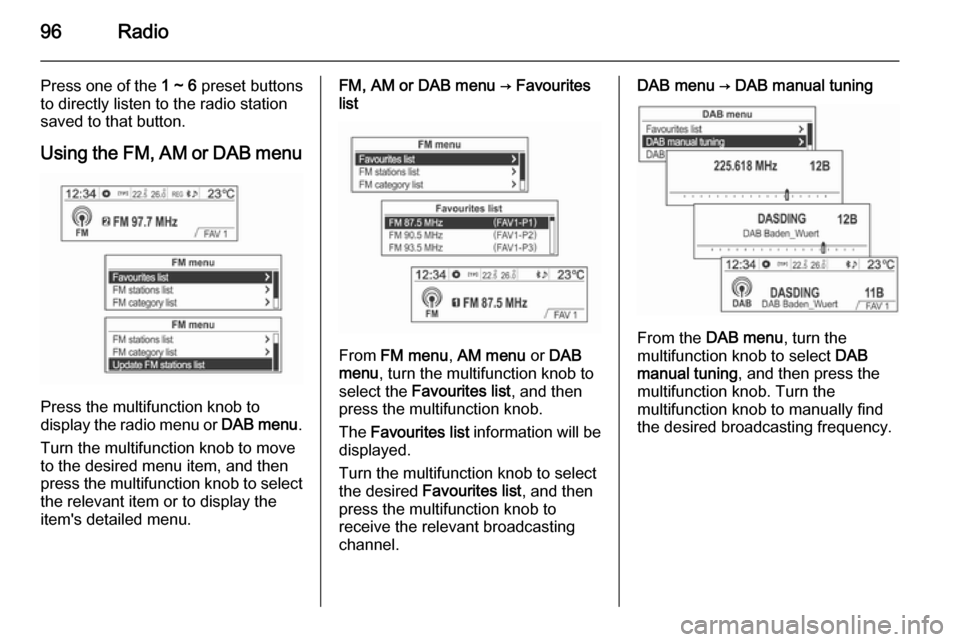
Using the FM, AM or DAB menu
Press the multifunction knob to
display the radio menu or DAB menu.
Turn the multifunction knob to move
to the desired menu item, and then
press the multifunction knob to select
the relevant item or to display the
item's detailed menu.
FM, AM or DAB menu → Favourites
list
From FM menu , AM menu or DAB
menu , turn the multifunction knob to
select the Favourites list , and then
press the multifunction knob.
The Favourites list information will be
displayed.
Turn the multifunction knob to select
the desired Favourites list , and then
press the multifunction knob to
receive the relevant broadcasting channel.
DAB menu → DAB manual tuning
From the DAB menu , turn the
multifunction knob to select DAB
manual tuning , and then press the
multifunction knob. Turn the
multifunction knob to manually find
the desired broadcasting frequency.
Page 106 of 135
106Audio players
■ To display album (disc title), track(track title), and artist (track artist)
information, the file should be
compatible with the ID3 tag V1 and
V2 formats.
■ This product can play MP3 files using VBR. When playing an MP3
file of this VBR type, the remaining
time displayed may be different
from the real time.
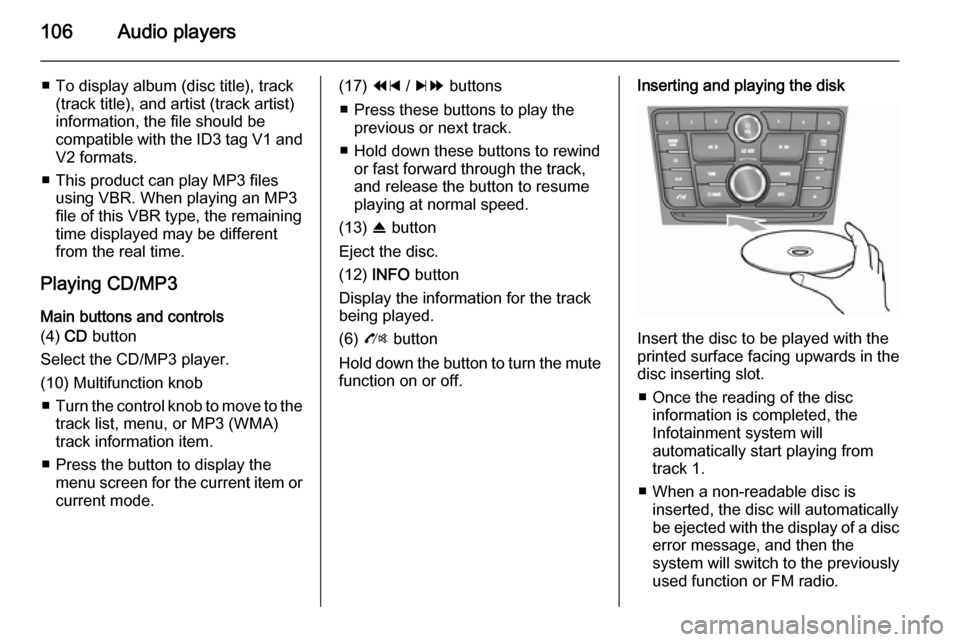
Playing CD/MP3 Main buttons and controls
(4) CD button
Select the CD/MP3 player.
(10) Multifunction knob ■ Turn the control knob to move to the
track list, menu, or MP3 (WMA)
track information item.
■ Press the button to display the menu screen for the current item orcurrent mode.(17) 1 / 8 buttons
■ Press these buttons to play the previous or next track.
■ Hold down these buttons to rewind or fast forward through the track,
and release the button to resume
playing at normal speed.
(13) R button
Eject the disc.
(12) INFO button
Display the information for the track
being played.
(6) O button
Hold down the button to turn the mute function on or off.Inserting and playing the disk
Insert the disc to be played with the
printed surface facing upwards in the
disc inserting slot.
■ Once the reading of the disc information is completed, the
Infotainment system will
automatically start playing from
track 1.
■ When a non-readable disc is inserted, the disc will automaticallybe ejected with the display of a disc
error message, and then the
system will switch to the previously
used function or FM radio.
Page 107 of 135
Audio players107
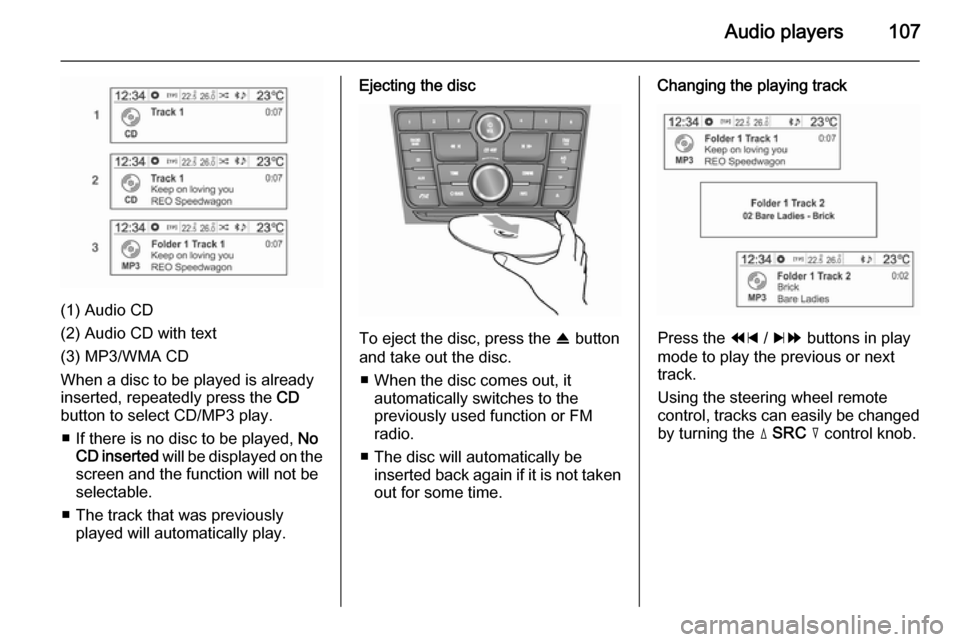
(1) Audio CD
(2) Audio CD with text
(3) MP3/WMA CD
When a disc to be played is already inserted, repeatedly press the CD
button to select CD/MP3 play.
■ If there is no disc to be played, No
CD inserted will be displayed on the
screen and the function will not be
selectable.
■ The track that was previously played will automatically play.
Ejecting the disc
To eject the disc, press the R button
and take out the disc.
■ When the disc comes out, it automatically switches to the
previously used function or FM
radio.
■ The disc will automatically be inserted back again if it is not taken
out for some time.
Changing the playing track
Press the 1 / 8 buttons in play
mode to play the previous or next
track.
Using the steering wheel remote
control, tracks can easily be changed by turning the d SRC c control knob.
Page 108 of 135
108Audio players
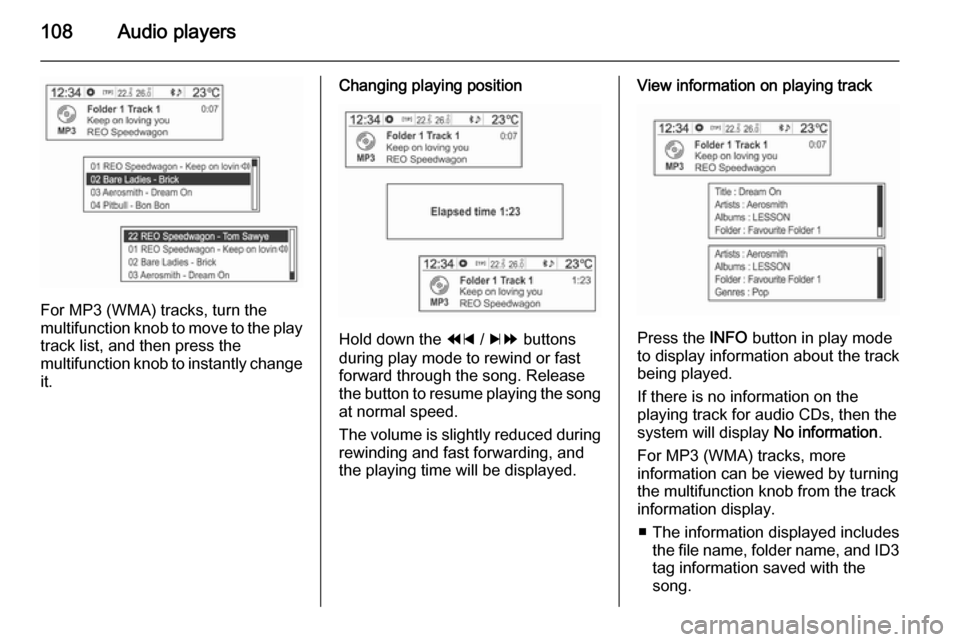
For MP3 (WMA) tracks, turn the
multifunction knob to move to the play
track list, and then press the
multifunction knob to instantly change it.
Changing playing position
Hold down the 1 / 8 buttons
during play mode to rewind or fast
forward through the song. Release
the button to resume playing the song
at normal speed.
The volume is slightly reduced during rewinding and fast forwarding, and
the playing time will be displayed.
View information on playing track
Press the INFO button in play mode
to display information about the track
being played.
If there is no information on the
playing track for audio CDs, then the
system will display No information.
For MP3 (WMA) tracks, more information can be viewed by turning
the multifunction knob from the track
information display.
■ The information displayed includes the file name, folder name, and ID3
tag information saved with the
song.
Page 113 of 135
Audio players113
◆ ISO 9660 Level 1: Maximum of12 characters
◆ ISO 9660 Level 2: Maximum of 31 characters
◆ Joliet: Maximum of 64 characters
(1 byte)
◆ Windows long file name: maximum of 28 characters
(1 byte)
■ This product can play MP3 files which use VBR. When a VBR type
MP3 file is being played, the
remaining time displayed may be
different from the actual time
remaining.
Main buttons and controls The following main buttons and
controls are used to play USB music
files.
(5) AUX button
Press the button repeatedly when the
USB device is connected to select the
USB play mode.(10) Multifunction knob
■ Turn the control knob to move to the
track list, menu or MP3 (WMA)
track information.
■ Press the button to display the menu screen provided by the
current item or current mode.
(17) 1 / 8 buttons
■ Press these buttons to play the previous or next track.
■ Hold down these buttons to rewind or fast forward, and then release to
play at normal speed.
(12) INFO button
Displays the information of the track
being played.
(6) O button
Hold down the button to turn the
pause function on or off.
(9) P BACK button
Cancel the input item or return to the
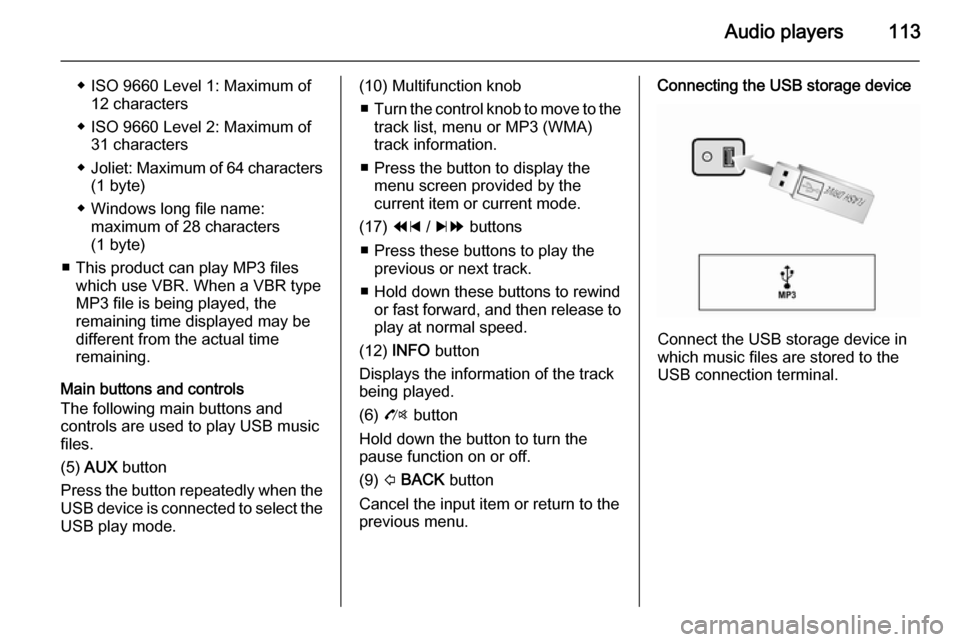
previous menu.Connecting the USB storage device
Connect the USB storage device in
which music files are stored to the
USB connection terminal.
Page 115 of 135
Audio players115
iPod playerMain buttons and controls
The following main buttons and
controls are used to play iPod music
files.
(5) AUX button
Press the button repeatedly when the
iPod is connected to select the iPod
play mode.
(10) Multifunction knob ■ Turn the control knob to move and display the track list that is playing.
■ Press the button to display the menu screen provided by the
current item or current mode.
(17) 1 / 8 buttons
■ Press these buttons to play the previous or next track.
■ Hold down these buttons to rewind or fast forward, and then release toplay at normal speed.
(12) INFO button
Displays the information of the track
being played.
(6) O buttonHold down the button to turn the
pause function on or off.
(9) P BACK button
Cancel the previous item or return to the previous menu.
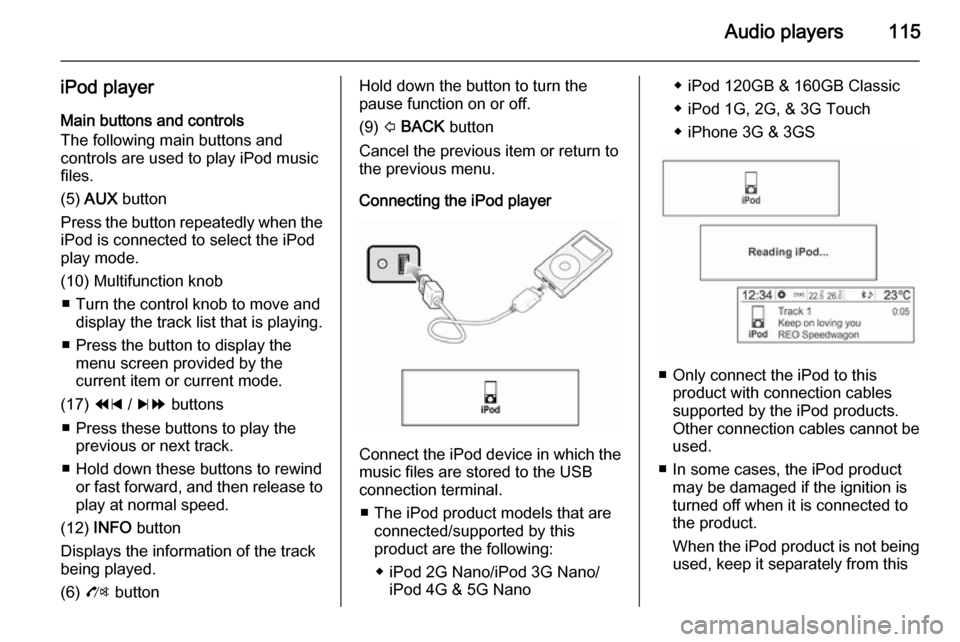
Connecting the iPod player
Connect the iPod device in which the
music files are stored to the USB
connection terminal.
■ The iPod product models that are connected/supported by this
product are the following:
◆ iPod 2G Nano/iPod 3G Nano/ iPod 4G & 5G Nano
◆ iPod 120GB & 160GB Classic
◆ iPod 1G, 2G, & 3G Touch
◆ iPhone 3G & 3GS
■ Only connect the iPod to this product with connection cablessupported by the iPod products.
Other connection cables cannot be
used.
■ In some cases, the iPod product may be damaged if the ignition is
turned off when it is connected to
the product.
When the iPod product is not being used, keep it separately from this