change time VAUXHALL MOKKA 2014 Infotainment system
[x] Cancel search | Manufacturer: VAUXHALL, Model Year: 2014, Model line: MOKKA, Model: VAUXHALL MOKKA 2014Pages: 221, PDF Size: 4.66 MB
Page 18 of 221
18Basic operation
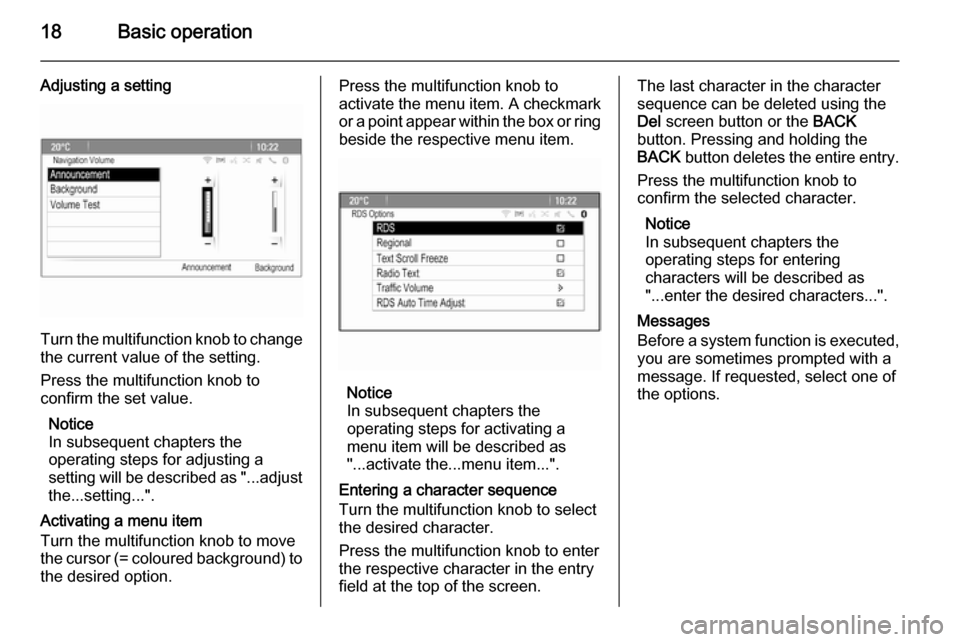
Adjusting a setting
Turn the multifunction knob to changethe current value of the setting.
Press the multifunction knob to
confirm the set value.
Notice
In subsequent chapters the
operating steps for adjusting a
setting will be described as "...adjust
the...setting...".
Activating a menu item
Turn the multifunction knob to move
the cursor (= coloured background) to the desired option.
Press the multifunction knob to
activate the menu item. A checkmark
or a point appear within the box or ring
beside the respective menu item.
Notice
In subsequent chapters the
operating steps for activating a
menu item will be described as
"...activate the...menu item...".
Entering a character sequence
Turn the multifunction knob to select
the desired character.
Press the multifunction knob to enter
the respective character in the entry
field at the top of the screen.
The last character in the character sequence can be deleted using the
Del screen button or the BACK
button. Pressing and holding the
BACK button deletes the entire entry.
Press the multifunction knob to
confirm the selected character.
Notice
In subsequent chapters the
operating steps for entering
characters will be described as
"...enter the desired characters...".
Messages
Before a system function is executed, you are sometimes prompted with a
message. If requested, select one of
the options.
Page 22 of 221

22Basic operation
Set time
To adjust the time settings, select the Set Time menu item. Adjust the
settings as desired.
Set date
To adjust the date settings, select the
Set Date menu item. Adjust the
settings as desired.
Time format
To choose the desired time format, select the 12 hr / 24 hr Format menu
item. A submenu is displayed.
Activate 12 Hour or the 24 Hour .
Software information Press the CONFIG button and then
select the Radio Settings menu item.
Scroll through the list and select
Software Versions Menu to display
the respective submenu.
Software version information
To display a list of all software
versions installed, select Software
Version Information .
By default, all versions are activated.Software update
To update your system software, contact your Opel Service Partner.
Log file
To generate a log file of your current
software version, select the Create
Log File menu item.
Licensing information
To display information on the
manufacturer of the Infotainment
system, select Licensing Information .
Factory defaults
To reset all Infotainment settings to
their factory defaults, select Clear and
Reset Radio .
Display settings
Press the CONFIG button and then
select the Display Settings menu item
to display the respective submenu.
Home Page
Select Home Page Menu to display
the home page settings menu.To access the menu from the Home
Page , select the Menu screen button
at the bottom of the screen.
The Home Page may be adjusted
according to your personal
preferences.Customise
The application icons displayed on
the first home page may be chosen as
desired.
Select the Customise menu item to
display a list of all applications
installed in the system. Activate the
menu items of those applications you wish to be displayed on the first home
page.
The other applications are then
arranged on the following pages.Sort
Up to eight application icons may be
arranged on each home page.
The positions of the icons can be
changed as desired.
Select the Sort menu item to display
the home pages in edit mode.
Select the icon you wish to move.
Page 41 of 221

Navigation41
Map modes
Press the multifunction knob to
display the Navigation Menu . Select
the Map Modes menu item to display
the respective submenu.
The following options are available: ■ Full Map ("Normal" view described
above): Full screen map view, all
function and indication screen
buttons displayed.
■ Full Glory : Full screen map view,
most functions and indication
screen buttons hidden.
■ Split with Turn List : Divided screen
with map on the left and turn list on the right side.
■ Split with Turn Arrow : Divided
screen with map on the left side and
turn arrow for the next turning
manoeuvre on the right side.
■ Split with Media : Divided screen
with map on the left side and audio
source currently active on the right
side.
Select the desired option.Map display
Press the multifunction knob to
display the Navigation Menu . Select
the Map Settings menu item and then
Map Display to display the respective
submenu.
Depending on the external lighting
conditions, activate the Day or Night
menu item.
For an automatic adaption by the
system, activate Automatic.
Displaying POIs
Press the multifunction knob to
display the Navigation Menu .
Select the Show POIs menu item to
display the respective submenu.
If you wish all POIs available in the
system to be displayed on the map, activate Show all POIs .
If you do not wish POIs to be
displayed on the map, activate Hide
all POIs .
To only display specific POIs, activate
the User Defined menu item and then
activate the POI categories you wish
to be displayed.Changing screen information
The route information displayed on
the screen during active route
guidance may be customised.
Press the multifunction knob to
display the Navigation Menu . Scroll
through the list and select the Switch
Route Time/Destination menu item.Time information
If you wish to change the time
information displayed, select Switch
Arrival/Travel Time to display the
respective submenu.
Activate the information setting you
wish to be displayed.Destination information
If you are in a waypoint trip, you may
want to display the route information
for a waypoint instead of those for the final destination.
To change the setting, select Switch
Waypoint/Destination . A list of all
destinations in the waypoint trip
currently active is displayed.
Activate the information setting you
wish to be displayed.
Page 62 of 221

62Phonephones is prohibited, if
interference is caused by the
mobile phone or if dangerous
situations can occur.
Bluetooth
The Phone portal is certified by the
Bluetooth Special Interest Group
(SIG).
You will find further information about the specification on the Internet at
http://www.bluetooth.com
Bluetooth connection Bluetooth is a radio standard for the
wireless connection of e.g. mobile
phones, iPod/iPhone models, or other devices.
To be able to set up a Bluetooth
connection to the Infotainment
system, the Bluetooth function of the
Bluetooth device must be activated.
For further information, please
consult the user guide of the
Bluetooth device.
Via the Bluetooth menu, pairing (PIN
code exchange between Bluetooth device and Infotainment system) and
connecting of the Bluetooth devices
to the Infotainment system are carried
out.
Important information ■ Up to five devices can be paired to the system.
■ Only one paired device can be connected to the Infotainment
system at a time.
■ Pairing normally only needs to be carried out once, unless the device
is deleted from the list of paired
devices. If the device has been connected previously, the
Infotainment system establishes
the connection automatically.
■ Bluetooth operation considerably drains the device's battery.
Therefore, connect the device to
the power outlet for charging.Bluetooth menu
To open the Bluetooth menu, you
may optionally:
■ Press the O button. Select the
Phone Settings menu item and
then Bluetooth .
■ Press the CONFIG button. Select
the Phone Settings menu item and
then Bluetooth .
■ Press the ; button and select the
Config icon. Select the Phone
Settings menu item and then
Bluetooth .
The menu items Device list and Pair
device are displayed.
Pair device To initiate the pairing process on the
Infotainment system, select the Pair
device menu item. A message with a
four-digit Infotainment system code is
displayed.
Initiate the pairing process on the
Bluetooth device. If required, enter
the Infotainment system code on the
Bluetooth device.
Page 67 of 221
Phone67
To transfer the call back to the
Infotainment system, select the
Transfer call menu item in the Private
Call menu.
Second phone call Initiating a second phone call
While a call is active, select the Enter
number menu item in the in-call view.
The keypad is displayed. You may enter a number or select a number
from the phone book, see above.
Second incoming phone call
When a second call comes in, a
message is displayed at the bottom of
the screen.
Select the desired option.
If the call is taken, the first call is put
on hold and the second call becomes
active.
Both calls are displayed in the in-call
view.
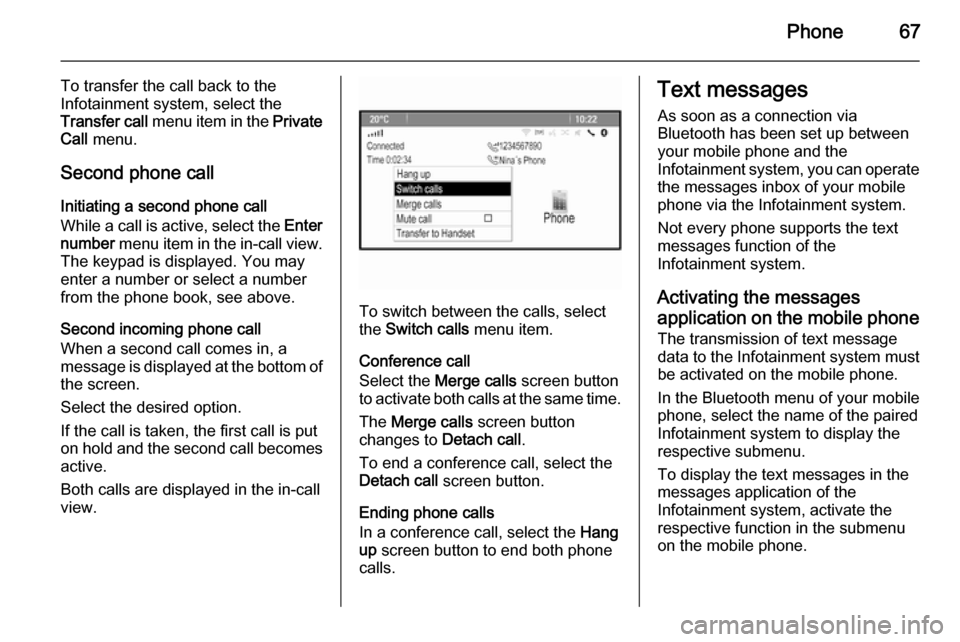
To switch between the calls, select
the Switch calls menu item.
Conference call
Select the Merge calls screen button
to activate both calls at the same time.
The Merge calls screen button
changes to Detach call.
To end a conference call, select the
Detach call screen button.
Ending phone calls
In a conference call, select the Hang
up screen button to end both phone
calls.
Text messages
As soon as a connection via
Bluetooth has been set up between
your mobile phone and the
Infotainment system, you can operate
the messages inbox of your mobile phone via the Infotainment system.
Not every phone supports the text
messages function of the
Infotainment system.
Activating the messages
application on the mobile phone The transmission of text message
data to the Infotainment system must
be activated on the mobile phone.
In the Bluetooth menu of your mobile phone, select the name of the paired
Infotainment system to display the
respective submenu.
To display the text messages in the
messages application of the
Infotainment system, activate the
respective function in the submenu
on the mobile phone.
Page 77 of 221

Introduction77
Important information on
operation and traffic safety9 Warning
The Infotainment system has to be
used so that the vehicle can bedriven safely at all times. If in doubt
stop your vehicle and operate the Infotainment system while the
vehicle is stationary.
9 Warning
The usage of the navigation
system does not release the driver
from the responsibility for a
correct, vigilant attitude in road
traffic.The related traffic
regulations must always be
followed.
Only make entries (e.g. addresses) with the vehicle
stationary.
If a navigation instruction
contradicts traffic regulations, the
traffic regulations always apply.
9 Warning
In some areas one-way streets
and other roads and entrances
(e.g. pedestrian zones) that you
are not allowed to turn into are not marked on the map. In such areas
the Infotainment system may
issue a warning that must be
accepted. Here you must pay
particular attention to one-way
streets, roads and entrances that
you are not allowed to drive into.
Radio reception
Radio reception may be disrupted by
static, noise, distortion or loss of reception due to
■ changes in distance from the transmitter,
■ multi-path reception due to reflection,
■ shadowing.
Theft-deterrent feature
The Infotainment system is equipped
with an electronic security system for
the purpose of theft deterrent.
The Infotainment system therefore
functions only in your vehicle and is
worthless to a thief.
Page 93 of 221
Radio93
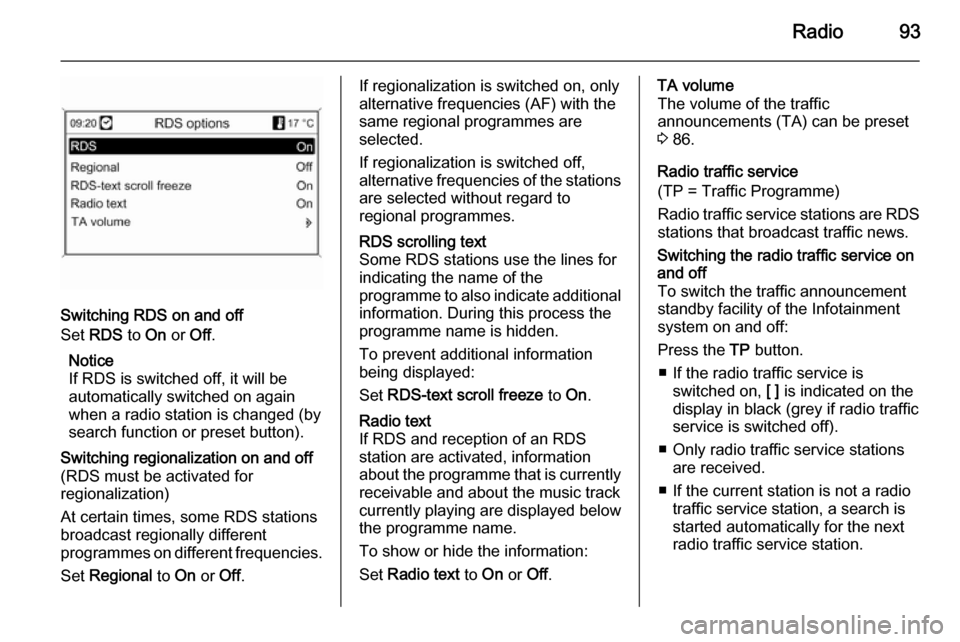
Switching RDS on and off
Set RDS to On or Off.
Notice
If RDS is switched off, it will be
automatically switched on again when a radio station is changed (bysearch function or preset button).
Switching regionalization on and off(RDS must be activated for
regionalization)
At certain times, some RDS stations
broadcast regionally different
programmes on different frequencies.
Set Regional to On or Off.If regionalization is switched on, only
alternative frequencies (AF) with the
same regional programmes are
selected.
If regionalization is switched off,
alternative frequencies of the stations are selected without regard to
regional programmes.RDS scrolling text
Some RDS stations use the lines for
indicating the name of the
programme to also indicate additional
information. During this process the
programme name is hidden.
To prevent additional information
being displayed:
Set RDS-text scroll freeze to On.Radio text
If RDS and reception of an RDS
station are activated, information
about the programme that is currently
receivable and about the music track
currently playing are displayed below
the programme name.
To show or hide the information:
Set Radio text to On or Off.TA volume
The volume of the traffic
announcements (TA) can be preset
3 86.
Radio traffic service
(TP = Traffic Programme)
Radio traffic service stations are RDS
stations that broadcast traffic news.Switching the radio traffic service on
and off
To switch the traffic announcement
standby facility of the Infotainment
system on and off:
Press the TP button.
■ If the radio traffic service is switched on, [ ] is indicated on the
display in black (grey if radio traffic
service is switched off).
■ Only radio traffic service stations are received.
■ If the current station is not a radio traffic service station, a search is
started automatically for the next
radio traffic service station.
Page 107 of 221
Navigation107
The map of the current location is
shown on the display, see
"Information on the display" below.
Route guidance messagesIn addition to the visual instructions
on the display (see "Information on
the display" below), route guidance
messages will be announced when
route guidance is active.
Presetting the volume of route
guidance messages: see "Setting up
the navigation system" below.
Adjusting the volume of route
guidance messages while they are
announced: turn the X VOL knob.
Repeating the last announced route guidance message: press the RPT /
NAV button.Information on the display
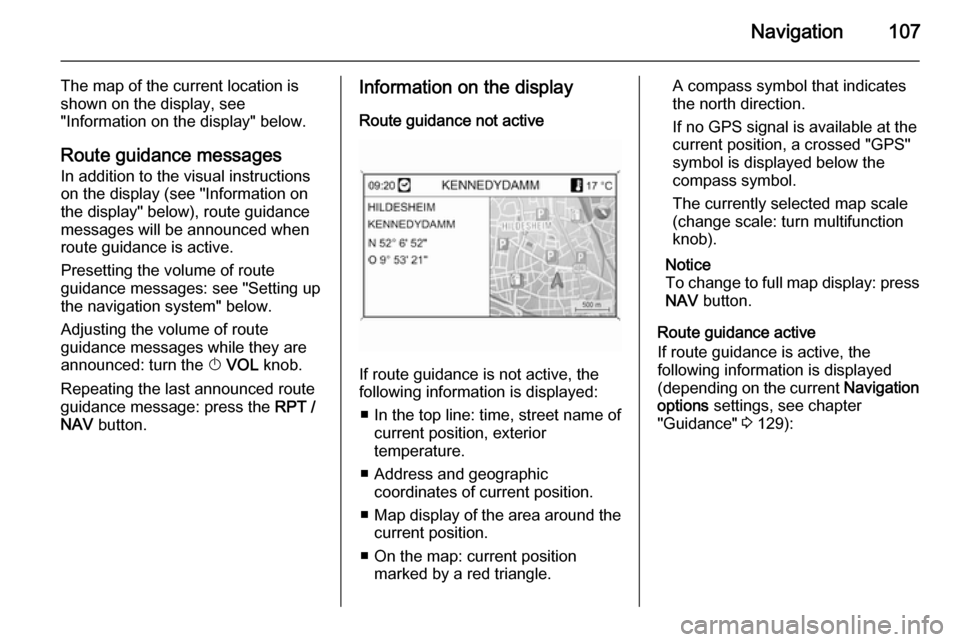
Route guidance not active
If route guidance is not active, the
following information is displayed:
■ In the top line: time, street name of current position, exterior
temperature.
■ Address and geographic coordinates of current position.
■ Map display of the area around the
current position.
■ On the map: current position marked by a red triangle.
A compass symbol that indicates
the north direction.
If no GPS signal is available at the current position, a crossed "GPS"
symbol is displayed below the
compass symbol.
The currently selected map scale
(change scale: turn multifunction
knob).
Notice
To change to full map display: press
NAV button.
Route guidance active
If route guidance is active, the
following information is displayed (depending on the current Navigation
options settings, see chapter
"Guidance" 3 129):
Page 127 of 221
Navigation127
Editing or deleting a stored
address Address data (including the categoryand telephone number) stored in the
address book or myPOIs memory can
be edited or entirely deleted at any time.
Editing or deleting an address book
entry
Press the DEST / NAV button, select
Address book , select the desired
address entry and then select Edit.
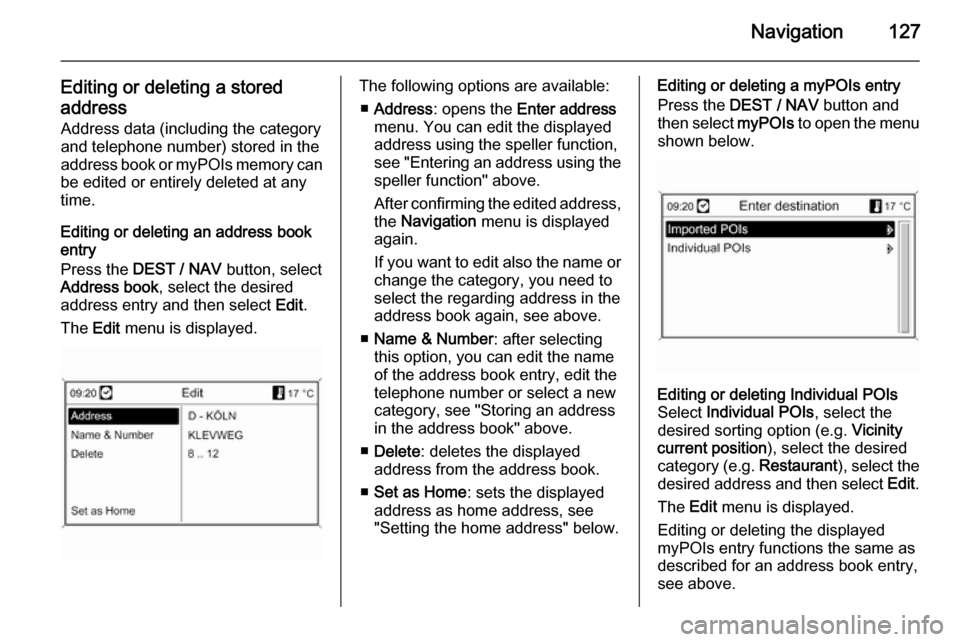
The Edit menu is displayed.The following options are available:
■ Address : opens the Enter address
menu. You can edit the displayed address using the speller function,
see "Entering an address using the speller function" above.
After confirming the edited address,
the Navigation menu is displayed
again.
If you want to edit also the name or
change the category, you need to
select the regarding address in the
address book again, see above.
■ Name & Number : after selecting
this option, you can edit the name
of the address book entry, edit the
telephone number or select a new
category, see "Storing an address
in the address book" above.
■ Delete : deletes the displayed
address from the address book.
■ Set as Home : sets the displayed
address as home address, see
"Setting the home address" below.Editing or deleting a myPOIs entry
Press the DEST / NAV button and
then select myPOIs to open the menu
shown below.Editing or deleting Individual POIs
Select Individual POIs , select the
desired sorting option (e.g. Vicinity
current position ), select the desired
category (e.g. Restaurant), select the
desired address and then select Edit.
The Edit menu is displayed.
Editing or deleting the displayed
myPOIs entry functions the same as
described for an address book entry,
see above.
Page 151 of 221
Phone151
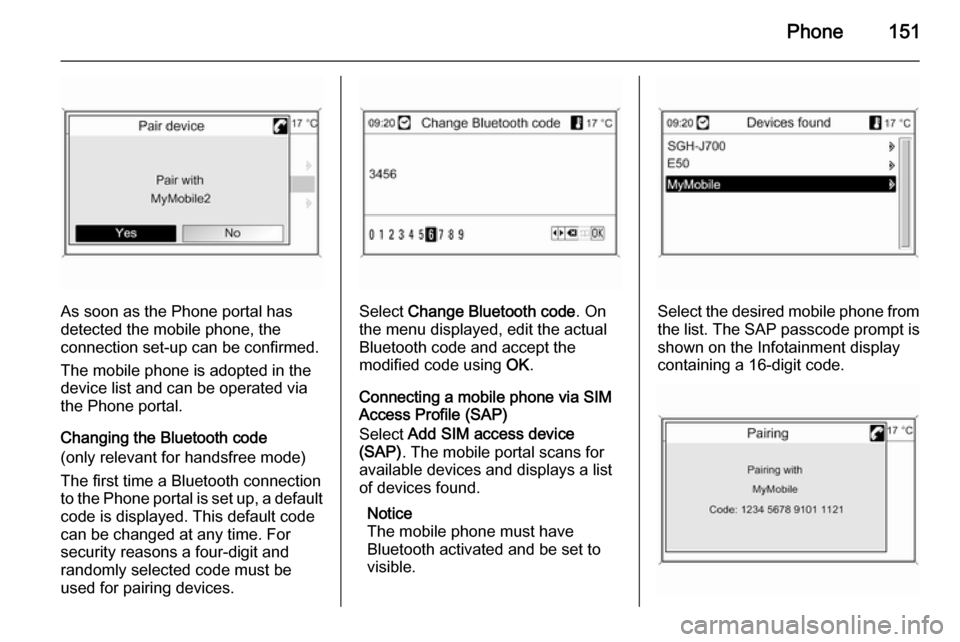
As soon as the Phone portal has
detected the mobile phone, the
connection set-up can be confirmed.
The mobile phone is adopted in the
device list and can be operated via
the Phone portal.
Changing the Bluetooth code
(only relevant for handsfree mode)
The first time a Bluetooth connection
to the Phone portal is set up, a default code is displayed. This default code
can be changed at any time. For
security reasons a four-digit and
randomly selected code must be
used for pairing devices.Select Change Bluetooth code . On
the menu displayed, edit the actual Bluetooth code and accept the
modified code using OK.
Connecting a mobile phone via SIM
Access Profile (SAP)
Select Add SIM access device
(SAP) . The mobile portal scans for
available devices and displays a list
of devices found.
Notice
The mobile phone must have
Bluetooth activated and be set to
visible.Select the desired mobile phone from
the list. The SAP passcode prompt is
shown on the Infotainment display
containing a 16-digit code.