light VAUXHALL MOKKA 2015.5 Owner's Manual
[x] Cancel search | Manufacturer: VAUXHALL, Model Year: 2015.5, Model line: MOKKA, Model: VAUXHALL MOKKA 2015.5Pages: 229, PDF Size: 6.45 MB
Page 3 of 229

Introduction.................................... 2
In brief ............................................ 6
Keys, doors and windows ............19
Seats, restraints ........................... 33
Storage ........................................ 54
Instruments and controls .............72
Lighting ...................................... 104
Climate control ........................... 114
Driving and operating .................121
Vehicle care ............................... 161
Service and maintenance ..........202
Technical data ........................... 205
Customer information ................217
Index .......................................... 222Contents
Page 13 of 229

In brief11
1Central locking system ..........21
2 Power windows .....................29
3 Exterior mirrors .....................27
4 Light switch ......................... 104
5 Cruise control ...................... 137
Speed limiter ....................... 138
Forward collision alert .........139
6 Side air vents ...................... 119
7 Turn and lane-change
signals ................................. 109
Headlight flash ....................105
Low beam and high beam ..105
Buttons for Driver
Information Centre (DIC) ....... 90
8 Instruments ........................... 79
9 Steering wheel controls .......72
10 Windscreen wiper,
windscreen washer system ...73
Rear window wiper, rear
window washer system .........75
11 Centre air vents ................... 11912Electronic Stability Control
(ESC) .................................. 135
Hazard warning flashers ....109
Control indicator for airbag deactivation .......................... 84
13 Anti-theft alarm system
status LED ........................... 25
14 Info-Display .......................... 93
15 Instrument panel storage ......54
16 Glovebox .............................. 55
17 Infotainment system
18 Climate control system ........ 114
19 Stop-start system ................123
Fuel selector ......................... 80
20 AUX input, USB input, SD
card slot
21 Selector lever, manual
transmission ....................... 131
Automatic transmission ......128
22 Parking brake ......................133
23 Power outlet .......................... 7824Parking assist ..................... 142
Descent control system ......... 86
25 Ignition switch with
steering wheel lock ............122
26 Horn ..................................... 73
Driver airbag ........................ 44
27 Steering wheel adjustment ..72
28 Bonnet release lever ..........163
29 Instrument panel storage ......54
Fuse box ............................ 177
Page 14 of 229

12In briefExterior lighting
Turn light switch:
7=lights off8=sidelights9=low beam
Automatic light control
AUTO=automatic light control:
exterior lighting is switched
on and off automaticallym=activation or deactivation of
the automatic light control8=sidelights9=low beam
Fog lights
Press light switch:
>=front fog lightsr=rear fog light
Lighting 3 104.
Headlight flash, high beam and
low beamheadlight flash=pull leverhigh beam=push leverlow beam=push or pull lever
Automatic light control 3 105, High
beam 3 105, Headlight flash 3 105,
Adaptive forward lighting 3 107.
Page 18 of 229

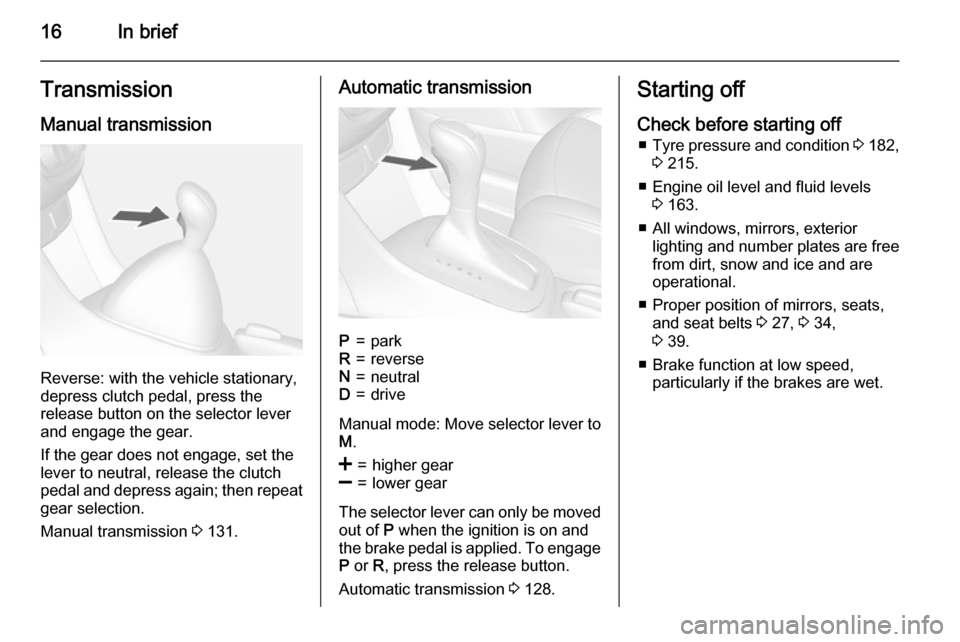
16In briefTransmission
Manual transmission
Reverse: with the vehicle stationary,
depress clutch pedal, press the
release button on the selector lever
and engage the gear.
If the gear does not engage, set the
lever to neutral, release the clutch
pedal and depress again; then repeat
gear selection.
Manual transmission 3 131.
Automatic transmissionP=parkR=reverseN=neutralD=drive
Manual mode: Move selector lever to
M .
<=higher gear]=lower gear
The selector lever can only be moved
out of P when the ignition is on and
the brake pedal is applied. To engage P or R, press the release button.
Automatic transmission 3 128.
Starting off
Check before starting off ■ Tyre pressure and condition 3 182,
3 215.
■ Engine oil level and fluid levels 3 163.
■ All windows, mirrors, exterior lighting and number plates are free
from dirt, snow and ice and are
operational.
■ Proper position of mirrors, seats, and seat belts 3 27, 3 34,
3 39.
■ Brake function at low speed, particularly if the brakes are wet.
Page 19 of 229

In brief17
Starting the engine
■ Turn key to position 1.
■ Move the steering wheel slightly to release the steering wheel lock.
■ Operate clutch and brake.
■ Automatic transmission in P or N.
■ Do not operate accelerator pedal.
■ Diesel engines: turn the key to position 2 for preheating and wait
until control indicator !
extinguishes.
■ Turn key to position 3 and release.
Starting the engine 3 122.
Stop-start system
If the vehicle is at a low speed or at a
standstill and certain conditions are
fulfilled, activate an Autostop as
follows:
■ Depress the clutch pedal.
■ Shift the selector lever to N.
■ Release the clutch pedal.
An Autostop is indicated by the
needle at the AUTOSTOP position in
the tachometer.
To restart the engine, depress the
clutch pedal again.
Stop-start system 3 123.
Parking9 Warning
■ Do not park the vehicle on an
easily ignitable surface. The
high temperature of the exhaust system could ignite the surface.
■ Always apply the parking brake.
Activate the parking brake
without pressing the release
button. Apply as firmly as
possible on a downhill slope or
uphill slope. Depress foot brake
at the same time to reduce
operating force.
■ Switch off the engine.
■ If the vehicle is on a level surface or uphill slope, engage
first gear or set the selector lever
to position P before removing
the ignition key. On an uphill
slope, turn the front wheels
away from the kerb.
If the vehicle is on a downhill
slope, engage reverse gear or
set the selector lever to position
Page 23 of 229

Keys, doors and windows21
Extend the key and open the unit.
Replace the battery (battery type
CR 2032), paying attention to the installation position. Close the unit
and synchronise.
Radio remote control
synchronisation
After replacing the battery, unlock the
door with the key in the driver's door
lock. The radio remote control is
synchronised when the ignition is
switched on.
Memorised settings Whenever the key is removed from
the ignition switch, the following
settings are automatically memorised by the key:
■ lighting
■ infotainment system
■ central locking system
The saved settings are automatically
used the next time the memorised key
is inserted into the ignition switch and
turned to position 1 3 122.A precondition is that Personalization
by driver is activated in the personal
settings of the Graphic-Info-Display.
This must be set for each key used.
On vehicles equipped with
Colour-Info-Display, the
personalisation is permanently
activated.
Vehicle personalisation 3 100.
Central locking system
Unlocks and locks doors, load
compartment and fuel filler flap.
A pull on an interior door handle
unlocks the respective door. Pulling
the handle again opens the door.
Notice
In the event of an accident in which
airbags or belt pretensioners are
deployed, the vehicle is
automatically unlocked.
Notice
A short time after unlocking with the
remote control the doors are locked
automatically if no door has been
opened.Unlocking
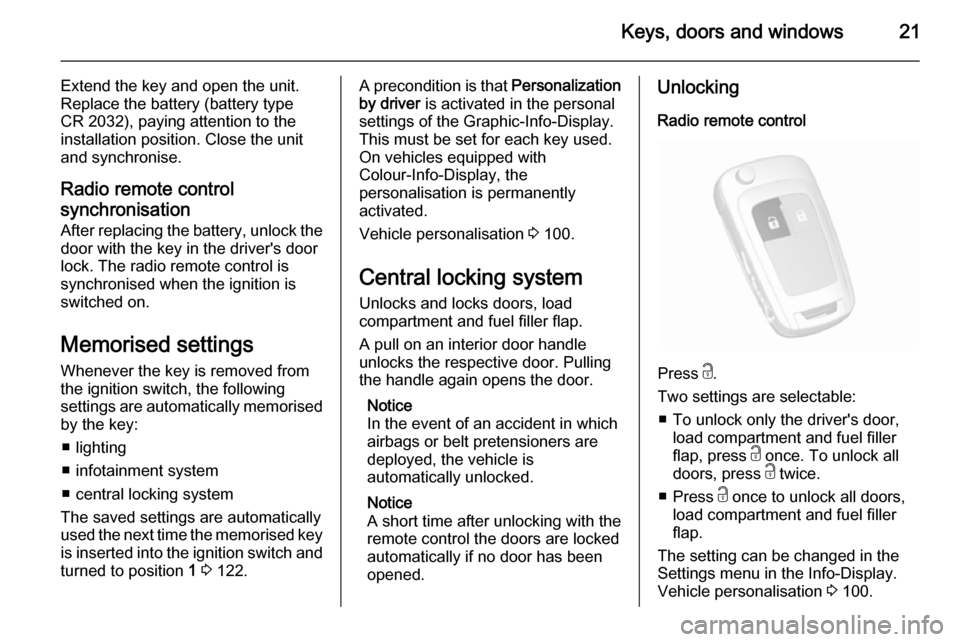
Radio remote control
Press c.
Two settings are selectable: ■ To unlock only the driver's door, load compartment and fuel filler
flap, press c once. To unlock all
doors, press c twice.
■ Press c once to unlock all doors,
load compartment and fuel filler
flap.
The setting can be changed in the
Settings menu in the Info-Display.
Vehicle personalisation 3 100.
Page 29 of 229

Keys, doors and windows27Exterior mirrors
Convex shape
The convex exterior mirror contains
an aspherical area and reduces blind spots. The shape of the mirror makes
objects appear smaller, which will affect the ability to estimate
distances.
Electric adjustment
Select the relevant exterior mirror by
turning the control to left (L) or right
(R) . Then swivel the control to adjust
the mirror.
In position 0 no mirror is selected.
Folding mirrors
Manual folding
For pedestrian safety, the exterior
mirrors will swing out of their normal
mounting position if they are struck
with sufficient force. Reposition the mirror by applying slight pressure tothe mirror housing.
Electric folding
Turn control to 0, then push the
control backwards. Both exterior
mirrors will fold in.
Push the control backwards again -
both exterior mirrors return to their
original position.
Page 36 of 229

34Seats, restraints
Horizontal adjustment
To adjust horizontally, pull the head
restraint forwards. It engages in three
positions.
To return to its rearmost position, pull fully forwards and release.
Head restraints on rear seats
Height adjustment
Pull the head restraint upwards.
To move down, press the catch (1)
and push the head restraint
downwards.
Removal
Raise head restraint to its full height.
Press the catches (1) and (2) at the
same time.
Pull up the head restraint.
Front seats
Seat position9 Warning
Only drive with the seat correctly
adjusted.
■ Sit with buttocks as far back against
the backrest as possible. Adjust the distance between the seat and the
pedals so that legs are slightly
angled when pressing the pedals.
Slide the front passenger seat as
far back as possible.
Page 37 of 229

Seats, restraints35
■ Sit with shoulders as far backagainst the backrest as possible.
Set the backrest rake so that it is
possible to easily reach the
steering wheel with arms slightly
bent. Maintain contact between
shoulders and the backrest when
turning the steering wheel. Do not
tilt the backrest too far back. We
recommend a maximum rake of
approx. 25°.
■ Adjust the steering wheel 3 72.
■ Set seat height high enough to have a clear field of vision on all
sides and of all display instruments.
There should be at least one hand
of clearance between head and the
headlining. Your thighs should rest
lightly on the seat without pressing
into it.
■ Adjust the head restraint 3 33.
■ Adjust the height of the seat belt 3 39.■ Adjust the thigh support so that
there is a space approx.
two fingers wide between the edge
of the seat and the hollow of the
knee.
■ Adjust the lumbar support so that it
supports the natural shape of the
spine.
Seat adjustment9 Danger
Do not sit nearer than 25 cm from
the steering wheel, to permit safe
airbag deployment.
9 Warning
Never adjust seats while driving as
they could move uncontrollably.
Drive only with engaged seats and
backrests.
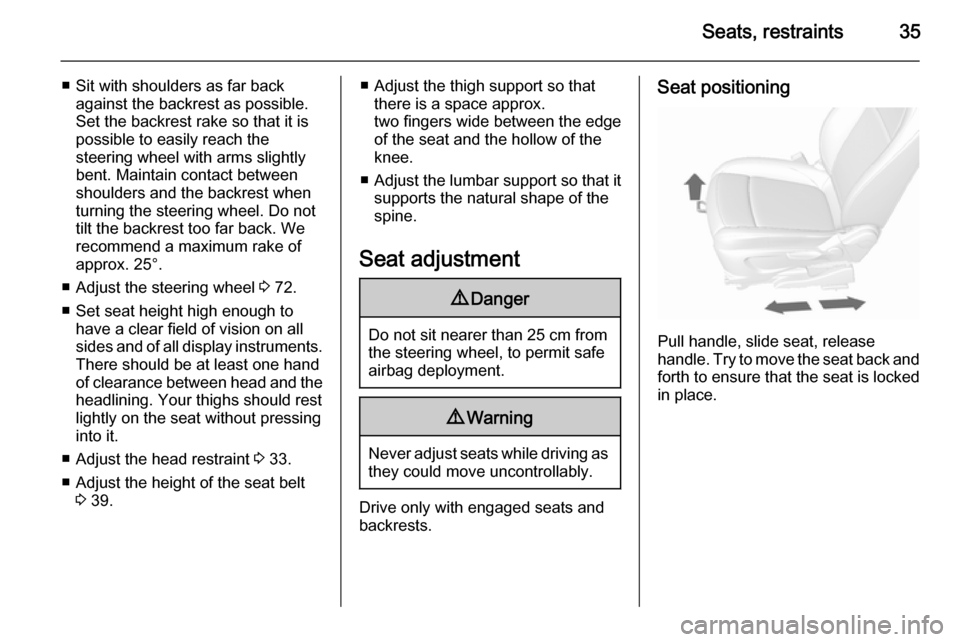
Seat positioning
Pull handle, slide seat, release
handle. Try to move the seat back and forth to ensure that the seat is locked
in place.
Page 41 of 229

Seats, restraints39Three-point seat belt
Fastening
Withdraw the belt from the retractor,
guide it untwisted across the body
and insert the latch plate into the
buckle.
Tighten the lap belt regularly whilst
driving by pulling the shoulder belt.
Loose or bulky clothing prevents the
belt from fitting snugly. Do not place
objects such as handbags or mobile
phones between the belt and your body.
9 Warning
The belt must not rest against hard
or fragile objects in the pockets of
your clothing.
Height adjustment
1. Pull belt out slightly.
2. Shift the height adjustment upwards or press button to
disengage and push the height
adjustment downwards.