VAUXHALL MOVANO_B 2016.5 Owner's Manual
Manufacturer: VAUXHALL, Model Year: 2016.5, Model line: MOVANO_B, Model: VAUXHALL MOVANO_B 2016.5Pages: 239, PDF Size: 5.64 MB
Page 111 of 239
Climate control109CoolingThe air conditioning system cools and
dehumidifies (dries) when outside
temperature is above a specific level.
Therefore condensation may form
and drip from under the vehicle.
If no cooling or drying is required
press A/C OFF to switch the cooling
system off, thus saving fuel.
" A/C OFF " appears in the display.
Manual air recirculation mode Press u. LED illuminates and u
appears in the display.9 Warning
The exchange of fresh air is
reduced in air recirculation mode.
In operation without cooling the air humidity increases, so the
windows may mist up. The quality
of the passenger compartment air
deteriorates, which may cause the vehicle occupants to feel drowsy.
To return to automatic mode: press
u or AUTO .
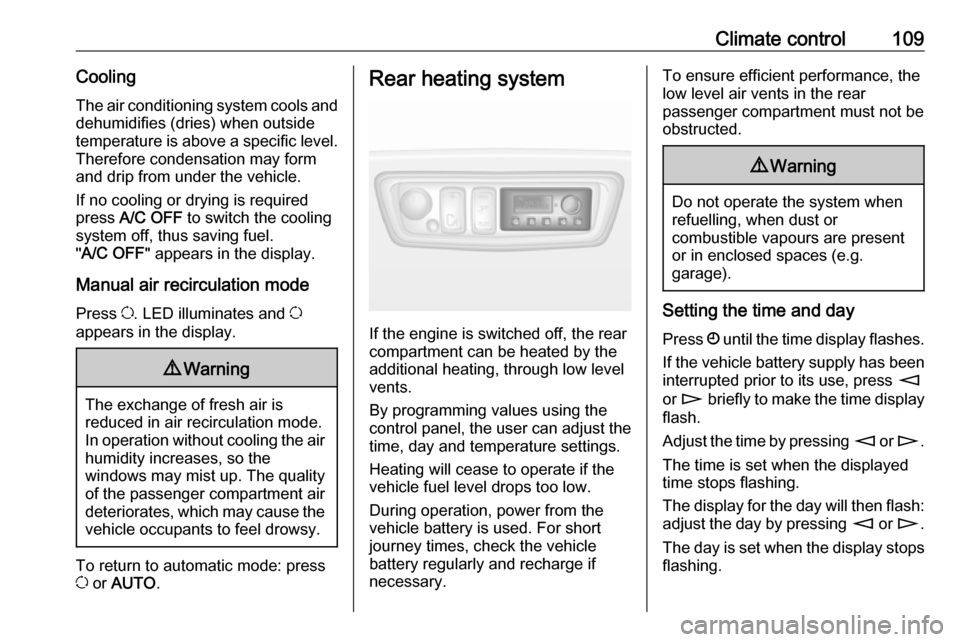
Rear heating system
If the engine is switched off, the rear
compartment can be heated by the
additional heating, through low level
vents.
By programming values using the
control panel, the user can adjust the
time, day and temperature settings.
Heating will cease to operate if the
vehicle fuel level drops too low.
During operation, power from the
vehicle battery is used. For short
journey times, check the vehicle
battery regularly and recharge if
necessary.
To ensure efficient performance, the
low level air vents in the rear
passenger compartment must not be
obstructed.9 Warning
Do not operate the system when
refuelling, when dust or
combustible vapours are present
or in enclosed spaces (e.g.
garage).
Setting the time and day
Press Ö until the time display flashes.
If the vehicle battery supply has been
interrupted prior to its use, press m
or n briefly to make the time display
flash.
Adjust the time by pressing m or n .
The time is set when the displayed
time stops flashing.
The display for the day will then flash: adjust the day by pressing m or n .
The day is set when the display stops
flashing.
Page 112 of 239
110Climate controlThe display will remain illuminated forapprox. 15 seconds after the ignition
is switched off.
Operating the rear compartment
additional heating
Press Y to operate heating. Y will
appear in the display to indicate that
the heating is operating.
Changing the period for which
heating is operating
With the heating switched off ( Y
extinguished in display), press m for
approx. 3 seconds until the time
period for which heating is provided
flashes in the display.
Press m or n to adjust the heating
duration. The duration is set when the
display extinguishes.
Programming the heating mode
It is possible to store up to three
programmes which allow the heating
to be switched on.
Press P the appropriate number of
times to select the desired stored programme.Press m or n briefly; the
programming time flashes in the
display.
Press m or n to adjust to the
desired time, then, as soon as the
time display stops flashing, adjust the day by pressing m or n .
The time and day are set when the
display stops flashing and the clock is displayed.
Recalling a programming mode
To activate a stored programme,
press P the appropriate number of
times until the corresponding number appears on the display.
Neutral position or no stored
programme activated
Press P until there is no stored
programme number visible in the
display.
Adjusting the temperature To adjust the temperature of the
heating, turn the rotary knob located
on the control panel.turn clockwise:increase
temperatureturn anti-clock‐
wise:decrease
temperature
Rear air conditioning
system
The rear air conditioning system is
actuated in conjunction with the front
passenger compartment air
conditioning system.
Bus
Rear air vents
Page 113 of 239
Climate control111Additional air conditioning is supplied
to the rear passenger compartment
via the overhead air vents.
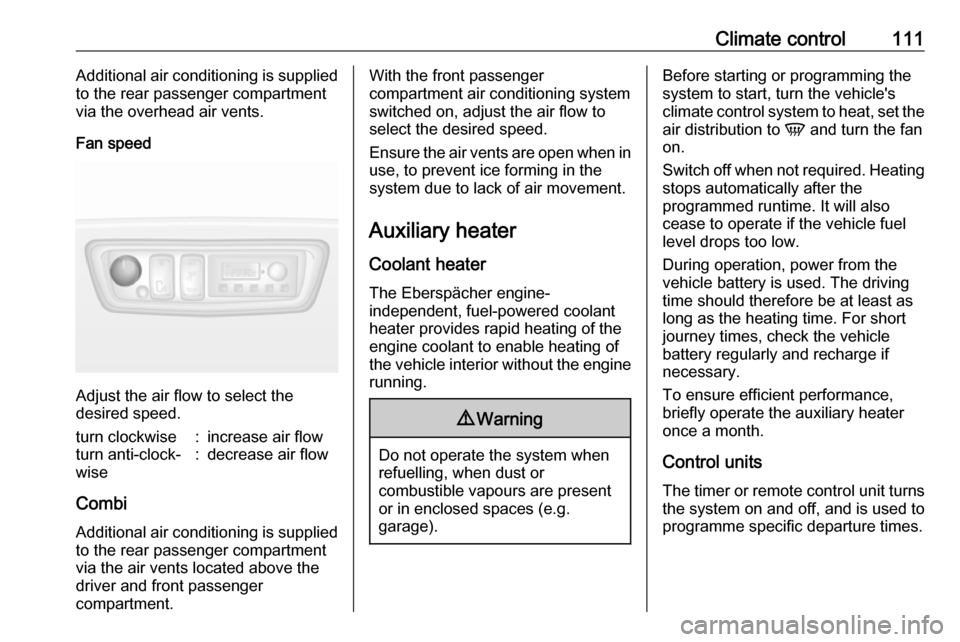
Fan speed
Adjust the air flow to select the
desired speed.
turn clockwise:increase air flowturn anti-clock‐
wise:decrease air flow
Combi
Additional air conditioning is supplied
to the rear passenger compartment
via the air vents located above the
driver and front passenger
compartment.
With the front passenger
compartment air conditioning system
switched on, adjust the air flow to
select the desired speed.
Ensure the air vents are open when in use, to prevent ice forming in the
system due to lack of air movement.
Auxiliary heater
Coolant heater The Eberspächer engine-
independent, fuel-powered coolant
heater provides rapid heating of the
engine coolant to enable heating of
the vehicle interior without the engine
running.9 Warning
Do not operate the system when
refuelling, when dust or
combustible vapours are present
or in enclosed spaces (e.g.
garage).
Before starting or programming the
system to start, turn the vehicle's
climate control system to heat, set the
air distribution to V and turn the fan
on.
Switch off when not required. Heating stops automatically after the
programmed runtime. It will also
cease to operate if the vehicle fuel
level drops too low.
During operation, power from the
vehicle battery is used. The driving
time should therefore be at least as
long as the heating time. For short
journey times, check the vehicle
battery regularly and recharge if
necessary.
To ensure efficient performance,
briefly operate the auxiliary heater
once a month.
Control units
The timer or remote control unit turns the system on and off, and is used to
programme specific departure times.
Page 114 of 239
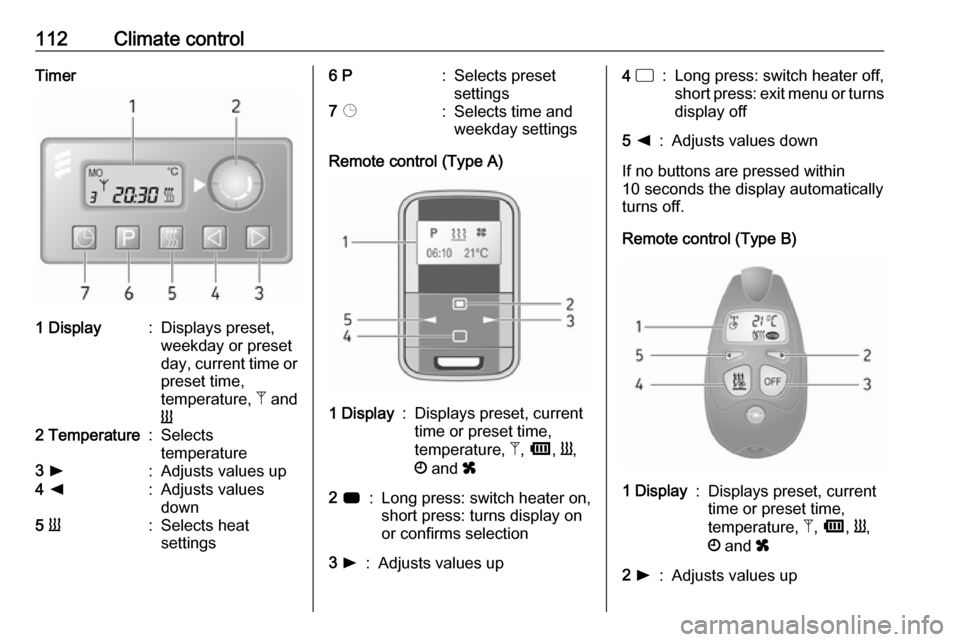
112Climate controlTimer1 Display:Displays preset,
weekday or preset
day, current time or preset time,
temperature, Z and
Y2 Temperature:Selects
temperature3 l:Adjusts values up4 k:Adjusts values
down5 Y:Selects heat
settings6 P:Selects preset
settings7 Þ:Selects time and
weekday settings
Remote control (Type A)
1 Display:Displays preset, current
time or preset time,
temperature, Z, Ü , Y ,
Ö and x2 7:Long press: switch heater on,
short press: turns display on
or confirms selection3 l:Adjusts values up4 d:Long press: switch heater off,
short press: exit menu or turns
display off5 k:Adjusts values down
If no buttons are pressed within
10 seconds the display automatically
turns off.
Remote control (Type B)
1 Display:Displays preset, current
time or preset time,
temperature, Z, Ü , Y ,
Ö and x2 l:Adjusts values up
Page 115 of 239
Climate control1133
OFF:Switch heater off, or press
Y and OFF simultaneously
to confirm selection4 Y:Switch heater on, or press Y
and OFF simultaneously to
confirm selection5 k:Adjusts values down
If no buttons are pressed within
30 seconds the display automatically
turns off.
9 Warning
When refuelling, switch off the
remote control unit as well as the
heater!
The remote control has a maximum
range of 1000 metres. The range may
be reduced due to environmental
conditions and as the battery
becomes weaker.
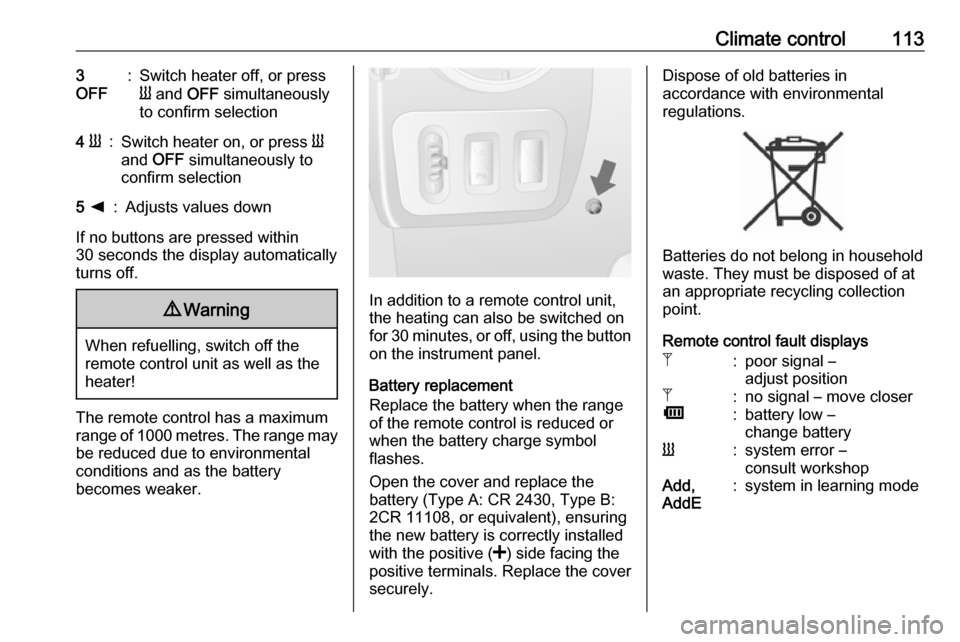
In addition to a remote control unit,
the heating can also be switched on
for 30 minutes, or off, using the button on the instrument panel.
Battery replacement
Replace the battery when the range
of the remote control is reduced or
when the battery charge symbol
flashes.
Open the cover and replace the
battery (Type A: CR 2430, Type B:
2CR 11108, or equivalent), ensuring
the new battery is correctly installed
with the positive ( <) side facing the
positive terminals. Replace the cover
securely.
Dispose of old batteries in
accordance with environmental
regulations.
Batteries do not belong in household
waste. They must be disposed of at
an appropriate recycling collection
point.
Remote control fault displays
Z:poor signal –
adjust positionZ:no signal – move closerÜ:battery low –
change batteryY:system error –
consult workshopAdd,
AddE:system in learning mode
Page 116 of 239

114Climate controlTeach remote control
If the vehicle battery is reconnected,
the LED in the instrument panel
button illuminates and the system
configures the remote control menu
automatically. If the LED flashes,
select Add or AddE and confirm.
Additional remote control units may
also be configured. Press the button
until LED flashes, switch on the
remote control, select Add and
confirm.
AddE teaches the current remote
control unit exclusively and blocks all
previously configured units. Add
teaches up to 4 remote control units, but only one unit can operate the
system at any one time.
Operation
Heating Y
Press Y, the predetermined heating
duration, e.g. 30 is displayed.
To temporarily adjust the heating
duration, adjust with k or l. The
value can be set from 10 to120 minutes. Due to the power
consumption, note the heating
duration.
To switch off, press Y.
To change the default predetermined heating duration, ensure the heater is switched off, press and hold k until
the display flashes and adjust with
k or l.
Programming P
Up to 3 preset departure times during one day, or one preset departure time
over one week can be programmed.
● Press P once to select preset
memory number 1.
● Press P twice to select preset
memory number 2.
● Press P three times to select
preset memory number 3.
● Press P again to exit the preset
memory.
Start heating within 24 hours ● Press P to select desired preset
memory number 1, 2 or 3.
● Briefly press k or l; the preset
time flashes.● Adjust the preset time with k or
l .
● Press P to confirm and exit the
preset memory.
Start heating up to 7 days ● Press P to select desired preset
memory number 1, 2 or 3.
● Briefly press k or l; the preset
time flashes.
● Adjust the preset time with k or
l .
● After 5 seconds the preset day flashes.
● Adjust the preset day with k or
l .
● The preset time and day are set once the display changes to the
current time.
Set time and weekday Þ
If the vehicle battery is disconnected
or its voltage is too low, the unit will
need to be reset.
● Press Þ until the time flashes.
● Press k or l to change the
current time.
Page 117 of 239
Climate control115● Time is stored when the displaystops flashing.
● Wait for weekday to flash.
● Press k or l to change the
weekday.
● Weekday is stored when the display stops flashing.
Heating level
The preferred heating level for
programmed departure times can be
set between 10 to 30℃.
Adjust using the temperature
preselection dial.Air vents
Adjustable air vents
At least one air vent must be open
while cooling is on in order to prevent the evaporator from icing up due tolack of air movement.
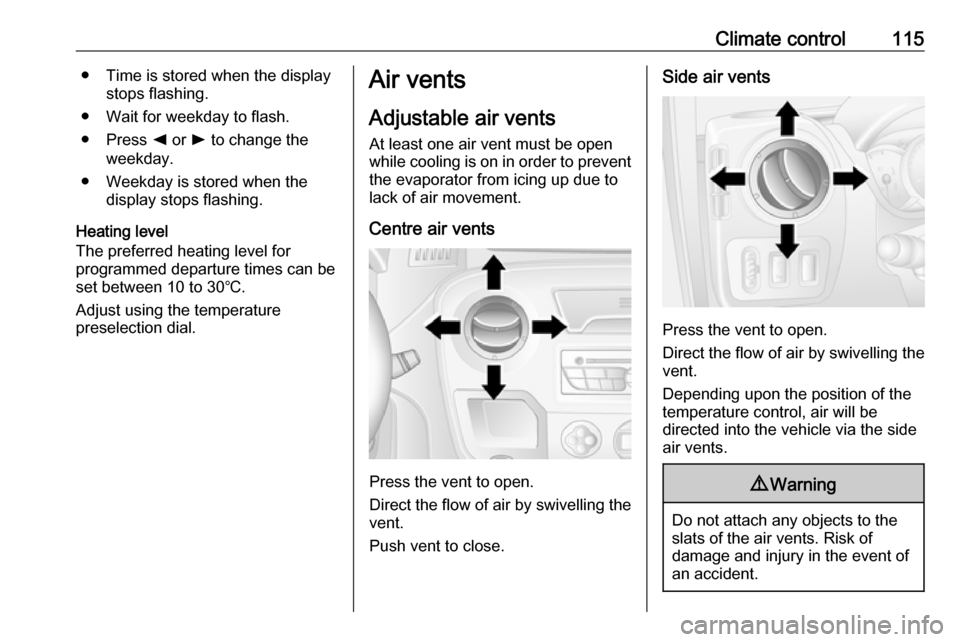
Centre air vents
Press the vent to open.
Direct the flow of air by swivelling the vent.
Push vent to close.
Side air vents
Press the vent to open.
Direct the flow of air by swivelling the vent.
Depending upon the position of the
temperature control, air will be
directed into the vehicle via the side
air vents.
9 Warning
Do not attach any objects to the
slats of the air vents. Risk of
damage and injury in the event of
an accident.
Page 118 of 239
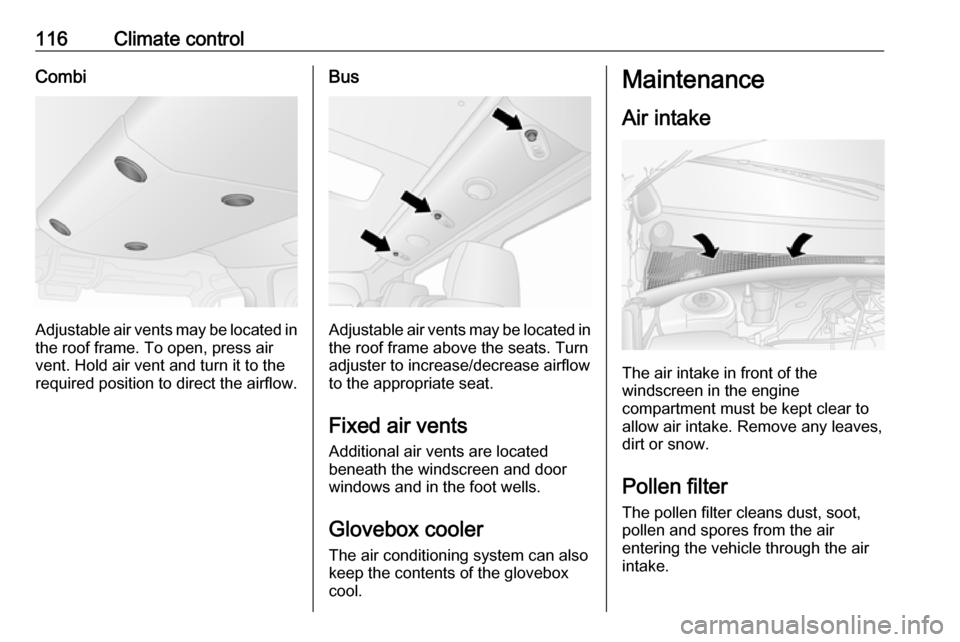
116Climate controlCombi
Adjustable air vents may be located inthe roof frame. To open, press air
vent. Hold air vent and turn it to the
required position to direct the airflow.
Bus
Adjustable air vents may be located in the roof frame above the seats. Turn
adjuster to increase/decrease airflow
to the appropriate seat.
Fixed air vents Additional air vents are located
beneath the windscreen and door
windows and in the foot wells.
Glovebox cooler
The air conditioning system can also
keep the contents of the glovebox
cool.
Maintenance
Air intake
The air intake in front of the
windscreen in the engine
compartment must be kept clear to
allow air intake. Remove any leaves,
dirt or snow.
Pollen filter The pollen filter cleans dust, soot,
pollen and spores from the air
entering the vehicle through the air
intake.
Page 119 of 239

Climate control117Air conditioning regular
operation
In order to ensure continuously
efficient performance, cooling must
be operated for a few minutes once a month, irrespective of the weather
and time of year. Operation with
cooling is not possible when outside
temperature is too low.
Service For optimal cooling performance, it is recommended that the climate control
system be checked annually, starting three years after initial vehicle
registration, including:
● functionality and pressure test
● heating functionality
● leakage check
● check of drive belts
● cleaning of condenser and evaporator drainage
● performance check
Page 120 of 239

118Driving and operatingDriving and
operatingDriving hints ............................... 119
Driving economically ...............119
Control of the vehicle ...............119
Steering ................................... 119
Starting and operating ...............120
New vehicle running-in ............120
Ignition switch positions ...........120
Starting the engine ..................121
Idle speed control ....................121
Overrun cut-off ........................ 122
Stop-start system ....................122
Parking .................................... 124
Air suspension ......................... 125
Engine exhaust .......................... 127
Diesel particle filter ..................127
Catalytic converter ...................127
AdBlue ..................................... 128
Manual transmission ..................133
Manual transmission automa‐ ted .............................................. 134
Transmission display ...............134
Starting the engine ..................134
Selector lever .......................... 134Manual mode........................... 135
Electronic driving programmes 136
Fault ........................................ 137
Interruption of power supply ....137
Brakes ........................................ 137
Antilock brake system .............137
Parking brake .......................... 138
Brake assist ............................. 139
Hill start assist ......................... 139
Ride control systems .................140
Traction Control system ..........140
Electronic stability program .....141
Driver assistance systems .........142
Cruise control .......................... 142
Speed limiter ........................... 145
Parking assist .......................... 146
Rear view camera ...................147
Lane departure warning ..........150
Fuel ............................................ 151
Fuel for diesel engines ............151
Refuelling ................................ 152
Fuel consumption - CO 2-
Emissions .............................. 153
Trailer hitch ................................ 153
General information .................153
Driving characteristics and towing tips .............................. 153
Trailer towing ........................... 154Towing equipment ...................154
Trailer stability assist ...............155
Auxiliary features .......................155
Power take-off ......................... 155