VAUXHALL MOVANO_B 2016.5 Owner's Manual
Manufacturer: VAUXHALL, Model Year: 2016.5, Model line: MOVANO_B, Model: VAUXHALL MOVANO_B 2016.5Pages: 239, PDF Size: 5.64 MB
Page 171 of 239
Vehicle care169
5. Detach bulb from bulb holder andrenew the bulb.
6. Insert the bulb holder, engaging the two lugs in the reflectorhousing and rotate clockwise to
secure.
7. Reattach wiring connector to bulb.
8. Replace protective cover.
Adaptive forward lighting
Cornering light
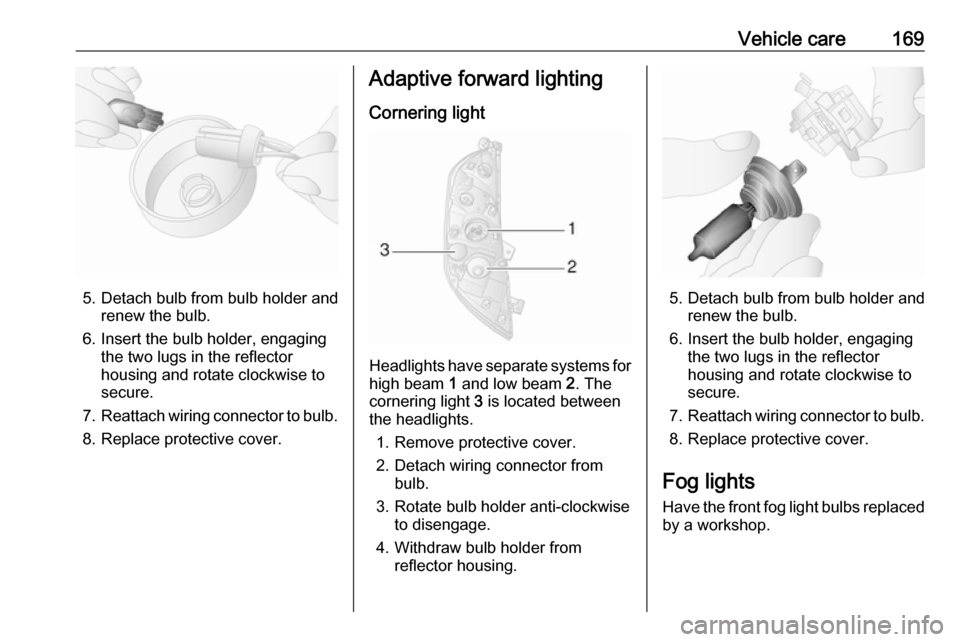
Headlights have separate systems for high beam 1 and low beam 2. The
cornering light 3 is located between
the headlights.
1. Remove protective cover.
2. Detach wiring connector from bulb.
3. Rotate bulb holder anti-clockwise to disengage.
4. Withdraw bulb holder from reflector housing.
5. Detach bulb from bulb holder andrenew the bulb.
6. Insert the bulb holder, engaging the two lugs in the reflectorhousing and rotate clockwise to
secure.
7. Reattach wiring connector to bulb.
8. Replace protective cover.
Fog lights
Have the front fog light bulbs replaced by a workshop.
Page 172 of 239

170Vehicle careFront turn signal lights
1. Remove protective cover.
2. Detach wiring connector from bulb.
3. Rotate bulb holder anti-clockwise to disengage.
4. Withdraw bulb holder from reflector housing.
5. Detach bulb from bulb holder andrenew the bulb.
6. Insert the bulb holder, engaging the two lugs in the reflectorhousing and rotate clockwise to
secure.
7. Reattach wiring connector to bulb.
8. Replace protective cover.
Tail lights
Rear brake, tail, turn signal,
reverse and fog tail lights
1. Remove the upper and lower trim panels from the rear pillar.
2. Unscrew the two nuts from the locating pins on the rear of the
lamp assembly.
3. Withdraw the lamp assembly rearwards from the outer side.
4. Detach wiring connector from lamp assembly.
Page 173 of 239
Vehicle care171
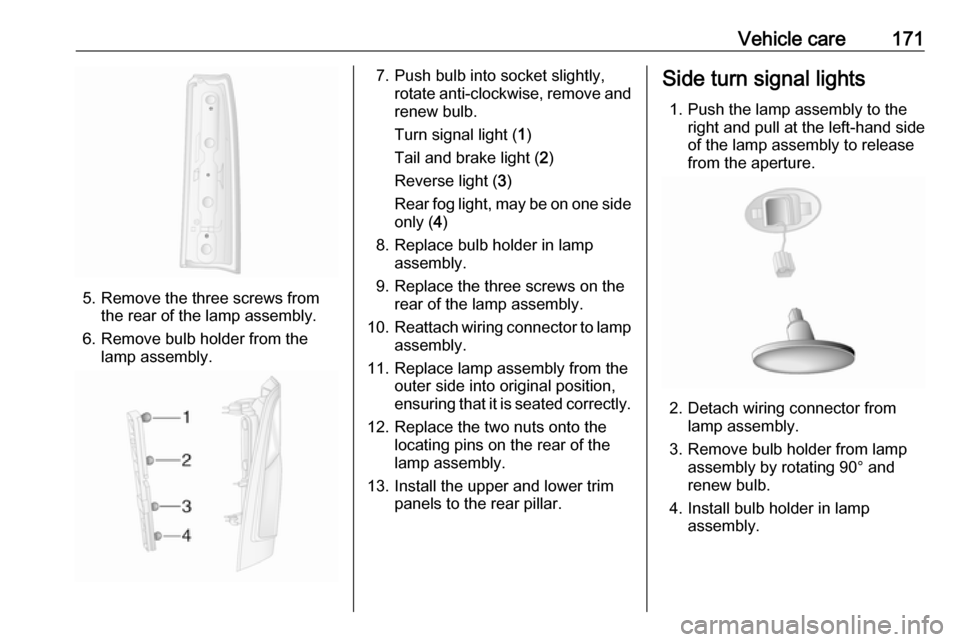
5. Remove the three screws fromthe rear of the lamp assembly.
6. Remove bulb holder from the lamp assembly.
7. Push bulb into socket slightly, rotate anti-clockwise, remove and
renew bulb.
Turn signal light ( 1)
Tail and brake light ( 2)
Reverse light ( 3)
Rear fog light, may be on one side only ( 4)
8. Replace bulb holder in lamp assembly.
9. Replace the three screws on the rear of the lamp assembly.
10. Reattach wiring connector to lamp
assembly.
11. Replace lamp assembly from the outer side into original position,
ensuring that it is seated correctly.
12. Replace the two nuts onto the locating pins on the rear of the
lamp assembly.
13. Install the upper and lower trim panels to the rear pillar.Side turn signal lights
1. Push the lamp assembly to the right and pull at the left-hand side
of the lamp assembly to release
from the aperture.
2. Detach wiring connector from lamp assembly.
3. Remove bulb holder from lamp assembly by rotating 90° and
renew bulb.
4. Install bulb holder in lamp assembly.
Page 174 of 239
172Vehicle care5. Reattach wiring connector.
6. Install lamp assembly into aperture and push to the left to
secure.
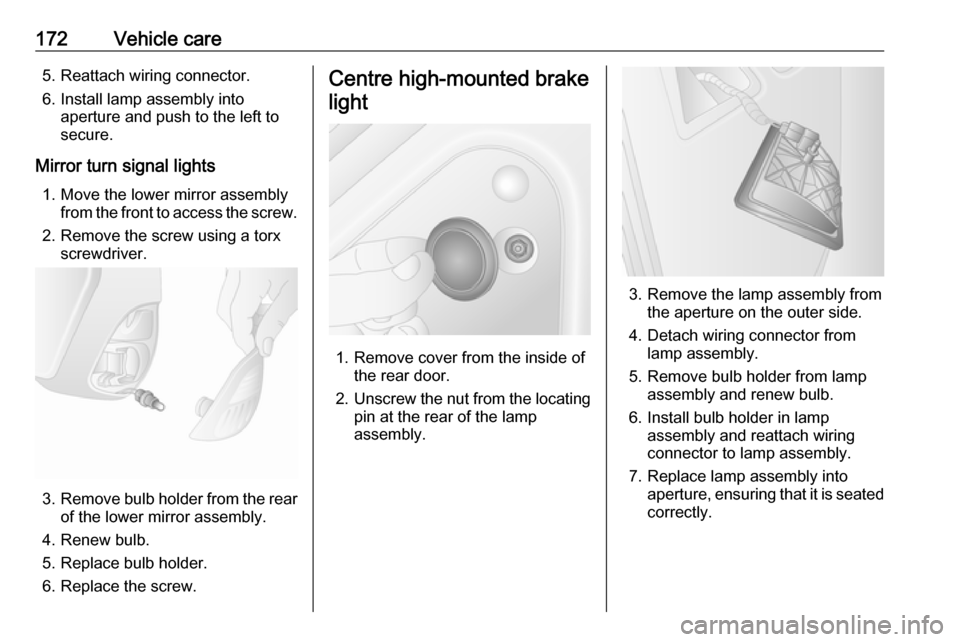
Mirror turn signal lights 1. Move the lower mirror assembly from the front to access the screw.
2. Remove the screw using a torx screwdriver.
3. Remove bulb holder from the rear
of the lower mirror assembly.
4. Renew bulb.
5. Replace bulb holder.
6. Replace the screw.
Centre high-mounted brake
light
1. Remove cover from the inside of the rear door.
2. Unscrew the nut from the locating
pin at the rear of the lamp
assembly.
3. Remove the lamp assembly from the aperture on the outer side.
4. Detach wiring connector from lamp assembly.
5. Remove bulb holder from lamp assembly and renew bulb.
6. Install bulb holder in lamp assembly and reattach wiring
connector to lamp assembly.
7. Replace lamp assembly into aperture, ensuring that it is seated
correctly.
Page 175 of 239
Vehicle care1738. Replace the nut onto the locatingpin on the rear of the lamp
assembly.
9. Install cover on the inside of the rear door.
Number plate light
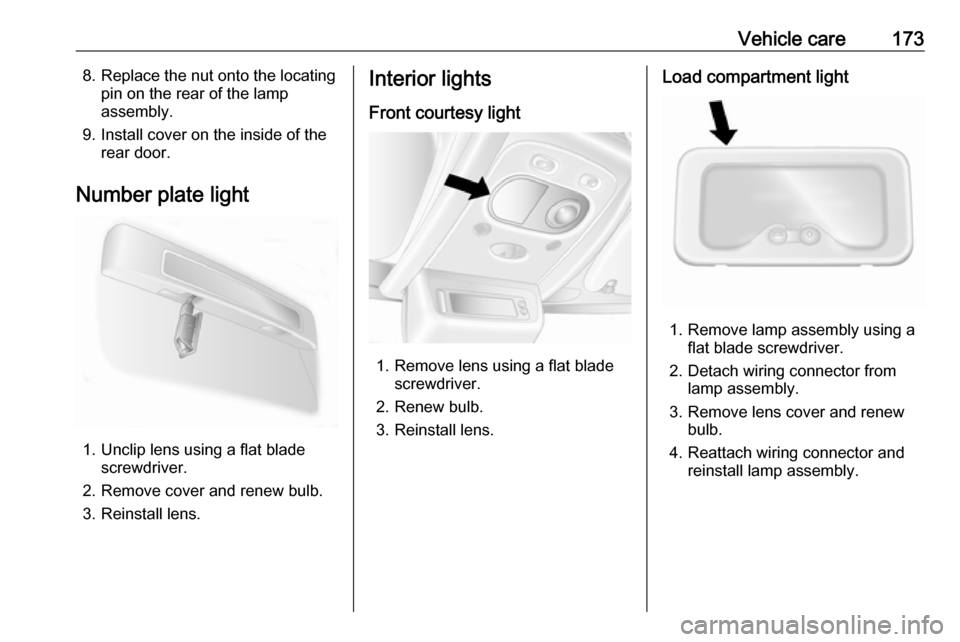
1. Unclip lens using a flat blade screwdriver.
2. Remove cover and renew bulb.
3. Reinstall lens.
Interior lights
Front courtesy light
1. Remove lens using a flat blade screwdriver.
2. Renew bulb.
3. Reinstall lens.
Load compartment light
1. Remove lamp assembly using a flat blade screwdriver.
2. Detach wiring connector from lamp assembly.
3. Remove lens cover and renew bulb.
4. Reattach wiring connector and reinstall lamp assembly.
Page 176 of 239
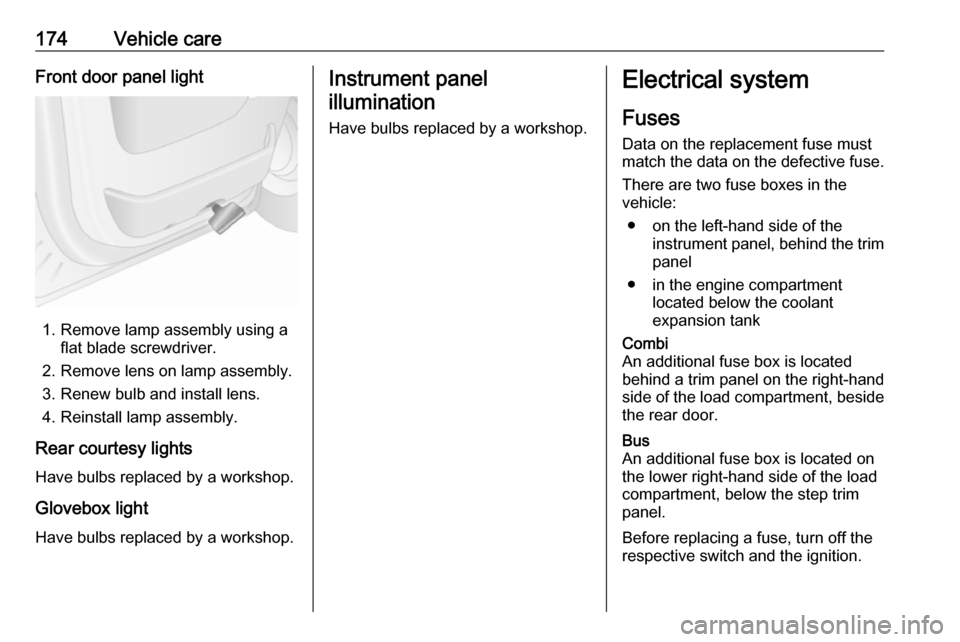
174Vehicle careFront door panel light
1. Remove lamp assembly using aflat blade screwdriver.
2. Remove lens on lamp assembly.
3. Renew bulb and install lens. 4. Reinstall lamp assembly.
Rear courtesy lights Have bulbs replaced by a workshop.
Glovebox light
Have bulbs replaced by a workshop.
Instrument panel
illumination
Have bulbs replaced by a workshop.Electrical system
Fuses Data on the replacement fuse must
match the data on the defective fuse.
There are two fuse boxes in the
vehicle:
● on the left-hand side of the instrument panel, behind the trim
panel
● in the engine compartment located below the coolant
expansion tankCombi
An additional fuse box is located
behind a trim panel on the right-hand
side of the load compartment, beside the rear door.Bus
An additional fuse box is located on
the lower right-hand side of the load
compartment, below the step trim
panel.
Before replacing a fuse, turn off the
respective switch and the ignition.
Page 177 of 239
Vehicle care175
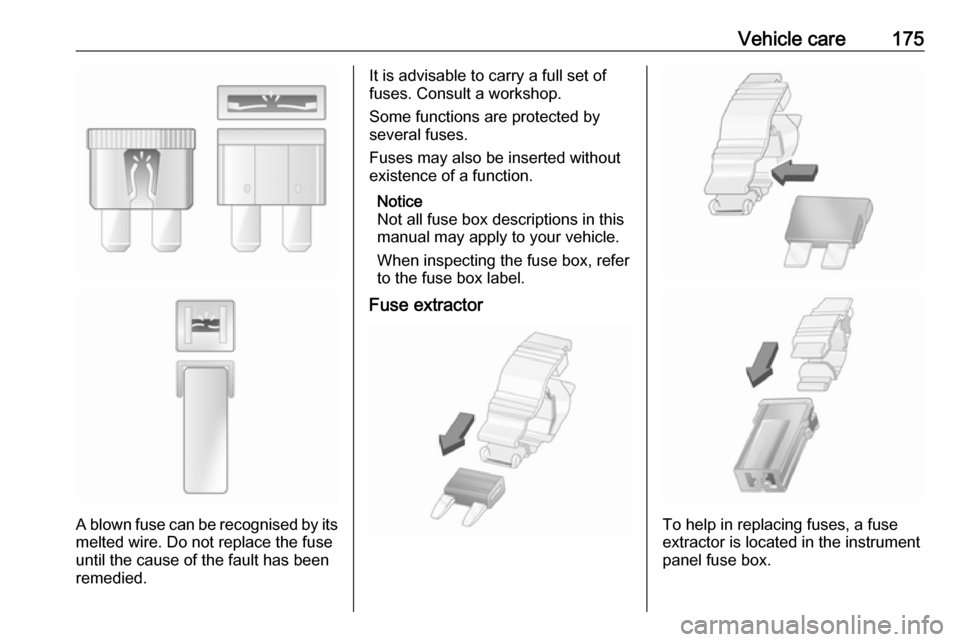
A blown fuse can be recognised by itsmelted wire. Do not replace the fuse
until the cause of the fault has been
remedied.
It is advisable to carry a full set of
fuses. Consult a workshop.
Some functions are protected by
several fuses.
Fuses may also be inserted without
existence of a function.
Notice
Not all fuse box descriptions in this
manual may apply to your vehicle.
When inspecting the fuse box, refer to the fuse box label.
Fuse extractor
To help in replacing fuses, a fuse
extractor is located in the instrument
panel fuse box.
Page 178 of 239
176Vehicle carePlace the fuse extractor on the
various types of fuse from the top or
side, and withdraw fuse.
Engine compartment fusebox
Located below the coolant expansion
tank.
Some circuits may be protected by
several fuses.
Due to restricted accessibility, have
fuses replaced by a workshop.SymbolCircuitSRight side lightsTLeft side lightsWRight low beamaLeft low beam>Front fog lightLLeft high beamNRight high beamuABSKWindscreen wiperSymbolCircuitnHeating and ventilation
system / Air conditioningVHeated windscreen
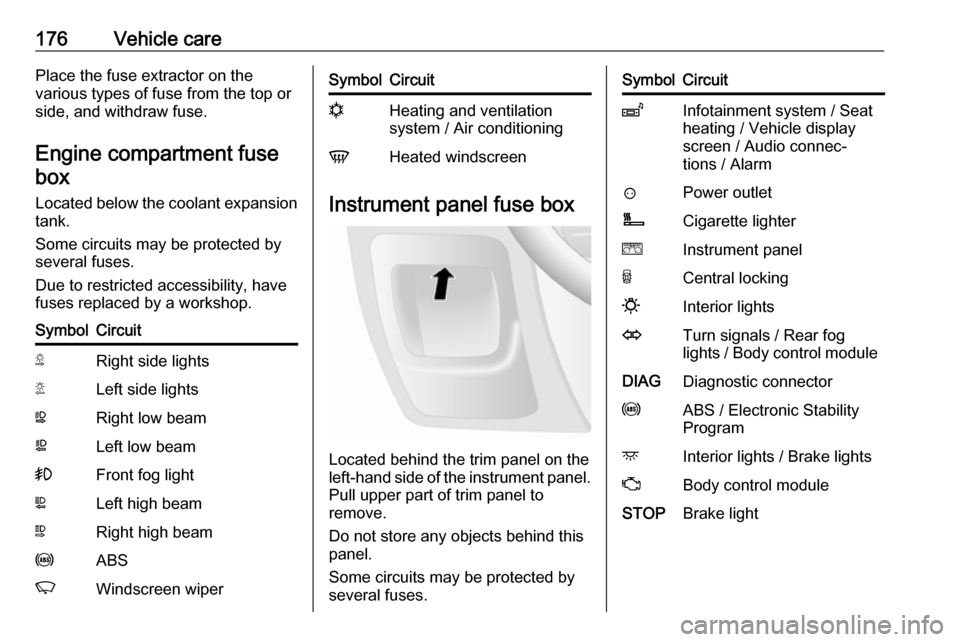
Instrument panel fuse box
Located behind the trim panel on the
left-hand side of the instrument panel.
Pull upper part of trim panel to
remove.
Do not store any objects behind this
panel.
Some circuits may be protected by
several fuses.
SymbolCircuitZInfotainment system / Seat
heating / Vehicle display
screen / Audio connec‐
tions / Alarm?Power outletÌCigarette lightereInstrument panelUCentral locking0Interior lightsOTurn signals / Rear fog
lights / Body control moduleDIAGDiagnostic connectoruABS / Electronic Stability
ProgramdInterior lights / Brake lightsZBody control moduleSTOPBrake light
Page 179 of 239
Vehicle care177SymbolCircuitIBody control module /
Power windows / Heating
and ventilation system / Air
conditioningmLeft heated rear windownRight heated rear windowRWindscreen washerMElectronic immobiliserUHeated seatsFBLCornering lightlHands-free connection&TachographPTOPower take-offjHornÍPreheating / Diesel fuel filterxClimate control fandHeated exterior mirrorsTLeft-hand side lightSRight-hand side lightSymbolCircuitQPneumatic suspensionONavigation systemADPAdditional adaptations,Power windows / Body
control module
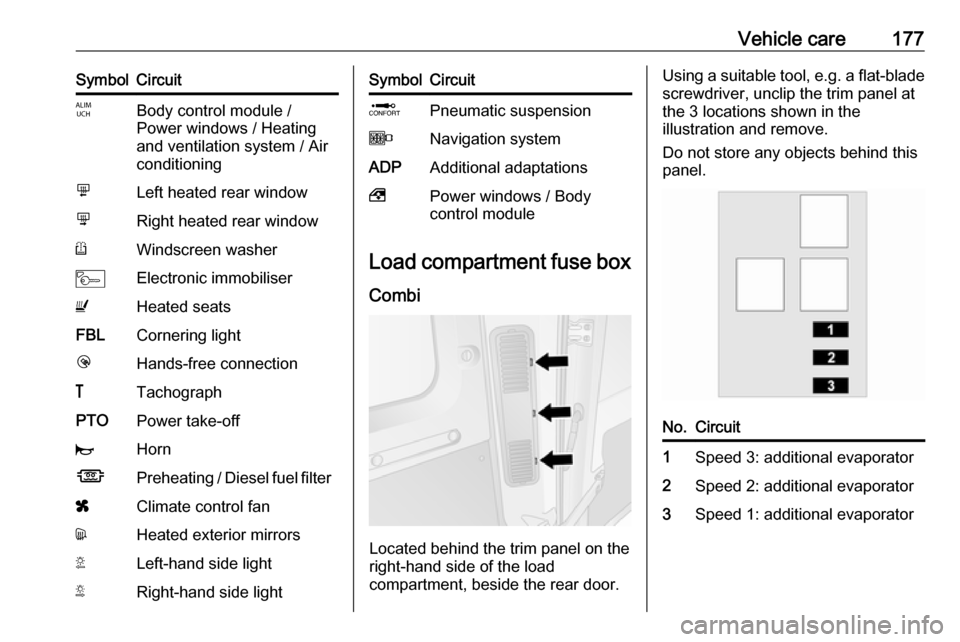
Load compartment fuse box
Combi
Located behind the trim panel on the
right-hand side of the load
compartment, beside the rear door.
Using a suitable tool, e.g. a flat-blade screwdriver, unclip the trim panel at
the 3 locations shown in the
illustration and remove.
Do not store any objects behind this
panel.No.Circuit1Speed 3: additional evaporator2Speed 2: additional evaporator3Speed 1: additional evaporator
Page 180 of 239
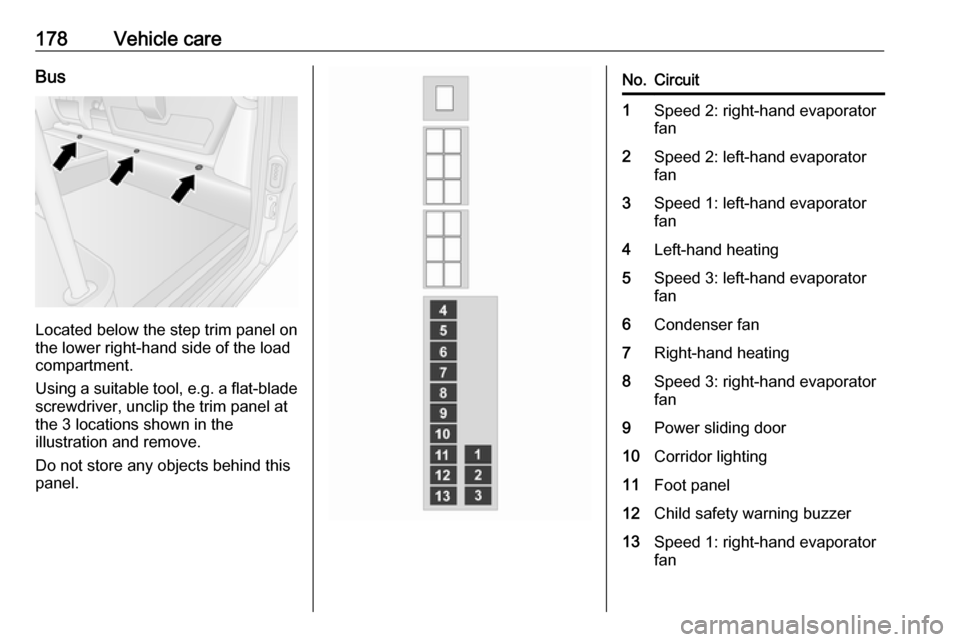
178Vehicle careBus
Located below the step trim panel on
the lower right-hand side of the load
compartment.
Using a suitable tool, e.g. a flat-blade screwdriver, unclip the trim panel at
the 3 locations shown in the
illustration and remove.
Do not store any objects behind this
panel.
No.Circuit1Speed 2: right-hand evaporator
fan2Speed 2: left-hand evaporator
fan3Speed 1: left-hand evaporator
fan4Left-hand heating5Speed 3: left-hand evaporator
fan6Condenser fan7Right-hand heating8Speed 3: right-hand evaporator
fan9Power sliding door10Corridor lighting11Foot panel12Child safety warning buzzer13Speed 1: right-hand evaporator
fan