check oil VAUXHALL VIVARO 2014.5 Owner's Manual
[x] Cancel search | Manufacturer: VAUXHALL, Model Year: 2014.5, Model line: VIVARO, Model: VAUXHALL VIVARO 2014.5Pages: 189, PDF Size: 4.16 MB
Page 18 of 189

16In brief
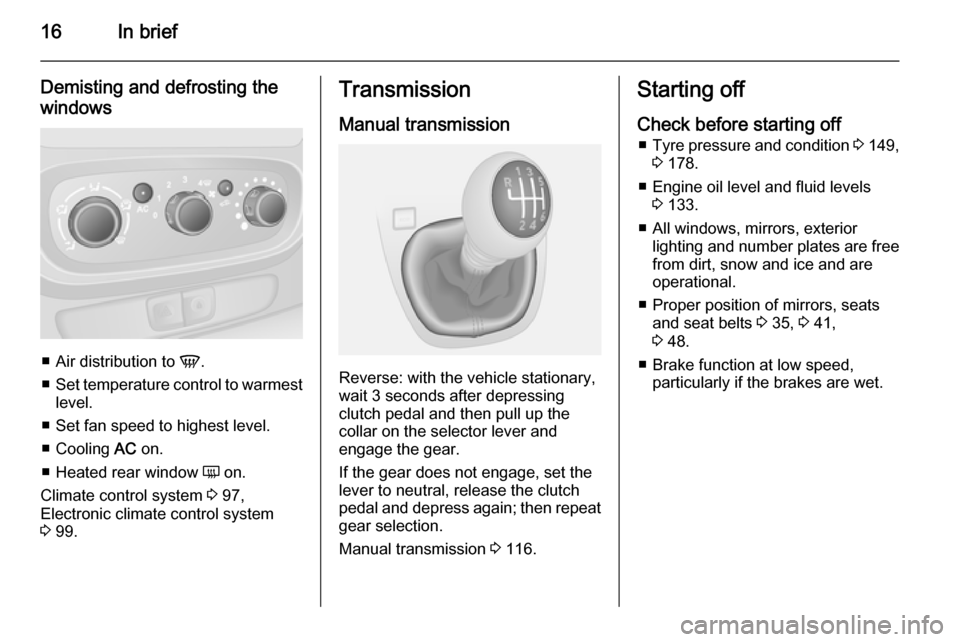
Demisting and defrosting the
windows
â– Air distribution to V.
â– Set temperature control to warmest
level.
â– Set fan speed to highest level.
â– Cooling AC on.
â– Heated rear window Ăś on.
Climate control system 3 97,
Electronic climate control system 3 99.
Transmission
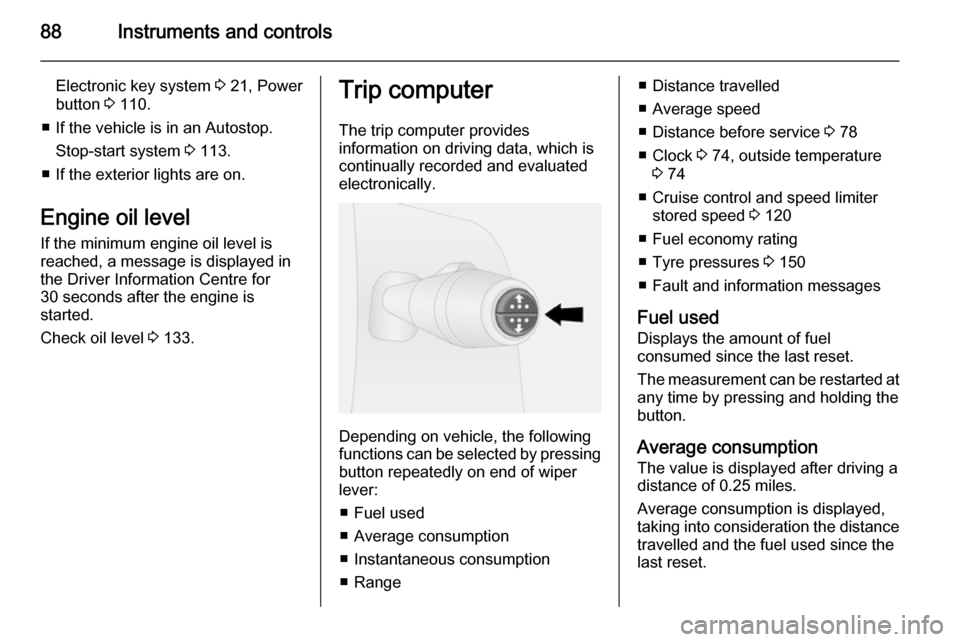
Manual transmission
Reverse: with the vehicle stationary,
wait 3 seconds after depressing
clutch pedal and then pull up the
collar on the selector lever and
engage the gear.
If the gear does not engage, set the
lever to neutral, release the clutch
pedal and depress again; then repeat
gear selection.
Manual transmission 3 116.
Starting off
Check before starting off â– Tyre pressure and condition 3 149,
3 178.
â– Engine oil level and fluid levels 3 133.
â– All windows, mirrors, exterior lighting and number plates are free
from dirt, snow and ice and are
operational.
â– Proper position of mirrors, seats and seat belts 3 35, 3 41,
3 48.
â– Brake function at low speed, particularly if the brakes are wet.
Page 86 of 189

84Instruments and controlsEngine coolant
temperature
W illuminates blue or red.
Illuminates red briefly when the
ignition is switched on, then turns blue.
Illuminates red when the engine is running
Stop, switch off engine.Caution
Coolant temperature too high.
Check coolant level 3 135.
If there is sufficient coolant, consult a workshop.
The control indicator must be blue
before continuing driving.
Preheating
! illuminates yellow.
Preheating is activated. Only
activates when outside temperature
is low.
Tyre pressure monitoring
system
w illuminates or flashes.
Illuminates Tyre pressure loss. Stop immediately
and check tyre pressure.
Flashes Fault in system or tyre without
pressure sensor mounted ( e.g. spare
wheel). After a delay the control
indicator illuminates continuously.
Consult a workshop.
Tyre pressure monitoring system 3 150.
Engine oil pressure
I illuminates red.
Illuminates briefly when the ignition is
switched on.Illuminates when the engine is
running
If control indicator I illuminates
when the engine is running
(accompanied by a warning chime):
Stop, switch off engine.Caution
Engine lubrication may be
interrupted. This may result in
damage to the engine and/or
locking of the drive wheels.
1. Depress clutch.
2. Select neutral gear (or move selector lever to N).
3. Move out of the flow of traffic as quickly as possible without
impeding other vehicles.
4. Switch off ignition.
Page 87 of 189

Instruments and controls859Warning
When the engine is off,
considerably more force is needed
to brake and steer.
Do not remove key until vehicle is stationary, otherwise the steeringwheel lock could engage
unexpectedly.
Check oil level before seeking
assistance of a workshop 3 133.
Fuel economy mode
ECO illuminates green when ECO
mode is engaged to reduce fuel
consumption.
ECO mode, driving economically
3 108.
Low fuel Y illuminates yellow.
Illuminates when level in fuel tank is
too low; refuel immediately 3 127.
Catalytic converter 3 115.
Bleeding the diesel fuel system
3 138.
Autostop
D illuminates when engine is in an
Autostop.
Stop-start system 3 113.
Exterior light 9 illuminates green.
Illuminated when the headlights are on.
8 illuminates green.
Illuminated when the sidelights are
on.
Lighting 3 91.
High beam P illuminates blue.
Illuminated when high beam is on and
during headlight flash 3 92.
Fog light
> illuminates green.Illuminated when the front fog lights
are on 3 93.
Rear fog light
r illuminates green.
Illuminated when the rear fog light is
on 3 93.
Cruise control
m , U illuminates green or yellow.
m illuminates green when a certain
speed is stored.
U illuminates green when the system
is on.
Speed limiter U illuminates yellow.
U illuminates yellow when the
system is on.
Cruise control and speed limiter
3 120.
Door open
U illuminates red.
Page 90 of 189

88Instruments and controls
Electronic key system 3 21, Power
button 3 110.
â– If the vehicle is in an Autostop. Stop-start system 3 113.
â– If the exterior lights are on.
Engine oil level If the minimum engine oil level is
reached, a message is displayed in
the Driver Information Centre for 30 seconds after the engine is
started.
Check oil level 3 133.Trip computer
The trip computer provides
information on driving data, which is
continually recorded and evaluated electronically.
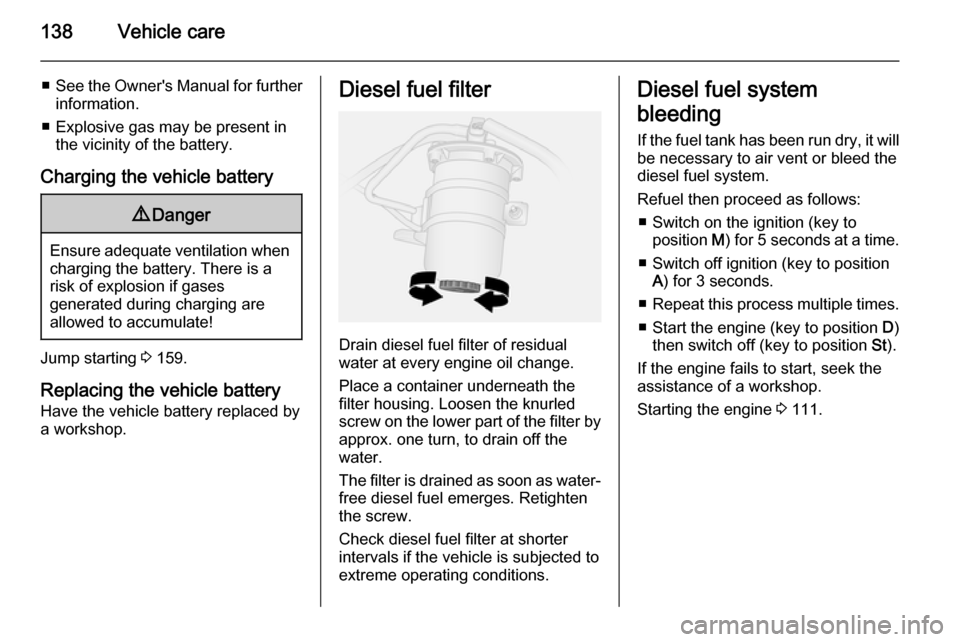
Depending on vehicle, the following
functions can be selected by pressing button repeatedly on end of wiper
lever:
â– Fuel used
â– Average consumption
â– Instantaneous consumption
â– Range
â– Distance travelled
â– Average speed
â– Distance before service 3 78
â– Clock 3 74, outside temperature
3 74
â– Cruise control and speed limiter stored speed 3 120
â– Fuel economy rating
â– Tyre pressures 3 150
â– Fault and information messages
Fuel used Displays the amount of fuel
consumed since the last reset.
The measurement can be restarted at
any time by pressing and holding the
button.
Average consumption
The value is displayed after driving a
distance of 0.25 miles.
Average consumption is displayed,
taking into consideration the distance
travelled and the fuel used since the
last reset.
Page 133 of 189

Vehicle care131Vehicle careGeneral Information...................131
Vehicle checks ........................... 132
Bulb replacement .......................139
Electrical system ........................144
Vehicle tools .............................. 148
Wheels and tyres .......................149
Jump starting ............................. 159
Towing ....................................... 161
Appearance care .......................162General Information
Accessories and vehicle
modifications
We recommend the use of Genuine Parts and Accessories and factory
approved parts specific for your
vehicle type. We cannot assess or guarantee reliability of other products
- even if they have a regulatory or
otherwise granted approval.
Do not make any modifications to the electrical system, e.g. changes of
electronic control units (chip tuning).
Vehicle storage Storage for a long period of time
If the vehicle is to be stored for several months:
â– Wash and wax the vehicle.
â– Have the wax in the engine compartment and underbody
checked.
â– Clean and preserve rubber seals.
â– Fill up fuel tank completely.â– Change the engine oil.
â– Drain the washer fluid reservoir.
â– Check the coolant antifreeze and corrosion protection.
â– Adjust tyre pressure to the value specified for full load.
â– Park vehicle in a dry, well ventilated
place. Engage first or reverse gear. Prevent the vehicle from rolling.
â– Do not apply the parking brake.
â– Open the bonnet, close all doors and lock the vehicle.
â– Disconnect the clamp from the negative terminal of the vehicle
battery. Beware that all systems are
not functional, e.g. anti-theft alarm
system.
Putting back into operation When the vehicle is to be put back into
operation:
â– Connect the clamp to the negative terminal of the vehicle battery.
Activate the electronics of the
power windows.
â– Check tyre pressure.
Page 134 of 189

132Vehicle care
â– Fill up the washer fluid reservoir.
â– Check the engine oil level.
â– Check the coolant level.
â– Fit the number plate, if necessary.
End-of-life vehicle
recovery
Information on end-of-life vehicle
recovery centres and the recycling of
end-of-life vehicles is available on our website. Only entrust this work to an
authorised recycling centre.Vehicle checks
Performing work9 Warning
Only perform engine compartment
checks when the ignition is off.
The cooling fan may start
operating even if the ignition is off.
9 Danger
The ignition system generates
extremely high voltages. Do not
touch.
The caps for topping up the engine oil, the coolant, the washer fluid and the
oil dipstick handle are yellow for ease
of identification.
Bonnet
Opening
Pull the release lever and return it to
its original position.
Page 135 of 189

Vehicle care133
Move the safety catch (located
slightly right of centre) sideways to
the left and open the bonnet.
The bonnet is held open
automatically.
If the bonnet is opened during an
Autostop, the engine will be restarted automatically for safety reasons.
Stop-start system 3 113.
Closing Lower the bonnet and let it fall into the
latch from a low height (20-25 cm).
Check that the bonnet is engaged.
Engine oil
Check the engine oil level manually
on a regular basis to prevent damage
to the engine.
Ensure that the correct specification
of oil is used. Recommended fluids
and lubricants 3 166.
Check with the vehicle on a level
surface. The engine must be at
operating temperature and switched
off for at least 10 minutes.
Pull out the dipstick, wipe it clean, insert it to the stop on the handle, pull
out and read the engine oil level.Caution
It is the owner's responsibility to
maintain the proper level of an
appropriate quality oil in the
engine.
When the engine oil level has
dropped to the "add oil" mark A, top
up engine oil.
Caution
Do not allow the engine oil level to drop below the minimum level!
Page 140 of 189

138Vehicle care
â– See the Owner's Manual for further
information.
â– Explosive gas may be present in the vicinity of the battery.
Charging the vehicle battery9 Danger
Ensure adequate ventilation when
charging the battery. There is a
risk of explosion if gases
generated during charging are
allowed to accumulate!
Jump starting 3 159.
Replacing the vehicle battery
Have the vehicle battery replaced by
a workshop.
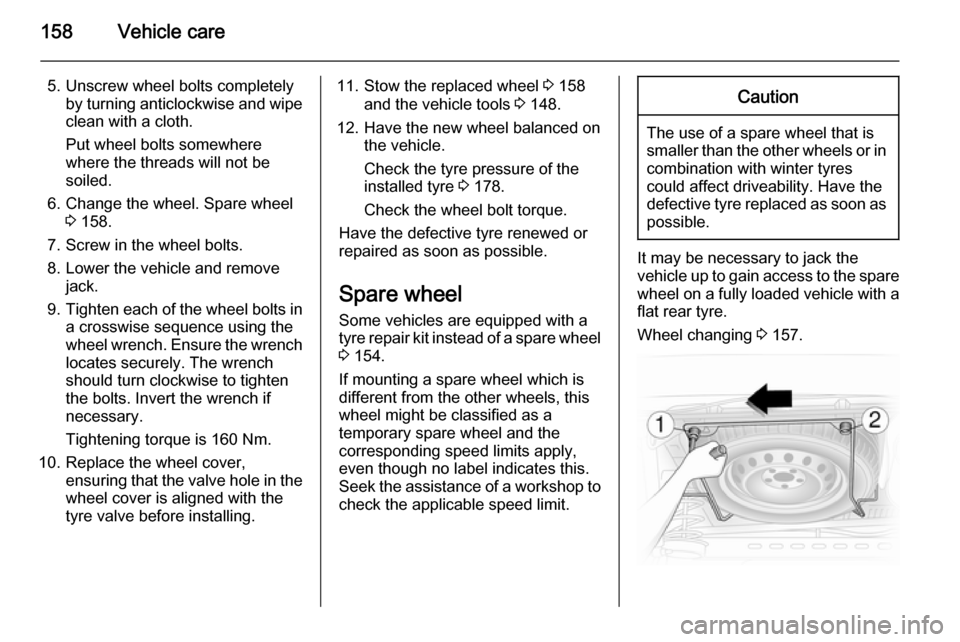
Diesel fuel filter
Drain diesel fuel filter of residual
water at every engine oil change.
Place a container underneath the
filter housing. Loosen the knurled
screw on the lower part of the filter by approx. one turn, to drain off the
water.
The filter is drained as soon as water-
free diesel fuel emerges. Retighten
the screw.
Check diesel fuel filter at shorter
intervals if the vehicle is subjected to
extreme operating conditions.
Diesel fuel system
bleeding
If the fuel tank has been run dry, it will
be necessary to air vent or bleed the
diesel fuel system.
Refuel then proceed as follows: â– Switch on the ignition (key to position M) for 5 seconds at a time.
â– Switch off ignition (key to position A) for 3 seconds.
â– Repeat this process multiple times.
â– Start the engine (key to position D)
then switch off (key to position St).
If the engine fails to start, seek the
assistance of a workshop.
Starting the engine 3 111.
Page 160 of 189

158Vehicle care
5. Unscrew wheel bolts completelyby turning anticlockwise and wipe
clean with a cloth.
Put wheel bolts somewhere
where the threads will not be
soiled.
6. Change the wheel. Spare wheel 3 158.
7. Screw in the wheel bolts.
8. Lower the vehicle and remove jack.
9. Tighten each of the wheel bolts in
a crosswise sequence using the
wheel wrench. Ensure the wrench
locates securely. The wrench
should turn clockwise to tighten
the bolts. Invert the wrench if
necessary.
Tightening torque is 160 Nm.
10. Replace the wheel cover, ensuring that the valve hole in thewheel cover is aligned with the
tyre valve before installing.11. Stow the replaced wheel 3 158
and the vehicle tools 3 148.
12. Have the new wheel balanced on the vehicle.
Check the tyre pressure of the
installed tyre 3 178.
Check the wheel bolt torque.
Have the defective tyre renewed or
repaired as soon as possible.
Spare wheel
Some vehicles are equipped with a tyre repair kit instead of a spare wheel 3 154.
If mounting a spare wheel which is
different from the other wheels, this
wheel might be classified as a
temporary spare wheel and the
corresponding speed limits apply,
even though no label indicates this.
Seek the assistance of a workshop to
check the applicable speed limit.Caution
The use of a spare wheel that is smaller than the other wheels or in combination with winter tyres
could affect driveability. Have the defective tyre replaced as soon as
possible.
It may be necessary to jack the
vehicle up to gain access to the spare
wheel on a fully loaded vehicle with a
flat rear tyre.
Wheel changing 3 157.
Page 166 of 189

164Vehicle care
Paintwork damageRectify minor paintwork damage with
a touch-up pen before rust forms.
Have more extensive damage or rust
areas repaired by a workshop.
UnderbodySome areas of the vehicle underbody
have a PVC undercoating while other
critical areas have a durable
protective wax coating.
After the underbody is washed, check
the underbody and have it waxed if
necessary.
Bitumen/rubber materials could
damage the PVC coating. Have
underbody work carried out by a
workshop.
Before and after winter, wash the
underbody and have the protective
wax coating checked.
Towing equipment
Do not clean the coupling ball bar with a steam-jet or high-pressure jet
cleaner.Interior care
Interior and upholstery
Only clean the vehicle interior,
including the instrument panel fascia
and panelling, with a dry cloth or
interior cleaner.
Clean any leather upholstery with
clear water and a soft cloth. In case of heavy soiling, use leather care.
The instrument cluster and the
displays should only be cleaned using
a soft damp cloth. If necessary use a
weak soap solution.
Clean fabric upholstery with a
vacuum cleaner and brush. Remove
stains with an upholstery cleaner.
Clothing fabrics may not be
colourfast. This could cause visible
discolourations, especially on light- coloured upholstery. Removable
stains and discolourations should be
cleaned as soon as possible.
Clean seat belts with lukewarm water or interior cleaner.Caution
Close Velcro fasteners as open
Velcro fasteners on clothing could damage seat upholstery.
The same applies to clothing with
sharp-edged objects, like zips or
belts or studded jeans.
Plastic and rubber parts
Plastic and rubber parts can be
cleaned with the same cleaner as
used to clean the body. Use interior cleaner if necessary. Do not use any
other agent. Avoid solvents and petrol in particular. Do not use high-
pressure jet cleaners.