VAUXHALL VIVARO 2014 Owners Manual
Manufacturer: VAUXHALL, Model Year: 2014, Model line: VIVARO, Model: VAUXHALL VIVARO 2014Pages: 173, PDF Size: 4.11 MB
Page 91 of 173

Climate control89
Teach remote control
If the vehicle battery is reconnected, the LED in the instrument panel
button illuminates and the system
configures the remote control menu
automatically. If the LED flashes,
press OK button on remote control,
select Add or AddE and confirm.
Additional remote control units may
also be configured. Press the button
until LED flashes, switch on the
remote control, select Add and
confirm.
AddE teaches the current remote
control unit exclusively and blocks all
previously configured units. Add
teaches up to 4 remote control units,
but only one unit can operate the
system at any one time.
Operation
Heating Y
Select Y in the menu bar and confirm.
The predetermined heating duration,
e.g. L 30, flashes in the display. The
factory setting is 30 minutes.To temporarily adjust the heating
duration, adjust with the q or r
button and confirm. The value can be
set from 10 to 120 minutes. Due to the
power consumption, note the heating duration.
To switch off, select Y in the menu bar
again and confirm.
Ventilation x
Select x in the menu bar and confirm.
The ventilation duration can be
accepted or adjusted. The duration
shown is accepted without
confirmation.
To switch off, select x in the menu bar
again and confirm.
Programming P
Up to 3 preset departure times can be
programmed, either during one day or
over one week.
■ Select P in the menu bar and
confirm
■ Select desired preset memory number 1, 2 or 3 and confirm
■ Select day and confirm■ Select hour and confirm
■ Select minutes and confirm
■ Select Y or x and confirm
■ If necessary, adjust the runtime duration prior to departure andconfirm
The next preset memory number to
be activated is underlined and the
weekday is displayed. Repeat the
procedure to programme the other
preset memory numbers.
Pressing button X during the
procedure will exit without storing programme adjustments.
To delete a preset departure time,
follow the steps for programming until
heating symbol Y flashes. Press
button q or r until oFF appears in
the display and confirm.
Heating stops automatically
5 minutes after the programmed
departure time.
Notice
The remote control system features
a temperature sensor which
calculates the runtime according to
the ambient temperature and the
Page 92 of 173
90Climate control
desired heating level (ECO or
HIGH). The system starts
automatically between 5 and
60 minutes prior to the programmed
departure time.
Set weekday, time and heating
duration Ö
If the vehicle battery is disconnected or its voltage is too low, the unit will
need to be reset.
■ Select Ö and confirm
■ Select weekday and confirm
■ Change hours and confirm
■ Change minutes and confirm
■ Change the default heating duration and confirm
Heating level Y
The preferred heating level for
programmed departure times can be set to either ECO or HIGH.
Select Y and confirm. ECO or HIGH
flashes in the display. Adjust using
the q or r button and confirm.Air vents
Adjustable air vents
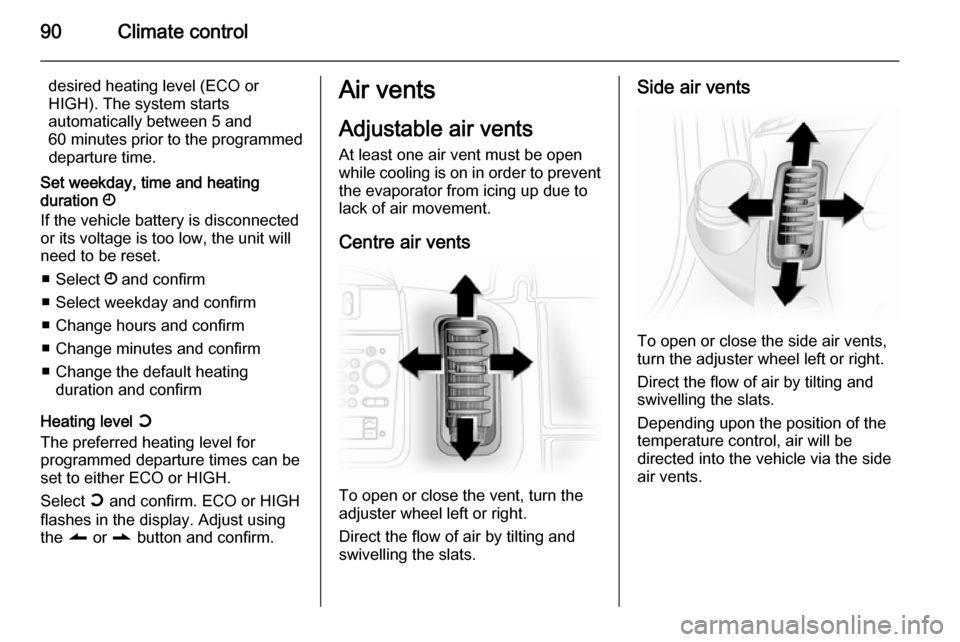
At least one air vent must be open
while cooling is on in order to prevent the evaporator from icing up due tolack of air movement.
Centre air vents
To open or close the vent, turn the
adjuster wheel left or right.
Direct the flow of air by tilting and
swivelling the slats.
Side air vents
To open or close the side air vents,
turn the adjuster wheel left or right.
Direct the flow of air by tilting and
swivelling the slats.
Depending upon the position of the
temperature control, air will be
directed into the vehicle via the side
air vents.
Page 93 of 173
Climate control919Warning
Do not attach any objects to the
slats of the air vents. Risk of
damage and injury in case of an
accident.
Fixed air vents
Additional air vents are located
beneath the windscreen and door windows and in the foot wells.
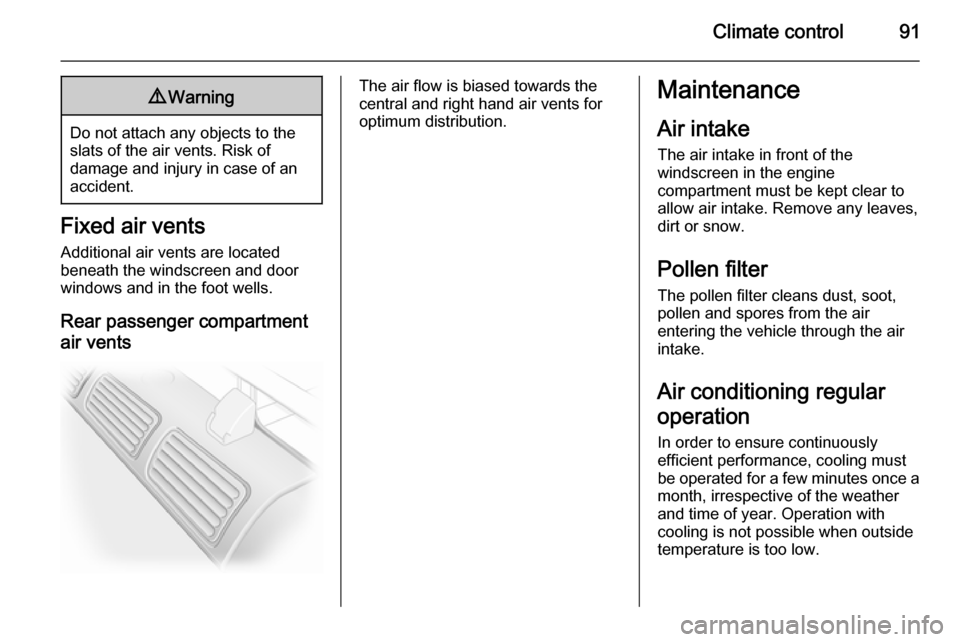
Rear passenger compartment
air vents
The air flow is biased towards the
central and right hand air vents for
optimum distribution.Maintenance
Air intake
The air intake in front of the
windscreen in the engine
compartment must be kept clear to
allow air intake. Remove any leaves,
dirt or snow.
Pollen filter
The pollen filter cleans dust, soot,
pollen and spores from the air
entering the vehicle through the air
intake.
Air conditioning regular
operation
In order to ensure continuously
efficient performance, cooling must
be operated for a few minutes once a month, irrespective of the weather
and time of year. Operation with
cooling is not possible when outside
temperature is too low.
Page 94 of 173

92Climate controlServiceFor optimal cooling performance, it is
recommended that the climate control system be checked annually, starting
three years after initial vehicle
registration, including:
■ Functionality and pressure test■ Heating functionality
■ Leakage check
■ Check of drive belts
■ Cleaning of condenser and evaporator drainage
■ Performance check
Page 95 of 173

Driving and operating93Driving and operatingDriving hints................................. 93
Starting and operating .................94
Engine exhaust ............................ 95
Manual transmission ....................96
Manual transmission automa‐ ted ................................................ 97
Brakes ........................................ 101
Ride control systems .................102
Cruise control ............................. 104
Object detection systems ........... 108
Fuel ............................................ 109
Trailer hitch ................................ 112Driving hints
Control of the vehicleNever coast with engine not
running
Many systems will not function in this
situation (e.g. brake servo unit, power
steering). Driving in this manner is a
danger to yourself and others.
Pedals To ensure the pedal travel is
uninhibited, there must be no mats in
the area of the pedals.
Steering If power steering assist is lost
because the engine stops or due to a system malfunction, the vehicle can
be steered but may require increased
effort.Caution
Vehicles equipped with hydraulic
power steering:
If the steering wheel is turned until it reaches the end of its travel, and
is held in that position for more
than 15 seconds, damage may
occur to the power steering
system and there may be loss of
power steering assist.
Page 96 of 173
94Driving and operatingStarting and operating
New vehicle running-in Do not brake unnecessarily hard for
the first few journeys and after new
disc brake pads have been fitted.
During the first drive, smoke may
occur because of wax and oil
evaporating off the exhaust system.
Park the vehicle in the open for a
while after the first drive and avoid
inhaling the fumes.
During the running-in period fuel and engine oil consumption may be
higher and the cleaning process of the diesel particle filter may take
place more often.
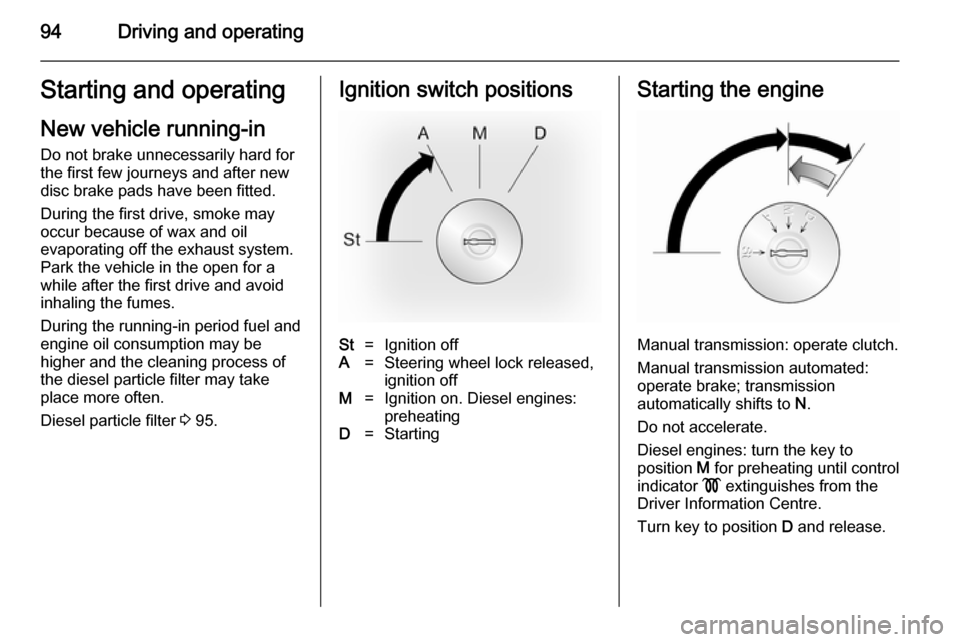
Diesel particle filter 3 95.Ignition switch positionsSt=Ignition offA=Steering wheel lock released,
ignition offM=Ignition on. Diesel engines:
preheatingD=StartingStarting the engine
Manual transmission: operate clutch.
Manual transmission automated:
operate brake; transmission
automatically shifts to N.
Do not accelerate.
Diesel engines: turn the key to
position M for preheating until control
indicator ! extinguishes from the
Driver Information Centre.
Turn key to position D and release.
Page 97 of 173

Driving and operating95
The increased engine speed
automatically returns to normal idling
speed as the engine temperature
rises.
Start attempts should not last longer
than 15 seconds. If engine does not
start, wait 15 seconds before
repeating starting procedure. If
necessary, depress accelerator
before repeating starting procedure.
Before restarting or to switch off the
engine, turn key back to St.
Overrun cut-off The fuel supply is automatically cut off
during overrun, i.e. when the vehicle
is driven with a gear engaged but
accelerator is released.
Parking ■ Do not park the vehicle on an easily
ignitable surface. The high
temperature of the exhaust system
could ignite the surface.
■ Always apply parking brake without
pressing release button. Apply as firmly as possible on a downhill oruphill slopes. Operate the foot
brake at the same time to reduce
operating force.
■ Switch off the engine and ignition. Turn the steering wheel until the
steering wheel lock is felt to
engage.
■ If the vehicle is on a level surface or
uphill slope, engage first gear
before switching off the ignition. On an uphill slope, turn the front
wheels away from the kerb.
If the vehicle is on a downhill slope,
engage reverse gear before
switching off the ignition. Turn the
front wheels towards the kerb.
■ Lock the vehicle and activate the anti-theft locking and anti-theft
alarm systems.Engine exhaust9 Danger
Engine exhaust gases contain
poisonous carbon monoxide,
which is colourless and odourless and could be fatal if inhaled.
If exhaust gases enter the interior
of the vehicle, open the windows.
Have the cause of the fault
rectified by a workshop.
Avoid driving with an open load
compartment, otherwise exhaust
gases could enter the vehicle.
Diesel particle filter
The diesel particle filter system filters
harmful soot particles out of the
exhaust gases. The system includes
a self-cleaning function that runs
automatically during driving without
any notification. The filter is cleaned
by periodically burning off the soot
particles at high temperature. This
Page 98 of 173
96Driving and operating
process takes place automatically
and the emission of smells and
smoke during this process is normal.
If cleaning of the filter is required and automatic cleaning does not occur, it
will be indicated by the illumination of
control indicator A and Z in the
instrument cluster. Seek the
assistance of a workshop
immediately.
Catalytic converter
The catalytic converter reduces the
amount of harmful substances in the
exhaust gases.Caution
Fuel grades other than those listed on pages 3 109, 3 154 could
damage the catalytic converter or
electronic components.
Unburnt petrol will overheat and
damage the catalytic converter.
Therefore avoid excessive use of
the starter, running the fuel tank
dry and starting the engine by
pushing or towing.
In the event of misfiring, uneven
engine running, a reduction in engine performance or other unusual
problems, have the cause of the fault
rectified by a workshop as soon as
possible. In an emergency, driving
can be continued for a short period,
keeping vehicle speed and engine
speed low.
If control indicator Z flashes, the
permitted emission limits may be
exceeded. Lift your foot off the
accelerator until Z stops flashing and
is steadily illuminated. Contact a
workshop immediately.
Malfunction indicator light 3 71
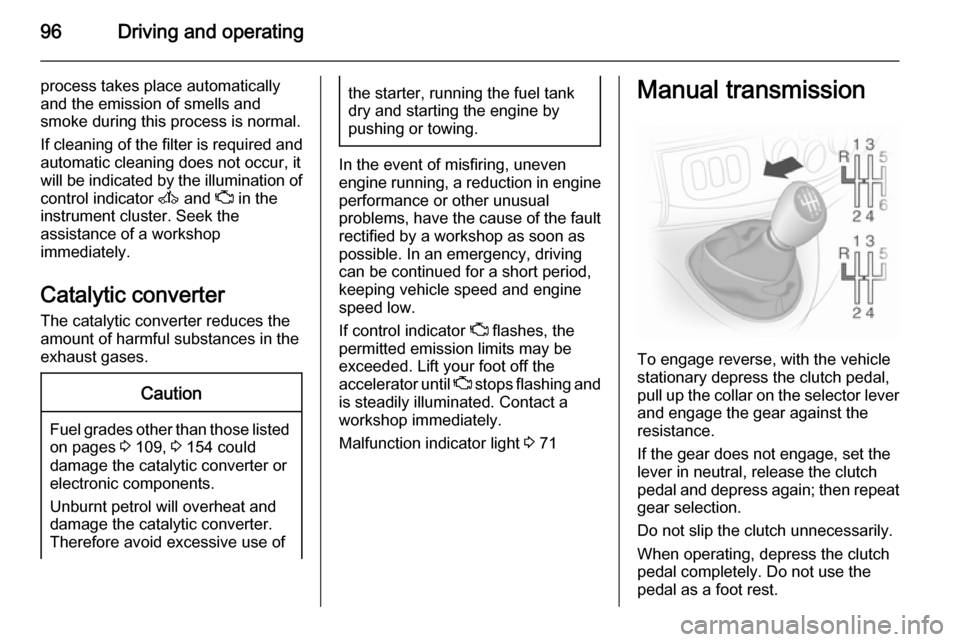
Manual transmission
To engage reverse, with the vehicle
stationary depress the clutch pedal, pull up the collar on the selector lever
and engage the gear against the
resistance.
If the gear does not engage, set the
lever in neutral, release the clutch
pedal and depress again; then repeat
gear selection.
Do not slip the clutch unnecessarily.
When operating, depress the clutch pedal completely. Do not use the
pedal as a foot rest.
Page 99 of 173
Driving and operating97Caution
It is inadvisable to drive with hand
resting on the selector lever.
Manual transmission
automated
This transmission permits manual
(manual mode) or automatic gear
shifting (automatic mode), both with
automatic clutch control.
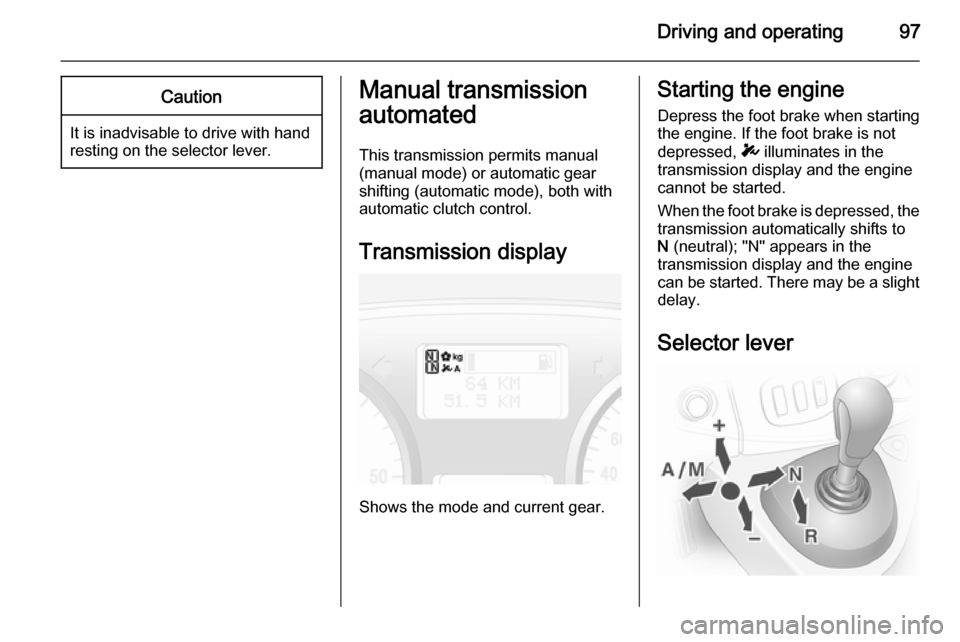
Transmission display
Shows the mode and current gear.
Starting the engine Depress the foot brake when starting
the engine. If the foot brake is not
depressed, T illuminates in the
transmission display and the engine
cannot be started.
When the foot brake is depressed, the
transmission automatically shifts to
N (neutral); "N" appears in the
transmission display and the engine
can be started. There may be a slight delay.
Selector lever
Page 100 of 173

98Driving and operating
Always move the selector lever in the
appropriate direction as far as it will
go. Upon release, it automatically
returns to the centre position.N=Neutral.A/
M=Switch between automatic
and manual mode.
The transmission display
shows "A" when in automatic mode.R=Reverse gear.
Engage only when vehicle is
stationary. The transmission
display shows "R" when
reverse gear is engaged.+=Shift to a higher gear.-=Shift to a lower gear.
Starting off
When the engine is started, the
transmission is in automatic mode.
Depress the foot brake and move the selector lever towards + to engage
first gear. If R is selected,
reverse gear is engaged. The vehicle
starts to move when the foot brake is
released. To start off quickly, release
the foot brake and accelerate
immediately after engaging a gear.
In automatic mode the transmission
shifts to other gears automatically,
dependent on driving conditions.
To engage manual mode, move the
selector lever towards A/M. The
current gear will appear in the
transmission display. To engage
first gear, depress foot brake and
move selector lever towards + or -.
Shift to a higher or lower gear by
moving selector lever to + or -. Gears
can be skipped by moving the
selector lever repeatedly at short
intervals.
Stopping the vehicle
In automatic or manual mode,
first gear is engaged and the clutch is
released when the vehicle is stopped. In R, reverse gear remains engaged.
When stopping on gradients, engage parking brake or depress the foot
brake. To prevent overheating of the
clutch, an intermittent audiblewarning may sound as a signal to
depress the foot brake or apply the
parking brake.
Switch off engine if stopping for a lengthy period, e.g. in traffic jams.
When the vehicle is parked and the
driver's door is opened, a warning
chime will sound if neutral is not
selected or the foot brake has not
been depressed.
Engine braking
Automatic mode
When driving downhill, the manual
transmission automated does not shift into higher gears until a fairly
high engine speed has been reached. It shifts down in good time when
braking.
Manual mode
To utilise the engine braking effect,
select a lower gear in good time when
driving downhill.