VAUXHALL VIVARO 2014 Owner's Manual
Manufacturer: VAUXHALL, Model Year: 2014, Model line: VIVARO, Model: VAUXHALL VIVARO 2014Pages: 173, PDF Size: 4.11 MB
Page 111 of 173
Driving and operating109
Permanent deactivation
Permanently deactivate the system
by pressing and holding the E button
on the instrument panel for approx. 3 seconds with the ignition on and
reverse gear engaged. The system is deactivated and will not operate.
When reverse gear is selected no
acoustic signal will sound, indicating
deactivation.
The function is reactivated by
pressing and holding button E for
approx. 3 seconds.
Fault
If the system detects an operating
fault, a continuous acoustic alarm will sound for approx. 5 seconds whenselecting reverse gear. Consult a
workshop to have the cause of the
fault remedied.Caution
When reversing, the area should
be free from obstacles which could
impact on the underside of the
vehicle.
Impact to the rear axle, which may
not be visible, could lead to
uncharacteristic changes in the
vehicle handling. In the event of
such an impact, consult a
workshop.Fuel
Fuel for petrol engines Only use unleaded fuel that complies
with European standard EN 228 or
E DIN 51626-1 or equivalent.
Your engine is capable of running
with E10 fuel that fulfills these
standards. E10 fuel contains up to
10 % bioethanol.
Use fuel with the recommended octane rating 3 154. Use of fuel with
too low an octane rating can reduce
engine power and torque and slightly
increases fuel consumption.Caution
Do not use fuel or fuel additives
that contain metallic compounds
such as manganese-based
additives. This may cause engine
damage.
Page 112 of 173
110Driving and operatingCaution
Use of fuel that does not comply toEN 228 or E DIN 51626-1 or
equivalent can lead to deposits or
engine damage and may affect
your warranty.
Caution
Use of fuel with too low an octane
rating could lead to uncontrolled combustion and engine damage.
Fuel for diesel engines
Only use diesel fuel that complies
with EN 590.
In countries outside the European
Union use Euro-Diesel fuel with a
sulphur concentration below 50 ppm.
Caution
Use of fuel that does not comply to EN 590 or similar can lead to
engine powerloss, increased wear
or engine damage and may affect
your warranty.
Do not use marine diesel oils, heating
oils, Aquazole and similar diesel-
water emulsions. Diesel fuels must
not be diluted with fuels for petrol
engines.
Refuelling
9 Danger
Before refuelling, switch off engine
and any external heaters with
combustion chambers (identified
by sticker on fuel filler flap). Switch off any mobile phones.
Follow the operating and safety
instructions of the filling station
when refuelling.
9 Danger
Fuel is flammable and explosive.
No smoking. No naked flames or
sparks.
If you can smell fuel in your
vehicle, have the cause of this
remedied immediately by a
workshop.
Caution
In case of misfuelling, do not
switch on ignition.
Notice
To ensure the fuel level is displayed
correctly, the ignition must be
switched off before refuelling. Avoid
minor fuel top-ups (e.g. less than
5 litres) to ensure accurate readings.
The fuel tank filler neck with bayonet
cap is located on the left hand side of
the vehicle.
The fuel filler flap can only be opened
if the vehicle is unlocked.
Page 113 of 173
Driving and operating111
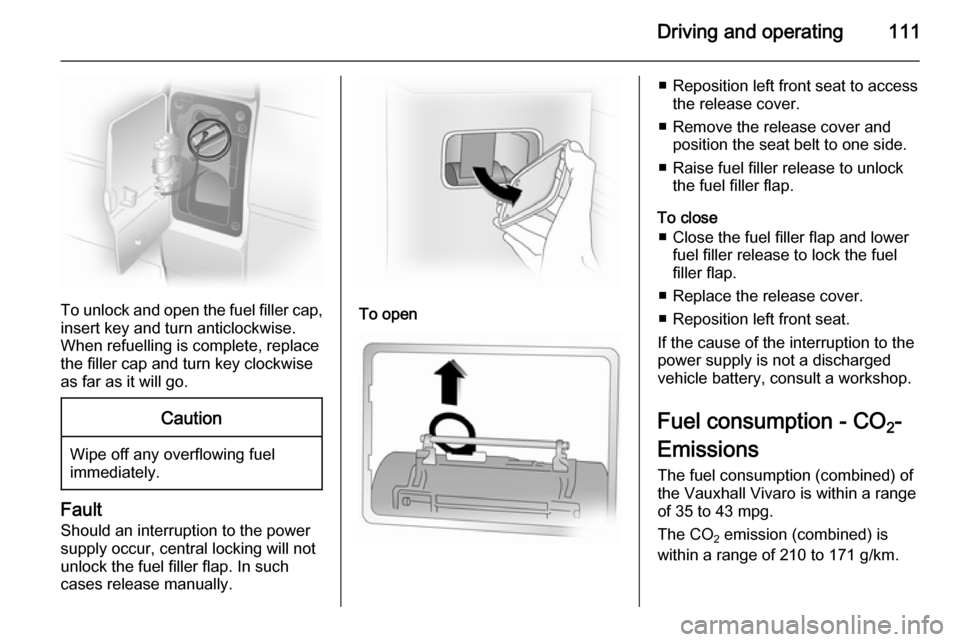
To unlock and open the fuel filler cap,insert key and turn anticlockwise.
When refuelling is complete, replace
the filler cap and turn key clockwise
as far as it will go.
Caution
Wipe off any overflowing fuel
immediately.
Fault
Should an interruption to the power supply occur, central locking will not
unlock the fuel filler flap. In such
cases release manually.
To open
■ Reposition left front seat to access the release cover.
■ Remove the release cover and position the seat belt to one side.
■ Raise fuel filler release to unlock the fuel filler flap.
To close ■ Close the fuel filler flap and lower fuel filler release to lock the fuel
filler flap.
■ Replace the release cover.
■ Reposition left front seat.
If the cause of the interruption to the
power supply is not a discharged
vehicle battery, consult a workshop.
Fuel consumption - CO 2-
Emissions
The fuel consumption (combined) of
the Vauxhall Vivaro is within a range
of 35 to 43 mpg.
The CO 2 emission (combined) is
within a range of 210 to 171 g/km.
Page 114 of 173

112Driving and operating
For the values specific to your
vehicle, refer to the EEC Certificate of Conformity provided with your vehicle
or other national registration
documents.
General information The official fuel consumption and
specific CO 2 emission figures quoted
relate to the EU base model with
standard equipment.
Fuel consumption data and CO 2
emission data are determined
according to regulation R (EC) No.
715/2007 (in the applicable version),
taking into consideration the vehicle
weight in running order, as specified
by the regulation.
The figures are provided only for the
purpose of comparison between
different vehicle variants and must
not be taken as a guarantee for the
actual fuel consumption of a
particular vehicle.
Additional equipment may result in
slightly higher results than the stated
fuel consumption and CO 2 figures.Furthermore, fuel consumption is
dependent on personal driving style
as well as road and traffic conditions.Trailer hitch
General information
Entrust retrofitting of towing
equipment to a workshop. It may be
necessary to make changes that
affect the cooling system, heat
shields or other equipment. Only use
towing equipment that has been
approved for your vehicle.
Driving characteristics and
towing tips
In the case of trailers with brakes,
attach the breakaway stopping cable.
Before attaching a trailer, lubricatethe coupling ball. However, do not do
so if a stabiliser, which acts on the coupling ball, is being used to reduce snaking movements. For trailers with
low driving stability the use of a
stabiliser is recommended.
A maximum speed of 50 mph must
not be exceeded, even in countries
where higher speeds are permitted.
Page 115 of 173

Driving and operating113
If the trailer starts snaking, drive moreslowly, do not attempt to correct the
steering and brake sharply if
necessary.
When driving downhill, drive in the
same gear as if driving uphill and
drive at a similar speed.
Adjust tyre pressure to the value
specified for full load 3 163.
Trailer towing Trailer loads
The permissible trailer loads are
vehicle and engine-dependent
maximum values which must not be exceeded. The actual trailer load is
the difference between the actual
gross weight of the trailer and the
actual coupling socket load with the
trailer coupled.
The permissible trailer loads are
specified in the vehicle documents. In general, they are valid for gradients
up to max. 12 %.The permitted trailer load applies up
to the specified incline and up to an
altitude of 1000 metres above sea
level. Since engine power decreases
as altitude increases due to the air
becoming thinner, therefore reducing
climbing ability, the permissible gross
train weight also decreases by 10 %
for every 1000 metres of additional
altitude. The gross train weight does
not have to be reduced when driving
on roads with slight inclines (less than 8 %, e.g. motorways).
The permissible gross train weight
must not be exceeded. This weight is
specified on the identification plate
3 150.
Vertical coupling load
The vertical coupling load is the load
exerted by the trailer on the coupling
ball. It can be varied by changing the
weight distribution when loading the
trailer.
The maximum permissible vertical
coupling load is specified on the
towing equipment identification plate
and in the vehicle documents. Always aim for the maximum load, especiallyin the case of heavy trailers. The
vertical coupling load should never
fall below 25 kg.
In the case of trailer loads of
1200 kg or more, the vertical coupling load should not be less than 50 kg.
Rear axle load When the trailer is coupled and the
towing vehicle fully loaded (including
all occupants), the permissible rear
axle load (see identification plate or
vehicle documents) must not be
exceeded.
Towing equipmentCaution
When operating without a trailer,
remove the coupling ball bar.
Page 116 of 173

114Driving and operating9Warning
Towing a trailer is permitted only
when a coupling ball bar is fitted correctly. If the coupling ball bardoes not engage correctly, seekthe assistance of a workshop.
Towing equipment audible
warning For vehicles fitted with towingequipment, when connected to a
trailer the pitch of the audible warning
changes upon operation of the turn
signals.
The pitch of the audible warning will
also change if a turn signal light on the trailer or the towing vehicle fails.
Page 117 of 173

Vehicle care115Vehicle careGeneral Information...................115
Vehicle checks ........................... 116
Bulb replacement .......................124
Electrical system ........................128
Vehicle tools .............................. 131
Wheels and tyres .......................131
Towing ....................................... 141
Appearance care .......................143General Information
Accessories and vehicle
modifications
We recommend the use of Genuine Parts and Accessories and factory
approved parts specific for your
vehicle type. We cannot assess or guarantee reliability of other products
- even if they have a regulatory or
otherwise granted approval.
Do not make any modifications to the electrical system, e.g. changes of
electronic control units (chip tuning).
Vehicle storage Storage for a long period of time
If the vehicle is to be stored for several months:
■ Wash and wax the vehicle.
■ Have the wax in the engine compartment and underbody
checked.
■ Clean and preserve rubber seals.
■ Fill up fuel tank completely.■ Change the engine oil.
■ Drain the washer fluid reservoir.
■ Check the coolant antifreeze and corrosion protection.
■ Adjust tyre pressure to the value specified for full load.
■ Park vehicle in a dry, well ventilated
place. Engage first or reverse gear. Prevent the vehicle from rolling.
■ Do not apply the parking brake.
■ Open the bonnet, close all doors and lock the vehicle.
■ Disconnect the clamp from the negative terminal of the vehicle
battery. Beware that all systems are
not functional, e.g. anti-theft alarm
system.
Putting back into operation When the vehicle is to be put back into
operation:
■ Connect the clamp to the negative terminal of the vehicle battery.
Activate the electronics of the
power windows.
■ Check tyre pressure.
Page 118 of 173
116Vehicle care
■ Fill up the washer fluid reservoir.
■ Check the engine oil level.
■ Check the coolant level.
■ Fit the number plate, if necessary.
End-of-life vehicle
recovery
Information on end-of-life vehicle
recovery centres and the recycling of
end-of-life vehicles is available on our website. Only entrust this work to an
authorised recycling centre.Vehicle checks
Performing work9 Warning
Only perform engine compartment
checks when the ignition is off.
The cooling fan may start
operating even if the ignition is off.
9 Danger
The ignition system generates
extremely high voltages. Do not
touch.
The caps for topping up the engine oil, the coolant, the washer fluid and the
oil dipstick handle are yellow for ease
of identification.
Bonnet
Opening
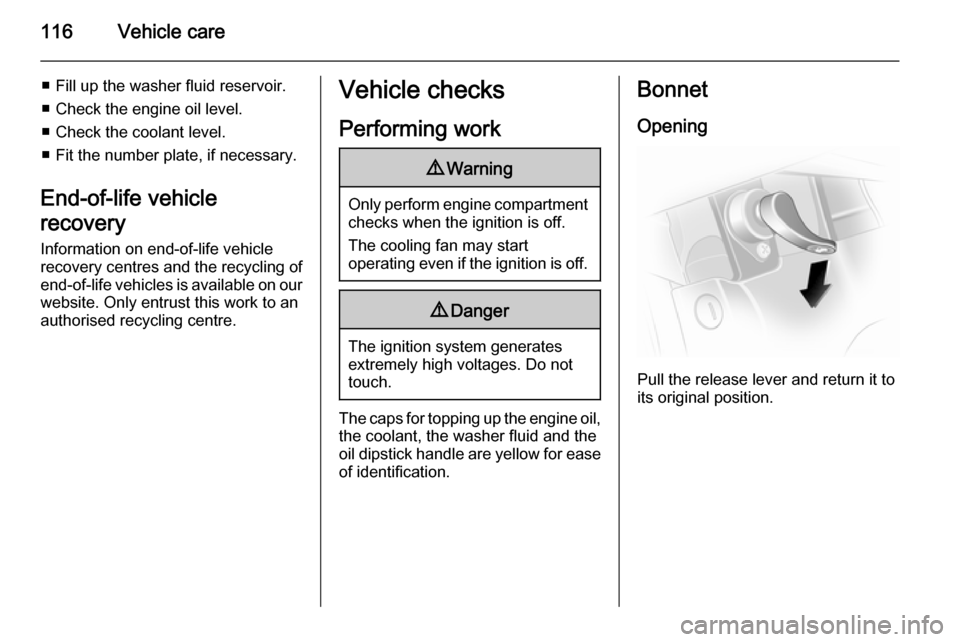
Pull the release lever and return it to
its original position.
Page 119 of 173
Vehicle care117
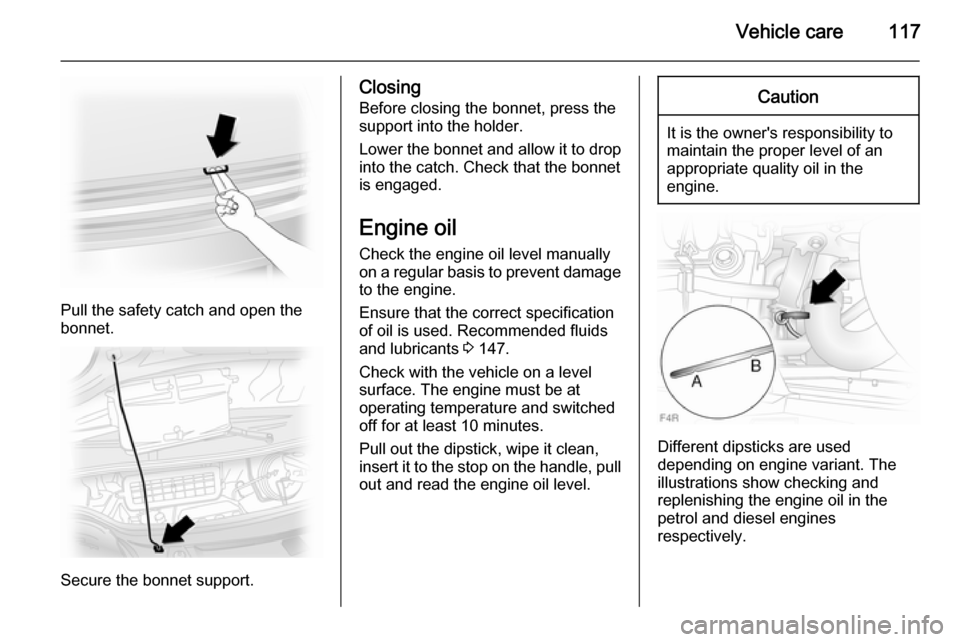
Pull the safety catch and open the
bonnet.
Secure the bonnet support.
Closing
Before closing the bonnet, press the
support into the holder.
Lower the bonnet and allow it to drop into the catch. Check that the bonnet
is engaged.
Engine oil
Check the engine oil level manually
on a regular basis to prevent damage
to the engine.
Ensure that the correct specification
of oil is used. Recommended fluids
and lubricants 3 147.
Check with the vehicle on a level
surface. The engine must be at
operating temperature and switched
off for at least 10 minutes.
Pull out the dipstick, wipe it clean,
insert it to the stop on the handle, pull
out and read the engine oil level.Caution
It is the owner's responsibility to
maintain the proper level of an
appropriate quality oil in the
engine.
Different dipsticks are used
depending on engine variant. The
illustrations show checking and
replenishing the engine oil in the
petrol and diesel engines
respectively.
Page 120 of 173
118Vehicle care
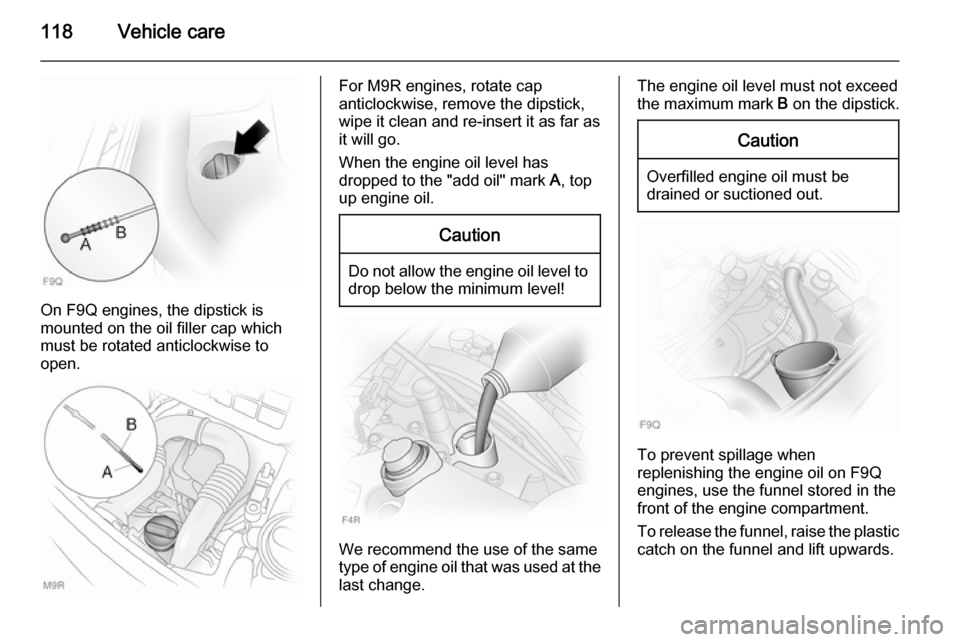
On F9Q engines, the dipstick is
mounted on the oil filler cap which
must be rotated anticlockwise to
open.
For M9R engines, rotate cap
anticlockwise, remove the dipstick,
wipe it clean and re-insert it as far as
it will go.
When the engine oil level has
dropped to the "add oil" mark A, top
up engine oil.Caution
Do not allow the engine oil level to drop below the minimum level!
We recommend the use of the same
type of engine oil that was used at the
last change.
The engine oil level must not exceed the maximum mark B on the dipstick.Caution
Overfilled engine oil must be
drained or suctioned out.
To prevent spillage when
replenishing the engine oil on F9Q
engines, use the funnel stored in the
front of the engine compartment.
To release the funnel, raise the plastic catch on the funnel and lift upwards.