Locking VAUXHALL VIVARO 2016 User Guide
[x] Cancel search | Manufacturer: VAUXHALL, Model Year: 2016, Model line: VIVARO, Model: VAUXHALL VIVARO 2016Pages: 209, PDF Size: 4.86 MB
Page 30 of 209
28Keys, doors and windowsHandsfree operation is automatically
disabled when e is pressed. To re-
enable handsfree operation, restart
the engine.
Electronic key system 3 22.
Slam door locks Certain models feature load
compartment locks which are isolated
for added security.
With slam door locks, while the doors can be locked and unlocked using the
remote control or electronic key, the
load compartment must be manually
opened by turning the key in the lock.
Rear doors 3 29.
Automatic locking Automatic locking after driving off This security feature can be
configured to automatically lock the
doors and load compartment as soon as the vehicle is driven.Activation
With the ignition switched on, press and hold e on the central locking
switch for approx. 5 seconds. An audible signal confirms activation.
Deactivation
With the ignition switched on, press and hold e on the central locking
switch for approx. 5 seconds. An audible signal confirms deactivation.
Central locking switch 3 23.
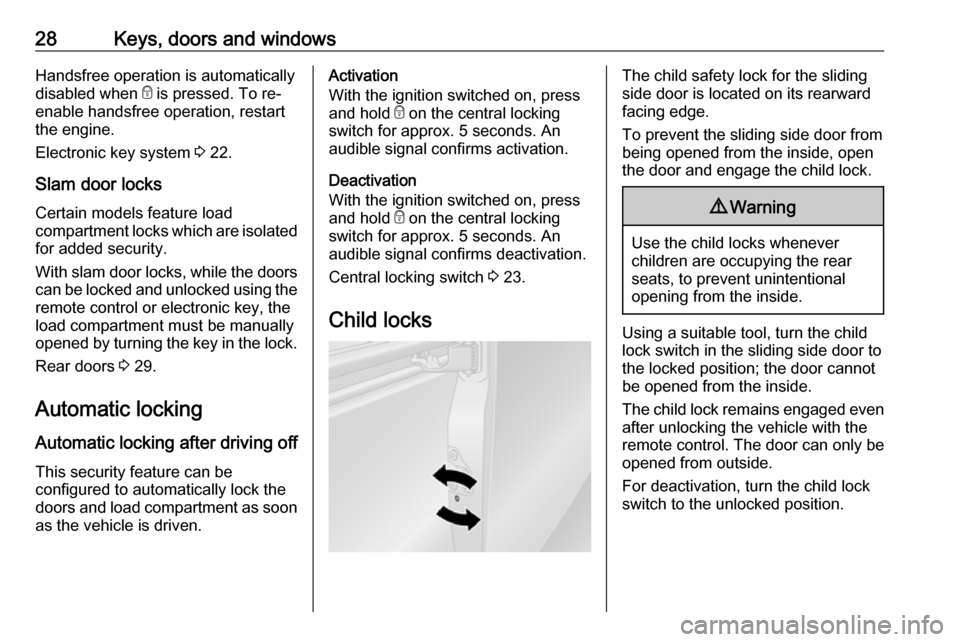
Child locksThe child safety lock for the sliding
side door is located on its rearward
facing edge.
To prevent the sliding side door from being opened from the inside, open
the door and engage the child lock.9 Warning
Use the child locks whenever
children are occupying the rear
seats, to prevent unintentional
opening from the inside.
Using a suitable tool, turn the child
lock switch in the sliding side door to
the locked position; the door cannot
be opened from the inside.
The child lock remains engaged even after unlocking the vehicle with the
remote control. The door can only be
opened from outside.
For deactivation, turn the child lock
switch to the unlocked position.
Page 32 of 209
30Keys, doors and windows
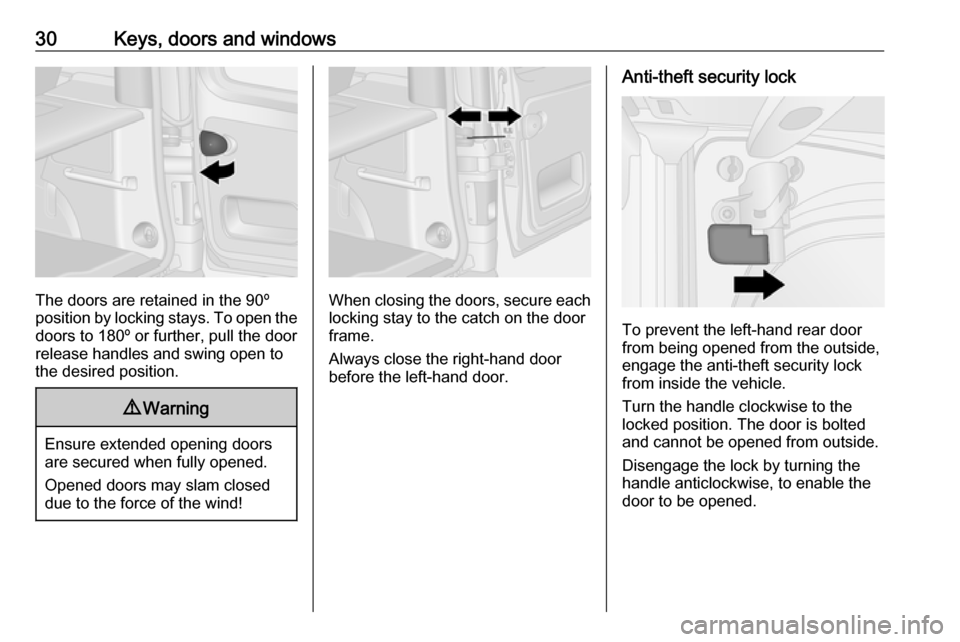
The doors are retained in the 90º
position by locking stays. To open the
doors to 180º or further, pull the door
release handles and swing open to
the desired position.
9 Warning
Ensure extended opening doors
are secured when fully opened.
Opened doors may slam closed due to the force of the wind!
When closing the doors, secure each locking stay to the catch on the door
frame.
Always close the right-hand door
before the left-hand door.
Anti-theft security lock
To prevent the left-hand rear door
from being opened from the outside,
engage the anti-theft security lock
from inside the vehicle.
Turn the handle clockwise to the
locked position. The door is bolted
and cannot be opened from outside.
Disengage the lock by turning the
handle anticlockwise, to enable the
door to be opened.
Page 33 of 209
Keys, doors and windows31Load compartmentTailgate
Opening
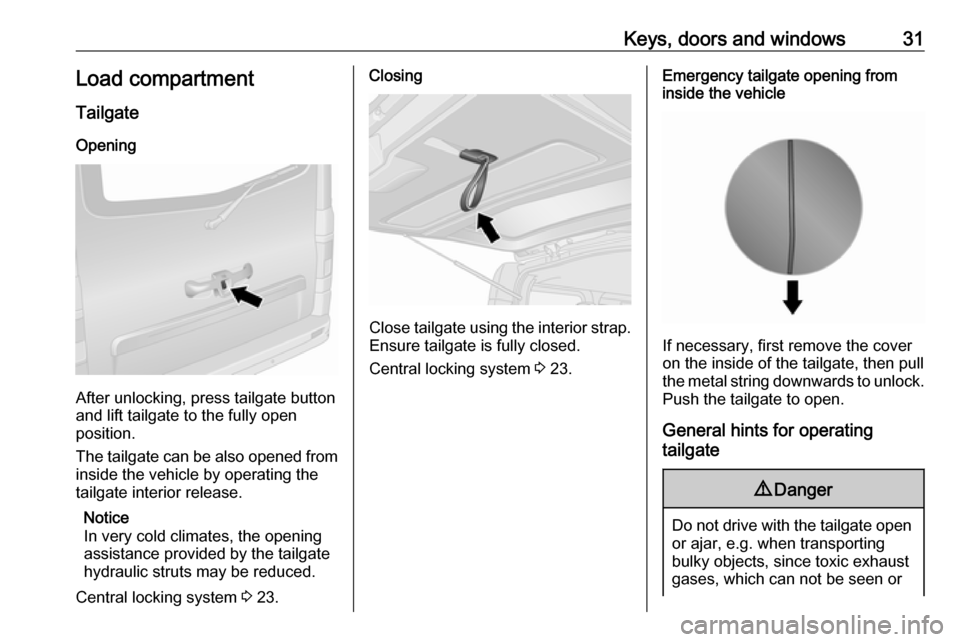
After unlocking, press tailgate button
and lift tailgate to the fully open
position.
The tailgate can be also opened from inside the vehicle by operating the
tailgate interior release.
Notice
In very cold climates, the opening
assistance provided by the tailgate
hydraulic struts may be reduced.
Central locking system 3 23.
Closing
Close tailgate using the interior strap.
Ensure tailgate is fully closed.
Central locking system 3 23.
Emergency tailgate opening from
inside the vehicle
If necessary, first remove the cover
on the inside of the tailgate, then pull
the metal string downwards to unlock. Push the tailgate to open.
General hints for operating
tailgate
9 Danger
Do not drive with the tailgate open
or ajar, e.g. when transporting
bulky objects, since toxic exhaust
gases, which can not be seen or
Page 34 of 209
32Keys, doors and windowssmelled, could enter the vehicle.
This can cause unconsciousness
and even death.Caution
Before opening the tailgate, check overhead obstructions, e.g. a
garage door, to avoid damage to
the tailgate.
Ensure there is adequate
clearance both above (at least
2.15 metres) and behind when
opening tailgate.
Notice
The installation of certain heavy
accessories onto the tailgate may
affect its ability to remain open.
Vehicle security
Anti-theft locking system9 Warning
Do not use the system if there are
people in the vehicle! The doorscannot be unlocked from the
inside.
The system deadlocks all doors and the load compartment.
All doors and the load compartment
must be closed or the system cannot
be activated.
Notice
The anti-theft locking system cannot be activated when the hazard
warning lights or sidelights are
switched on.
Activation and deactivation are not possible with the central locking
switch.
Central locking system 3 23.
2-button and 3-button remote
control operation
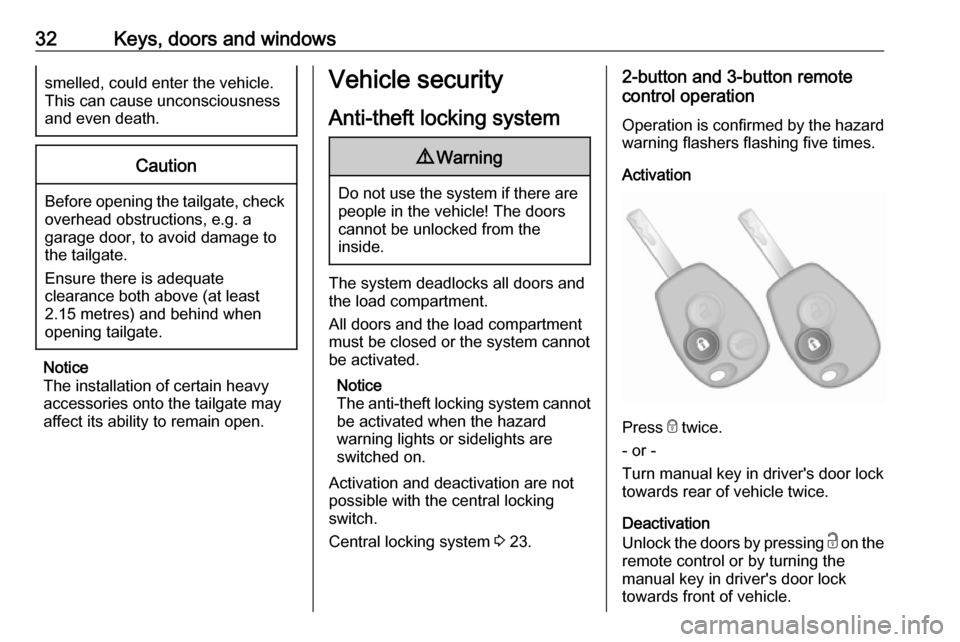
Operation is confirmed by the hazard warning flashers flashing five times.
Activation
Press e twice.
- or -
Turn manual key in driver's door lock
towards rear of vehicle twice.
Deactivation
Unlock the doors by pressing c on the
remote control or by turning the
manual key in driver's door lock
towards front of vehicle.
Page 35 of 209
Keys, doors and windows33Electronic key system operationOperation is confirmed by the hazard
warning flashers.
Activation
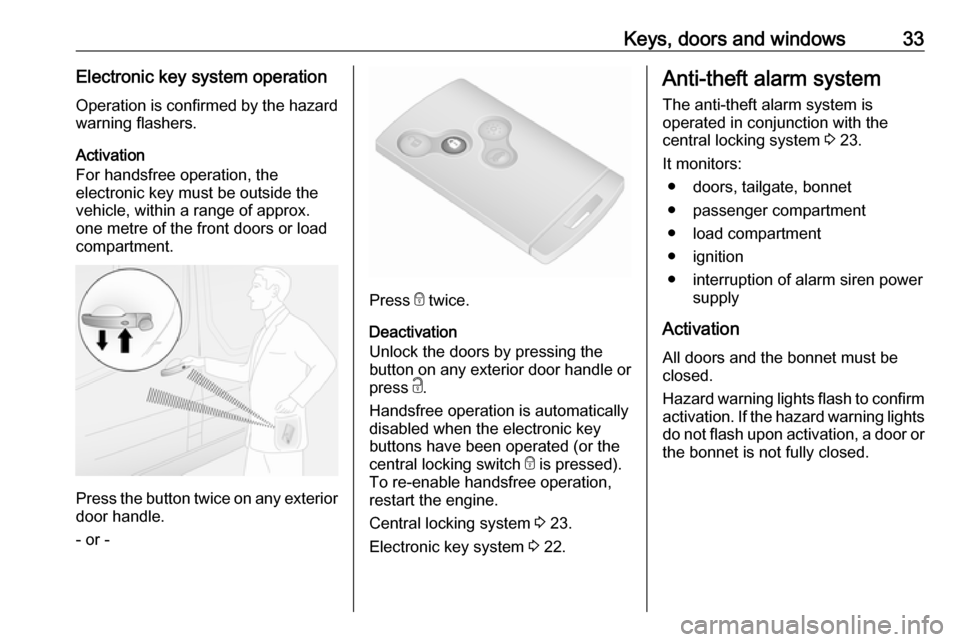
For handsfree operation, the
electronic key must be outside the
vehicle, within a range of approx.
one metre of the front doors or load
compartment.
Press the button twice on any exterior
door handle.
- or -
Press e twice.
Deactivation
Unlock the doors by pressing the
button on any exterior door handle or
press c.
Handsfree operation is automatically disabled when the electronic key
buttons have been operated (or the
central locking switch e is pressed).
To re-enable handsfree operation,
restart the engine.
Central locking system 3 23.
Electronic key system 3 22.
Anti-theft alarm system
The anti-theft alarm system is
operated in conjunction with the
central locking system 3 23.
It monitors: ● doors, tailgate, bonnet
● passenger compartment
● load compartment
● ignition
● interruption of alarm siren power supply
Activation
All doors and the bonnet must be
closed.
Hazard warning lights flash to confirm activation. If the hazard warning lights
do not flash upon activation, a door or the bonnet is not fully closed.
Page 36 of 209
34Keys, doors and windows2-button and 3-button remote control
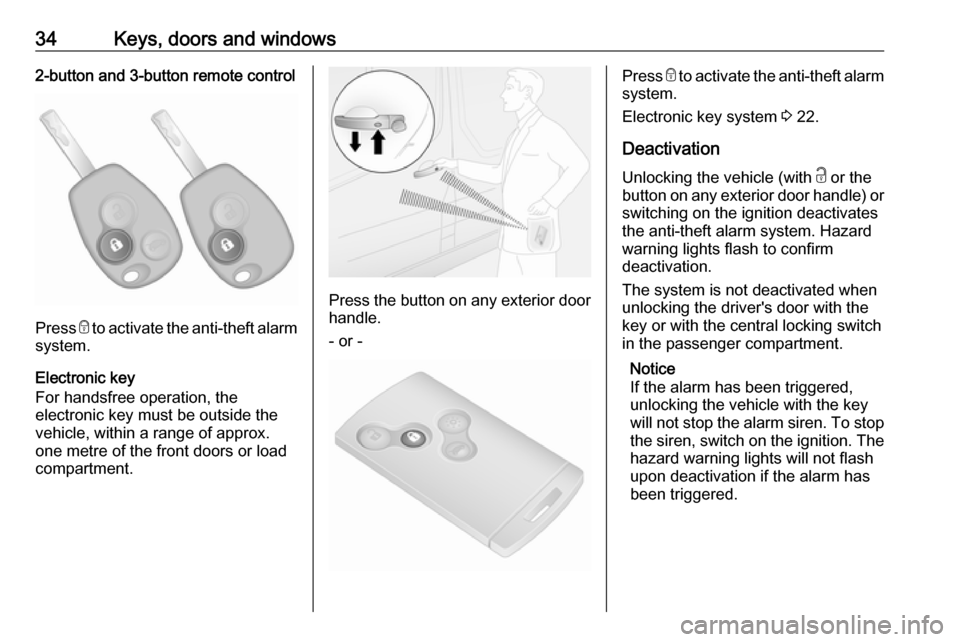
Press e to activate the anti-theft alarm
system.
Electronic key
For handsfree operation, the
electronic key must be outside the
vehicle, within a range of approx.
one metre of the front doors or load compartment.
Press the button on any exterior door
handle.
- or -
Press e to activate the anti-theft alarm
system.
Electronic key system 3 22.
Deactivation
Unlocking the vehicle (with c or the
button on any exterior door handle) or switching on the ignition deactivates
the anti-theft alarm system. Hazard
warning lights flash to confirm
deactivation.
The system is not deactivated when
unlocking the driver's door with the
key or with the central locking switch
in the passenger compartment.
Notice
If the alarm has been triggered,
unlocking the vehicle with the key
will not stop the alarm siren. To stop the siren, switch on the ignition. The
hazard warning lights will not flash
upon deactivation if the alarm has
been triggered.
Page 39 of 209
Keys, doors and windows37Depending on version, exterior
mirrors can be automatically folded to
the parking position upon locking the
vehicle. For further information, refer
to the Infotainment system manual.
Heated mirrors
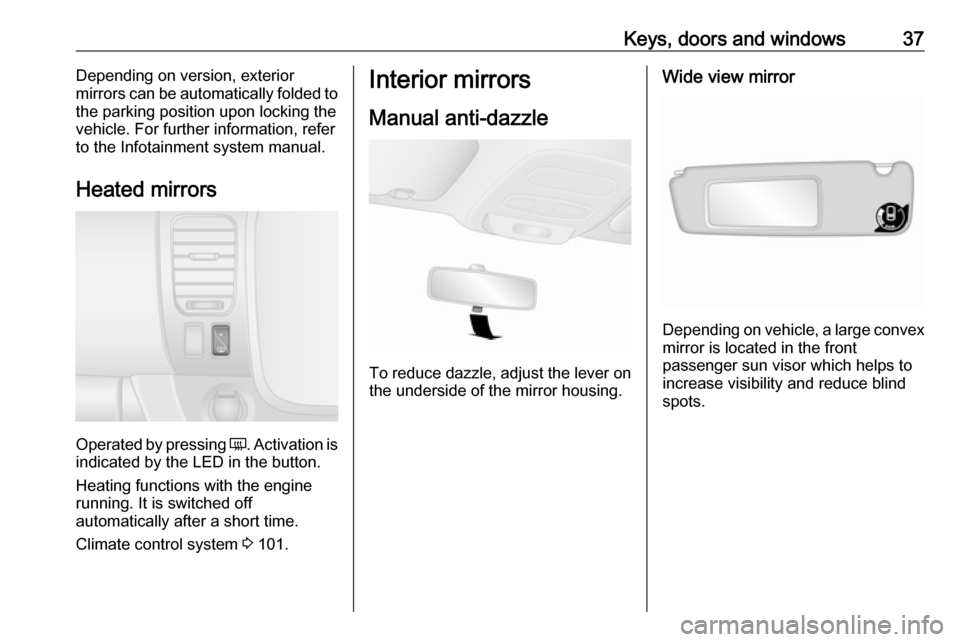
Operated by pressing Ü
. Activation is
indicated by the LED in the button.
Heating functions with the engine running. It is switched off
automatically after a short time.
Climate control system 3 101.
Interior mirrors
Manual anti-dazzle
To reduce dazzle, adjust the lever on the underside of the mirror housing.
Wide view mirror
Depending on vehicle, a large convex
mirror is located in the front
passenger sun visor which helps to
increase visibility and reduce blind
spots.
Page 48 of 209
46Seats, restraintsRear seat access
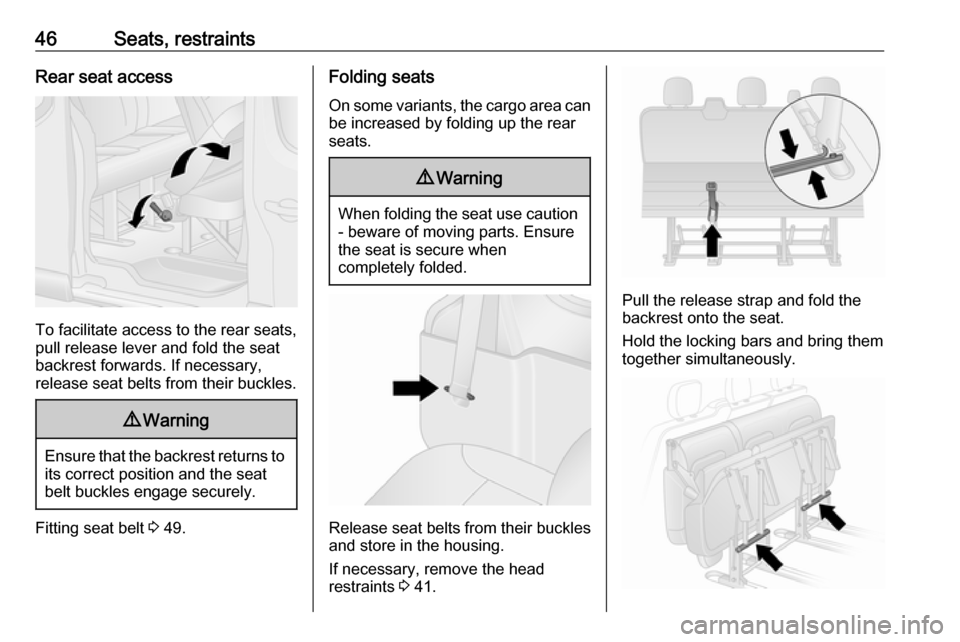
To facilitate access to the rear seats,
pull release lever and fold the seat backrest forwards. If necessary,
release seat belts from their buckles.
9 Warning
Ensure that the backrest returns to
its correct position and the seat
belt buckles engage securely.
Fitting seat belt 3 49.
Folding seats
On some variants, the cargo area can
be increased by folding up the rear
seats.9 Warning
When folding the seat use caution
- beware of moving parts. Ensure
the seat is secure when
completely folded.
Release seat belts from their buckles and store in the housing.
If necessary, remove the head
restraints 3 41.
Pull the release strap and fold the
backrest onto the seat.
Hold the locking bars and bring them
together simultaneously.
Page 49 of 209
Seats, restraints47Lift and fold the seat assembly
forwards until it engages in the folded
forward position.
Lock the seat into position by pushing
the rear support legs and ensure they are engaged.Caution
For safety reasons, do not place
loads on the folded rear seats.
When returning the seat assembly to
its original position, pull locking bars,
carefully lower seat assembly and
ensure the rear support legs are
correctly located and latched. Raise
the backrest, and if necessary,
replace the head restraints.
Removable rear seats
On some variants, the cargo area can
be increased by removing the rear
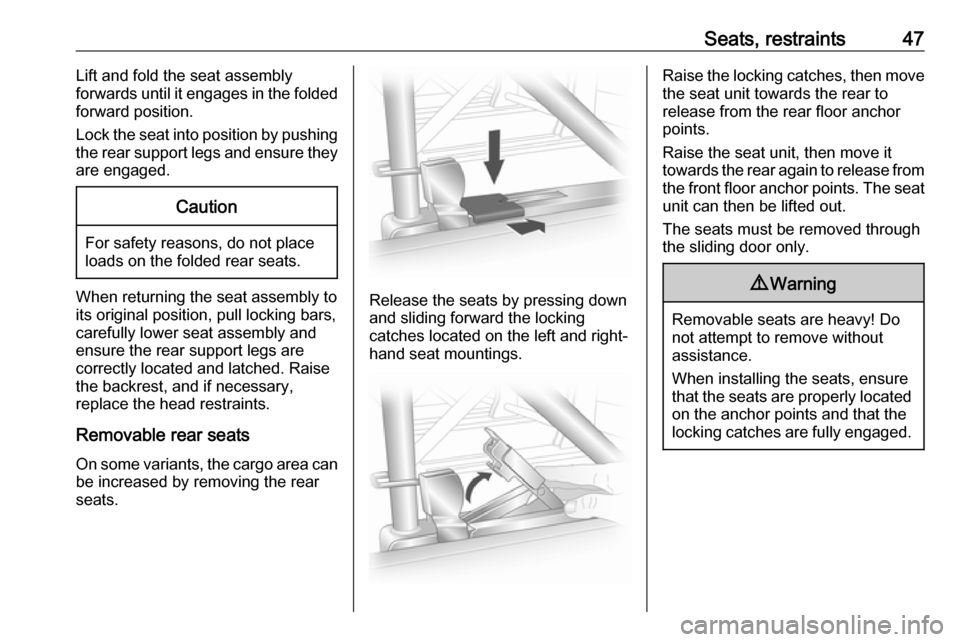
seats.Release the seats by pressing down
and sliding forward the locking
catches located on the left and right-
hand seat mountings.
Raise the locking catches, then move the seat unit towards the rear to
release from the rear floor anchor
points.
Raise the seat unit, then move it
towards the rear again to release from
the front floor anchor points. The seat unit can then be lifted out.
The seats must be removed through
the sliding door only.9 Warning
Removable seats are heavy! Do
not attempt to remove without
assistance.
When installing the seats, ensure that the seats are properly located
on the anchor points and that the
locking catches are fully engaged.
Page 89 of 209

Instruments and controls87If there is sufficient coolant, consult a
workshop.
The control indicator must be blue
before continuing driving.
Preheating
! illuminates yellow.
Preheating is activated. Only
activates when outside temperature
is low.
AdBlue
Y illuminates yellow.
AdBlue level is low. Refill AdBlue as
soon as possible, to avoid prevention
of engine starts.
Illuminates together with control
indicator F to indicate a system
failure or as a warning that engine
starting may not be possible after a
certain distance. Seek the assistance
of a workshop immediately.
A corresponding message appears in the Driver Information Centre (DIC)
3 89.Adblue percentage remaining can
also be checked by pressing button
repeatedly on end of wiper lever. Trip computer 3 91.
AdBlue 3 121.
Tyre pressure monitoring system
w illuminates or flashes.
Illuminates
Tyre pressure loss. Stop immediately
and check tyre pressure.
Flashes
Fault in system or tyre without
pressure sensor mounted (e.g. spare wheel). After a delay the control
indicator illuminates continuously.
Consult a workshop.
Tyre pressure monitoring system (TPMS) 3 164.
Engine oil pressure
I illuminates red.Illuminates briefly when the ignition is
switched on.
Illuminates when the engine is
running
If control indicator I illuminates
when the engine is running (together
with control indicator C and a
warning chime): Stop, switch off
engine.Caution
Engine lubrication may be
interrupted. This may result in
damage to the engine and/or
locking of the drive wheels.
1. Depress clutch.
2. Select neutral gear (or move selector lever to N).
3. Move out of the flow of traffic as quickly as possible without
impeding other vehicles.
4. Switch off ignition.