wiring VAUXHALL VIVARO 2018.5 Owner's Manual
[x] Cancel search | Manufacturer: VAUXHALL, Model Year: 2018.5, Model line: VIVARO, Model: VAUXHALL VIVARO 2018.5Pages: 239, PDF Size: 5.75 MB
Page 60 of 239
58Seats, restraintsAirbag systemThe airbag system consists of a
number of individual systems
depending on the scope of
equipment.
When triggered, the airbags inflate
within milliseconds. They also deflate
so quickly that it is often unnoticeable during the collision.9 Warning
As the airbag system deploys in an
explosive manner, repairs must be
performed by skilled personnel
only.
9 Warning
Adding accessories that change
the vehicle's frame, bumper
system, height, front end or side
sheet metal, may keep the airbag
system from working properly. The operation of the airbag system can
also be affected by changing any
parts of the front seats, seat belts,
airbag sensing and diagnostic
module, steering wheel,
instrument panel, inner door seals including the speakers, any of the
airbag modules, ceiling or pillar
trim, front sensors, side impact
sensors or airbag wiring.
Notice
The airbag systems and belt
pretensioner control electronics are
located in the centre console area.
Do not put any magnetic objects in
this area.
Do not affix any objects onto the
airbag covers and do not cover them with other materials. Have damagedcovers replaced by a workshop.
Each airbag is triggered only once.
Have deployed airbags replaced by
a workshop. Furthermore, it may be
necessary to have the steering
wheel, the instrument panel, parts of
the panelling, the door seals,
handles and the seats replaced.
Do not make any modifications to
the airbag system as this will
invalidate the vehicle operating
permit.
Control indicator v for airbag systems
3 96.
Child restraint systems on front
passenger seat with airbag
systems
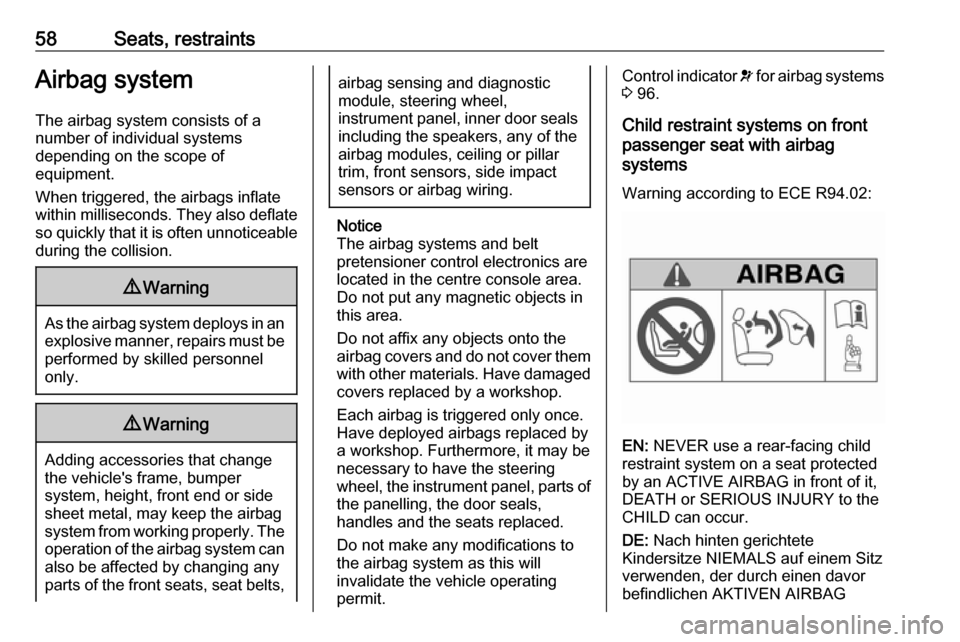
Warning according to ECE R94.02:
EN: NEVER use a rear-facing child
restraint system on a seat protected
by an ACTIVE AIRBAG in front of it,
DEATH or SERIOUS INJURY to the
CHILD can occur.
DE: Nach hinten gerichtete
Kindersitze NIEMALS auf einem Sitz
verwenden, der durch einen davor
befindlichen AKTIVEN AIRBAG
Page 176 of 239

174Vehicle careBulb replacement
Switch off the ignition and turn off the relevant switch or close the doors.
Only hold a new bulb at the base. Do
not touch the bulb glass with bare
hands.
Use only the same bulb type for
replacement.
Bulb check After a bulb replacement, switch on
the ignition, operate and check the
lights.
Headlights
Low beam and high beam Replace headlight bulbs from within
the engine compartment.
1. Remove protective cover by rotating it anticlockwise.
2. Detach wiring connector.
3. Release retaining clip (see illustration) and remove bulb.
4. Renew bulb and install retaining clip ensuring that bulb is in correct
orientation.
5. Reattach wiring connector and protective cover.
Sidelights / Daytime running lights
1. Remove protective cover byrotating it anticlockwise.
2. Release retaining clips and remove bulb holder from reflector
housing.
3. Renew bulb.
4. Install bulb holder in reflector housing and engage retaining
clips.
5. Install protective cover.
Page 177 of 239
Vehicle care175Daytime running light with LEDsDaytime running lights consist of
LEDs which cannot be changed.
Consult a workshop in case of a
defective LED.
Fog lights
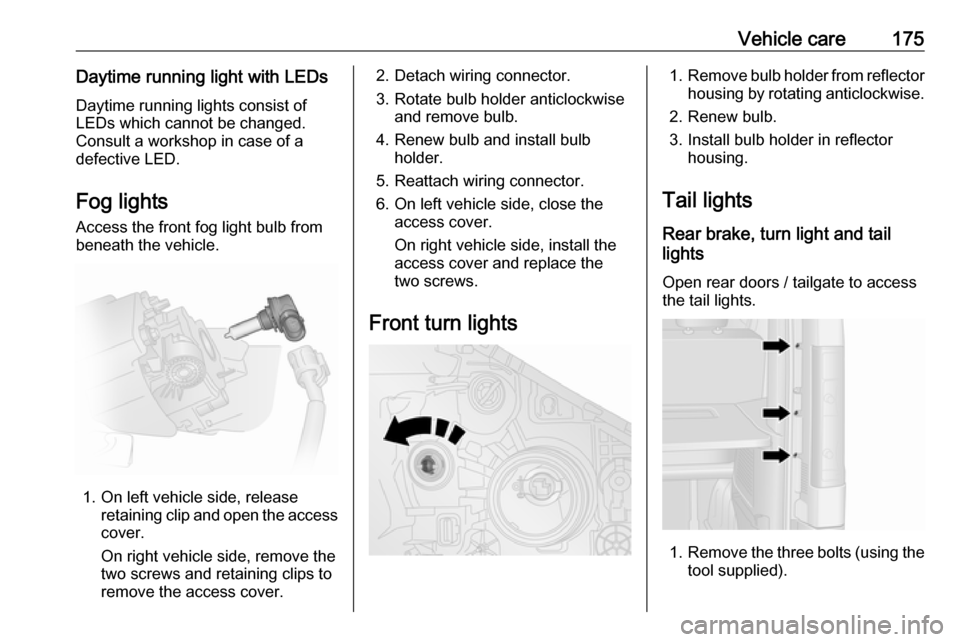
Access the front fog light bulb from
beneath the vehicle.
1. On left vehicle side, release retaining clip and open the accesscover.
On right vehicle side, remove the
two screws and retaining clips to
remove the access cover.
2. Detach wiring connector.
3. Rotate bulb holder anticlockwise and remove bulb.
4. Renew bulb and install bulb holder.
5. Reattach wiring connector.
6. On left vehicle side, close the access cover.
On right vehicle side, install the
access cover and replace the
two screws.
Front turn lights1. Remove bulb holder from reflector
housing by rotating anticlockwise.
2. Renew bulb.
3. Install bulb holder in reflector housing.
Tail lights
Rear brake, turn light and tail
lights
Open rear doors / tailgate to access
the tail lights.
1. Remove the three bolts (using the
tool supplied).
Page 178 of 239
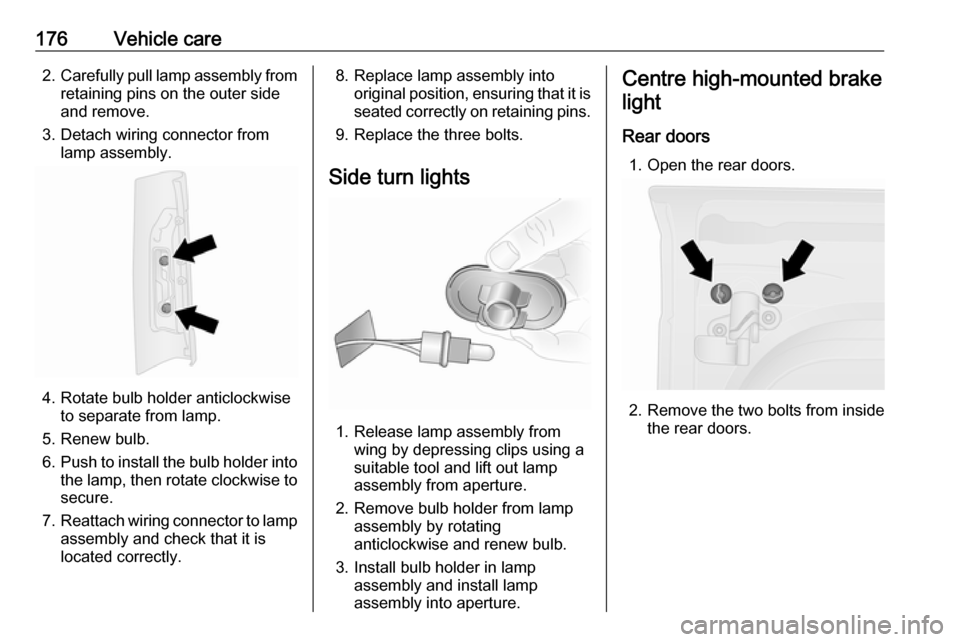
176Vehicle care2.Carefully pull lamp assembly from
retaining pins on the outer side
and remove.
3. Detach wiring connector from lamp assembly.
4. Rotate bulb holder anticlockwise to separate from lamp.
5. Renew bulb.
6. Push to install the bulb holder into
the lamp, then rotate clockwise to secure.
7. Reattach wiring connector to lamp
assembly and check that it is
located correctly.
8. Replace lamp assembly into original position, ensuring that it isseated correctly on retaining pins.
9. Replace the three bolts.
Side turn lights
1. Release lamp assembly from wing by depressing clips using a
suitable tool and lift out lamp
assembly from aperture.
2. Remove bulb holder from lamp assembly by rotating
anticlockwise and renew bulb.
3. Install bulb holder in lamp assembly and install lamp
assembly into aperture.
Centre high-mounted brake
light
Rear doors 1. Open the rear doors.
2. Remove the two bolts from inside the rear doors.
Page 179 of 239
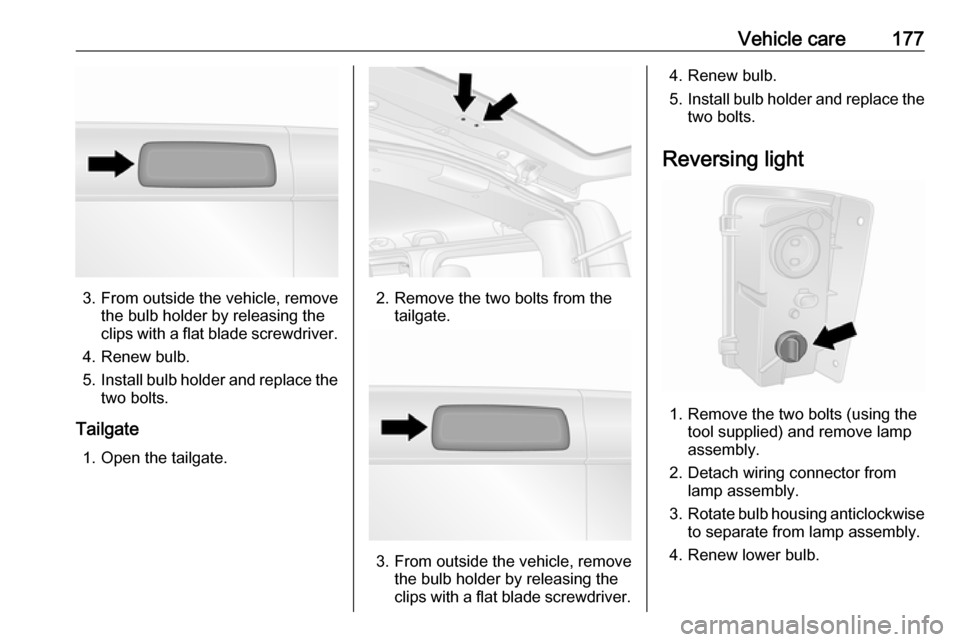
Vehicle care177
3. From outside the vehicle, removethe bulb holder by releasing the
clips with a flat blade screwdriver.
4. Renew bulb.
5. Install bulb holder and replace the
two bolts.
Tailgate 1. Open the tailgate.2. Remove the two bolts from the tailgate.
3. From outside the vehicle, remove the bulb holder by releasing the
clips with a flat blade screwdriver.
4. Renew bulb.
5. Install bulb holder and replace the
two bolts.
Reversing light
1. Remove the two bolts (using the tool supplied) and remove lamp
assembly.
2. Detach wiring connector from lamp assembly.
3. Rotate bulb housing anticlockwise
to separate from lamp assembly.
4. Renew lower bulb.
Page 180 of 239
178Vehicle care5.Push to install the bulb holder into
the lamp assembly, then rotate
clockwise to secure.
6. Reattach wiring connector to lamp
assembly.
7. Install lamp assembly with the two bolts.
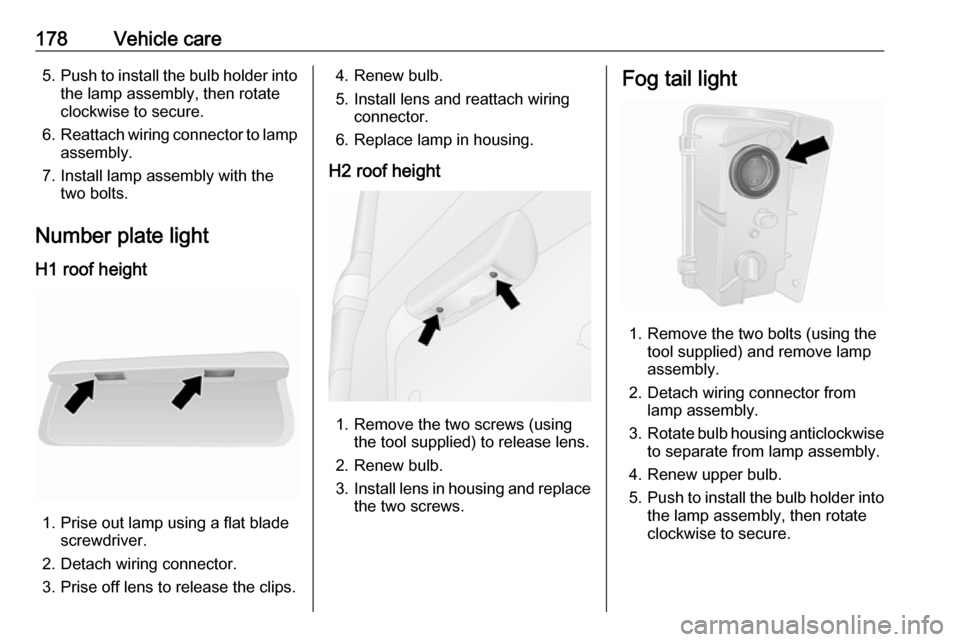
Number plate light H1 roof height
1. Prise out lamp using a flat blade screwdriver.
2. Detach wiring connector.
3. Prise off lens to release the clips.
4. Renew bulb.
5. Install lens and reattach wiring connector.
6. Replace lamp in housing.
H2 roof height
1. Remove the two screws (using the tool supplied) to release lens.
2. Renew bulb.
3. Install lens in housing and replace
the two screws.
Fog tail light
1. Remove the two bolts (using the tool supplied) and remove lamp
assembly.
2. Detach wiring connector from lamp assembly.
3. Rotate bulb housing anticlockwise
to separate from lamp assembly.
4. Renew upper bulb.
5. Push to install the bulb holder into
the lamp assembly, then rotate
clockwise to secure.
Page 181 of 239
Vehicle care1796.Reattach wiring connector to lamp
assembly.
7. Install lamp assembly with the two bolts.
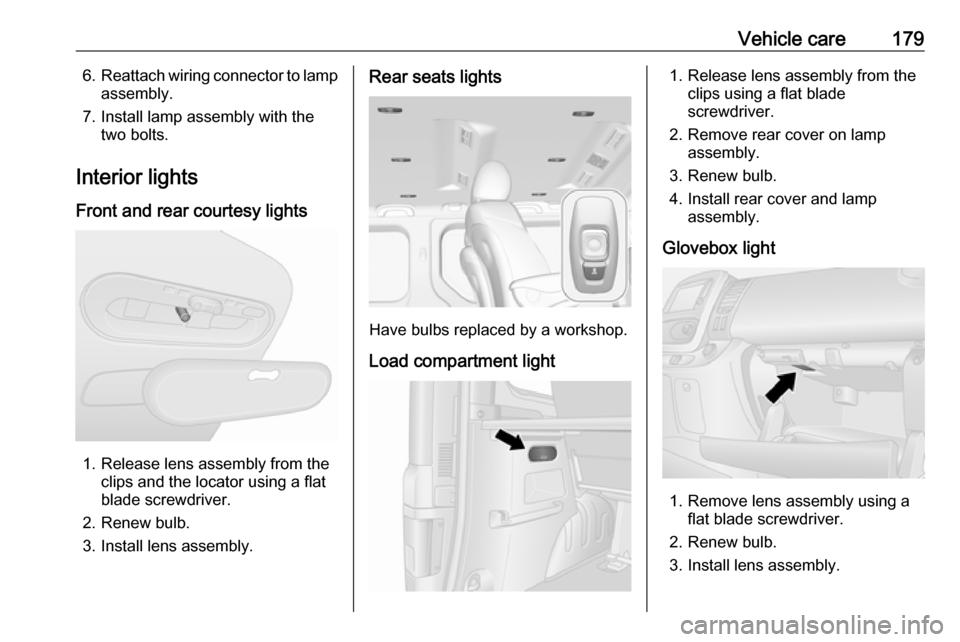
Interior lights
Front and rear courtesy lights
1. Release lens assembly from the clips and the locator using a flat
blade screwdriver.
2. Renew bulb.
3. Install lens assembly.
Rear seats lights
Have bulbs replaced by a workshop.
Load compartment light
1. Release lens assembly from the clips using a flat blade
screwdriver.
2. Remove rear cover on lamp assembly.
3. Renew bulb.
4. Install rear cover and lamp assembly.
Glovebox light
1. Remove lens assembly using a flat blade screwdriver.
2. Renew bulb.
3. Install lens assembly.