heating VAUXHALL VIVARO 2018 Owner's Manual
[x] Cancel search | Manufacturer: VAUXHALL, Model Year: 2018, Model line: VIVARO, Model: VAUXHALL VIVARO 2018Pages: 233, PDF Size: 5.73 MB
Page 17 of 233
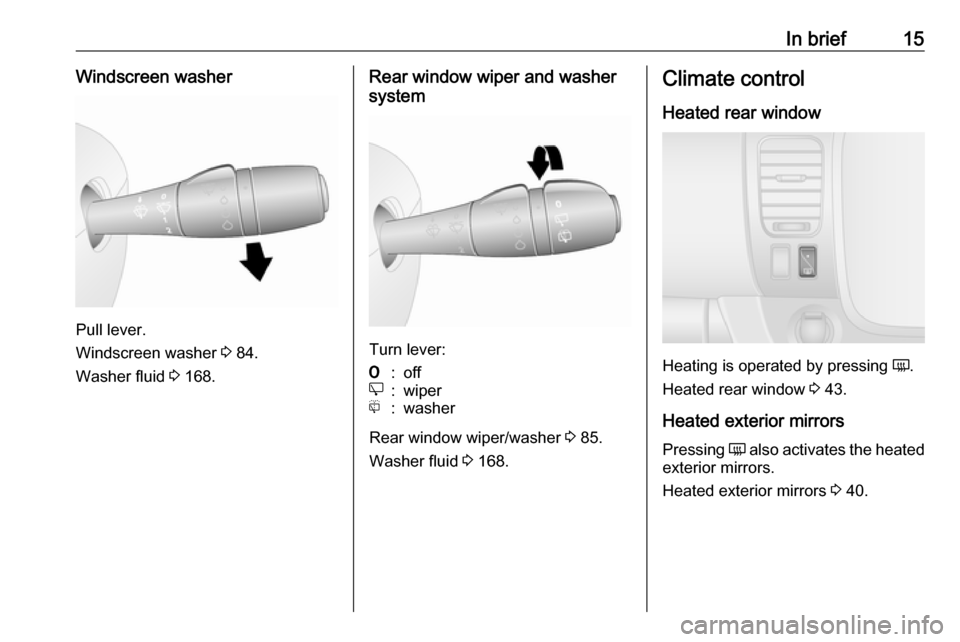
In brief15Windscreen washer
Pull lever.
Windscreen washer 3 84.
Washer fluid 3 168.
Rear window wiper and washer
system
Turn lever:
7:offe:wiperf:washer
Rear window wiper/washer 3 85.
Washer fluid 3 168.
Climate control
Heated rear window
Heating is operated by pressing Ü.
Heated rear window 3 43.
Heated exterior mirrors
Pressing Ü also activates the heated
exterior mirrors.
Heated exterior mirrors 3 40.
Page 19 of 233
In brief17Starting offCheck before starting off ● Tyre pressure and condition 3 184, 3 217.
● Engine oil level and fluid levels 3 165.
● All windows, mirrors, exterior lighting and number plates are
free from dirt, snow and ice and
are operational.
● Proper position of mirrors, seats and seat belts 3 39, 3 45,
3 54.
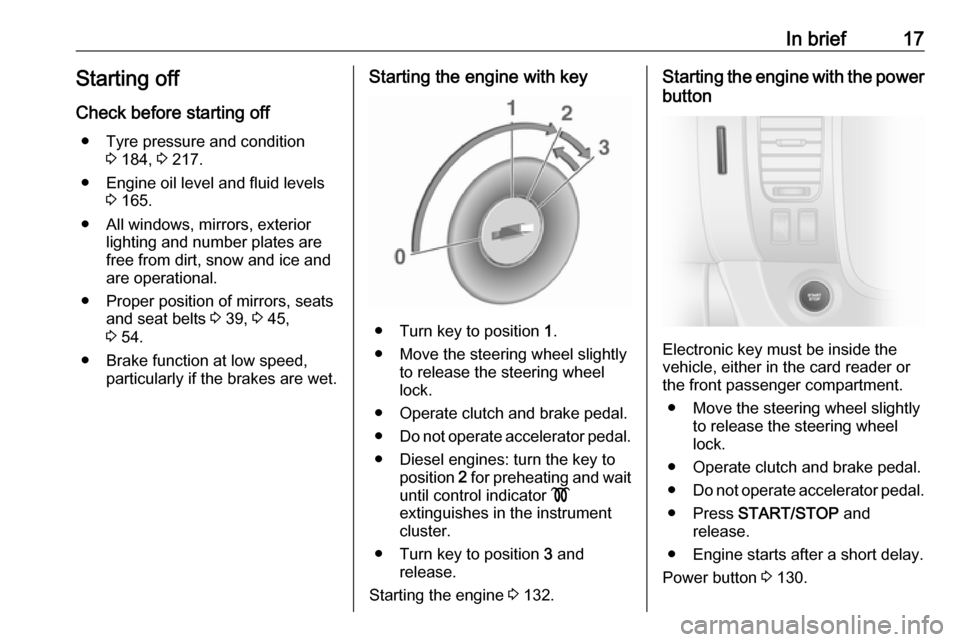
● Brake function at low speed, particularly if the brakes are wet.Starting the engine with key
● Turn key to position 1.
● Move the steering wheel slightly to release the steering wheel
lock.
● Operate clutch and brake pedal. ● Do not operate accelerator pedal.
● Diesel engines: turn the key to position 2 for preheating and wait
until control indicator !
extinguishes in the instrument
cluster.
● Turn key to position 3 and
release.
Starting the engine 3 132.
Starting the engine with the power
button
Electronic key must be inside the
vehicle, either in the card reader or
the front passenger compartment.
● Move the steering wheel slightly to release the steering wheel
lock.
● Operate clutch and brake pedal.
● Do not operate accelerator pedal.
● Press START/STOP and
release.
● Engine starts after a short delay.
Power button 3 130.
Page 42 of 233
40Keys, doors and windowsDepending on version, exterior
mirrors can be automatically folded to the parking position upon locking the
vehicle. For further information, refer
to the Infotainment manual.
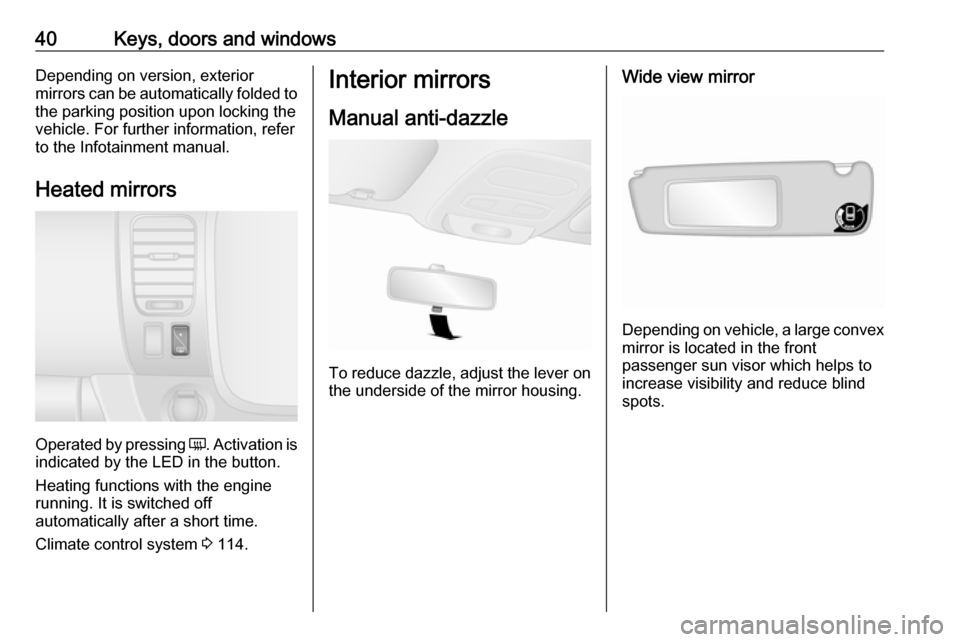
Heated mirrors
Operated by pressing Ü
. Activation is
indicated by the LED in the button.
Heating functions with the engine running. It is switched off
automatically after a short time.
Climate control system 3 114.
Interior mirrors
Manual anti-dazzle
To reduce dazzle, adjust the lever on the underside of the mirror housing.
Wide view mirror
Depending on vehicle, a large convex
mirror is located in the front
passenger sun visor which helps to
increase visibility and reduce blind
spots.
Page 45 of 233
Keys, doors and windows43Sun blind
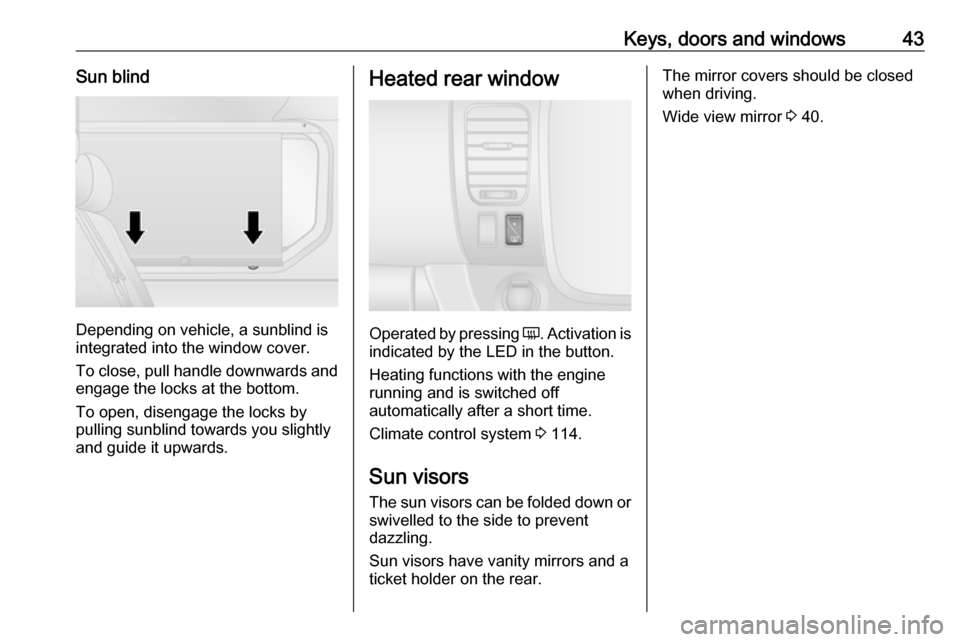
Depending on vehicle, a sunblind is
integrated into the window cover.
To close, pull handle downwards and engage the locks at the bottom.
To open, disengage the locks by
pulling sunblind towards you slightly
and guide it upwards.
Heated rear window
Operated by pressing Ü. Activation is
indicated by the LED in the button.
Heating functions with the engine running and is switched off
automatically after a short time.
Climate control system 3 114.
Sun visors
The sun visors can be folded down or swivelled to the side to prevent
dazzling.
Sun visors have vanity mirrors and a
ticket holder on the rear.
The mirror covers should be closed when driving.
Wide view mirror 3 40.
Page 46 of 233
44Seats, restraintsSeats, restraintsHead restraints............................ 44
Front seats ................................... 45
Seat position .............................. 45
Seat adjustment ........................46
Seat folding ............................... 48
Armrest ...................................... 48
Heating ...................................... 48
Rear seats ................................... 49
Seat belts ..................................... 53
Three-point seat belt .................54
Airbag system .............................. 57
Front airbag system ...................61
Side airbag system ....................61
Curtain airbag system ...............62
Airbag deactivation ....................62
Child restraints ............................. 63
Child restraint systems ..............63
Child restraint installation locations ................................... 66Head restraints
Position9 Warning
Only drive with the head restraint
set to the proper position.
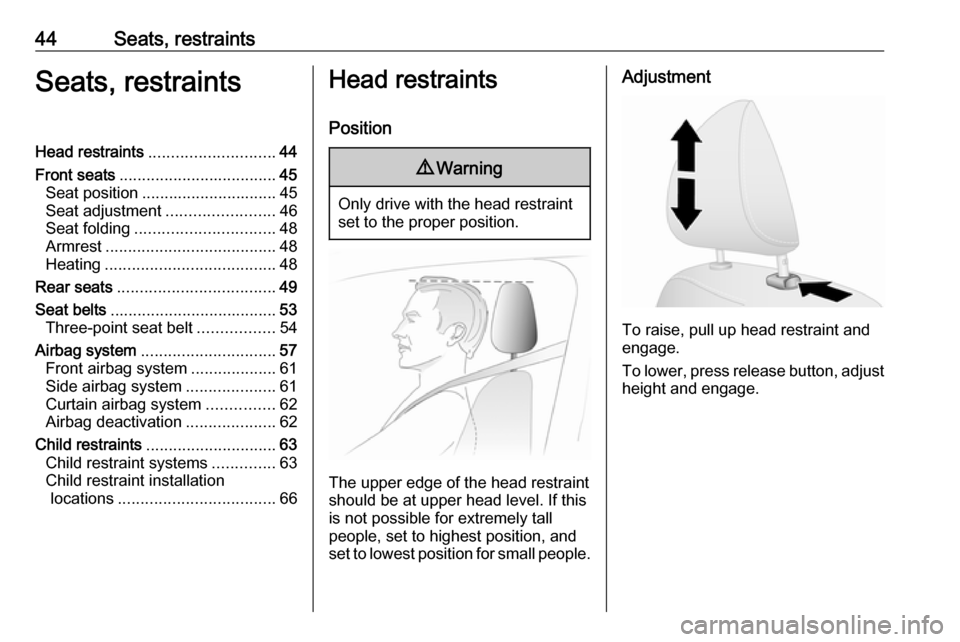
The upper edge of the head restraint
should be at upper head level. If this
is not possible for extremely tall
people, set to highest position, and
set to lowest position for small people.
Adjustment
To raise, pull up head restraint and
engage.
To lower, press release button, adjust
height and engage.
Page 50 of 233
48Seats, restraintsSeat foldingFolding front centre passenger
seat
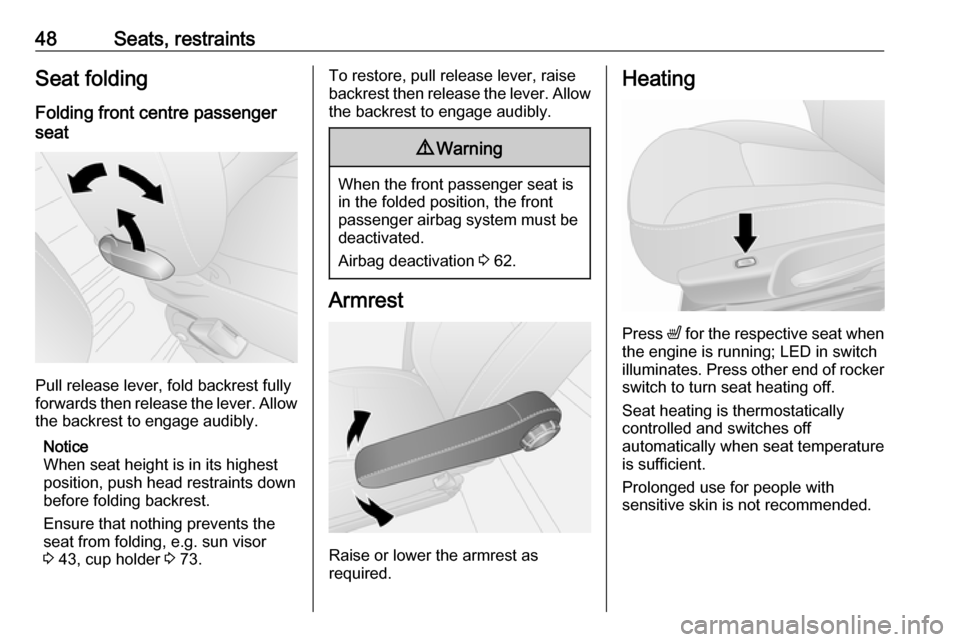
Pull release lever, fold backrest fully
forwards then release the lever. Allow the backrest to engage audibly.
Notice
When seat height is in its highest
position, push head restraints down
before folding backrest.
Ensure that nothing prevents the
seat from folding, e.g. sun visor
3 43, cup holder 3 73.
To restore, pull release lever, raise
backrest then release the lever. Allow the backrest to engage audibly.9 Warning
When the front passenger seat is
in the folded position, the front
passenger airbag system must be deactivated.
Airbag deactivation 3 62.
Armrest
Raise or lower the armrest as
required.
Heating
Press ß for the respective seat when
the engine is running; LED in switch
illuminates. Press other end of rocker switch to turn seat heating off.
Seat heating is thermostatically
controlled and switches off
automatically when seat temperature
is sufficient.
Prolonged use for people with
sensitive skin is not recommended.
Page 84 of 233

82Instruments and controlsInstruments and
controlsControls ....................................... 83
Steering wheel adjustment ........83
Steering wheel controls .............83
Horn ........................................... 83
Steering column controls ...........83
Windscreen wiper/washer .........84
Rear window wiper/washer .......85
Outside temperature ..................85
Clock ......................................... 86
Power outlets ............................. 86
Cigarette lighter ......................... 88
Ashtrays .................................... 88
Warning lights, gauges and indi‐ cators ........................................... 89
Instrument cluster ......................89
Speedometer ............................. 89
Odometer .................................. 89
Trip odometer ............................ 89
Tachometer ............................... 90
Fuel gauge ................................ 90
Fuel economy gauge .................91
Service display .......................... 91
Control indicators ......................92
Turn signal ................................. 94Seat belt reminder.....................95
Airbag and belt tensioners .........95
Airbag deactivation ....................95
Charging system .......................96
Malfunction indicator light ..........96
Service vehicle soon .................96
Stop engine ............................... 96
Brake system ............................. 96
Antilock brake system (ABS) .....97
Upshift ....................................... 97
Electronic Stability Program ......97
Electronic Stability Program off ............................................. 97
Engine coolant temperature ......97
Preheating ................................. 98
AdBlue ....................................... 98
Tyre pressure monitoring system ...................................... 98
Engine oil pressure ....................98
Fuel economy mode ..................99
Low fuel ..................................... 99
Stop-start system ......................99
Exterior light .............................. 99
High beam ................................. 99
Fog light ..................................... 99
Rear fog light ............................. 99
Cruise control .......................... 100
Tachograph ............................. 100
Door open ................................ 100Information displays...................100
Driver Information Centre ........100
Info display .............................. 100
Vehicle messages ......................101
Warning chimes .......................102
Engine oil level ........................ 102
Trip computer ............................. 103
Tachograph ................................ 105
Page 96 of 233
94Instruments and controlsControl indicators in the roof
console
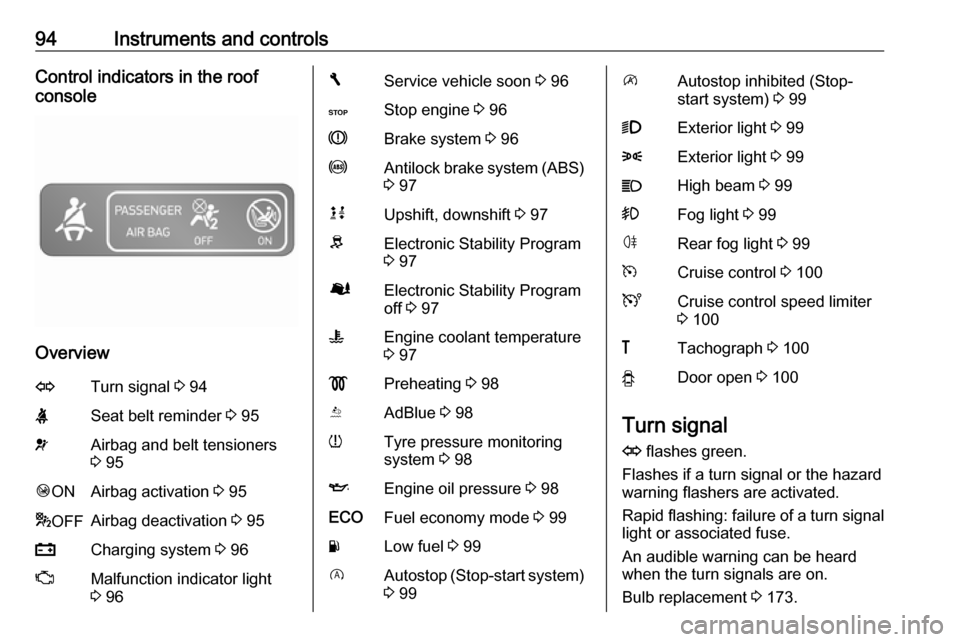
Overview
OTurn signal 3 94XSeat belt reminder 3 95vAirbag and belt tensioners
3 95Ó ONAirbag activation 3 95* OFFAirbag deactivation 3 95pCharging system 3 96ZMalfunction indicator light
3 96FService vehicle soon 3 96CStop engine 3 96RBrake system 3 96uAntilock brake system (ABS)
3 97kjUpshift, downshift 3 97RElectronic Stability Program
3 97ØElectronic Stability Program
off 3 97WEngine coolant temperature
3 97!Preheating 3 98YAdBlue 3 98wTyre pressure monitoring
system 3 98IEngine oil pressure 3 98ECOFuel economy mode 3 99YLow fuel 3 99DAutostop (Stop-start system)
3 99\Autostop inhibited (Stop-
start system) 3 999Exterior light 3 998Exterior light 3 99CHigh beam 3 99>Fog light 3 99øRear fog light 3 99mCruise control 3 100UCruise control speed limiter
3 100&Tachograph 3 100yDoor open 3 100
Turn signal
O flashes green.
Flashes if a turn signal or the hazard
warning flashers are activated.
Rapid flashing: failure of a turn signal
light or associated fuse.
An audible warning can be heard
when the turn signals are on.
Bulb replacement 3 173.
Page 100 of 233

98Instruments and controlsCaution
Coolant temperature too high.
Check coolant level 3 167.
If there is sufficient coolant, consult a workshop.
The control indicator must be blue
before continuing driving.
Preheating
! illuminates yellow.
Preheating is activated. Only
activates when outside temperature
is low.
AdBlue Y illuminates yellow.
AdBlue level is low. Refill AdBlue as
soon as possible, to avoid prevention
of engine starts.
Illuminates together with control
indicator F to indicate a system
failure or as a warning that engine
starting may not be possible after a
certain distance. Seek the assistance
of a workshop immediately.
A corresponding message appears in the Driver Information Centre 3 100.
AdBlue percentage remaining can
also be checked by pressing button
repeatedly on end of wiper lever.
Trip computer 3 103.
AdBlue 3 139.
Tyre pressure monitoring system
w illuminates or flashes yellow.
Illuminates briefly when the ignition is
switched on.
Illuminates
Tyre pressure loss. Stop immediately
and check tyre pressure.
Control indicator w illuminates
together with C 3 96 and a
corresponding message appears in the Driver Information Centre when a puncture or severely under-inflated
tyre is detected.Flashes
Fault in system. After a delay the
control indicator illuminates
continuously. Consult a workshop.
Control indicator w illuminates
together with A 3 96 and a
corresponding message appears in
the Driver Information Centre when a
tyre without a pressure sensor is
mounted (e.g. spare wheel).
Tyre pressure monitoring system
3 186.
Engine oil pressure
I illuminates red.
Illuminates briefly when the ignition is
switched on.
Illuminates when the engine is
running
If control indicator I illuminates
when the engine is running (together
with control indicator C and a
warning chime): Stop, switch off
engine.
Page 116 of 233
114Climate controlClimate controlClimate control systems.............114
Heating and ventilation system 114
Air conditioning system ...........115
Electronic climate control system .................................... 116
Rear heating system ...............118
Rear air conditioning system ...119
Auxiliary heater ........................120
Air vents ..................................... 125
Adjustable air vents .................125
Fixed air vents ......................... 126
Glovebox cooler ......................126
Maintenance .............................. 126
Air intake ................................. 126
Pollen filter ............................... 126
Air conditioning regular operation ................................ 126
Service .................................... 127Climate control systems
Heating and ventilation system
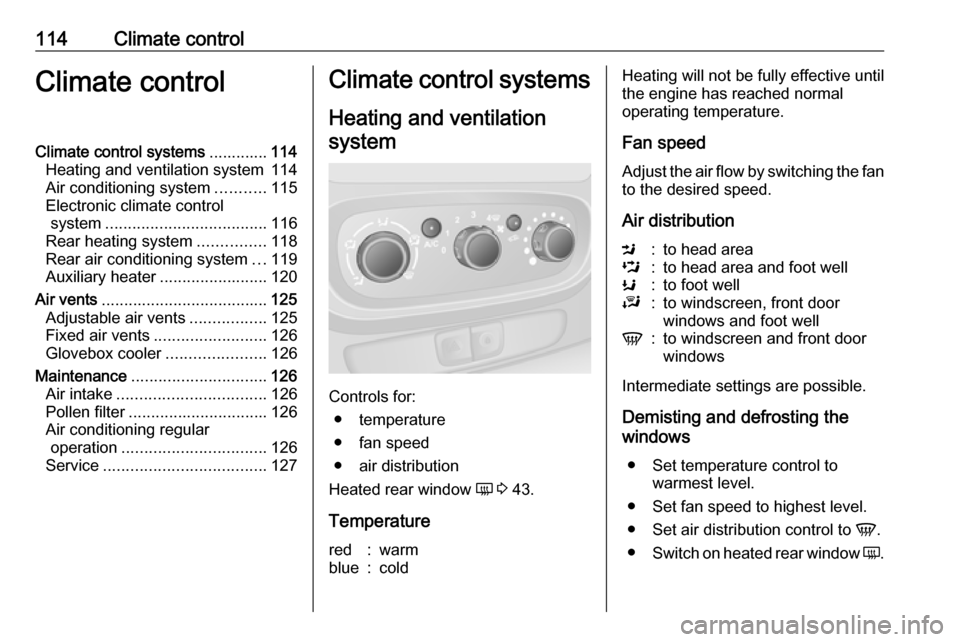
Controls for: ● temperature
● fan speed
● air distribution
Heated rear window Ü 3 43.
Temperature
red:warmblue:coldHeating will not be fully effective until
the engine has reached normal
operating temperature.
Fan speed
Adjust the air flow by switching the fan
to the desired speed.
Air distributionM:to head areaL:to head area and foot wellK:to foot wellJ:to windscreen, front door
windows and foot wellV:to windscreen and front door
windows
Intermediate settings are possible.
Demisting and defrosting the
windows
● Set temperature control to warmest level.
● Set fan speed to highest level.
● Set air distribution control to V.
● Switch on heated rear window Ü.