ignition VAUXHALL VIVARO C 2020 User Guide
[x] Cancel search | Manufacturer: VAUXHALL, Model Year: 2020, Model line: VIVARO C, Model: VAUXHALL VIVARO C 2020Pages: 289, PDF Size: 10.16 MB
Page 40 of 289
38Keys, doors and windowsdeactivated as follows: switch the
ignition on then off, then disconnect
the vehicle's battery within
15 seconds.
If the battery has been reconnected,
wait for 10 minutes to restart the
engine.
Locking the vehicle without
activation of the anti-theft alarm
Lock the vehicle by inserting andturning the integrated key of the
remote control or the electronic key
system in the lock cylinder of the
driver's door.
Malfunction of the remote control
Unlock the vehicle by inserting and
turning the integrated key of the
remote control or the electronic key
system in the lock cylinder of the
driver's door.
Open the driver's door.
The horn of the anti-theft alarm will
sound.
Switch on ignition.
The horn will stop sounding and the status LED extinguishes.Immobiliser
The system is part of the ignition
switch and checks whether the
vehicle is allowed to be started with
the key being used.
The immobiliser is activated
automatically after the key has been removed from the ignition switch.
Notice
Radio Frequency Identification
(RFID) tags may cause interference
with the key. Do not have it placed
near the key when starting the
vehicle.
Notice
The immobiliser does not lock the
doors. Always lock the vehicle after
leaving it 3 24.
Switch on the anti-theft alarm
system 3 36.
Emergency operation of electronic
key 3 153.Exterior mirrors
Convex shape The shape of the mirror makes
objects appear smaller, which will affect the ability to estimate
distances.
Side blind spot alert 3 194.
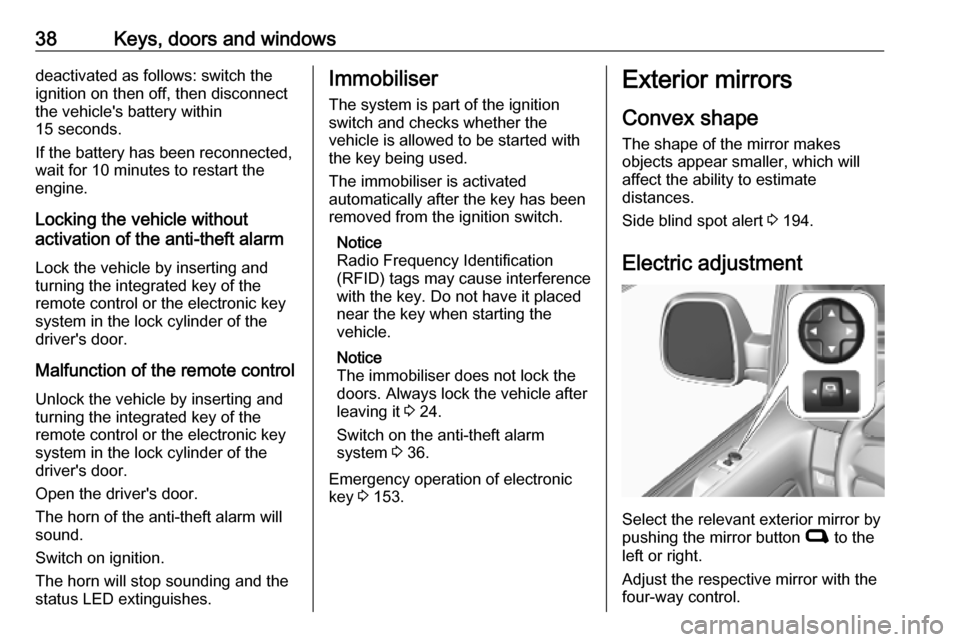
Electric adjustment
Select the relevant exterior mirror by
pushing the mirror button C to the
left or right.
Adjust the respective mirror with the
four-way control.
Page 43 of 289
Keys, doors and windows41Windows
Windscreen
Windscreen stickers
Do not attach stickers such as toll
road stickers or similar on the
windscreen in the area of the interior
mirror. Otherwise the detection zone
of the sensor and the view area of the camera in the mirror housing could be
restricted.
Windscreen replacementCaution
If the vehicle has a front-looking
camera sensor for the driver
assistance systems, it is very
important that any windscreen
replacement is performed
accurately according to Vauxhall
specifications. Otherwise, these systems may not work properly
and there is a risk of unexpected
behaviour and / or messages from these systems.
Power windows9 Warning
Take care when operating the
power windows. Risk of injury,
particularly to children.
If there are children on the rear seats, switch on the child safety
system for the power windows.
Keep a close watch on the
windows when closing them.
Ensure that nothing becomes
trapped in them as they move.
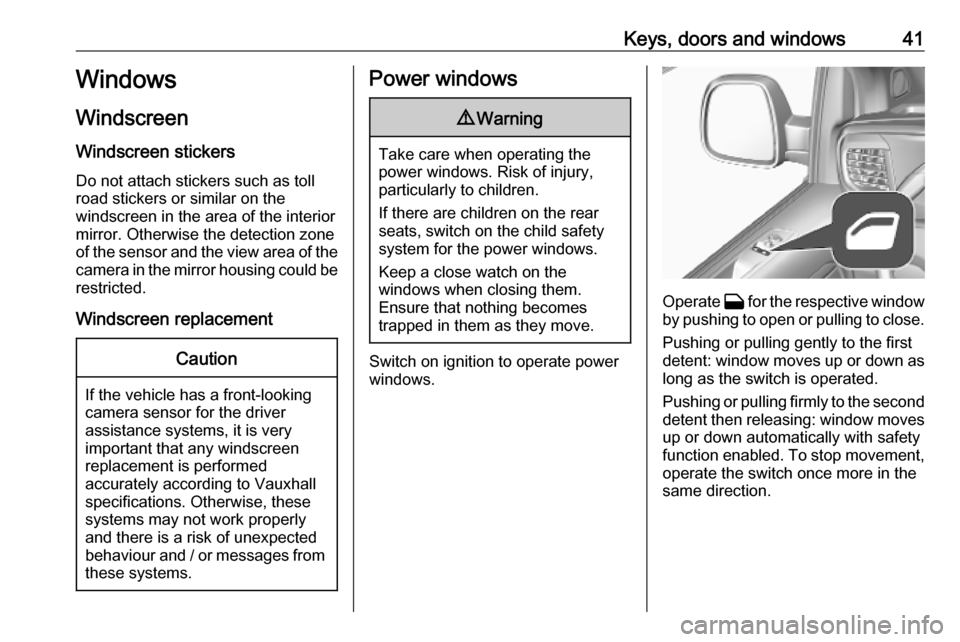
Switch on ignition to operate power
windows.
Operate G for the respective window
by pushing to open or pulling to close.
Pushing or pulling gently to the first
detent: window moves up or down as long as the switch is operated.
Pushing or pulling firmly to the second
detent then releasing: window moves
up or down automatically with safety
function enabled. To stop movement,
operate the switch once more in the
same direction.
Page 44 of 289
42Keys, doors and windowsSafety function
This function depends upon version.
If the window glass encounters
resistance above the middle of the
window during automatic closing, it is
immediately stopped and opened
again.
Override safety function
In the event of closing difficulties due to frost or the like, switch on the
ignition, then pull the switch to the first
detent and hold. The window moves
up without safety function enabled.
To stop movement, release the
switch.
Operating windows from outside
The windows can be closed remotely
from outside the vehicle.
Press and hold - to close windows.
Release button to stop window
movement.Overload
If the windows are repeatedly
operated within short intervals, the
window operation is disabled for
some time.
Initialising the power windows
If the windows cannot be closed
automatically (e.g. after
disconnecting the vehicle battery), a
warning message is displayed in the
Driver Information Centre.
Vehicle messages 3 122.
Activate the window electronics as
follows:
1. Close doors.
2. Switch on ignition.
3. Push switch until the window is completely open.
4. Pull switch until the window is completely closed and keep
pulling for additional two seconds.
5. Repeat for each window.Rear windows
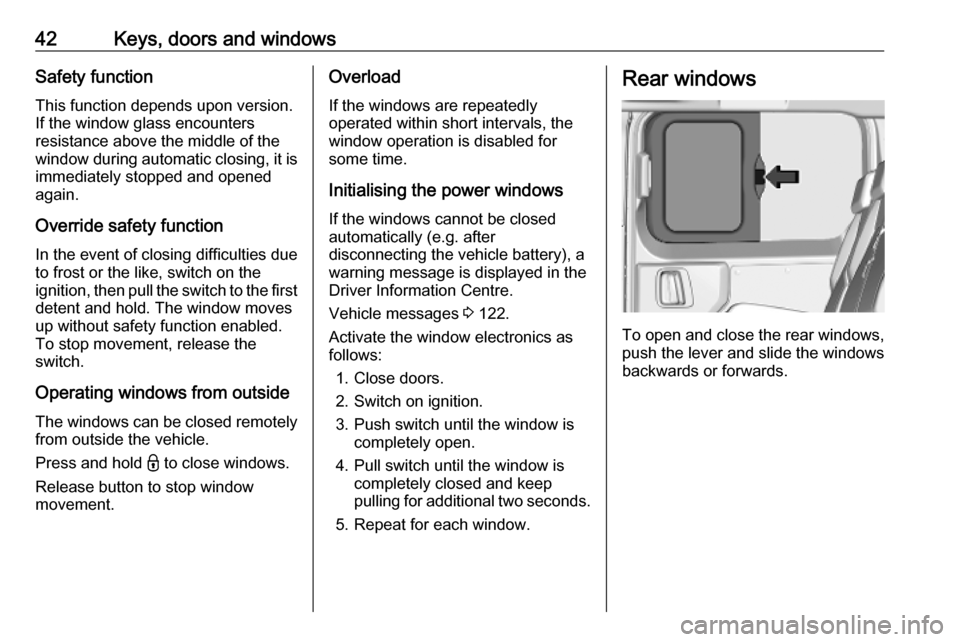
To open and close the rear windows,
push the lever and slide the windows
backwards or forwards.
Page 65 of 289
Seats, restraints63ET: ÄRGE kasutage tahapoole
suunatud lapseturvaistet istmel, mille
ees on AKTIIVSE TURVAPADJAGA
kaitstud iste, sest see võib
põhjustada LAPSE SURMA või
TÕSISE VIGASTUSE.
MT: QATT tuża trażżin għat-tfal li
jħares lejn in-naħa ta’ wara fuq sit
protett b’AIRBAG ATTIV quddiemu;
dan jista’ jikkawża l-MEWT jew
ĠRIEĦI SERJI lit-TFAL.
GA: Ná húsáid srian sábháilteachta
linbh cúil RIAMH ar shuíochán a
bhfuil mála aeir ag feidhmiú os a
chomhair. Tá baol BÁIS nó GORTÚ
DONA don PHÁISTE ag baint leis.
Beyond the warning required by
ECE R94.02, for safety reasons a
forward-facing child restraint system
must only be used subject to the
instructions and restrictions in the
table 3 69.
The airbag label is located on both
sides of the front passenger sun visor.
Airbag deactivation 3 64.Front airbag system
The front airbag system consists of
one airbag in the steering wheel and
one in the instrument panel on the
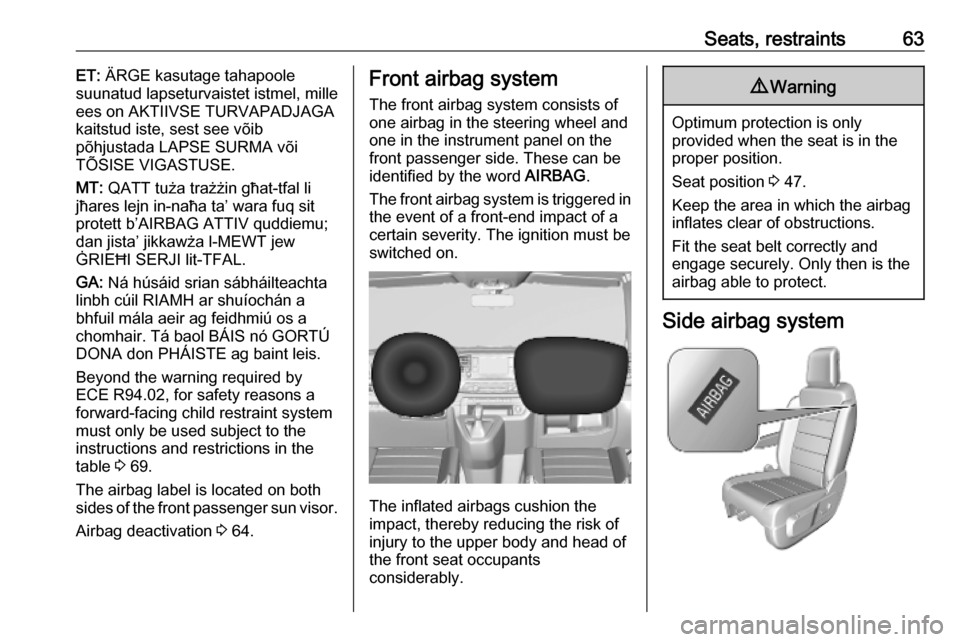
front passenger side. These can be
identified by the word AIRBAG.
The front airbag system is triggered in
the event of a front-end impact of a
certain severity. The ignition must be
switched on.
The inflated airbags cushion the
impact, thereby reducing the risk of
injury to the upper body and head of
the front seat occupants
considerably.
9 Warning
Optimum protection is only
provided when the seat is in the
proper position.
Seat position 3 47.
Keep the area in which the airbag
inflates clear of obstructions.
Fit the seat belt correctly and
engage securely. Only then is the
airbag able to protect.
Side airbag system
Page 66 of 289
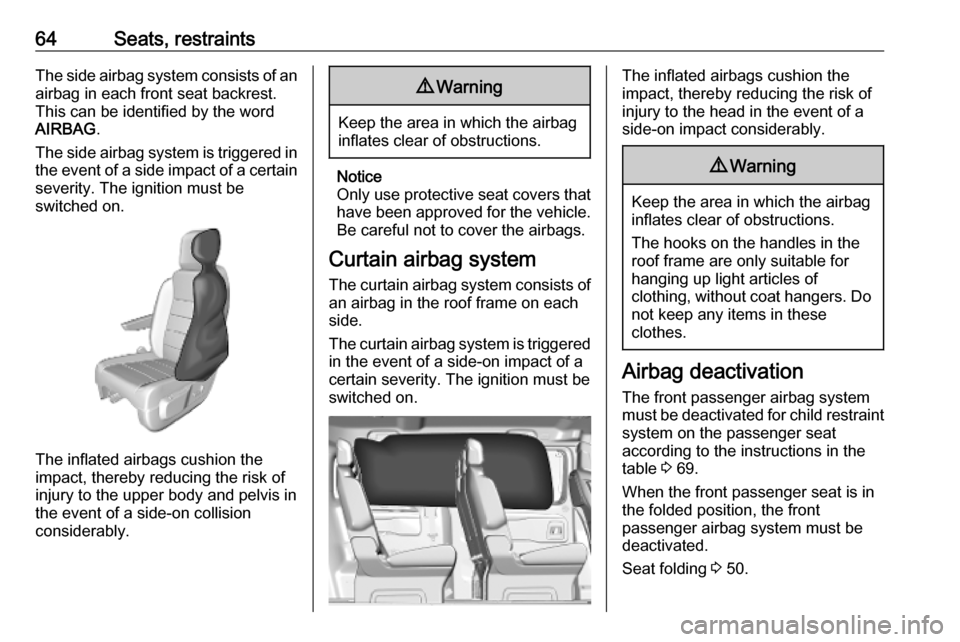
64Seats, restraintsThe side airbag system consists of anairbag in each front seat backrest.
This can be identified by the word
AIRBAG .
The side airbag system is triggered in
the event of a side impact of a certain severity. The ignition must be
switched on.
The inflated airbags cushion the
impact, thereby reducing the risk of
injury to the upper body and pelvis in
the event of a side-on collision
considerably.
9 Warning
Keep the area in which the airbag
inflates clear of obstructions.
Notice
Only use protective seat covers that have been approved for the vehicle.Be careful not to cover the airbags.
Curtain airbag system
The curtain airbag system consists of an airbag in the roof frame on each
side.
The curtain airbag system is triggered
in the event of a side-on impact of a
certain severity. The ignition must be
switched on.
The inflated airbags cushion the
impact, thereby reducing the risk of
injury to the head in the event of a
side-on impact considerably.9 Warning
Keep the area in which the airbag
inflates clear of obstructions.
The hooks on the handles in the
roof frame are only suitable for
hanging up light articles of
clothing, without coat hangers. Do not keep any items in these
clothes.
Airbag deactivation
The front passenger airbag system must be deactivated for child restraint
system on the passenger seat
according to the instructions in the
table 3 69.
When the front passenger seat is in the folded position, the front
passenger airbag system must be
deactivated.
Seat folding 3 50.
Page 67 of 289
Seats, restraints65The side airbag and curtain airbag
systems, the belt pretensioners and
all driver airbag systems will remain
active.
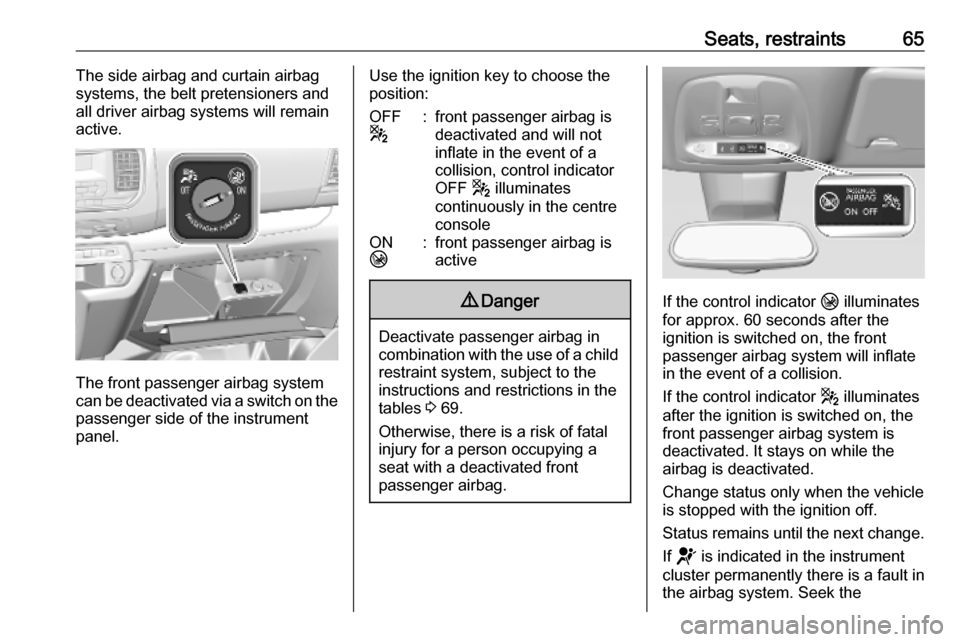
The front passenger airbag system
can be deactivated via a switch on the
passenger side of the instrument
panel.
Use the ignition key to choose the position:OFF
g:front passenger airbag is
deactivated and will not
inflate in the event of a
collision, control indicator
OFF g illuminates
continuously in the centre
consoleON
H:front passenger airbag is
active9 Danger
Deactivate passenger airbag in
combination with the use of a child restraint system, subject to the
instructions and restrictions in the
tables 3 69.
Otherwise, there is a risk of fatal
injury for a person occupying a
seat with a deactivated front
passenger airbag.
If the control indicator H illuminates
for approx. 60 seconds after the
ignition is switched on, the front
passenger airbag system will inflate
in the event of a collision.
If the control indicator g illuminates
after the ignition is switched on, the front passenger airbag system is
deactivated. It stays on while the
airbag is deactivated.
Change status only when the vehicle is stopped with the ignition off.
Status remains until the next change.
If d is indicated in the instrument
cluster permanently there is a fault in
the airbag system. Seek the
Page 97 of 289
Instruments and controls95To activate interval wiping mode the
next time ignition is switched on,
press the lever downwards to position
0 and back to INT.
Windscreen wiper with rain sensor2:fast1:slowINT:interval wiping0:offAUTO:automatic wiping with rain
sensor
In AUTO position, the rain sensor
detects the amount of water on the
windscreen and automatically
regulates the frequency of the
windscreen wiper. To deactivate the automatic wiping mode, press the
lever downwards to AUTO again.
If ignition is switched off for more than a minute, automatic wiping mode is
deactivated. To activate automatic
wiping mode the next time ignition is
switched on, press the lever
downwards to AUTO again.
For a single wipe when the
windscreen wiper is off, pull the lever
briefly towards you.
Do not use if the windscreen is frozen.
Switch off in car washes.
Windscreen washerWasher fluid is sprayed onto the
windscreen and the wiper wipes a few
times.
Washer fluid 3 215.
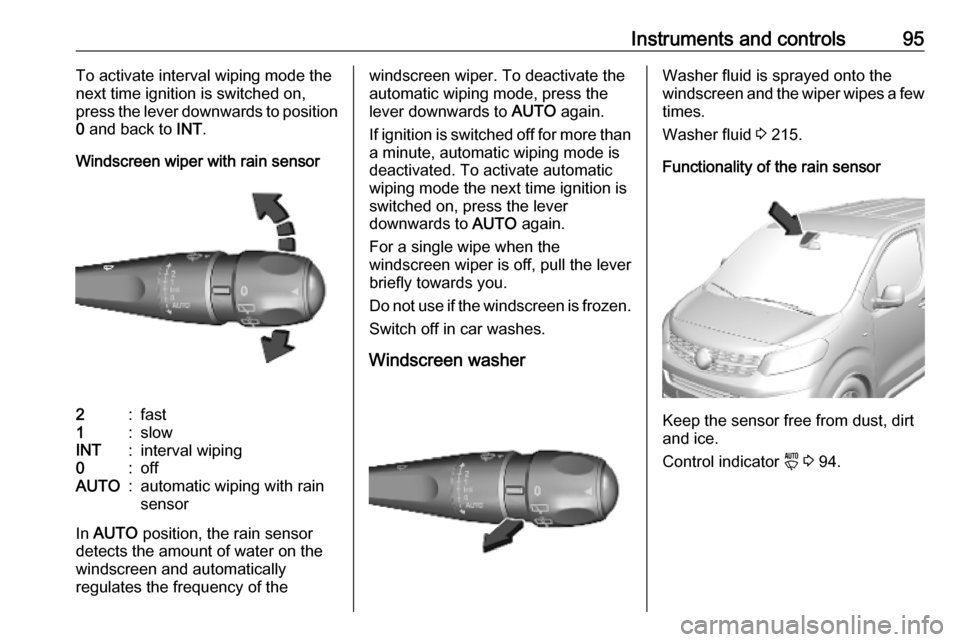
Functionality of the rain sensor
Keep the sensor free from dust, dirt
and ice.
Control indicator y 3 94.
Page 100 of 289
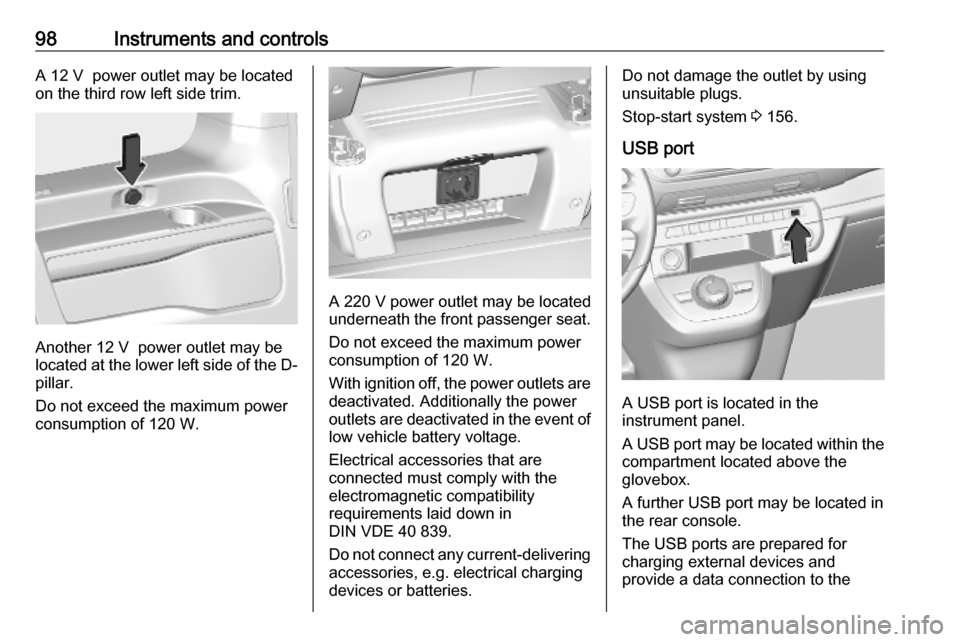
98Instruments and controlsA 12 V power outlet may be located
on the third row left side trim.
Another 12 V power outlet may be
located at the lower left side of the D- pillar.
Do not exceed the maximum power
consumption of 120 W.
A 220 V power outlet may be located
underneath the front passenger seat.
Do not exceed the maximum power
consumption of 120 W.
With ignition off, the power outlets are
deactivated. Additionally the power
outlets are deactivated in the event of low vehicle battery voltage.
Electrical accessories that are
connected must comply with the
electromagnetic compatibility
requirements laid down in
DIN VDE 40 839.
Do not connect any current-delivering
accessories, e.g. electrical charging
devices or batteries.
Do not damage the outlet by using
unsuitable plugs.
Stop-start system 3 156.
USB port
A USB port is located in the
instrument panel.
A USB port may be located within the
compartment located above the
glovebox.
A further USB port may be located in the rear console.
The USB ports are prepared for
charging external devices and
provide a data connection to the
Page 110 of 289

108Instruments and controlsEngine oil level monitorThe state of the engine oil level is
displayed in the Driver Information
Centre for a few seconds following
the service information after switching
on the ignition.
A proper state of engine oil level is
confirmed.
If engine oil level is low, T flashes
and warning message is indicated in
the Driver Information Centre.
Depending on the version, D
flashes in the Driver Information
Centre. Confirm engine oil level by
using the oil dipstick and top up
engine oil respectively.
Engine oil 3 213.
A fault of measurement is indicated
by E or a message in the Driver
Information Centre together with
T . Check engine oil level manually
by using the dipstick.
Service display
The service system informs when to
change the engine oil and filter or a
vehicle service is required. Based ondriving conditions, the interval at
which an engine oil and filter change
is required can vary considerably.
Service information 3 259.
A required service due is displayed in the Driver Information Centre forseveral seconds after switching on
the ignition.
If no service is required for the next
1800 miles or more no service
information appears in the display.
If service is required within the next
1800 miles, A illuminates temporary
as reminder. Simultaneously, the
remaining distance or time duration is
indicated for several seconds.
Depending on the version, the
distance travelled since the due date
is indicated in the Driver Information
Centre.
If service is required in less than
600 miles, A flashes and then
illuminates permanently. Remaining distance or time duration is indicated
for several seconds. Simultaneously,
the remaining distance or time
duration is indicated for several
seconds. Depending on the version,the distance travelled since the due
date is indicated in the Driver
Information Centre.
Overdued service is indicated by a
message in the Driver Information
Centre which indicates the overdued
distance. A flashes and then
illuminates permanently until service
is executed. Additionally, the control
indicator C or SERVICE
illuminates.
Reset of service interval
After each service, the service
indicator must be reset to ensure
proper functionality. It is
recommended to seek the assistance of a workshop.
If service is executed by yourself,
operate as following:
● switch off ignition
● press and hold F, G
or CHECK
● switch on ignition, the distance indication begins a countdown
● when the display indicates =0,
release the button and
Page 111 of 289
Instruments and controls109A disappears
Retrieving service information
To retrieve the status of the service
information at any time press
F , G or CHECK .
The service information is displayed for a few seconds.
Instrument cluster 3 100.
Service information 3 259.
Control indicators
The control indicators described are
not present in all vehicles. The
description applies to all instrument
versions. Depending on the
equipment, the position of the control indicators may vary. When the
ignition is switched on, most control
indicators will illuminate briefly as a
functionality test.
The control indicator colours mean:red:danger, important reminderyellow:warning, information, faultgreen:confirmation of activationblue:confirmation of activationwhite:confirmation of activationSee all control indicators on different
instrument clusters 3 100.
Turn lights
1 flash green.
Flash Turn lights or the hazard warning
flashers are activated.
Rapid flashing: failure of a turn light or associated fuse, failure of turn light on
trailer.
Bulb replacement 3 219.
Turn lights 3 133.
Seat belt reminder
a illuminates or flashes in the
instrument cluster and in the
overhead console.
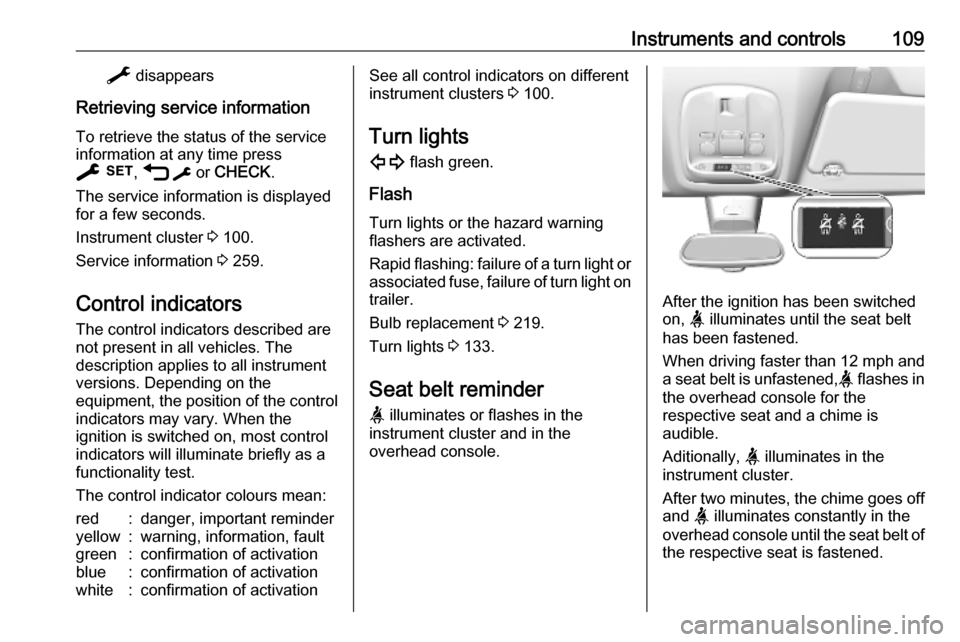
After the ignition has been switched
on, a illuminates until the seat belt
has been fastened.
When driving faster than 12 mph and
a seat belt is unfastened, a flashes in
the overhead console for the
respective seat and a chime is
audible.
Aditionally, a illuminates in the
instrument cluster.
After two minutes, the chime goes off
and a illuminates constantly in the
overhead console until the seat belt of the respective seat is fastened.