ignition VAUXHALL VIVARO C 2020 Service Manual
[x] Cancel search | Manufacturer: VAUXHALL, Model Year: 2020, Model line: VIVARO C, Model: VAUXHALL VIVARO C 2020Pages: 289, PDF Size: 10.16 MB
Page 165 of 289

Driving and operating163Notice
Whenever a filling pump with a
nozzle for passenger cars is not
available at a filling station, use only
AdBlue bottles or canisters with a
sealed refill adapter for refilling, to
prevent splashback and overspill,
and in order to ensure that the fumes
from the AdBlue tank are captured
and do not emerge. AdBlue in
bottles or canisters is available in
many filling stations and can be
purchased e.g. at Vauxhall dealers
and other retail outlets.
Since AdBlue has a limited
durability, check the date of expiry
before refilling.
Notice
Refill the AdBlue tank to a level of at
least 5 l to ensure that the new
AdBlue level is being detected.
In case AdBlue refill is not
successfully detected:1. Continuously drive the vehicle for 10 min making sure that
vehicle speed is always higher
than 12 mph.
2. If AdBlue refill is detected successfully, AdBlue supply-
driven warnings or limitations will
disappear.
If AdBlue refill is still not detected,
seek the assistance of a workshop.
If AdBlue must be refilled at
temperatures below -11 °C, the
refilling of AdBlue may not be
detected by the system. In this
event, park the vehicle in a space
with a higher ambient temperature
until AdBlue is liquified.
Notice
When unscrewing the protective cap from the filler neck, ammonia fumesmay emerge. Do not inhale as the
fumes have a pungent smell. The
fumes are not harmful by inhalation.
The AdBlue tank should be filled
completely. This must be done if the
warning message regarding
prevention of an engine restart is
already displayed.The vehicle must be parked on a level surface.
1. Remove key from ignition switch.
2. Open the driver's door to access the AdBlue flap.
3. Open the AdBlue flap by inserting
a finger in the slot in the low part
of the flap. Pull the flap to the front.
Page 167 of 289

Driving and operating165Transmission display
The mode or selected gear is shown
in the Driver Information Centre.
In automatic mode, the driving
programme is indicated by D, A or
AUTO .
In manual mode, M and the number
of the selected gear is indicated.
R indicates reverse gear.
N indicates neutral position.
For automatic transmission type A
only: P indicates park position.
Gear selection 3 165.
Gear selectionType A
Turn the gear selector.
P:park position, front wheels are
locked, engage only when the
vehicle is stationary and the
parking brake is appliedR:reverse gear, engage only when
the vehicle is stationaryN:neutralD:automatic modeM:manual mode
The gear selector is locked in P and
can only be moved when the ignition
is on and the brake pedal is applied.
The engine can only be started with
the gear selector in position P or N.
When position N is selected, press
the brake pedal or apply the parking
brake before starting.
Do not accelerate while engaging a
gear. Never depress the accelerator
pedal and brake pedal at the same
time.
When a gear is engaged, the vehicle
slowly begins to creep when the
brake is released.Type B
Turn the gear selector.
Page 173 of 289

Driving and operating171Deactivation
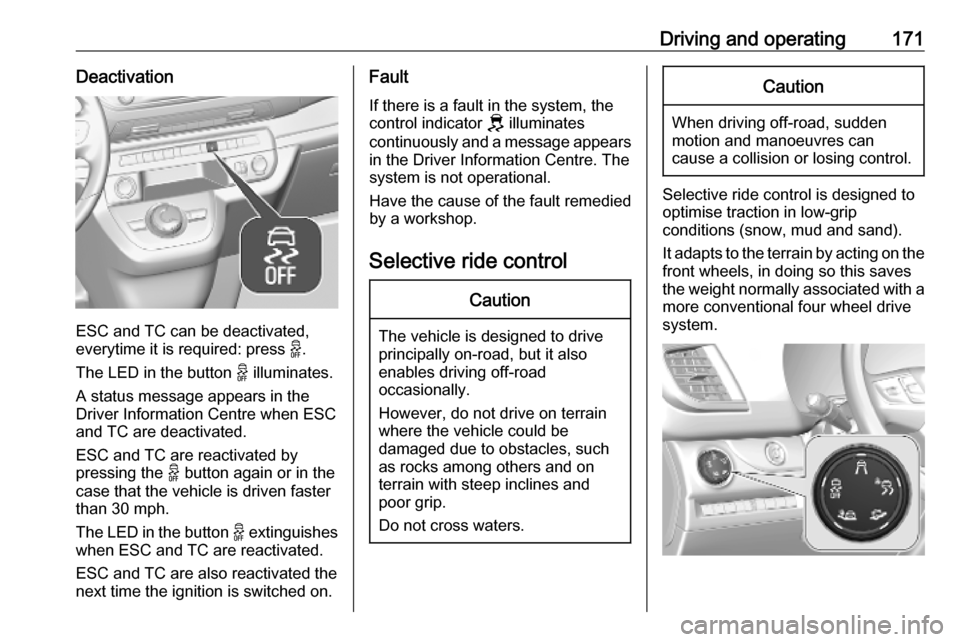
ESC and TC can be deactivated,
everytime it is required: press 9.
The LED in the button 9 illuminates.
A status message appears in the
Driver Information Centre when ESC
and TC are deactivated.
ESC and TC are reactivated by
pressing the 9 button again or in the
case that the vehicle is driven faster
than 30 mph.
The LED in the button 9 extinguishes
when ESC and TC are reactivated.
ESC and TC are also reactivated the
next time the ignition is switched on.
Fault
If there is a fault in the system, the control indicator J illuminates
continuously and a message appears
in the Driver Information Centre. The
system is not operational.
Have the cause of the fault remedied
by a workshop.
Selective ride controlCaution
The vehicle is designed to drive
principally on-road, but it also
enables driving off-road
occasionally.
However, do not drive on terrain
where the vehicle could be
damaged due to obstacles, such
as rocks among others and on
terrain with steep inclines and
poor grip.
Do not cross waters.
Caution
When driving off-road, sudden
motion and manoeuvres can
cause a collision or losing control.
Selective ride control is designed to
optimise traction in low-grip
conditions (snow, mud and sand).
It adapts to the terrain by acting on the
front wheels, in doing so this saves
the weight normally associated with a more conventional four wheel drive
system.
Page 174 of 289

172Driving and operatingSelective ride control allows to
choose between five driving modes:
● ESC off mode 9
● standard mode 2
● snow mode 3
● mud mode 4
● sand mode 1
The several modes can be activated
by turning the control.
An LED illuminates and a status
message appears in the Driver
Information Centre to confirm the
chosen mode.
ESC off mode 9
The ESC and Traction Control are
deactivated in this mode.
An LED in the button 9 illuminates.
ESC and Traction Control are
reactivated automatically from
30 mph or everytime the ignition is
switched on.Standard mode 2
This mode is calibrated for a low level of wheel spin, based on the differenttypes of grip generally encountered in
normal day to day driving.
Everytime the ignition is switched off,
the system is automatically reset to
this mode.
Snow mode 3
This mode adapts to the grip
conditions encountered by each
wheel when starting.
When advancing, the system
optimises wheel spin to guarantee the
best acceleration based on the
available traction. Recommended in
cases of deep snow and steep
inclines.
This mode is active up to a speed of
30 mph.
Mud mode 4
This mode allows considerable wheel
spin at start-up for the wheel with the
least grip, this removes mud and re-
establishes traction.Simultaneously, the wheel with the
most grip is provided with the most
torque possible.
This mode is active up to a speed of 50 mph.
Sand mode 1
This mode allows a small amount of
simultaneous wheel spin on the two drive wheels, enabling the vehicle to
advance and reduce the risk of
sinking.
This mode is active up to a speed of
75 mph.Caution
Do not use the other modes on
sand as the vehicle may become
stuck.
Page 185 of 289

Driving and operating183start moving. Be always prepared
to manually apply the brake to hold the vehicle stationary.
Do not leave the vehicle while it is
being held at a stop by adaptive
cruise control. Always move
selector lever to park position P
and switch off the ignition before
leaving the vehicle.
Setting the following distance
When adaptive cruise control detects
a slower moving vehicle in the driving path, it will adjust the vehicle speed tomaintain the following distance
selected by the driver.
The following distance can be set to
close (1 bar), normal (2 bars) or far
(3 bars).
If the engine is running and the
adaptive cruise control is enabled
(grey), you can modify the following
distance setting:
Press GAP, the current setting is
shown in the Driver Information
Centre.
Press GAP again to change the
following distance: The new setting is
displayed in the Driver Information
Centre.
The selected following distance is
indicated by full bars in the adaptive
cruise control page.9 Warning
The driver accepts full
responsibility for the appropriate
following distance based on traffic, weather and visibility conditions.
Following distance must be
adjusted or the system switched
off when required by the prevailing
conditions.
Detecting the vehicle ahead
If the system does not detect a vehicle
in the driving path, U is displayed
in the Driver Information Centre. The system operates as conventional
cruise control.
If the system detects a vehicle in the
driving path, V is displayed in the
Driver Information Centre. The
system operates as conventional
cruise control.
If the system detects a vehicle in the
driving path which is too close or too
slow, it adjusts the speed accordingly. X is displayed in the Driver
Information Centre.
If the system reaches the limit of
adjusting the speed and the driver
does not react to this situation, the
system is automatically deactivated
and W is displayed in the Driver
Information Centre.
If the set speed is temporarily
exceeded by the driver, the system is automatically deactivated and Z is
displayed in the Driver Information Centre.
Page 186 of 289

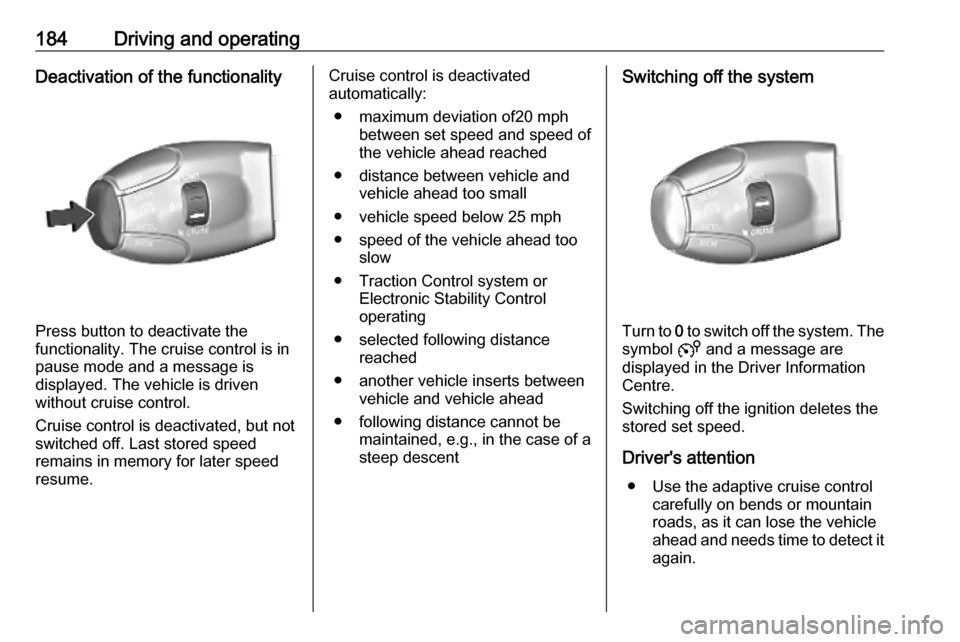
184Driving and operatingDeactivation of the functionality
Press button to deactivate the
functionality. The cruise control is in
pause mode and a message is
displayed. The vehicle is driven
without cruise control.
Cruise control is deactivated, but not
switched off. Last stored speed
remains in memory for later speed
resume.
Cruise control is deactivated
automatically:
● maximum deviation of20 mph between set speed and speed of
the vehicle ahead reached
● distance between vehicle and vehicle ahead too small
● vehicle speed below 25 mph
● speed of the vehicle ahead too slow
● Traction Control system or Electronic Stability Control
operating
● selected following distance reached
● another vehicle inserts between vehicle and vehicle ahead
● following distance cannot be maintained, e.g., in the case of a
steep descentSwitching off the system
Turn to 0 to switch off the system. The
symbol 5 and a message are
displayed in the Driver Information
Centre.
Switching off the ignition deletes the
stored set speed.
Driver's attention ● Use the adaptive cruise control carefully on bends or mountain
roads, as it can lose the vehicle
ahead and needs time to detect it again.
Page 191 of 289

Driving and operating189FunctionalityActive emergency braking is
equipped with a front camera and
operates in forward gear above
walking speed up to 53 mph. The
system detects stationary vehicles
only if the speed does not exceed
50 mph. Pedestrians are detected
only if the speed does not exceed
37 mph.
A precondition is that active
emergency braking is not deactivated
in the vehicle personalisation menu
3 123.
If deactivated, m illuminates in the
instrument cluster and a warning
message is displayed in the Driver
Information Centre.
If the system has been deactivated, it
is reactivated automatically the next
time the ignition is switched on.
The system includes: ● emergency automatic braking
● forward collision alert
● front pedestrian protectionEmergency automatic braking
After activation of brake preparation
system and just before the imminent
collision, this function automatically
applies limited braking to reduce the
impact speed of the collision or
prohibit a crash.
If active emergency braking is
applied, m flashes in the instrument
cluster.
Depending on the situation, the
vehicle may automatically brake
moderately or hard.
Front automatic braking can only
occur if a vehicle or a pedestrian
ahead is detected.
Forward collision alert 3 186
Front pedestrian protection 3 190
Below a speed of 19 mph, emergency automatic braking may slow down thevehicle to a complete stop. If the
speed exceeds 19 mph, emergency
automatic braking reduces the speed.
However, the driver must apply the
brake.Emergency automatic braking may
slow the vehicle to a complete stop to try to avoid a potential crash. If the
vehicle comes to a complete stop,
automatic braking is maintained for
up to 2 seconds.
● Automatic transmission: If the vehicle comes to a complete
stop, keep the brake pedal
depressed to prevent the vehicle
from starting off again.
● Manual transmission: If the vehicle comes to a completestop, the engine may stall.
Operation of the function may be felt
by a slight vibration in the brake
pedal.9 Warning
Emergency automatic braking is
an emergency crash preparation
feature and is not designed to
avoid crashes. Do not rely on the
system to brake the vehicle.
Emergency automatic braking will
not brake outside of its operating
Page 194 of 289

192Driving and operatingRear parking assist
The system warns the driver with
acoustic signals against potentially
hazardous obstacles behind the
vehicle in a distance range up to
50 cm while reverse gear is engaged.
The system operates with ultrasonic
parking assist sensors in the rear bumper.
Activation
Rear parking assist is activated when reverse gear is engaged and ignition
is switched on. This is confirmed by a
chime.Info Display without touchscreen
The system is ready to operate when
the LED in the parking assist button
é is not illuminated.Info Display with touchscreen
Activate the parking assist in the
vehicle personalisation 3 123.
Indication
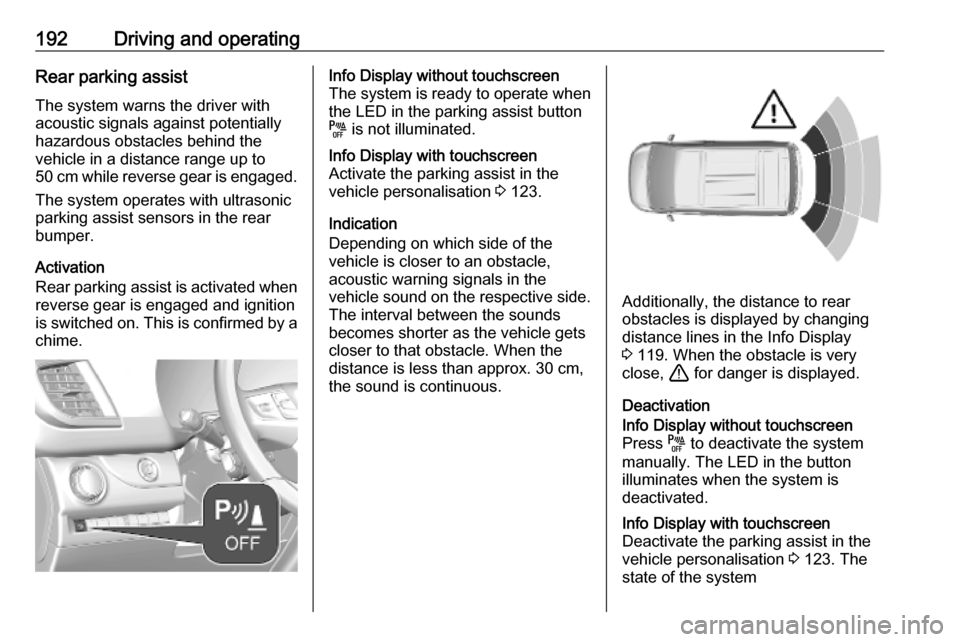
Depending on which side of the
vehicle is closer to an obstacle,
acoustic warning signals in the
vehicle sound on the respective side.
The interval between the sounds
becomes shorter as the vehicle gets
closer to that obstacle. When the
distance is less than approx. 30 cm,
the sound is continuous.
Additionally, the distance to rear
obstacles is displayed by changing
distance lines in the Info Display
3 119. When the obstacle is very
close, + for danger is displayed.
Deactivation
Info Display without touchscreen
Press é to deactivate the system
manually. The LED in the button
illuminates when the system is
deactivated.Info Display with touchscreen
Deactivate the parking assist in the
vehicle personalisation 3 123. The
state of the system
Page 195 of 289

Driving and operating193If the system has been deactivated, it
is not reactivated automatically the
next time the ignition is switched on.
Front-rear parking assist
The front-rear parking assist
measures the distance between the vehicle and obstacles in front and
behind the vehicle. It informs and
warns the driver by giving acoustic
signals and display indication.
It uses two different acoustic warning
signals for the front and rear
monitoring areas, each with a
different tone frequency.
The system operates with ultrasonic parking assist sensors in the rear and
front bumper.
Activation
In addition to the rear parking assist,
the front parking assist is triggered
when an obstacle is detected in front
and the speed of the vehicle is below 6 mph.Info Display without touchscreen
The system is ready to operate when
the LED in the parking assist button
é is not illuminated.Info Display with touchscreen
Activate the parking assist in the
vehicle personalisation 3 123.
Indication
Depending on which side of the
vehicle is closer to an obstacle,
acoustic warning signals in the
vehicle sound on the respective side.
The interval between the sounds
becomes shorter as the vehicle gets closer to that obstacle. When the
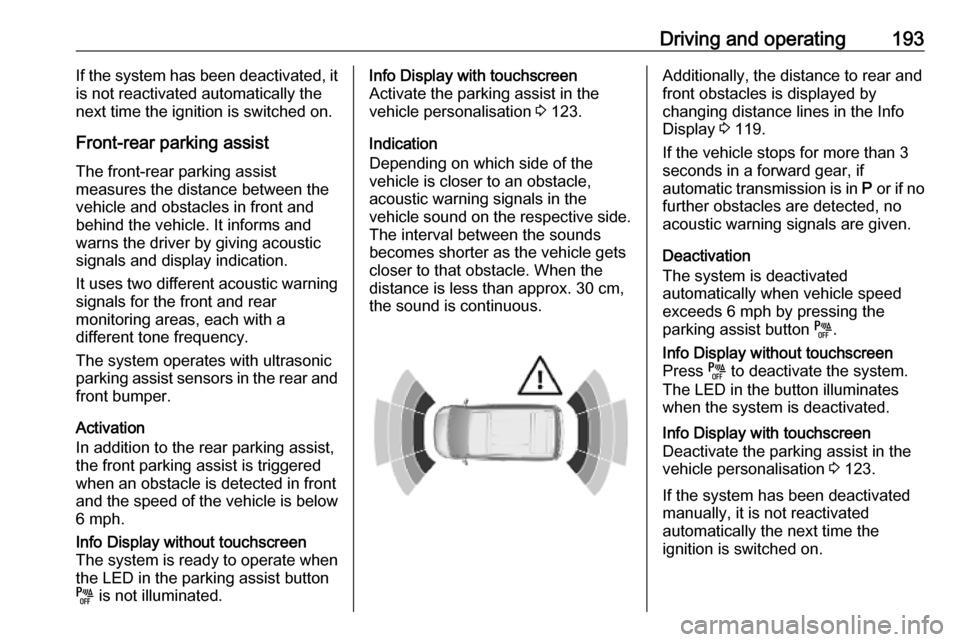
distance is less than approx. 30 cm, the sound is continuous.Additionally, the distance to rear and
front obstacles is displayed by
changing distance lines in the Info Display 3 119.
If the vehicle stops for more than 3
seconds in a forward gear, if
automatic transmission is in P or if no
further obstacles are detected, no acoustic warning signals are given.
Deactivation
The system is deactivated
automatically when vehicle speed
exceeds 6 mph by pressing the
parking assist button é.Info Display without touchscreen
Press é to deactivate the system.
The LED in the button illuminates
when the system is deactivated.Info Display with touchscreen
Deactivate the parking assist in the
vehicle personalisation 3 123.
If the system has been deactivated
manually, it is not reactivated
automatically the next time the
ignition is switched on.
Page 198 of 289

196Driving and operatingNo alert will be given in the following
situations:
● in the presence of non-moving objects, e.g. parked vehicles,
barriers, street lamps, road signs
● with vehicles moving in the opposite direction
● driving on a winding road or a sharp corner
● when passing or being passed by
a very long vehicle, e.g. lorry,
coach, which is at the same time
detected at the rear in the blind
spot angle and present in the
driver's forward field of vision
● in very heavy traffic, vehicles detected in front and behind are
confused with a lorry or a
stationary object
● when passing too quickly
DeactivationInfo Display without touchscreen
Press B.Info Display with touchscreen
The system is deactivated in the
vehicle personalisation 3 123.T extinguishes in the instrument
cluster. Additionally, an acoustic
signal sounds.
The state of the system is stored
when switching off the ignition.
The system is automatically
deactivated when connecting a trailer
or bike carrier.
Due to adverse weather conditions
such as heavy rain, false detections
may occur.
Fault
In the event of a fault, T flashes for a
few moments in the instrument
cluster, accompanied by R and a
display message. Have the cause of
the fault remedied by a workshop.
Panoramic view system
This system allows views of the
vehicle's surroundings to be
displayed as a nearly 180° picture in
the Info display, like a bird's eye view.The system uses:
● rear camera, installed in the tailgate
● ultrasonic parking assist sensors in the rear bumper
The screen in the Info Display is
divided into two parts. On the right
there is a view from above the vehicle,
and on the left there is the view from
the rear displayed. The parking
sensors complete the information on
the view from above the vehicle.
Change the volume of the acoustic
signals by pressing 4 in the right
lower zone of the display.