stop start VAUXHALL ZAFIRA 2014 User Guide
[x] Cancel search | Manufacturer: VAUXHALL, Model Year: 2014, Model line: ZAFIRA, Model: VAUXHALL ZAFIRA 2014Pages: 217, PDF Size: 7.85 MB
Page 96 of 217
94Instruments and controls
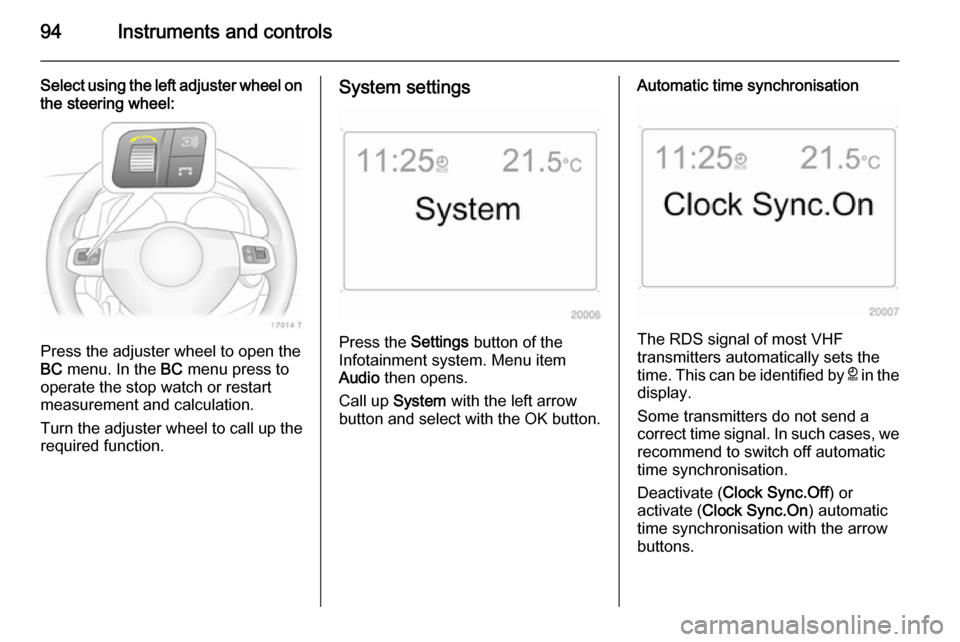
Select using the left adjuster wheel onthe steering wheel:
Press the adjuster wheel to open the
BC menu. In the BC menu press to
operate the stop watch or restart
measurement and calculation.
Turn the adjuster wheel to call up the required function.
System settings
Press the Settings button of the
Infotainment system. Menu item
Audio then opens.
Call up System with the left arrow
button and select with the OK button.
Automatic time synchronisation
The RDS signal of most VHF
transmitters automatically sets the
time. This can be identified by } in the
display.
Some transmitters do not send a
correct time signal. In such cases, we recommend to switch off automatic
time synchronisation.
Deactivate ( Clock Sync.Off ) or
activate ( Clock Sync.On ) automatic
time synchronisation with the arrow
buttons.
Page 105 of 217

Instruments and controls103
Average speed
Displays average speed. The
measurement can be reset at any
time.
Stoppages in the journey with the
ignition off are not included in the
calculations.
Distance Displays distance travelled. The
measurement can be reset at any
time.
RangeRange is calculated from current fuel
tank content and current
consumption. The display shows
average values.
After refuelling, the range updates automatically after a brief delay.
When the fuel level in the tank is low,
the message Range appears in the
display.
When the fuel tank is nearly empty,
the message Refuel! appears in the
display.
Stop watchSelect the function. Press the OK
button or the left adjuster wheel on the
steering wheel to start or stop the stop watch.
Restart trip computer
The measurement or calculation of
the following trip computer
information can be restarted:
■ Average consumption,
■ Absolute consumption,
■ Average speed,
■ Distance,
■ Stop watch.
Select the desired trip computer
information 3 93 . To restart, press the
OK button or the left adjuster wheel
on the steering wheel for approx.
2 seconds.
Page 107 of 217

Instruments and controls105
DistanceDisplays distance travelled. The
measurement can be reset at any
time.
Average speed
Displays average speed. The
measurement can be reset at any
time.
Stoppages in the journey with the
ignition off are not included in the
calculations.
Absolute consumption
Displays fuel consumed. The
measurement can be reset at any
time.
Average consumption
Displays average consumption. The
measurement can be reset at any
time.
Restart trip computer
The measurement or calculation of
the following trip computer
information can be restarted:
■ Distance,
■ Average speed,
■ Absolute consumption,
■ Average consumption.
Select BC 1 or BC 2 from the Board
Computer menu.
The information of the two trip
computers can be reset separately,
making it possible to evaluate data
from different time periods.
Select the required trip computer
information and confirm.
Page 108 of 217

106Instruments and controls
To reset all information of a trip
computer, select menu item All
values .
Stop watch
Select menu item Timer from the
Board Computer menu.
To start, select menu item Start. To
stop, select menu item Stop.
To reset, select menu item Reset.
The relevant stop watch display can
be selected in the Options menu:
Driving Time excl. Stops
The time the vehicle is in motion is
recorded. Stationary time is not
included.
Driving Time incl. Stops
The time the vehicle is in motion is
recorded. The time the vehicle is
stationary with the ignition switched
on is included.
Travel Time Measurement of the time from
manual activation via Start to manual
deactivation via Reset.
Tyre pressures
Select menu Tyres from the Board
Computer menu.
Page 127 of 217
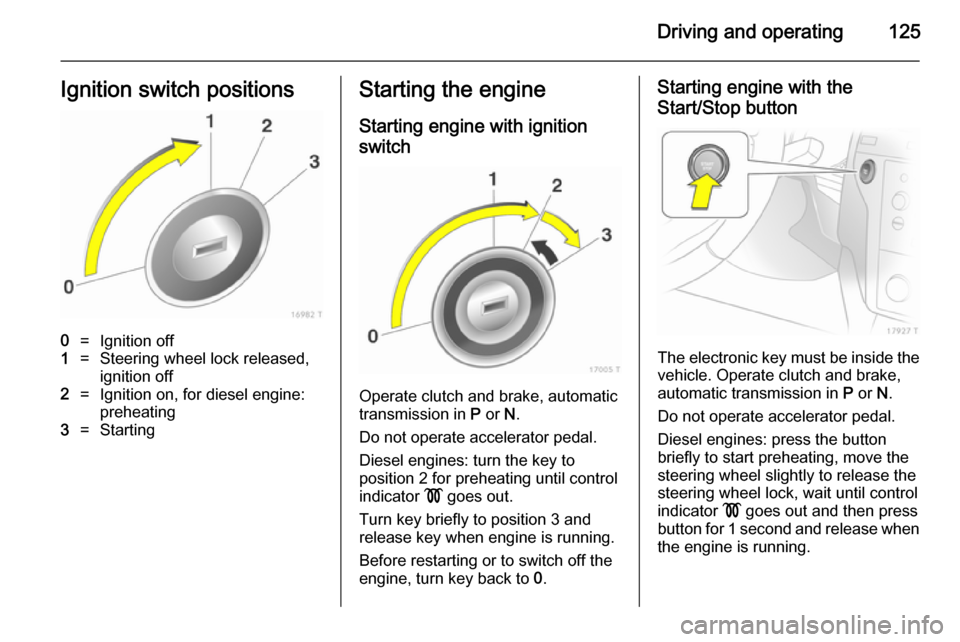
Driving and operating125Ignition switch positions0=Ignition off1=Steering wheel lock released,ignition off2=Ignition on, for diesel engine:
preheating3=StartingStarting the engine
Starting engine with ignition
switch
Operate clutch and brake, automatic
transmission in P or N.
Do not operate accelerator pedal.
Diesel engines: turn the key to
position 2 for preheating until control
indicator ! goes out.
Turn key briefly to position 3 and
release key when engine is running.
Before restarting or to switch off the engine, turn key back to 0.
Starting engine with the
Start/Stop button
The electronic key must be inside the
vehicle. Operate clutch and brake,
automatic transmission in P or N.
Do not operate accelerator pedal.
Diesel engines: press the button
briefly to start preheating, move the
steering wheel slightly to release the
steering wheel lock, wait until control
indicator ! goes out and then press
button for 1 second and release when
the engine is running.
Page 129 of 217
Driving and operating127Engine exhaust9Danger
Engine exhaust gases contain
poisonous carbon monoxide,
which is colourless and odourless and could be fatal if inhaled.
If exhaust gases enter the interior
of the vehicle, open the windows.
Have the cause of the fault
rectified by a workshop.
Avoid driving with an open load
compartment, otherwise exhaust
gases could enter the vehicle.
Diesel particle filter
The diesel particle filter system filters
harmful soot particles out of the
exhaust gases. The system includes
a self-cleaning function that runs
automatically during driving. The filter
is cleaned by burning off the soot
particles at high temperature. This
process takes place automatically
under set driving conditions and may
take up to 25 minutes. Fuel
consumption may be higher during
this period. The emission of smells
and smoke during this process is
normal.
Under certain driving conditions, e.g.
short distances, the system cannot
clean itself automatically.
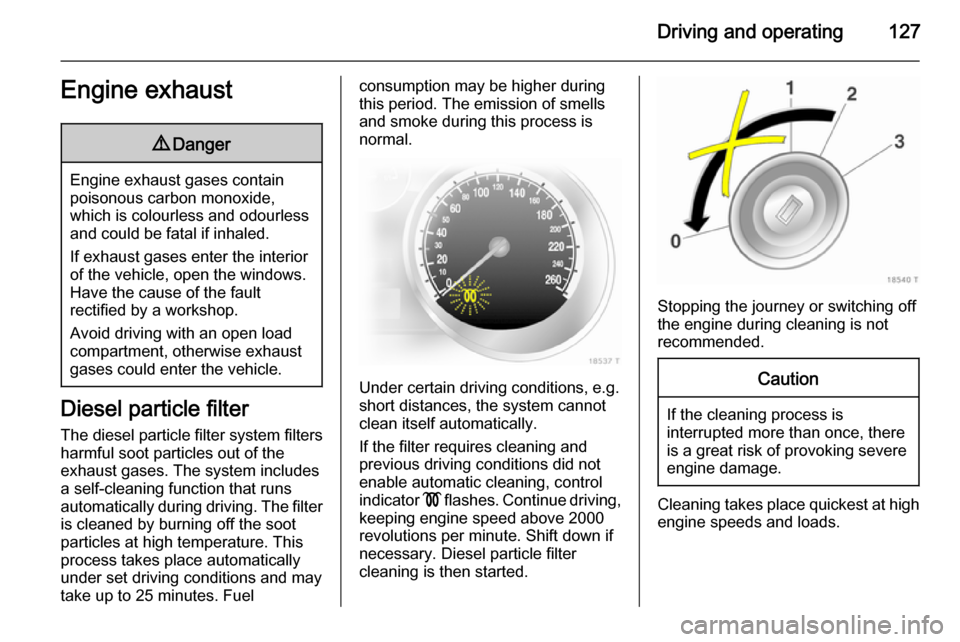
If the filter requires cleaning and
previous driving conditions did not
enable automatic cleaning, control
indicator ! flashes. Continue driving,
keeping engine speed above 2000
revolutions per minute. Shift down if
necessary. Diesel particle filter
cleaning is then started.
Stopping the journey or switching off
the engine during cleaning is not
recommended.
Caution
If the cleaning process is
interrupted more than once, there
is a great risk of provoking severe
engine damage.
Cleaning takes place quickest at high
engine speeds and loads.
Page 133 of 217
Driving and operating131
No automatic shifting to a higher geartakes place at a high engine speed.
For reasons of safety, kickdown is
also available in manual mode.
Electronic driving
programmes ■ Following a cold start, the operating
temperature programme increases
engine speed to quickly bring the
catalytic converter to the required
temperature.
■ The automatic neutral shift function
automatically shifts to idling when
the vehicle is stopped with a
forward gear engaged.
■ When Sport mode is engaged, the vehicle shifts at higher engine
speeds (unless cruise control is
on). Sport mode 3 140.Winter programme T
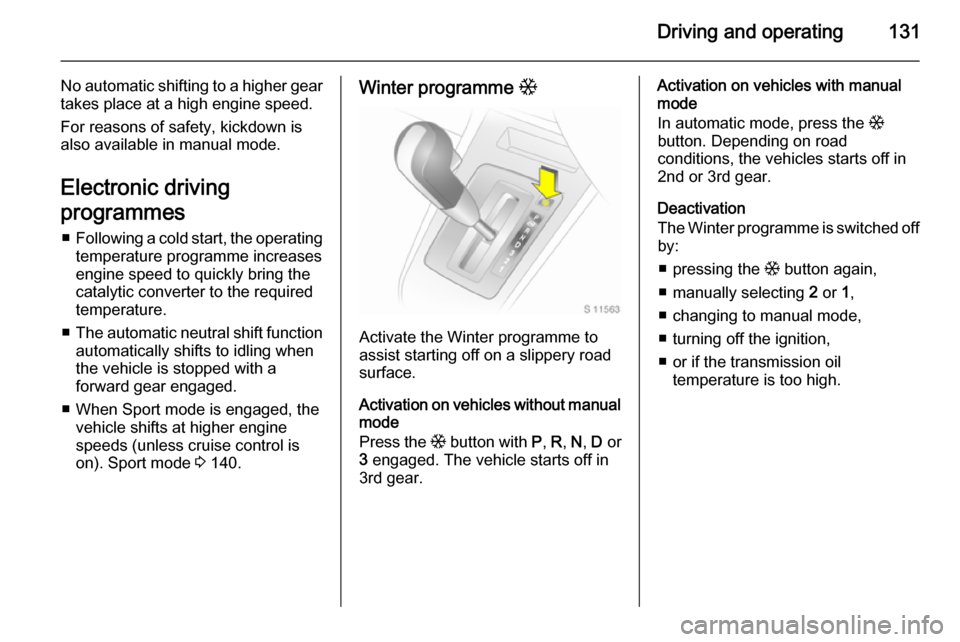
Activate the Winter programme to
assist starting off on a slippery road surface.
Activation on vehicles without manual
mode
Press the T button with P, R , N , D or
3 engaged. The vehicle starts off in
3rd gear.
Activation on vehicles with manual mode
In automatic mode, press the T
button. Depending on road
conditions, the vehicles starts off in 2nd or 3rd gear.
Deactivation
The Winter programme is switched off by:
■ pressing the T button again,
■ manually selecting 2 or 1,
■ changing to manual mode,
■ turning off the ignition,
■ or if the transmission oil temperature is too high.
Page 137 of 217

Driving and operating135
Starting off
Depress the foot brake and move the selector lever to A, + or -. The
transmission is in automatic mode
and first gear is engaged. If R is
selected, reverse gear is engaged.
The vehicle starts to move when the
brake is released.
To start off without depressing the
foot brake, accelerate immediately
after engaging a gear.
If neither the accelerator nor the
brake pedal are depressed, no gear
is engaged and A or R flashes for a
brief time in the display.
Stopping the vehicle
In A, first gear is engaged and the
clutch is released when the vehicle is stopped. In R, reverse gear remains
engaged.
Engine braking Automatic mode
When driving downhill, the manual
transmission automated does not
shift into higher gears until a fairlyhigh engine speed has been reached. It shifts down in good time when
braking.
Manual mode
To utilise the engine braking effect,
select a lower gear in good time when
driving downhill.
Rocking the vehicle
Rocking the vehicle is only
permissible if the vehicle is stuck in
sand, mud or snow. Move the selector
lever between R and A in a repeat
pattern. Do not race the engine and
avoid sudden acceleration.
Parking
Apply the parking brake. The most recently engaged gear (see
transmission display) remains
engaged. With N, no gear is engaged.
When the ignition is switched off the
transmission no longer responds to
movement of the selector lever.Manual mode
If a higher gear is selected when the
engine speed is too low, or a lower
gear when the speed is too high, the
shift is not executed. This prevents
the engine from running at too low or
too high an engine speed.
If engine speed is too low, the
transmission automatically shifts to a
lower gear.
If engine speed is too high, the
transmission only switches to a higher gear via kickdown.
When + or - is selected in automatic
mode, the transmission switches to
manual mode and shifts accordingly.
Electronic driving
programmes ■ Following a cold start, the operating
temperature programme increases engine speed to quickly bring the
catalytic converter to the required
temperature.
Page 141 of 217
Driving and operating139Parking brake
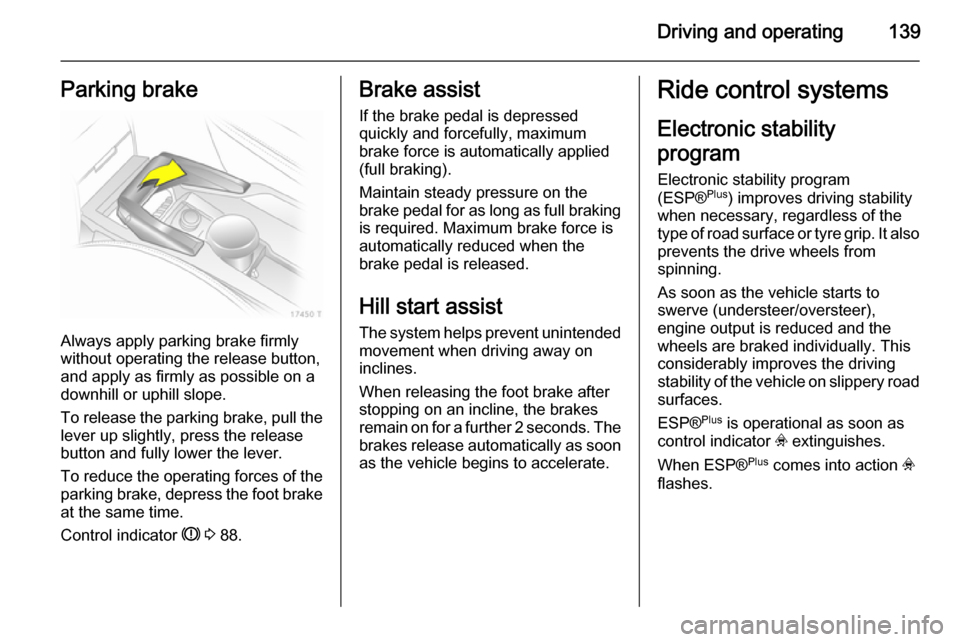
Always apply parking brake firmly
without operating the release button,
and apply as firmly as possible on a
downhill or uphill slope.
To release the parking brake, pull the lever up slightly, press the release
button and fully lower the lever.
To reduce the operating forces of the
parking brake, depress the foot brake
at the same time.
Control indicator R 3 88.
Brake assist
If the brake pedal is depressed
quickly and forcefully, maximum
brake force is automatically applied
(full braking).
Maintain steady pressure on the
brake pedal for as long as full braking
is required. Maximum brake force is
automatically reduced when the
brake pedal is released.
Hill start assist
The system helps prevent unintended movement when driving away on
inclines.
When releasing the foot brake after
stopping on an incline, the brakes
remain on for a further 2 seconds. The brakes release automatically as soon
as the vehicle begins to accelerate.Ride control systems
Electronic stability
program
Electronic stability program
(ESP® Plus
) improves driving stability
when necessary, regardless of the
type of road surface or tyre grip. It also
prevents the drive wheels from
spinning.
As soon as the vehicle starts to
swerve (understeer/oversteer),
engine output is reduced and the
wheels are braked individually. This
considerably improves the driving
stability of the vehicle on slippery road
surfaces.
ESP® Plus
is operational as soon as
control indicator v extinguishes.
When ESP® Plus
comes into action v
flashes.
Page 181 of 217
Vehicle care179
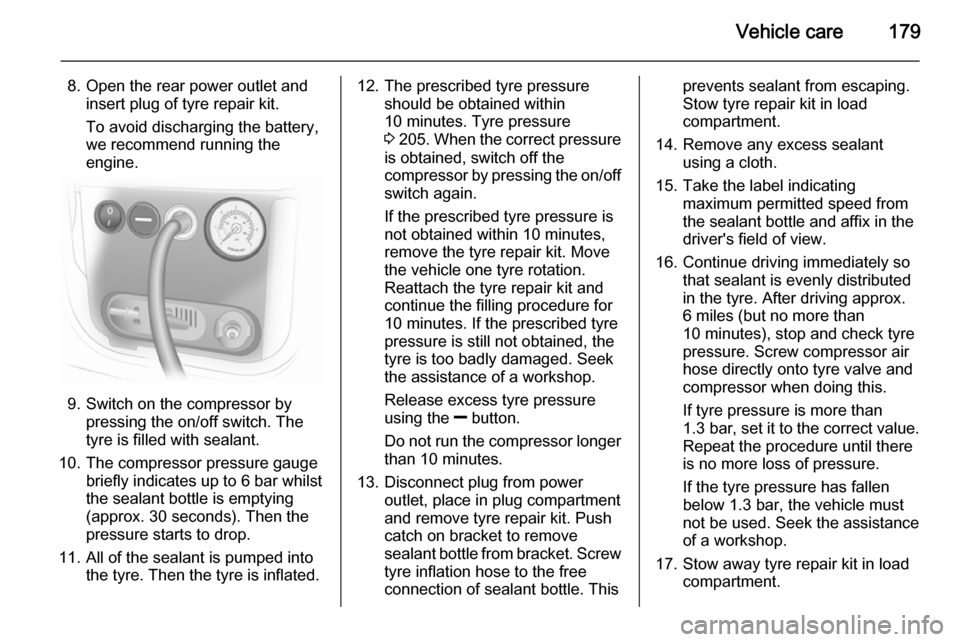
8. Open the rear power outlet andinsert plug of tyre repair kit.
To avoid discharging the battery,
we recommend running the
engine.
9. Switch on the compressor by pressing the on/off switch. The
tyre is filled with sealant.
10. The compressor pressure gauge briefly indicates up to 6 bar whilstthe sealant bottle is emptying
(approx. 30 seconds). Then the
pressure starts to drop.
11. All of the sealant is pumped into the tyre. Then the tyre is inflated.
12. The prescribed tyre pressureshould be obtained within
10 minutes. Tyre pressure
3 205 . When the correct pressure
is obtained, switch off the
compressor by pressing the on/off switch again.
If the prescribed tyre pressure is
not obtained within 10 minutes,
remove the tyre repair kit. Move
the vehicle one tyre rotation.
Reattach the tyre repair kit and
continue the filling procedure for 10 minutes. If the prescribed tyre
pressure is still not obtained, the
tyre is too badly damaged. Seek
the assistance of a workshop.
Release excess tyre pressure
using the ] button.
Do not run the compressor longer than 10 minutes.
13. Disconnect plug from power outlet, place in plug compartment
and remove tyre repair kit. Push
catch on bracket to remove
sealant bottle from bracket. Screw
tyre inflation hose to the free
connection of sealant bottle. Thisprevents sealant from escaping.
Stow tyre repair kit in load
compartment.
14. Remove any excess sealant using a cloth.
15. Take the label indicating maximum permitted speed from
the sealant bottle and affix in the
driver's field of view.
16. Continue driving immediately so that sealant is evenly distributed
in the tyre. After driving approx.
6 miles (but no more than 10 minutes), stop and check tyre
pressure. Screw compressor air
hose directly onto tyre valve and
compressor when doing this.
If tyre pressure is more than
1.3 bar , set it to the correct value.
Repeat the procedure until there
is no more loss of pressure.
If the tyre pressure has fallen
below 1.3 bar, the vehicle must
not be used. Seek the assistance
of a workshop.
17. Stow away tyre repair kit in load compartment.