door lock VAUXHALL ZAFIRA TOURER 2015 User Guide
[x] Cancel search | Manufacturer: VAUXHALL, Model Year: 2015, Model line: ZAFIRA TOURER, Model: VAUXHALL ZAFIRA TOURER 2015Pages: 297, PDF Size: 8.99 MB
Page 130 of 297
128Instruments and controls
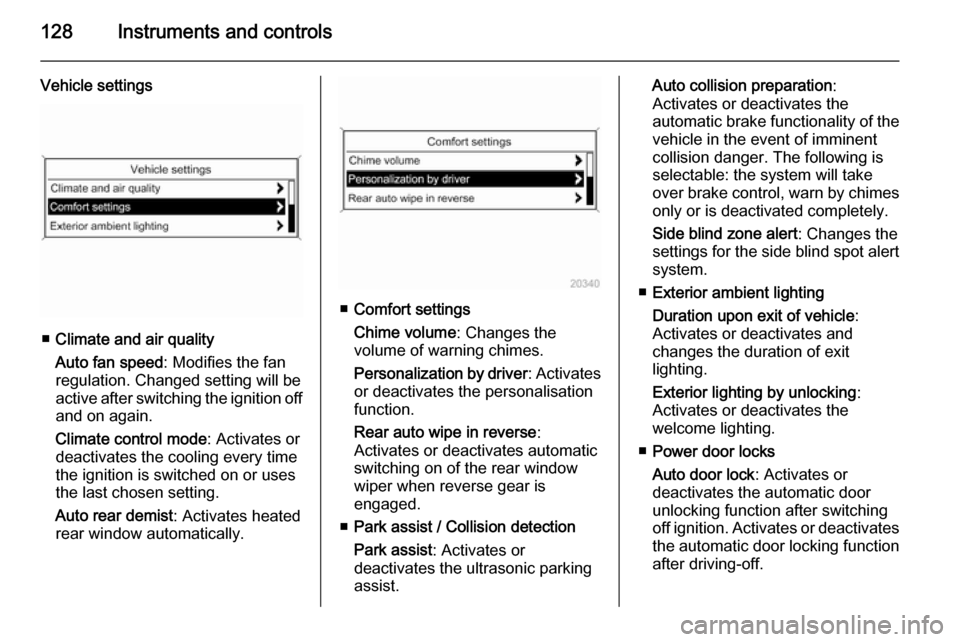
Vehicle settings
■Climate and air quality
Auto fan speed : Modifies the fan
regulation. Changed setting will be
active after switching the ignition off
and on again.
Climate control mode : Activates or
deactivates the cooling every time
the ignition is switched on or uses
the last chosen setting.
Auto rear demist : Activates heated
rear window automatically.
■ Comfort settings
Chime volume : Changes the
volume of warning chimes.
Personalization by driver : Activates
or deactivates the personalisation
function.
Rear auto wipe in reverse :
Activates or deactivates automatic
switching on of the rear window
wiper when reverse gear is
engaged.
■ Park assist / Collision detection
Park assist : Activates or
deactivates the ultrasonic parking
assist.
Auto collision preparation :
Activates or deactivates the
automatic brake functionality of the vehicle in the event of imminent
collision danger. The following is
selectable: the system will take
over brake control, warn by chimes
only or is deactivated completely.
Side blind zone alert : Changes the
settings for the side blind spot alert
system.
■ Exterior ambient lighting
Duration upon exit of vehicle :
Activates or deactivates and
changes the duration of exit
lighting.
Exterior lighting by unlocking :
Activates or deactivates the
welcome lighting.
■ Power door locks
Auto door lock : Activates or
deactivates the automatic door
unlocking function after switching off ignition. Activates or deactivates the automatic door locking function
after driving-off.
Page 131 of 297
Instruments and controls129
Stop door lock if door open:
Activates or deactivates the
automatic door locking function
while a door is open.
Delayed door lock : Activates or
deactivates the delayed door
locking function.
■ Remote locking, unlocking, starting
Remote unlock feedback : Activates
or deactivates the hazard warning
flasher feedback whilst unlocking.
Remote door unlock : Changes the
configuration to unlock only the driver's door or the entire vehicle whilst unlocking.
Auto relock doors : Activates or
deactivates the automatic relock
function after unlocking without
opening the vehicle.
■ Restore factory settings
Restore factory settings : Resets all
settings to the default settings.
Personalised settings in the
Colour-Info-Display
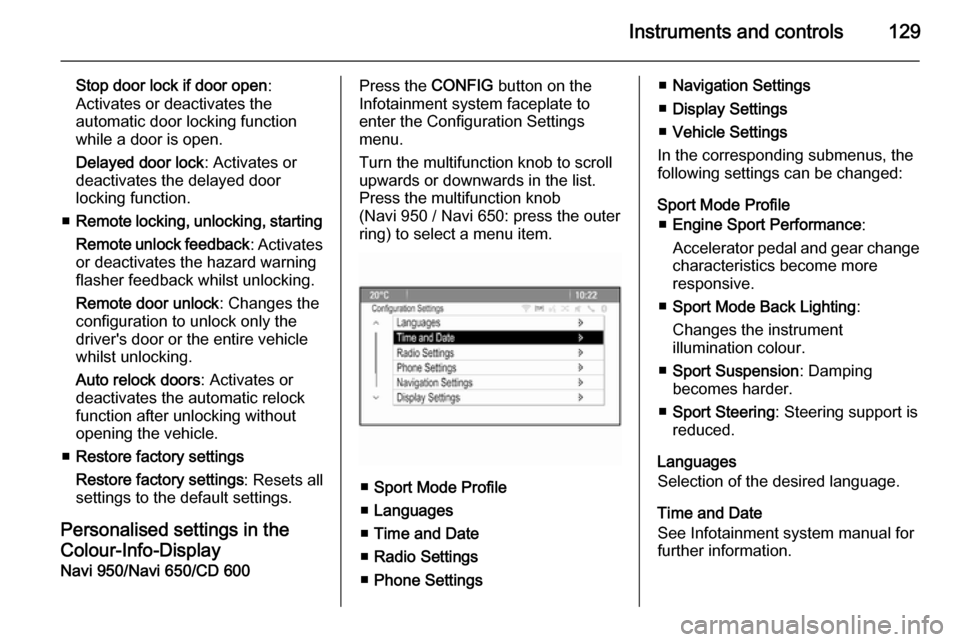
Navi 950/Navi 650/CD 600Press the CONFIG button on the
Infotainment system faceplate to enter the Configuration Settings
menu.
Turn the multifunction knob to scroll
upwards or downwards in the list.
Press the multifunction knob
(Navi 950 / Navi 650: press the outer
ring) to select a menu item.
■ Sport Mode Profile
■ Languages
■ Time and Date
■ Radio Settings
■ Phone Settings
■Navigation Settings
■ Display Settings
■ Vehicle Settings
In the corresponding submenus, the
following settings can be changed:
Sport Mode Profile ■ Engine Sport Performance :
Accelerator pedal and gear change
characteristics become more
responsive.
■ Sport Mode Back Lighting :
Changes the instrument
illumination colour.
■ Sport Suspension : Damping
becomes harder.
■ Sport Steering : Steering support is
reduced.
Languages
Selection of the desired language.
Time and Date
See Infotainment system manual for
further information.
Page 132 of 297

130Instruments and controls
Radio Settings
See Infotainment system manual for further information.
Phone Settings
See Infotainment system manual for
further information.
Navigation Settings
See Infotainment system manual for
further information.
Display Settings ■ Home Page Menu :
See Infotainment system manual
for further information.
■ Rear Camera Options :
Press to adjust the rear camera
options 3 197.
■ Display Off :
See Infotainment system manual
for further information.
■ Map Settings :
See Infotainment system manual
for further information.Vehicle Settings
■ Climate and Air Quality
Auto Fan Speed : Modifies the fan
regulation. Changed setting will be
active after switching the ignition off
and on again.
Air Conditioning Mode : Activates or
deactivates cooling when switching on the ignition or uses the lastchosen setting.
Auto Demist : Activates or
deactivates auto demist.
Auto Rear Demist : Activates the
heated rear window automatically.
■ Comfort and Convenience
Chime Volume : Changes the
volume of warning chimes.
Personalisation by Driver :
Activates or deactivates the
personalisation function.
Auto Reverse Gear Wiper :
Activates or deactivates automatic switching on of the rear window
wiper when reverse gear is
engaged.■ Collision Detection Systems
Park Assist : Activates or
deactivates the ultrasonic sensors.
Automatic Collision Preparation :
Activates or deactivates the
automatic brake functionality of the
vehicle in the event of imminent
collision danger. The following is
selectable: the system will take
over brake control, warn by chimes
only or is deactivated completely.
Side Blind Zone Alert : Activates or
deactivates the side blind spot alert system.
■ Lighting
Vehicle Locator Lights : Activates or
deactivates the entry lighting.
Exit Lighting : Activates or
deactivates and changes the
duration of exit lighting.
■ Power Door Locks
Open Door Anti Lock Out : Activates
or deactivates the automatic door
locking function while a door is
open.
Auto Door Lock : Activates or
deactivates the automatic door
Page 133 of 297

Instruments and controls131
unlocking function after switchingoff ignition. Activates or deactivates the automatic door locking function
after driving-off.
Delay Door Lock : Activates or
deactivates the delayed door
locking function.
■ Remote Lock/Unlock/Start
Remote Lock Feedback : Activates
or deactivates the hazard warning flasher feedback whilst locking.
Remote Unlock Feedback :
Activates or deactivates the hazard warning flasher feedback whilst
unlocking.
Remote Door Unlock : Changes the
configuration to unlock only the
driver's door or the entire vehicle whilst unlocking.
Relock Remotely Unlocked Doors :
Activates or deactivates the
automatic relock function after
unlocking without opening the
vehicle.
■ Return to Factory Settings? :
Resets all settings to the default settings.
Page 144 of 297
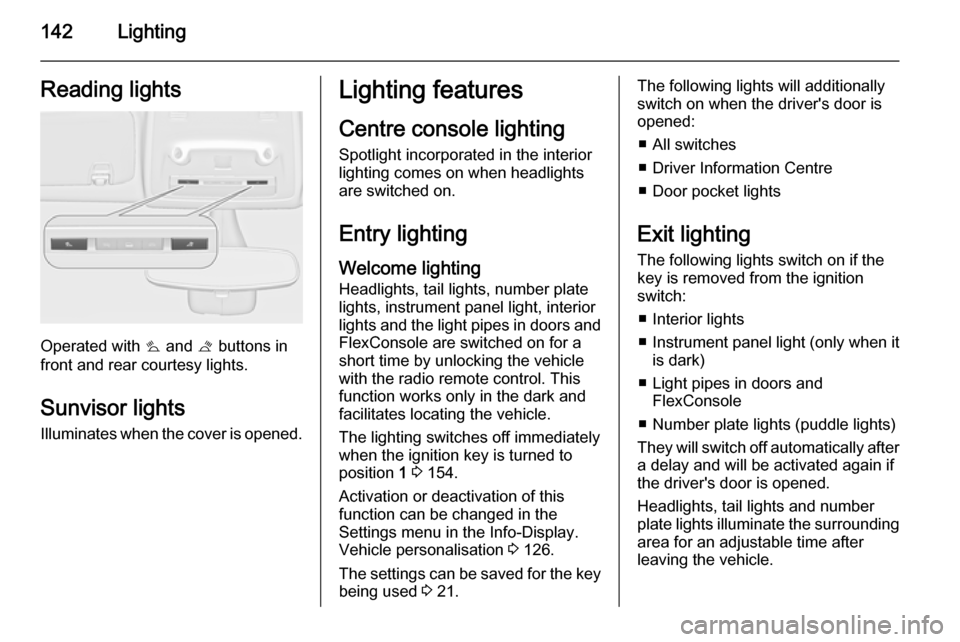
142LightingReading lights
Operated with s and t buttons in
front and rear courtesy lights.
Sunvisor lights
Illuminates when the cover is opened.
Lighting features
Centre console lighting Spotlight incorporated in the interior
lighting comes on when headlights
are switched on.
Entry lighting
Welcome lighting
Headlights, tail lights, number plate
lights, instrument panel light, interior
lights and the light pipes in doors and
FlexConsole are switched on for a
short time by unlocking the vehicle
with the radio remote control. This
function works only in the dark and
facilitates locating the vehicle.
The lighting switches off immediately
when the ignition key is turned to
position 1 3 154.
Activation or deactivation of this
function can be changed in the
Settings menu in the Info-Display.
Vehicle personalisation 3 126.
The settings can be saved for the key being used 3 21.The following lights will additionally
switch on when the driver's door is opened:
■ All switches
■ Driver Information Centre
■ Door pocket lights
Exit lighting The following lights switch on if the
key is removed from the ignition
switch:
■ Interior lights
■ Instrument panel light (only when it
is dark)
■ Light pipes in doors and FlexConsole
■ Number plate lights (puddle lights)
They will switch off automatically after
a delay and will be activated again if
the driver's door is opened.
Headlights, tail lights and number
plate lights illuminate the surrounding area for an adjustable time after
leaving the vehicle.
Page 156 of 297
154Driving and operatingStarting and operating
New vehicle running-in Do not brake unnecessarily hard for
the first few journeys.
During the first drive, smoke may
occur because of wax and oil
evaporating off the exhaust system.
Park the vehicle in the open for a
while after the first drive and avoid
inhaling the fumes.
During the running-in period, fuel and
engine oil consumption may be
higher and the cleaning process of
the diesel particle filter may take
place more often. Autostop may be
inhibited to allow for charging of the vehicle battery.
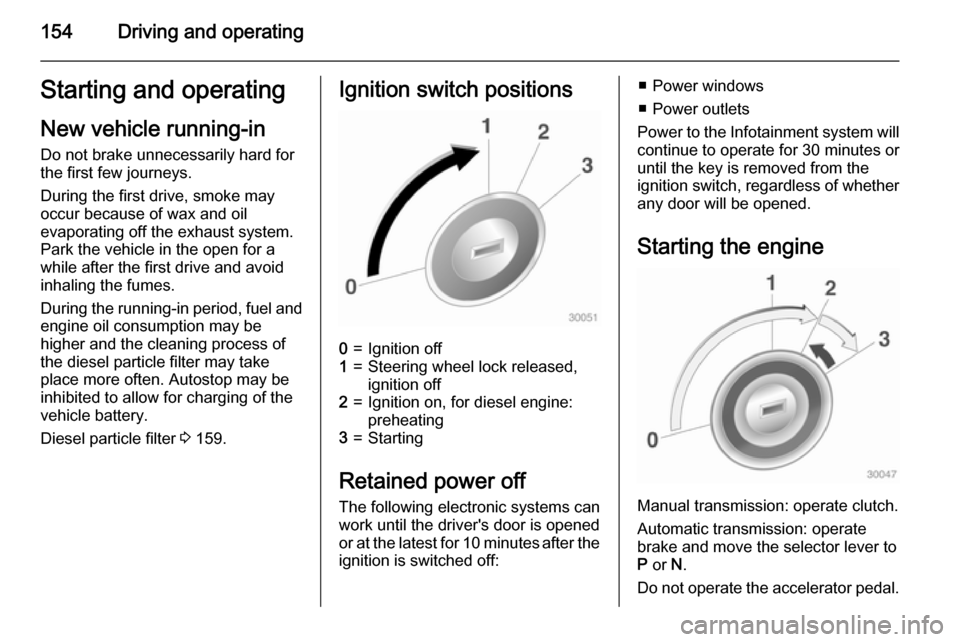
Diesel particle filter 3 159.Ignition switch positions0=Ignition off1=Steering wheel lock released,
ignition off2=Ignition on, for diesel engine:
preheating3=Starting
Retained power off
The following electronic systems can
work until the driver's door is opened
or at the latest for 10 minutes after the
ignition is switched off:
■ Power windows
■ Power outlets
Power to the Infotainment system will continue to operate for 30 minutes oruntil the key is removed from the
ignition switch, regardless of whether
any door will be opened.
Starting the engine
Manual transmission: operate clutch.
Automatic transmission: operate
brake and move the selector lever to
P or N.
Do not operate the accelerator pedal.
Page 164 of 297
162Driving and operating
To restart the engine, the tank must
be filled with AdBlue first.
Refilling AdBlueCaution
Only use AdBlue that complies
with European standards
DIN 70 070 and ISO 22241-1.
Do not use additives.
Do not dilute AdBlue.
Otherwise the selective catalytic
reduction system could be
damaged.
Notice
Only use the designated AdBlue canisters for refilling, to prevent a
topping-up of too much AdBlue.
Additionally, the fumes in the tank
are captured in the canister and do
not emerge.
Since AdBlue has a limited
durability, check the date of expiry
before refilling.
Notice
A volume of at least 5 litres of AdBlue must be added when refilling.
Otherwise the refilling of AdBlue
may not be detected by the system.
If AdBlue must be refilled at
temperatures below -11 °C, the
refilling of AdBlue may not be
detected by the system. In this case, park the vehicle in a space with a
higher ambient temperature until
AdBlue is liquefied.
Notice
When unscrewing the protective cap
from the filler neck, ammonia fumes may emerge. Do not inhale as the
fumes have a pungent smell. The
fumes are not harmful by inhalation.
The vehicle must be parked on a level surface.
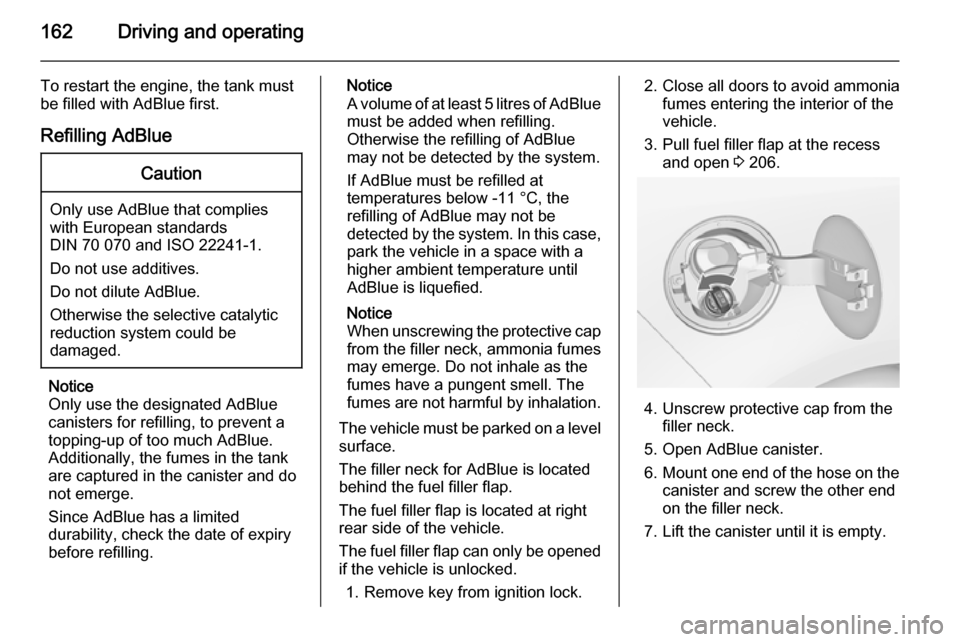
The filler neck for AdBlue is located behind the fuel filler flap.
The fuel filler flap is located at right rear side of the vehicle.
The fuel filler flap can only be opened
if the vehicle is unlocked.
1. Remove key from ignition lock.2. Close all doors to avoid ammonia fumes entering the interior of the
vehicle.
3. Pull fuel filler flap at the recess and open 3 206.
4. Unscrew protective cap from the
filler neck.
5. Open AdBlue canister.
6. Mount one end of the hose on the
canister and screw the other end
on the filler neck.
7. Lift the canister until it is empty.
Page 220 of 297
218Vehicle care
■ Open the bonnet, close all doorsand lock the vehicle.
■ Disconnect the clamp from the negative terminal of the vehicle
battery. Beware that all systems are not functional, e.g. anti-theft alarm
system.
Putting back into operation When the vehicle is to be put back into
operation:
■ Connect the clamp to the negative terminal of the vehicle battery.
Activate the electronics of the
power windows.
■ Check tyre pressure.
■ Fill up the washer fluid reservoir.
■ Check the engine oil level.
■ Check the coolant level.
■ Fit the number plate if necessary.
End-of-life vehicle
recovery
Information on end-of-life vehicle
recovery centres and the recycling of
end-of-life vehicles is available on ourwebsite, where legally required. Only
entrust this work to an authorised
recycling centre.
Gas vehicles must be recycled by a
service centre authorised for gas
vehicles.Vehicle checks
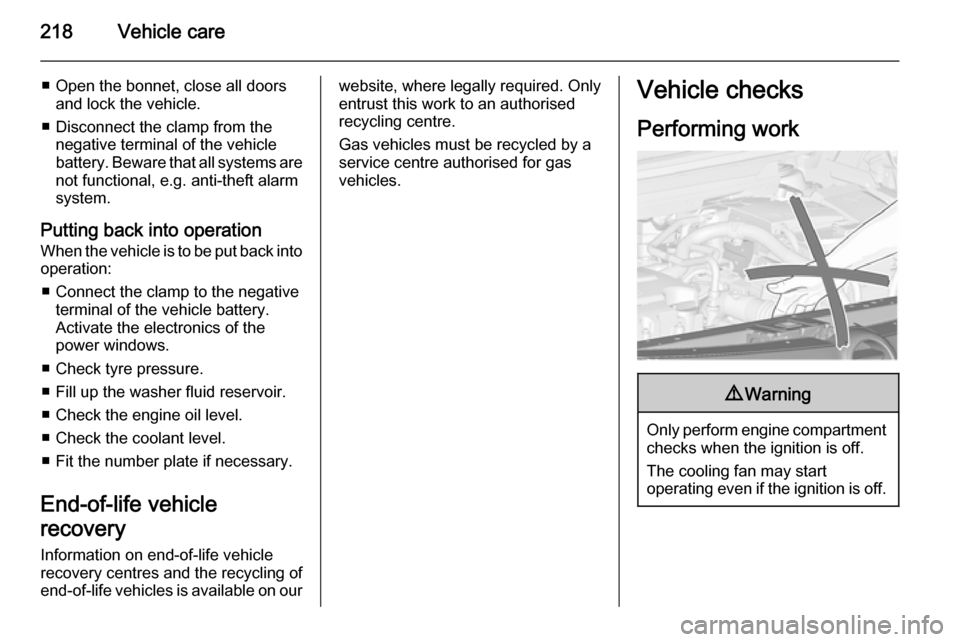
Performing work9 Warning
Only perform engine compartment
checks when the ignition is off.
The cooling fan may start
operating even if the ignition is off.
Page 228 of 297
226Vehicle careBulb replacement
Switch off the ignition and switch off
the relevant switch or close the doors.
Only hold a new bulb at the base. Do not touch the bulb glass with bare
hands.
Use only the same bulb type for
replacement.
Replace headlight bulbs from within
the engine compartment.
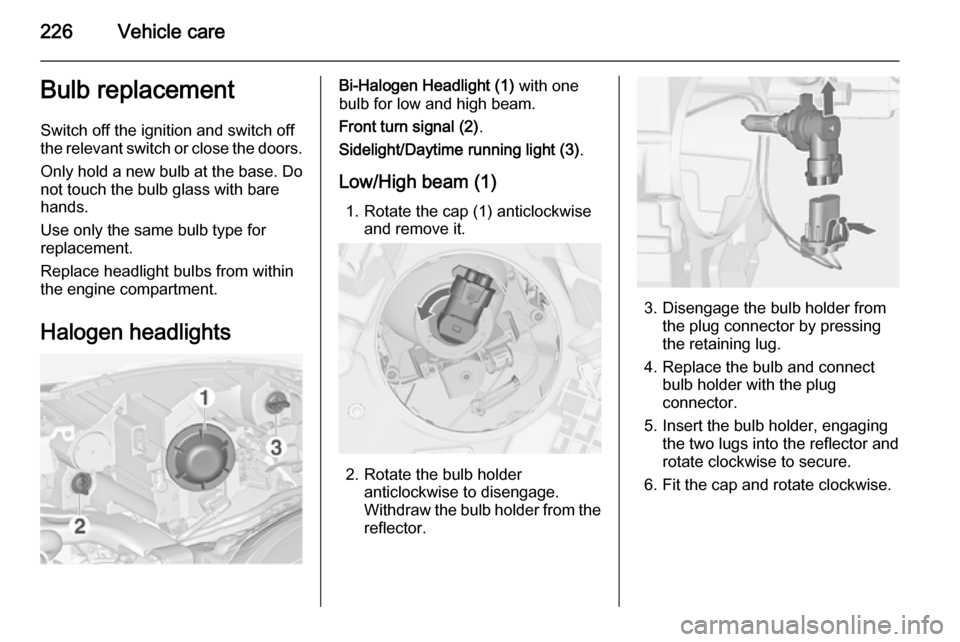
Halogen headlightsBi-Halogen Headlight (1) with one
bulb for low and high beam.
Front turn signal (2) .
Sidelight/Daytime running light (3) .
Low/High beam (1) 1. Rotate the cap (1) anticlockwise and remove it.
2. Rotate the bulb holder anticlockwise to disengage.
Withdraw the bulb holder from the
reflector.
3. Disengage the bulb holder from the plug connector by pressing
the retaining lug.
4. Replace the bulb and connect bulb holder with the plug
connector.
5. Insert the bulb holder, engaging the two lugs into the reflector and
rotate clockwise to secure.
6. Fit the cap and rotate clockwise.
Page 240 of 297
238Vehicle careInstrument panel fuse box
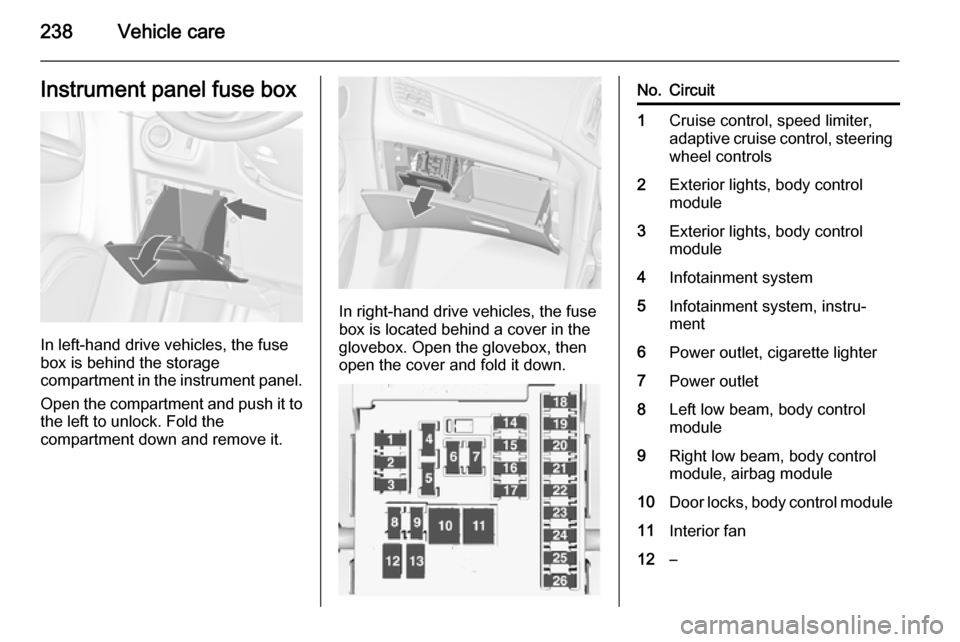
In left-hand drive vehicles, the fuse
box is behind the storage
compartment in the instrument panel.
Open the compartment and push it to the left to unlock. Fold the
compartment down and remove it.
In right-hand drive vehicles, the fuse
box is located behind a cover in the
glovebox. Open the glovebox, then
open the cover and fold it down.
No.Circuit1Cruise control, speed limiter,
adaptive cruise control, steering wheel controls2Exterior lights, body control
module3Exterior lights, body control
module4Infotainment system5Infotainment system, instru‐
ment6Power outlet, cigarette lighter7Power outlet8Left low beam, body control
module9Right low beam, body control
module, airbag module10Door locks, body control module11Interior fan12–