ESP VAUXHALL ZAFIRA TOURER 2017.5 Infotainment system
[x] Cancel search | Manufacturer: VAUXHALL, Model Year: 2017.5, Model line: ZAFIRA TOURER, Model: VAUXHALL ZAFIRA TOURER 2017.5Pages: 111, PDF Size: 2.29 MB
Page 7 of 111
Introduction79Warning
The usage of the navigation
system does not release the driver
from the responsibility for a
correct, vigilant attitude in road
traffic.The related traffic
regulations must always be
followed.
Only make entries (e.g. addresses) with the vehicle
stationary.
If a navigation instruction
contradicts traffic regulations, the
traffic regulations always apply.
9 Warning
Areas such as one-way streets
and pedestrian zones are not
marked on the navigation system map. In such areas, the system
may issue a warning that must be
accepted. Therefore, pay
particular attention to one-way
streets and other roads and
entrances that must not be driven
into.
Radio reception
Radio reception may be disrupted by
static, noise, distortion or loss of
reception due to:
● changes in distance from the transmitter
● multi-path reception due to reflection
● shadowing
Theft-deterrent feature
The Infotainment system is equipped
with an electronic security system for
the purpose of theft deterrence.
The Infotainment system therefore
functions only in your vehicle and is
worthless to a thief.
Page 12 of 111
12Basic operationBasic operationBasic operation............................ 12
Tone settings ............................... 15
Volume settings ........................... 16
System settings ........................... 17Basic operation
MENU SELECT knob Turn the MENU SELECT knob:
● To mark a menu option.
● To set an alphanumeric value.
Press the MENU SELECT knob:
● To select or activate the marked option.
● To confirm a set value.
● To open an application or submenu.
Touch screen Touch a screen button: ● To activate the respective option or function.
● To open an application or submenu.
Touch the screen and move your
finger:
● To scroll a list.
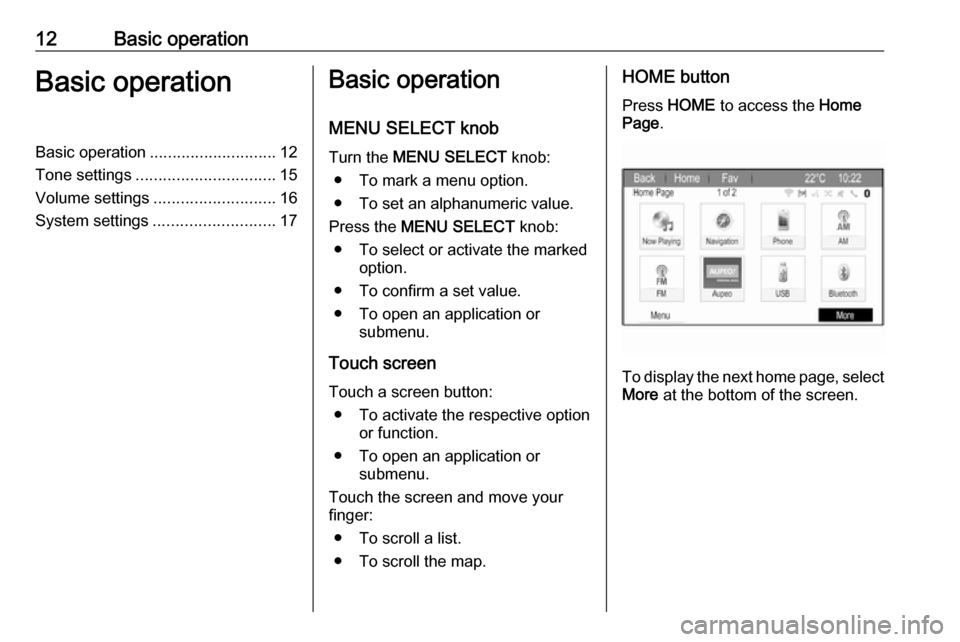
● To scroll the map.HOME button
Press HOME to access the Home
Page .
To display the next home page, select
More at the bottom of the screen.
Page 13 of 111
Basic operation13
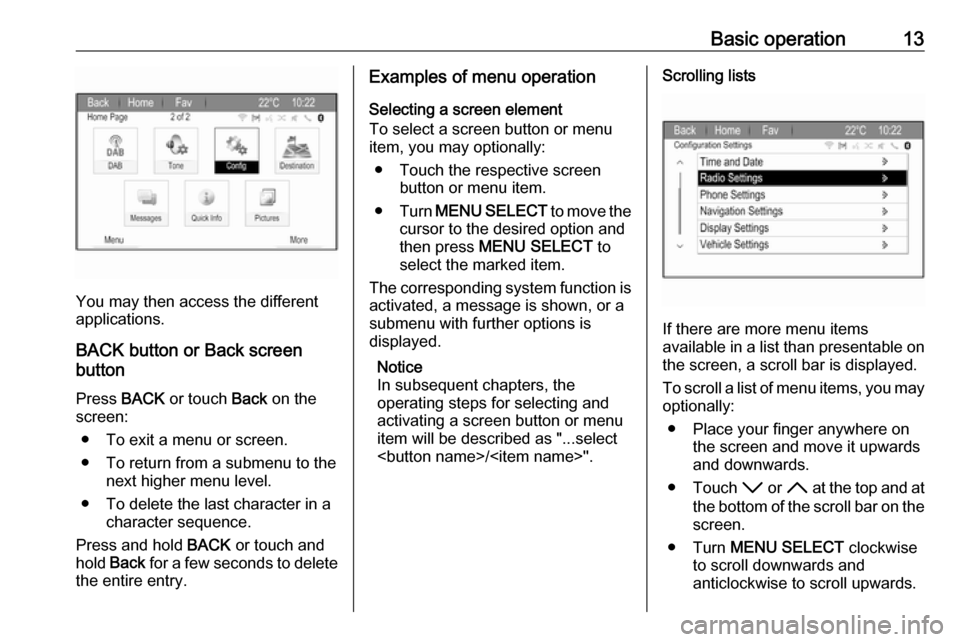
You may then access the different
applications.
BACK button or Back screen
button
Press BACK or touch Back on the
screen:
● To exit a menu or screen.
● To return from a submenu to the next higher menu level.
● To delete the last character in a character sequence.
Press and hold BACK or touch and
hold Back for a few seconds to delete
the entire entry.
Examples of menu operation
Selecting a screen element
To select a screen button or menu
item, you may optionally:
● Touch the respective screen button or menu item.
● Turn MENU SELECT to move the
cursor to the desired option and then press MENU SELECT to
select the marked item.
The corresponding system function is
activated, a message is shown, or a
submenu with further options is
displayed.
Notice
In subsequent chapters, the
operating steps for selecting and
activating a screen button or menu
item will be described as "...select
Page 14 of 111
14Basic operationNotice
In subsequent chapters, the operating steps for scrolling to a list
item will be described as "...scroll to
Adjusting a setting
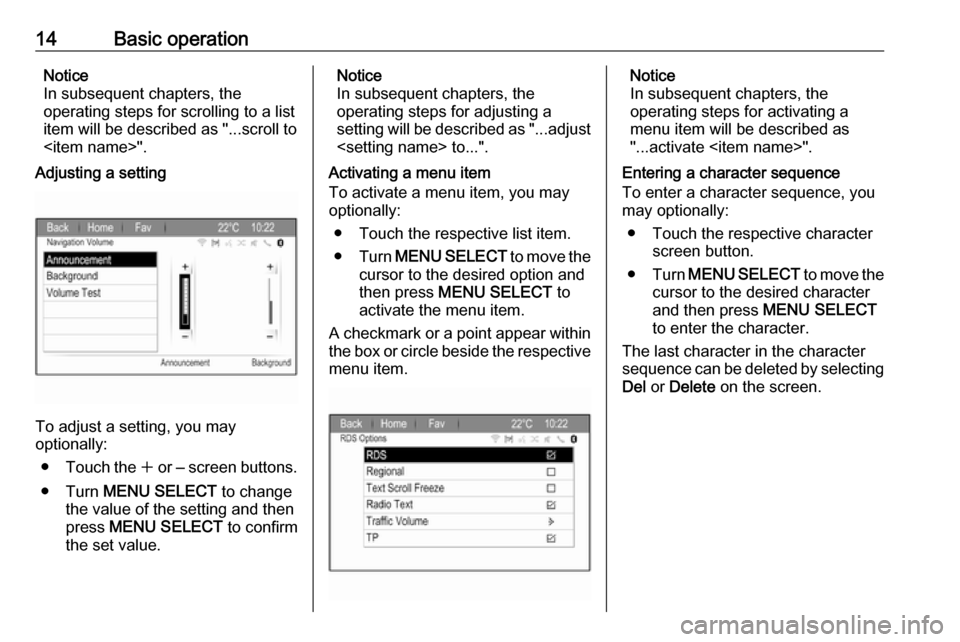
To adjust a setting, you may
optionally:
● Touch the w or ‒ screen buttons.
● Turn MENU SELECT to change
the value of the setting and then
press MENU SELECT to confirm
the set value.
Notice
In subsequent chapters, the
operating steps for adjusting a
setting will be described as "...adjust
Activating a menu item
To activate a menu item, you may
optionally:
● Touch the respective list item.
● Turn MENU SELECT to move the
cursor to the desired option and then press MENU SELECT to
activate the menu item.
A checkmark or a point appear within
the box or circle beside the respective menu item.Notice
In subsequent chapters, the
operating steps for activating a
menu item will be described as
"...activate
Entering a character sequence
To enter a character sequence, you
may optionally:
● Touch the respective character screen button.
● Turn MENU SELECT to move the
cursor to the desired character
and then press MENU SELECT
to enter the character.
The last character in the character
sequence can be deleted by selecting Del or Delete on the screen.
Page 18 of 111

18Basic operationScroll through the list and select
Software Versions Menu to display
the respective submenu.
Software version information
To display a list of all software
versions installed, select Software
Version Information .
By default, all versions are activated.
Software update
To update your system software,
contact your workshop.
Log file
To generate a log file of your current
software version, select Create Log
File .
Licensing information
To display information on the
manufacturer of the Infotainment
system, select Licensing Information .
Factory defaults
To reset all Infotainment settings to
their factory defaults, select Clear and
Reset Radio .Display settings
Press HOME , select Config and then
Display Settings .
Home Page
Select Home Page Menu to display
the home page settings menu.
To access the menu from the Home
Page , select Menu at the bottom of
the screen.
The Home Page may be adjusted
according to your personal
preferences.Customise
The application icons displayed on
the first home page may be chosen as desired.
Select Customise to display a list of
all applications installed in the
system. Activate the menu items of
those applications you wish to be
displayed on the first home page.
The other applications are then
arranged on the following pages.Sort
Up to eight application icons may be
arranged on each home page.The positions of the icons can be
changed as desired.
Select Sort to display the home pages
in edit mode.
Touch and hold the icon you want to
move.
To swap this icon to a new position, select the icon in that desired position on the home page.
To confirm the change, select Done.
The two icons are swapped.Home page defaults
To reset the Home Page to its factory
defaults, select Restore Home Page
Defaults .
Display Off
To turn the display off, select Display
Off .
To turn the display back on, press any
button on the Infotainment system
(except the m VOL knob).
Page 19 of 111
Radio19RadioUsage.......................................... 19
Station search .............................. 19
Favourite lists ............................... 20
Radio data system (RDS) ............21
Digital audio broadcasting ...........23Usage
Activating radio
Press HOME and then select AM,
FM or DAB .
The station last selected is played.
Notice
You may toggle between the
different audio sources by pressing
SRC or selecting Source.
Station search
Automatic station search
Briefly press I or H to play the next
station in the station memory.
Manual station search
Press and hold I or H. Release
the button when the required
frequency has almost been reached
on the frequency display.
Manual station tuning
To adjust the frequency, turn
MENU SELECT .
Adjust the frequency as desired.Station lists
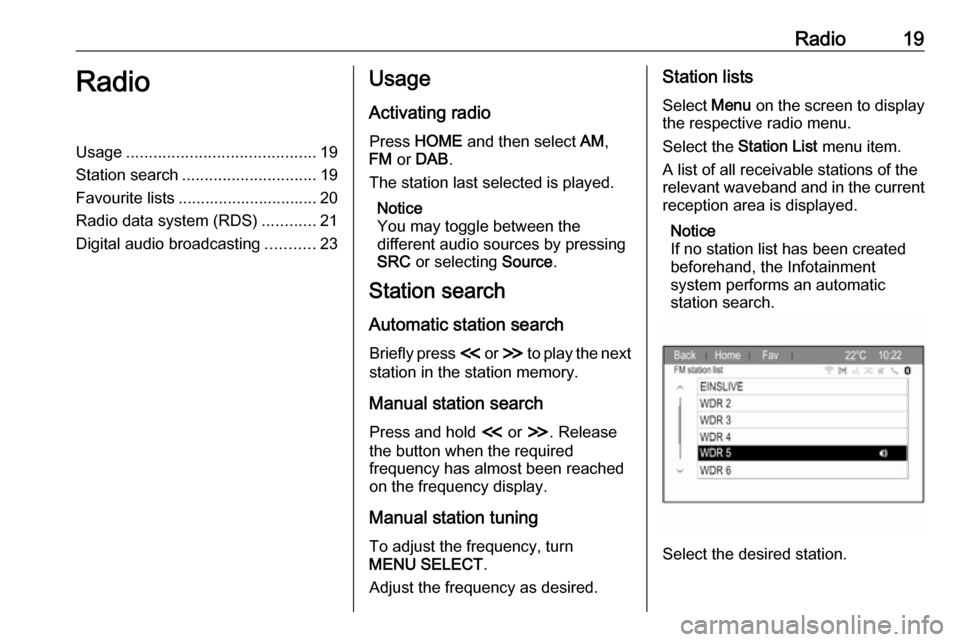
Select Menu on the screen to display
the respective radio menu.
Select the Station List menu item.
A list of all receivable stations of the
relevant waveband and in the current
reception area is displayed.
Notice
If no station list has been created
beforehand, the Infotainment
system performs an automatic
station search.
Select the desired station.
Page 20 of 111
20RadioNotice
The currently received station is
marked by i.
Category list Numerous stations broadcast a PTY
code, which specifies the type of
programme transmitted (e.g. news).
Some stations also change the PTY
code depending on the content which
is currently transmitted.
The Infotainment system stores these stations in the corresponding
category list sorted by programme
type.
Notice
The category list submenu item is only available for the FM and theDAB wavebands.
To search for a programme type
determined by the stations, select the
waveband-specific category list
option.
A list of programme types currently
available is displayed.Select the desired programme type. A
list of stations is displayed
transmitting a programme of the
selected type.
Select the desired station.
Notice
The currently received station is marked by i.
Updating the station lists If the stations stored in the waveband-
specific station list can no longer be
received, the AM and the DAB station
lists must be updated.
Notice
The FM station list is updated
automatically.
Select the corresponding list item in
the waveband-specific menu to
update a station list.
A station search is started. Once the
search is finished, the station
previously selected is played.
To cancel the station search, press
MENU SELECT .Notice
If a waveband-specific station list is
updated, the corresponding
category list is also updated.
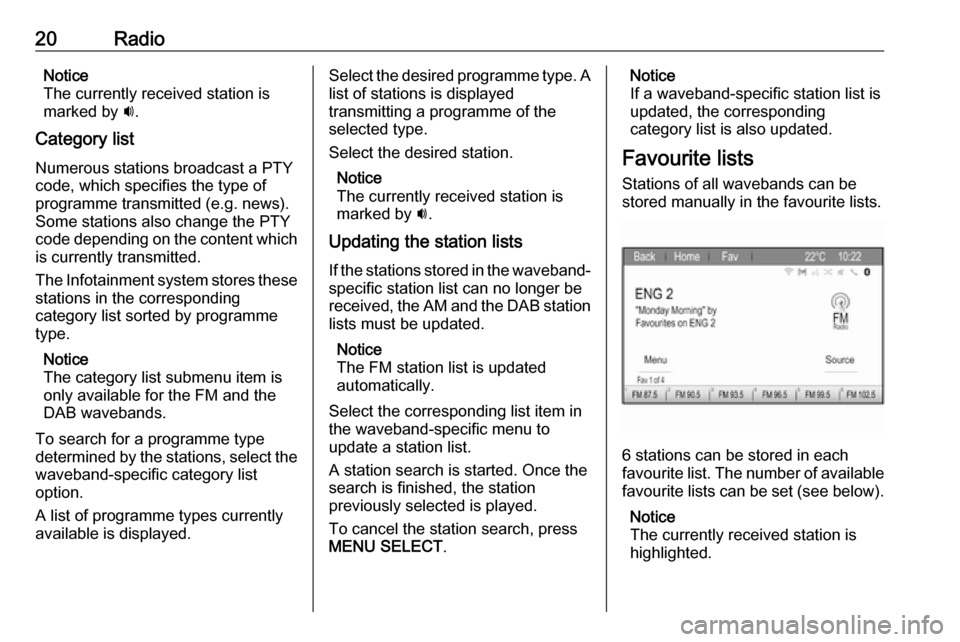
Favourite lists
Stations of all wavebands can be
stored manually in the favourite lists.
6 stations can be stored in each
favourite list. The number of available favourite lists can be set (see below).
Notice
The currently received station is
highlighted.
Page 21 of 111
Radio21Storing a station
Set the station to be stored.
Briefly select Fav at the top of the
screen to open a favourite list or to
switch to another favourite list.
To store the station in a list position:
touch and hold the corresponding
station screen button 1...6 until a
confirmation message is displayed.
Retrieving a station If required, briefly select Fav to open
a favourite list or to switch to another favourite list. Select one of the station
screen buttons 1...6 to activate the
station stored in the respective
location.
Defining the number of favourite
pages
Press HOME and then select Config
to open the settings menu.
Select Radio Settings and then
Number of Favourite Pages .
Select the number of favourite pages you wish to be displayed.Radio data system (RDS)
RDS is a service of FM stations that
considerably facilitates the finding of
the desired station and its fault-free
reception.
Advantages of RDS ● On the display the programme name of the set station appears
instead of its frequency.
● During station search the Infotainment system tunes in to
RDS stations only.
● The Infotainment system always tunes in to the best receivable
broadcasting frequency of the set station by means of AF
(Alternative Frequency).
● Depending on the station that is received, the Infotainment
system displays radio text that
can contain, for example,
information on the current
programme.RDS Options menu
To open the menu for RDS
configuration, press HOME and then
select Config to open the settings
menu.
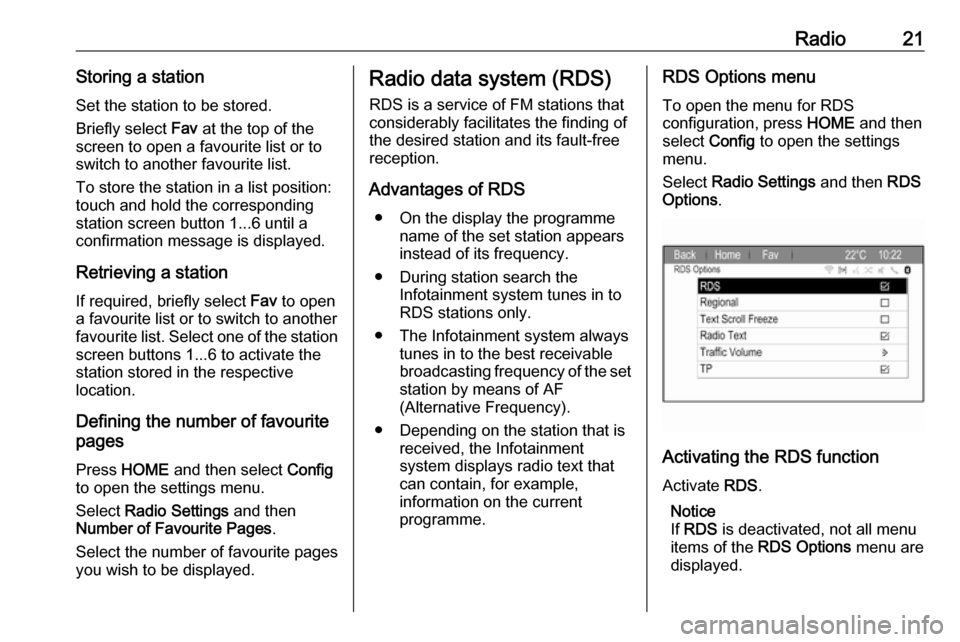
Select Radio Settings and then RDS
Options .
Activating the RDS function
Activate RDS.
Notice
If RDS is deactivated, not all menu
items of the RDS Options menu are
displayed.
Page 22 of 111

22RadioRegional
RDS stations sometimes broadcast
regionally different programmes on different frequencies.
If Regional is activated, only
alternative frequencies (AF) with the
same regional programmes are
selected.
If Regional is deactivated, alternative
frequencies of the stations are
selected without regard to regional
programmes.
Text Scroll Freeze Some RDS stations do not only show
the programme service name on the
display, but also additional
information on the current
programme. If additional information
is displayed, the programme name is
hidden.
To prevent additional information
from being displayed, activate Text
Scroll Freeze .Radio Text
If RDS and the reception of an RDS
station are activated, information on
the radio programme currently active
or the music track currently playing
are displayed below the programme
name.
To show or hide the information,
activate or deactivate Radio Text.
Radio traffic service
(TP = Traffic Programme)
Radio traffic service stations are RDS stations that broadcast traffic news.
If the radio traffic service is switched
on, radio or media playback is
interrupted for the duration of the
traffic announcement.
Switching the radio traffic service on
and off
Press HOME and then select Config
to open the settings menu.
Select Radio Settings and then RDS
Options .
To switch the traffic announcement
standby facility of the Infotainment
system on and off, activate TP.● If the radio traffic service is
switched on, [ ] is indicated on the
display.
● If the current station is not a radio
traffic service station, a search is started automatically for the next
radio traffic service station.
● If a radio traffic service station has been found, [TP] is indicated
on the display.
Traffic announcement volume
To adjust the volume of traffic
announcements, select Traffic
Volume . The respective submenu is
displayed. Adjust the setting as
desired.
Listening to traffic announcements only
Switch on the radio traffic service and
completely turn down the volume of
the Infotainment system.
Blocking out traffic announcements
Select Cancel in the TP message on
the screen.
The traffic announcement is
cancelled, but the radio traffic service
remains switched on.
Page 24 of 111

24External devicesExternal devicesGeneral information.....................24
Playing audio ............................... 25
Displaying pictures ....................... 26General information
A sockets for the connection of
external devices is located in the
centre console.
Notice
The sockets must always be kept
clean and dry.
USB port
An MP3 player, USB device or
smartphone can be connected to the
USB port. The Infotainment system
can play music files or display
pictures contained in auxiliary
devices.
When connected to the USB port, the devices mentioned above can be
operated via the controls and menus
of the Infotainment system.
Notice
Not all auxiliary devices are
supported by the Infotainment
system.
Connecting/disconnecting a device
Connect the USB device to the USB
port.Notice
If a non-readable USB device is
connected, a corresponding error
message appears and the
Infotainment system automatically
switches to the previous function.
To disconnect the USB device, select
another function and then remove the USB storage device.Caution
Avoid disconnecting the device
during playback. This may
damage the device or the
Infotainment system.
Bluetooth
Devices which support the Bluetooth
music profiles A2DP and AVRCP can be connected wirelessly to the
Infotainment system. The
Infotainment system can play music
files contained in these devices.
Connecting a device
For a detailed description on the
Bluetooth connection 3 55.