buttons VOLKSWAGEN BEETLE 2010 User Guide
[x] Cancel search | Manufacturer: VOLKSWAGEN, Model Year: 2010, Model line: BEETLE, Model: VOLKSWAGEN BEETLE 2010Pages: 138, PDF Size: 48.59 MB
Page 34 of 138
Downloaded from www.Manualslib.com manuals search engine The remote control transmitte r and the battery are
integrated in the key. Th e receiver is located
in the
vehicl e int erio r. The remote control range is several
metres around the vehicle when the battery is
fully
charged.
If the vehicle cannot be opened and closed using
the vehicle key, the vehi cle key
will have to be re
synchro
nise d ~page 45 , or the battery in the key
r ep laced
~page 45 .
Several vehicle keys can be used .
Opening and closing the key bit
Press button ~Fig. 22 G) or ~Fig. 23 G) to re
lease the key bit and
fold it out.
To fold in, press button G) and simultaneously fold
in the key bit until it clicks into place .
Alarm button
Only press the alarm button 0 in the event of an
emergency .
Once the button is pressed , the horn is
sounded and the vehicle lights flash.
Press the
alarm button again to switch off the alarm.
Replacement key
You will need to quote the vehicle chassis number
when ordering a replacement key or additional re
mote control keys.
Every new key contains a microchip which must be
encoded with the data for the
vehicle 's electronic
immobilizer . The vehicle key will not work if it is not
fitted with a micro chip, or if the microchip has not
been encoded. The same goes for keys that have
been cut to fit the
vehicle .
New keys or replacement keys are available from
Volkswagen dealerships or from qualifi
ed work
shops and authorised key services that are quali
fied to manufacture these
vehicle keys.
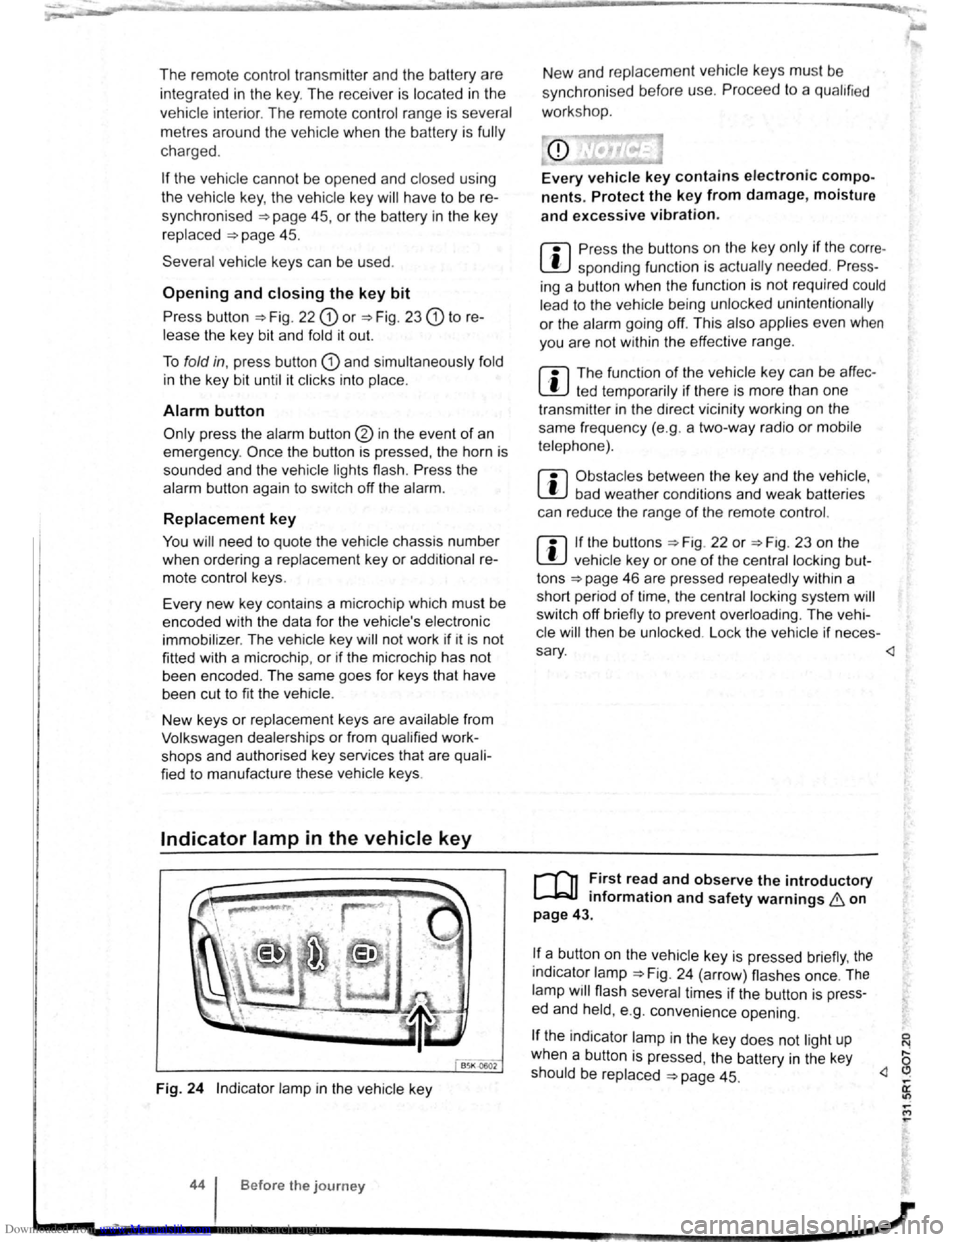
Indicator lamp in the vehicle key
B5K 0602
Fig. 24 Indicator lamp in the vehicle key
44 Before the journey
New and replace ment veh icle keys must be
sync hron ise d before use.
Proce ed to a qu alified
work sho p.
nents. Protect the key from damage, moisture
and excessive vibration.
m Press the buttons on the ke y only if the corre
L!J spending function is actually needed. Press
ing a button when the functio n is not required could
lead to the vehicle be ing unlocked unintentionally
or the alarm going off. Thi s also applies even when
you are not wi
thin the effective range.
m The functio n of the vehicle ke y can be affec
W ted temporarily if there is more than one
transmitte r in the direct vicinity working on the
same frequency (e.g . a two -way radio
or mobile
telephone).
m Obstacles between the ke y and the vehicle ,
W bad weather conditions and weak batteries
can reduce the range
of the remote control.
m If the buttons ~Fig. 22 or ~Fig. 23 on the
W vehicle key or one of the central lock ing but
tons
~page 46 are pressed repeated ly within a
short period
of time, the central locking system will
switch off briefly to prevent overloading . The vehi
cle
will then be unlo cked . Lo ck the vehicle if neces -
sary .
mformat1on and safety warnings 8 on
page 43.
!f a_ button on the vehicle key is pressed briefly, the
1nd1cator lamp ~Fig. 24 (arrow) flashes once. The
lamp will flash several times if the button is press
ed and held, e .
g. convenience opening.
If the indicator lamp in the key does not light up
when a button is pressed , the battery
in the key
should be replaced
~page 45. ,... a: "? ,... M ,...
Page 36 of 138
Downloaded from www.Manualslib.com manuals search engine Central locking system
c:DJ Introduction
This chapter contains information on the following
subjects:
Description
of the central locking system 46
Locking and unlocking the vehicle from the
outside . . . . . . . . . . . . . . . . . . . . . . . . . . . . . . . .
47
Locking and unlocking the vehicle from the
inside . . . . . . . . . . . . . . . . . . . . . . . . . . . . . . . . .
48
Locking and unlocking the vehicle with
Keyless Access . . . . . . . . . . . . . . . . . . . . . . . . . 49
SAFELOCK mechanism . . . . . . . . . . . . . . . . . . 51
Anti-theft alarm . . . . . . . . . . . . . . . . . . . . . . . . . 52
Interior monitoring system and anti-tow alarm 53
The central locking system
will only work correctly
when all doors and the tailgate are closed properly.
The
vehicle cannot be locked with the key if the
driver door is open .
In vehicles with the Keyless Access locking and
starting system, the
veh icle can only be locked
when the ignition has been switched
off and the
driver door is closed .
If the vehicle is unlocked and not used for a long
time (e.g. in your own garage) the
vehicle battery
could discharge
or the engine may not start.
Additional information and warnings:
• Exterior views ~page 6
• lnfotainment system ~page 31
• Vehicle key set ~page 43
• Doors ~page 55
• Tailgate ~page 57
• Electric windows ~page 60 •
Electric
panorama sliding/tilting roof
~page 63
• Towing a trailer ~page 140
•
Manual opening or closing ~page 339
A WARNING
Improper use of the central locking system
could cause serious injury.
• The central locking system locks all
doors. Locking the vehicle from the inside
may prevent the doors from being opened
unintentionally and unauthorised persons
from entering the vehicle . However, locked
doors can delay assistance to passengers in
side the vehicle in the event of an accident or
emergency.
• Never leave children or people requiring
assistance alone in the vehicle. All doors can
be
locked from the inside using the central
locking button. This may mean that people
lock themselves in the vehicle. People locked
in the vehicle may be subjected to very high
or very low temperatures.
• Depending on the time of year, locked ve
hicles can be subjected to very high or very
low temperatures. This can cause serious in
juries and illness or fatalities, especially for
small children.
• Never leave anyone inside a locked vehi
cle. People in the vehicle could become trap
ped in an emergency and may not be able to
get themselves to safety.
Description of the central locking system
r-('n First read and observe the introductory
L-Jr=JJ information and safety warnings & on
page 46.
The central locking system enables you to lock and
unlock
all the doors, the tailgate and tank flap from
one central point:
• From outside the vehi cle with the vehicle key
~page 47.
• From outside the vehicle with Keyless-Access
~page 49.
• From inside the vehicle with the central locking
button ~page 48.
Certain central locking functions can be activated
or deactivated in the infotainm ent system using the
@ill button and the~ and (Open and Clos e) function
buttons =>page 31, or the vehicle can be taken to a~
qualifi ed work shop .
--~--------------------~~
Page 38 of 138
![VOLKSWAGEN BEETLE 2010 User Guide Downloaded from www.Manualslib.com manuals search engine [Q] First read and observe the introductory information and safety warnings .et. on page 46.
Function Buttons to be used on the vehicle key => VOLKSWAGEN BEETLE 2010 User Guide Downloaded from www.Manualslib.com manuals search engine [Q] First read and observe the introductory information and safety warnings .et. on page 46.
Function Buttons to be used on the vehicle key =>](/img/18/55756/w960_55756-37.png)
Downloaded from www.Manualslib.com manuals search engine [Q] First read and observe the introductory information and safety warnings .et. on page 46.
Function Buttons to be used on the vehicle key =>Fig. 27 or =>Fig. 28-
Unlocking the vehicle . Press the@ button . Press and hold for convenience opening. -
Lo cking the vehicle .
Pres s the@) button . Press and hold for convenience closing. In
vehicles with a SAFELOCK mechanism , press the@) button
once to lo ck the vehicle us ing the SAFELOCK mech anism .
Press the @) button twice to lock the vehicle without the SAFE
LOCK mechanism .
Unlocking the tailgate .
Press the~ button =>page 57.
Please note: depending on the central locking
function that has been set in the infotainment sys
tem ,
all of the doors and the tailgate may only be
unlocked when the
@ button is press ed twice
=>page 31.
The vehicle key
will lock or unlock the vehicle only
when the battery has enough power and the key
is
located within a few metr es of the vehi cle .
• When the vehicle is locked , all turn signals will
flash
once as confirmation.
• When the vehicle is unlocked, all turn signals
will flash twice as confirmation .
If the turn signals do not flash as confirmation, at
least one
of the doors or the tailgate is not closed. The v
ehic le cannot be locked using the
vehicle key
if the driver door is still open . The vehic le will lock
again automatically within a few seconds of being
unlocked if you do not open one of the doors
or the
tailgate . This function prevents the vehicle from re
maining unlocked if the unlocking button is pressed
by mistake .
Convenience opening and closing
• See electric windows -functions =>page 60 .
• See fun ction of the electric panorama sliding/
tilting roof
=>page 63. ~
Locking and unlocking the vehicle from the inside
Fig. 29 In the driver door: central locking button
r-fl1 First read and observe the introductory
L-l=.U information and safety warnings £on
page 46.
Press the
button =>Fig. 29:
a Unlocks the vehicle . The
centr al lo ck ing button functions with the igni
tion switched on or
off only when all doors are
closed.
If the vehicle has been locked with the vehicle key,
the central locki
ng button does not work .
Please note the following when using the central
lo cking button to lock the veh ic le :
~ The indicator lamp Q in the button =>Fig. 29
lights up yellow when all doors and the tailg ate are
closed and locked .
• In vehicles with SAFELOCK mechanism: the
SAFELOCK mec hanism is not activated
=>page 51.
• The anti-theft alarm will not be activa ted.
• lt is not possible to open the doors or tailgate
from the outside, for instance when stopped at traf
fic lights .
'
Q Locks the ve hicle .
• The doors can be unlocked and opened from
the inside by pulling the door release handle . The ~
indicator lamp Q in all doors switches off. You maY ~ ~
~l .... ~.-gz-. ........ 4•8·'~•B•e•f•or•e•t•h•e•jo•u•r•n•ey ............................ ______________ .... ~ .... .-.-Jr-
Page 40 of 138
Downloaded from www.Manualslib.com manuals search engine In vehicles without a SAFELOCK
mechanism: closing and locking the doors
(Keyless Exit)
• Close the driver door.
• Touch the locking sensor@ on the outside of
the driver or front passenger door ha ndle once .
The door being used must be closed.
In vehicles with a SAFELOCK mechanism:
closing and locking the doors (Keyless Exit)
• Close the driver door.
• Touch the locking sensor@ on the outside of
the driver or front passenger door handle once .
The car is locked with the SAFELOCK mechan ism
=>page 51 active. The door be ing used must be
closed.
• Touch the locking sensor@ (arrow) on the out
side of the driver or fron t passenger door handle
twice to lock the vehicle without activating the
SAFE LOCK mechanism =>page 51.
Locking and unlocking the tailgate
If the vehicle is locked, the tailgate will be unlocke d
automatically when you open it if a valid vehicle
key is located within the operating range of the tail
gate =>Fig . 30.
Open and close the tailgate as normal
=>page 57.
The tailgate is locked automat ically after it is
closed. This al so applies if a val id vehicle key is lo
cated on the luggage compart ment cover or in the
luggage compartment.
The tailgate will not lock automat ically after closing
if one of the following criteria applies :
• The vehicle is complete ly un locked .
• A valid vehicle key is located near the front or
rear seats in the v ehicle .
Response when locking the vehicle with a
second vehicle key
If a vehicle key is loca ted inside the vehicle, the
vehicle w ill only lock from the outside if a se cond
valid vehicle key is located outside the vehicle,
within the operating range of the Keyless Access
system.
Automatic switch-off of the sensors
If an exterior sensor in one of the door handles on
a locked
vehicle is activated more often than usual ,
e .g.
if branches from a hedge rub against it, the
proxim i
ty sensor will be switched off for a short
t ime .
The sensors are reactivated if any of the following
takes place:
• Some time has passed.
• OR: the vehicle is unlocked using the 0 button
on the vehicle key.
• OR: the tailgate is opened.
• OR: the vehicle is unlocked with the vehicle
key .
Convenience functions
To use convenience closing for all electric win
dows and the electric panorama sliding/tilting roof,
hold a finger on the locking sensor
=>Fig . 31 @on
the outside of the driver or front passenger door
handle for a few seconds until the windows and/or
the electric panorama sliding/tilting r
oof have
closed.
When the sensor on the
door handle is to uched ,
the
door will open in accordance with the settings
activated in the infotainment system using
the~
button, and the~ and (Open ing and closing ) function
buttons
=>page 31.
lt is possible that the sensors in the door han
dles will be activated by a powerful jet of water
or steam if a valid vehicle key is within its oper
ating range at the same time. If at least one
window is open and the sensor@ (arrow) in a
door handle is activated permanently, all win
dows close. lt is possible that all windows will
open if the jet of water or steam is moved away
from the door handle sensor® (arrow) briefly
and then moved back onto it =>page 50, Con
venience functions.
m lt may not be possible to lock or unlock the
L!J vehicle using Keyless Access if the vehicle
battery or battery
in the vehicle key is weak or dis
charged . The vehicle can be locked or unlocked
manually
=>page 339 .
m If there is no valid vehicle key in the vehicle
L!J or if it is not detected , a co rre spond ing dis
play w ill be shown in the instrum ent cluster display.
T his may occur if the vehicle key is obstructed
by
another radio signal or is cov ered by another item,
e .g . an aluminium suitcase or briefcase.
m The function of the door handle sens?rs maY
L!J be limited by dirt, e.g . by salty depos1ts.
Clean the vehi cle as necessary =>page 294 .
m A veh icle with an automatic gearbox c~~ only
Page 46 of 138
Downloaded from www.Manualslib.com manuals search engine Electric windows
Introduction
Thi .h'" t r co nt ins information on the following
'll j· t ":
I' · A WARNING (Continued) ·----""=~·
ning r cl ing the windows elec trically . . 60
• Never leave children or people requiring
assistance alone in the vehicle when the ve
hicle is locked. The windows can no longer
be opened in an emergency.
tric wind ws - functions . . . . . . . . . . . . . . 61
R 1\-b k fun ction f or th e electric windows . . . 61
Additional information and warnings:
• V lk wag n information system ~page 26
• ntr I loc king system :::) page 46
• lnfo tai nm ent system ~page 31
• Always take all vehicle keys with you ev
ery time you leave the vehicle. The windows
can still be operated using the buttons sever
al minutes after the ignition has been switch
ed off, provided that the driver door and front
passenger door are not opened.
A~ WARNING
~-~~------------------·~--------~~~
• When transporting children on the rear
bench seat, the rear electric windows should
always be deactivated using the safety button
so that they cannot be opened or closed.
ltnproper or unsupervised use of the electric
windows can cause serious injuries.
• The electric windows should only be
opened or closed when you are sure that no
body is in their operating area . During sudden rain showers, water can enter
the vehicle interior via open windows and
cause damage
to the vehicle.
Opening or closing the windows electrically
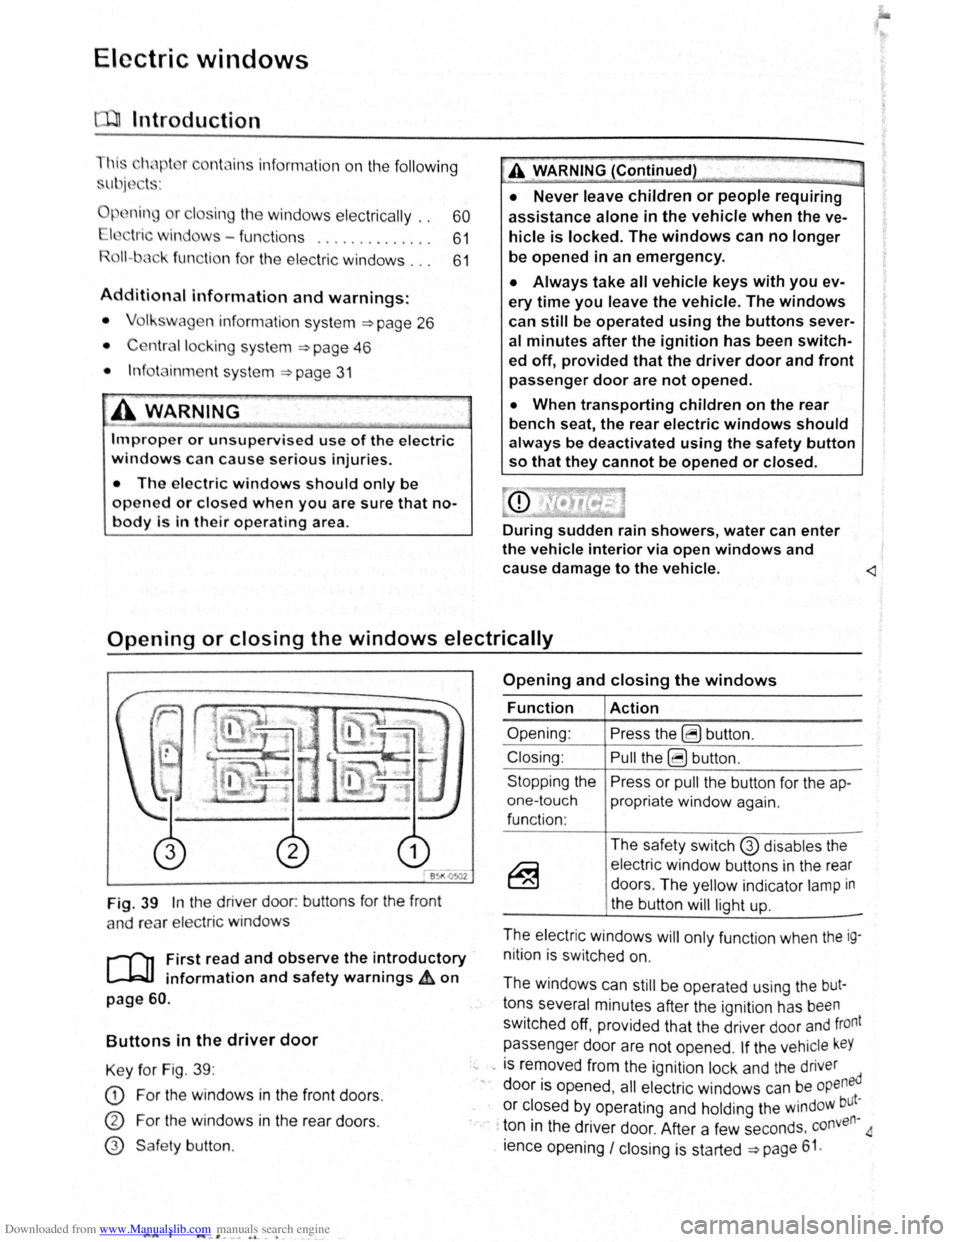
Fig. 39 In the driver door: buttons for the front
a nd rear
elec tric windo ws
r--('n First read and observe the introductory
~ information and safety warnings £ on
page 60.
Buttons in the driver door
Key for Fig. 39 :
CD For the windows in the front doors .
CD For the windows in the rear doors .
@ Safe ty button .
AA l ..._-'. --~ o. -•
Opening and closing the windows
Function
Opening :
Closing:
Stopping the
one-touch
function :
Action
Press the ~ button .
Pull the ~ button .
Press or
pull the button for the ap
propriate window again.
The safety switch
G) disables the
electric window buttons in the rear
doors . The yellow indicator
lamp in
the button
will light up.
-
The electric windows will only function when the ig
nition is switched on.
The windows can
still be operated using the but
tons several minutes after the ignition has been
switched off, provided that the driver door and front
passenger door are not opened .
If the vehicle keY
... -is removed from the ignition lock and the driver
" door is opened , all electric windows can be opened
or closed by operating and holding the windoW but~
· · ton in the driver door. After a few seconds . conven
ience opening
I closing is started ~page 61.
Page 47 of 138
Downloaded from www.Manualslib.com manuals search engine lcctrlc windows-functions
lr .. t r ,nd nd obsorv the Introductory
lnf rmotl n nn d 1 fety warnings~ on
n - t uc h opening ond closing
11 t ur.11 p n ln a n d cl sing mnk s it possib le
t fully p n n
butt on , do n t h v t o e h Id do wn to do this .
r
o n -touch closing: pull th button fo r th e ap
pr prl1 l window up brl fly Into the s co nd posi
tion.
or ono-touch opening: pr ss the bu tto n for the
ppr prl1t wind w down bri fly Into the seco nd
p
s lti n .
Stopping the one-touch function: press or pull
lh
bu tt n f r the appropri te window again.
R
estoring one-touch opening and closing
On - touc h op ning and closing is deac tiv a te d if
th v hi 'I batt ery has been disconnec ted or dis
c h
rg d whil e the wind ow s were not fully closed.
The fun ction will ha ve to be reset.
• Cl s all windows and doors .
• Swi tc h on the ignit ion .
• Pull up the bu tton for the window and hold it in
thi s posi tion for longer than 2 sec onds .
• Let go of the bu tton then pull it up aga in and
ho ld i t in this position . On e-to uch opening and
c los ing is
now ready for operation .
The one -to uch function can be res tored for individ
u
I windows or for several wind ow s a t th e same
tim e.
Convenience opening and closing
The windows ca n be opened and clos ed from out
side
t11e v e hi cle using the vehicle key :
• Press and hold the locking or unlocking button
o n the
ve hi cle k e y. All electr ic windows will be ei
ther opened or closed.
•
To interrupt this function , let go of the locking or
unlo cking button .
During co
nveni ence closing , the windows and the
elec tric panorama sliding/tilting roof close .
A varie ty of setti ngs re lated to window operation
can be made and adjusted using the @) button
and the
G and (open and close ) function buttons
~page 31.
A WARNING
Improper or unsupervised use of the electric
windows can cause serious injuries.
• The electric windows should only be
opened or closed when you are sure that no
body is in their operating area.
• Never leave children or people requiring
assistance alone in the vehicle when the ve
hicle is locked. The windows can no longer
be opened in an emergency.
• Always take all vehicle keys with you ev
ery time you leave the vehicle. The windows
can still be operated using the buttons sever
al minutes after the ignition has been switch
ed off, provided that the driver door and front
passenger door are not opened.
• When transporting children on the rear
bench seat, the rear electric windows should
always be deactivated using the safety button
so that they cannot be opened or closed.
r::l One-touch opening and closing and the roii
L!J back function will not work if there is a fault in
the
electric windows . Proceed to a qualified work-
shop . ~
Roll-back function for the electric windows
r-('n First read and observe the i~troductory
l.-W.I information and safety warnmgs A on
page 60.
The roll -b ac k function for the electric windows can
reduce the risk
of injuri es when the windows are
closing => ,&. If the one- touch closing function for a
wind ow
does not work beca use it is stiff or is being
obs tructe d the
window will autom atically open I
again.
• Check to see why the window has not closed.
• Try to close the window again. ..,..
Opening and closing 61
Page 50 of 138
Downloaded from www.Manualslib.com manuals search engine Electrical controls on the front seats ~~~~~~~~~~~~-----------------------
®
651<-()590
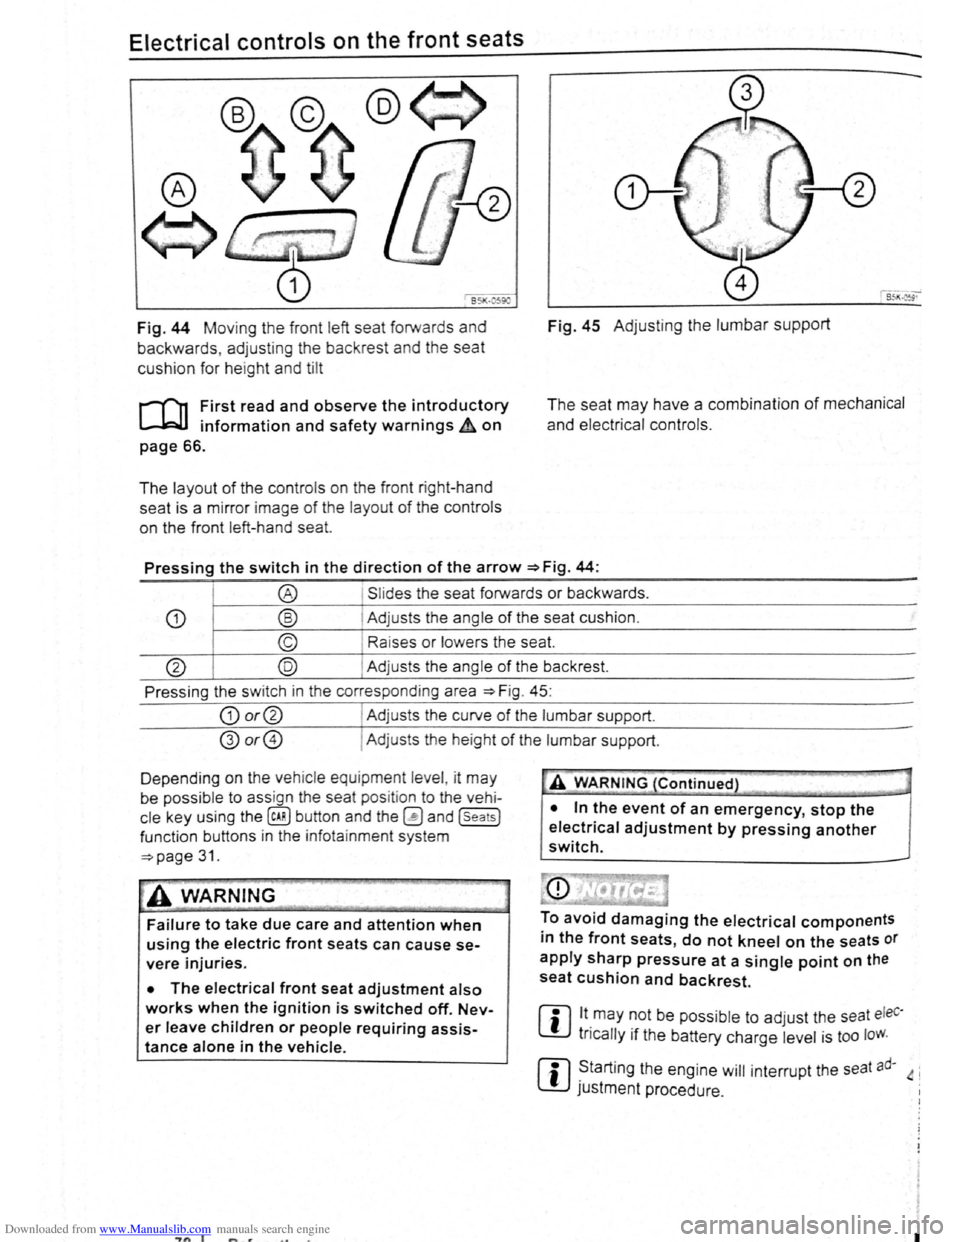
Fig. 44 Moving th e front left seat forwards and
backwards , ad j
usting the backrest and the seat
cushion for hei
ght and tilt
r-('n First read and observe the introductory
L-.lc:J.I information and safety warnings~ on
page 66.
The layout of the contro ls on the front r ight-hand
seat is a m irror image
of the layout of th e contro ls
on the front left-hand sea
t.
Fig. 45 Adju stin g the lumbar support
The seat may have a combination of mechanical
and electrical controls.
Pressing the switch in the direction of the arrow ~Fig. 44:
® Slides the seat forwards or backwards .
CD ® Adjusts the ang le of the seat cushion.
© Raises or lower s the seat.
@ @ Adjust s th e angle of the backrest.
Press ing the s witch in th e corresponding area
~Fig. 45:
CD or@ I Adjusts the curv e of the lumbar support.
@or@ I Ad justs the he ight of the lumbar support .
D epending on the veh ic le equ ipment leve l, it
may
be possib le to ass ign the seat pos it ion to the vehi
cle key using the @ill button and the~ and (seats]
funct ion buttons in the info ta inment system
~page 31.
~A WARNING
Failure to take due care and attention when
using the electric front seats can cause se
vere injuries.
• The electrical front seat adjustment also
works when the ignition is switched off. Nev
er leave children or people requiring assis
tance alone in the vehicle.
~"'A WARNING (Continued} --~ ~ -·-
• In the event of an emergency, stop the
electrical adjustment by pressing another
switch.
To avoid damaging the electrical components
in the front seats, do not kneel on the seats or
apply sharp pressure at a single point on the
seat cushion and backrest.
m lt.may ~Ot be poss ib le to adjust the seat eleC·
W tncally 1f the battery charge level is too loW.
m ~tarting the engine will interrupt the seat ad· 4 i
W JUStment procedure .
"7n I I
Page 64 of 138
Downloaded from www.Manualslib.com manuals search engine "Coming Home"
Switching on
Switching off
"Leaving Home"
Switch ing on
Switc h ing off
I Action
------Swit c h off the ignit io n .
- Operate the headlight flashe r for approximately one second ~page 106.
The Coming Home lights are switched on when the driver door is opened . The
swi tc h-off de lay starts when the last vehicle door or the tailgate has been closed
-Occurs automatica lly once the set switch-off delay has elapsed .
-Occurs automatica lly if another ve h icle door or the tailgate is opened within ap-
proximately 30 seco nds of it being swit ched on.
- Turn the
ligh t switc h to positio n 0.
- Swit ch o n the ignition .
Action
-Unl ock the vehicle when the ligh t senso r is in position AUTO and the twilight sen
sor that it is d ar k.
- Occ urs autom atically once the switch-off delay has elapsed .
- Lo ck
the vehicle.
-Turn the light switc h to positi on 0.
-Switch on the ignition .
Surround lighting in the exterior mirrors m The length of the switch-off delay can be ad
L!:J justed , o r the function can be switched on
and off, u sing the
(ill) button and the~ and (Light)
functio n buttons in the infota inment system
=:.page 31.
Th e surround lighting in the exterior mirrors ligh ts
up the area directly around
the doors while you are
ente ring or ex iting the vehicle . lt is sw itc h ed on
when th e ve hi cle is unlo cked, when opening the
driver door or wh en
the Coming Home or Leav ing
Hom e lighting function is ac tiv e .
If the veh icle is
eq uipp ed with a ligh t sensor , the surround lighting
i n th e exterior mirrors
will only be switched on
wh en it is dark.
m When the Com ing Home function is switched .
L!:J on, no acoustic warning will sound when the t
driver d oor is opened to remind you that a light is
still switched on.
Headlight range control, instrument and switch lighting
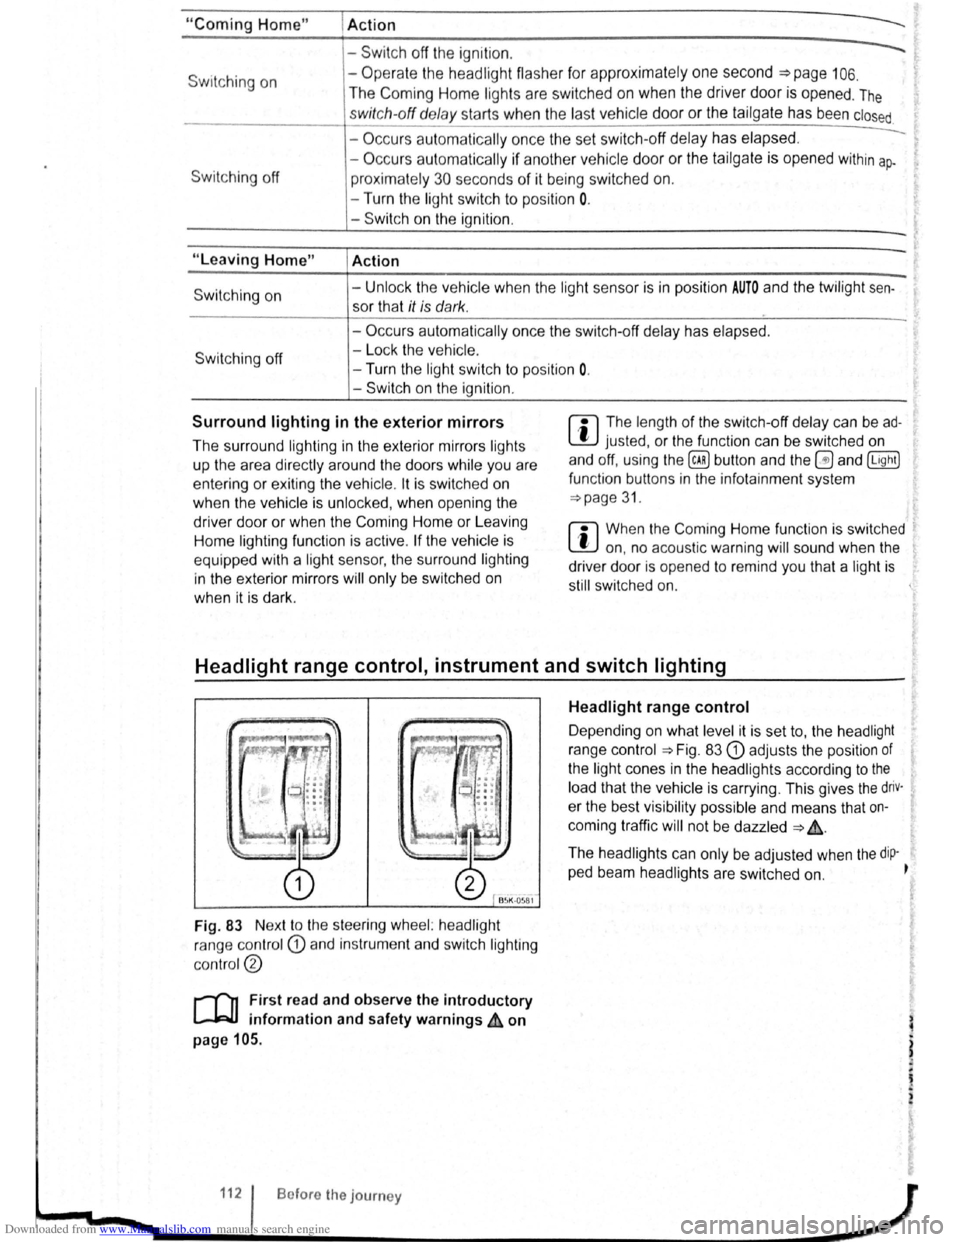
Fig. 83 Nex t to the stee ring wheel: head light
ra nge contr ol
CD and in strum ent and swit ch lighting
co ntr ol@
r-('n First read and observe the introductory
~ information and safety warnings ~ on
page 105.
112 Bofore the journey
Headlight range control
D epending on what level it is se t to, the head light
rang e co ntrol
:::.Fig . 83 CD adjusts the position of
the light cones in the head lights according to the
load that the vehi cle is carrying. This gives the driv·
er the best visibilit y possible and means that on
coming traffic
will not be dazzle d :::. &.
The hea dlights ca n on ly be adjust ed when the dip-
ped beam headlights are switched on. ~
t
Page 65 of 138
Downloaded from www.Manualslib.com manuals search engine To adjust, turn the control CD to:
-Set~ng I Vehicle load lev~la) -------
1
2
3
Fron t seats occupied and luggage
compa rtment
empty.
All seats occupied and luggage com
partment empty.
All sea ts occ upi ed and luggage com
partm ent fully loaded . Towing a trai le r
wit h a
lo w drawbar load .
Only the driver sea t occupi ed and lug
ga ge compartm ent fully load ed . Tow
ing a trai le r w ith maximum drawbar
l
oad.
a) If you have diff ere nt loads. you can select a positi on be
tween th e settings.
Dynamic headlight range control
Th ere is no control CD for headlight range if the ve
hicle
has dynamic headli ght control. The head light
r ange is
automatically adapted to suit the ve hicle
load level as soon as the headli ghts are switched
on~&.
Instrument and switch lighting
The brightness of the in strument and switch li gh t
ing can be adjusted using the @ill button and the
~and !Ltght] function buttons in the infot ainm ent
system
~page 31 .
Depending on the vehicle equipment level, it may
be possible to adjust the brightness of the instru
ment and switch lighting to suit your requirements
by turning control® when the headlights are
switched on.
Interior and reading lights
Instrument cluster lighting
The instrumen t cl uste r ligh ting sw it c hes off auto
mati cally
in darkness and at other times, e.g . when
driving through a tunnel. This is in tended to prompt
the driver to switch on the dipped beam so that the
v e hi cle' s rea r l
ights are swit c hed on ~page 109.
.A WARNING
-
Heavy objects in the vehicle can cause the
headlights to dazzle and distract other road
users. This can lead to accidents and serious
injuries.
• The light cone should always be adjusted
to the load level of the vehicle to ensure that
other road users are not dazzled.
A WARNING
A failure or malfunction in the dynamic head
light range control can cause the headlights
to dazzle or distract other road users. This
can lead to accidents and serious injuries.
• Proceed to a qualified workshop to have
the headlight range control checked immedi
I
ately. ~--------------- --------------------~
ClJ] First read and observe the introductory information and safety warnings & on page 105.
Button
~REAR
Function
Switches the front interior lights on or off.
Switches the rear interior lights on or off.
Switches the door contact switch on or off.
The interior lights are switche d on automatically when the vehicle is unlocked , a door
is opened, or the ve hicle key is removed from the ignition lock.
The light will go out a few seconds after all doors are closed, the vehicle is locked, or
the ignition is switched on.
/q'j/
---------j Switches the reading lights on or off.
Lights and vision 113
Page 69 of 138
Downloaded from www.Manualslib.com manuals search engine -~
....,
m
.u \ 1n j w v ip r 1 switched on auto
.1t1 ',111 if the front -.. ind creen wipers are
<::' t ' ' r ~ rse gear i eng ged.
m The automatic switch-on function when in. re
W verse gear can be switched on and off us1ng
the@] button and the G and (Mirror and wipers ) func
tion buttons in the infotainment system ~page 31.
ro Fi tread and observe the introductory information and safety warnings & on page 117.
iper response in various situat ions:
\.._e t e e d~ sat na•y
Healed a her jet
Headlight
hen sw1tched on , the wipers will temporarily be switched to the
ext setting down.
T e C hmatromc w1ll sw1tch to air recirculation mode for approxits ru -n a e l 30 seconds to prevent the smell of the windscreen wash-
a s t
er utd from entering the vehicle interior.
T e
rper in tervals are adjusted depending on the vehicle
speed. The faster the vehicle is travelling, the shorter the inter
a!
nses on
ward s the steering wheel when the dipped beam
headlights or main beam are switched on. Clean
off stubborn dirt (msects, etc.) from the headl ights
at regular intervals, for instance when filling the
tank .
In winter, you should remove any snow from the
headligh t w as her nozzles in the
bumper to keep
the headligh t washer system in work ing order. Re
move any ice with a de-icer spray.
r:l The w1per will try to wipe away any obstacles
L!J that are on the wind screen . The w 1per will
sop moving 1f the obstacle blocks its path . Re-
mo e the obstacle and swttch the wiper back on
agam
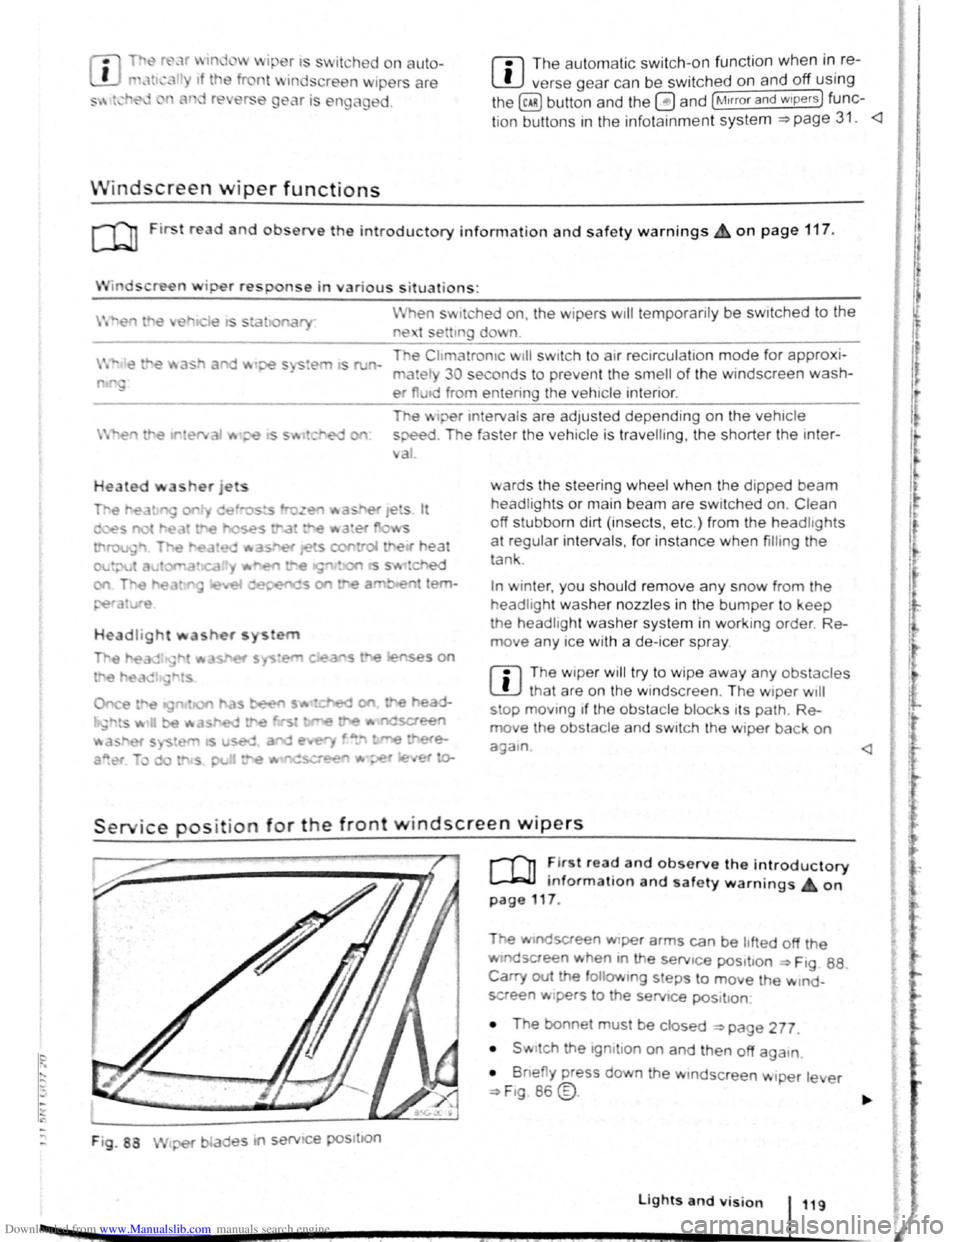
Service position for the front windscreen wipers
F ig . 88
2 -!.
r-T'n ~lr t rea~ and observe the introductory
L-Jr:J.J mformat1on and safety warnings on
page 117 .
Tt>e .vtndscreen Wlper arms can be h fted off the
ndsaeen when 10 the serv1ce pos1t1on ~ Ftg. 88.
Carry out e followtng s eps to move the w rnd
screen w1pers
t o the servtce pos1t1on
• The bonnet must be closed ~page 277.
• Swrtch the 1gntlton on and then off aga
1n
•
B ne y press down the wtndsc reen w1per le er
~F1g. 86 @.
Lights and vision 119
I 3£