lower VOLKSWAGEN E-GOLF 2019 Owners Manual
[x] Cancel search | Manufacturer: VOLKSWAGEN, Model Year: 2019, Model line: E-GOLF, Model: VOLKSWAGEN E-GOLF 2019Pages: 394, PDF Size: 3.86 MB
Page 8 of 394
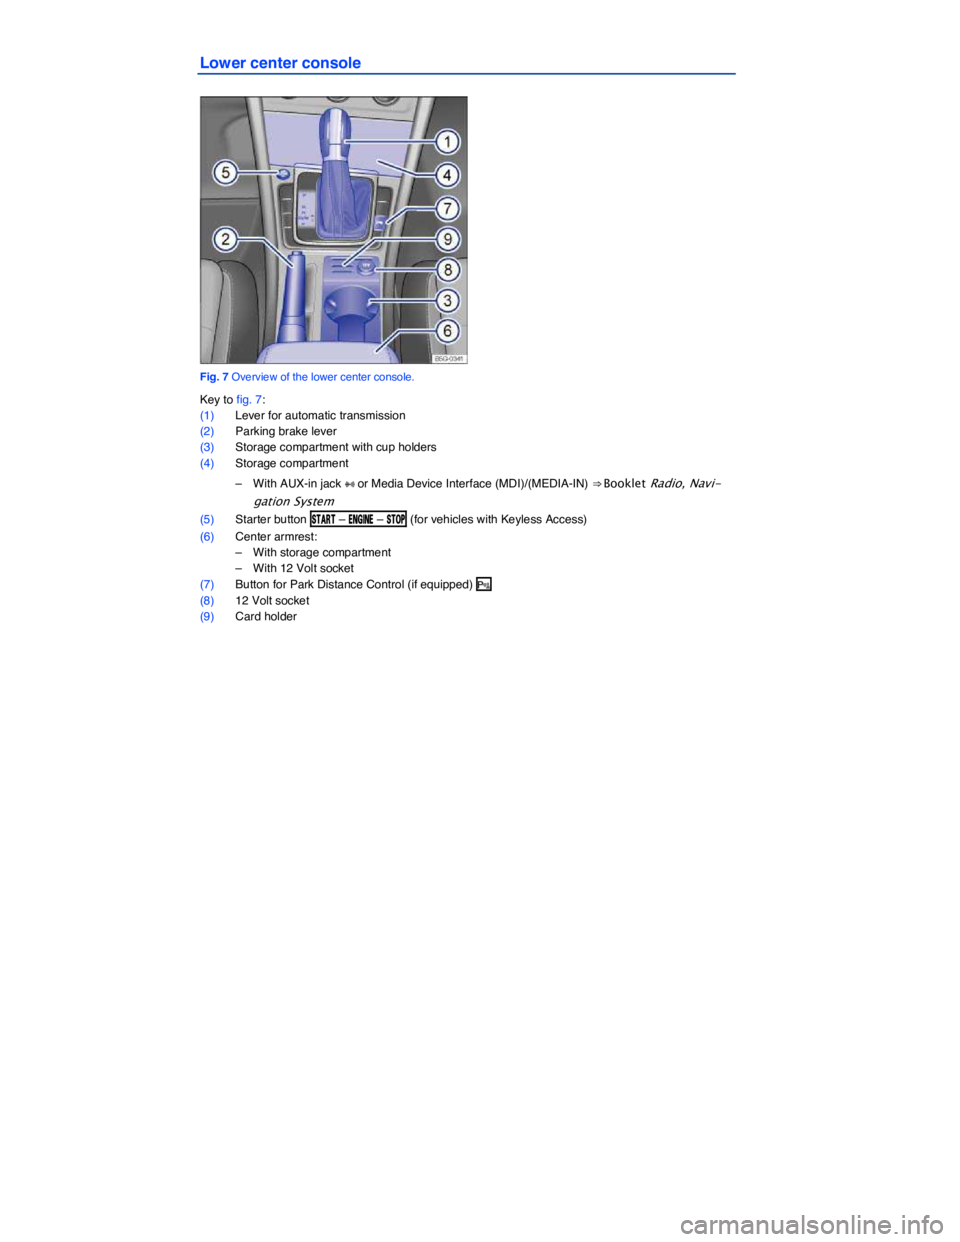
Lower center console
Fig. 7 Overview of the lower center console.
Key to fig. 7:
(1) Lever for automatic transmission
(2) Parking brake lever
(3) Storage compartment with cup holders
(4) Storage compartment
– With AUX-in jack �
Page 77 of 394
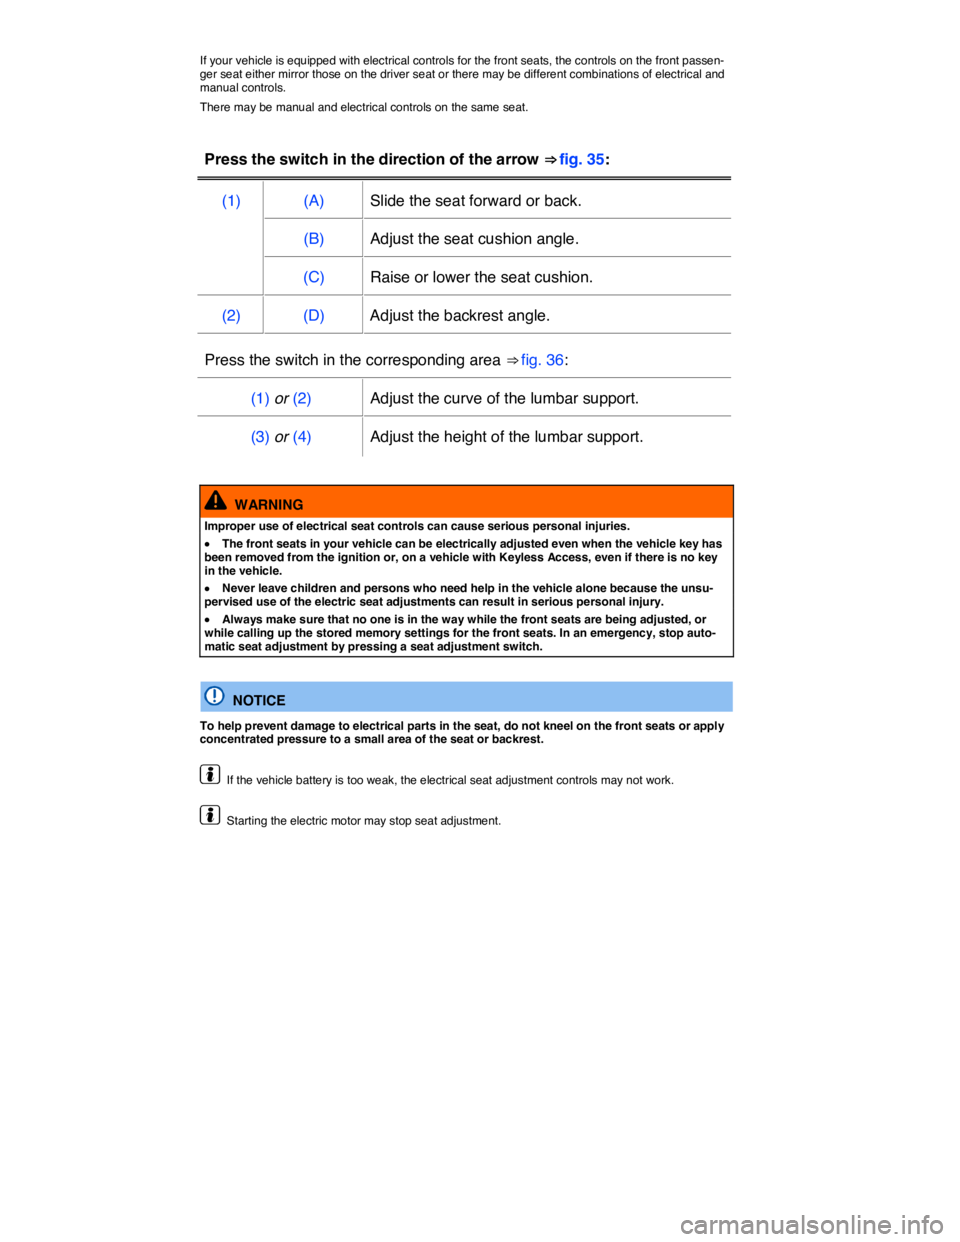
If your vehicle is equipped with electrical controls for the front seats, the controls on the front passen-ger seat either mirror those on the driver seat or there may be different combinations of electrical and manual controls.
There may be manual and electrical controls on the same seat.
Press the switch in the direction of the arrow ⇒ fig. 35:
(1) (A) Slide the seat forward or back.
(B) Adjust the seat cushion angle.
(C) Raise or lower the seat cushion.
(2) (D) Adjust the backrest angle.
Press the switch in the corresponding area ⇒ fig. 36:
(1) or (2) Adjust the curve of the lumbar support.
(3) or (4) Adjust the height of the lumbar support.
WARNING
Improper use of electrical seat controls can cause serious personal injuries.
�x The front seats in your vehicle can be electrically adjusted even when the vehicle key has been removed from the ignition or, on a vehicle with Keyless Access, even if there is no key in the vehicle.
�x Never leave children and persons who need help in the vehicle alone because the unsu-pervised use of the electric seat adjustments can result in serious personal injury.
�x Always make sure that no one is in the way while the front seats are being adjusted, or while calling up the stored memory settings for the front seats. In an emergency, stop auto-matic seat adjustment by pressing a seat adjustment switch.
NOTICE
To help prevent damage to electrical parts in the seat, do not kneel on the front seats or apply concentrated pressure to a small area of the seat or backrest.
If the vehicle battery is too weak, the electrical seat adjustment controls may not work.
Starting the electric motor may stop seat adjustment.
Page 79 of 394
Proper head restraint adjustment
Adjust head restraints so that the upper edge of the head restraint is at least at eye level or higher. Position the back of the head as close as possible to the head restraint.
Adjusting the head restraint for short people
Push the head restraint down as far as it will go, even if this means the person's head is still below the top edge of the head restraint. A small gap may remain between the head restraint and the backrest when the head restraint is all the way down.
Adjusting the head restraint for tall people
Pull the head restraint up as far as it will go.
WARNING
Driving without head restraints or with improperly adjusted head restraints increases the risk of serious injuries in a collision.
�x Always drive with the head restraints in place and properly adjusted to help minimize the risk of neck injury in a crash.
�x Every person in the vehicle must have a properly adjusted head restraint to minimize the risk of neck injury in a crash. Each head restraint must be adjusted according to the occu-pants' size so that the upper edge is even with the top of the person's head, but no lower than eye level. Always sit so that the back of your head is as close as possible to the head re-straint.
�x Never adjust head restraint while driving.
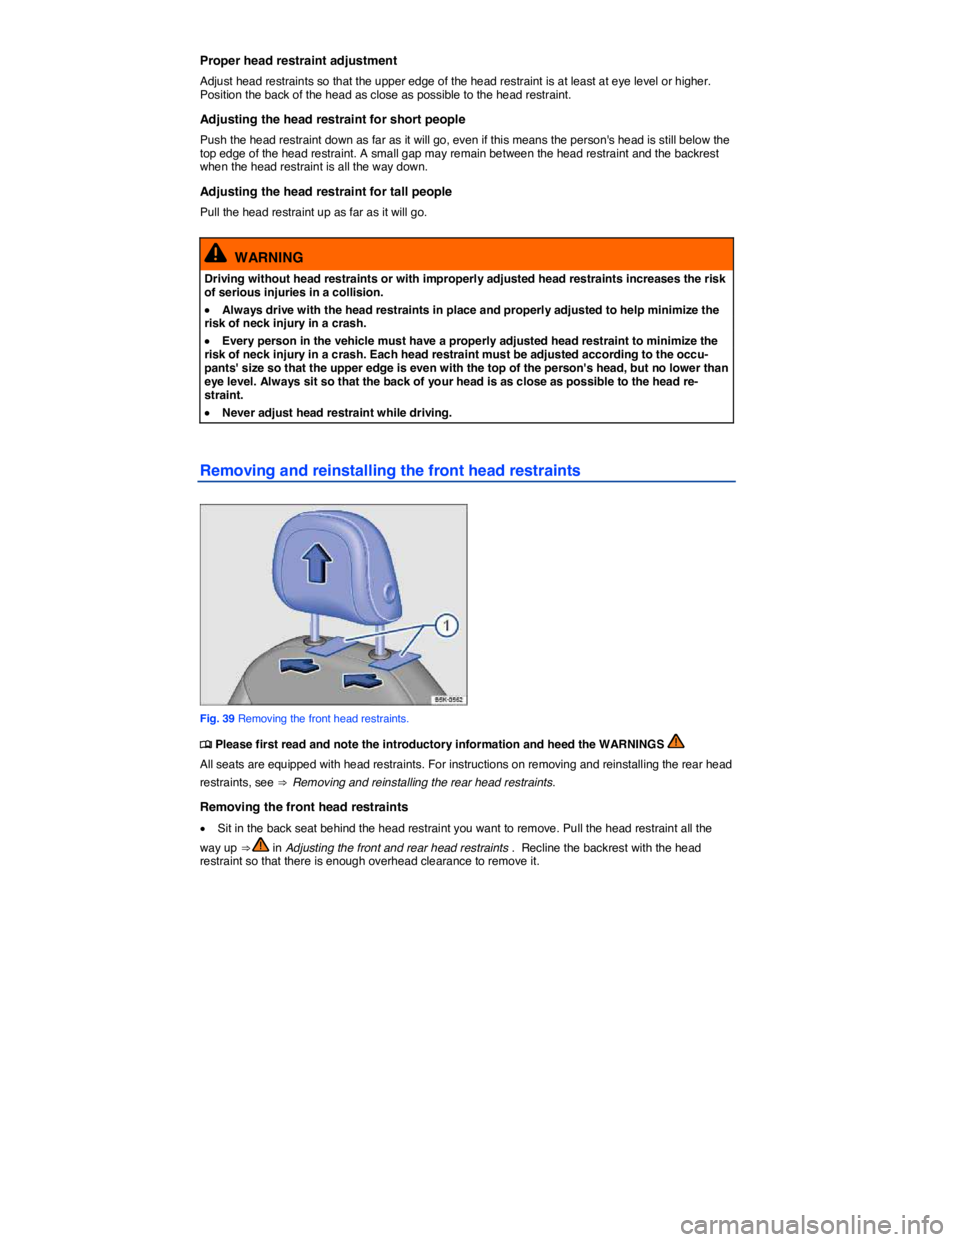
Removing and reinstalling the front head restraints
Fig. 39 Removing the front head restraints.
�
Page 86 of 394

�x If the outside temperature or the temperature inside the passenger compartment is +77 °F (+25 °C) or more.
Function Action for seat heating ⇒ fig. 45
Switch on: Press the �A or �e button. Seat heating is switched on to
maximum.
Adjust the heat-
ing level:
Press the �A or �e button repeatedly until the desired
heating level is set.
Switch off: Press the �A or �e button repeatedly until all indicator
lights in the button are off.
Special seat heating features
On the driver and the passenger side, the seat heating will resume at the setting that was set when the ignition was last switched off. However, this feature only works if the key is not taken out of the ignition switch, or, for vehicles with Keyless Access, the driver door is not opened or the vehicle is not locked.
People suffering from a low level of perceived pain or a lowered awareness of pain as from medica-
tion, paralysis, or chronic illness (e.g. diabetes) should NEVER use the seat heating feature ⇒ !
The use of seat heating by persons with these conditions could result in burns to the back, buttocks, and legs that may take a long time to heal and may never heal completely. If you have any of these conditions, you should take regular breaks and get out of the vehicle, particularly on long trips. Consult your doctor for advice regarding your specific condition.
WARNING
Certain medical conditions, such as paralysis and diabetes, and certain medications can increase the risk of serious burns when the seat heating feature is switched on.
�x Vehicle occupants who have a low level of perceived pain or a lowered awareness of pain can receive serious burns to the back, buttocks, and legs that take a long time to heal or may never heal completely.
�x Never use the seat heating feature if you or your passengers are at risk of being burned because of a medical condition. Take regular breaks and get out of the vehicle, particularly on long trips. Consult your doctor for advice regarding your specific condition.
�x Never let exposed skin remain in contact with the seat upholstery when the seat heating is being used.
WARNING
A wet seat can cause the seat heating to malfunction and increase the risk of serious burns.
�x Always make sure the seats are dry before using the seat heating.
�x Never sit on the seat with wet clothes.
�x Never put damp or wet things including clothes on the seat.
�x Never spill liquids on the seats.
Page 124 of 394
Possible reasons for changes in the way the rain sensor works
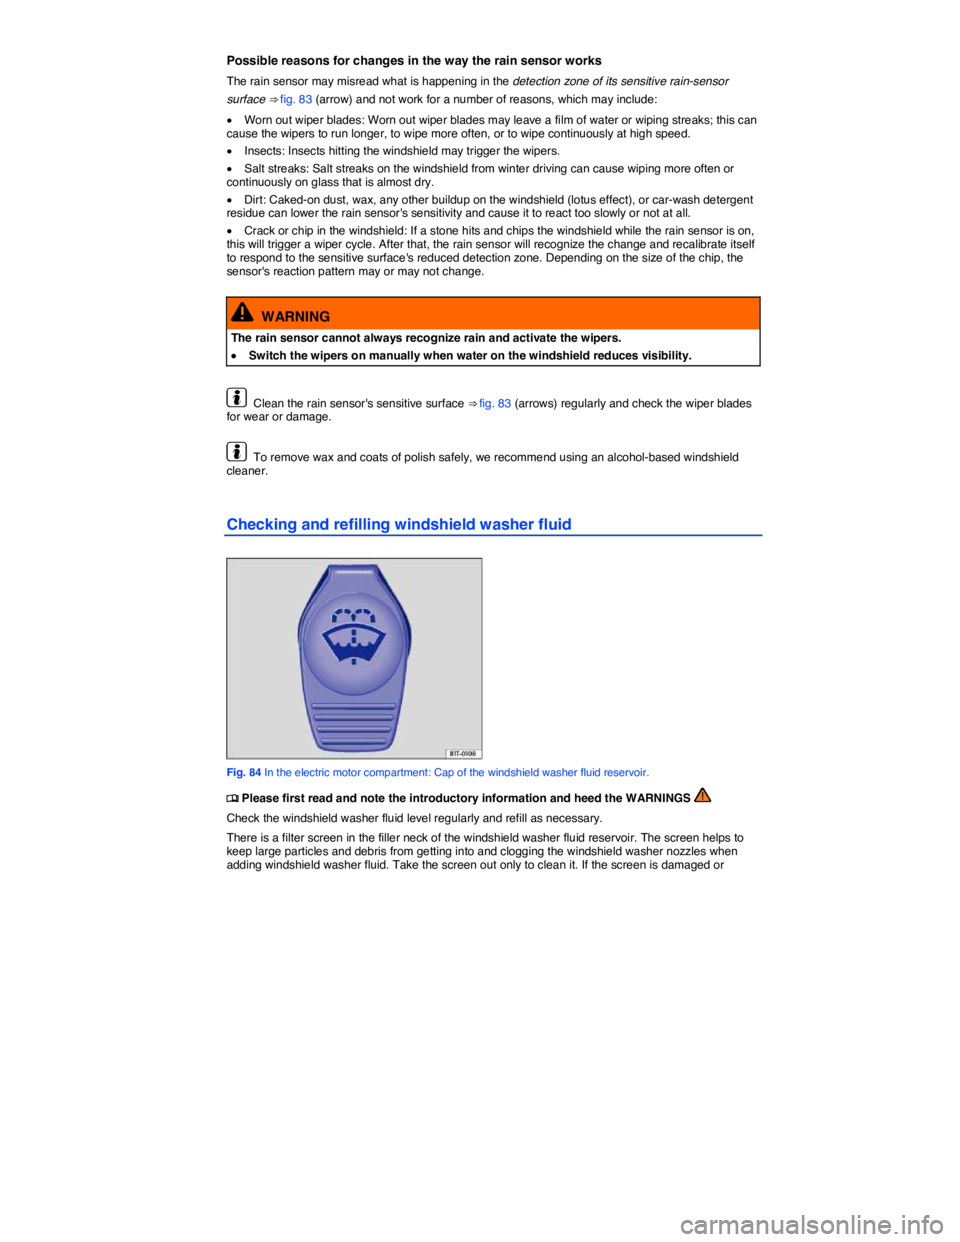
The rain sensor may misread what is happening in the detection zone of its sensitive rain-sensor
surface ⇒ fig. 83 (arrow) and not work for a number of reasons, which may include:
�x Worn out wiper blades: Worn out wiper blades may leave a film of water or wiping streaks; this can cause the wipers to run longer, to wipe more often, or to wipe continuously at high speed.
�x Insects: Insects hitting the windshield may trigger the wipers.
�x Salt streaks: Salt streaks on the windshield from winter driving can cause wiping more often or continuously on glass that is almost dry.
�x Dirt: Caked-on dust, wax, any other buildup on the windshield (lotus effect), or car-wash detergent residue can lower the rain sensor's sensitivity and cause it to react too slowly or not at all.
�x Crack or chip in the windshield: If a stone hits and chips the windshield while the rain sensor is on, this will trigger a wiper cycle. After that, the rain sensor will recognize the change and recalibrate itself to respond to the sensitive surface's reduced detection zone. Depending on the size of the chip, the sensor's reaction pattern may or may not change.
WARNING
The rain sensor cannot always recognize rain and activate the wipers.
�x Switch the wipers on manually when water on the windshield reduces visibility.
Clean the rain sensor's sensitive surface ⇒ fig. 83 (arrows) regularly and check the wiper blades for wear or damage.
To remove wax and coats of polish safely, we recommend using an alcohol-based windshield cleaner.
Checking and refilling windshield washer fluid
Fig. 84 In the electric motor compartment: Cap of the windshield washer fluid reservoir.
�
Page 163 of 394

�x After installing the spare wheel or compact spare wheel, check the tire pressure as soon as possi-
ble ⇒ Tire inflation pressure.
Check the tire inflation pressure of the spare or compact spare whenever you check the tire pressure of the road wheels, at least once a month. Inflate a spare wheel to the cold tire pressure specified for the vehicle's road wheels on the tire pressure label; inflate a compact spare wheel to the cold tire pressure specified for the compact spare on the tire pressure label or on a separate label for the compact spare, if there is one.
WARNING
Improper use of a spare wheel or a compact spare wheel can cause loss of vehicle control, a crash or other accident, and serious personal injury.
�x Never use a spare wheel or compact spare wheel if it is damaged or worn down to the wear indicators.
�x In some vehicles, the spare wheel or compact spare wheel is smaller than the original tire. A smaller compact spare wheel is identified with a sticker and the words “50 mph” or “80 km/h”. This is the maximum permissible speed when driving with this tire.
�x Never drive faster than 50 mph (80 km/h) with a compact spare wheel. Avoid full-throttle acceleration, heavy braking, and fast cornering!
�x Never drive more than 125 miles (200 km) if a compact spare wheel is installed on the front axle (drive axle).
�x Replace the compact spare with a normal wheel and tire as soon as possible. Compact spare tires are designed for brief use only.
�x Regularly check the U.S. DOT Tire Identification Number (TIN) to determine the age of the
compact spare wheel ⇒ Tire labeling. Tires age even if they are not being used and can fail suddenly, especially at higher speeds.
�x Tires that are more than 6 years old can only be used in an emergency and then with spe-cial care and at lower speeds.
�x The compact spare wheel must always be secured with the wheel bolts provided by the factory.
�x Never drive using more than one compact spare wheel.
�x After installing the compact spare wheel, the tire pressure must be checked as soon as
possible ⇒ Tire inflation pressure.
�x Snow chains cannot be used on the compact spare wheel. If you must use snow chains and have a compact spare wheel mounted, move the compact spare wheel to the rear axle if a front tire has to be replaced. The tire taken off the rear axle can then be used to replace the flat front tire. Be sure you do not change the tire's direction of rotation. Install the snow chains on the full-sized road tire.
NOTICE
When the spare wheel or compact spare is being used, the TPMS indicator light can light up
after a couple of minutes ⇒ Tire Pressure Monitoring System (TPMS).
If possible, attach the spare wheel, compact spare wheel, or the wheel you took off the vehicle securely in the luggage compartment.
Page 169 of 394

WARNING
Driving faster than the maximum speed for which the winter tires on your vehicle were de-signed can cause sudden tire failure including a blowout and sudden deflation, loss of con-trol, crashes and serious personal injuries.
�x Winter tires have a maximum speed rating that may be lower than your vehicle's maximum speed.
�x Never drive faster than the maximum speed for which the winter tires installed on your vehicle are rated because tires that are driven faster than their rated speed can fail suddenly.
�x Never exceed the maximum load rating for the winter tires installed on your vehicle.
Install summer tires promptly in the spring. Summer tires offer better handling characteristics for temperatures above +45 °F (+7 °C). They are quieter, do not wear as quickly, and reduce power consumption.
The Tire Pressure Monitoring System must be recalibrated whenever you remove and remount or change any wheel or tire on the vehicle, even if the reinstalled or replacement wheels and tires are
identical to those that were removed and even if the tire pressure does not change ⇒ Tire Pressure Monitoring System (TPMS) and recalibration through the Infotainment system.
If necessary, ask your authorized Volkswagen dealer or authorized Volkswagen Service Facility about permissible winter tire dimensions.
Snow chains
�
Page 199 of 394
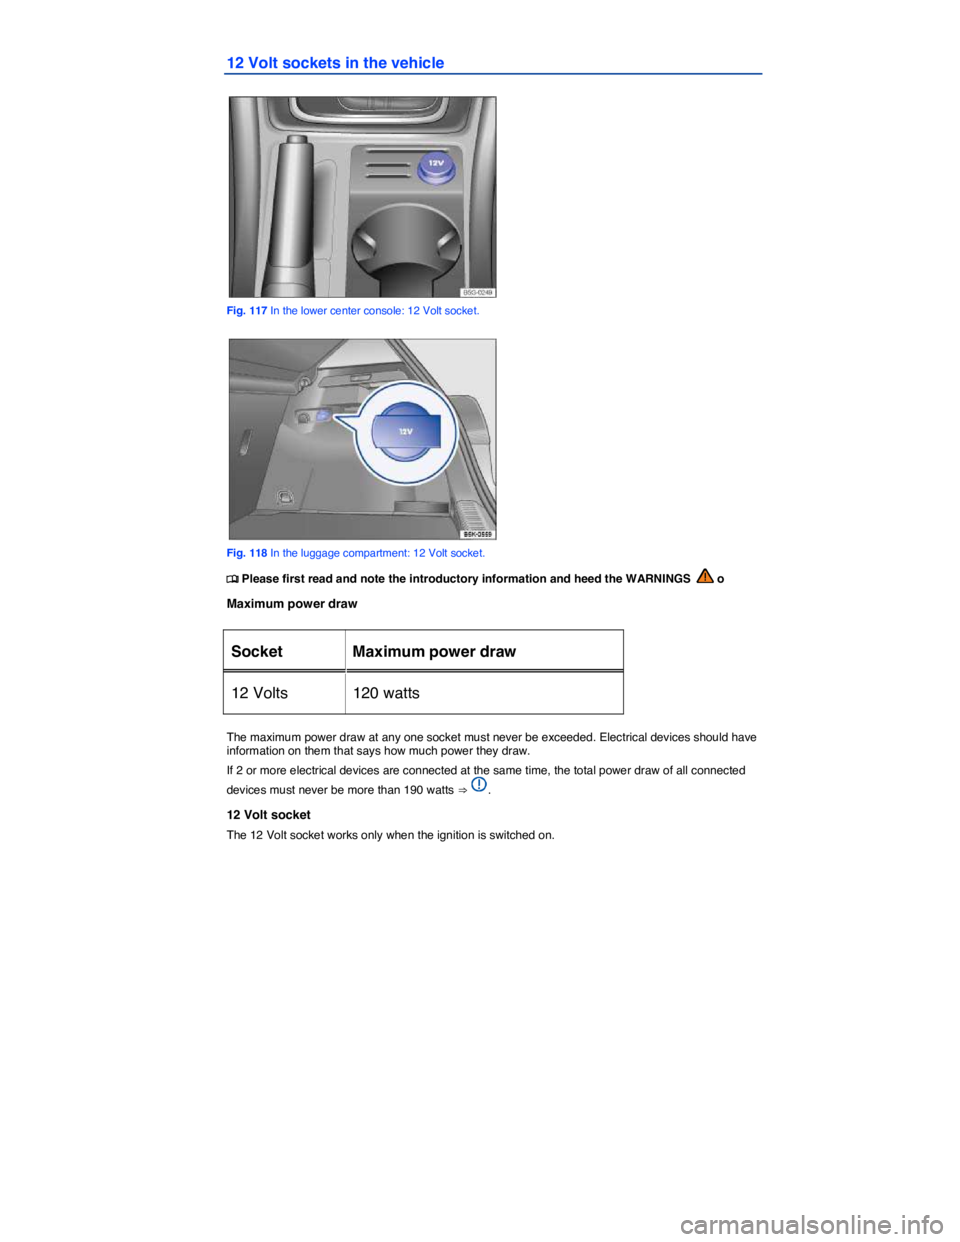
12 Volt sockets in the vehicle
Fig. 117 In the lower center console: 12 Volt socket.
Fig. 118 In the luggage compartment: 12 Volt socket.
�
Page 200 of 394

If the ignition is on but the electric motor is not activated, the vehicle battery will be drained by any device that is plugged in and turned on. For this reason, never use the electrical sockets unless the electric motor is activated.
To help prevent damage from voltage fluctuations, switch off all electrical devices connected to a 12 Volt socket before switching the ignition on or off or starting the electric motor.
The vehicle may have 12 Volt sockets at the following places:
�x In the lower center console ⇒ fig. 117.
�x In the luggage compartment ⇒ fig. 118.
�x In the front center armrest storage compartment ⇒ Storage compartment in the front center arm-rest.
NOTICE
�x Follow the manufacturer's instructions for connected devices!
�x Never exceed the maximum power consumption, or the entire vehicle electrical system may be damaged.
�x 12 Volt socket:
– Only use equipment that has been tested for electromagnetic compatibility and complies with applicable guidelines.
– Never feed current into the socket, with a solar panel, for example.
Unshielded devices may interfere with radio reception or the vehicle's electrical system.
Page 206 of 394

�x The charging port (B)
�x Covers on components of the high-voltage system (B)
Power output of the electric motor
The maximum torque of the electric motor is available as soon as you press the accelerator pedal ⇒
.
As the charge level of the high-voltage battery increases, the recuperation and thus also the electric motor braking effect will decrease when the vehicle is braked and when the vehicle rolls in overrun mode or drives downhill. No brake energy recuperation occurs and therefore no electric motor braking
effect is available once the high-voltage battery is fully charged ⇒ .
DANGER
High-voltage systems in the electric motor compartment and in other places on the vehicle can cause electrical shocks or even electrocution, severe burns, other serious injuries, and even death!
�x Touching damaged orange high-voltage cables, the high-voltage battery or other parts of the high-voltage electrical system can cause fatal electric shock.
�x The high-voltage system may also be active even when the ignition is switched off!
�x Electrolyte fluid in the high-voltage battery will cause severe chemical burns. If electrolyte fluid contacts skin, thoroughly flush affected area with clean water for at least 15 minutes and then wash affected area with soap and water; medical attention is recommended.
�x Any work on the high-voltage system, or on systems which could be directly or indirectly affected by it, must only be carried out by properly trained and qualified experts.
WARNING
Rapid acceleration can cause loss of traction and skidding, particularly on slippery roads. This can cause you to lose control of the vehicle, which can lead to accidents and serious injuries.
�x Always adjust your driving style in accordance with the flow of traffic.
�x Only use the kickdown or fast acceleration if visibility, weather, road and traffic conditions permit, and other road users are not put at risk due to the acceleration and the driving style.
WARNING
Medium, high and very high recuperation can lead to loss of traction and skidding, particular-ly on slippery roads. This can cause you to lose control of the vehicle, which can lead to accidents and serious injuries.
�x Only use medium, high or very high recuperation if visibility, weather, road and traffic conditions permit, and other road users are not put at risk due to the vehicle's acceleration and your driving style.
WARNING
The higher the charge level of the high-voltage battery, the lower the electric motor braking effect, to the point where no electric motor braking effect may be generated at all.
�x Reduce your speed before driving down a long, steep gradient.
�x When driving down a long, steep gradient, slow the vehicle using the vehicle brake.