handbrake VOLKSWAGEN GOLF 1993 1H / 3.G Owners Manual
[x] Cancel search | Manufacturer: VOLKSWAGEN, Model Year: 1993, Model line: GOLF, Model: VOLKSWAGEN GOLF 1993 1H / 3.GPages: 156, PDF Size: 6.36 MB
Page 7 of 156
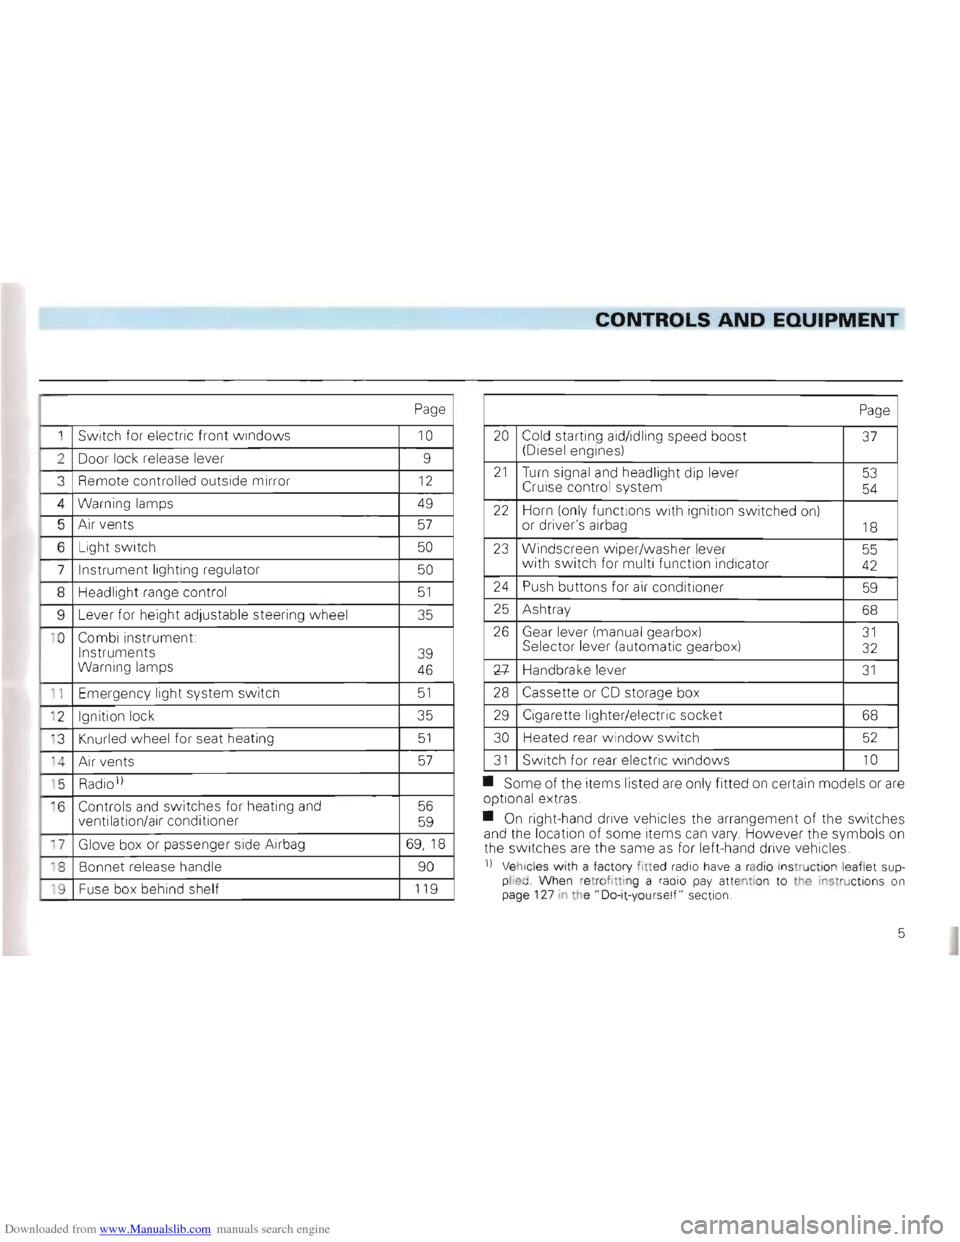
Downloaded from www.Manualslib.com manuals search engine __CONTROLS AND EQUIPMENT
Page
1 Switch for electric front windows 10
2 Door lock release lever 9
3
Remote controlled outside mirror 12
4 Warning lamps 49
5 Air vents 57
6 Light switch 50
7 Instrument lighting regulator 50
8 Headlig ht range control 51
9 Lever for heig ht adjustable steeri ng w heel 35
1 0
Combi instrument:
Instruments
Warning lamps
39
46
1 1 Emer gency light system switch 51
' 2 Ignition lock 35
' 3
Knurled wheel for seat heating 51
'4 A ir ve nts 57
' 5 Radio 1)
·6 Controls and switches for heating and
ventilation/air conditioner 56
59
17 Glove box or passenger side Airbag 69,1 8
18 Bonnet release handle 90
'9 Fuse box behind shelf 119
Page
20 Cold starting aid/idling speed boost (Diesel engines) 37
21 Turn signal and headlight dip lever
Cruise control system 53
54
22 Horn (on ly functions with ign ition switched on)
or driver's airbag 18
23 Windscreen w iper/washer lever
w ith switch for multi function indica tor 55 42
24 Push buttons for air conditi oner 59
25 Ash tray 68
26 Gear lever (manua l ge arbox) Sel ector lever (automa tic gea rbox) 31 32
Xl-Handbrake leve r 31
28 Cassette or CD storage box
29 Cigarette lighter/elec tric soc ket 68
30
Heated rear windo w switch 52
31 Switch for rear electric w indows 10
• Some of the items listed are only fitted on certain models or are op tional extras .
• On right-hand drive vehicles the
arrangement of the switches
and the location of some items can vary. However the symbo ls on
th e switc hes are the same as for left-hand drive vehic les.
n Vehicl es with a facto ry fitted radio have a rad io ins truction le aflet supplied Whe n re trof ittin g a radio pay atte ntion to the instructions on
page 127 in the" Do-it-yours elf " sect ion.
5
Page 33 of 156
Downloaded from www.Manualslib.com manuals search engine CONTROLS AND EaUIPMENT ------------------------------~---
Pedals
- _ movement of the peda ls must never be ~S ncted .
::-thIs reason, do not put articles in the '00 well which cou ld roll or slide under
- 3ath th e pedals.
-
he case of defects on the brake sys
'em, a greater pedal travel may be necessa , t should always be possib le to depress
- "'e clut ch and acce le rator pedals fully.
All peda ls must be able to return , unh in-Jere d, to their rest positions. .
= o r these reasons, the only foot mats which e 'Y'\ay be used are those which leave the
ed al area compl ete ly free and which are pre ve nted from slipping .
'11
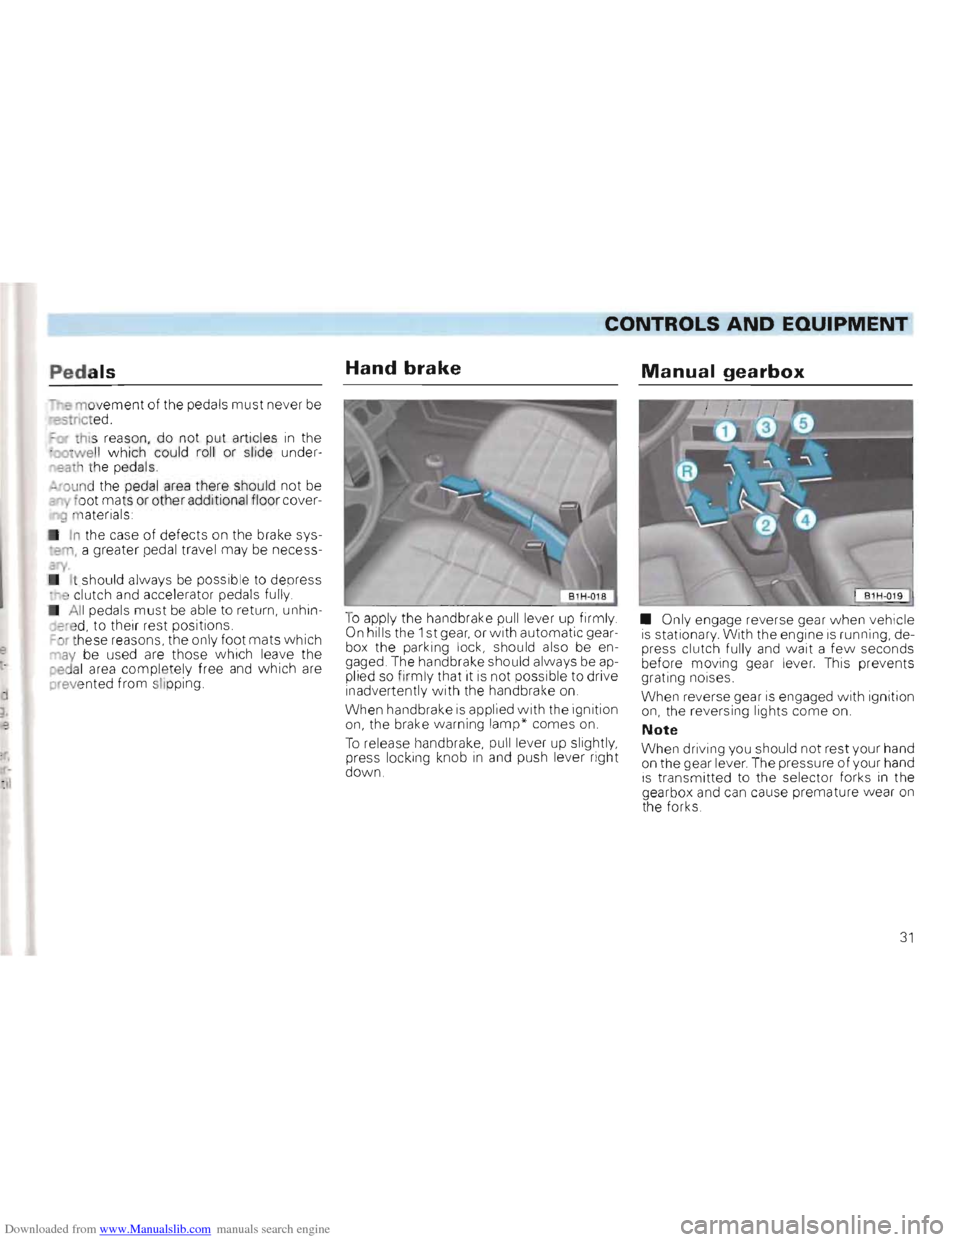
Hand brake
To apply the handbrake pull lever up firmly . On hills th e 1 st gear, or with automatic gear
box the parking lock, sho uld also be en
gaged. The handbrake should a lways be applied so firmly that it is not possible to drive inadve rtentl y with the handbrake on.
W h
en handbrake is applied with the ignition on, the brake warning lam p* comes on.
To release handbrake, pu ll lev er up slightly ,
press locking knob in and push lever right
do w n.
Manual gearbox
• Only engage reverse gear when vehicle is st ationary With the engin e is running, de
press clutch fully and wait a fe w seconds before mo ving gear lever. ThiS prevents
g rating noises .
When
rev erse gear is engaged with ignition on , the reversing lights come on.
Note
When driving you shou ld not rest your hand
on th e gear lever . The pressure of your hand is transmitted to the selector forks In the
gearb ox and can cause premature wear on the forks .
31
Page 38 of 156
Downloaded from www.Manualslib.com manuals search engine CONTROLS AND EQUIPMEN-=-T-=------___
Starting the engine
General hints
Attention When starting the engine in confined spaces there is a danger of poisoning.
• Before starting, move gear lever to neu·
tral (with automatic gearbox: Selector lever in "P" or"N" position) and apply handbrake fi rmly
•
On vehicles with a manual gearbox de
press the clutch pedal when operating
starter
so that starter only has to turn en
gine .
• As soon
as engine starts, release the
ignition key so that starter can dise ngage .
• After starting a co
ld engine It may sound
noisy for a moment or two because the 011 pressure has to build up in the hydraulic
tappets first. This is normal and no cause for
alarm .
~Do not warm engine up by run~ning it with vehicle stationary. Drive off straight away.
Do not overrev or use full throttle until the
engine has reached the normal operating
temperature .
• On vehicles with a catalytic converter the engine must not be started by towing the vehicle in ex· cess of 50 m. Otherwise unburnt fuel can pass into the converter and lead to damage.
• Before trying to start engine by towing, the battery from another ve· hicle should be used for starting if possible -see page 128.
Petrol engines
These engines are equipped with a petrol in
jection system that automat ically supp lies
the correct fuel/air mixture at all ambient
temperatures.
When engine
is cold or at operating temperature do not accelerate before or
during the starting procedure.
I f the engin e does not start at once, stop
us ing th e starter after 10 secs. wait about
half a m in ute and then try again.
If the engine sti
ll does not start, the electric
fuel pump fuse may have blown -see page
119 .
When the engine
is very hot it may be
neces sary to accelerate slightl y after the
engine has start
ed.
/
36
Page 50 of 156
Downloaded from www.Manualslib.com manuals search engine CONTROLS AND EQUIPMENT
5 -Brake system
(CD)
The warning lamp* co mes on when
• the handb rake is
on • the brake fluid level is too low The ignition must be switched on.
Attention
If the lamp does not go out when handbrake is released or comes on when driving, the fluid level in the reservoir is too low. Immedi
ately contact a Volkswagen dealer and have the brake system
examined.
You can drive on carefully to the
nearest Volkswagen dealer but allow for higher pedal pressures and longer braking distances on
the way.
I6 -Brake pad wear I,'0',
indicator*
The wa rning lamp lights up for one second when the ignition is switched on as a func
tiona l check.
If the lamp then does not go out or it lights
up dur ing the Journey , the front brake pads
are worn. You should visit a Volkswagen
dealer to have the brake pads checked.
As the brake pad wea r indicator only moni
t ors the front brake pads, we recommend
that you have the rear brake linings checked as well.
7 -Turn signals
The warn ing lamp flashe s when turn signals are sWitched on. If a turn signal fails, the
warning lamp flashes tw ice as fast. (Not
w hen towing a trailer )
Fur ther details are given
on pages 49 and 53.
8 -Main beam
The warning lamp come s on when th e main
beam is on or when the headligh t flas her is used.
48
Page 93 of 156
Downloaded from www.Manualslib.com manuals search engine GENERAL MAINTE NA NCE
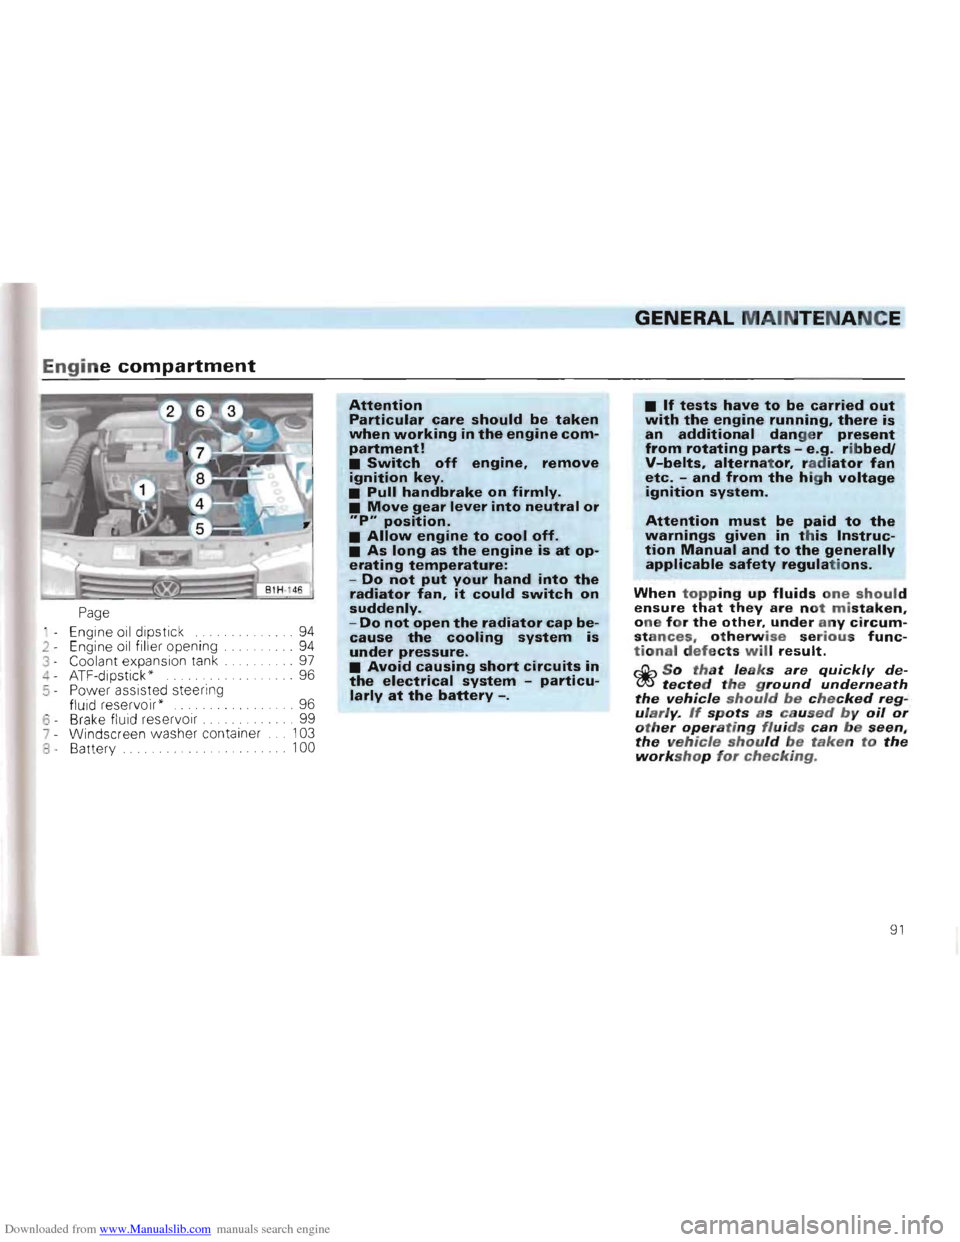
Engine c ompartmen t
Page
Engine oil dip sti ck . . 94
2 - Eng ine o
il filler openi ng ... ...... . 94
3 - Coolant exp ansion ta nk .. 97
4 -ATF-dip sti ck " . . . . . . . . . . . .. . 96
5 - Power assist ed steering flu id r eservoir '
6 Brak e fl uid re se rvo ir .
7 - Wi nd sc reen w ash er c on tainer
8 Battery .
Attention
Particular care should be taken
when working in the engine com
partment!
• Switch off engine. remove ignition key_
•
Pull handbrake on firmly.
• Move gear lever into neutral or
"P" position.
• Allow engine to cool off.
• As long as the engine is at op
erating temperature:
-Do not put your hand into the
radiator fan. it could switch on
suddenly.
-Do not open the radiator cap be
cause the cooling system is
under pressure.
• Avoid causing short circuits in
the electrical system -particu
larly at the battery -.
. .. 96
. .. 99
10 3
100
• If tests have to be ca rried o ut with the engine running. there is an additional dang e r present from rotating parts - e.g . ribbedl V-belts, alternator, ra d iator fan etc. -and fro m the high voltage ignition system.
Attention m ust be paid to the w arn ings given in this Instruction Manual and to the generally ap plicable safety regulations.
When topp ing up fluids one should ensure that they are not mistaken. one for the other, under any circum stances. otherwise serious fu nctional defects will result.
rJjh So that leaks are quickly de(!J!J tected the ground underneath the vehicle should be checked regularly. If spots as caused by oil or other operating fluids can be seen, the vehicle should be taken to the workshop for checking.
91
Page 98 of 156
Downloaded from www.Manualslib.com manuals search engine GENERAL MAINTENANCE
Automatic transmission fluid (ATF)*
The ATF' ) level must however be
checked between the interva ls given in the
Service Schedule. To do this the vehicle
must be standing on a level surface. The level must only be checked when the ATF is warm ( approximate ly 10 km afte r starting
from cold the ATF will reach the required
temperature). If ATF is cold or too hot the
reading w ill be incorrect.
The engine must be running at idling speed,
the handbrake must be appl ied and the se
lector lever at "N ".
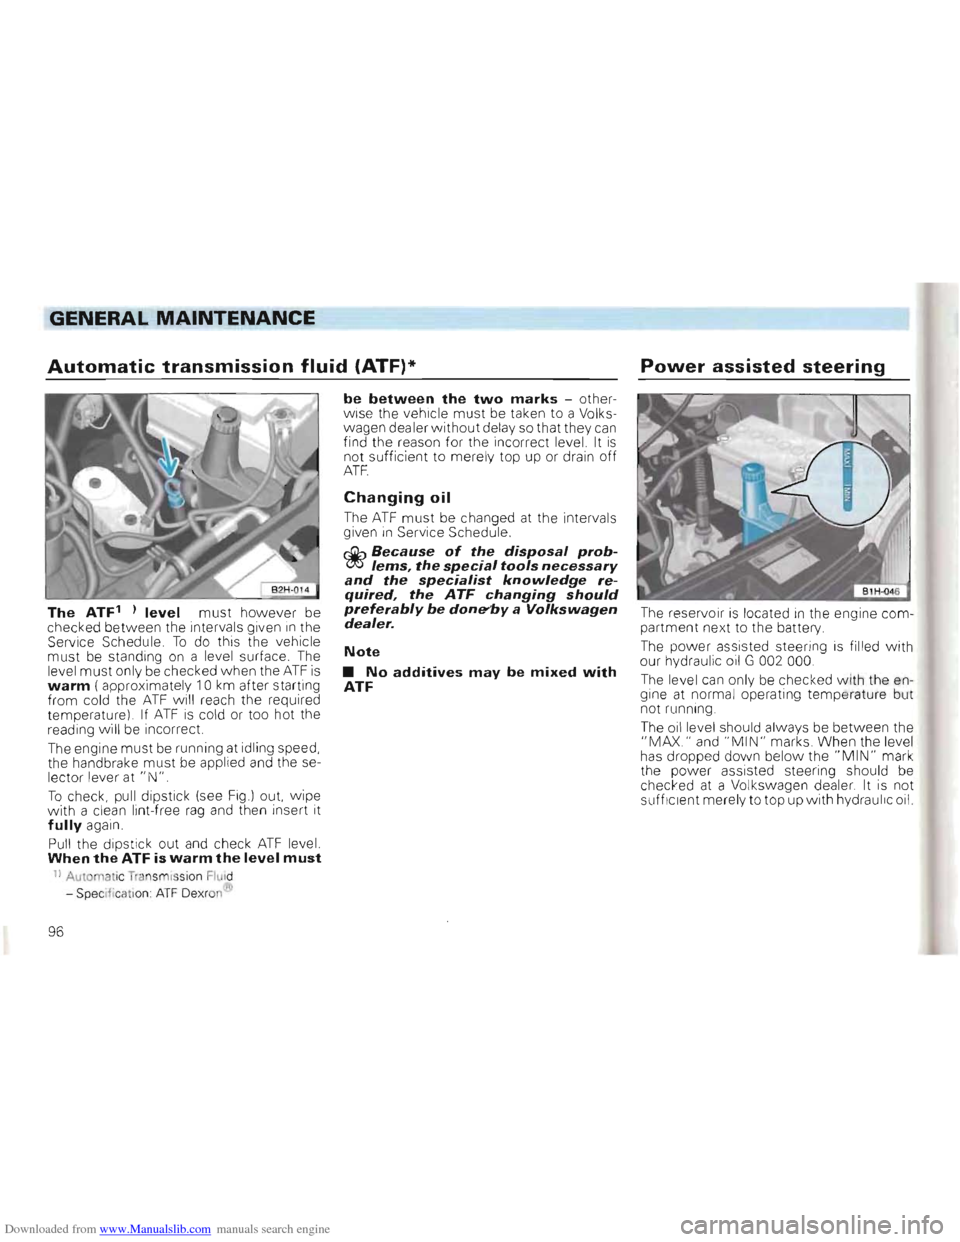
To check, pull dipstick (see Fig .) out. wipe
w ith a clea n lint -free rag and then insert it fully again.
Pull the dipstick out and check ATF level. When the ATF is warm the level must
11 Automat ic Transm is sion Fluid
- Spe cif ic ati on ATF Dexr on®
be between the two marks -other
w ise the vehicle must be taken to a Volks
wagen dealer without delay so that they can find the reason for the incorrect level. It is not sufficient to merely top up or drain off ATF.
Changing oil
The ATF must be changed at the intervals
given in Service Schedule .
r£il:-, Because of the disposal prob~lems, the special tools necessary and the specialist knowledge required, the ATF changing should preferably be donfY'by a Volkswagen dealer.
Note
• No additives may be mixed with ATF
Power assisted steering
The reservoir is located in the engine com
partment nex t to the battery.
The power assisted steering is fil led with
our hydraulic oil G 002 000.
The leve l can only be checked With the en
gine at normal operating temperature but
not running .
The oil level should always be between the
"MAX." and "MIN" m arks. When the leve l
has dropped down below the "MIN" mark
the power assisted steering should be
ched:ed at a Volkswagen dealer. It is not
suff iCient merely to top up with hy draulic oil.
96
Page 118 of 156
Downloaded from www.Manualslib.com manuals search engine DO-lT-YOURSELF
Changing wheels
Park the vehicle as far as possible away
from the traffic flow. If necessary switch on
emergency warning lights
and place the
warning triangle in position -note legal reQuirements,
• A
ll veh icles occupa nts shou ld leave the
vehicle and move to a safe area (e,g, behind
the barrier),
• App ly handbrake firml
y, If the car is on a
slope, block one of the wheels on the oppo
site side with a stone or some similar ob
ject.
•
Take too ls and spare wheel out of lug
gage compartment.
• Remove wheel bolt caps:
- Remove wheel bolt caps
with hook (from
vehicle tools),
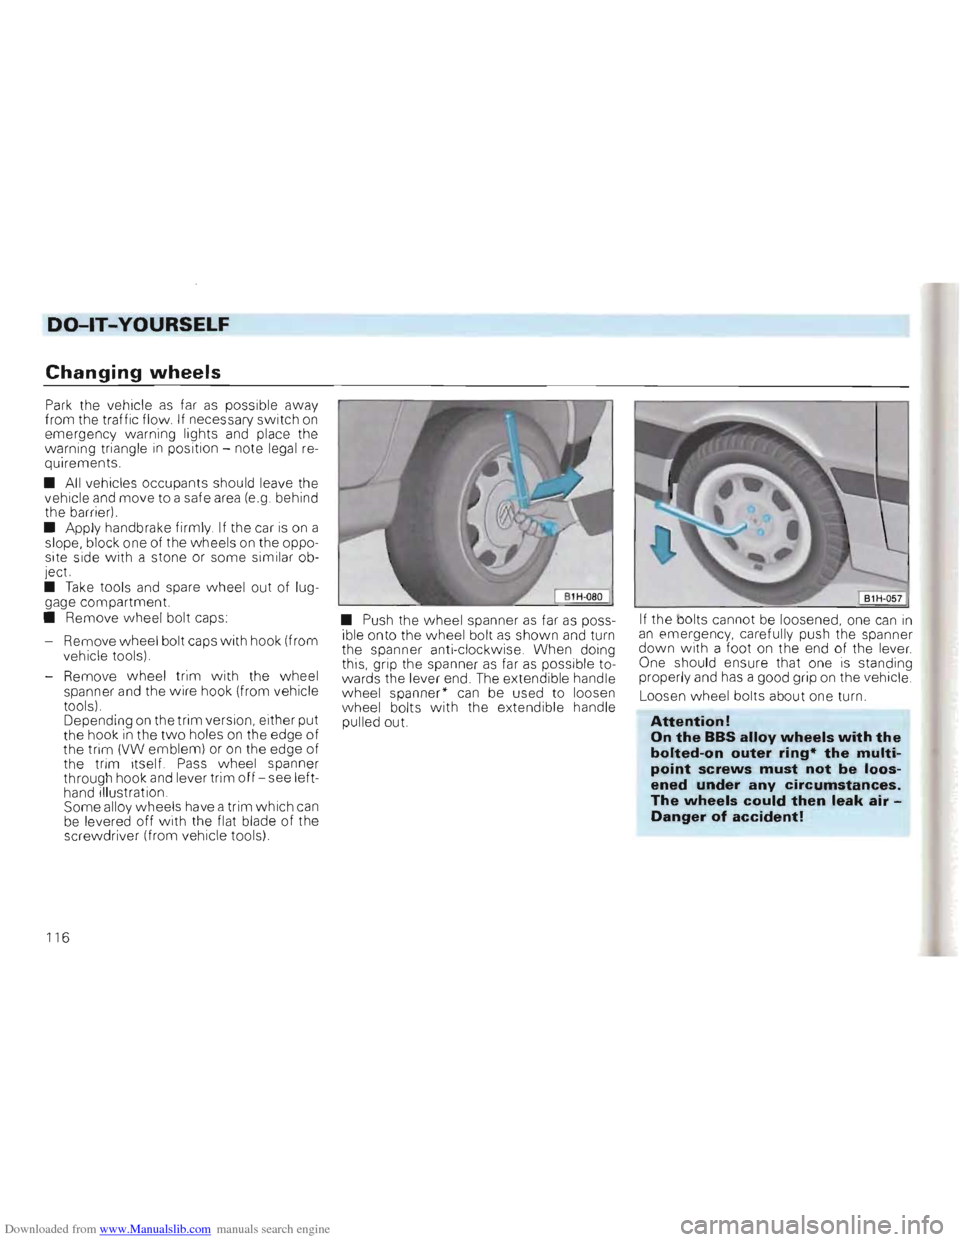
- Remove wheel trim with the
wheel
spanner and the wire hook (from vehicle
tools) ,
Depending
on the trim version , either put
the hook in the two holes on the edge of the trim (VW emblem) or on the edge of
the trim itself, Pass wheel spanner
through hook and lever trim off -see left
hand illustration ,
Some alloy wheels have a trim which can be levered off with the flat blade of the
screwdriver (from vehicle tools) •
Push the wheel spanner
as far as poss
ible onto the wheel bolt as shown and turn
the spanner anti-clockwise, When doing
this, grip the spanner
as far as possib le to
wards the lever end, The extend ib le handle
wheel spanner"
can be used to loosen wheel bolts with the extendible handle
pulled out. If
the bolts cannot be loosened, one can
in an emergency, carefully push the spanner down wi th a foot on the end of the lever.
One should ensure that one is standing
proper ly and has a good grip on the vehic le ,
Loosen
wheel bolts about one turn,
Attention!
On the BBS alloy wheels with the
bolted-on outer ring· the multi
point screws must not be loos
ened under any circumstances.
The wheels could then leak air Danger of accident!
116