ignition VOLKSWAGEN GOLF 2011 Owner´s Manual
[x] Cancel search | Manufacturer: VOLKSWAGEN, Model Year: 2011, Model line: GOLF, Model: VOLKSWAGEN GOLF 2011Pages: 138, PDF Size: 49.24 MB
Page 36 of 138
Downloaded from www.Manualslib.com manuals search engine Central locking system
c:DJ Introduction
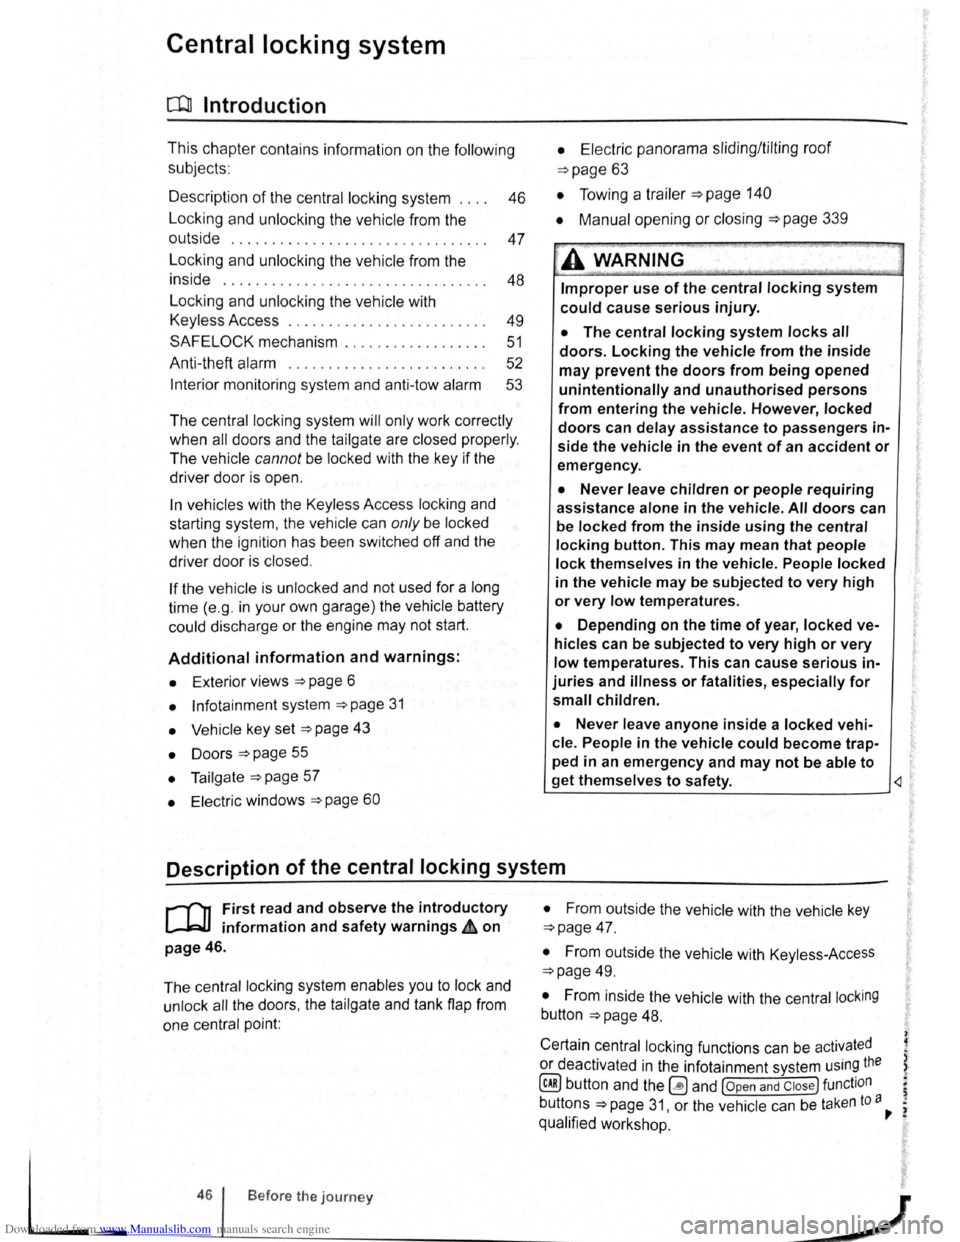
This chapter contains information on the following
subjects:
Description
of the central locking system 46
Locking and unlocking the vehicle from the
outside . . . . . . . . . . . . . . . . . . . . . . . . . . . . . . . .
47
Locking and unlocking the vehicle from the
inside . . . . . . . . . . . . . . . . . . . . . . . . . . . . . . . . .
48
Locking and unlocking the vehicle with
Keyless Access . . . . . . . . . . . . . . . . . . . . . . . . . 49
SAFELOCK mechanism . . . . . . . . . . . . . . . . . . 51
Anti-theft alarm . . . . . . . . . . . . . . . . . . . . . . . . . 52
Interior monitoring system and anti-tow alarm 53
The central locking system
will only work correctly
when all doors and the tailgate are closed properly.
The
vehicle cannot be locked with the key if the
driver door is open .
In vehicles with the Keyless Access locking and
starting system, the
veh icle can only be locked
when the ignition has been switched
off and the
driver door is closed .
If the vehicle is unlocked and not used for a long
time (e.g. in your own garage) the
vehicle battery
could discharge
or the engine may not start.
Additional information and warnings:
• Exterior views ~page 6
• lnfotainment system ~page 31
• Vehicle key set ~page 43
• Doors ~page 55
• Tailgate ~page 57
• Electric windows ~page 60 •
Electric
panorama sliding/tilting roof
~page 63
• Towing a trailer ~page 140
•
Manual opening or closing ~page 339
A WARNING
Improper use of the central locking system
could cause serious injury.
• The central locking system locks all
doors. Locking the vehicle from the inside
may prevent the doors from being opened
unintentionally and unauthorised persons
from entering the vehicle . However, locked
doors can delay assistance to passengers in
side the vehicle in the event of an accident or
emergency.
• Never leave children or people requiring
assistance alone in the vehicle. All doors can
be
locked from the inside using the central
locking button. This may mean that people
lock themselves in the vehicle. People locked
in the vehicle may be subjected to very high
or very low temperatures.
• Depending on the time of year, locked ve
hicles can be subjected to very high or very
low temperatures. This can cause serious in
juries and illness or fatalities, especially for
small children.
• Never leave anyone inside a locked vehi
cle. People in the vehicle could become trap
ped in an emergency and may not be able to
get themselves to safety.
Description of the central locking system
r-('n First read and observe the introductory
L-Jr=JJ information and safety warnings & on
page 46.
The central locking system enables you to lock and
unlock
all the doors, the tailgate and tank flap from
one central point:
• From outside the vehi cle with the vehicle key
~page 47.
• From outside the vehicle with Keyless-Access
~page 49.
• From inside the vehicle with the central locking
button ~page 48.
Certain central locking functions can be activated
or deactivated in the infotainm ent system using the
@ill button and the~ and (Open and Clos e) function
buttons =>page 31, or the vehicle can be taken to a~
qualifi ed work shop .
--~--------------------~~
Page 41 of 138
Downloaded from www.Manualslib.com manuals search engine -
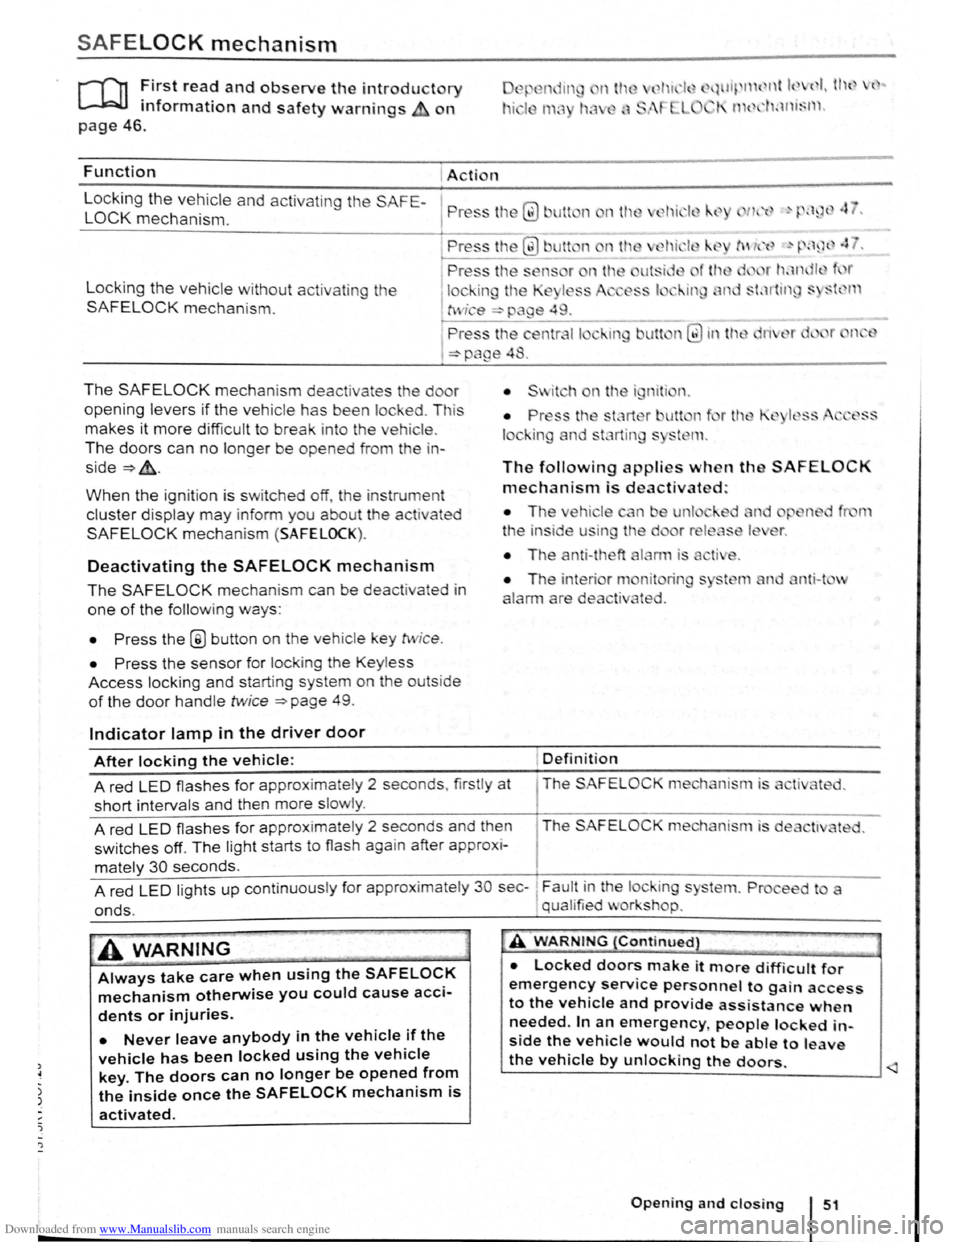
SAFELOCK mechanism
ro ~irst rea? and observe the introductory
mformat1on and safety warnings on
~.wl~ 11 { nt k ( I I tl l { ..
I' 1 t 1'klnt~l l .
page 46.
Function Action
L
ocking the vehicle and activating the SAFE-
LOCK mechanism. P ress tl1 Q) Jlt n nth
Locking the vehicle without activat in g the
SAFELOCK mechanis m .
The SAFELOCK mechanis m deactivates the do r
opening levers if the v e hic le has been lock ed . Th is
makes it more d ifficult to break in to the vehicle .
The doors can no longer be opened from th e in
side~&..
When the ignition is switched off, th e instrum ent
cluster display may inform you about t he activated
SAFELOCK mechani sm (SAFELOCK).
Deactivating the SAFELOCK mechanism
The SAFELOCK mechanis m can be deactivated in
one of the following ways:
• Press the @ button on the veh icle key twic e .
• Press the sensor fo r lock ing the Keyless
Access locking and s tarting system on the outs ide
of the door handle twice ~page 49.
Indicator lamp in the driver door
The following applies when th SAFELOCK
mechanism is deactivated:
• The ehi le n e unl
t
he in side u in the d
• The anti-theft
nit rin
ted .
nti-t v
After locking the vehicle: Definition
A red LED flash es for approximately 2 seconds , firstly at The SAFELOC
short intervals and then more slowly .
A red
LED flashes for approximate ly 2 seconds and then The SAFELOCK me hanism is de
switches off. The light starts to flash again after approx i-
mately 30 seconds.
A red
LED lights up cont inuous ly for approx imate ly 30 sec-~ Fault in the lock ing s
onds. , qual ified v or shop.
A WARNING
Always take care when using the SAFELOCK
mechanism otherwise you could cause acci
dents or injuries.
• Never leave anybody in the vehicle if the
vehicle has been locked using the vehicle
key. The doors can no longer be opened from
the inside once the SAFELOCK mechanism is
activated.
A WARNING {Continued}
• Locked doors make it more difficult for
emergency service personnel to gain access
to the vehicle and provide assistance when
needed. In an emergency people locked in
side the vehicle would not be able to leave
the vehicle by unlocking the doors.
Page 42 of 138
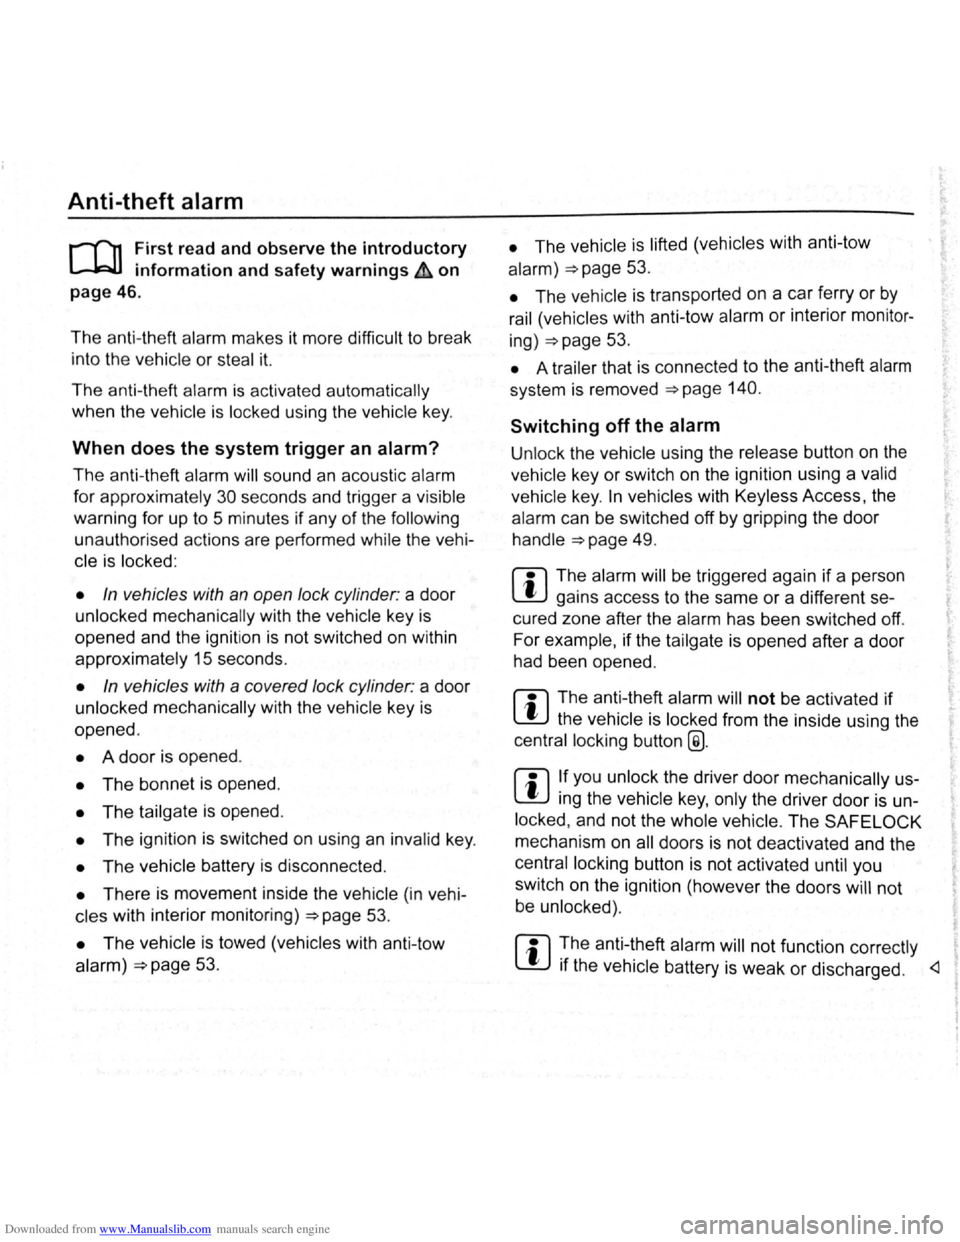
Downloaded from www.Manualslib.com manuals search engine Anti-theft alarm
r-f'n First read and observe the introductory
L-.bll information and safety warnings&. on
page 46.
The anti-th eft ala rm make s it more difficult to break
into the ve hi cle or steal it.
The anti-theft alarm is activated automatically
when the vehicle is locked using the vehicle key.
When does the system trigger an alarm?
The anti-theft alarm will sound an acoustic alarm
for approximately
30 seconds and trigger a visible
warning for up to 5 minutes if any of the following
unauthorised actions are pe rformed while the ve hi
cle is locked :
• In vehicles with an open lock cylinder : a door
unlocked mechanically with the vehicle key is
opened and the ignition is not switched on within
approximately 15 seconds.
• In vehicles with a covered lock cylinder : a door
unlocked mechanically with the vehicle key is
opened .
• A door is opened .
• The bonnet is opened.
• The tailgate is opened.
• The ignition is switched on using an inval id key .
• The vehicle battery is disconnected.
• There is movement inside the vehicle (in vehi
cles with interior monitoring)
~page 53.
• The vehicle is towed (vehicles with anti-tow
alarm)~ page 53.
• The vehicle is lifted (vehicles with anti-tow
alarm)~ page 53.
• The vehicle is transported on a car ferry or by
rail (vehicles with anti-tow alarm or interior moni tor
ing)~ page 53.
• A trai ler that is connected to the anti- theft alarm
system is removed ~page 140.
Switching off the alarm
Unlock the vehicle using the release button on the
vehicle key or switch on the ignition using a valid
vehicle key.
In vehicles with Keyless Acc ess , the
alarm can be switched off by
gripp ing the door
handle
~page 49.
r::l The alarm will be triggered again if a person
L!J gains access to the same or a differen t se
cured zone after the alarm has been
switched off .
For example , if the tailgate is opened after a door
had been opened .
r::l The anti-theft alarm will not be activated if
l!J the vehicle is locked from the inside using the
central locking button
@.
r::l If you unlock the driver door mechanically us
L!J ing the vehicle key, only the driver door is un
locked , and not the whole vehicle . The
SAFELOCK
mechanism on all doors is not deactivated and the
central locking button is not activated until you
switch on the ignit ion (however the doors
will not
be unlocked) .
r::l !he anti-~heft alarm will not function correctly
L!J 1f the veh1cle battery is weak or discharged .
Page 43 of 138
Downloaded from www.Manualslib.com manuals search engine Interior monitoring system and anti-tow alarm
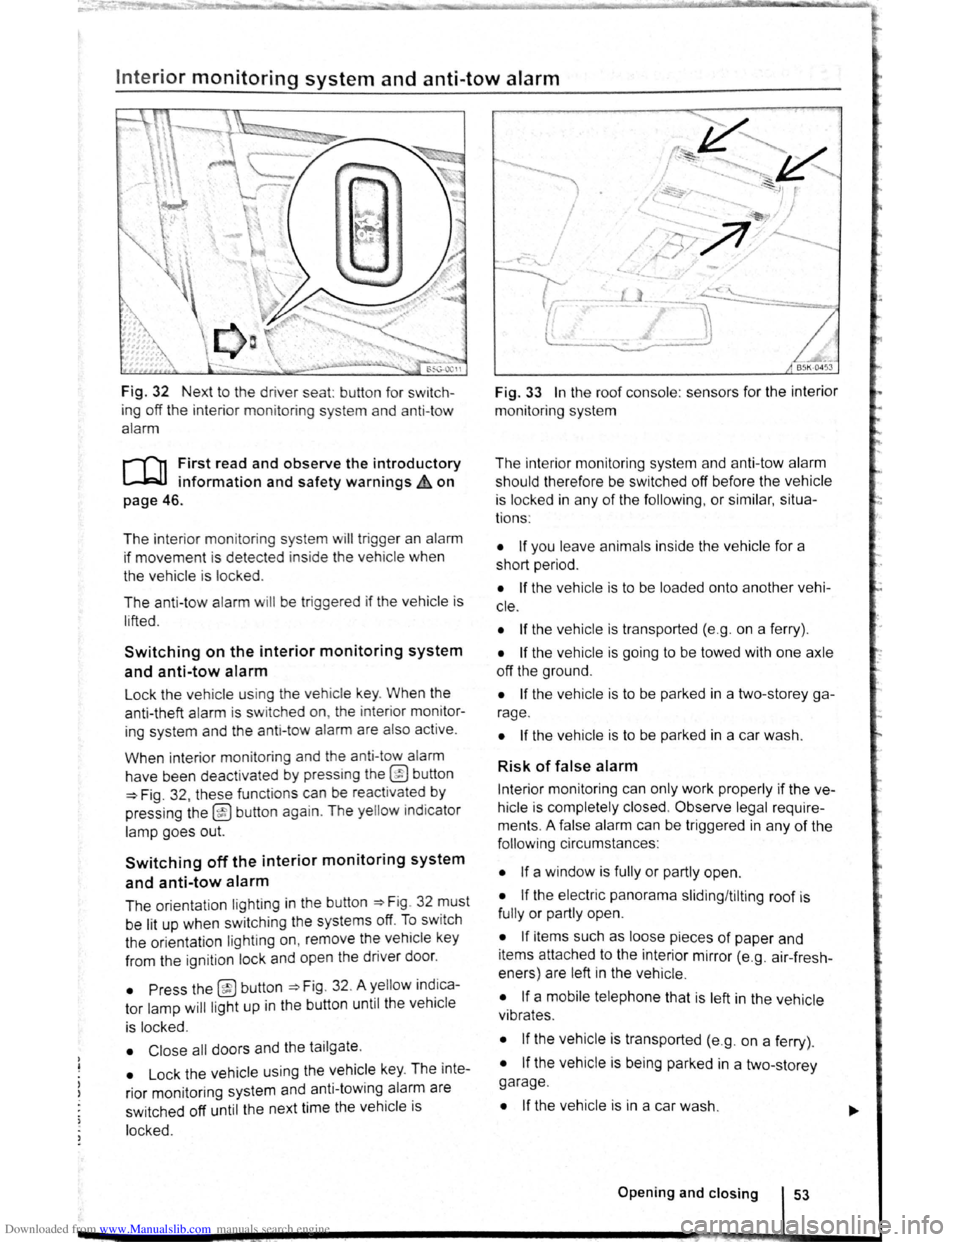
Fig. 32 Next to the driver seat: button for switch
ing off the interior moni
toring system and anti-tow
alarm
r-T'n First read and observe the introductory
L-l=JJ information and safety warnings Lh on
page 46.
The interior monitoring system will trigge r an alarm
if movement is dete cted inside the vehicle when
the vehicle is locked .
The anti-tow alarm
will be trig gered if the vehicle is
l ifted .
Switching on the interior monitoring system
and anti-tow alarm
Lock the vehicle using th e veh icle key . When the
anti-theft alarm is sw itched on, the inter ior monitor
ing system and th e anti-tow alarm are also active .
When interior monitoring and the anti-tow alarm
have been deactivated
by press ing the @ button
=>Fig . 32 , these functions can be reactivated by
pressing the
@ button again . The yellow indicator
lamp goe s out.
Switching off the interior monitoring system
and anti-tow alarm
The orientation lighting in the button ~Fig. 32 must
be lit up when swit ching the systems off.
To sw itch
the orientation lighting
on , remove the vehicle key
from the ignition lock and open the driver door.
• Press the @button =>Fig. 32. A yellow indica
tor lamp
will ligh t up in the button until the veh icle
is locked.
• Close all doors and the tailgate .
• Lock the vehicle using the vehicle key. The inte
rior mon itoring system and anti-towing alarm are
sw itched off until the next time the
vehicle is
locked.
~
I
I
Fig. 33 In the roof console : sensors for the interior
monitoring system
The interior monitoring system and anti-tow alarm
should therefore be switched off before the
vehicle
is locked in any of the following , or similar, situa
tions :
• If you leave animals inside the vehicle for a
short period .
• If the vehicle is to be loaded onto another vehi
c le .
• If the vehicle is transported (e.g . on a ferry) .
• If the vehicle is going to be towed with one axle
off the ground .
• If the vehicle is to be parked in a two-storey ga
rage .
• If the vehicle is to be parked in a car wash.
Risk of false alarm
Interior monitoring can only work properly if the ve
hicle is completely closed.
Observe legal require
ments . A false alarm can be triggered in any
of the
foll owi ng circumstances :
• If a window is fully or partly open.
• If the electric panorama sliding/tilting roof is
fully or partly open.
• If items such as loose pieces of paper and
items attached to the interior mirror (e.g . air-fresh
eners) are left in the vehicle .
• If a mobile telephone that is left in the vehicle
vibrates .
• If the vehicle is transported (e.g. on a ferry) .
• If the vehicle is being parked in a two-storey
garage .
• If the vehicle is in a car wash .
Opening and closing 53
Page 46 of 138
Downloaded from www.Manualslib.com manuals search engine Electric windows
Introduction
Thi .h'" t r co nt ins information on the following
'll j· t ":
I' · A WARNING (Continued) ·----""=~·
ning r cl ing the windows elec trically . . 60
• Never leave children or people requiring
assistance alone in the vehicle when the ve
hicle is locked. The windows can no longer
be opened in an emergency.
tric wind ws - functions . . . . . . . . . . . . . . 61
R 1\-b k fun ction f or th e electric windows . . . 61
Additional information and warnings:
• V lk wag n information system ~page 26
• ntr I loc king system :::) page 46
• lnfo tai nm ent system ~page 31
• Always take all vehicle keys with you ev
ery time you leave the vehicle. The windows
can still be operated using the buttons sever
al minutes after the ignition has been switch
ed off, provided that the driver door and front
passenger door are not opened.
A~ WARNING
~-~~------------------·~--------~~~
• When transporting children on the rear
bench seat, the rear electric windows should
always be deactivated using the safety button
so that they cannot be opened or closed.
ltnproper or unsupervised use of the electric
windows can cause serious injuries.
• The electric windows should only be
opened or closed when you are sure that no
body is in their operating area . During sudden rain showers, water can enter
the vehicle interior via open windows and
cause damage
to the vehicle.
Opening or closing the windows electrically
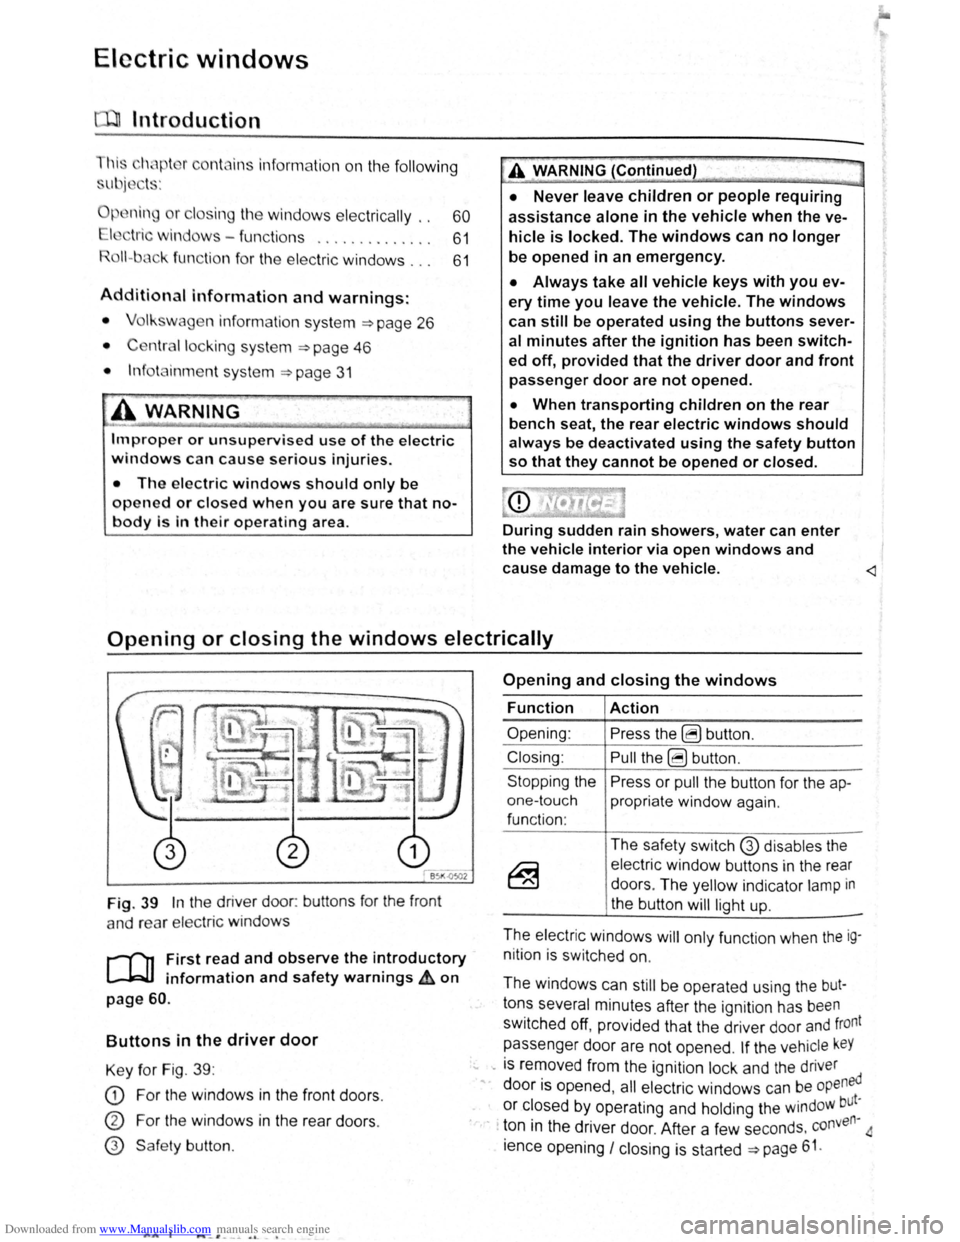
Fig. 39 In the driver door: buttons for the front
a nd rear
elec tric windo ws
r--('n First read and observe the introductory
~ information and safety warnings £ on
page 60.
Buttons in the driver door
Key for Fig. 39 :
CD For the windows in the front doors .
CD For the windows in the rear doors .
@ Safe ty button .
AA l ..._-'. --~ o. -•
Opening and closing the windows
Function
Opening :
Closing:
Stopping the
one-touch
function :
Action
Press the ~ button .
Pull the ~ button .
Press or
pull the button for the ap
propriate window again.
The safety switch
G) disables the
electric window buttons in the rear
doors . The yellow indicator
lamp in
the button
will light up.
-
The electric windows will only function when the ig
nition is switched on.
The windows can
still be operated using the but
tons several minutes after the ignition has been
switched off, provided that the driver door and front
passenger door are not opened .
If the vehicle keY
... -is removed from the ignition lock and the driver
" door is opened , all electric windows can be opened
or closed by operating and holding the windoW but~
· · ton in the driver door. After a few seconds . conven
ience opening
I closing is started ~page 61.
Page 47 of 138
Downloaded from www.Manualslib.com manuals search engine lcctrlc windows-functions
lr .. t r ,nd nd obsorv the Introductory
lnf rmotl n nn d 1 fety warnings~ on
n - t uc h opening ond closing
11 t ur.11 p n ln a n d cl sing mnk s it possib le
t fully p n n
butt on , do n t h v t o e h Id do wn to do this .
r
o n -touch closing: pull th button fo r th e ap
pr prl1 l window up brl fly Into the s co nd posi
tion.
or ono-touch opening: pr ss the bu tto n for the
ppr prl1t wind w down bri fly Into the seco nd
p
s lti n .
Stopping the one-touch function: press or pull
lh
bu tt n f r the appropri te window again.
R
estoring one-touch opening and closing
On - touc h op ning and closing is deac tiv a te d if
th v hi 'I batt ery has been disconnec ted or dis
c h
rg d whil e the wind ow s were not fully closed.
The fun ction will ha ve to be reset.
• Cl s all windows and doors .
• Swi tc h on the ignit ion .
• Pull up the bu tton for the window and hold it in
thi s posi tion for longer than 2 sec onds .
• Let go of the bu tton then pull it up aga in and
ho ld i t in this position . On e-to uch opening and
c los ing is
now ready for operation .
The one -to uch function can be res tored for individ
u
I windows or for several wind ow s a t th e same
tim e.
Convenience opening and closing
The windows ca n be opened and clos ed from out
side
t11e v e hi cle using the vehicle key :
• Press and hold the locking or unlocking button
o n the
ve hi cle k e y. All electr ic windows will be ei
ther opened or closed.
•
To interrupt this function , let go of the locking or
unlo cking button .
During co
nveni ence closing , the windows and the
elec tric panorama sliding/tilting roof close .
A varie ty of setti ngs re lated to window operation
can be made and adjusted using the @) button
and the
G and (open and close ) function buttons
~page 31.
A WARNING
Improper or unsupervised use of the electric
windows can cause serious injuries.
• The electric windows should only be
opened or closed when you are sure that no
body is in their operating area.
• Never leave children or people requiring
assistance alone in the vehicle when the ve
hicle is locked. The windows can no longer
be opened in an emergency.
• Always take all vehicle keys with you ev
ery time you leave the vehicle. The windows
can still be operated using the buttons sever
al minutes after the ignition has been switch
ed off, provided that the driver door and front
passenger door are not opened.
• When transporting children on the rear
bench seat, the rear electric windows should
always be deactivated using the safety button
so that they cannot be opened or closed.
r::l One-touch opening and closing and the roii
L!J back function will not work if there is a fault in
the
electric windows . Proceed to a qualified work-
shop . ~
Roll-back function for the electric windows
r-('n First read and observe the i~troductory
l.-W.I information and safety warnmgs A on
page 60.
The roll -b ac k function for the electric windows can
reduce the risk
of injuri es when the windows are
closing => ,&. If the one- touch closing function for a
wind ow
does not work beca use it is stiff or is being
obs tructe d the
window will autom atically open I
again.
• Check to see why the window has not closed.
• Try to close the window again. ..,..
Opening and closing 61
Page 50 of 138
Downloaded from www.Manualslib.com manuals search engine Electrical controls on the front seats ~~~~~~~~~~~~-----------------------
®
651<-()590
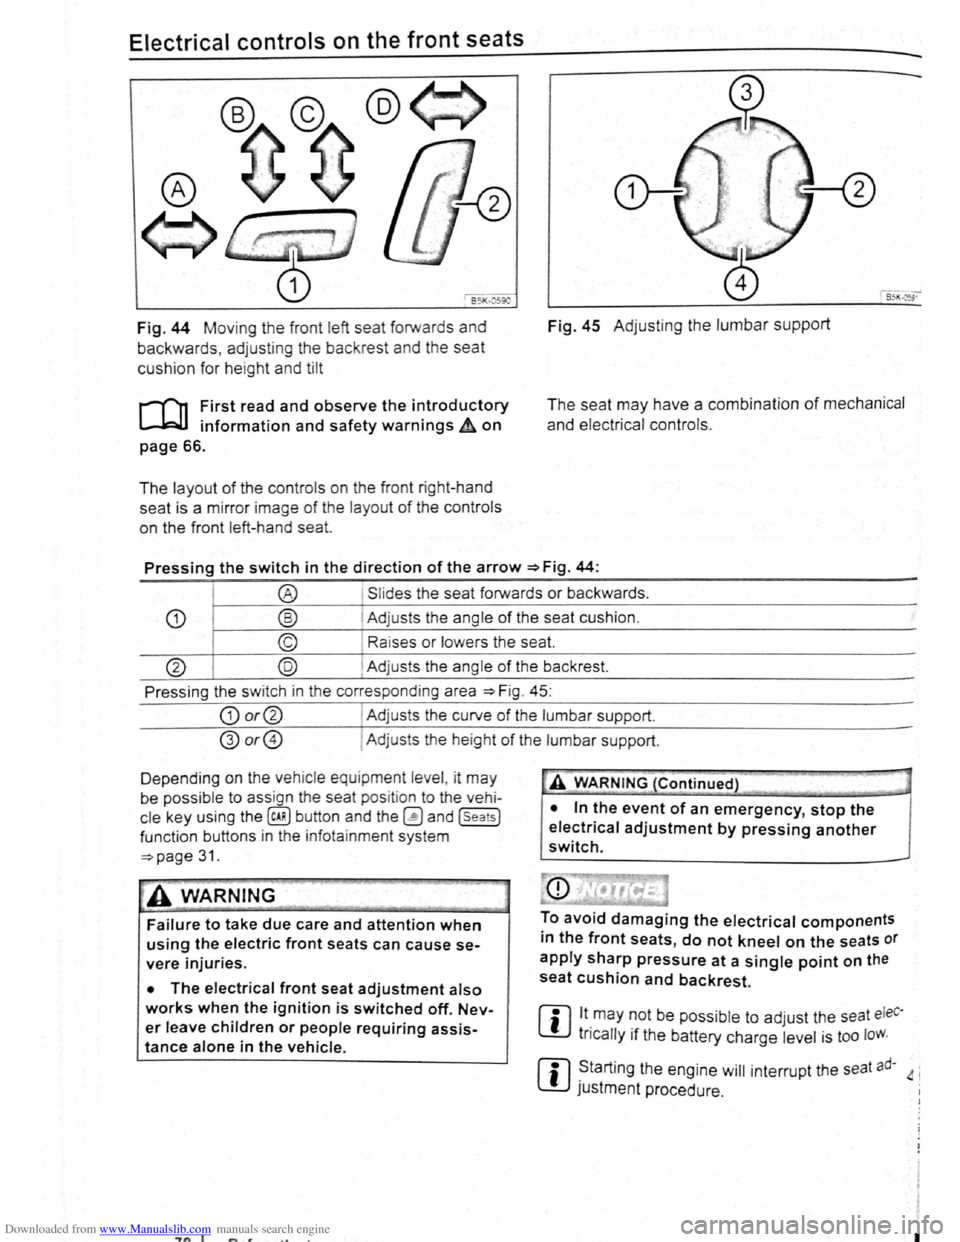
Fig. 44 Moving th e front left seat forwards and
backwards , ad j
usting the backrest and the seat
cushion for hei
ght and tilt
r-('n First read and observe the introductory
L-.lc:J.I information and safety warnings~ on
page 66.
The layout of the contro ls on the front r ight-hand
seat is a m irror image
of the layout of th e contro ls
on the front left-hand sea
t.
Fig. 45 Adju stin g the lumbar support
The seat may have a combination of mechanical
and electrical controls.
Pressing the switch in the direction of the arrow ~Fig. 44:
® Slides the seat forwards or backwards .
CD ® Adjusts the ang le of the seat cushion.
© Raises or lower s the seat.
@ @ Adjust s th e angle of the backrest.
Press ing the s witch in th e corresponding area
~Fig. 45:
CD or@ I Adjusts the curv e of the lumbar support.
@or@ I Ad justs the he ight of the lumbar support .
D epending on the veh ic le equ ipment leve l, it
may
be possib le to ass ign the seat pos it ion to the vehi
cle key using the @ill button and the~ and (seats]
funct ion buttons in the info ta inment system
~page 31.
~A WARNING
Failure to take due care and attention when
using the electric front seats can cause se
vere injuries.
• The electrical front seat adjustment also
works when the ignition is switched off. Nev
er leave children or people requiring assis
tance alone in the vehicle.
~"'A WARNING (Continued} --~ ~ -·-
• In the event of an emergency, stop the
electrical adjustment by pressing another
switch.
To avoid damaging the electrical components
in the front seats, do not kneel on the seats or
apply sharp pressure at a single point on the
seat cushion and backrest.
m lt.may ~Ot be poss ib le to adjust the seat eleC·
W tncally 1f the battery charge level is too loW.
m ~tarting the engine will interrupt the seat ad· 4 i
W JUStment procedure .
"7n I I
Page 55 of 138
Downloaded from www.Manualslib.com manuals search engine Seat functions
[ Introduction
1 hi · chnptor contnins inforrnntion o n th e follo wing
sub wrts :
'" t dt ll 'nting . . . . . . . . . . . . . . . . . . . . . . . . . . . 75
8dl.k nm~S<. g fun ction . . . . . . . . . . . . . . . . . . . 76
F lldm .. th front Pt ~seng r s n t bac kres t
ft.)rWflrd.. . . . . . . . . . . . . . . . . . . . . . . . . . . . . . . . 77
Additiona l inforn1ation and warnings:
• Adjus ting the s t1t po sitio n ;;. page 66
• S at b Its -:-pag e 79
• Airbrtg sys te m => pag e 88
• Child s ts (accessories ) ::::>page 97
• Ex t rior mirr ors =-> pflge 1 22
• Arr condi tio ning ->page 256
Seat heating
c.:.:..J L.:..J L..:..l
BAJ -0013
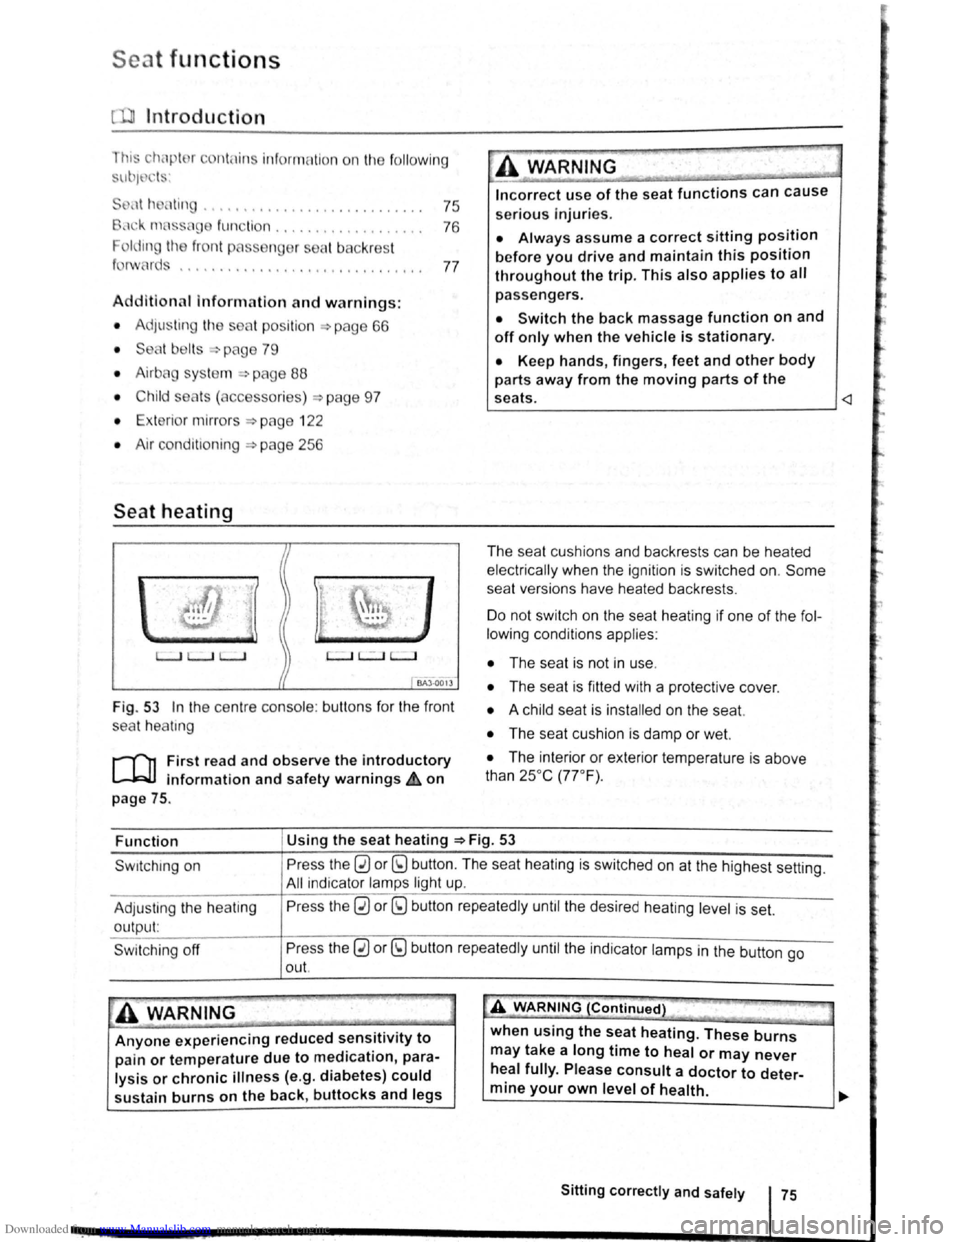
Fig . 53 In the ce ntre conso le : butt ons for the front
sea t
hea trng
i""""fl1 First read and observe the introductory
L-...lr::JJ information and safety warnings £ on
page
75.
Incorrect use of the seat functions can cause
serious Injuries.
• Always assume a correct sitting position
before you drive and maintain this position
throughout the trip. This also applies to all
passengers.
• Switch the back massage function on and
off only when the vehicle is stationary.
• Keep hands , fingers, feet and other body
parts away from the moving parts of the
seats.
elec trical ly when the ignition is switched on.
Some
seat ve rsions have heated backrests .
Do not switc h on the seat heating if one of the fol
lowing conditions applies:
• The seat is not in u se.
• The seat is fitted with a protect ive cover.
• A chi ld seat is installed on the seat.
• The seat cushion is damp or wet.
• The interior or exterior tempera ture is above
than 25oc (77 °F) .
Function Using
the seat heating ::::>Fig. 53
Swrtching on
Adjus ting
the heating
output:
Swi tchi ng off
Press the 0 or (9 button. The seat heating is switched on at the highest setting.
All indicato r l amps light up.
Pre ss the
0 or (9 button repeatedly until the desired heating level is set.
Press the
0 or (9 button repeatedly until the ind ica tor lamps in the button go
out.
~A WARNING (Continued) " ._..~~1 ~...... -~.~. ~-~ ~----J
Anyone experiencing reduced sensitivity to
pain or temperature due to medication, para
lysis or chronic illness (e.g. diabetes) could
sustain burns on the back, buttocks and legs when
using the
seat heating. These burns
may take a long time to heal or may never
heal fully. Please consult a doctor to deter
mine your own level of health.
~--------------~--------~~
Sitting correctly and safely 75
Page 58 of 138
Downloaded from www.Manualslib.com manuals search engine Lit up Possible cause Solution
Tr ailer turn signal. -......
Q\~ The indica tor lamp goe s out if a tra iler turn Check the trailer l ighting as required.
signal
or all trailer lig ht s st op working .
Main beam is swi tc h e d on or the headlight
----D =>pa ge 106 .
flasher is being opera ted .
-
0 Main beam ass ist swi tc hed on. =>page 110 .
-1
) A separate display appears in the instrumen t cluster if there is a bend lighting fault.
>) Displayed in colour on an instru ment cluster with colour display .
Several warning and indicato r lamps will light up
briefly as a
functiona l check when the ign iti on i s
switched
on. T he y will swi tc h off after a few sec
onds.
--·--~-
Failure to observe illuminated warning lamps
and text messages can lead to your vehicle
breaking down in traffic, and can cause acci
dent and serious injury.
• Never ignore any illuminated warning
lamps or text messages.
• Stop the vehicle as soon as possible and
when safe to do so.
Turn signal and main beam lever
®
B5K ·0415
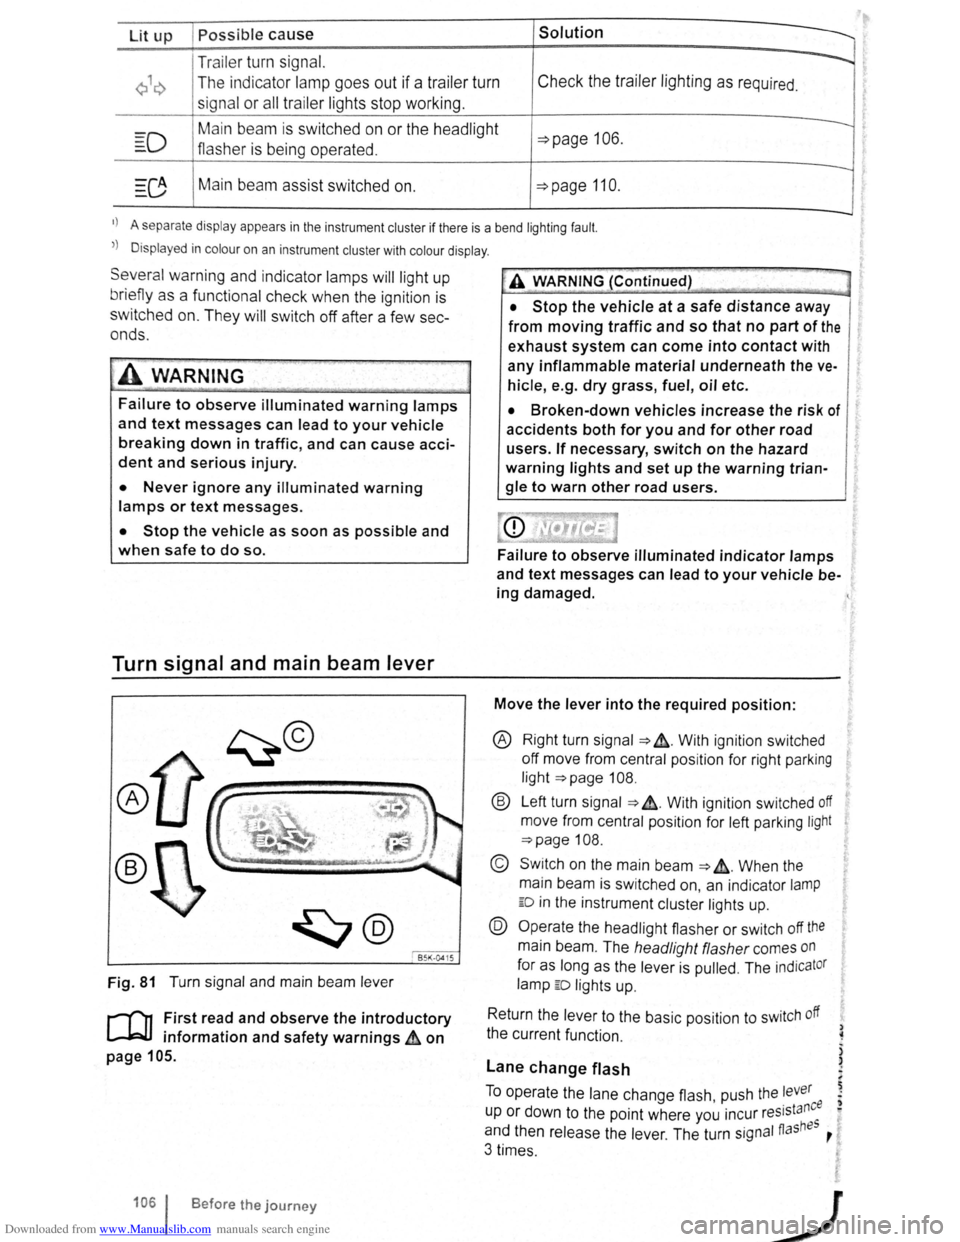
Fig. 81 T urn signa l and main beam lever
r-('n F irst read and observe the introductory
1.-J=JJ information and safety warnings~ on
page 105 .
1061 Before the journey
--
~>A WARNING (Continued) -
• Stop the vehicle at a safe distance away
from moving traffic and so that no part of the
exhaust system can come into contact with
any inflammable material underneath the ve
hicle, e .g . dry grass, fuel, oil etc.
• Broken-down vehicles increase the risk of
accidents both for you and for other road
users. If necessary, switch on the hazard
warning lights and set up the warning trian
gle to warn other road users.
Failure to observe illuminated indicator lamps
and text messages can lead to your vehicle be
ing damaged.
Move the lever into the required position:
® Right turn signa l ~ &. W it h ignit ion swi tched
off m ove from centr al posit io n for right parking
li g ht
~page 108.
® Left turn sig na l ~ ~. W ith ignition switched off
move from centra l posi tion for left parking light
~page 108 .
© Switch on the main beam ~ &. Whe n the
main beam is switc hed on, an indicator
lamp
ED in the instr ument cluster lights up.
@ Operate the headlight flasher or switch off the
main beam. The h eadligh t flasher comes on
for as long as the leve r is pulled . The indicator
lamp ED lights u p .
R etu
rn the le ver to the basic position to switch off
the c urrent fu nc tio n.
Lane change flash
) ~
)
)
To o pe rate the la ne c hange flash push the lever ' . nee I) u p or d own to the poin t where you incur reslsta eo
and th en release the le ver. The turn signal fiashBS ,
3 times .
Page 59 of 138
Downloaded from www.Manualslib.com manuals search engine ..,
of turn signals, a failure to use
r f rg tting to switch off a turn
nfuse other road users. This can
nt and serious Injuries.
• lw. y activate the turn signal In good
tim wh n ch anging lanes and performing
'lt king or turning manoeuvres.
• Alw ys switch off the turn signal once the
le ne change or overtaking or turning ma-
n euvre has been completed.
A W~RNING
In correct use of the main beam headlights
ca n lead to accidents and serious injuries as
the main beam headlights can distract and
dazzle other road users.
Switching lights on and off
m The turn signal will only work when the igni
W tion is switched on. The hazard warning lights
a ls o work
when the ignition is switched off
=>page 336.
m If one turn signal fails, the indicator lamp will
W start flashing twice as fast.
m The main beam headlights can only be
W switched on if the dipped beam headlights
are already on.
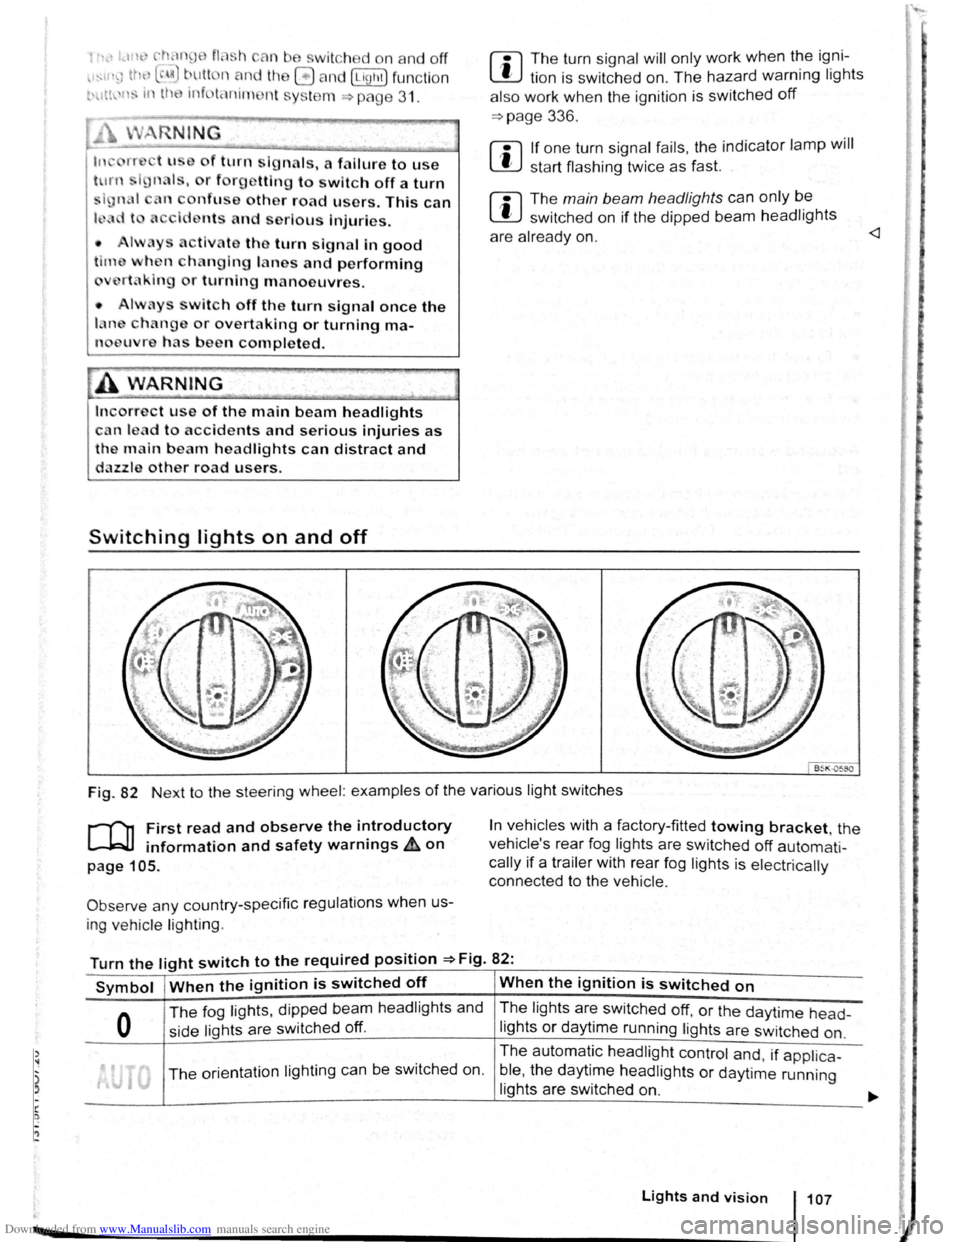
Fig. 82 Next to the steering wheel: examples of the various light switches
r-("n First read and observe the introductory
L-.W1 information and safety warnings ~on
page 105.
Observe any country-specific regulations when us
ing ve hic le lighting .
In vehicles with a factory-fitted towing bracket, the
vehicle's rear fog lights are switched
off automati
cally if a trailer with rear fog lights is electrically
connected to the vehicle .
Turn the light switch to the required position =>Fig. 82:
Symbol When the ignition is switched off When the ignition is switched on
0
The fog lights, dipped bea m headlights and
side lights are switched
off.
The lights are switched off, or the daytime head-
lights or daytime running lights are switched on.
The orientation lighting ca n be switched on. The
automatic
headlight control and, if applica -
ble ,
the daytime headlights or daytime running
lights are switched
on.
Lights and vision 107