trim VOLKSWAGEN TIGUAN 2017 Owner´s Manual
[x] Cancel search | Manufacturer: VOLKSWAGEN, Model Year: 2017, Model line: TIGUAN, Model: VOLKSWAGEN TIGUAN 2017Pages: 341, PDF Size: 9.14 MB
Page 6 of 341
Upper holder for the net partition ⇒ Net partition
Rigid fastening rings ⇒ Fastening rings
Removable light ⇒ Removeable lights
Button for unlocking the ball head ⇒ Trailer towing
Bracket for the luggage compartment floor ⇒ Luggage compartment floor
Backrest remote release mechanism ⇒ Folding the backrests on the rear bench seat
forwards and backwards
230-volt socket ⇒ Electrical sockets
Foldable fastening rings ⇒ Fastening rings
Stowage area behind trim
12-volt socket ⇒ Electrical sockets
Bag hook ⇒ Bag hook
Luggage compartment light
Driver door
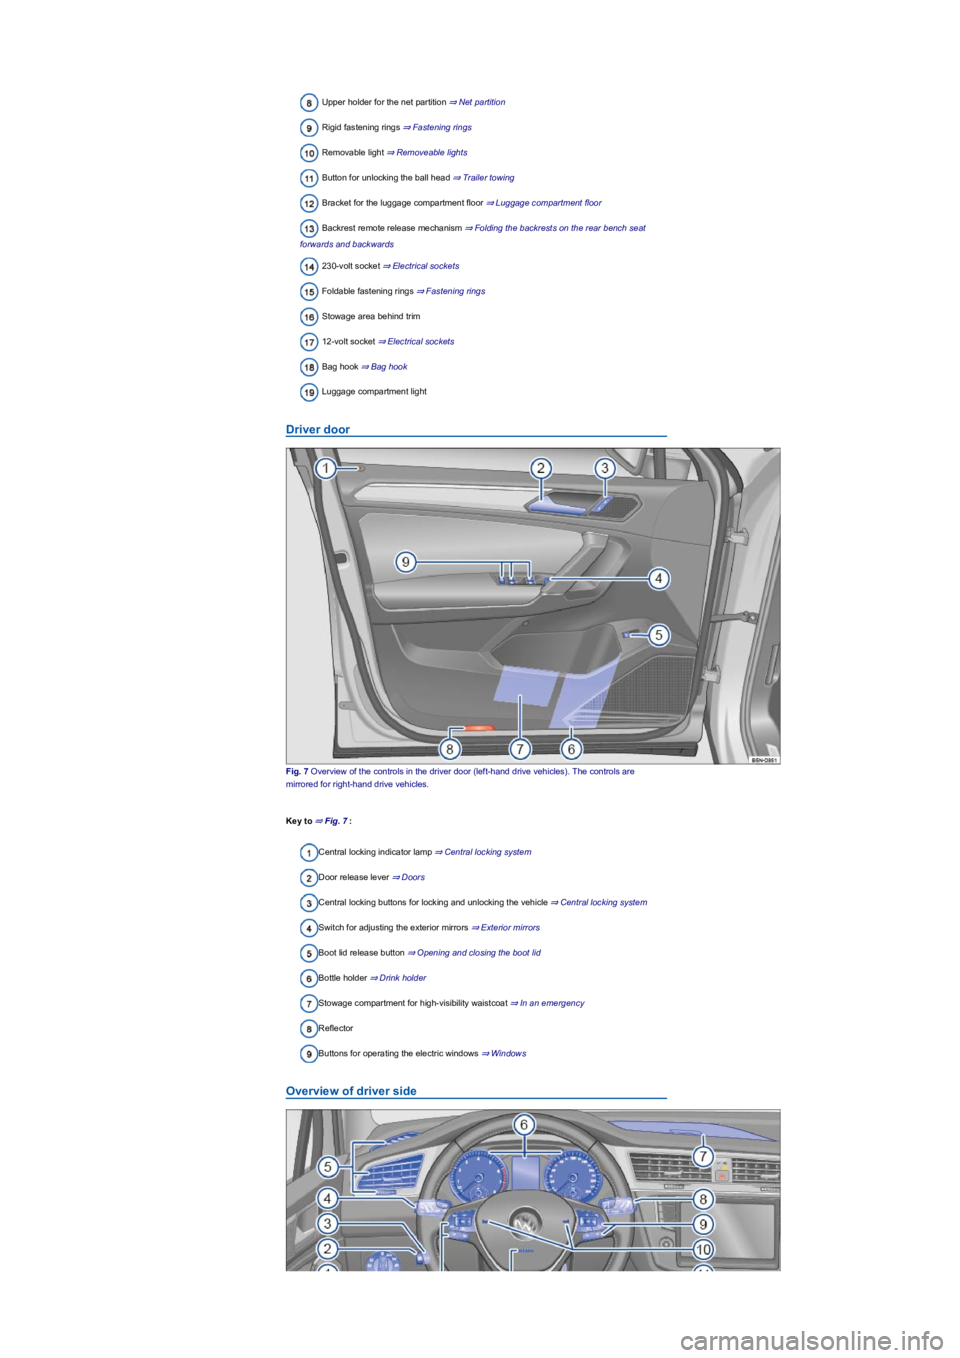
Fig. 7 Overview of the controls in the driver door (left-hand drive vehicles). The controls are
mirrored for right-hand drive vehicles.
Key to ⇒ Fig. 7:
Central locking indicator lamp ⇒ Central locking system
Door release lever ⇒ Doors
Central locking buttons for locking and unlocking the vehicle ⇒ Central locking system
Switch for adjusting the exterior mirrors ⇒ Exterior mirrors
Boot lid release button ⇒ Opening and closing the boot lid
Bottle holder ⇒ Drink holder
Stowage compartment for high-visibility waistcoat ⇒ In an emergency
Reflector
Buttons for operating the electric windows ⇒ Windows
Overview of driver side
Page 42 of 341
Check the condition of all seat belts regularly.
Keep the seat belts clean.
Avoid allowing any foreign substances or liquids to get on to the seat belt or latch plate or
into the slot in the seat belt buckle.
Do not trap or damage the seat belt and latch plate, for example when closing the door.
Never remove, modify or repair the seat belt or any part of the belt fixture system.
Always fasten the seat belt correctly before every journey and keep it fastened while the
vehicle is in motion.
trip – even if you are only planning to drive a very short distance. Ensure that all passengers also
wear their seat belts properly.
Accident statistics have shown properly worn seat belts to be an effective means of substantially
reducing the risk of injury and improving the chances of survival in a serious accident. Furthermore,
properly worn seat belts improve the protection provided by airbags in the event of an accident.
This is why wearing a seat belt is a legal requirement in most countries.
Although the vehicle is equipped with airbags, the seat belts must be fastened and worn. For
example, the front airbags will be triggered only in certain types of frontal collision. The front airbags
will not be triggered during minor frontal collisions, minor side collisions, rear collisions, rolls or
accidents in which the airbag trigger threshold in the control unit is not exceeded.
Therefore, always wear your seat belt and ensure that your passengers have fastened their seat
belts properly before you drive off.
Using seat belts
First read and observe the introductoryinformation and safety warnings⇒
Introduction
Checklist
Using seat belts ⇒:
Twisted seat belt
If it is difficult to remove the seat belt from the belt guide, the seat belt may have become twisted if
it was returned too quickly into the side trim:
•Take hold of the latch plate then slowly and carefully pull out the seat belt.
•Untwist the seat belt and guide it back slowly by hand.
Fasten the seat belt even if you are unable to undo the twist. However, the twist should not be in
part of the seat belt that comes into direct contact with the body. The twist should be corrected
immediately by a qualified workshop.
Fastening and unfastening seat belts
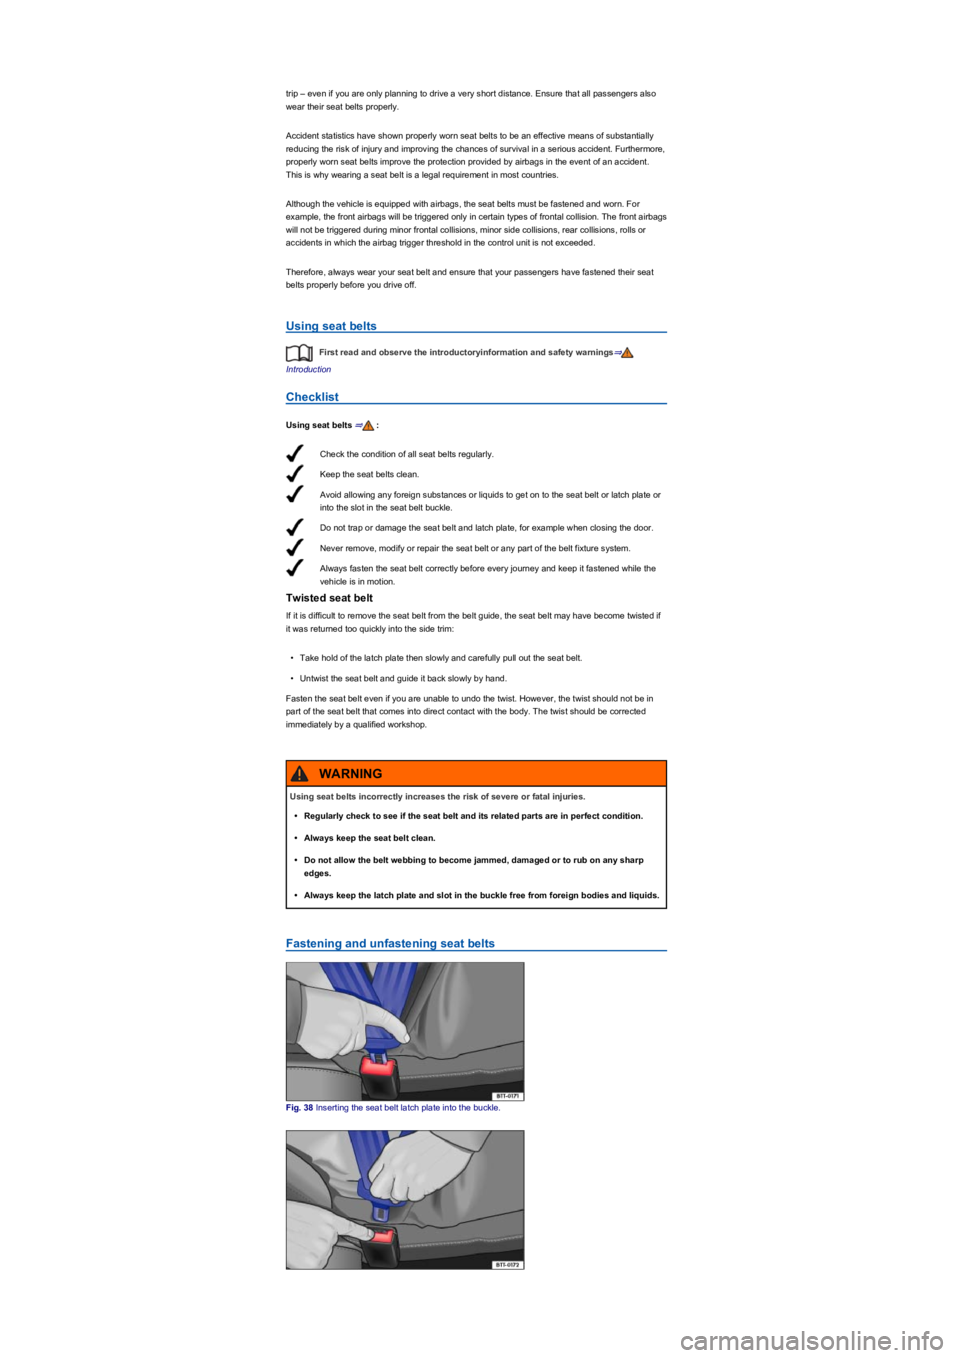
Fig. 38 Inserting the seat belt latch plate into the buckle.
Using seat belts incorrectly increases the risk of severe or fatal injuries.
•Regularly check to see if the seat belt and its related parts are in perfect condition.
•Always keep the seat belt clean.
•Do not allow the belt webbing to become jammed, damaged or to rub on any sharp
edges.
•Always keep the latch plate and slot in the buckle free from foreign bodies and liquids.
WARNING
Page 43 of 341
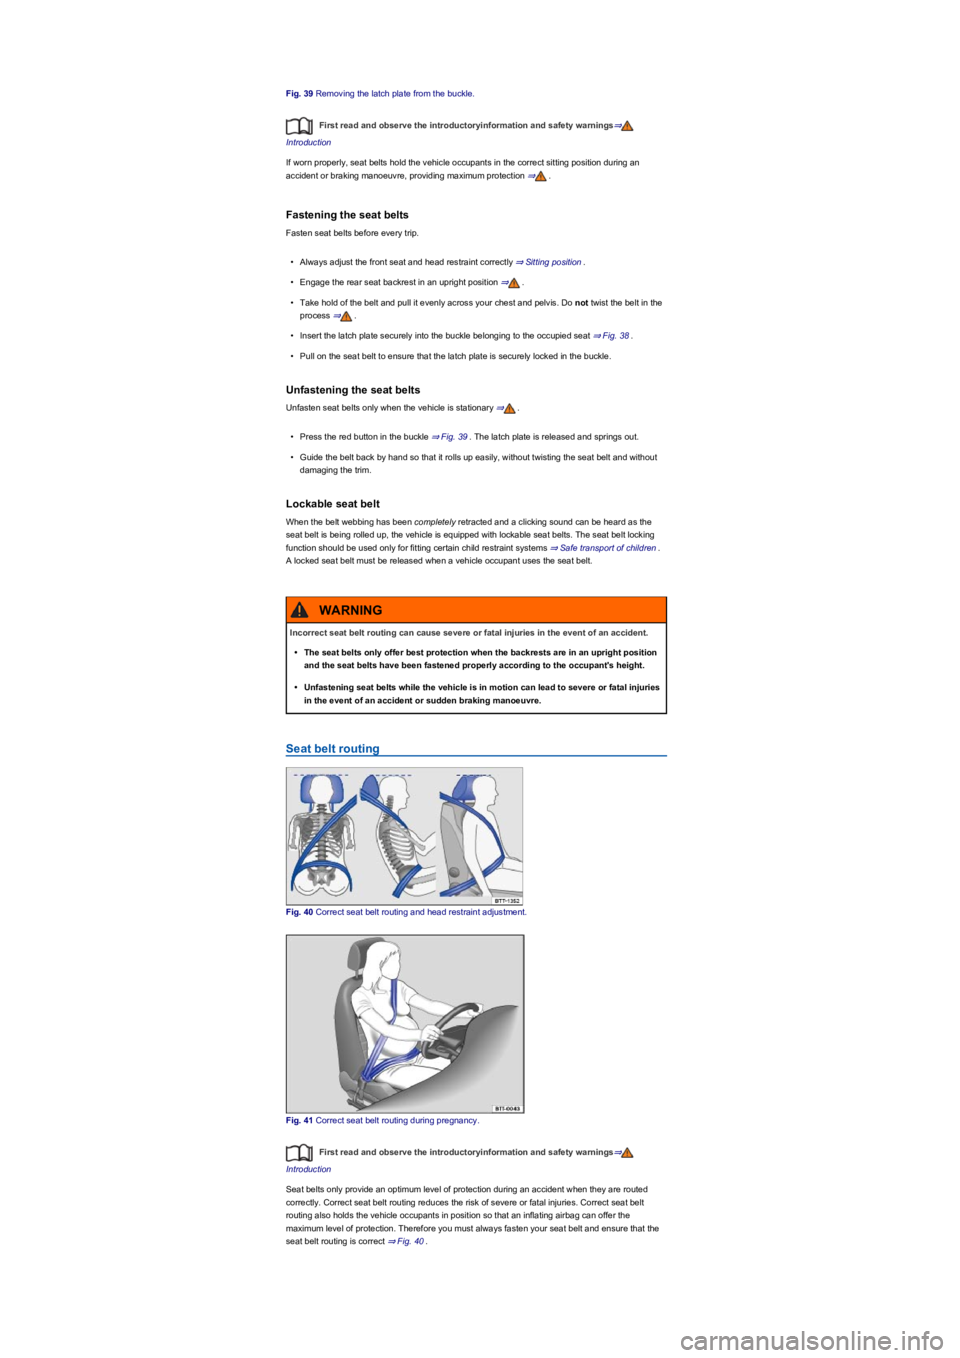
Fig. 39 Removing the latch plate from the buckle.
First read and observe the introductoryinformation and safety warnings⇒
Introduction
If worn properly, seat belts hold the vehicle occupants in the correct sitting position during an
accident or braking manoeuvre, providing maximum protection ⇒.
Fastening the seat belts
Fasten seat belts before every trip.
•Always adjust the front seat and head restraint correctly ⇒ Sitting position.
•Engage the rear seat backrest in an upright position ⇒.
•Take hold of the belt and pull it evenly across your chest and pelvis. Do not twist the belt in the
process ⇒.
•Insert the latch plate securely into the buckle belonging to the occupied seat ⇒ Fig. 38.
•Pull on the seat belt to ensure that the latch plate is securely locked in the buckle.
Unfastening the seat belts
Unfasten seat belts only when the vehicle is stationary ⇒.
•Press the red button in the buckle ⇒ Fig. 39. The latch plate is released and springs out.
•Guide the belt back by hand so that it rolls up easily, without twisting the seat belt and without
damaging the trim.
Lockable seat belt
When the belt webbing has been completely retracted and a clicking sound can be heard as the
seat belt is being rolled up, the vehicle is equipped with lockable seat belts. The seat belt locking
function should be used only for fitting certain child restraint systems ⇒ Safe transport of children.
A locked seat belt must be released when a vehicle occupant uses the seat belt.
Seat belt routing
Fig. 40 Correct seat belt routing and head restraint adjustment.
Fig. 41 Correct seat belt routing during pregnancy.
First read and observe the introductoryinformation and safety warnings⇒
Introduction
Seat belts only provide an optimum level of protection during an accident when they are routed
correctly. Correct seat belt routing reduces the risk of severe or fatal injuries. Correct seat belt
routing also holds the vehicle occupants in position so that an inflating airbag can offer the
maximum level of protection. Therefore you must always fasten your seat belt and ensure that the
seat belt routing is correct ⇒ Fig. 40.
Incorrect seat belt routing can cause severe or fatal injuries in the event of an accident.
•The seat belts only offer best protection when the backrests are in an upright position
and the seat belts have been fastened properly according to the occupant's height.
•Unfastening seat belts while the vehicle is in motion can lead to severe or fatal injuries
in the event of an accident or sudden braking manoeuvre.
WARNING
Page 53 of 341
Side airbags
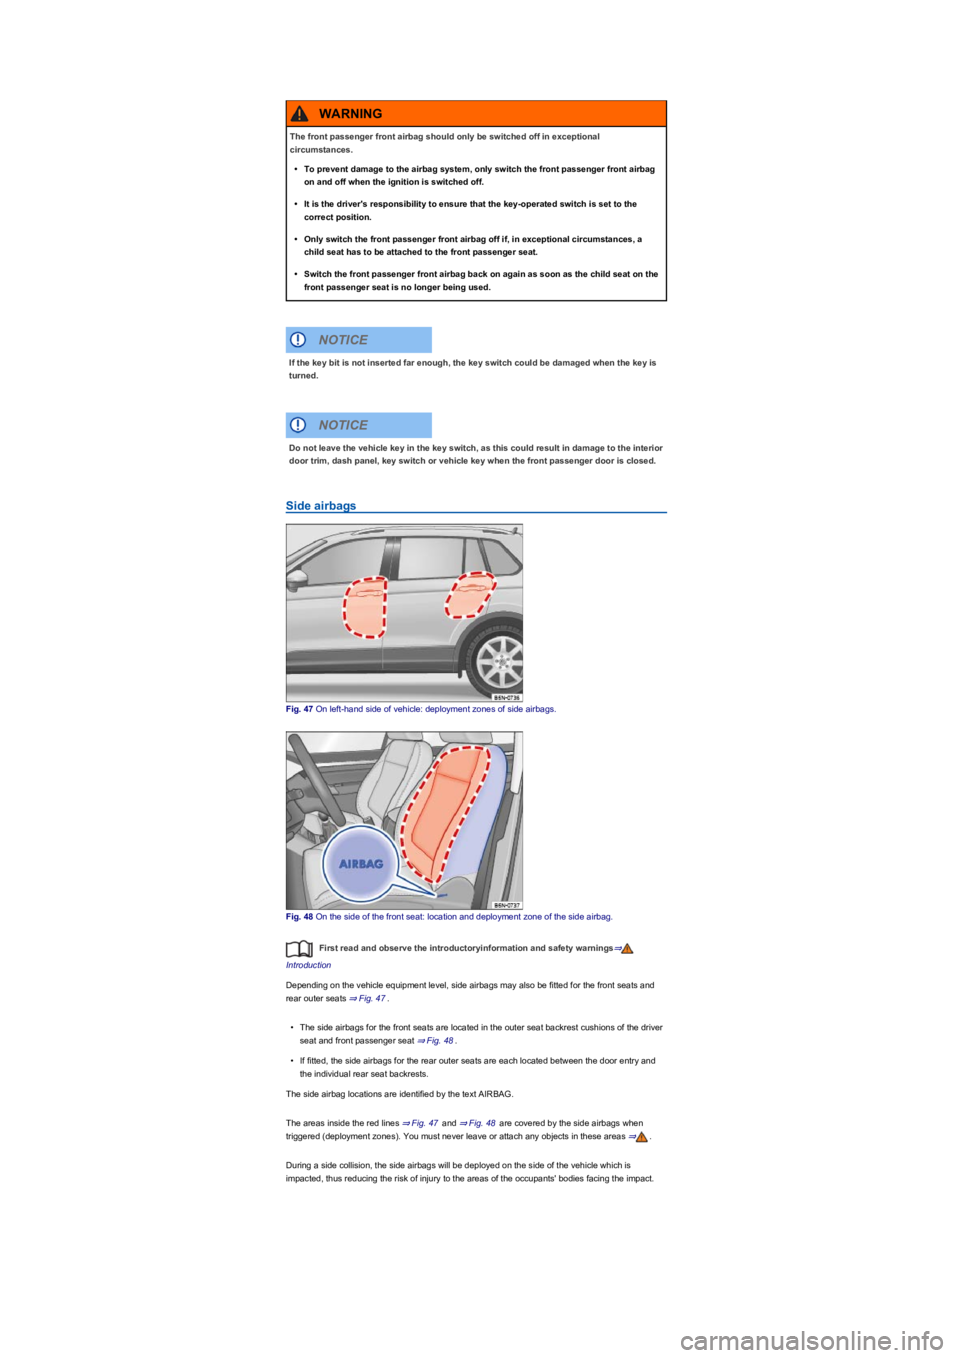
Fig. 47 On left-hand side of vehicle: deployment zones of side airbags.
Fig. 48 On the side of the front seat: location and deployment zone of the side airbag.
First read and observe the introductoryinformation and safety warnings⇒
Introduction
Depending on the vehicle equipment level, side airbags may also be fitted for the front seats and
rear outer seats ⇒ Fig. 47.
•The side airbags for the front seats are located in the outer seat backrest cushions of the driver
seat and front passenger seat ⇒ Fig. 48.
•If fitted, the side airbags for the rear outer seats are each located between the door entry and
the individual rear seat backrests.
The side airbag locations are identified by the text AIRBAG.
The areas inside the red lines ⇒ Fig. 47 and ⇒ Fig. 48 are covered by the side airbags when
triggered (deployment zones). You must never leave or attach any objects in these areas ⇒.
During a side collision, the side airbags will be deployed on the side of the vehicle which is
impacted, thus reducing the risk of injury to the areas of the occupants' bodies facing the impact.
The front passenger front airbag should only be switched off in exceptional
circumstances.
•To prevent damage to the airbag system, only switch the front passenger front airbag
on and off when the ignition is switched off.
•It is the driver's responsibility to ensure that the key-operated switch is set to the
correct position.
•Only switch the front passenger front airbag off if, in exceptional circumstances, a
child seat has to be attached to the front passenger seat.
•Switch the front passenger front airbag back on again as soon as the child seat on the
front passenger seat is no longer being used.
WARNING
If the key bit is not inserted far enough, the key switch could be damaged when the key is
turned.
NOTICE
Do not leave the vehicle key in the key switch, as this could result in damage to the interior
door trim, dash panel, key switch or vehicle key when the front passenger door is closed.
NOTICE
Page 63 of 341
The 12-volt vehicle battery will discharge if the hazard warning lights are left on over a long
period of time – even when the ignition is switched off.
Depending on the vehicle equipment, the brake lights flash rapidly if you brake sharply or
initiate full braking at a speed of more than 80 km/h (50 mph). This is a particularly effective way of
attracting the attention of vehicles behind you. If you then continue to brake, the hazard warning
lights will be switched on automatically at speeds under approximately 10 km/h (6 mph). Once the
vehicle starts to accelerate, the hazard warning lights will switch off again.
Equipment for an emergency
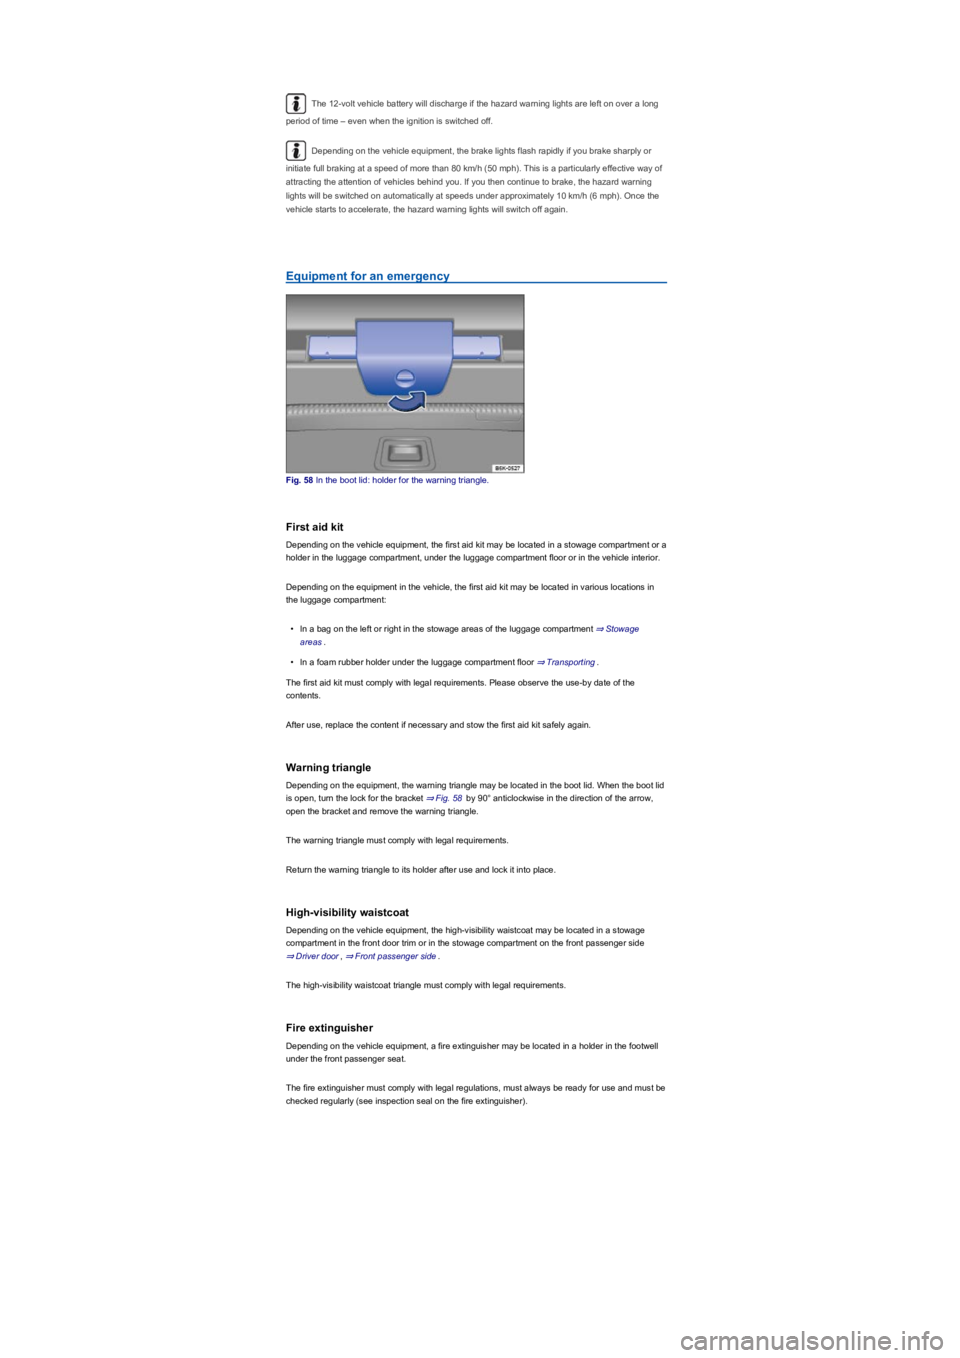
Fig. 58 In the boot lid: holder for the warning triangle.
First aid kit
Depending on the vehicle equipment, the first aid kit may be located in a stowage compartment or a
holder in the luggage compartment, under the luggage compartment floor or in the vehicle interior.
Depending on the equipment in the vehicle, the first aid kit may be located in various locations in
the luggage compartment:
•In a bag on the left or right in the stowage areas of the luggage compartment ⇒ Stowage
areas.
•In a foam rubber holder under the luggage compartment floor ⇒ Transporting.
The first aid kit must comply with legal requirements. Please observe the use-by date of the
contents.
After use, replace the content if necessary and stow the first aid kit safely again.
Warning triangle
Depending on the equipment, the warning triangle may be located in the boot lid. When the boot lid
is open, turn the lock for the bracket ⇒ Fig. 58 by 90° anticlockwise in the direction of the arrow,
open the bracket and remove the warning triangle.
The warning triangle must comply with legal requirements.
Return the warning triangle to its holder after use and lock it into place.
High-visibility waistcoat
Depending on the vehicle equipment, the high-visibility waistcoat may be located in a stowage
compartment in the front door trim or in the stowage compartment on the front passenger side
⇒ Driver door, ⇒ Front passenger side.
The high-visibility waistcoat triangle must comply with legal requirements.
Fire extinguisher
Depending on the vehicle equipment, a fire extinguisher may be located in a holder in the footwell
under the front passenger seat.
The fire extinguisher must comply with legal regulations, must always be ready for use and must be
checked regularly (see inspection seal on the fire extinguisher).
Page 80 of 341
Opening and closing the boot lid
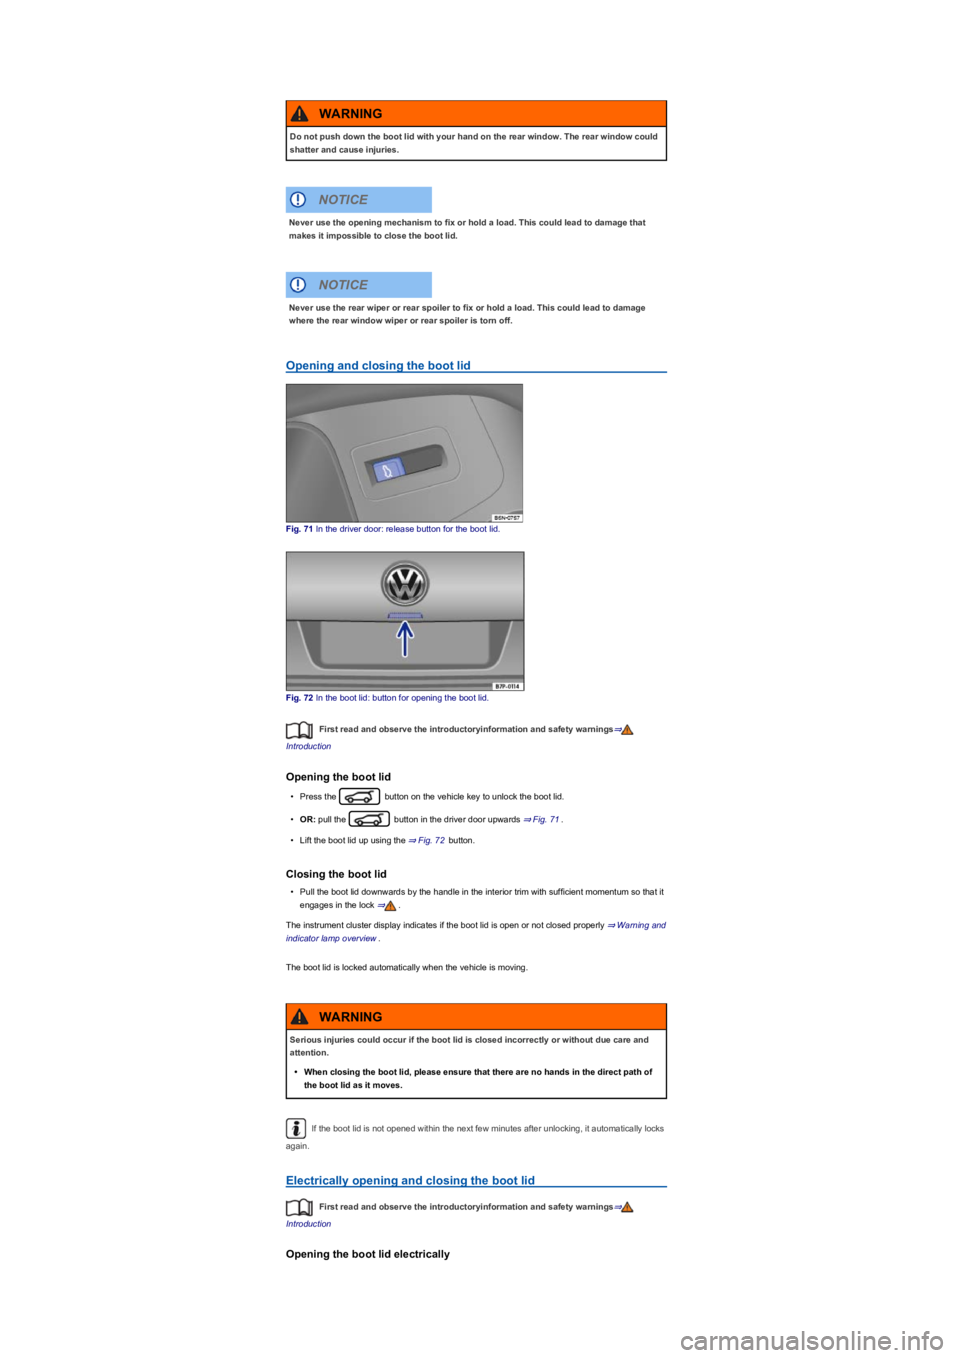
Fig. 71 In the driver door: release button for the boot lid.
Fig. 72 In the boot lid: button for opening the boot lid.
First read and observe the introductoryinformation and safety warnings⇒
Introduction
Opening the boot lid
•Press the button on the vehicle key to unlock the boot lid.
•OR: pull the button in the driver door upwards ⇒ Fig. 71.
•Lift the boot lid up using the ⇒ Fig. 72 button.
Closing the boot lid
•Pull the boot lid downwards by the handle in the interior trim with sufficient momentum so that it
engages in the lock ⇒.
The instrument cluster display indicates if the boot lid is open or not closed properly ⇒ Warning and
indicator lamp overview.
The boot lid is locked automatically when the vehicle is moving.
If the boot lid is not opened within the next few minutes after unlocking, it automatically locks
again.
Electrically opening and closing the boot lid
First read and observe the introductoryinformation and safety warnings⇒
Introduction
Opening the boot lid electrically
Do not push down the boot lid with your hand on the rear window. The rear window could
shatter and cause injuries.
WARNING
Never use the opening mechanism to fix or hold a load. This could lead to damage that
makes it impossible to close the boot lid.
NOTICE
Never use the rear wiper or rear spoiler to fix or hold a load. This could lead to damage
where the rear window wiper or rear spoiler is torn off.
NOTICE
Serious injuries could occur if the boot lid is closed incorrectly or without due care and
attention.
•When closing the boot lid, please ensure that there are no hands in the direct path of
the boot lid as it moves.
WARNING
Page 87 of 341
Closing the glass roof without the roll-back function
•Press the button to the 2nd position Ⓓ until the glass roof has fully closed.
•The glass roof will now close without the roll-back function.
•Please go to a qualified workshop if the glass roof still cannot be closed.
If you let go of the switch during the closing procedure, the glass roof will open automatically.
Troubleshooting
First read and observe the introductoryinformation and safety warnings⇒
Introduction
Glass roof will not close
•The glass roof only works when the ignition is switched on. The glass roof can still be opened or
closed for a short time after the ignition has been switched off, provided the driver door or front
passenger door are not opened.
Steering wheel
Adjusting the steering wheel position
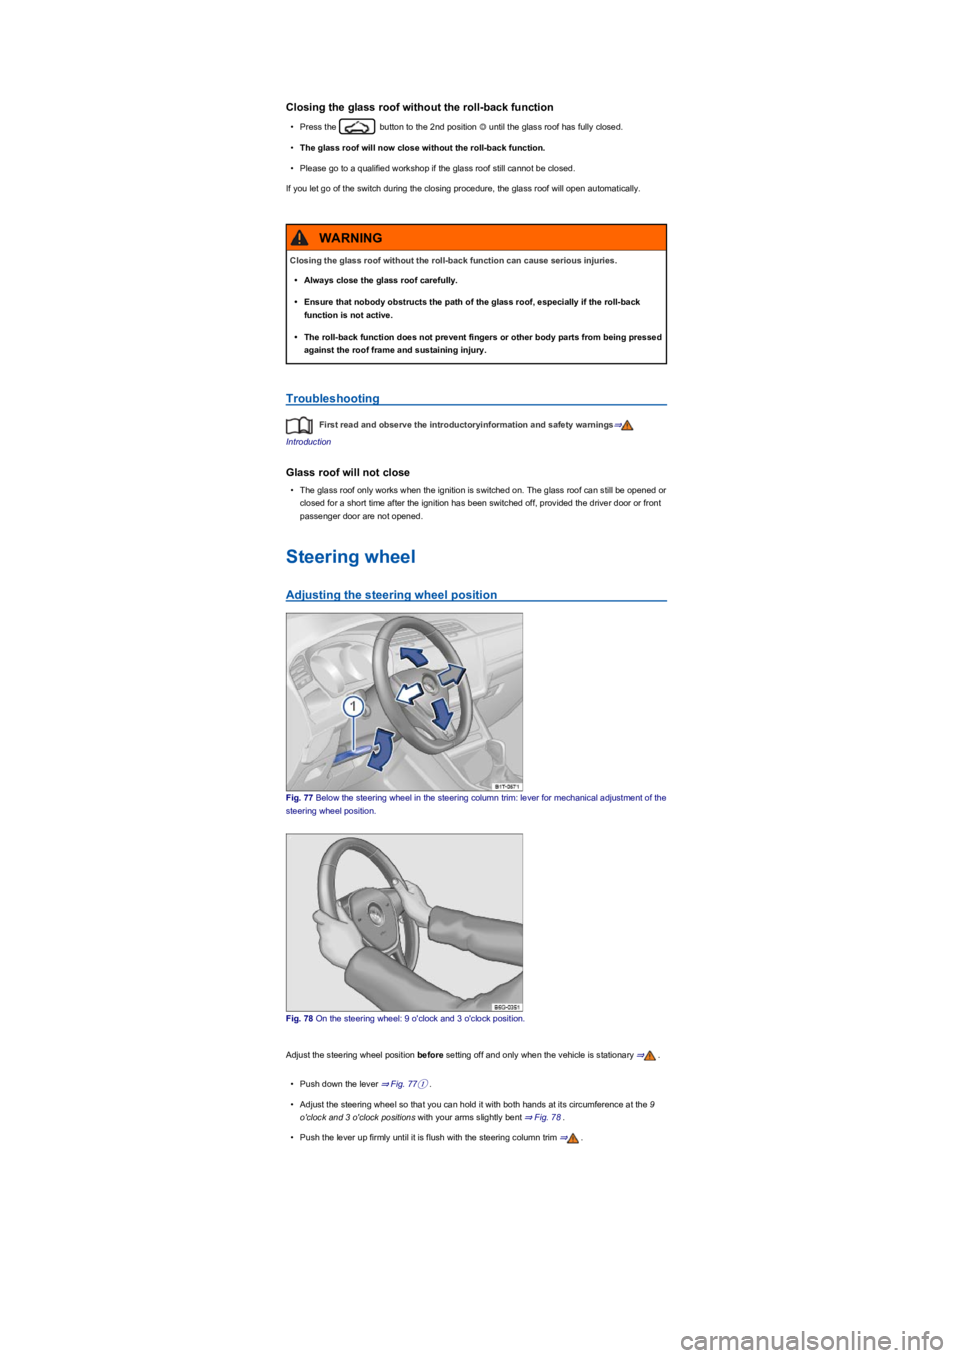
Fig. 77 Below the steering wheel in the steering column trim: lever for mechanical adjustment of the
steering wheel position.
Fig. 78 On the steering wheel: 9 o'clock and 3 o'clock position.
Adjust the steering wheel position before setting off and only when the vehicle is stationary ⇒.
•Push down the lever ⇒ Fig. 77①.
•Adjust the steering wheel so that you can hold it with both hands at its circumference at the 9
o'clock and 3 o'clock positions with your arms slightly bent ⇒ Fig. 78.
•Push the lever up firmly until it is flush with the steering column trim ⇒.
Closing the glass roof without the roll-back function can cause serious injuries.
•Always close the glass roof carefully.
•Ensure that nobody obstructs the path of the glass roof, especially if the roll-back
function is not active.
•The roll-back function does not prevent fingers or other body parts from being pressed
against the roof frame and sustaining injury.
WARNING
Page 141 of 341
First read and observe the introductoryinformation and safety warnings⇒
Introduction
Warning and indicator lamps in the instrument cluster
Warning and indicator lamps light up
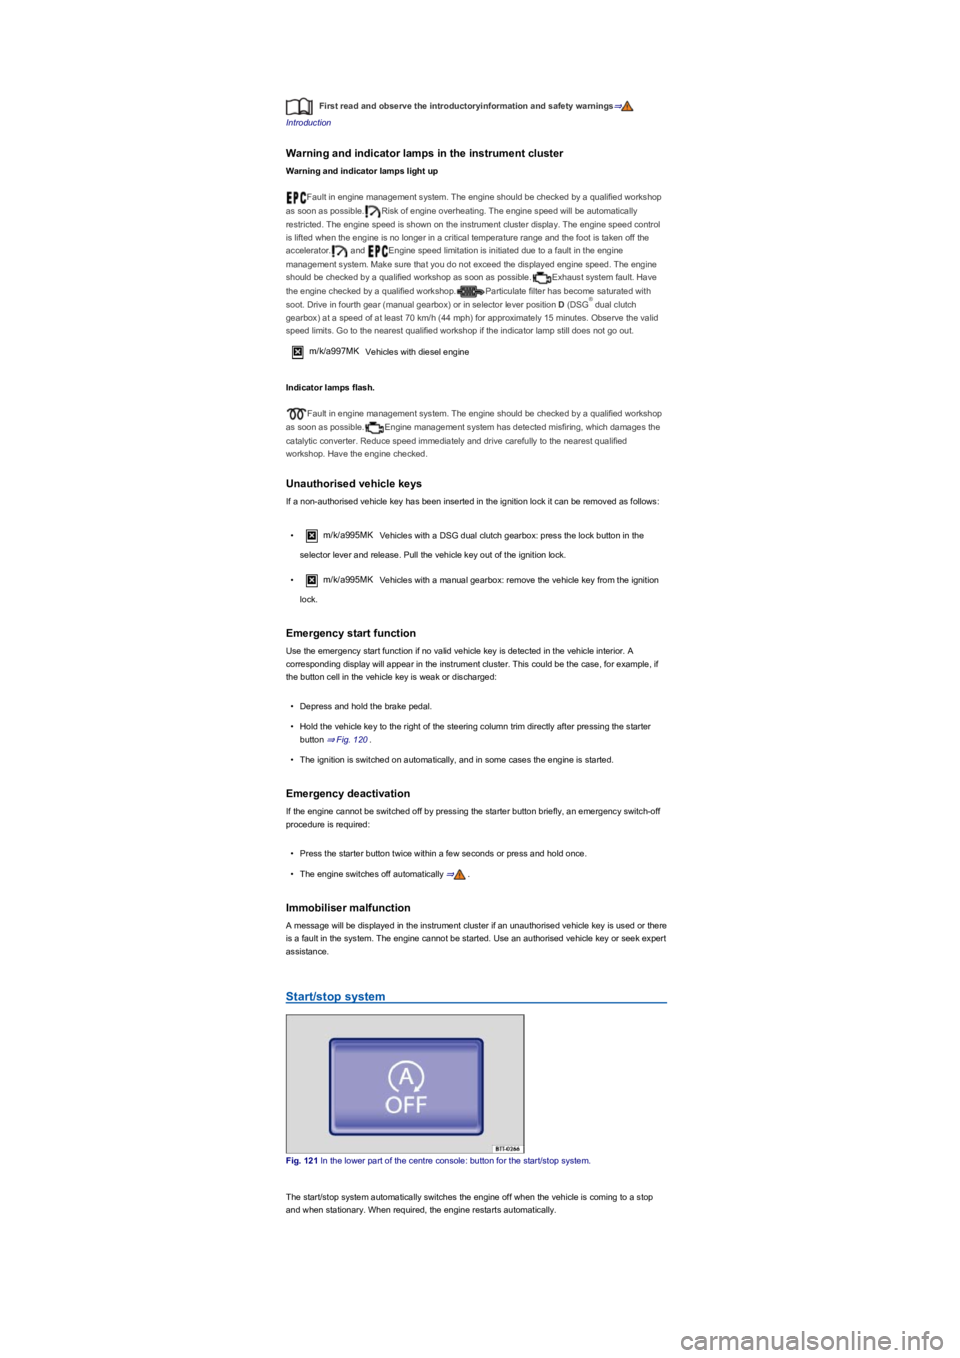
Fault in engine management system. The engine should be checked by a qualified workshop
as soon as possible.Risk of engine overheating. The engine speed will be automatically
restricted. The engine speed is shown on the instrument cluster display. The engine speed control
is lifted when the engine is no longer in a critical temperature range and the foot is taken off the
accelerator. and Engine speed limitation is initiated due to a fault in the engine
management system. Make sure that you do not exceed the displayed engine speed. The engine
should be checked by a qualified workshop as soon as possible.Exhaust system fault. Have
the engine checked by a qualified workshop.Particulate filter has become saturated with
soot. Drive in fourth gear (manual gearbox) or in selector lever position D (DSG dual clutch
gearbox) at a speed of at least 70 km/h (44 mph) for approximately 15 minutes. Observe the valid
speed limits. Go to the nearest qualified workshop if the indicator lamp still does not go out.
m/k/a997MKVehicles with diesel engine
Indicator lamps flash.
Fault in engine management system. The engine should be checked by a qualified workshop
as soon as possible.Engine management system has detected misfiring, which damages the
catalytic converter. Reduce speed immediately and drive carefully to the nearest qualified
workshop. Have the engine checked.
Unauthorised vehicle keys
If a non-authorised vehicle key has been inserted in the ignition lock it can be removed as follows:
•m/k/a995MKVehicles with a DSG dual clutch gearbox: press the lock button in the
selector lever and release. Pull the vehicle key out of the ignition lock.
•m/k/a995MKVehicles with a manual gearbox: remove the vehicle key from the ignition
lock.
Emergency start function
Use the emergency start function if no valid vehicle key is detected in the vehicle interior. A
corresponding display will appear in the instrument cluster. This could be the case, for example, if
the button cell in the vehicle key is weak or discharged:
•Depress and hold the brake pedal.
•Hold the vehicle key to the right of the steering column trim directly after pressing the starter
button ⇒ Fig. 120.
•The ignition is switched on automatically, and in some cases the engine is started.
Emergency deactivation
If the engine cannot be switched off by pressing the starter button briefly, an emergency switch-off
procedure is required:
•Press the starter button twice within a few seconds or press and hold once.
•The engine switches off automatically ⇒.
Immobiliser malfunction
A message will be displayed in the instrument cluster if an unauthorised vehicle key is used or there
is a fault in the system. The engine cannot be started. Use an authorised vehicle key or seek expert
assistance.
Start/stop system
Fig. 121 In the lower part of the centre console: button for the start/stop system.
The start/stop system automatically switches the engine off when the vehicle is coming to a stop
and when stationary. When required, the engine restarts automatically.
®
Page 178 of 341
The warning lamp and a message are displayed on the instrument cluster display in the event
of malfunctions.
If the malfunction cannot be rectified by one of the listed measures, switch off ACC and go to a
qualified workshop. Volkswagen recommends using a Volkswagen dealership for this purpose.
ACC is not available, the radar sensor does not have sufficient visibility
•The radar sensor is dirty. Clean the radar sensor ⇒ Vehicle care.
•The visibility of the radar sensor is impaired by add-on parts, the trim frames of number plate
holders or stickers. Keep the area around the radar sensor free.
•The radar sensor has been displaced or damaged, e.g. due to damage to the front of the
vehicle. Check whether damage is visible ⇒ Repairs and technical modifications.
•Fault or malfunction. Switch off and restart the engine.
•Structural modifications have been made to the front of the vehicle.
•The genuine Volkswagen badge is not used.
ACC does not function as expected
•The radar sensor is dirty. Clean the radar sensor ⇒ Vehicle care.
•The visibility of the radar sensor is impaired due to the weather conditions, e.g. snow, or due to
detergent deposits or coatings. Clean the radar sensor ⇒ Vehicle care.
•The system limits are not met ⇒ System limits.
•The brakes have overheated, control was interrupted automatically. Allow the brakes to cool
down and check functioning again.
Control cannot be started
•A forward gear other than first gear is selected (manual gearbox) or the selector lever is in
selector lever position D or the Tiptronic gate.
•The speed is at least 25 km/h (16 mph) in the case of vehicles with manual gearbox.
•The brake lights on the vehicle and trailer ⇒ are working.
•ESC is not regulating.
•The brake pedal is not depressed.
Unusual noises during the automatic braking operation are normal and not a sign that there
is a fault.
Area monitoring system (Front Assist)
Introduction
This chapter contains information on the followingsubjects:
⇒ Warning levels and braking intervention
⇒ Operating the area monitoring system (Front Assist)
⇒ Pedestrian Monitoring
⇒ System limits
⇒ Troubleshooting
The area monitoring system (Front
Assist) with City Emergency Braking
System can help to avoid accidents.
Within the limits of the system, Front Assist can warn the driver about imminent collisions, prepare
the vehicle for emergency braking, assist with braking, and initiate automatic braking. The warning
time varies depending on the traffic situation and driver behaviour.
Front Assist is not a substitute for the full concentration of the driver.
Driving with Front Assist
You can cancel the automatic braking interventions of Front Assist by steering or pressing the
accelerator.
Automatic braking
Front Assist can decelerate the vehicle to a standstill. The vehicle will then not be held
permanently. Depress the brake pedal.
The brake pedal will feel harder during an automatic braking operation.
Radar sensor
Front Assist detects driving situations by means of the radar sensor at the front of the vehicle
⇒ Front view. The range of the radar sensor is up to approximately 120 m.
Page 182 of 341
Troubleshooting
First read and observe the introductoryinformation and safety warnings⇒
Introduction
A message is displayed on the instrument cluster display in the event of malfunctions.
If the malfunction cannot be rectified by one of the listed measures, switch off Front Assist and go
to a qualified workshop. Volkswagen recommends using a Volkswagen dealership for this purpose.
Front Assist is not available, the radar sensor does not have sufficient
visibility
•The radar sensor is dirty. Clean the radar sensor ⇒ Vehicle care.
•The visibility of the radar sensor is impaired by add-on parts, the trim frames of number plate
holders or stickers. Keep the area around the radar sensor free.
•The radar sensor has been displaced or damaged, e.g. due to damage to the front of the
vehicle. Check whether damage is visible ⇒ Repairs and technical modifications.
•Structural modifications have been made to the front of the vehicle.
•The genuine Volkswagen badge is not used.
Front Assist does not function as expected or is triggered unnecessarily
several times
•The radar sensor is dirty. Clean the radar sensor ⇒ Vehicle care.
•The visibility of the radar sensor is impaired due to the weather conditions, e.g. snow, or due to
detergent deposits or coatings. Clean the radar sensor ⇒ Vehicle care.
•The system limits are not met ⇒ System limits.
Lane keeping system (Lane Assist)
Introduction
This chapter contains information on the followingsubjects:
⇒ Driving with the lane keeping system
⇒ Troubleshooting
The lane keeping system (Lane Assist)
helps the driver stay in lane.
Using a camera in the windscreen ⇒ Vehicle overviews, the lane keeping system detects lane
markings on the road. If your vehicle moves too close to a recognised lane marking, the system will
warn the driver with a corrective steering intervention. The corrective steering intervention can be
overridden by the driver at any time.
Adaptive lane guidance (depending on vehicle equipment)
The adaptive lane guidance system detects the preferred position in a lane and keeps the vehicle in
this position.
Adaptive lane guidance is switched on and off in the Driver assistance menu in the Infotainment
system ⇒ Operation and display in the Infotainment system.
System limits
Use the lane keeping system only on motorways and good main roads.
The system is not active under the following conditions:
•Vehicle speed is less than 60 km/h (37 mph).
•Lane keeping system has not detected any lane markings or lane boundaries.