reset VOLKSWAGEN TOUAREG 2014 2.G Owners Manual
[x] Cancel search | Manufacturer: VOLKSWAGEN, Model Year: 2014, Model line: TOUAREG, Model: VOLKSWAGEN TOUAREG 2014 2.GPages: 620, PDF Size: 9.4 MB
Page 13 of 620
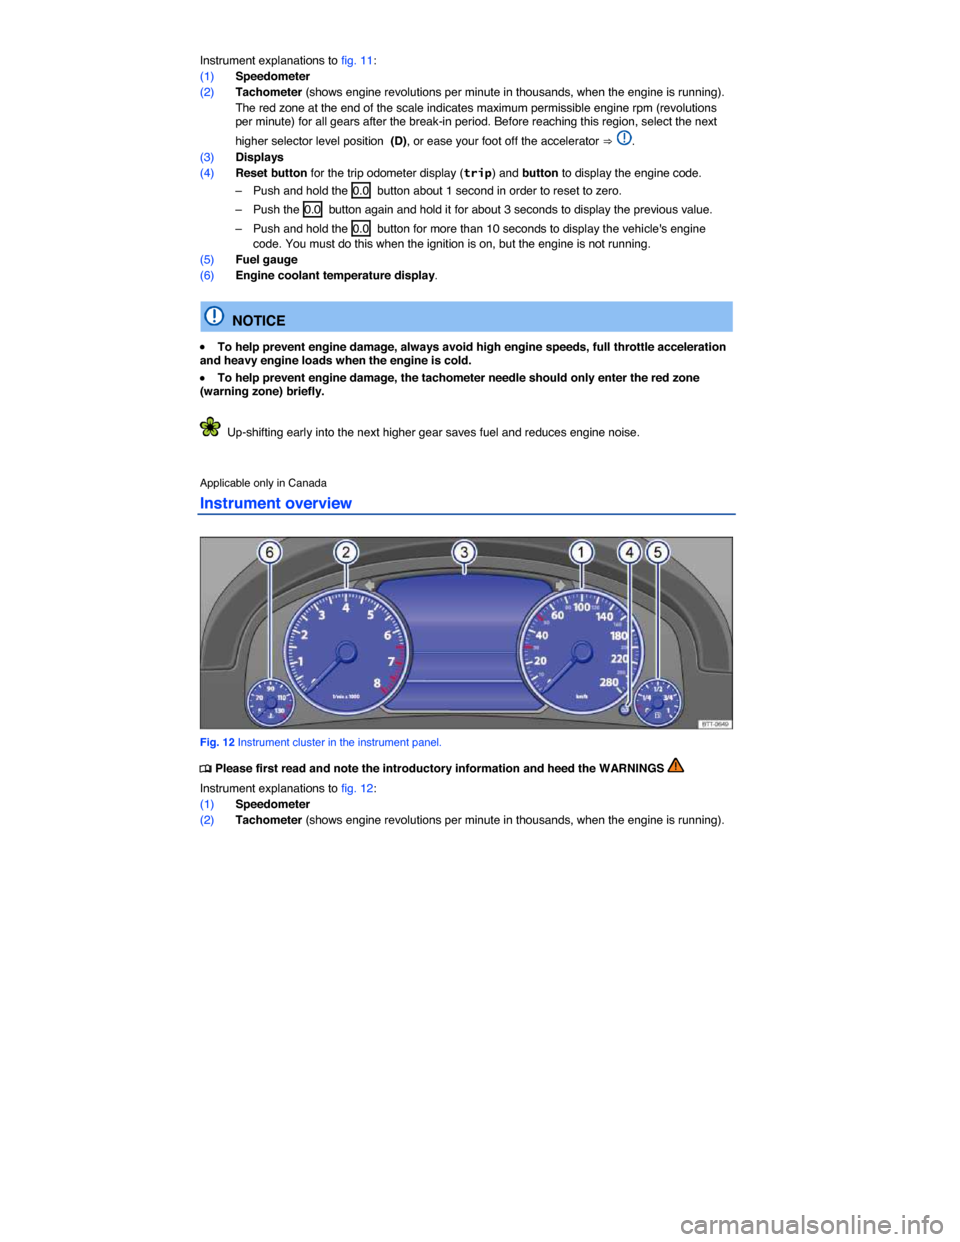
Instrument explanations to fig. 11:
(1) Speedometer
(2) Tachometer (shows engine revolutions per minute in thousands, when the engine is running).
The red zone at the end of the scale indicates maximum permissible engine rpm (revolutions per minute) for all gears after the break-in period. Before reaching this region, select the next
higher selector level position (D), or ease your foot off the accelerator ⇒ .
(3) Displays
(4) Reset button for the trip odometer display (trip) and button to display the engine code.
– Push and hold the 0.0 button about 1 second in order to reset to zero.
– Push the 0.0 button again and hold it for about 3 seconds to display the previous value.
– Push and hold the 0.0 button for more than 10 seconds to display the vehicle's engine code. You must do this when the ignition is on, but the engine is not running.
(5) Fuel gauge
(6) Engine coolant temperature display.
NOTICE
�x To help prevent engine damage, always avoid high engine speeds, full throttle acceleration and heavy engine loads when the engine is cold.
�x To help prevent engine damage, the tachometer needle should only enter the red zone (warning zone) briefly.
Up-shifting early into the next higher gear saves fuel and reduces engine noise.
Applicable only in Canada
Instrument overview
Fig. 12 Instrument cluster in the instrument panel.
�
Page 14 of 620
The red zone at the end of the scale indicates maximum permissible engine rpm (revolutions per minute) for all gears after the break-in period. Before reaching this region, select the next
higher selector level position (D), or ease your foot off the accelerator ⇒ .
(3) Displays
(4) Reset button for the trip odometer display (trip) and button to display the engine code.
– Push and hold the 0.0 button about 1 second in order to reset to zero.
– Push the 0.0 button again and hold it for about 3 seconds to display the previous value.
– Push and hold the 0.0 button for more than 10 seconds to display the vehicle's engine code. You must do this when the ignition is on, but the engine is not running.
(5) Fuel gauge
(6) Engine coolant temperature display.
NOTICE
�x To help prevent engine damage, always avoid high engine speeds, full throttle acceleration and heavy engine loads when the engine is cold.
�x To help prevent engine damage, the tachometer needle should only enter the red zone (warning zone) briefly.
Up-shifting early into the next higher gear saves fuel and reduces engine noise.
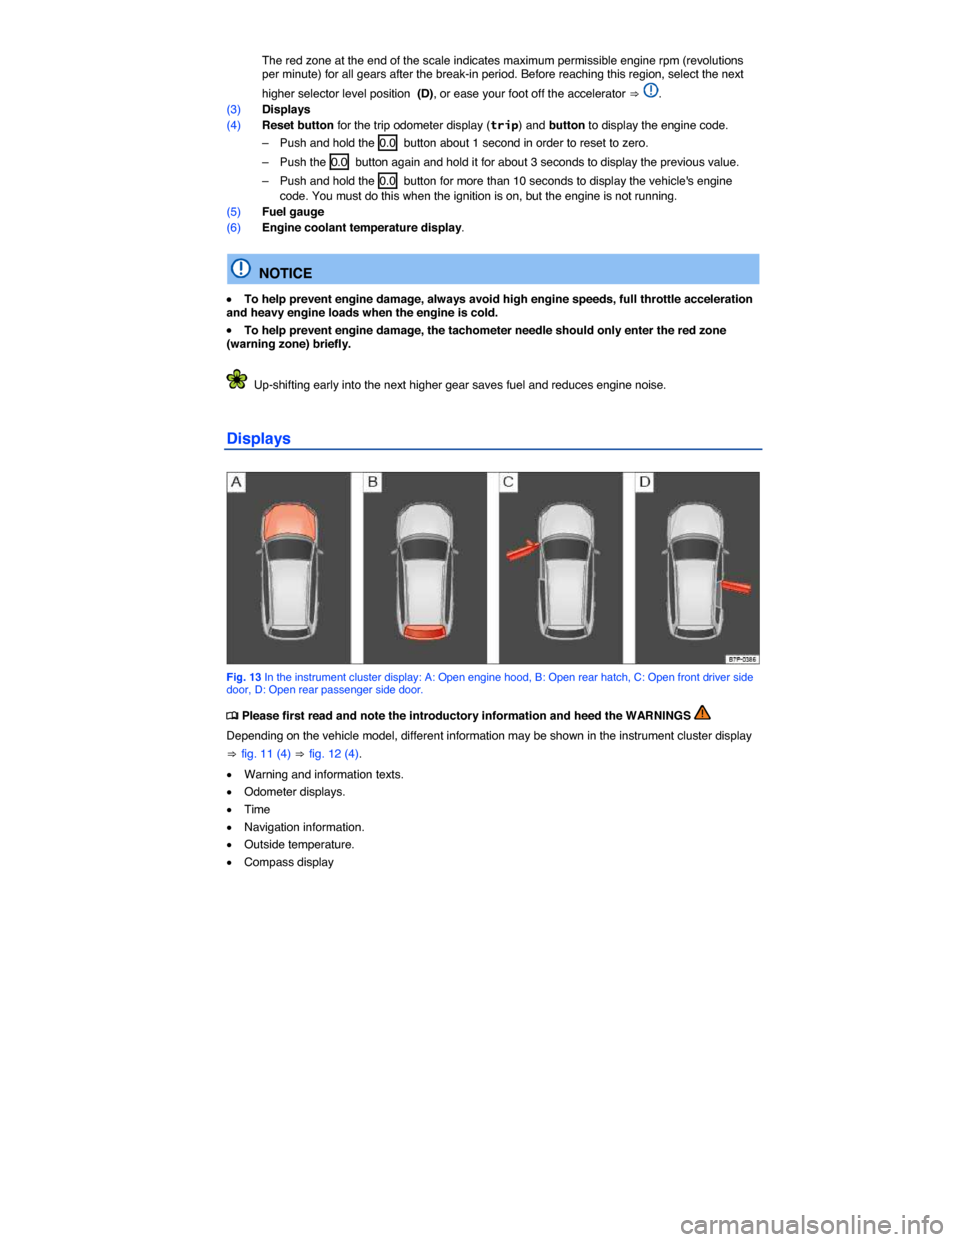
Displays
Fig. 13 In the instrument cluster display: A: Open engine hood, B: Open rear hatch, C: Open front driver side door, D: Open rear passenger side door.
�
Page 117 of 620

Function key: More information
30 Sec. : The lighting delay period is about 30 seconds. Tap the function to select the setting and close the window.
To close the window without changing the setting, tap X .
“Leaving home” feature
The “Leaving home” feature can be enabled or disabled in the Infotainment System. The lighting delay period can also be adjusted in the Infotainment System.
Function key: More information
Off : Feature is switched off. Tap the function to select the setting and close the window.
10 Sec. : The lighting delay period is about 10 seconds. Tap the function to select the setting and close the window.
20 Sec. : The lighting delay period is about 20 seconds. Tap the function to select the setting and close the window.
30 Sec. : The lighting delay period is about 30 seconds. Tap the function to select the setting and close the window.
To close the window without changing the setting, tap X .
Switching the “Coming home” and “Leaving home” features on and off
The “Coming home” feature must be switched on manually. The “Leaving home” feature is automatically controlled by a low-light sensor.
“Coming home” Action
Switch on: – Switch off the ignition.
– Operate the headlight flasher for about 1 second ⇒ page 119.
Opening the driver door switches on the “Coming home” feature. The delay period starts when the last vehicle door or the rear hatch is closed. The “Coming home” lighting is switched on when the driver door is open, the headlight switch is set to AUTO, and the low light sensor detects darkness. The delay period starts once the last vehicle door or the rear hatch is closed.
Switch off: – Automatically after the preset delay period is over.
– Automatically if any door or the rear hatch is still open about 60 seconds after activation.
– Turn the light switch to the �/ position.
– Switch on the ignition.
“Leaving home” Action
Switch on: – Unlock the vehicle when the light switch is not in the �/ position and the low-light sensor registers darkness. Unlock the vehicle if the light switch is in the AUTO position and the low-light sensor registers darkness.
Switch off: – Automatically after the preset delay period is over.
Page 174 of 620
The correct tire inflation pressure for factory-installed tires is listed on a label. The factory-installed
tires may be summer, winter, or all-season tires. The label ⇒ fig. 113 is on the driver door jamb.
Under- or over-inflation significantly shortens the service life of your tires and affects the handling of
the vehicle ⇒ . The correct tire pressure is very important, particularly when the vehicle is driven at higher speeds. Incorrect tire pressure causes increased wear and even sudden tire failure and blowouts.
Therefore tire pressure should be checked at least once a month and always before long trips.
The specified tire inflation pressure applies to a cold tire. When tires are warm, the pressure will be higher than when the tires are cold.
Do not reduce the tire pressure on warm tires to match the required cold tire inflation pressure. The tire inflation pressure would then be too low and could cause sudden tire failure and blowout.
Checking tire inflation pressure
Always check the tire pressure on “cold” tires when the vehicle has not been driven more than a couple of miles (kilometers) at low speed within the last 3 hours.
�x Check tire inflation pressure regularly and on cold tires. Check all the tires, including the collapsible spare (if any). In colder climates tire pressure should be checked more often, but only when the tires are cold. Always use an accurate tire pressure gauge.
�x After adjusting the tire inflation pressures, make sure to screw the valve caps back on, replace missing valve caps immediately. Please read and heed the information on resetting the Tire Pressure
Monitoring System if necessary ⇒ Tire Pressure Monitoring System (TPMS).
�x Remember that the vehicle manufacturer, not the tire manufacturer, determines the correct tire pressure for the tires on your vehicle. Never exceed the maximum inflation pressure listed on the tire sidewall for any reason.
Inflate the spare wheel to the pressure specified for the vehicle's road wheels on the tire pressure label; inflate a compact spare wheel to the pressure specified for the compact spare on the tire pressure label or on a separate label for the compact spare, if there is one.
WARNING
Incorrect tire pressure can cause a sudden tire failure, or blowout, loss of control, collision, serious personal injury, and even death.
�x Always inflate tires to the recommended and correct cold tire pressure before driving off.
�x Low tire pressure can cause tires to get too hot, resulting in tread separation, sudden loss of pressure, and blowouts. Tires with excessively low pressure flex (bend) more, which can cause the tire to overheat and fail suddenly without warning.
�x Excessive speed and/or overloading can cause heat buildup, sudden tire failure including a blowout and sudden deflation and loss of control.
�x If the tire pressure is too low or too high, the tires will wear prematurely and the vehicle will not handle well.
�x Regularly check tire inflation pressure, at least once a month, and also especially before a long trip.
�x Check the pressure in all 4 tires when the tires are still cold. Never reduce air pressure in warm tires to match cold tire inflation pressure.
NOTICE
�x Make sure not to jam the tire pressure gauge into the valve stem. Otherwise you can damage the tire valves and the tire inflation pressure sensors.
Page 176 of 620
Model Engine Tire dimensions Tire inflation pressure, front axle
Tire inflation pressure, rear axle
PSI kPa PSI kPa
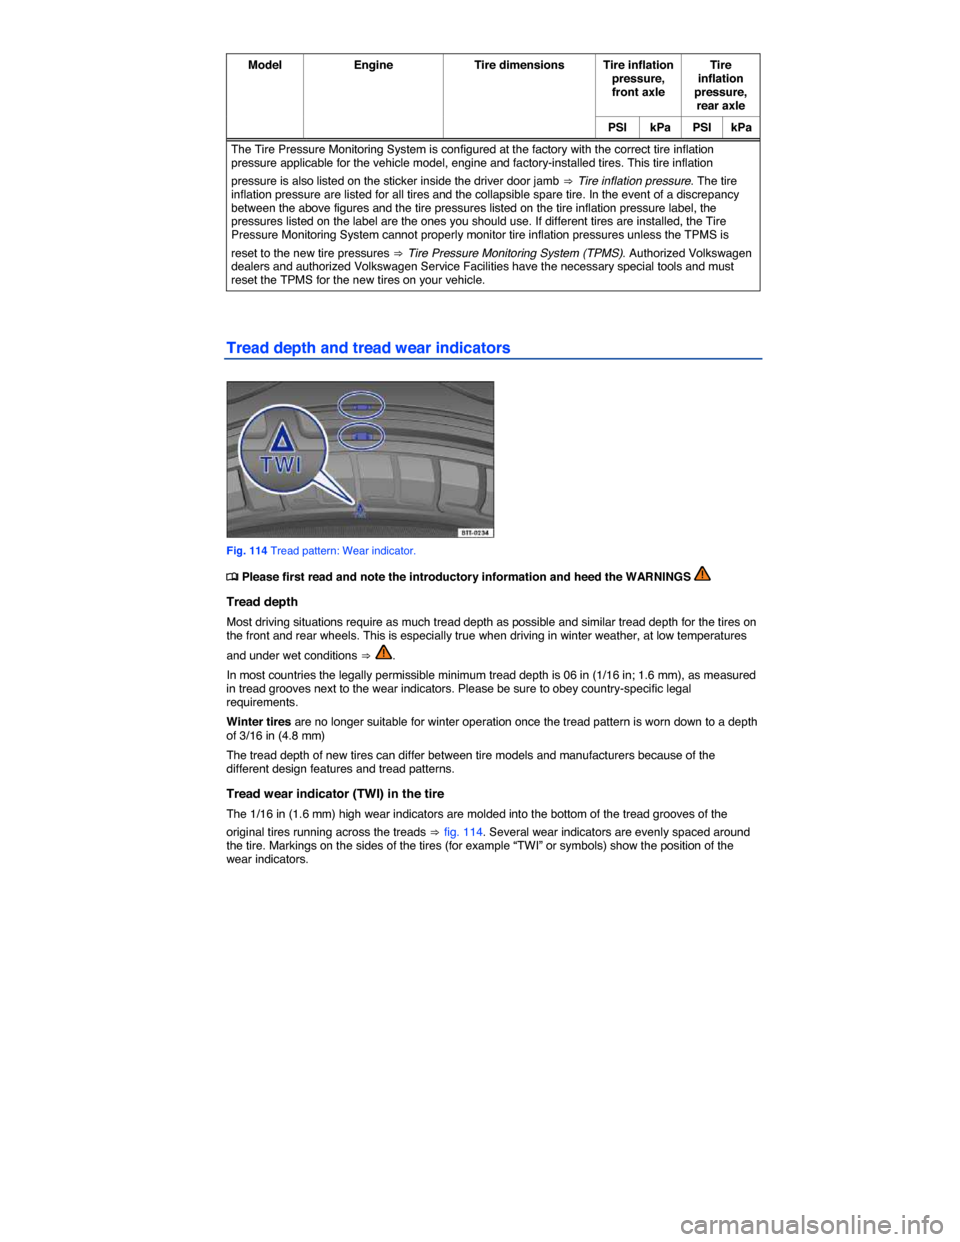
The Tire Pressure Monitoring System is configured at the factory with the correct tire inflation pressure applicable for the vehicle model, engine and factory-installed tires. This tire inflation
pressure is also listed on the sticker inside the driver door jamb ⇒ Tire inflation pressure. The tire inflation pressure are listed for all tires and the collapsible spare tire. In the event of a discrepancy between the above figures and the tire pressures listed on the tire inflation pressure label, the pressures listed on the label are the ones you should use. If different tires are installed, the Tire Pressure Monitoring System cannot properly monitor tire inflation pressures unless the TPMS is
reset to the new tire pressures ⇒ Tire Pressure Monitoring System (TPMS). Authorized Volkswagen dealers and authorized Volkswagen Service Facilities have the necessary special tools and must reset the TPMS for the new tires on your vehicle.
Tread depth and tread wear indicators
Fig. 114 Tread pattern: Wear indicator.
�
Page 233 of 620

�x In the Sound settings main menu, press the Dynaudio Confidence main menu.
Function key: Effect
Dynaudio Presets : Set sound profile and tone color.
Individual : Move slider �? to change setting for tone color.
Authentic , Soft , Dynamic , Speech : Press to select sound profile.
Surround : Set level of surround effect.
System settings
�
Page 234 of 620

241
Function key: Effect
Date format : Press to set format for displaying the date.
Resetting to factory settings
Resetting to the original settings will erase entered data, destinations and settings, depending on the selection made.
�x Press Factory default settings in the System settings main menu.
�x In the Factory settings selection menu, select the check boxes on the left of the entries that you want to delete.
�x Press the Reset function key.
�x Also accept the confirmation dialog with the Reset function key.
Music files stored on the unit's hard drive must be deleted manually
It is important that the correct date and time are set in the vehicle to ensure all Infotainment Systems work properly.
Display settings
�
Page 246 of 620
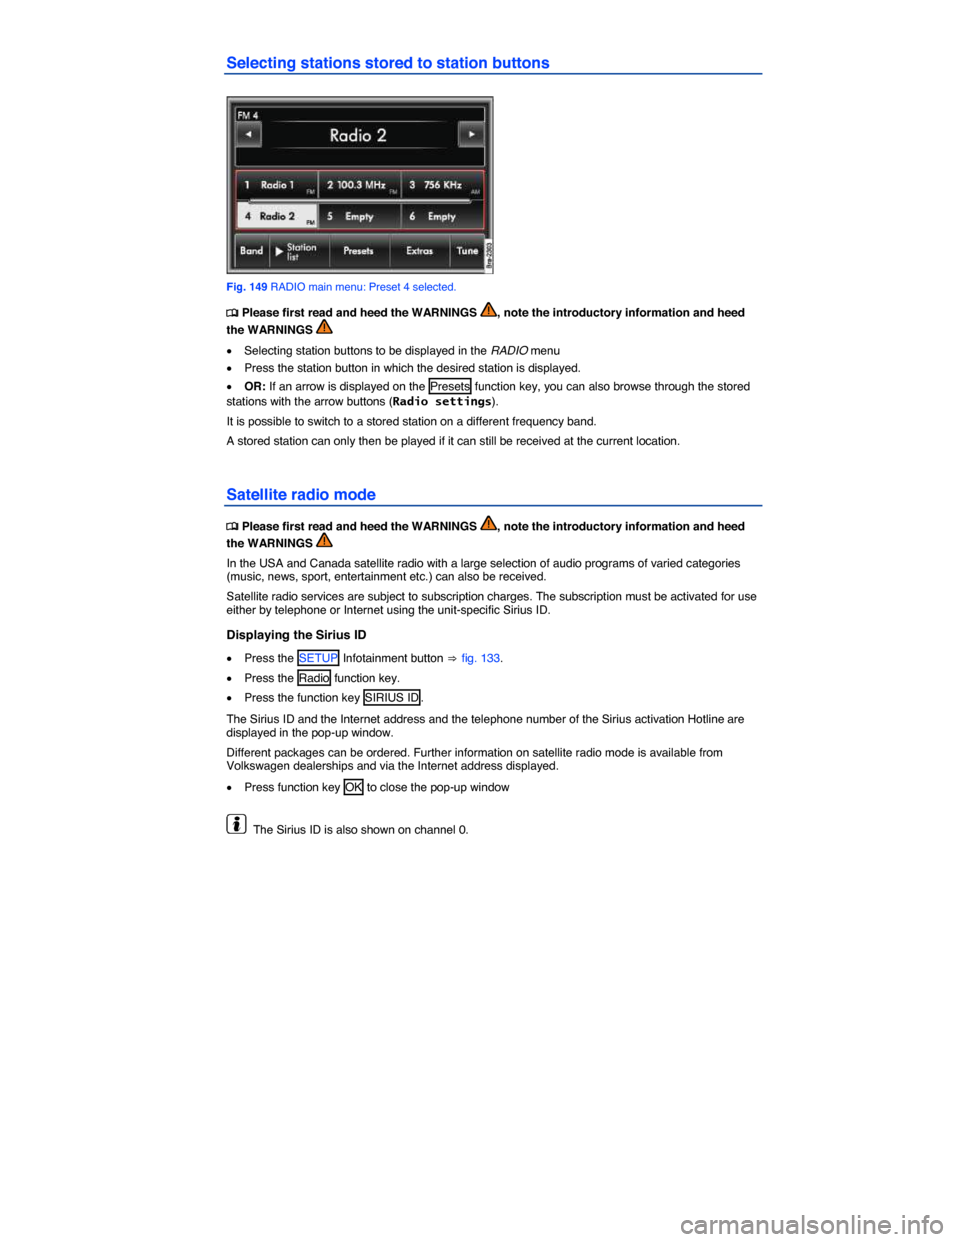
Selecting stations stored to station buttons
Fig. 149 RADIO main menu: Preset 4 selected.
�
Page 323 of 620
Acoustic driving recommendation settings
The volume of an acoustic driving recommendation can be adjusted to a predefined minimum and maximum volume using the volume control �D. All additional acoustic driving recommendations are issued at this volume.
The volume of audible navigation recommendations can be preset in the volume settings.
In the Navigation settings menu, you can switch off spoken navigation recommendations or define their level of detail.
Even when navigation information is switched off, you can show them briefly in the map view by
pressing the setting knob ⇒ fig. 133 (3).
If a turn was missed during route guidance and there is no possibility to turn, continue driving until the navigation system offers an alternative route.
The quality of the announcements given by the unit depends on the navigation data provided.
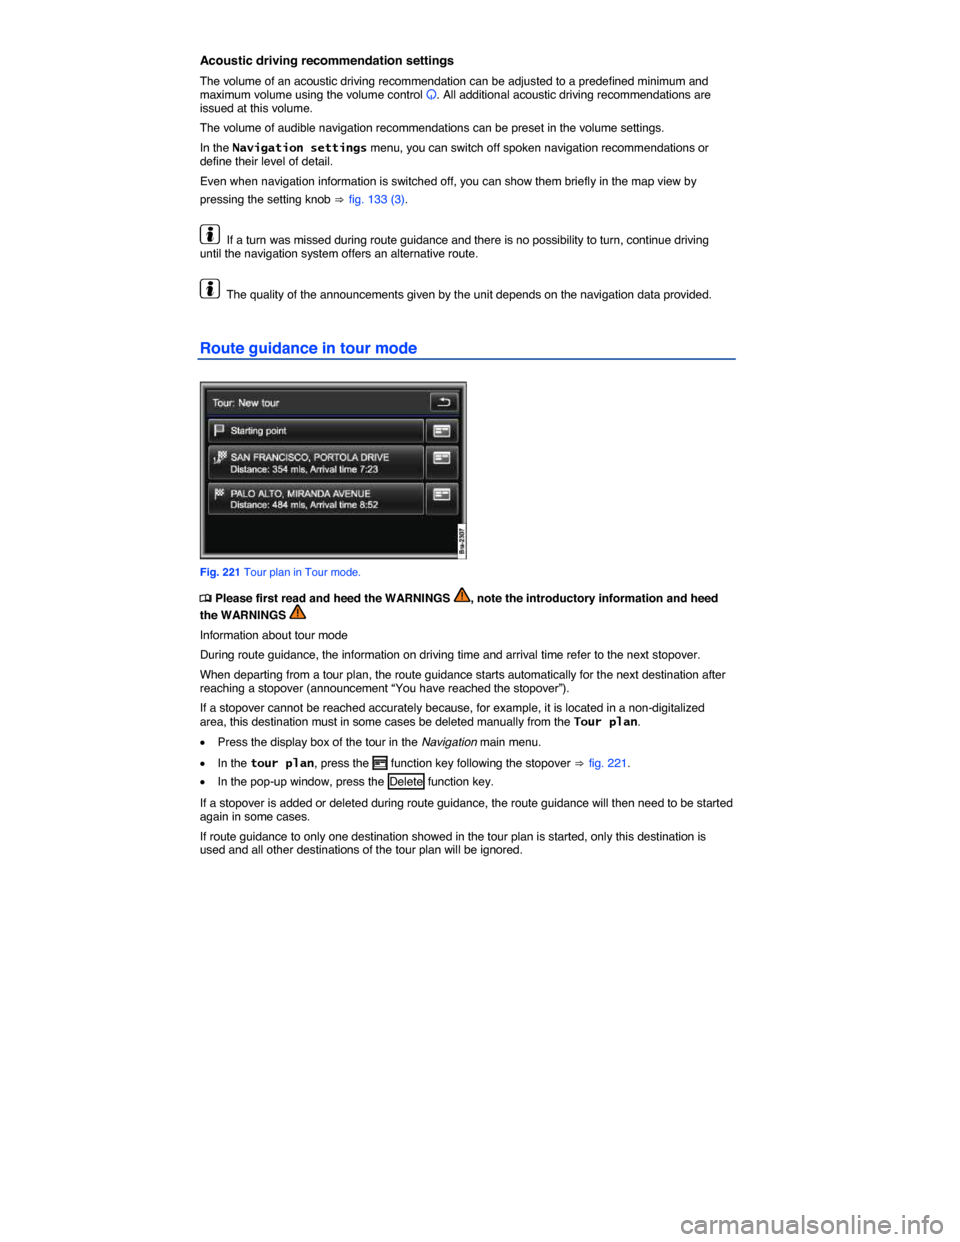
Route guidance in tour mode
Fig. 221 Tour plan in Tour mode.
�
Page 364 of 620

Function key: Effect
Telephone ID38: Display of IMEI (telephone ID, serial number). If a mobile phone is paired via Bluetooth rSAP or a SIM card is inserted in the SIM card reader, the telephone ID of the telephone control will be displayed. If a mobile phone is paired via Bluetooth HFP, the telephone ID of the
mobile phone is displayed ⇒ Bluetooth profiles.
Call options : Function settings for telephone calls that are made via the telephone control
SIM PIN settings38: Setting for use of the SIM PIN for the connection with a mobile phone.
Speed dial buttons : Set the telephone numbers for the speed dial buttons
SMS settings38: Setting for receiving and sending SMS from the vehicle.
Call forwarding38: Setting for forwarding incoming calls.
Automatic network selection38: Available mobile phone networks are displayed and can be selected. Logging on may not be possible due to restrictions for the SIM card being used. If the user profile is changed, the setting is reset to automatic if necessary.
Switch off telephone38: Switch the telephone control on or off.
Call options
�