warning lights VOLKSWAGEN TRANSPORTER 2011 Repair Manual
[x] Cancel search | Manufacturer: VOLKSWAGEN, Model Year: 2011, Model line: TRANSPORTER, Model: VOLKSWAGEN TRANSPORTER 2011Pages: 486, PDF Size: 69.28 MB
Page 284 of 486
• On vehicles with Climatronic: if the temperature inside the vehicle substantially increases or de-creases.
• When the vehicle starts rolling or brake support is required.
• If the voltage of the vehicle battery falls.
Conditions that necessitate a manual key start
The engine has to be started manually with the ve-hicle key in the following conditions:
• If the driver unfastens their seat belt.
• If a vehicle door is opened.
• If the bonnet is opened.
Switching the start/stop system on and off manually
• Press the @ button in the centre console 227.
• If the start/stop system has been deactivated, the indicator lamp in the button lights up.
The engine will start immediately if the vehicle Is In stop mode when the system is switched off man-ually with the @ button.
Hill Hold Assist
r--T'n First read and observe the Introductory L-I=JJ information and safety warnings & on page 282.
A WARNING
The brake servo and the power steering will not function If the engine Is switched off.
• Never allow the vehicle to roll if the engine is switched off.
• The start/stop system must be switched off if work Is to be carried out In the engine compartment.
CD
If the start/stop system Is used in very high outside temperatures over a long period, the vehicle battery can be damaged.
m In some cases. it will be necessary to restart L!J the engine manually with the vehicle key. Fol-low any corresponding messages on the instru-ment cluster display.
m At low speeds, the engine can be started L!J again if it has stalled by immediately pressing the clutch pedal.
holds the vehicle when pulling away on
an incline.
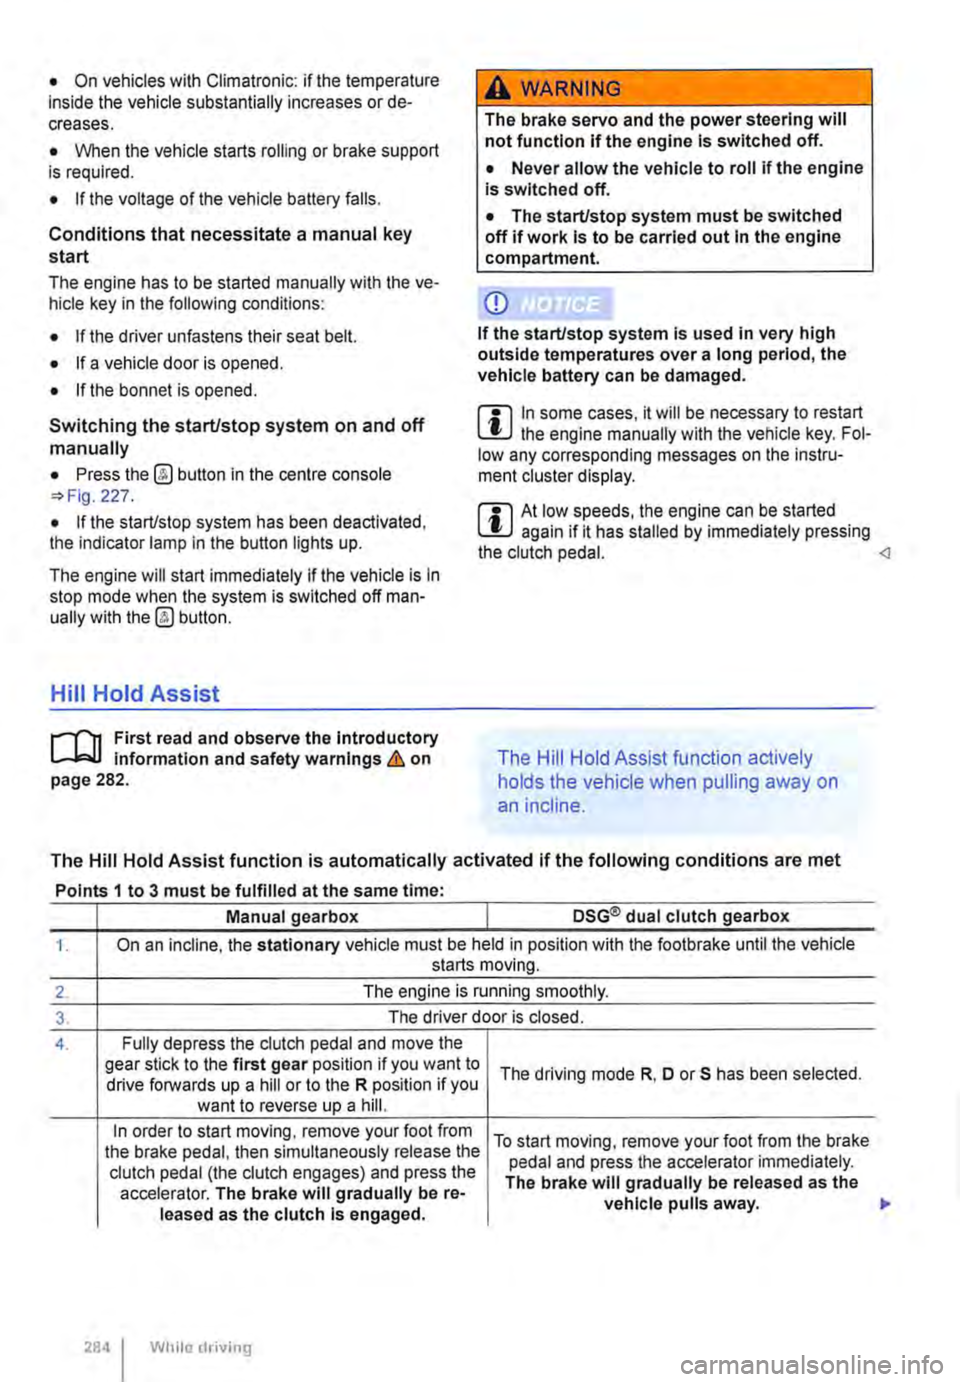
The Hill Hold Assist function is automatically activated if the following conditions are met
Points 1 to 3 must be fulfilled at the same time·
Manual gearbox DSG® dual clutch gearbox
1. On an incline, the stationary vehicle must be held in position with the footbrake until the vehicle starts moving.
2. The engine is running smoothly.
3. The driver door is closed.
4. Fully depress the clutch pedal and move the gear stick to the first gear position if you want to The driving mode R, D or S has been selected. drive forwards up a hill or to the R position if you want to reverse up a hill.
In order to start moving, remove your foot from To start moving, remove your foot from the brake the brake pedal, then simultaneously release the pedal and press the accelerator immediately. clutch pedal (the clutch engages) and press the The brake will gradually be released as the accelerator. The brake will gradually be re-vehicle pulls away. leased as the clutch Is engaged.
284 I While driving
Page 285 of 486
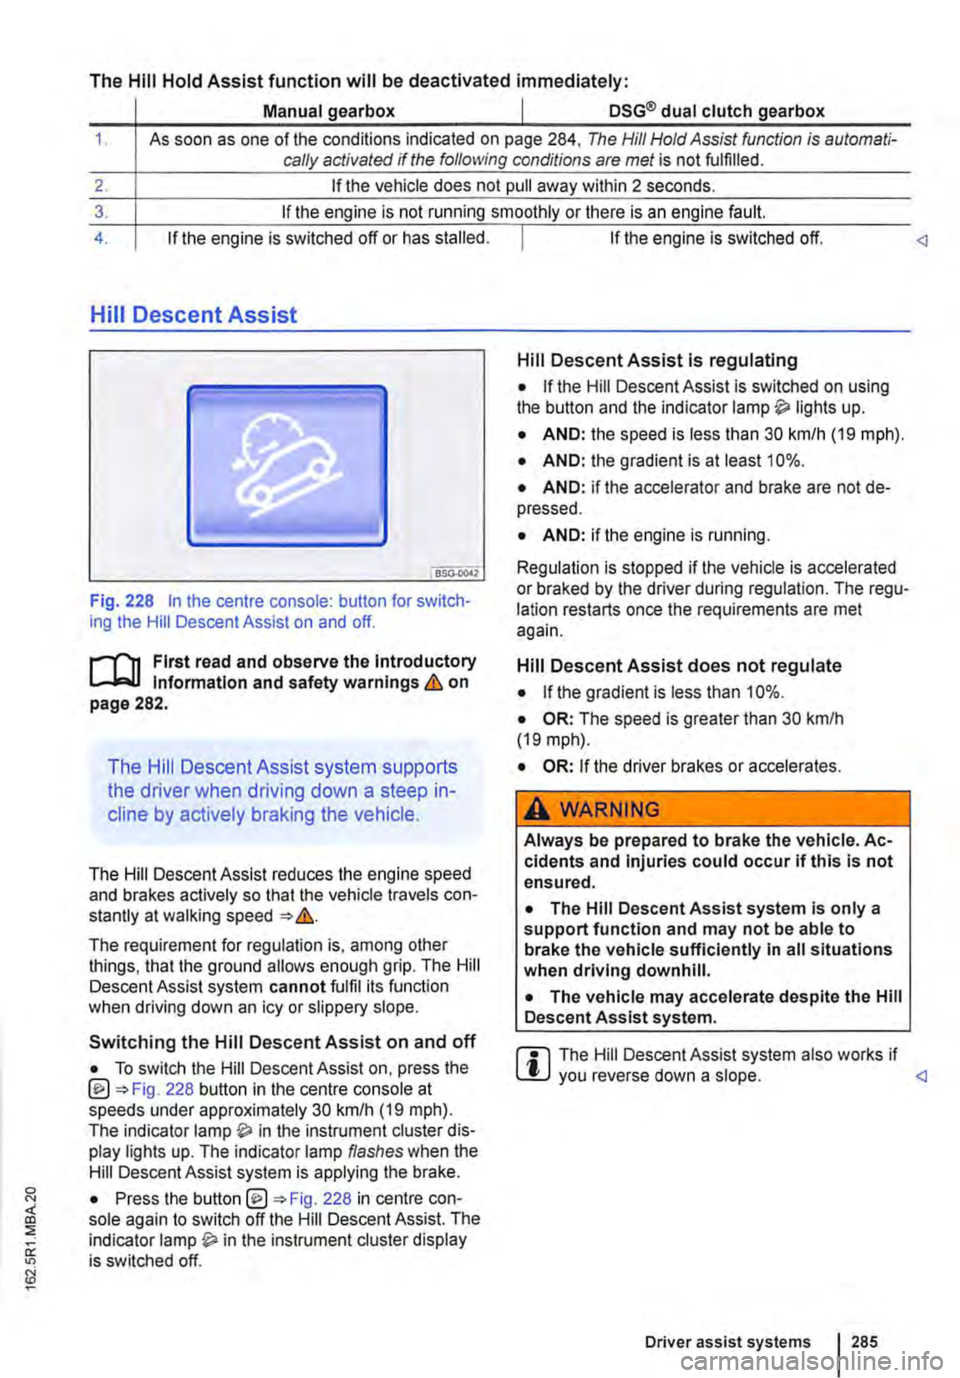
The Hill Hold Assist function will be deactivated immediately:
Manual gearbox I DSG® dual clutch gearbox
1. As soon as one of the conditions indicated on page 284, The Hill Hold Assist function is automati-cally activated if the following conditions are met is not fulfilled.
2. If the vehicle does not pull away within 2 seconds.
3. If the engine is not running smoothly or there is an engine fault.
4. If the engine is switched off or has stalled. I If the engine is switched off.
Hill Descent Assist
Fig. 228 In the centre console: button for switch-ing the Hill Descent Assist on and off.
l"'""'('n First read and observe the Introductory L-W.I Information and safety warnings & on page 282.
The Hill Descent Assist system supports
the driver when driving down a steep in-
cline by actively braking the vehicle.
The Hill Descent Assist reduces the engine speed and brakes actively so that the vehicle travels con-stantly at walking speed =>&.
The requirement for regulation is, among other things, that the ground allows enough grip. The Hill Descent Assist system cannot fulfil its function when driving down an icy or slippery slope.
Hill Descent Assist is regulating
• If the Hill Descent Assist is switched on using the button and the indicator lamp lights up.
• AND: the speed is less than 30 km/h (19 mph).
• AND: the gradient is at least 10%.
• AND: if the accelerator and brake are not de-pressed.
• AND: if the engine is running.
Regulation is stopped if the vehicle is accelerated or braked by the driver during regulation. The regu-lation restarts once the requirements are met again.
Hill Descent Assist does not regulate
• If the gradient is less than 10%.
• OR: The speed is greater than 30 km/h (19 mph).
• OR: If the driver brakes or accelerates.
A WARNING
Always be prepared to brake the vehicle. Ac-cidents and Injuries could occur if this is not ensured.
• The Hill Descent Assist system is only a support function and may not be able to brake the vehicle sufficiently In all situations when driving downhill.
• The vehicle may accelerate despite the Hill Descent Assist system.
• To switch the Hill Descent Assist on, press the @=>Fig. 228 button in the centre console at speeds under approximately 30 km/h (19 mph). The indicator in the instrument cluster dis-play lights up. The indicator lamp flashes when the Hill Descent Assist system is applying the brake.
r::l The Hill Descent Assist system also works if W you reverse down a slope.
Driver assist systems 285
Page 286 of 486
Rear axle differential lock
OSG-0041
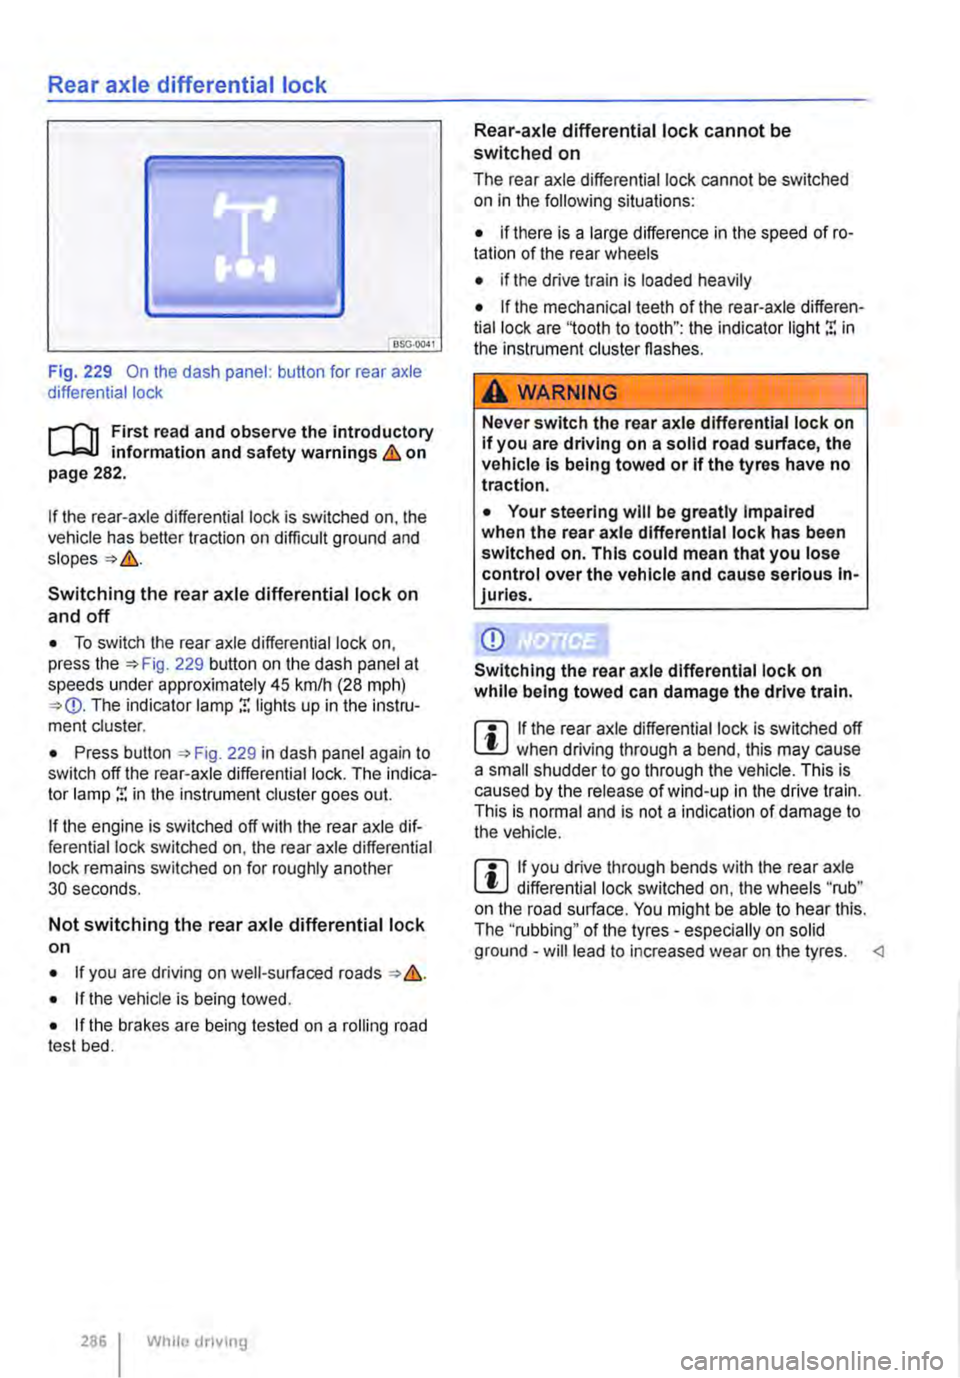
Fig. 229 On the dash panel: button for rear axle differential lock
i""('n First read and observe the introductory information and safety warnings & on page 282.
If the rear-axle differential lock is switched on, the vehicle has better traction on difficult ground and
Switching the rear axle differential lock on
and off
• To switch the rear axle differential lock on, press the 229 button on the dash panel at speeds under approximately 45 krnlh (28 mph) The indicator lamp r. lights up in the instru-ment cluster.
• Press button , Fig. 229 in dash panel again to switch off the rear-axle differential lock. The indica-tor lamp r. in the instrument cluster goes out.
If the engine is switched off with the rear axle dif-ferential lock switched on, the rear axle differential lock remains switched on for roughly another 30 seconds.
Not switching the rear axle differential lock on
• If you are driving on well-surfaced roads &.
• If the vehicle is being towed.
• If the brakes are being tested on a rolling road test bed.
286 I While dnving
Rear-axle differential lock cannot be switched on
The rear axle differential lock cannot be switched on in the following situations:
• if there is a large difference in the speed of ro-tation of the rear wheels
• if the drive train is loaded heavily
• If the mechanical teeth of the rear-axle differen-tial lock are '1ooth to tooth": the indicator light r. in the instrument cluster flashes.
A WARNING
Never switch the rear axle differential lock on If you are driving on a solid road surface, the vehicle is being towed or if the tyres have no traction.
• Your steering will be greatly Impaired when the rear axle differential lock has been switched on. This could mean that you lose control over the vehicle and cause serious In-juries.
CD
Switching the rear axle differential lock on while being towed can damage the drive train.
m If the rear axle differential lock is switched off W when driving through a bend, this may cause a small shudder to go through the vehicle. This is caused by the release of wind-up in the drive train. This is normal and is not a indication of damage to the vehicle.
m If you drive through bends with the rear axle W differential lock switched on, the wheels "rub" on the road surface. You might be able to hear this. The ''rubbing" of the tyres -especially on solid ground -will lead to increased wear on the tyres.
Page 289 of 486
m If there is a function fault in the ParkPilot, an W acoustic warning is emitted for approximately 3 seconds when switched on for the first time. The ParkPilot should be checked by a qualified work-shop immediately.
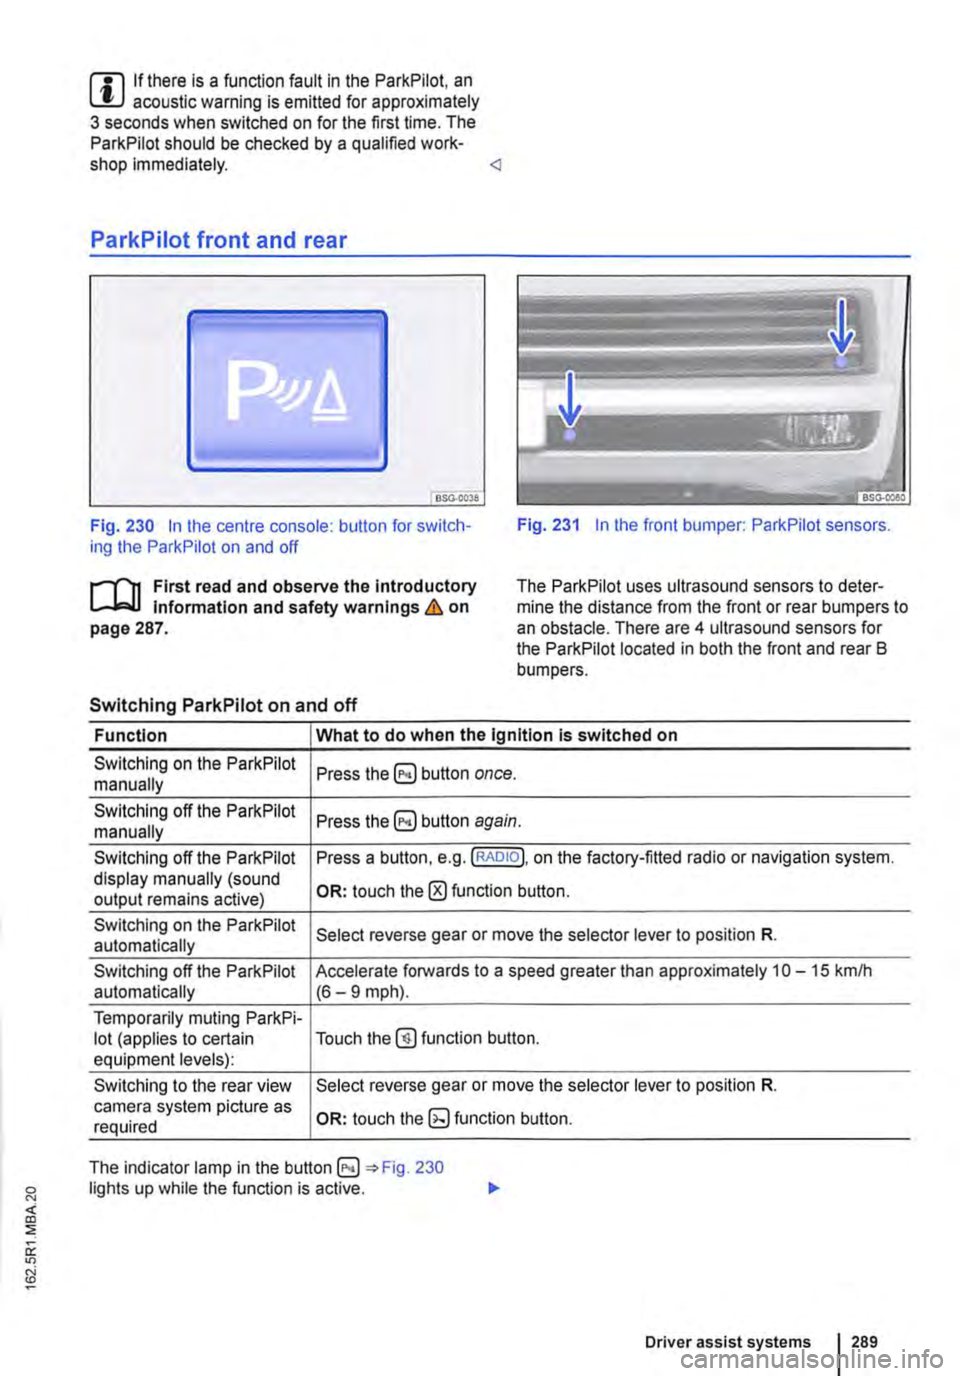
Fig. 230 In the centre console: button for switch-ing the ParkPilot on and off Fig. 231 In the front bumper: ParkPilot sensors.
r'l'11 First read and observe the Introductory Information and safety warnings & on page 287.
The Park Pilot uses ultrasound sensors to deter-mine the distance from the front or rear bumpers to an obstacle. There are 4 ultrasound sensors for the ParkPilot located in both the front and rear B bumpers.
Switching ParkPilot on and off
Function What to do when the Ignition is switched on
Switching on the ParkPilot Press button once. manually
Switching off the ParkPilot Press button again. manually
Switching off the ParkPilot Press a button, e.g. (RADIO!, on the factory-fitted radio or navigation system. display manually (sound OR: touch the 0 function button. output remains active)
Switching on the ParkPilot Select reverse gear or move the selector lever to position R. automatically
Switching off the ParkPilot Accelerate forwards to a speed greater than approximately 10-15 kmlh automatically (6-9 mph).
Temporarily muting ParkPi-lot (applies to certain Touch the@) function button. equipment levels):
Switching to the rear view Select reverse gear or move the selector lever to position R. camera system picture as OR: touch function button. required
The indicator lamp in the =:o Fig. 230 lights up while the function is active.
Driver assist systems 1289
Page 299 of 486
• System version 1 functions at speeds of 30-160 km/h (20 mph -100 mph).
• System version 2 functions at speeds of 30-210 km/h (20 m ph-130 m ph).
In vehicles with a dual clutch gearbox DSG®, the adaptive cruise control (ACC) can brake the vehi-cle until it comes to a complete standstill behind a vehicle in front that is stopping.
Driver prompt to take over control
There are system-specific limits on the adaptive cruise control (ACC) when driving. This means that the driver may have to control the speed and dis-tance between the vehicle and other vehicles in certain circumstances.
The driver is told to take control of the vehicle via a message on the instrument cluster display prompts a braking intervention, and a signal tone =<>page 300.
Additional information and warnings:
• Exterior views =<>page 5
• Volkswagen information system =<>page 24
• Cruise control system (CCS) =<>page 295
• Area monitoring system (Front Assist) =<>page 307
• Accessories, modifications, repairs and renewal of parts =<>page 394
A WARNING
The intelligent technology used in the adap-tive cruise control (ACC) cannot overcome the laws of physics, and functions only within the limits of the system. Careless or uninten-tional use of the adaptive cruise control (ACC) can cause accidents and lead to seri-ous injury. The system Is not a substitute for the full concentration of the driver.
• Adapt your speed and distance from the vehicles ahead to suit visibility, weather, road and traffic conditions.
• Do not use the adaptive cruise control (ACC) in poor visibility, on steep or winding roads, or on slippery road surfaces e.g. on snow, ice, wet roads, loose chippings or floo-ded roads.
A WARNING (Continued)
• Never use the adaptive cruise control (ACC) off-road or on unsurfaced roads. The adaptive cruise control (ACC) is designed for use on surfaced roads only.
• The adaptive cruise control (ACC) does not react to stationary obstacles, e.g. the tail end of a traffic jam, a vehicle that has broken down, or vehicles waiting at traffic lights.
• The adaptive cruise control (ACC) does not react to persons, animals or vehicles crossing or approaching in the same lane.
• If the adaptive cruise control (ACC) speed reduction is insufficient, you should brake the vehicle by depressing the foot brake.
• Brake the vehicle by depressing the brake if the vehicle rolls inadvertently on after the driver has been prompted to take control of the vehicle.
• If the instrument cluster display indicates that the driver should take control of the vehi-cle, you have to regulate the distance your-self.
• The driver must be prepared to take con-trol of the vehicle (by accelerating or braking) at all times.
CD
Switch off the adaptive cruise control (ACC) if you suspect that the radar sensor has been damaged. This can help to prevent secondary damage. Have the radar sensor realigned.
• Repair work on the radar sensor will require special knowledge and tools. Volkswagen rec-ommends using a Volkswagen dealership for this purpose.
m If the adaptive cruise control (ACC) does not L!J function as described in this chapter, do not use it, and have the system checked by a qualified workshop. Volkswagen recommends using a Voikswagen dealership for this purpose.
m The maximum vehicle speed when the adap-L!J live cruise control (ACC) is active is limited to either 160 km/h (1 00 m ph) or 210 km/h (130 m ph). depending on the system version.
m If the adaptive cruise control (ACC) is active, L!J unfamiliar noises may be heard during the automatic braking procedure. These are caused by the braking system.
Page 301 of 486
Several warning and indicator lamps will light up briefly as a functional check when the ignition is switched on. They will go out after a few seconds.
A WARNING
Failure to observe the warning lamps and text messages could lead to accidents and seri-ous Injuries.
Radar sensor
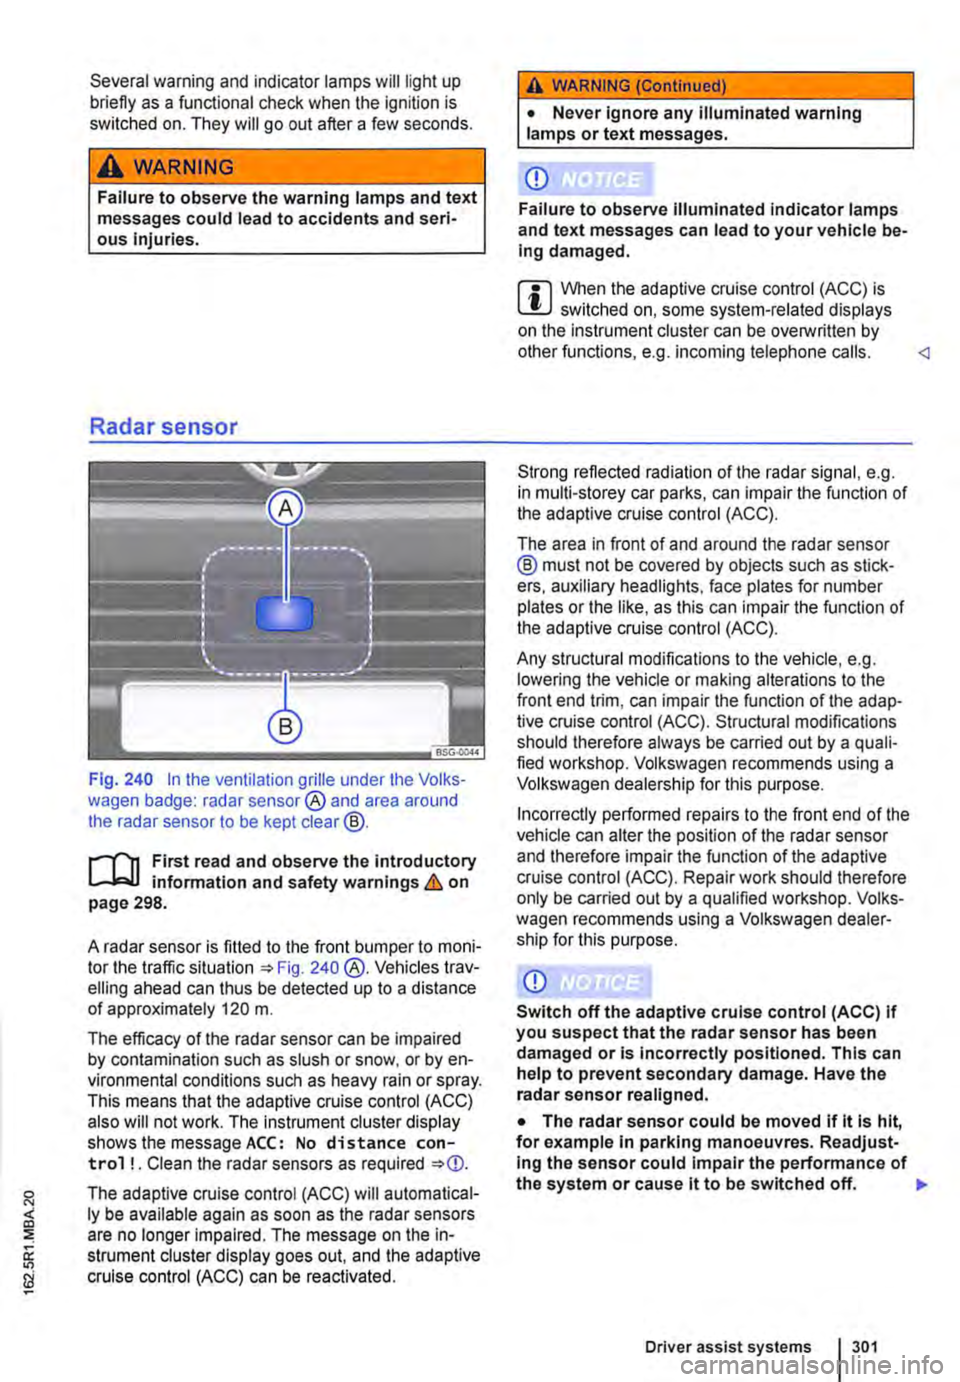
Fig. 240 In the ventilation grille under the Volks-wagen badge: radar sensor® and area around the radar sensor to be kept clear@.
r--('n First read and observe the introductory L-J,:.U information and safety warnings & on page 298.
A radar sensor is fitted to the front bumper to moni-tor the traffic situation 240 @.Vehicles trav-elling ahead can thus be detected up to a distance of approximately 120 m.
The efficacy of the radar sensor can be impaired by contamination such as slush or snow. or by en-vironmental conditions such as heavy rain or spray. This means that the adaptive cruise control (ACC) also will not work. The instrument cluster display shows the message ACC: No distance con-trol ! . Clean the radar sensors as required
The adaptive cruise control (ACC) will automatical-ly be available again as soon as the radar sensors are no longer impaired. The message on the in-strument cluster display goes out. and the adaptive cruise control (ACC) can be reactivated.
A WARNING (Continued)
• Never ignore any illuminated warning lamps or text messages.
CD
Failure to observe illuminated indicator lamps and text messages can lead to your vehicle be-Ing damaged.
m When the adaptive cruise control (ACC) is L!..J switched on, some system-related displays on the instrument cluster can be overwritlen by other functions, e.g. incoming telephone calls.
The area in front of and around the radar sensor ® must not be covered by objects such as stick-ers, auxiliary headlights, face plates for number plates or the like, as this can impair the function of the adaptive cruise control (ACC).
Any structural modifications to the vehicle, e.g. lowering the vehicle or making alterations to the front end trim, can impair the function of the adap-tive cruise control (ACC). Structural modifications should therefore always be carried out by a quali-fied workshop. Volkswagen recommends using a Volkswagen dealership for this purpose.
Incorrectly performed repairs to the front end of the vehicle can alter the position of the radar sensor and therefore impair the function of the adaptive cruise control (ACC). Repair work should therefore only be carried out by a qualified workshop. Volks-wagen recommends using a Volkswagen dealer-ship for this purpose.
CD
Switch off the adaptive cruise control (ACC) If you suspect that the radar sensor has been damaged or is incorrectly positioned. This can help to prevent secondary damage. Have the radar sensor realigned.
• The radar sensor could be moved if it is hit, for example in parking manoeuvres. Readjust-Ing the sensor could impair the performance of the system or cause it to be switched off. 11>
Driver assist systems 301
Page 302 of 486
CD CD
• Remove snow with a brush, and remove Ice • Repair work on the radar sensor will require special knowledge and tools. Volkswagen rec-ommends using a Volkswagen dealership for this purpose.
preferably with a solvent-free de-leer spray.
SSG-0047
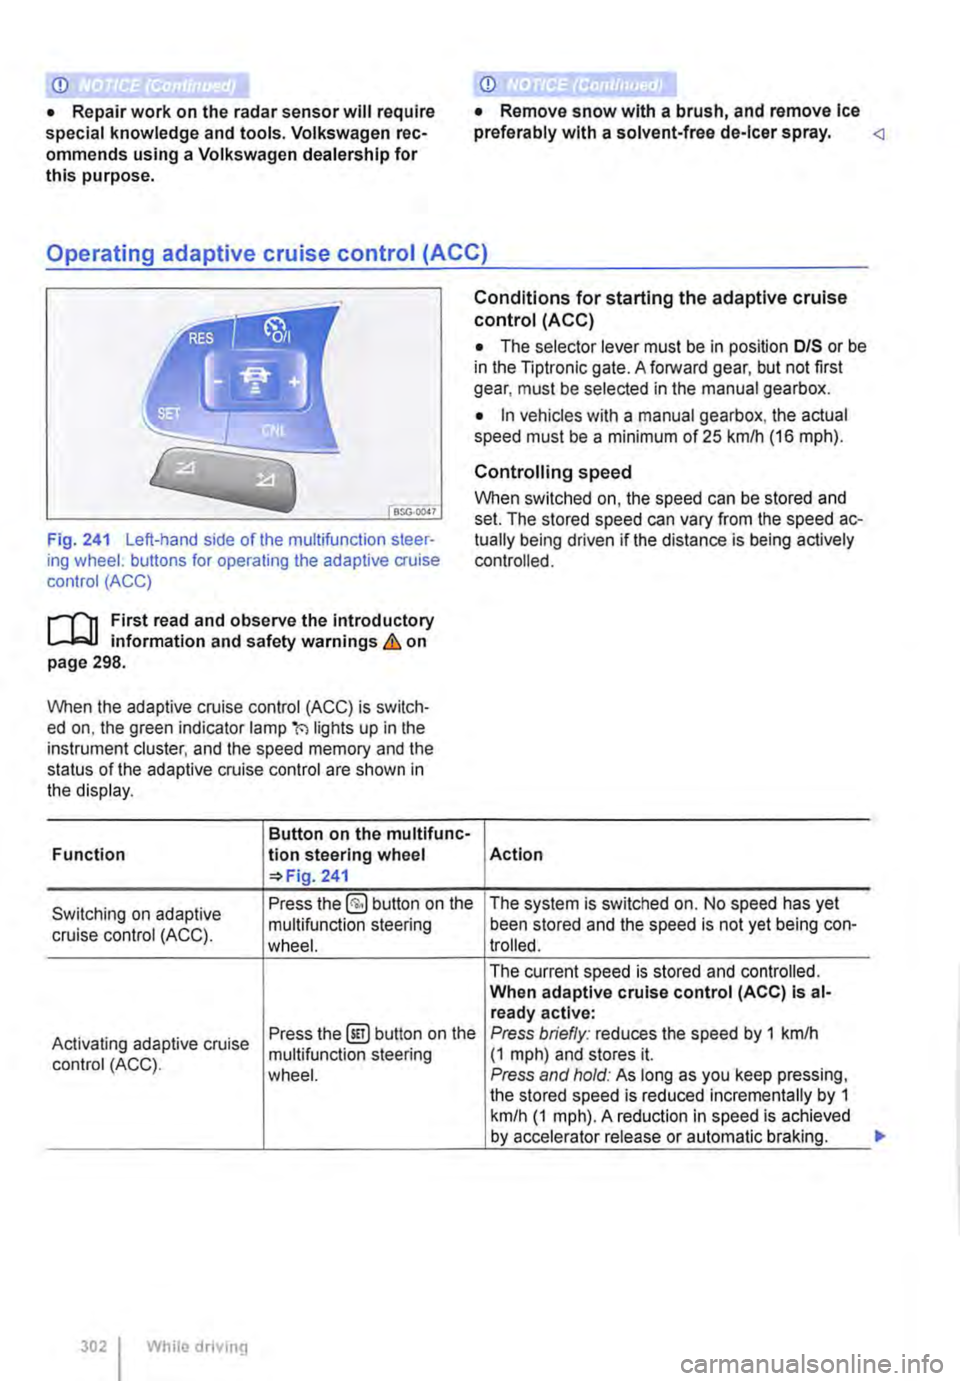
Fig. 241 Left-hand side of the multifunction steer-ing wheel: buttons for operating the adaptive cruise control (ACC)
1"1'11 First read and observe the introductory L-I=J.I information and safety warnings Lb. on page 298.
When the adaptive cruise control (ACC) is switch-ed on, the green indicator lamp(') lights up in the instrument cluster, and the speed memory and the status of the adaptive cruise control are shown in the display.
Button on the multifunc-Function lion steering wheel 241
Conditions for starting the adaptive cruise control (ACC)
• The selector lever must be in position D/S or be in the Tiptronic gate. A forward gear, but not first gear, must be selected in the manual gearbox.
• In vehicles with a manual gearbox, the actual speed must be a minimum of 25 kmlh (16 m ph).
Controlling speed
When switched on, the speed can be stored and set. The stored speed can vary from the speed ac-tually being driven if the distance is being actively controlled.
Action
Switching on adaptive Press the §) button on the The system is switched on. No speed has yet
cruise control (ACC). multifunction steering been stored and the speed is not yet being con-wheel. trolled.
The current speed is stored and controlled. When adaptive cruise control (ACC) Is al-ready active:
Activating adaptive cruise Press the@!) button on the Press briefly: reduces the speed by 1 kmlh
control (ACC). multifunction steering (1 mph) and stores it. wheel. Press and hold: As long as you keep pressing, the stored speed is reduced incrementally by 1 km/h (1 mph). A reduction in speed is achieved by accelerator release or automatic braking.
302 While driving
...
Page 304 of 486
When the highest level is reached, the distance re-turns to the lowest level when the button is press-ed again.
The distance level can also be set using the Q or Q buttons on the multifunction steering wheel im-mediately after the(!) button on the multifunction steering Fig. 241 has been pressed.
Select the Settings menu, Assist systems submenu, ACC to set the distance to be used when the ACC is switched on 24.
Setting the gearbox programme
The acceleration response can be influenced by the gearbox programme selected. The programme can be set Using the ACC option in the Assistant submenu in the Settings menu. The following gearbox programmes can be selected:
• Normal
• Sport
• Eco
The following conditions can prevent the adaptive cruise control (ACC) from reacting:
• If the accelerator is depressed.
• If no gear is selected.
• If the ESC is taking corrective action.
• If there is a fault in several brake lights on the vehicle or on a trailer with an electrical connection to the vehicle.
• If the vehicle is reversing.
• System version 1: if the vehicle is travelling faster than approximately 160 km/h (1 00 m ph).
• System version 2: if the vehicle is travelling faster than approximately 210 km/h (130 mph).
A WARNING
If you do not maintain the minimum distance to a vehicle In front and the difference In speed between the two vehicles is so great that the braking action of the adaptive cruise control (ACC) is insufficient, you are In dan-ger of colliding with the vehicle in front. You should reduce the vehicle speed immediately with the foot brake.
• The adaptive cruise control (ACC) may not be able to detect all driving situations cor-rectly.
• Leaving your foot on the accelerator means that the adaptive cruise control (ACC) will not brake automatically. This is because manual acceleration overrides the system.
• You should always be prepared to brake the vehicle yourself.
• Observe country-specific regulations re-garding the minimum distance.
m The set speed will be deleted if the ignition or L!.J the adaptive cruise control (ACC) is switched off.
m The adaptive cruise control (ACC) is auto-L!.J matically deactivated when the traction con-trol system (TCS) is deactivated.
m In vehicles with a start/stop system, the en-L!.J gine is switched off automatically during the stationary phase of adaptive cruise control (ACC) and is then restarted for moving off.
situations
1""111 First read and observe the introductory L-J,:.IJ Information and safety warnings & on page 298.
The adaptive cruise control (ACC) should be switched off in the following situations due to sys-tem limitations &:
304 I While driving
• When turning off roads, driving around round-abouts, narrow curves, joining motorways, exiting from motorways or driving through road works, to prevent the vehicle from unnecessarily accelerat-ing to the set speed in these situations
• When driving through a tunnel as this situation could impair the system function.
• On roads with more than one lane, if other vehi-cles are driving more slowly in the fast lane. The slower vehicles In the other lane would be overtak-en from the right side in this case.
• In heavy rain, snow or spray as vehicles travel-ling ahead cannot be monitored sufficiently or maybe cannot be monitored at all. .,.
Page 309 of 486
m When Front Assist is switched on, the display L!J in the instrument cluster can be overwritten by displays related to other functions, e.g. an in-coming telephone call.
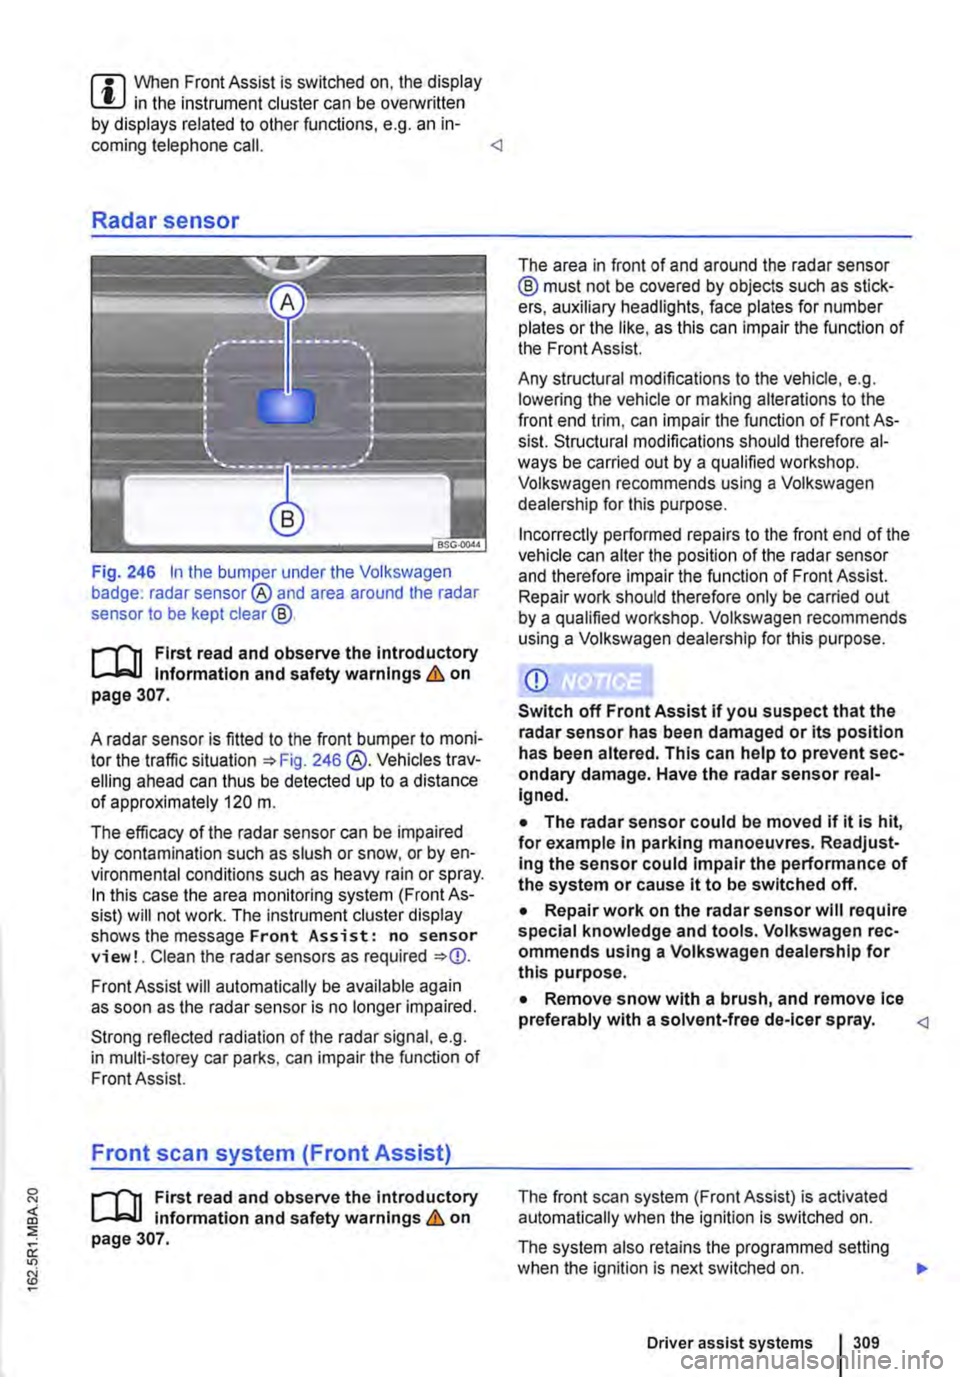
Fig. 246 In the bumper under the Volkswagen badge: radar sensor® and area around the radar sensor to be kept clear@.
r-f"'n First read and observe the Introductory l.-lo:-1.1 Information and safety warnings & on page 307.
A radar sensor is fitted to the front bumper to moni-tor the traffic situation =>Fig. 246 @.Vehicles trav-elling ahead can thus be detected up to a distance of approximately 120 m.
The efficacy of the radar sensor can be impaired by contamination such as slush or snow, or by en-vironmental conditions such as heavy rain or spray. In this case the area monitoring system (Front As-sist) will not work. The instrument cluster display shows the message Front Assist: no sensor view!. Clean the radar sensors as required =>
Strong reflected radiation of the radar signal, e.g. in multi-storey car parks, can impair the function of Front Assist.
Front scan system (Front Assist)
r-f"'n First read and observe the introductory l.-lo:-1.1 information and safety warnings & on page 307.
The area in front of and around the radar sensor @ must not be covered by objects such as stick-ers, auxiliary headlights, face plates for number plates or the like, as this can impair the function of the Front Assist.
Any structural modifications to the vehicle, e.g. lowering the vehicle or making alterations to the front end trim, can impair the function of Front As-sist. Structural modifications should therefore al-ways be carried out by a qualified workshop. Volkswagen recommends using a Volkswagen dealership for this purpose.
Incorrectly performed repairs to the front end of the vehicle can alter the position of the radar sensor and therefore impair the function of Front Assist. Repair work should therefore only be carried out by a qualified workshop. Volkswagen recommends using a Volkswagen dealership for this purpose.
• The radar sensor could be moved if it is hit, for example In parking manoeuvres. Readjust-Ing the sensor could impair the performance of the system or cause it to be switched off.
• Repair work on the radar sensor will require special knowledge and tools. Volkswagen rec-ommends using a Volkswagen dealership for this purpose.
• Remove snow with a brush, and remove Ice preferably with a solvent-free de-leer spray.
The system also retains the programmed setting when the ignition is next switched on. 1>
Driver assist systems 309
Page 310 of 486
Volkswagen recommends that Front Assist is switched on at all times. Exceptions =>page 310, Temporarily switch off the front scan system (Front Assist) in the following situations.
Activating and deactivating the front scan system
The front scan system can be activated and deacti-vated using the Front Assist option in the As-sistant submenu of the Settings menu. A tick indicates that a driver assist system is switched on.
The advance warning and distance warning are deactivated as well when the front scan system is deactivated.
If the front scan system is deactivated, a confirma-tory symbol is shown in the instrument cluster dis-play =>page 308
Activating and deactivating the advanced warning
The advance warning can be activated and deacti-vated using the Front Assist option in the As-sistant submenu of the Settings menu.
Activating or deactivating the distance warning
Depending on the vehicle equipment, the distance warning can be activated and deactivated using the Front Assist option in the Assistant sub-menu of the Settings menu.
Volkswagen recommends that the distance warn-ing is switched on at all times.
following situations
r-T'n First read and observe the introductory l-J,::JJ information and safety warnings & on page 307.
The area monitoring system (Front Assist) should be switched off in the following situations due to system limitations => &:
• If the vehicle is being towed.
• If the vehicle is on a rolling road test bed.
• If the vehide is utilised in a capacity beyond us-age on public roads, e.g. off-road or racing.
• If the radar sensor is faulty.
310 I While drivtng
• On external force on the radar sensor, e.g. after a rear-end collision.
• In the event of multiple unwanted interventions.
• If the radar sensor is covered temporarily by any auxiliary equipment, e.g. auxiliary headlights.
• If the vehicle is being loaded onto a truck, car ferry or motorail train.
A WARNING
Failure to switch off Front Assist in the situa-tions mentioned can cause accidents and se-rious Injuries.