alarm VOLKSWAGEN TRANSPORTER 2020 Owners Manual
[x] Cancel search | Manufacturer: VOLKSWAGEN, Model Year: 2020, Model line: TRANSPORTER, Model: VOLKSWAGEN TRANSPORTER 2020Pages: 486, PDF Size: 69.28 MB
Page 31 of 486
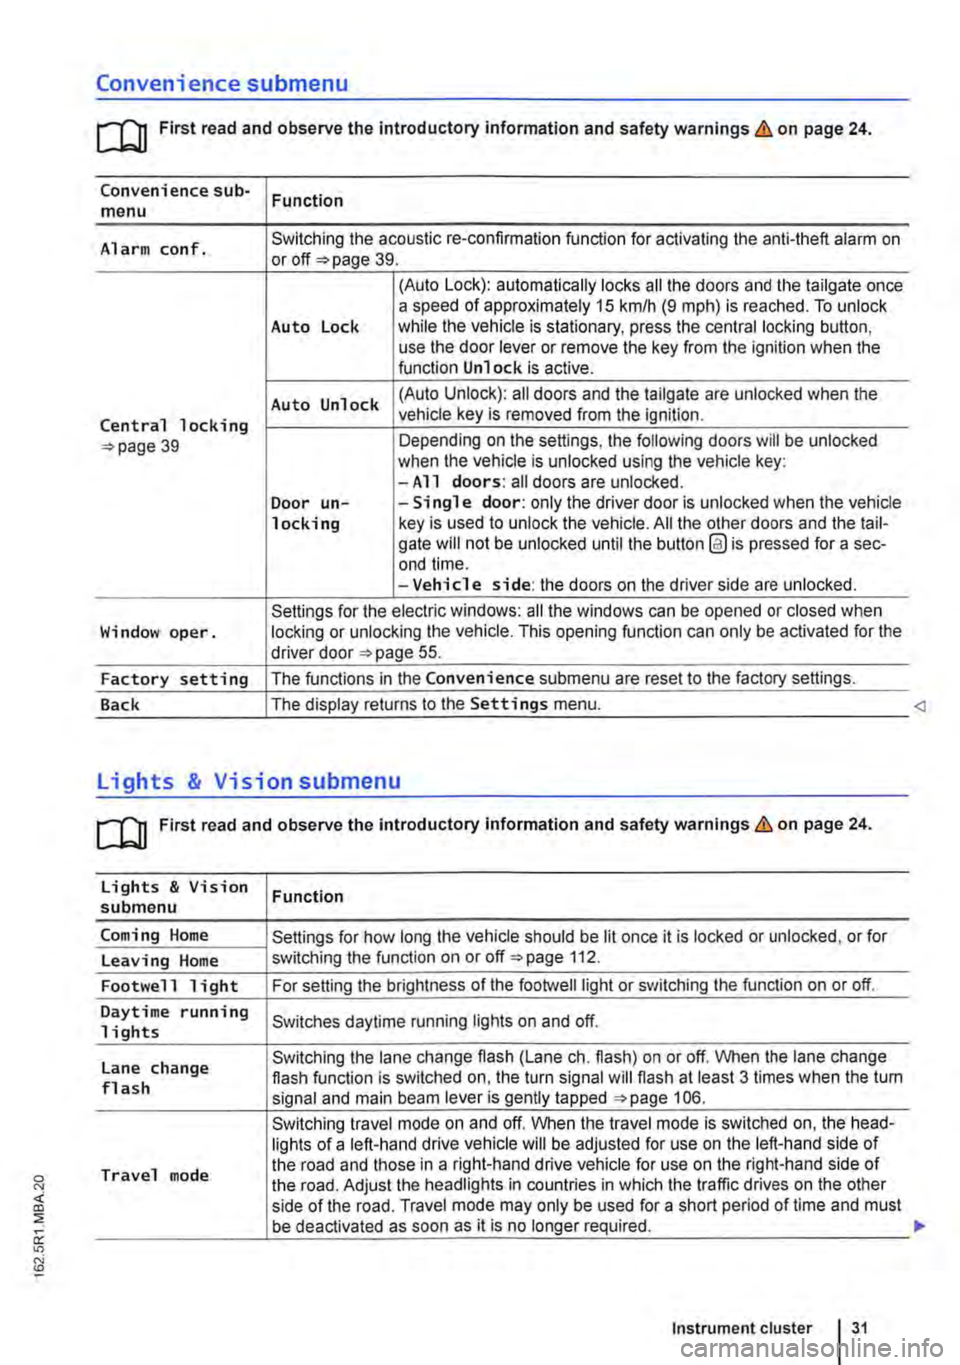
Convenience submenu
m First read and observe the introductory information and safety warnings & on page 24.
Convenience sub-menu Function
Alarm conf. Switching the acoustic re-confirmation function for activating the anti-theft alarm on or page 39.
(Auto Lock): automatically locks all the doors and the tailgate once a speed of approximately 15 km/h (9 m ph) is reached. To unlock Auto Lock while the vehicle is stationary, press the central locking button, use the door lever or remove the key from the ignition when the function Unlock is active.
Auto Unlock (Auto Unlock): all doors and the tailgate are unlocked when the
Central locking vehicle key is removed from the ignition.
39 Depending on the settings, the following doors will be unlocked when the vehicle is unlocked using the vehicle key: -All doors: all doors are unlocked. Door un--Single door: only the driver door is unlocked when the vehicle locking key is used to unlock the vehicle. All the other doors and the tail-gate will not be unlocked until the button @ is pressed for a sec-end time. -Vehicle side: the doors on the driver side are unlocked.
Settings for the electric windows: all the windows can be opened or closed when Window oper. locking or unlocking the vehicle. This opening function can only be activated for the driver door 55.
Factory setting The functions in the Convenience submenu are reset to the factory settings.
Back The display returns to the Settings menu.
[QJ First read and observe the introductory information and safety warnings & on page 24.
Lights & Vision Function submenu
Coming Home Settings for how long the vehicle should be lit once it is locked or unlocked, or for
Leaving Home switching the function on or off 112.
Footwell light For setting the brightness of the footwelllight or switching the function on or off.
Daytime running Switches daytime running lights on and off. 1 i ghts
Lane change Switching the lane change flash (Lane eh. flash) on or off. When the lane change flash function is switched on, the turn signal will flash at least 3 times when the tum flash signal and main beam lever is gently tapped 106.
Switching travel mode on and off. When the travel mode is switched on, the head-lights of a left-hand drive vehicle will be adjusted for use on the left-hand side of
Travel mode the road and those in a right-hand drive vehicle for use on the right-hand side of the road. Adjust the headlights in countries in which the traffic drives on the other side of the road. Travel mode may only be used for a short period of time and must be deactivated as soon as it is no longer required.
Instrument cluster 31
Page 37 of 486
Vehicle key
B D E
B7E:c2Ja
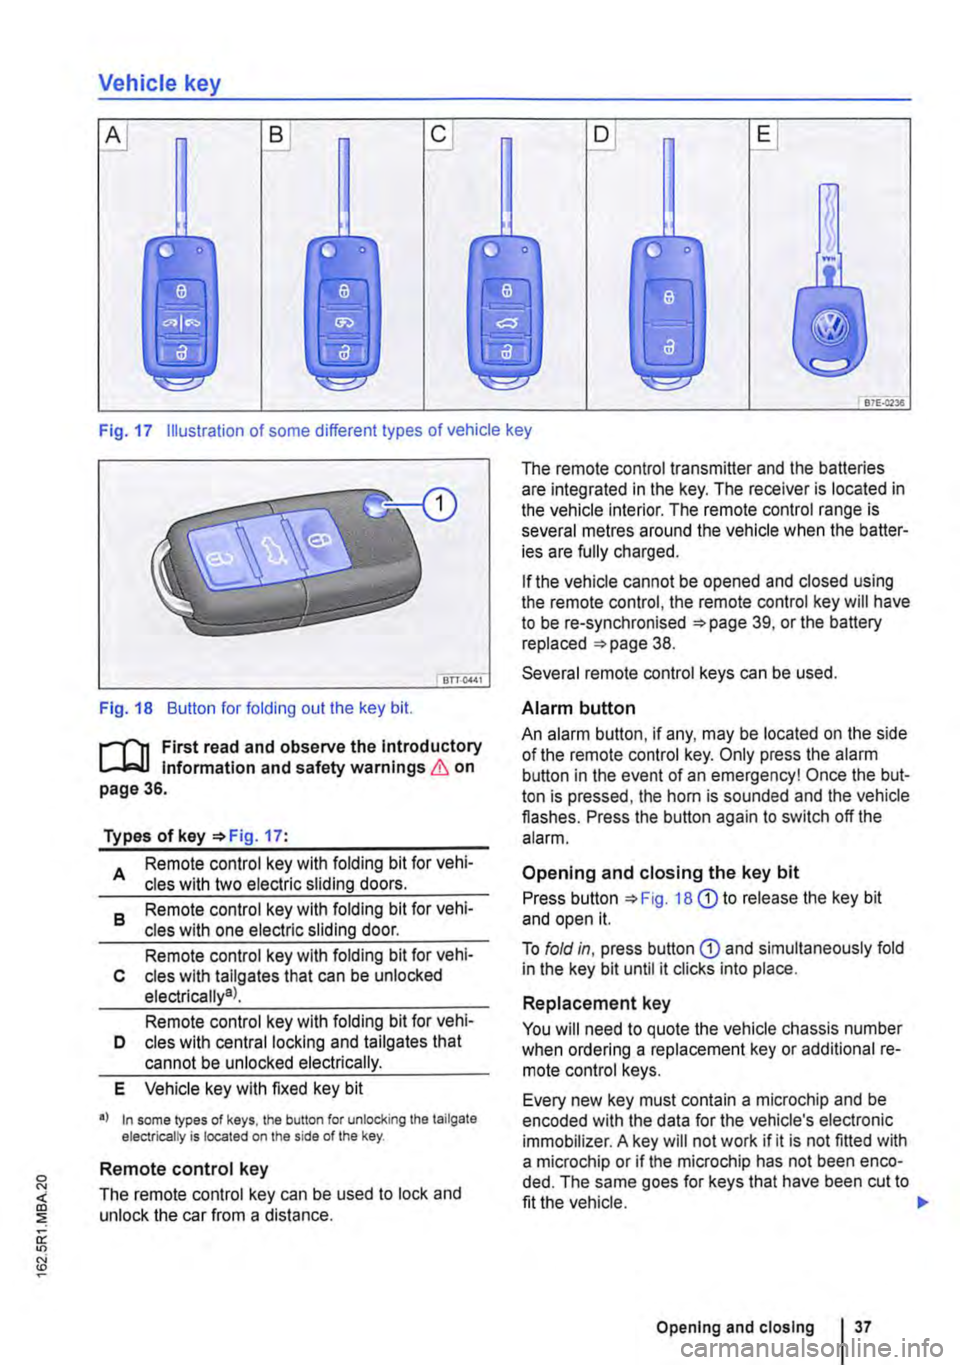
Fig. 17 Illustration of some different types of vehicle key
Fig. 18 Button for folding out the key bit.
r-('n First read and observe the Introductory L-J,..lJ Information and safety warnings & on page 36.
Types of key '*Fig. 17:
A Remote control key with folding bit for vehi-cles with two electric sliding doors.
8 Remote control key with folding bit for vehi-cles with one electric sliding door.
Remote control key with folding bit for vehi-c cles with tallgates that can be unlocked electrically9l.
Remote control key with folding bit for vehi-D cles with central locking and tailgates that cannot be unlocked electrically.
E Vehicle key with fixed key bit
•I In some lypes of keys, lhe button for unlocking the tailgate electrically is located on the side of the key.
Remote control key
The remote control key can be used to lock and unlock the car from a distance.
The remote control transmitter and the batteries are integrated in the key. The receiver is located in the vehicle interior. The remote control range is several metres around the vehicle when the batter-ies are fully charged.
If the vehicle cannot be opened and closed using the remote control, the remote control key will have to be re-synchronised '*page 39, or the battery replaced '*page 38.
Several remote control keys can be used.
Alarm button
An alarm button, if any, may be located on the side of the remote control key. Only press the alarm button in the event of an emergency! Once the but-ton is pressed, the horn is sounded and the vehicle flashes. Press the button again to switch off the alarm.
Opening and closing the key bit
Press button '*Fig. 18 G) to release the key bit and open it.
To fold in, press button G) and simultaneously fold in the key bit until it clicks into place.
Replacement key
You will need to quote the vehicle chassis number when ordering a replacement key or additional re-mote control keys.
Every new key must contain a microchip and be encoded with the data for the vehicle's electronic immobilizer. A key will not work if it is not fitted with a microchip or if the microchip has not been enco-ded. The same goes for keys that have been cut to fit the vehicle.
Opening and closing I 37
Page 38 of 486
New keys or replacement keys are available from Volkswagen Commercial Vehicle dealerships or from qualified workshops and authorised key serv-ices which are qualified to manufacture these vehi-cle keys.
New and replacement keys need to be synchron-ised before use =:-page 39.
CD
Every vehicle key contains electronic compo-nents. Protect the key from damage, moisture and excessive vibration.
m Press the buttons on the remote control key W only if the corresponding function is actually needed. Pressing a button when the function is not
required could lead to the vehicle being unlocked unintentionally or the alarm going off. This also ap-plies even when you are not within the effective range.
m The function of the remote control key can be W affected temporarily if there is more than one transmitter in the direct vicinity working on the same frequency (e.g. a mo-way radio or mobile telephone).
m Obstacles bemeen the remote control and W the vehicle, bad weather conditions and weak batteries can reduce the range of the remote con-trol.
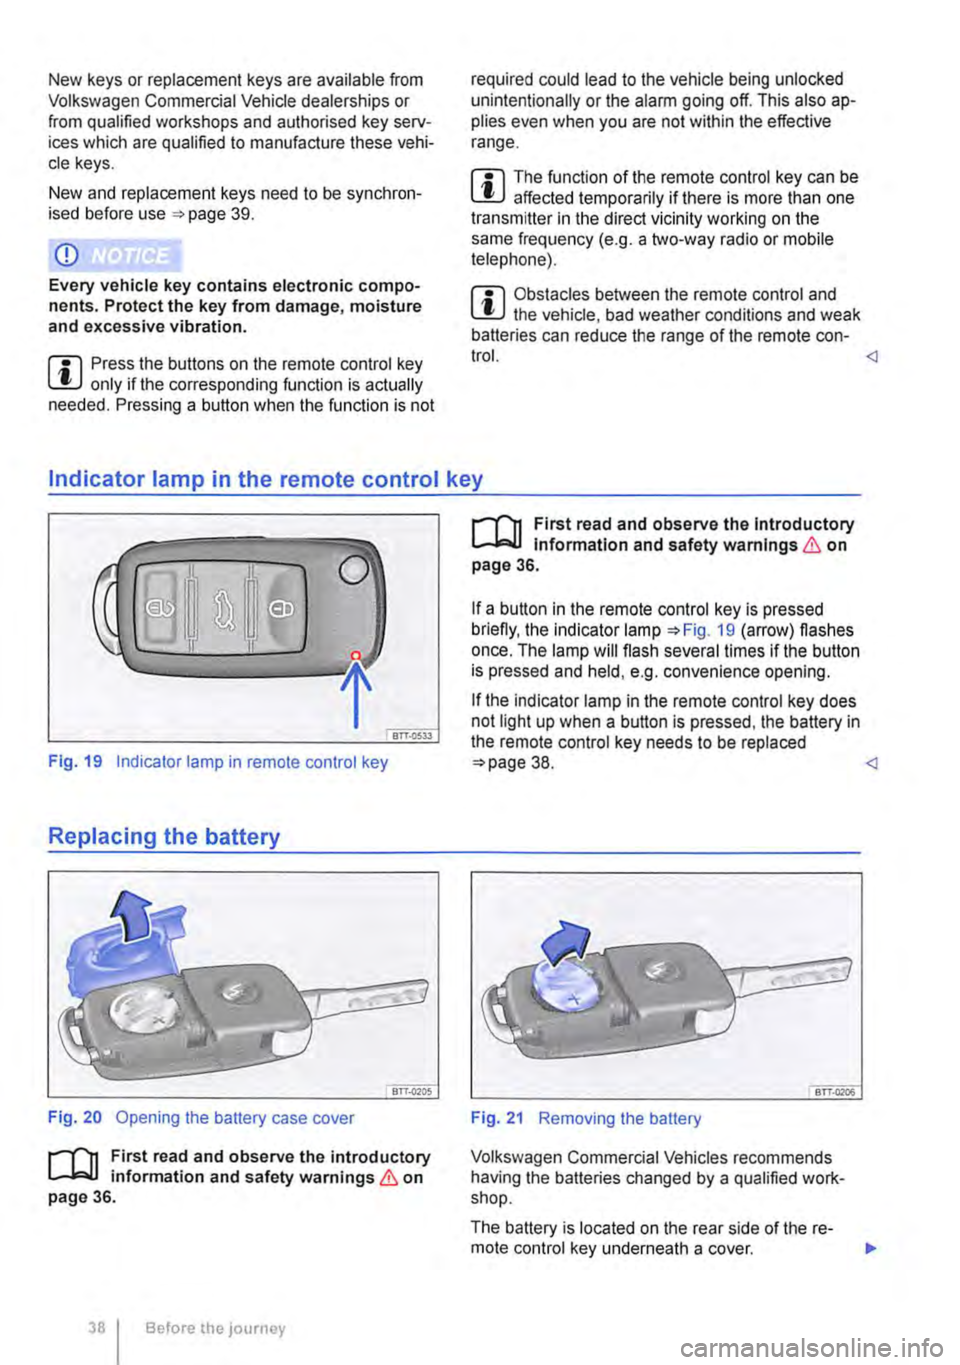
Fig. 19 Indicator lamp in remote control key
Replacing the battery
Fig. 20 Opening the battery case cover
r--('n First read and observe the introductory 1..-J=.U information and safety warnings & on page 36.
38 I Before the JOUrney
r--('n First read and observe the Introductory 1..-J=.U Information and safety warnings & on page 36.
If a button in the remote control key is pressed briefly, the indicator lamp =:-Fig. 19 (arrow) flashes once. The lamp will flash several times if the button is pressed and held, e.g. convenience opening.
If the indicator lamp in the remote control key does not light up when a button is pressed, the battery in the remote control key needs to be replaced =:>page 38.
Volkswagen Commercial Vehicles recommends having the batteries changed by a qualified work-shop.
The battery is located on the rear side of the re-mote control key underneath a cover. ..,.
Page 39 of 486
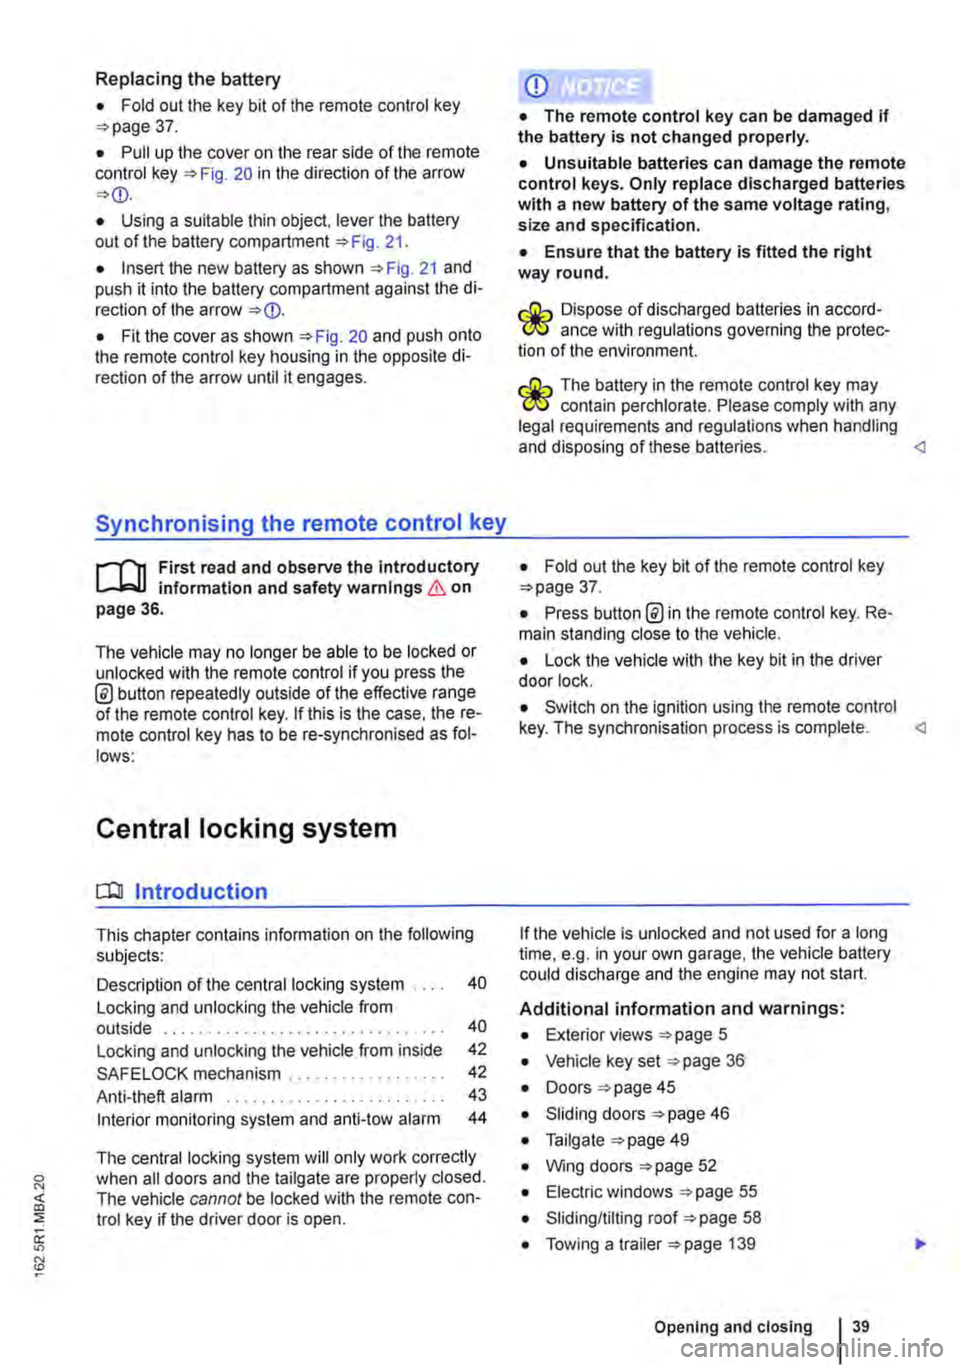
Replacing the battery
• Fold out the key bit of the remote control key =>page 37.
• Pull up the cover on the rear side of the remote control key =>Fig. 20 in the direction of the arrow =>
• Insert the new battery as shown =>Fig. 21 and push it into the battery compartment against the di-rection of the arrow =>
Synchronising the remote control key
,--m First read and observe the introductory L-.lo:.ll information and safety warnings & on page 36.
The vehicle may no longer be able to be locked or unlocked with the remote control if you press the @ button repeatedly outside of the effective range of the remote control key. If this is the case. the re-mote control key has to be re-synchronised as fol-lows:
Central locking system
CQ Introduction
This chapter contains information on the following subjects:
Description of the central locking system . . . . 40
Locking and unlocking the vehicle from outside . . . . . . . . . . . . . . . . . . . . . . . . . . . . . . . . 40
Locking and unlocking the vehicle from inside
SAFELOCK mechanism ................. .
Anti-theft alarm ........................ .
Interior monitoring system and anti-tow alarm
42
42
43
44
The central locking system will only work correctly when all doors and the tailgate are properly closed. The vehicle cannot be locked with the remote con-trol key if the driver door is open.
CD
• The remote control key can be damaged if the battery is not changed properly.
• Unsuitable batteries can damage the remote control keys. Only replace discharged batteries with a new battery of the same voltage rating, size and specification.
• Ensure that the battery Is fitted the right way round.
r:lib Dispose of discharged batteries in accord-W ance with regulations governing the protec-tion of the environment.
r:lib The battery in the remote control key may W contain perchlorate. Please comply with any legal requirements and regulations when handling and disposing of these batteries.
• Press button @in the remote control key. Re-main standing close to the vehicle.
• Lock the vehicle with the key bit in the driver door lock.
• Switch on the ignition using the remote control key. The synchronisation process is complete.
Additional information and warnings:
• Exterior views =>page 5
• Vehicle key set =>page 36
• Doors => page 45
• Sliding doors =>page 46
• Tailgate =>page 49
• Wing doors =>page 52
• Electric windows =>page 55
• Sliding/tilting roof =>page 58
• Towing a trailer =>page 139
Opening and closing 39
Page 42 of 486
Locking and unlocking the vehicle from inside
c
1 PSG-0030
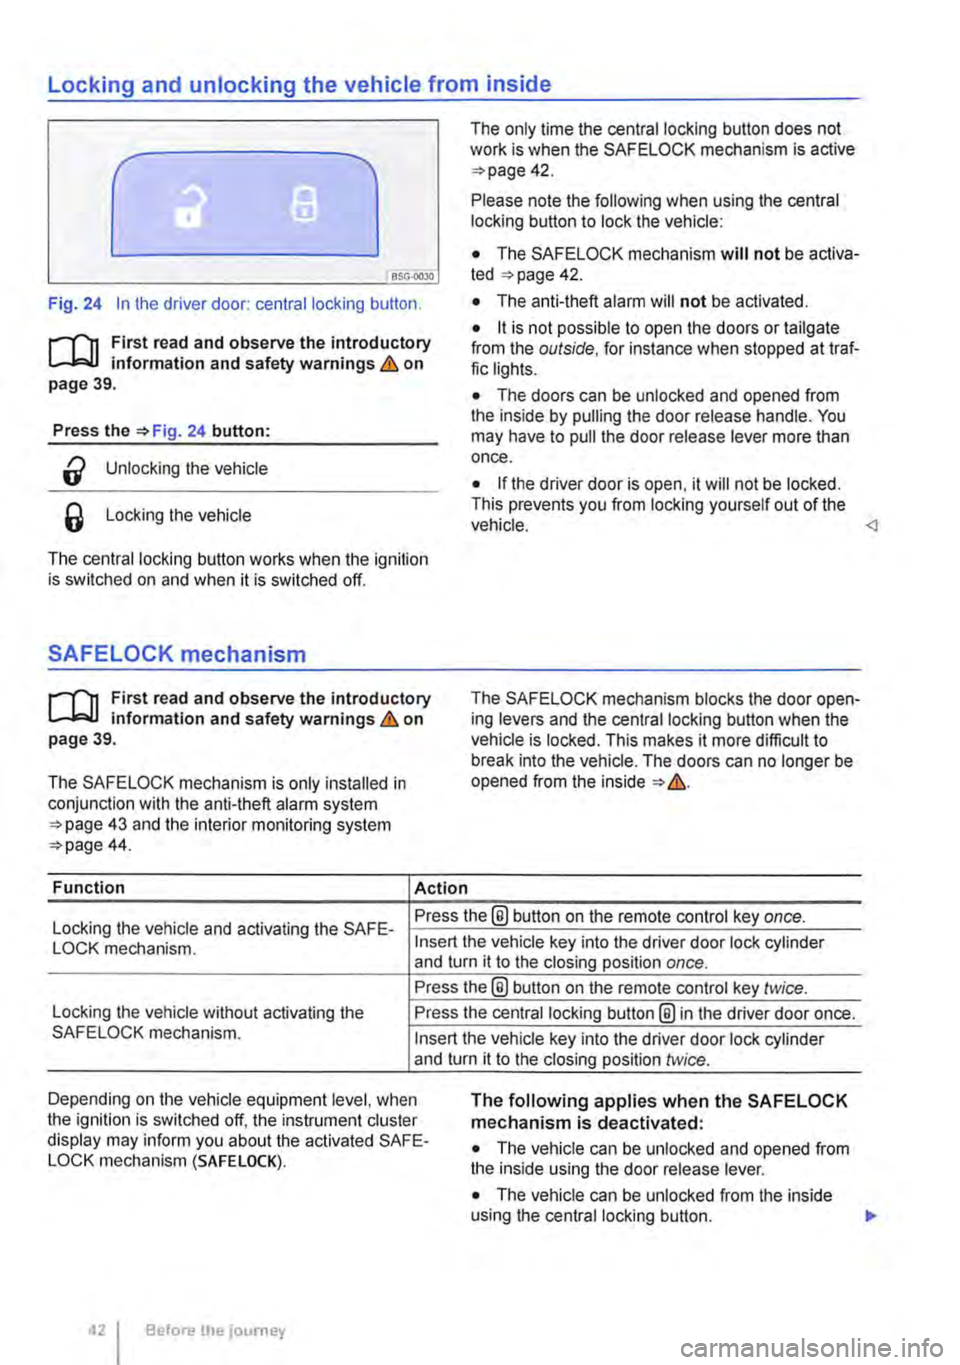
Fig. 24 In the driver door: central locking button.
rf'n First read and observe the introductory L.-J=.I.I information and safety warnings & on page 39.
Press the =>Fig. 24 button:
a Unlocking the vehicle
6 Locking the vehicle
The central locking button works when the ignition is switched on and when it is switched off.
SAFELOCK mechanism
rf'n First read and observe the introductory L.-J=.I.I information and safety warnings & on page 39.
The SAFELOCK mechanism is only installed in conjunction with the anti-theft alarm system =>page 43 and the interior monitoring system =>page 44.
Function Action
The only time the central locking button does not work is when the SAFE LOCK mechanism is active =>page 42.
Please note the following when using the central locking button to lock the vehicle:
• The SAFELOCK mechanism will not be activa-ted =:>page 42.
• The anti-theft alarm will not be activated.
• it is not possible to open the doors or tailgate from the outside, for instance when stopped at traf-fic lights.
• The doors can be unlocked and opened from the inside by pulling the door release handle. You may have to pull the door release lever more than once.
• If the driver door is open, it will not be locked. This prevents you from locking yourself out of the vehicle.
Locking the vehicle and activating the SAFE-Press the® button on the remote control key once.
LOCK mechanism.
Locking the vehicle without activating the SAFELOCK mechanism.
Insert the vehicle key into the driver door lock cylinder and turn it to the closing position once.
Press the@ button on the remote control key twice.
Press the central locking button@ in the driver door once.
Insert the vehicle key into the driver door lock cylinder and turn it to the closing position twice.
Depending on the vehicle equipment level, when the ignition is switched off, the instrument cluster display may inform you about the activated SAFE-LOCK mechanism (SAFE LOCK).
The following applies when the SAFELOCK mechanism is deactivated:
• The vehicle can be unlocked and opened from the inside using the door release lever.
• The vehicle can be unlocked from the inside using the central locking button. .,.
Before the journey
Page 43 of 486
• If the SAFELOCK mechanism has been activa-ted using the remote control key: the anti-theft alarm is active.
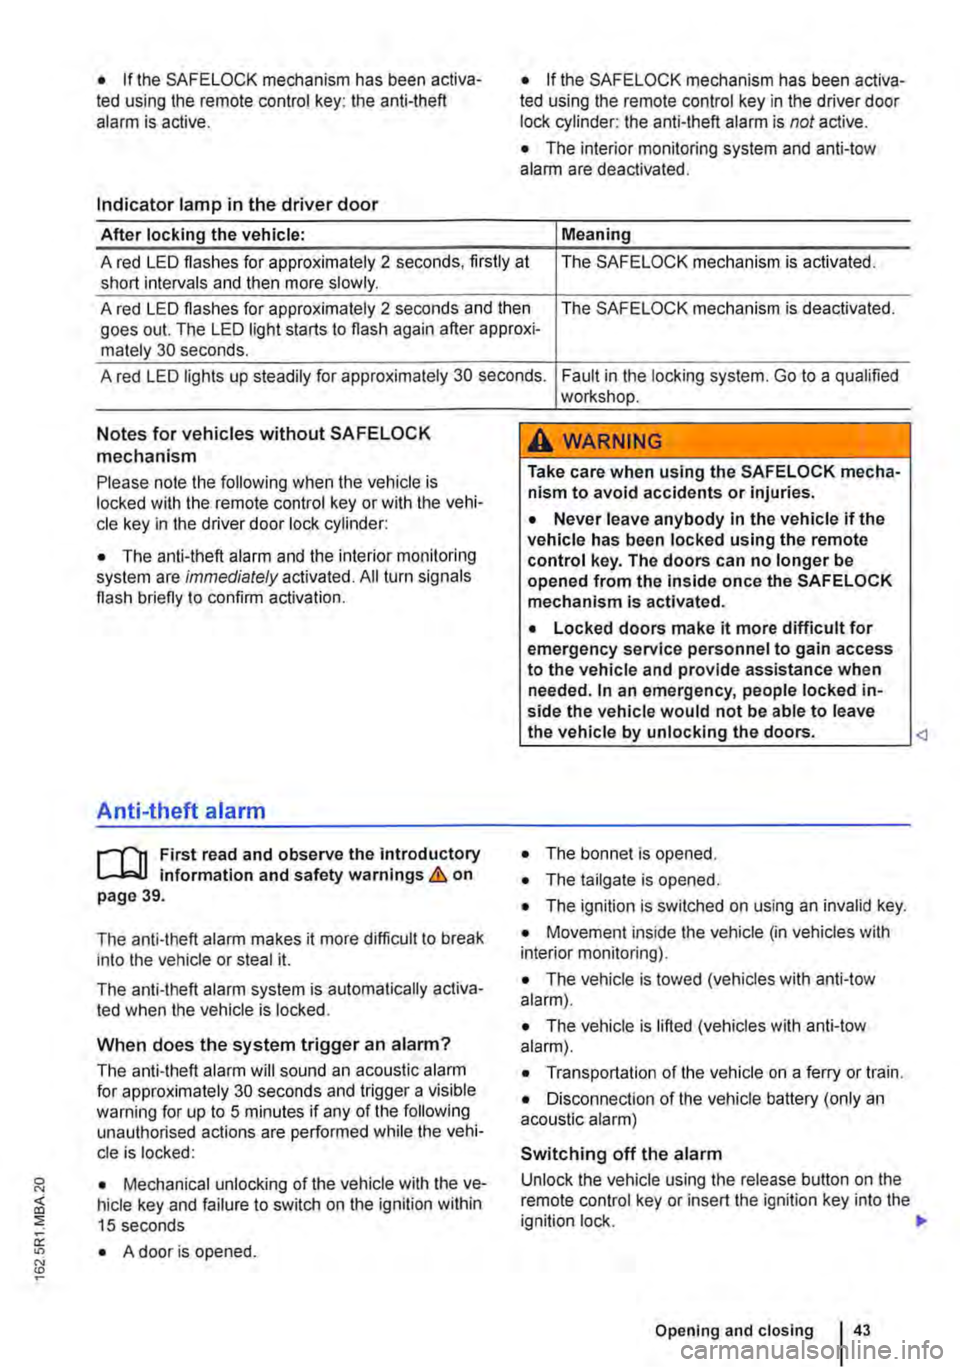
Indicator lamp in the driver door
After locking the vehicle:
• If the SAFELOCK mechanism has been activa-ted using the remote control key in the driver door lock cylinder: the anti-theft alarm is not active.
• The interior monitoring system and anti-tow alarm are deactivated.
Meaning
A red LED flashes for approximately 2 seconds, firstly at short inteNals and then more slowly. The SAFELOCK mechanism is activated.
A red LED flashes for approximately 2 seconds and then goes out. The LED light starts to flash again after approxi-mately 30 seconds.
The SAFELOCK mechanism is deactivated.
A red LED lights up steadily for approximately 30 seconds. Fault in the locking system. Go to a qualified workshop.
Notes for vehicles without SAFELOCK
mechanism
Please note the following when the vehicle is locked with the remote control key or with the vehi-cle key in the driver door lock cylinder:
• The anti-theft alarm and the interior monitoring system are immediately activated. All turn signals flash briefly to confirm activation.
Anti-theft alarm
rflt First read and observe the introductory 1..-.L::.U information and safety warnings & on page 39.
The anti-theft alarm makes it more difficult to break into the vehicle or steal it.
The anti-theft alarm system is automatically activa-ted when the vehicle is locked.
When does the system trigger an alarm?
The anti-theft alarm will sound an acoustic alarm for approximately 30 seconds and trigger a visible warning for up to 5 minutes if any of the following unauthorised actions are performed while the vehi-cle is locked:
• Mechanical unlocking of the vehicle with the ve-hicle key and failure to switch on the ignition within 15 seconds
• A door is opened.
A WARNING
Take care when using the SAFELOCK mecha-nism to avoid accidents or injuries.
• Never leave anybody in the vehicle if the vehicle has been locked using the remote control key. The doors can no longer be opened from the inside once the SAFELOCK mechanism is activated.
• Locked doors make it more difficult for emergency service personnel to gain access to the vehicle and provide assistance when needed. In an emergency, people locked in-side the vehicle would not be able to leave the vehicle by unlocking the doors.
• The tailgate is opened.
• The ignition is switched on using an invalid key.
• Movement inside the vehicle (in vehicles with interior monitoring).
• The vehicle is towed (vehicles with anti-tow alarm).
• The vehicle is lifted (vehicles with anti-tow alarm).
• Transportation of the vehicle on a ferry or train.
• Disconnection of the vehicle battery (only an acoustic alarm)
Switching off the alarm
Unlock the vehicle using the release button on the remote control key or insert the ignition key into the ignition lock. 11>-
Opening and closing 43
Page 44 of 486
m Due to the current legislation on the Israel W market, the acoustic warning signals are de-activated there.
m The alarm will be triggered again if a person W gains access to the same or a different se-cured zone after the alarm has been switched off. For example, if the tailgate is opened after a door had been opened.
m The anti-theft alarm will not be activated if W the vehicle is locked from the Inside using the central locking button @.
m If you unlock the driver door mechanically us-L!J ing the vehicle key, only the driver door is un-locked, and not the whole vehicle. The SAFELOCK mechanism on all doors is not deactivated and the central locking button is not activated until you switch on the ignition (however the doors will not be unlocked).
m The anti-theft alarm will not function correctly W if the vehicle battery is weak or discharged.
m lt is not possible to include the trailer in the W anti-theft alarm system.
81f·01U
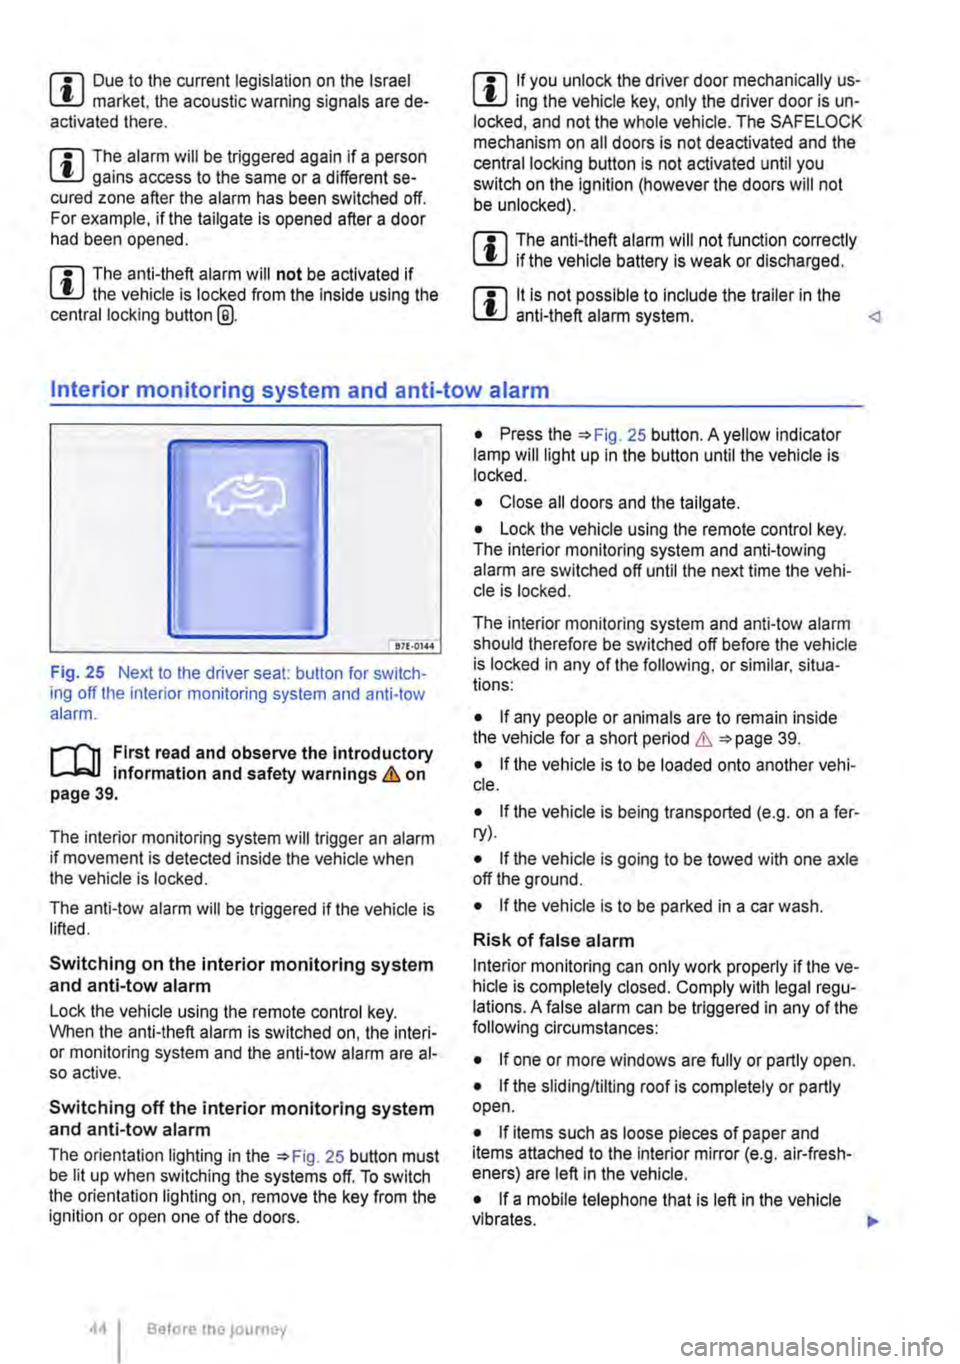
Fig. 25 Next to the driver seat: button for switch-ing off the interior monitoring system and anti-tow alarm.
r-f"n First read and observe the introductory information and safety warnings & on page 39.
The interior monitoring system will trigger an alarm if movement is detected inside the vehicle when the vehicle is locked.
The anti-tow alarm will be triggered if the vehicle is lifted.
Switching on the interior monitoring system and anti-tow alarm
Lock the vehicle using the remote control key. When the anti-theft alarm is switched on, the interi-or monitoring system and the anti-tow alarm are al-so active.
Switching off the interior monitoring system and anti-tow alarm
The orientation lighting in the =>Fig. 25 button must be lit up when switching the systems off. To switch the orientation lighting on, remove the key from the ignition or open one of the doors.
Before the journey
• Press the =>Fig. 25 button. A yellow indicator lamp will light up in the button until the vehicle is locked.
• Close all doors and the tailgate.
• Lock the vehicle using the remote control key. The interior monitoring system and anti-towing alarm are switched off until the next time the vehi-cle is locked.
The interior monitoring system and anti-tow alarm should therefore be switched off before the vehicle is locked in any of the following, or similar, situa-tions:
• If any people or animals are to remain inside the vehicle for a short period & =>page 39.
• If the vehicle is to be loaded onto another vehi-cle.
• If the vehicle is being transported (e.g. on a fer-ry).
• If the vehicle is going to be towed with one axle off the ground.
• If the vehicle is to be parked in a car wash.
Risk of false alarm
Interior monitoring can only work properly if the ve-hicle is completely closed. Comply with legal regu-lations. A false alarm can be triggered in any of the following circumstances:
• If one or more windows are fully or partly open.
• If the slidingflilting roof is completely or partly open.
• If items such as loose pieces of paper and items attached to the Interior mirror (e.g. air-fresh-eners) are left in the vehicle.
• If a mobile telephone that is left in the vehicle vibrates. 11>-
Page 45 of 486
• If the vehicle is being transported (e.g. on a fer-ry).
• If the vehicle is in a car wash.
Doors
CO Introduction
This chapter contains information on the following subjects:
Warning lamp . . . . . . . . . . . . . . . . . . . . . . . . . . . 45
Additional information and warnings:
• Exterior views page 5
• Vehicle key set 36
• Central locking system 39
• Manual opening and closing 413
A WARNING
Any door that Is not properly closed could open suddenly while the vehicle Is In motion. This could lead to severe Injuries.
Warning lamp
m If doors or the tailgate are still open when the W anti-theft alarm is activated, only the anti-theft alarm is activated. Interior monitoring and the anti-tow alarm are not activated until all doors and the tailgate are closed. <1
A WARNING (ConUnued)
• Stop as soon as possible and close the door.
• Make sure that the door Is closed properly and that the lock has engaged. The closed door must be flush with the surrounding body panels.
• Doors should only be opened or closed when you are sure there Is no-one in their path.
A WARNING
Any door being held open by the door arrest-er could close unexpectedly In strong winds or if the vehicle Is on a slope. This could lead to Injuries.
• Always keep a good grip on the handle when opening and closing doors.
m First read and observe the Introductory information and safety warnings&,. on page 45.
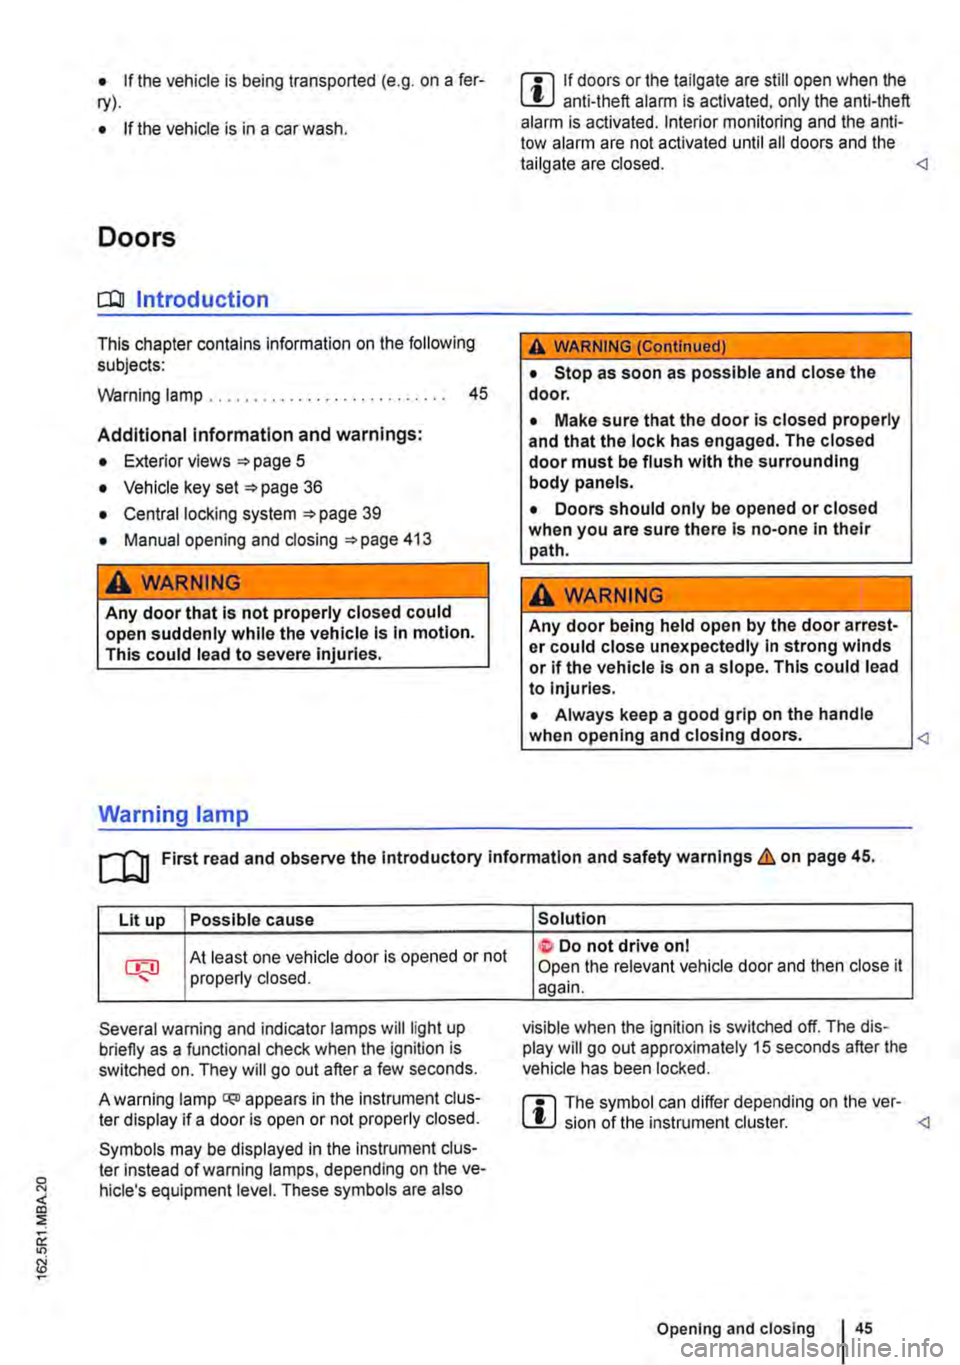
Lit up Possible cause
At least one vehicle door is opened or not properly closed.
Several warning and indicator lamps will light up briefly as a functional check when the ignition is switched on. They will go out after a few seconds.
A warning lamp q;o appears in the instrument clus-ter display if a door is open or not properly closed.
Symbols may be displayed in the Instrument clus-ter instead of warning lamps, depending on the ve-hicle's equipment level. These symbols are also
Solution
t Do not drive on I Open the relevant vehicle door and then close it again.
visible when the ignition is switched off. The dis-play will go out approximately 15 seconds after the vehicle has been locked.
m The symbol can differ depending on the ver-W sion of the instrument cluster. <1
Opening and closing 45
Page 141 of 486
A WARNING (Continued)
• Never try to stop a trailer from snaking by Increasing your speed.
A WARNING
Accidents and severe injuries can occur if the maximum permitted draw bar weight is ex-ceeded.
• Never exceed the specified values.
A WARNING
The start/stop system must always be switch-ed off manually when a trailer Is to be towed with towing brackets that were not retrofitted by Volkswagen Commercial Vehicles. Other-wise faults can occur In the brake system, possibly resulting In accidents and serious Injuries.
Technical requirements
,...-.('n First read and observe the introductory 1--J,:.U information and safety warnings & on page 139.
If the vehicle is supplied with a factory-fitted tow-ing bracket it will already have the necessary tech-nical modifications and meet the statutory require-ments for towing a trailer.
Only use a towing bracket which is approved for the gross weight of the trailer you want to tow as a retrofit solution. The towing bracket must be suit-able for the vehicle and trailer and be securely bol-ted to the vehicle's chassis. Only a towing bracket with a removable ball coupling should be used. Al-ways check and follow the data provided by the towing bracket manufacturer. Never install a weight-distributing or load-balancing towing brack-et on the vehicle.
Towing brackets fitted to the rear bumper
Never fit a towing bracket to the rear bumper or to its fastenings. The towing bracket must not prevent the rear bumper from functioning correctly. Do not
A WARNING (Continued)
• Always switch off the start/stop system manually If a trailer is attached to a towing bracket that was not retrofitted by Volkswa-gen Commercial Vehicles.
m Always switch off the anti-theft alarm when a L!J trailer is being hitched or unhitched 43. The tilt sensor could otherwise trigger an alarm unnecessarily.
m In new vehicles, do not tow a trailer during L!J the first 1,000 km 394.
m Volkswagen Commercial Vehicles recom-L!J mends removing the ball coupling before driving without a trailer. The level of damage sus-tained during a rear-end collision could be greater for vehicles with a fitted ball coupling than for those without.
m By law, the ball coupling must be removed if L!J a trailer is not being towed if it obscures the number plate.
m In some models, the towing bracket is re-L!J qui red for towing vehicles. For this reason, the towing bracket ball coupling should be stored in the vehicle at all times.
Engine cooling system
There is an increased load on the engine and the cooling system when towing a trailer. The cooling system must contain sufficient coolant and be able to cope with the extra load added by the trailer.
Trailer brake
If the trailer is equipped with its own brake system, comply with the relevant regulations. The trailer's brake system must never be connected to the ve-hicle brake system.
Emergency breakaway cable
Always use safety chains between your vehicle and the trailer 144.
Trailer rear lights
The rear lights on the trailer must meet legal re-quirements 144.
Transporting items 1141
Page 145 of 486
Key to diagram Fig. 114:
Pin Meaning
8 Reversing light
9 Permanent live
10 Charging cable plus
11 Earth pin 10, charging cable
12 Not assigned
13 Earth pin 9, permanent live
Trailer socket
A 13-pin trailer socket makes the electrical connec-tion between the towing vehicle and the trailer. When the engine is running, electrical consumers in the trailer are supplied with voltage (charging ca-ble) via the electrical connection (pin 10 of the trail-er socket). If required, the charging cable charges the caravan's battery.
When a trailer is electrically detected, electrical consumers in the trailer are supplied with voltage (permanent live) via the electrical connection (pin 9). Permanent live supplies a trailer's interior lighting for example. Electrical consumers such as a caravan refrigerator are supplied with voltage on-ly when the engine is running (pin 1 0).
To avoid overloading the electrical system, do not inter-connect the three earth wires (pins 3, 11 and 13).
If the trailer has a 7 -pin plug you will need to use a suitable adapter cable. Pin 10 (charging cable) is then without function.
Emergency breakaway cable
Always fasten the trailer's emergency breakaway cable properly to the towing vehicle. Leave enough slack in the emergency breakaway cable so that the vehicle can still drive around corners. However the emergency breakaway cable should not drag along the ground while you are driving.
Trailer rear lights
Ensure that the trailer lights work properly and meet legal requirements. Do not exceed the maxi-mum power consumption for the trailer 142.
Connection to the anti-theft alarm
The trailer is integrated in the anti-theft system if the following conditions are fulfilled:
• When the vehicle has a factory-fitted anti-theft alarm and a factory-fitted towing bracket.
• When the trailer is electrically connected to the towing vehicle via the trailer socket.
• When the vehicle and trailer electric systems are functional, fault-free and undamaged.
• When the vehicle is locked with the vehicle key and the anti-theft alarm is active.
When the vehicle is locked, the alarm will be trig-gered as soon as the electrical connection to the trailer is interrupted.
Always switch off the anti-theft alarm when a trailer is being hitched or unhitched. The tilt sensor could otherwise trigger an alarm unnecessarily.
Trailer with LED rear lights
For technical reasons, trailers with LED tail lights cannot be integrated into the anti-theft alarm sys-tem.
When the vehicle is locked, the alarm is not trig-gered as soon as the electrical connection to the trailer with LED rear lights is interrupted.
A WARNING
Any electrical cables that are not connected properly could cause a power surge to the trailer. This could cause faults tn the entire vehicle electronics system and also lead to accidents and serious Injuries.
• All work on the electric system should be carried out by a qualified workshop.
• Never connect the trailer's electrical sys-tem directly to the electrical connections of the tail lights or to other sources of electrici-ty.
CD
If you park the trailer using the support wheel or other trailer supports, disconnect the trailer from the vehicle. The vehicle could rock up and down if the load changes or if there is damage to the tyres. If this happens, a great deal of force will be exerted on the towing bracket and trailer, which could lead to damage to the vehi-cle and trailer.
CD
Maximum power consumption of the trailer should not be exceeded. Otherwise, the vehicle electrical system could be damaged.
m If there is a fault in the vehicle or trailer elec-L.:!.J trical systems or in the anti-theft alarm, have the systems checked by a qualified workshop.
m If the engine is not running and electrical L.:!.J equipment is switched on in the trailer via the trailer socket, the vehicle battery will discharge. .,.
Transporting Items 145