lock VOLVO C30 2013 Owner´s Manual
[x] Cancel search | Manufacturer: VOLVO, Model Year: 2013, Model line: C30, Model: VOLVO C30 2013Pages: 300, PDF Size: 6.58 MB
Page 71 of 300
02 Instruments and controls
Left-side steering wheel lever
02
* Option/accessory, for more information, see Introduction.69
Home safe lightingWhen you leave your car at night, you can
make use of the home safe lighting function to
illuminate the area in front of the car.
1. Remove the key from the ignition switch (or
turn the start control on models with key-
less drive* to position 0).
2. Pull the direction indicator lever to position
3 and release it.
3. Exit the car and lock the doors.
The headlights and parking lights will illuminate
and remain on for 30
1, 60 or 90 seconds. The
time interval can be changed according to your
preferences by using the Personal Settings
function, see page 84 for more information.
1Factory setting.
Page 75 of 300
02 Instruments and controls
Cruise control*
02
* Option/accessory, for more information, see Introduction.73
•During wheel spin or wheel lock-up.
•If the vehicle's speed is increased by using
the accelerator pedal for more than
1 minute.
Returning to the set speed
Press the button to resume the
previously set speed. CRUISE-
ON will be displayed.
Disengaging cruise control
Cruise control can also be disengaged by:
•Pressing the CRUISE button (CRUISE-
ON will no longer be shown in the function
display).
•Putting the gear selector in Neutral (N).
WARNING
Cruise control should not be used in heavy
traffic or when driving on wet or slippery
roads. Cruise control may not maintain the
set speed on steep downgrades.
Page 79 of 300
02 Instruments and controls
Steering wheel adjustment, Hazard warning flashers
02
77 Steering wheel adjustment
G027308
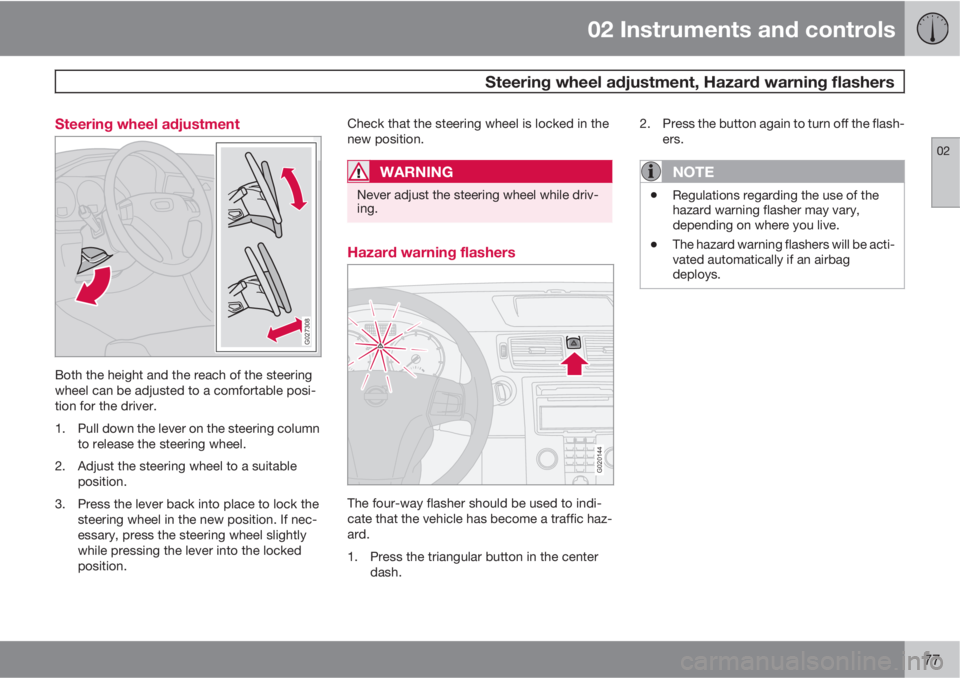
Both the height and the reach of the steering
wheel can be adjusted to a comfortable posi-
tion for the driver.
1. Pull down the lever on the steering column
to release the steering wheel.
2. Adjust the steering wheel to a suitable
position.
3. Press the lever back into place to lock the
steering wheel in the new position. If nec-
essary, press the steering wheel slightly
while pressing the lever into the locked
position.Check that the steering wheel is locked in the
new position.
WARNING
Never adjust the steering wheel while driv-
ing.
Hazard warning flashers
G020144
The four-way flasher should be used to indi-
cate that the vehicle has become a traffic haz-
ard.
1. Press the triangular button in the center
dash.2. Press the button again to turn off the flash-
ers.
NOTE
•Regulations regarding the use of the
hazard warning flasher may vary,
depending on where you live.
•The hazard warning flashers will be acti-
vated automatically if an airbag
deploys.
Page 82 of 300
02 Instruments and controls
Mirrors
02
80* Option/accessory, for more information, see Introduction.
G026409
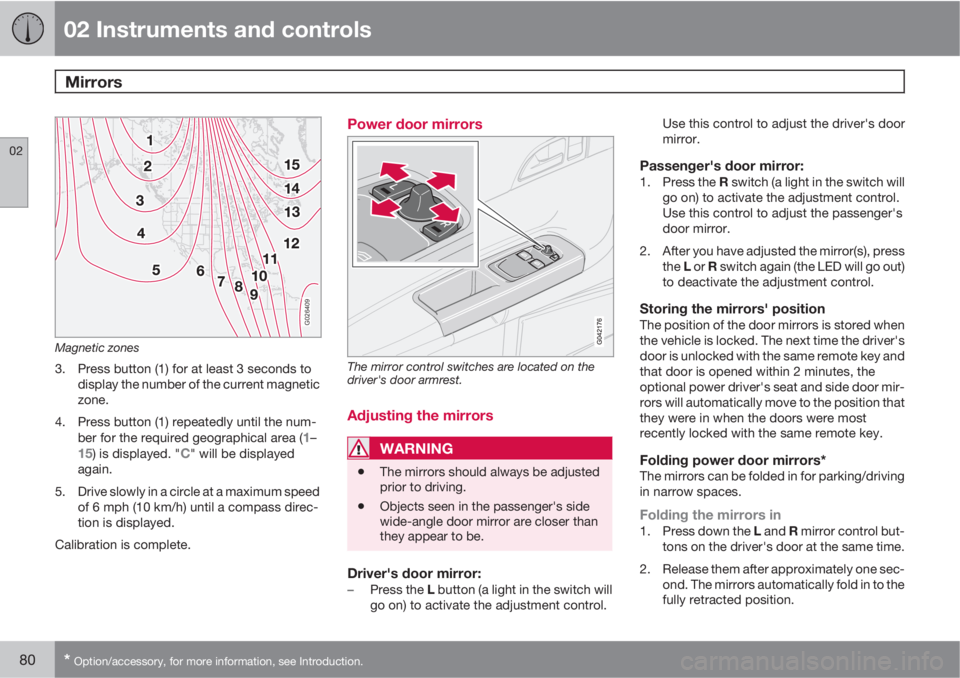
Magnetic zones
3. Press button (1) for at least 3 seconds to
display the number of the current magnetic
zone.
4. Press button (1) repeatedly until the num-
ber for the required geographical area (
1–15) is displayed. "C" will be displayed
again.
5. Drive slowly in a circle at a maximum speed
of 6 mph (10 km/h) until a compass direc-
tion is displayed.
Calibration is complete.
Power door mirrors
The mirror control switches are located on the
driver's door armrest.
Adjusting the mirrors
WARNING
•The mirrors should always be adjusted
prior to driving.
•Objects seen in the passenger's side
wide-angle door mirror are closer than
they appear to be.
Driver's door mirror:–
Press the L button (a light in the switch will
go on) to activate the adjustment control.Use this control to adjust the driver's door
mirror.
Passenger's door mirror:1.
Press the R switch (a light in the switch will
go on) to activate the adjustment control.
Use this control to adjust the passenger's
door mirror.
2. After you have adjusted the mirror(s), press
the L or R switch again (the LED will go out)
to deactivate the adjustment control.
Storing the mirrors' positionThe position of the door mirrors is stored when
the vehicle is locked. The next time the driver's
door is unlocked with the same remote key and
that door is opened within 2 minutes, the
optional power driver's seat and side door mir-
rors will automatically move to the position that
they were in when the doors were most
recently locked with the same remote key.
Folding power door mirrors*The mirrors can be folded in for parking/driving
in narrow spaces.
Folding the mirrors in1.
Press down the L and R mirror control but-
tons on the driver's door at the same time.
2. Release them after approximately one sec-
ond. The mirrors automatically fold in to the
fully retracted position.
Page 83 of 300
02 Instruments and controls
Mirrors
02
* Option/accessory, for more information, see Introduction.81
Folding the mirrors outFold out the mirrors by pressing down the L
and R buttons at the same time. The mirrors
automatically fold out to the fully extended
position.
Automatic foldingWhen the vehicle is locked/unlocked with the
remote key or with the optional keyless drive
system (see page 131), the power door mirrors
with automatically fold in or out.
NOTE
The door mirrors will not fold out automati-
cally when the vehicle is unlocked if they
were folded in using the buttons on the driv-
er's door control panel.
This function can be activated/deactivated in
Personal settings (see page 84). In the menu
system, go to Car settings…
Mirror fold
on locking.
Return to "neutral" positionIf a mirror has been inadvertently moved (bum-
ped in a parking lot, etc.) from its original (neu-
tral) position, it must be moved back to this
position before automatic folding will function
again.
To do so:1.
Fold in the mirrors by pressing the L and
R mirror control buttons on the driver's
door at the same time.
2.
Fold them out again by pressing the L and
R mirror control buttons.
This returns the mirrors to their original (neutral)
positions.
Blind Spot Information System (BLIS)*The Blind Spot Information System (BLIS) is an
information system that indicates the presence
of another vehicle in the side-view mirror's
"blind area." See page 170 for detailed infor-
mation.
Page 85 of 300
02 Instruments and controls
Power moonroof*
02
* Option/accessory, for more information, see Introduction.83
CAUTION
•Remove ice and snow before opening
the moonroof.
•Do not operate the moonroof if it is fro-
zen closed.
•Never place heavy objects on the
moonroof.
WARNING
•If the moonroof is obstructed during
auto-close operation, it will automati-
cally reverse direction and return to its
starting position.
•During manual closing, if the moonroof
is obstructed, immediately open it
again.
WARNING
•Never open or close the moonroof if it is
obstructed in any way.
•Never allow a child to operate the
moonroof.
•Never extend any object or body part
though the open moonroof, even if the
vehicle's ignition is completely
switched off.
•Never leave a child alone in a vehicle.
Visor
G020157
The optional moonroof features a sliding visor.
The visor slides open automatically when the
moonroof is opened, and must be closed man-
ually.
Wind blocker
The moonroof is equipped with a wind blocker
that folds up when the moonroof is open.
Page 86 of 300

02 Instruments and controls
Personal settings
02
84
Control panel
Display
Menu button
Exit button
Enter button
Menu navigation controlsPersonal settings can be made for some of the
car's functions, such as the central locking
system, climate control, and the audio system.
Please refer to page 248 for more information
on the audio functions that can be adjusted.
The settings are presented in the display (A).
To access the menu and adjust settings1.
Press MENU (B).
2.
Scroll to
Car settings… using the menu
navigation control (E).
3.
Press ENTER (D).
4. Select an alternative using the menu navi-
gation control (E).
5. Confirm your selection by pressing
ENTER.
To exit the menu–
Press EXIT (C).
Available settings
Clock adjustTo set the time:
1. Use the number keys or the up/down arrow
keys on the navigation control (E) to
change the hour or minute.2. Select hour(s) or minute(s) to be changed
with the left/right arrow keys.
3.
Press ENTER to start the clock.
NOTE
If you are currently using the 12-hour time
setting, use the up/down arrow keys to
select AM/PM after the minute-setting has
been adjusted.
Lock confirmation lightWhen the car is locked/unlocked with the
remote key, the direction indicators can be
selected to flash to confirm the action. The
alternatives On/Off are available for both lock-
ing and unlocking.
AutolockWhen the car starts to move, the doors and
liftgate can be locked automatically. The alter-
natives On/Off are available.
NOTE
Pulling the handle twice on a door unlocks
and opens that door.
UnlockThere are two alternatives for unlocking:
Page 87 of 300
02 Instruments and controls
Personal settings
02
* Option/accessory, for more information, see Introduction.85
•Global (All doors) – unlocks all doors and
the liftgate with one press on the remote
key.
•Two Step (Two-stage unlocking) – This
alternative unlocks the driver's door with
one press on the remote key. A second
press unlocks the passenger's door and
the liftgate.
Automatically folding the door mirrorsThe setting makes it possible to automatically
fold the door mirrors in or out when the vehicle
is locked or unlocked. See page 80.
Operating side windowsThe following alternative can be selected for
opening the door windows at the same time by
pressing and holding the Unlock switch in
either of the front doors (see page 135 for
additional information)
1
NOTE
The ignition key must be in position I or
higher (see page 149) before the door win-
dows can be opened using the switches in
the doors.
•Auto open all windows On/Off
Temporarily turning off the alarm
sensor(s)
The alarm sensors can be temporarily turned
off (if, for example, a person or a pet remains
in the vehicle when the doors are locked from
outside with the remote key). There are two
alternatives:
Activate once and Ask on exit,
see page 126 and 137.
Approach lightingThis alternative determines the length of time
for which the car's lights will remain on when
the Approach light button on the central lock-
ing system's remote key is pressed. Intervals
of 30/60/90 seconds may be selected, see the
section "Remote key functions" for more infor-
mation.
Home safe lightingThis alternative determines the length of time
for which the car's lights will remain on when
the high beam lever on the steering column is
pulled toward the wheel with the ignition
switched off. Intervals of 30/60/90 seconds
may be selected, see page 68 for information
on using this function.
Information
•VIN number – The VIN (Vehicle Identifica-
tion Number) is the car's unique identity
number.
•Number of Keys – the number of keys reg-
istered for the car is displayed here.
Climate functions
•Blower speed in AUTO mode – the blower
speed can be set to AUTO mode in models
equipped with ECC. Choose between
"Low", "Normal" and "High".
•Timer for recirculation – when the timer is
active, the air recirculates in the car for
3–12 minutes depending on the ambient
temperature. Select On/Off depending on
whether the recirculation timer is to be
active or not.
Keyless locking and unlocking*The following alternatives can be selected for
locking and unlocking the doors and liftgate:
•All doors – all doors are locked or unlocked
at the same time.
•Doors on the same side – front and rear
doors on the same side are unlocked
together.
1This menu alternative also makes it possible to open both door windows by pressing and holding the Unlock button on the remote key for several seconds.
Page 88 of 300
02 Instruments and controls
Personal settings
02
86
•Both front doors – both front doors are
unlocked together.
•One front door – either of the front doors
can be unlocked separately2.
Reset to factory settingsUse this alternative to return to the default cli-
mate system settings.
2Factory default.
Page 89 of 300
02 Instruments and controls
HomeLink® Wireless Control System*
02
* Option/accessory, for more information, see Introduction.87 Introduction
G030070
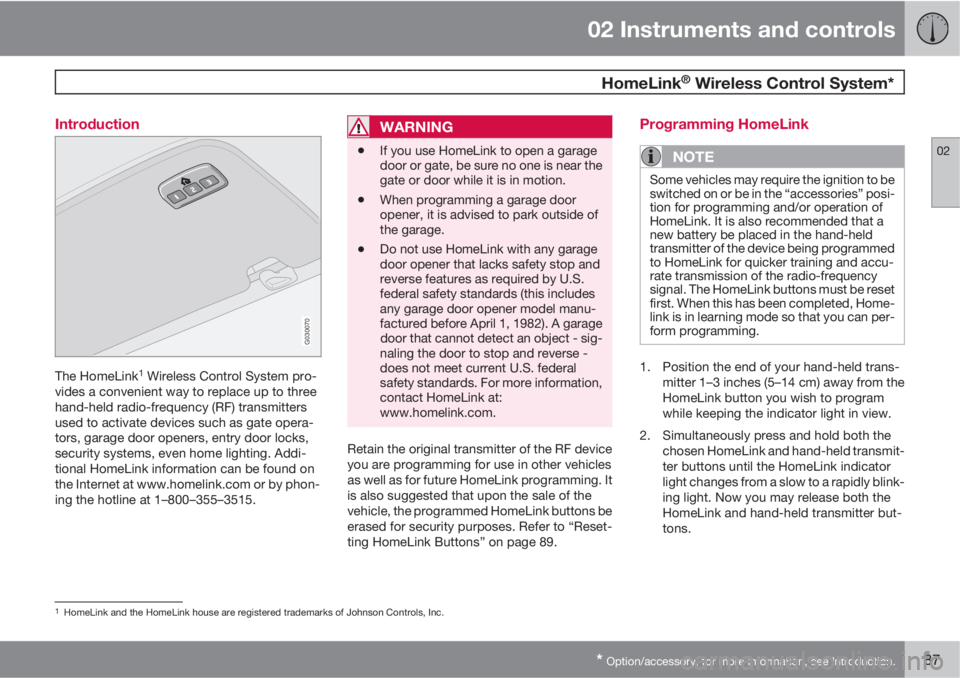
The HomeLink1 Wireless Control System pro-
vides a convenient way to replace up to three
hand-held radio-frequency (RF) transmitters
used to activate devices such as gate opera-
tors, garage door openers, entry door locks,
security systems, even home lighting. Addi-
tional HomeLink information can be found on
the Internet at www.homelink.com or by phon-
ing the hotline at 1–800–355–3515.
WARNING
•If you use HomeLink to open a garage
door or gate, be sure no one is near the
gate or door while it is in motion.
•When programming a garage door
opener, it is advised to park outside of
the garage.
•Do not use HomeLink with any garage
door opener that lacks safety stop and
reverse features as required by U.S.
federal safety standards (this includes
any garage door opener model manu-
factured before April 1, 1982). A garage
door that cannot detect an object - sig-
naling the door to stop and reverse -
does not meet current U.S. federal
safety standards. For more information,
contact HomeLink at:
www.homelink.com.
Retain the original transmitter of the RF device
you are programming for use in other vehicles
as well as for future HomeLink programming. It
is also suggested that upon the sale of the
vehicle, the programmed HomeLink buttons be
erased for security purposes. Refer to “Reset-
ting HomeLink Buttons” on page 89.
Programming HomeLink
NOTE
Some vehicles may require the ignition to be
switched on or be in the “accessories” posi-
tion for programming and/or operation of
HomeLink. It is also recommended that a
new battery be placed in the hand-held
transmitter of the device being programmed
to HomeLink for quicker training and accu-
rate transmission of the radio-frequency
signal. The HomeLink buttons must be reset
first. When this has been completed, Home-
link is in learning mode so that you can per-
form programming.
1. Position the end of your hand-held trans-
mitter 1–3 inches (5–14 cm) away from the
HomeLink button you wish to program
while keeping the indicator light in view.
2. Simultaneously press and hold both the
chosen HomeLink and hand-held transmit-
ter buttons until the HomeLink indicator
light changes from a slow to a rapidly blink-
ing light. Now you may release both the
HomeLink and hand-held transmitter but-
tons.
1HomeLink and the HomeLink house are registered trademarks of Johnson Controls, Inc.