VOLVO S40 2005 Owners Manual
Manufacturer: VOLVO, Model Year: 2005, Model line: S40, Model: VOLVO S40 2005Pages: 127, PDF Size: 2.32 MB
Page 91 of 127
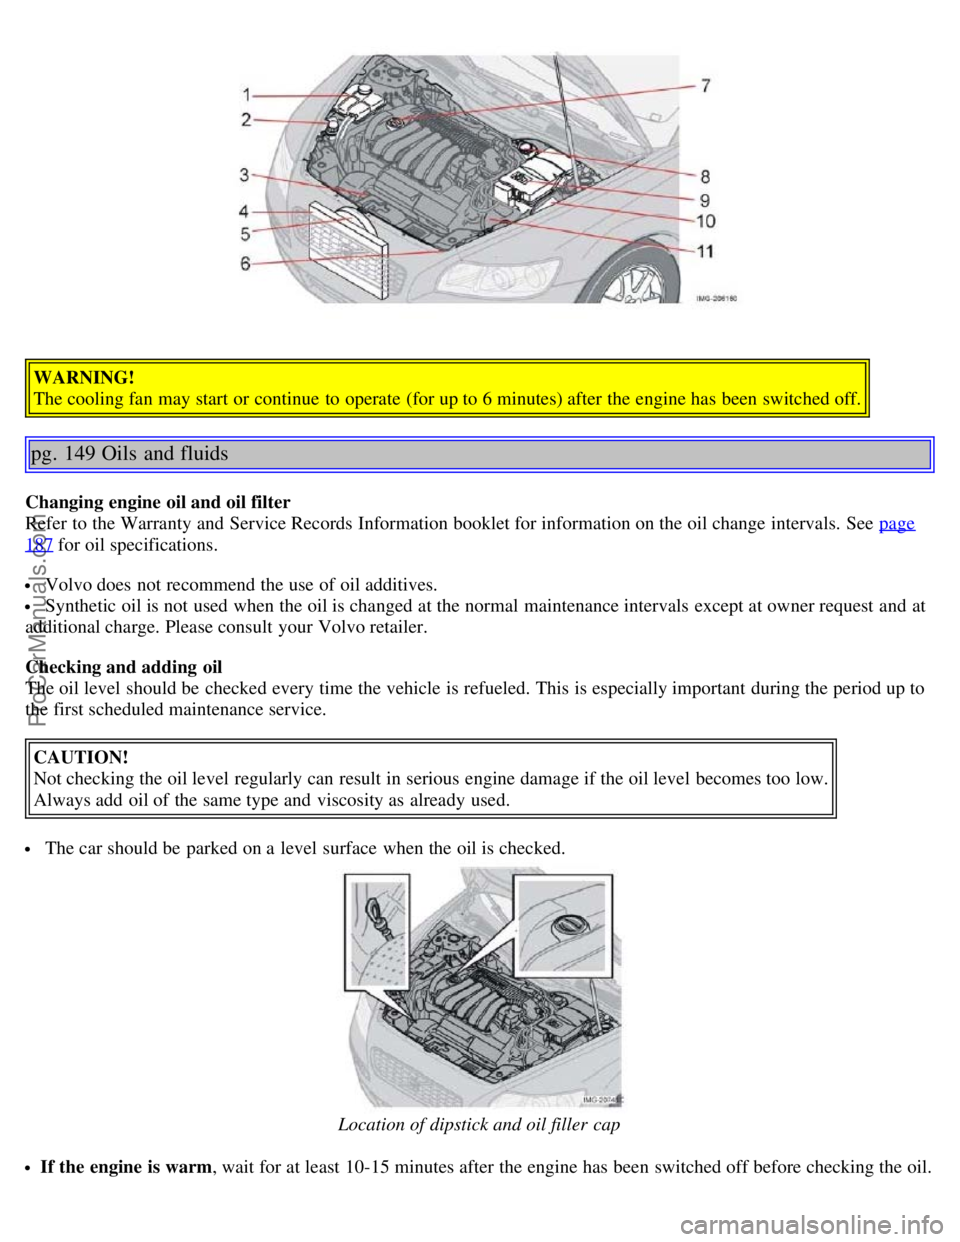
WARNING!
The cooling fan may start or continue to operate (for up to 6 minutes) after the engine has been switched off.
pg. 149 Oils and fluids
Changing engine oil and oil filter
Refer to the Warranty and Service Records Information booklet for information on the oil change intervals. See page
187 for oil specifications.
Volvo does not recommend the use of oil additives.
Synthetic oil is not used when the oil is changed at the normal maintenance intervals except at owner request and at
additional charge. Please consult your Volvo retailer.
Checking and adding oil
The oil level should be checked every time the vehicle is refueled. This is especially important during the period up to
the first scheduled maintenance service.
CAUTION!
Not checking the oil level regularly can result in serious engine damage if the oil level becomes too low.
Always add oil of the same type and viscosity as already used.
The car should be parked on a level surface when the oil is checked.
Location of dipstick and oil filler cap
If the engine is warm , wait for at least 10-15 minutes after the engine has been switched off before checking the oil.
ProCarManuals.com
Page 92 of 127
Checking the oil
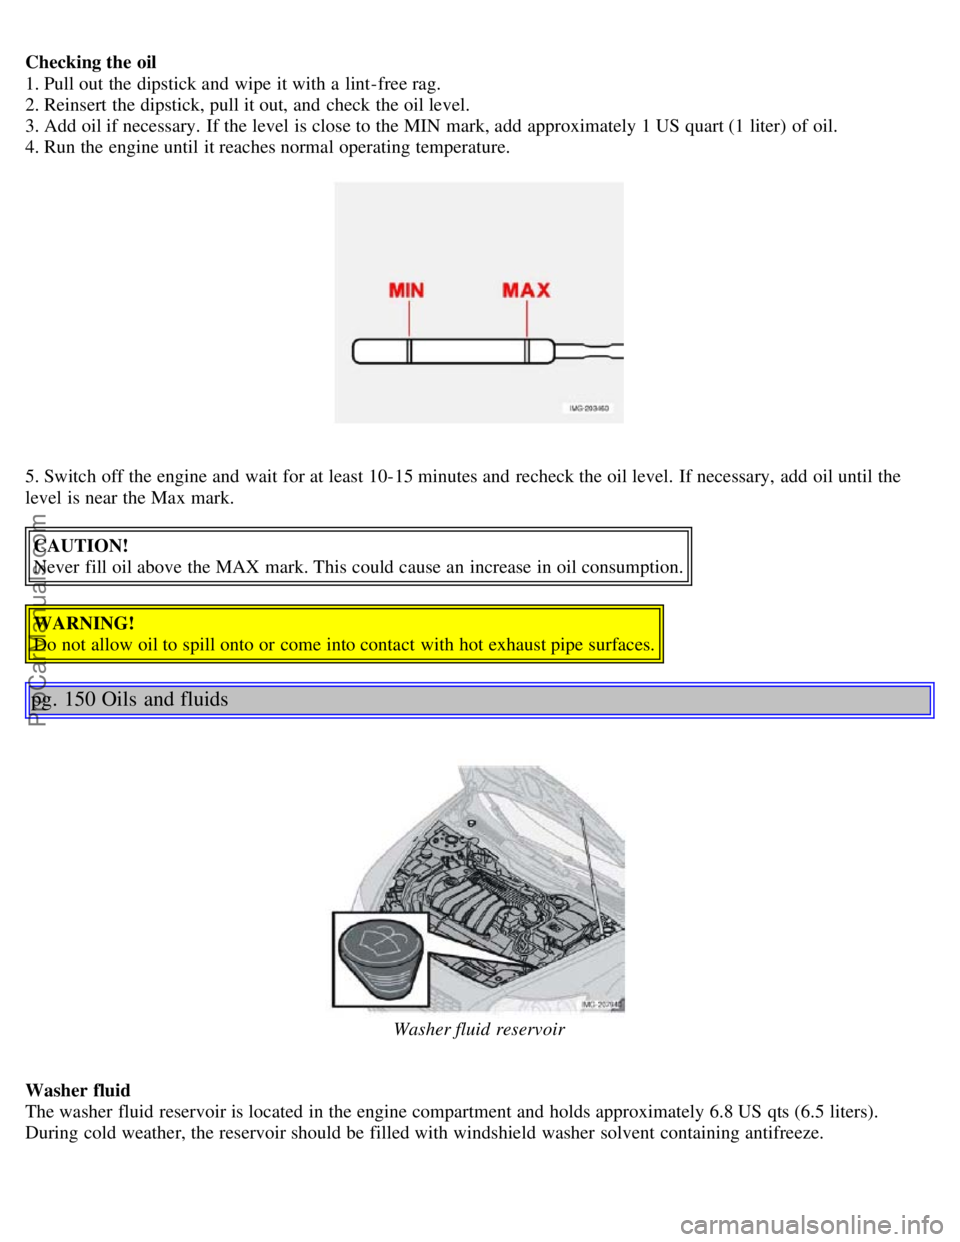
1. Pull out the dipstick and wipe it with a lint-free rag.
2. Reinsert the dipstick, pull it out, and check the oil level.
3. Add oil if necessary. If the level is close to the MIN mark, add approximately 1 US quart (1 liter) of oil.
4. Run the engine until it reaches normal operating temperature.
5. Switch off the engine and wait for at least 10-15 minutes and recheck the oil level. If necessary, add oil until the
level is near the Max mark.CAUTION!
Never fill oil above the MAX mark. This could cause an increase in oil consumption.
WARNING!
Do not allow oil to spill onto or come into contact with hot exhaust pipe surfaces.
pg. 150 Oils and fluids
Washer fluid reservoir
Washer fluid
The washer fluid reservoir is located in the engine compartment and holds approximately 6.8 US qts (6.5 liters).
During cold weather, the reservoir should be filled with windshield washer solvent containing antifreeze.
ProCarManuals.com
Page 93 of 127
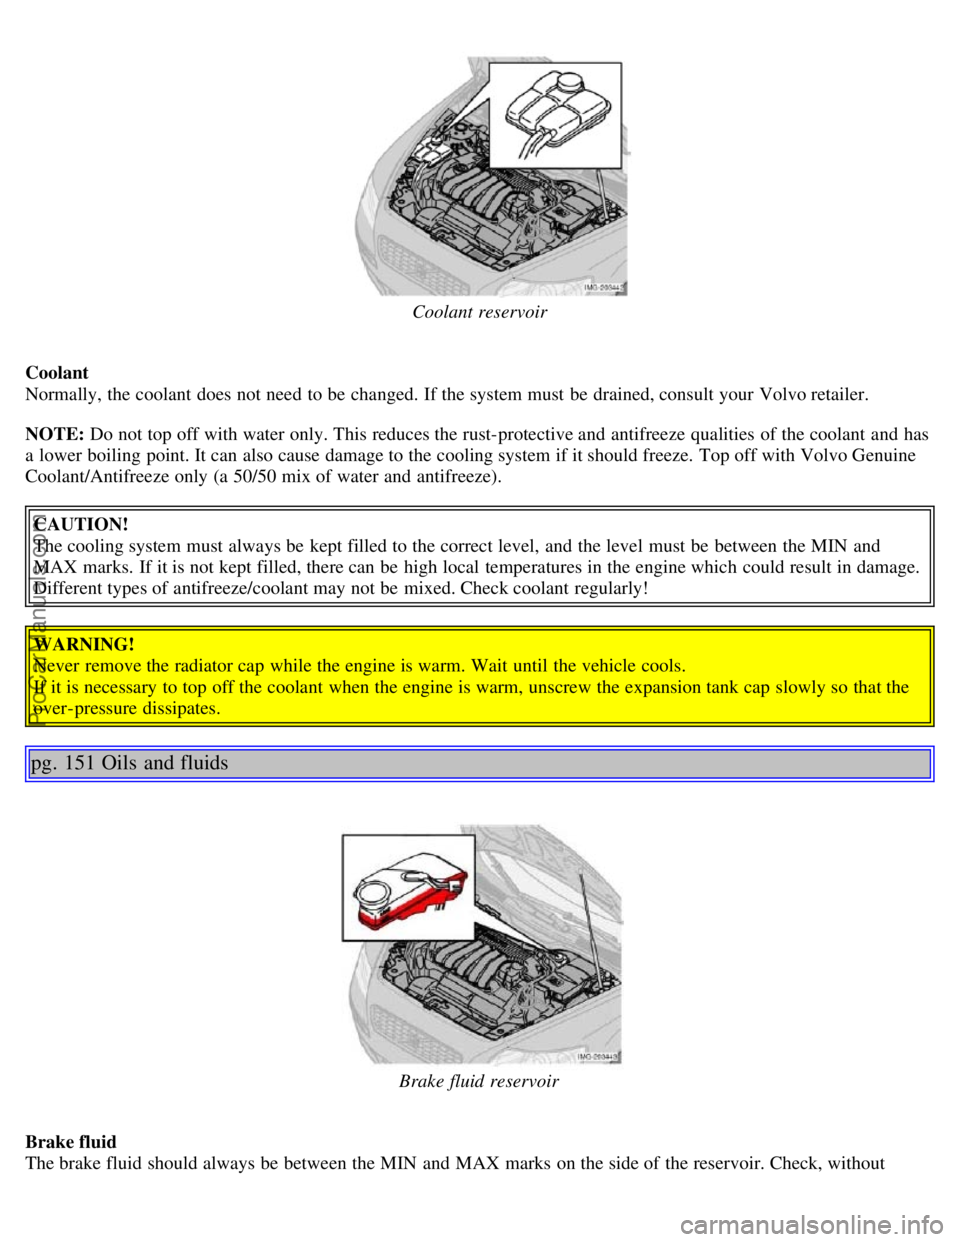
Coolant reservoir
Coolant
Normally, the coolant does not need to be changed. If the system must be drained, consult your Volvo retailer.
NOTE: Do not top off with water only. This reduces the rust-protective and antifreeze qualities of the coolant and has
a lower boiling point. It can also cause damage to the cooling system if it should freeze. Top off with Volvo Genuine
Coolant/Antifreeze only (a 50/50 mix of water and antifreeze). CAUTION!
The cooling system must always be kept filled to the correct level, and the level must be between the MIN and
MAX marks. If it is not kept filled, there can be high local temperatures in the engine which could result in damage.
Different types of antifreeze/coolant may not be mixed. Check coolant regularly!
WARNING!
Never remove the radiator cap while the engine is warm. Wait until the vehicle cools.
If it is necessary to top off the coolant when the engine is warm, unscrew the expansion tank cap slowly so that the
over-pressure dissipates.
pg. 151 Oils and fluids
Brake fluid reservoir
Brake fluid
The brake fluid should always be between the MIN and MAX marks on the side of the reservoir. Check, without
ProCarManuals.com
Page 94 of 127
removing the cap, that there is sufficient fluid in the reservoir.
Fluid type: DOT 4+ boiling point >536°F (280°C), P/N 9437433
Replace: The fluid should be replaced according to the intervals specified in the Warranty and Service Records
Information booklet. When driving under extremely hard conditions (mountain driving, etc), it may be necessary to
replace the fluid more often. Consult your Volvo retailer. Always entrust brake fluid changing to an authorized Volvo
retailer.
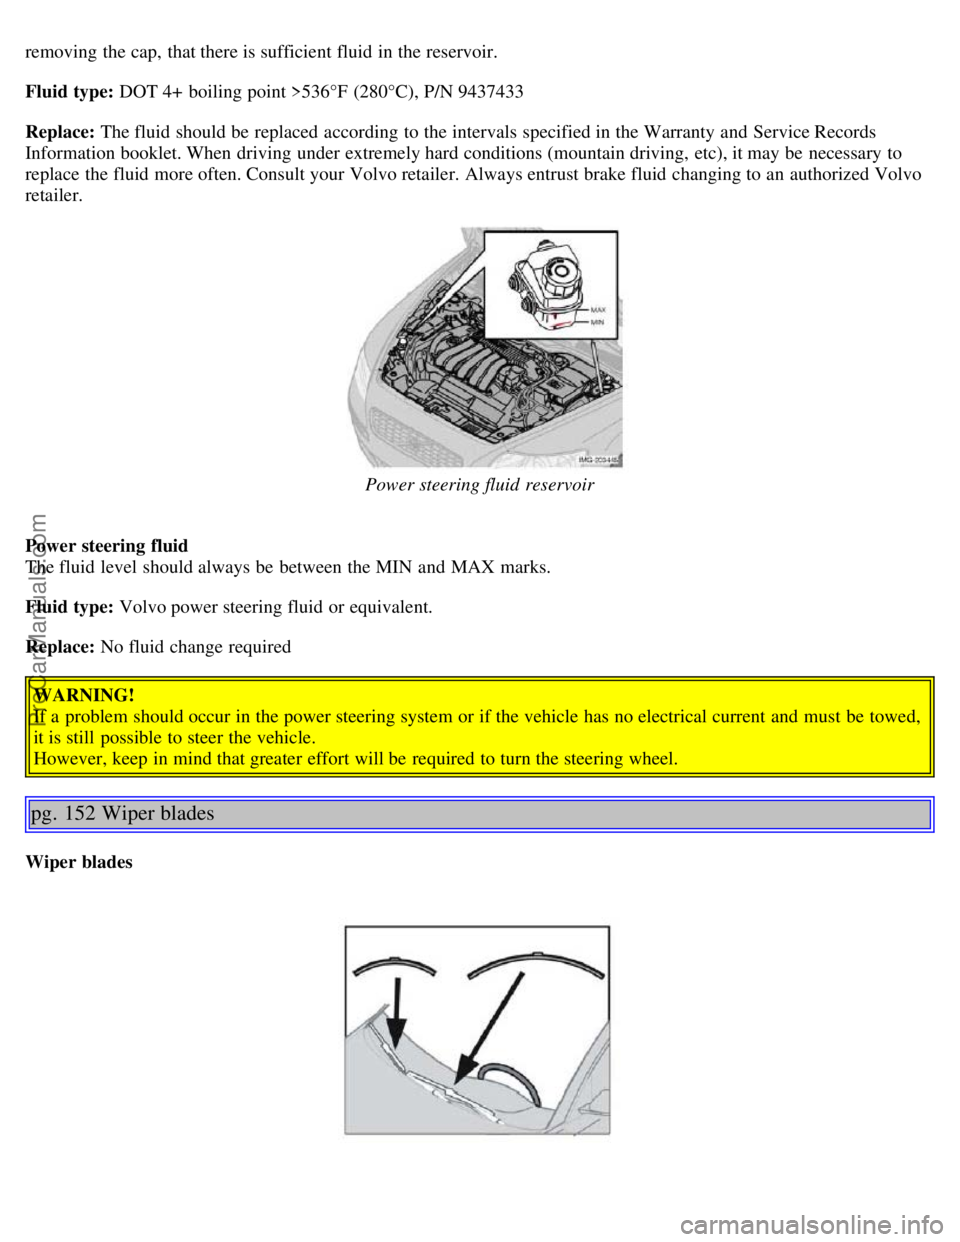
Power steering fluid reservoir
Power steering fluid
The fluid level should always be between the MIN and MAX marks.
Fluid type: Volvo power steering fluid or equivalent.
Replace: No fluid change required WARNING!
If a problem should occur in the power steering system or if the vehicle has no electrical current and must be towed,
it is still possible to steer the vehicle.
However, keep in mind that greater effort will be required to turn the steering wheel.
pg. 152 Wiper blades
Wiper blades
ProCarManuals.com
Page 95 of 127
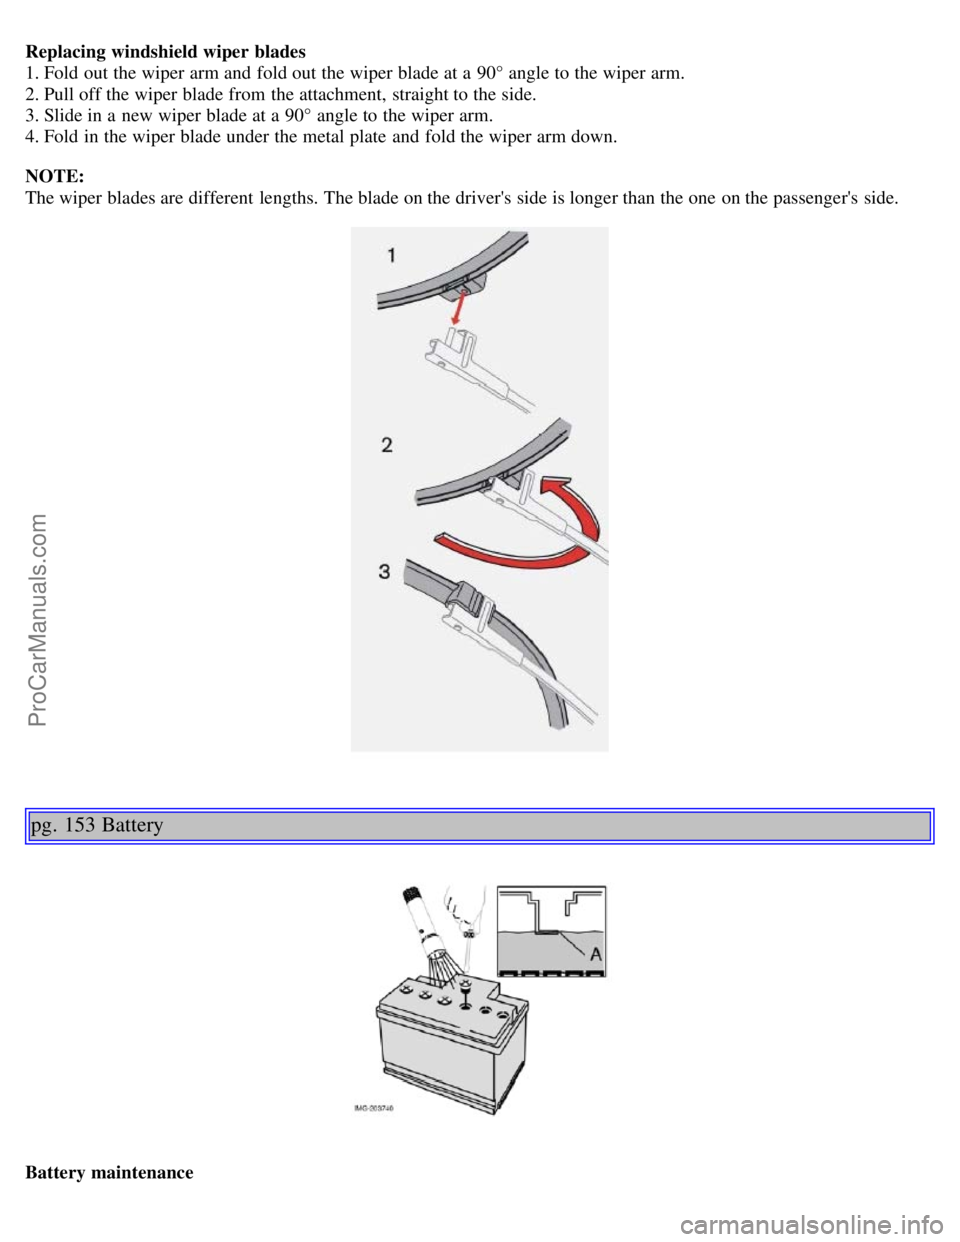
Replacing windshield wiper blades
1. Fold out the wiper arm and fold out the wiper blade at a 90° angle to the wiper arm.
2. Pull off the wiper blade from the attachment, straight to the side.
3. Slide in a new wiper blade at a 90° angle to the wiper arm.
4. Fold in the wiper blade under the metal plate and fold the wiper arm down.
NOTE:
The wiper blades are different lengths. The blade on the driver's side is longer than the one on the passenger's side.
pg. 153 Battery
Battery maintenance
ProCarManuals.com
Page 96 of 127
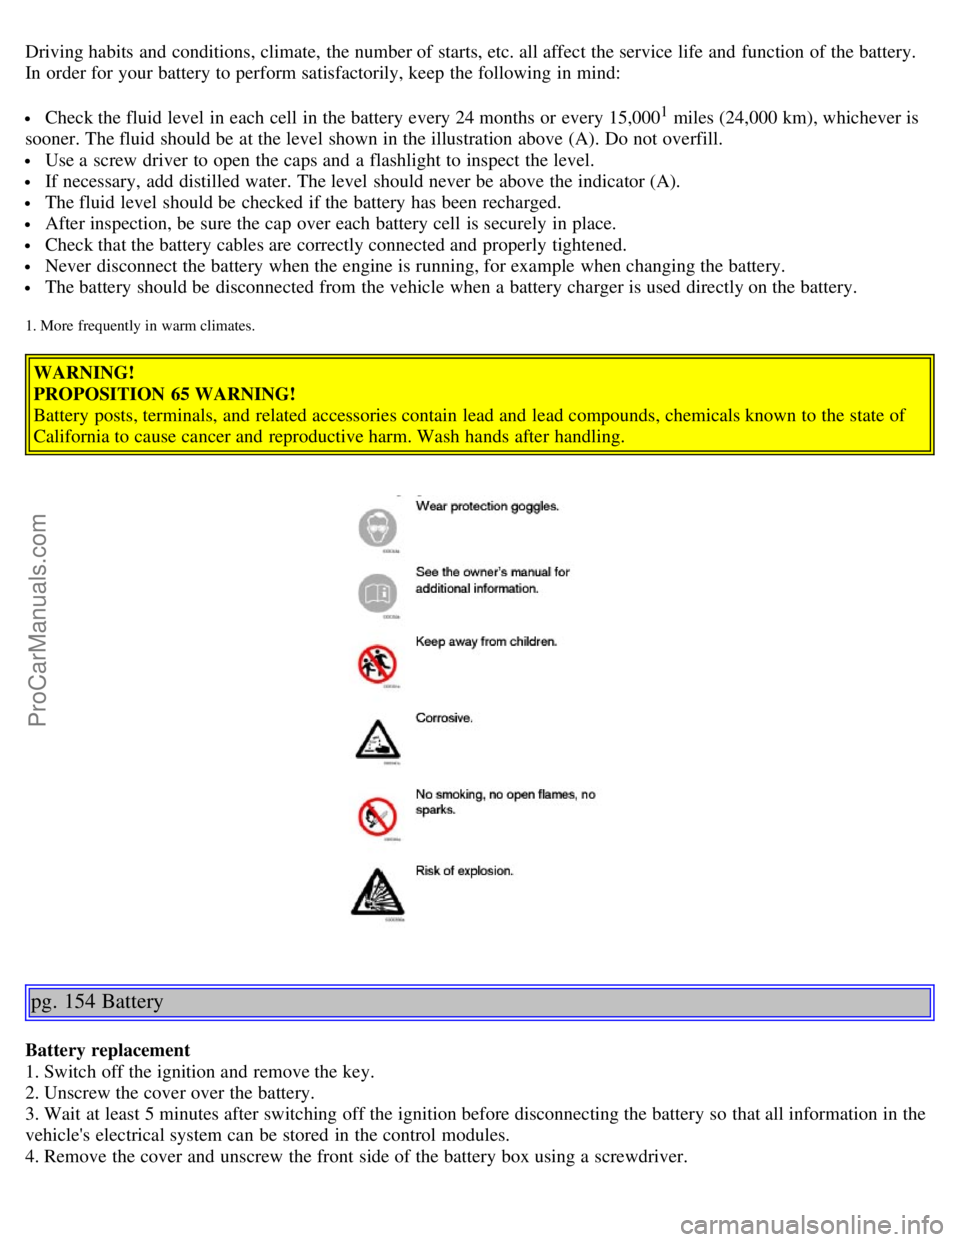
Driving habits and conditions, climate, the number of starts, etc. all affect the service life and function of the battery.
In order for your battery to perform satisfactorily, keep the following in mind:
Check the fluid level in each cell in the battery every 24 months or every 15,0001 miles (24,000 km), whichever is
sooner. The fluid should be at the level shown in the illustration above (A). Do not overfill.
Use a screw driver to open the caps and a flashlight to inspect the level.
If necessary, add distilled water. The level should never be above the indicator (A).
The fluid level should be checked if the battery has been recharged.
After inspection, be sure the cap over each battery cell is securely in place.
Check that the battery cables are correctly connected and properly tightened.
Never disconnect the battery when the engine is running, for example when changing the battery.
The battery should be disconnected from the vehicle when a battery charger is used directly on the battery.
1. More frequently in warm climates.
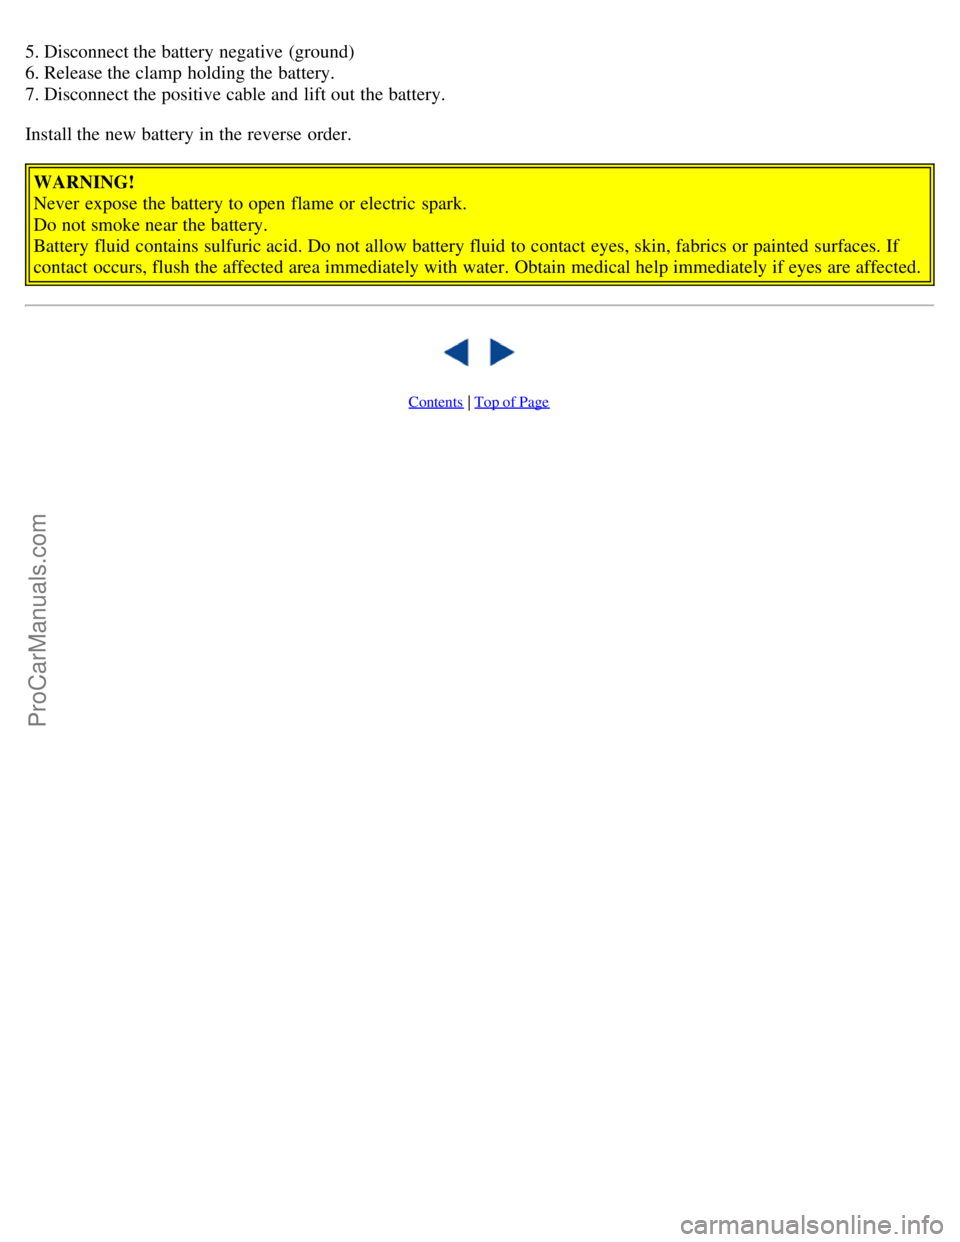
WARNING!
PROPOSITION 65 WARNING!
Battery posts, terminals, and related accessories contain lead and lead compounds, chemicals known to the state of
California to cause cancer and reproductive harm. Wash hands after handling.
pg. 154 Battery
Battery replacement
1. Switch off the ignition and remove the key.
2. Unscrew the cover over the battery.
3. Wait at least 5 minutes after switching off the ignition before disconnecting the battery so that all information in the
vehicle's electrical system can be stored in the control modules.
4. Remove the cover and unscrew the front side of the battery box using a screwdriver.
ProCarManuals.com
Page 97 of 127
5. Disconnect the battery negative (ground)
6. Release the clamp holding the battery.
7. Disconnect the positive cable and lift out the battery.
Install the new battery in the reverse order.WARNING!
Never expose the battery to open flame or electric spark.
Do not smoke near the battery.
Battery fluid contains sulfuric acid. Do not allow battery fluid to contact eyes, skin, fabrics or painted surfaces. If
contact occurs, flush the affected area immediately with water. Obtain medical help immediately if eyes are affected.
Contents | Top of Page
ProCarManuals.com
Page 98 of 127
2 0 0 5
VOLVO S40
Chapter 11 - Audio
pg. 167 Audio
Audio system - introduction168
Audio system overview169
Audio functions171
Radio functions174
CD player177
CD changer (certain audio systems only)179
Audio menu settings and selections181
pg. 168 Audio system - introduction
The audio system in your car is operated with the buttons and keys in the front, center control panel. Certain functions,
such as adjusting the volume, changing radio stations or tracks on a CD, etc, can also be controlled with the optional
steering wheel-mounted keypad.
The audio system is available in three
1 versions:
Performance
Features: AM/FM radio, single-disc CD player, 4x25W output, 4 full-range speakers and two treble speakers.
High-performance
Features: AM/FM radio, CD player, 4x40W output, eight speakers (bass and treble speakers in each door).
Premium sound
Features: AM/FM radio, integrated CD changer (6 discs), 4x70W output plus 25W Dolby Pro Logic II, twelve
speakers (bass, mid-range and treble speakers in the front doors, bass and treble speakers in the rear doors, and bass
and treble in the dashboard's center speaker).
A subwoofer mounted under the floor in the trunk is available as an accessory. Consult your Volvo retailer.
1. All three audio systems may not be available in all markets.
pg. 169 Audio system overview
ProCarManuals.com
Page 99 of 127
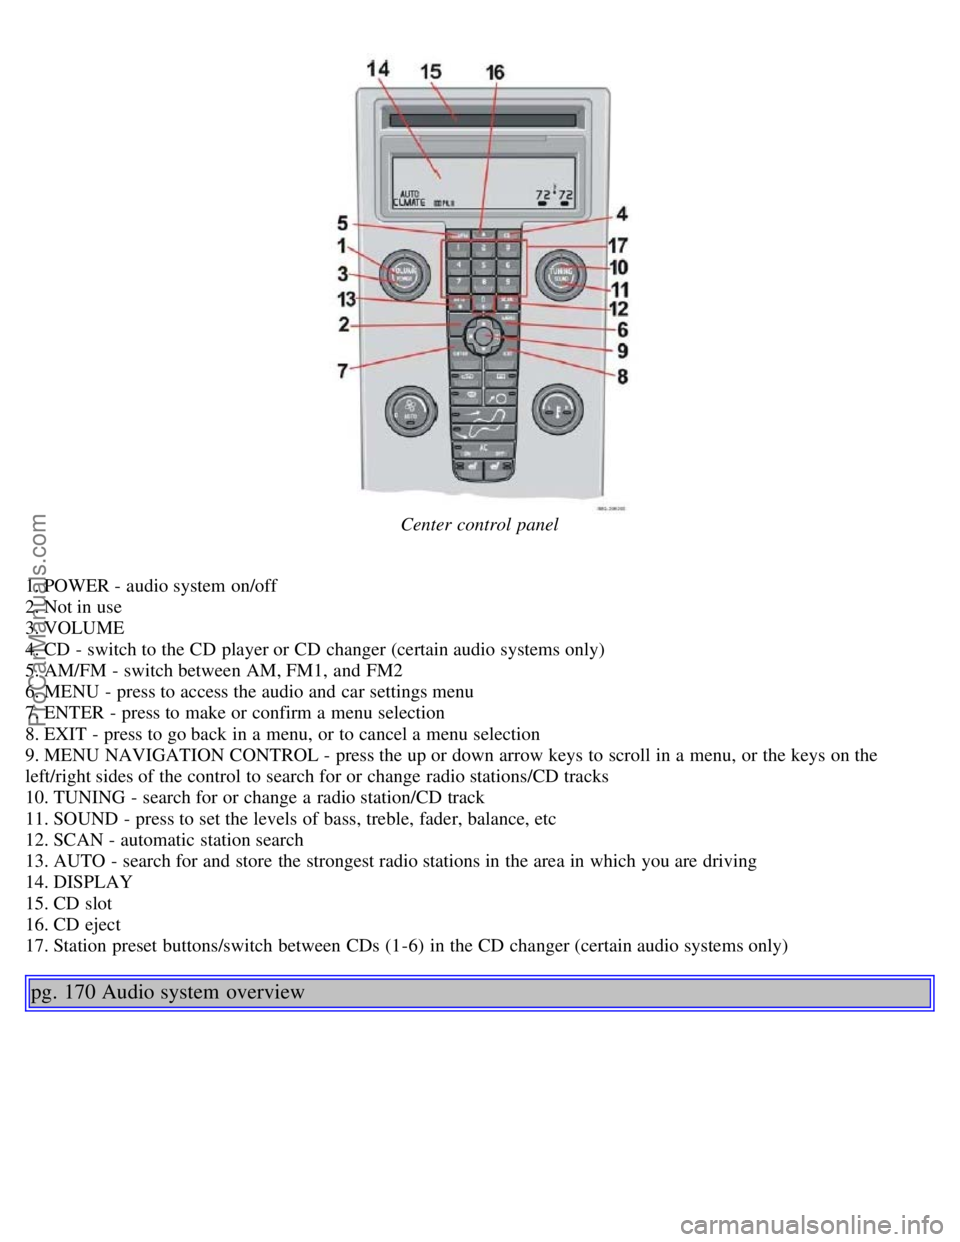
Center control panel
1. POWER - audio system on/off
2. Not in use
3. VOLUME
4. CD - switch to the CD player or CD changer (certain audio systems only)
5. AM/FM - switch between AM, FM1, and FM2
6. MENU - press to access the audio and car settings menu
7. ENTER - press to make or confirm a menu selection
8. EXIT - press to go back in a menu, or to cancel a menu selection
9. MENU NAVIGATION CONTROL - press the up or down arrow keys to scroll in a menu, or the keys on the
left/right sides of the control to search for or change radio stations/CD tracks
10. TUNING - search for or change a radio station/CD track
11. SOUND - press to set the levels of bass, treble, fader, balance, etc
12. SCAN - automatic station search
13. AUTO - search for and store the strongest radio stations in the area in which you are driving
14. DISPLAY
15. CD slot
16. CD eject
17. Station preset buttons/switch between CDs (1-6) in the CD changer (certain audio systems only)
pg. 170 Audio system overview
ProCarManuals.com
Page 100 of 127
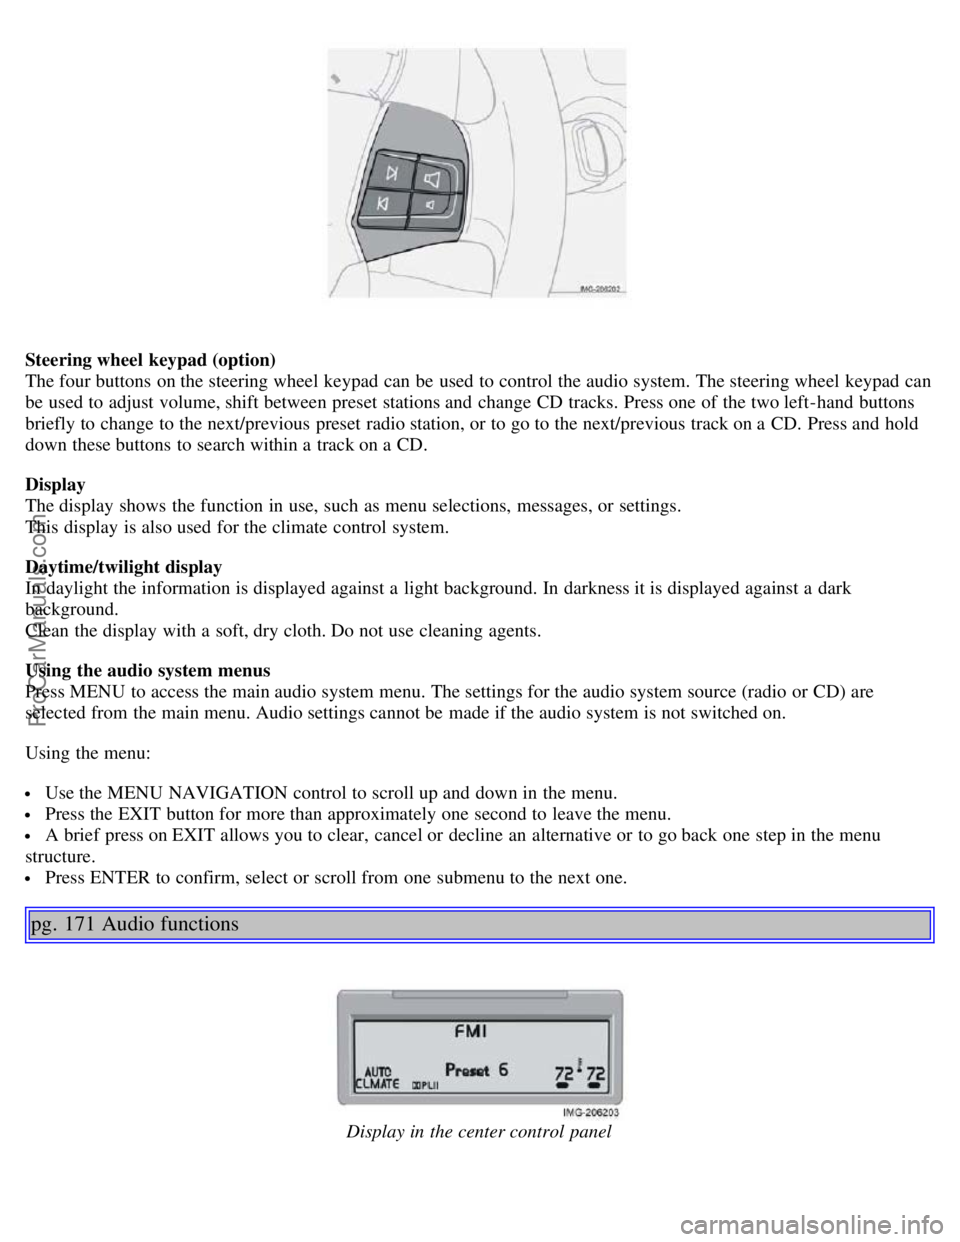
Steering wheel keypad (option)
The four buttons on the steering wheel keypad can be used to control the audio system. The steering wheel keypad can
be used to adjust volume, shift between preset stations and change CD tracks. Press one of the two left-hand buttons
briefly to change to the next/previous preset radio station, or to go to the next/previous track on a CD. Press and hold
down these buttons to search within a track on a CD.
Display
The display shows the function in use, such as menu selections, messages, or settings.
This display is also used for the climate control system.
Daytime/twilight display
In daylight the information is displayed against a light background. In darkness it is displayed against a dark
background.
Clean the display with a soft, dry cloth. Do not use cleaning agents.
Using the audio system menus
Press MENU to access the main audio system menu. The settings for the audio system source (radio or CD) are
selected from the main menu. Audio settings cannot be made if the audio system is not switched on.
Using the menu:
Use the MENU NAVIGATION control to scroll up and down in the menu.
Press the EXIT button for more than approximately one second to leave the menu.
A brief press on EXIT allows you to clear, cancel or decline an alternative or to go back one step in the menu
structure.
Press ENTER to confirm, select or scroll from one submenu to the next one.
pg. 171 Audio functions
Display in the center control panel
ProCarManuals.com