clutch VOLVO S40 2005 Owners Manual
[x] Cancel search | Manufacturer: VOLVO, Model Year: 2005, Model line: S40, Model: VOLVO S40 2005Pages: 127, PDF Size: 2.32 MB
Page 30 of 127

Increasing or decreasing speed
Use + or - in the following ways to increase or decrease the vehicle's speed:
Press and hold down + or - until the vehicle reaches the desired speed. This will become the set speed when the
button is released.
Press + or - for approximately a half second and release the button to increase or decrease vehicle speed by
approximately 1 mph (1.6 km/h).
NOTE:
Cruise control will not function at speeds below 20 m.p.h. (30 km/h).
Momentary acceleration, for less than 1 minute (e.g. when passing another car), does not affect cruise control
operation. The car will automatically return to the previously set speed when the accelerator pedal is released.
Temporarily disengaging the cruise control
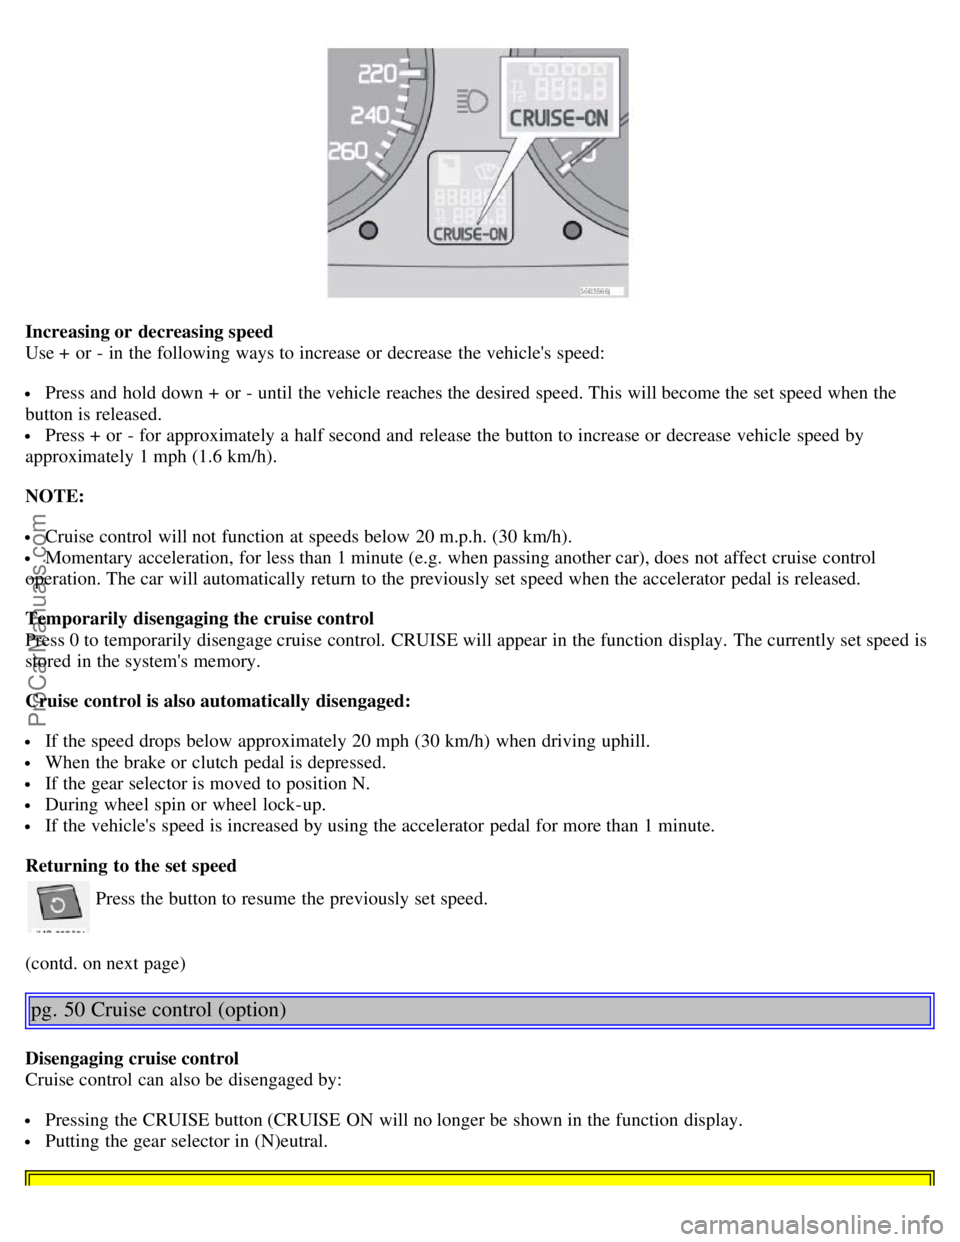
Press 0 to temporarily disengage cruise control. CRUISE will appear in the function display. The currently set speed is
stored in the system's memory.
Cruise control is also automatically disengaged:
If the speed drops below approximately 20 mph (30 km/h) when driving uphill.
When the brake or clutch pedal is depressed.
If the gear selector is moved to position N.
During wheel spin or wheel lock-up.
If the vehicle's speed is increased by using the accelerator pedal for more than 1 minute.
Returning to the set speed
Press the button to resume the previously set speed.
(contd. on next page)
pg. 50 Cruise control (option)
Disengaging cruise control
Cruise control can also be disengaged by:
Pressing the CRUISE button (CRUISE ON will no longer be shown in the function display.
Putting the gear selector in (N)eutral.
ProCarManuals.com
Page 64 of 127

pg. 103 Fuel requirements
CAUTION!
Do not refuel with the engine running
a. Turn the ignition off or to position I. If the ignition is on, an incorrect
reading could occur in the fuel gauge
After refueling, close the fuel filler cap by turning it clockwise until it clicks into place.
Allow for fuel expansion by not overfilling the tank. Overfilling could also cause damage to the emission control
systems.
Avoid spilling gasoline during refueling. In addition to causing damage to the environment, gasolines containing
alcohol can cause damage to painted surfaces, which may not be covered under the New Vehicle Limited Warranty.
Do not use gasolines containing methanol (methyl alcohol, wood alcohol). This practice can result in vehicle
performance deterioration and can damage critical parts in the fuel system. Such damage may not be covered under
the New Vehicle Limited Warranty.
a. If the fuel filler cap is not closed tightly or if the engine is running when the vehicle is refueled, the Check Engine
Light (malfunction indicator lamp) may indicate a fault. However, your vehicle's performance will not be affected. Use
only Volvo original or approved fuel filler caps.
pg. 104 Starting the vehicle
Starting the vehicle
To start the engine:
1. Fasten the seat belt. WARNING!
Before starting, check that the seat, steering wheel and mirrors are adjusted properly. Make sure the brake pedal can
be depressed completely. Adjust the seat if necessary.
2. Apply the parking brake if not already set. The gear selector (automatic transmission) is locked in the (P)ark position
(SHIFTLOCK). See also page 109.
Manual transmission: the clutch must be fully depressed.
3. Without touching the accelerator pedal, turn the ignition key to the starting position. Allow the starter to operate for
up to 10 seconds. Release the key as soon as the engine starts. If the engine fails to start, repeat this step.
NOTE:
On certain models, when the vehicle is started, idle speed may be noticeably higher than normal for a short period,
depending on the temperature of the engine. This has been done to help bring components in the emission control
system to their normal operating temperature as quickly as possible, which enables them to function normally.
For cold starts at altitudes above 6000 ft. (1800 meters), depress the accelerator pedal halfway and turn the key to
the starting position. Release the pedal slowly when the engine starts.
4. To release the gear selector from the (P)ark position, the engine must be running (or the ignition key must be in
position II) and the brake pedal must be depressed.
5. Select the desired gear. On models with an automatic transmission, the gear engages after a very slight delay which
is especially noticeable when selecting R.
NOTE:
ProCarManuals.com
Page 67 of 127

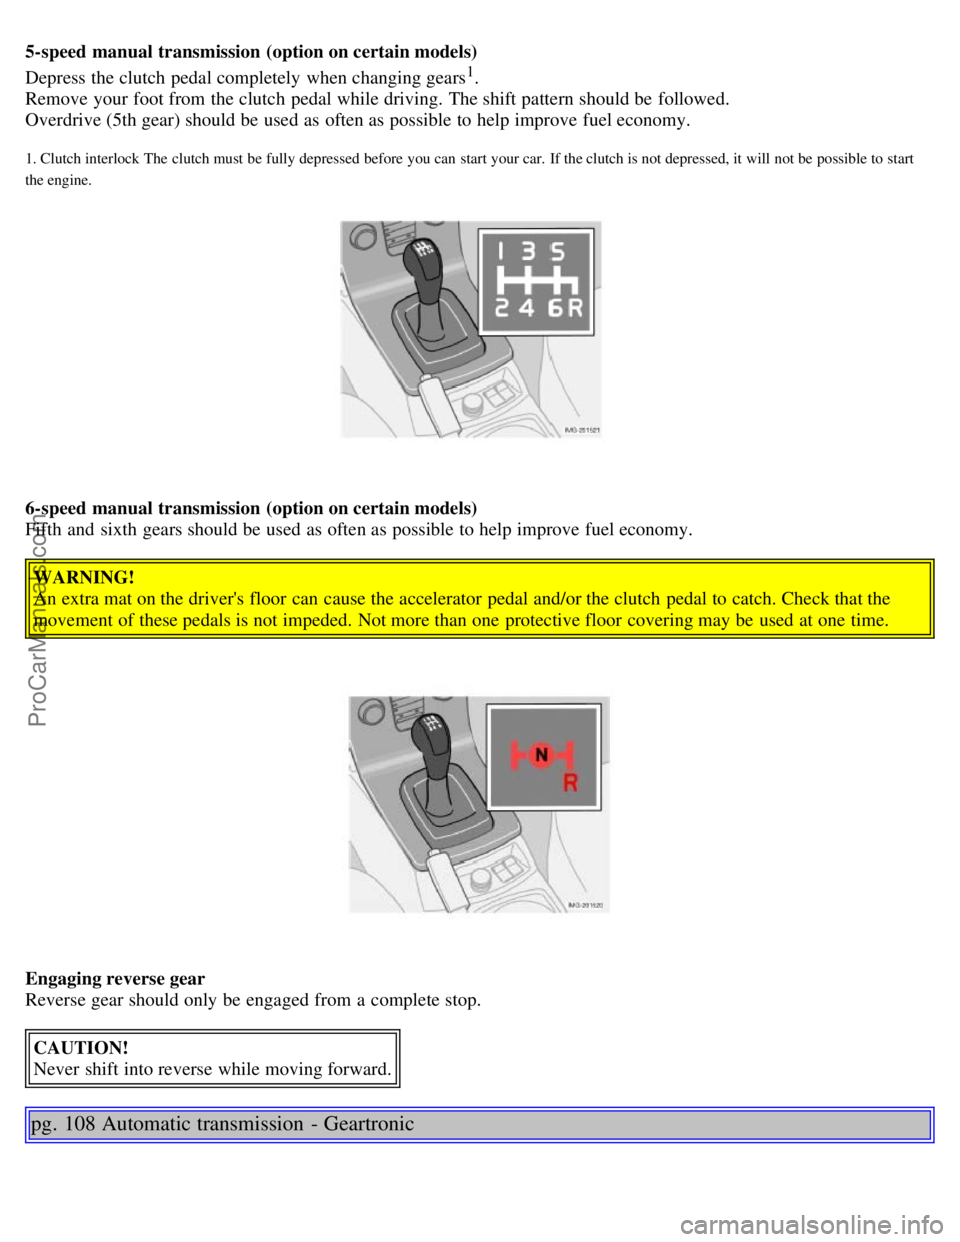
5-speed manual transmission (option on certain models)
Depress the clutch pedal completely when changing gears1.
Remove your foot from the clutch pedal while driving. The shift pattern should be followed.
Overdrive (5th gear) should be used as often as possible to help improve fuel economy.
1. Clutch interlock The clutch must be fully depressed before you can start your car. If the clutch is not depressed, it will not be possible to start
the engine.
6-speed manual transmission (option on certain models)
Fifth and sixth gears should be used as often as possible to help improve fuel economy.
WARNING!
An extra mat on the driver's floor can cause the accelerator pedal and/or the clutch pedal to catch. Check that the
movement of these pedals is not impeded. Not more than one protective floor covering may be used at one time.
Engaging reverse gear
Reverse gear should only be engaged from a complete stop.CAUTION!
Never shift into reverse while moving forward.
pg. 108 Automatic transmission - Geartronic
ProCarManuals.com
Page 90 of 127

Wash the car, including the undercarriage, to reduce wear that can be caused by a buildup of dirt, and corrosion that
can be caused by salt residues.
Clean leaves and twigs from air intake vents at the base of the windshield, and from other places where they may
collect.
NOTE:
Complete service information for qualified technicians is available online for purchase or subscription at
www.volvotechinfo.com
.
pg. 148 Hood and engine compartment
Hood and engine compartment
Opening the hood
To open the hood:
Pull the lever located under the left side of the dash to release the hood lock.
Lift the hood slightly.
Press up the release control located under the front edge of the hood (at the center) up to the right, and lift the hood.
WARNING!
Check that the hood locks engage properly when closed.
Engine compartment
1. Cooling system expansion tank
2. Power steering fluid reservoir
3. Dipstick - engine oil
4. Radiator
5. Cooling fan
6. Washer fluid reservoir
7. Engine oil filler cap
8. Brake/clutch fluid reservoir
9. Battery
10. Relay/fuse box
11. Air cleaner
ProCarManuals.com