VOLVO S40 2008 Owners Manual
Manufacturer: VOLVO, Model Year: 2008, Model line: S40, Model: VOLVO S40 2008Pages: 239, PDF Size: 5.94 MB
Page 91 of 239
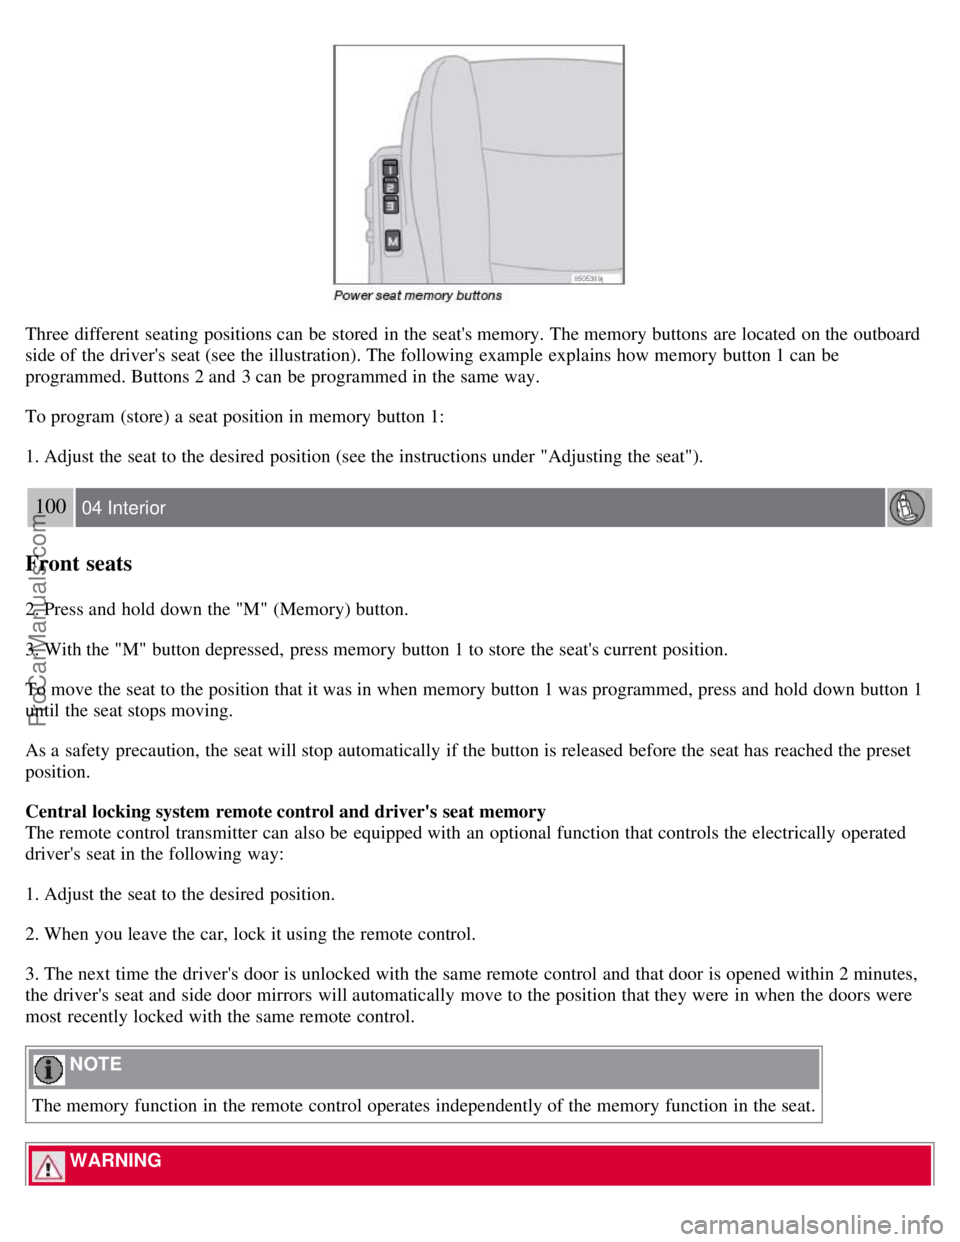
Three different seating positions can be stored in the seat's memory. The memory buttons are located on the outboard
side of the driver's seat (see the illustration). The following example explains how memory button 1 can be
programmed. Buttons 2 and 3 can be programmed in the same way.
To program (store) a seat position in memory button 1:
1. Adjust the seat to the desired position (see the instructions under "Adjusting the seat").
100 04 Interior
Front seats
2. Press and hold down the "M" (Memory) button.
3. With the "M" button depressed, press memory button 1 to store the seat's current position.
To move the seat to the position that it was in when memory button 1 was programmed, press and hold down button 1
until the seat stops moving.
As a safety precaution, the seat will stop automatically if the button is released before the seat has reached the preset
position.
Central locking system remote control and driver's seat memory
The remote control transmitter can also be equipped with an optional function that controls the electrically operated
driver's seat in the following way:
1. Adjust the seat to the desired position.
2. When you leave the car, lock it using the remote control.
3. The next time the driver's door is unlocked with the same remote control and that door is opened within 2 minutes,
the driver's seat and side door mirrors will automatically move to the position that they were in when the doors were
most recently locked with the same remote control.
NOTE
The memory function in the remote control operates independently of the memory function in the seat.
WARNING
ProCarManuals.com
Page 92 of 239
Because the driver's seat can be adjusted with the ignition off, children should never be left unattended in the car.
Movement of the seat can be STOPPED at any time by pressing any button on the power seat control panel.
Do not adjust the seat while driving. The seat should be adjusted so that the brake pedal can be depressed fully. In
addition, position the seat as far rearward as comfort and control allow.
The seat rails on the floor must not be obstructed in any way when the seat is in motion.
101 04 Interior
Interior lighting
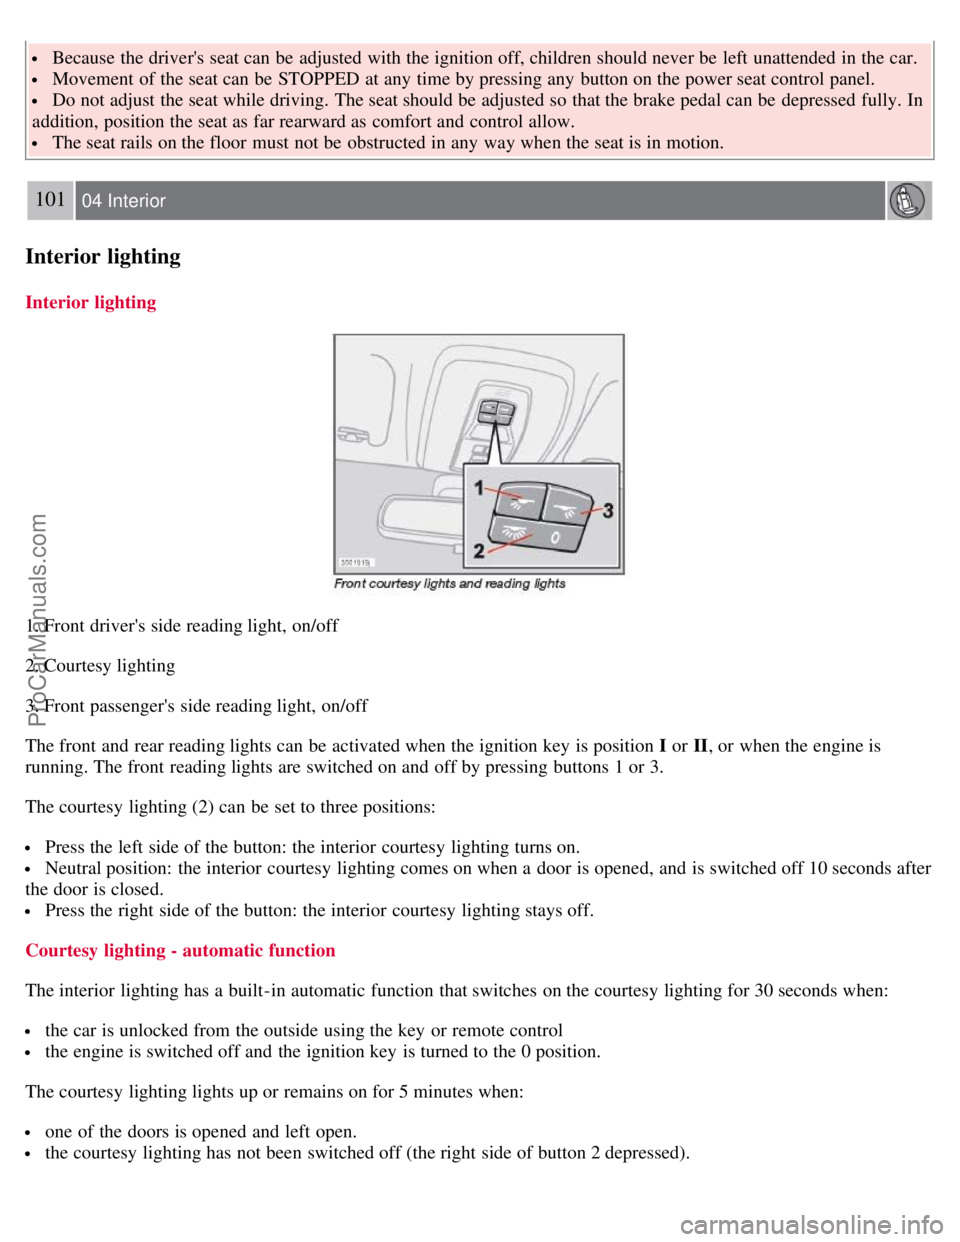
Interior lighting
1. Front driver's side reading light, on/off
2. Courtesy lighting
3. Front passenger's side reading light, on/off
The front and rear reading lights can be activated when the ignition key is position I or II, or when the engine is
running. The front reading lights are switched on and off by pressing buttons 1 or 3.
The courtesy lighting (2) can be set to three positions:
Press the left side of the button: the interior courtesy lighting turns on.
Neutral position: the interior courtesy lighting comes on when a door is opened, and is switched off 10 seconds after
the door is closed.
Press the right side of the button: the interior courtesy lighting stays off.
Courtesy lighting - automatic function
The interior lighting has a built-in automatic function that switches on the courtesy lighting for 30 seconds when:
the car is unlocked from the outside using the key or remote control
the engine is switched off and the ignition key is turned to the 0 position.
The courtesy lighting lights up or remains on for 5 minutes when:
one of the doors is opened and left open.
the courtesy lighting has not been switched off (the right side of button 2 depressed).
ProCarManuals.com
Page 93 of 239
The automatic lighting goes out when:
the engine is started
the car is locked from the outside using the key or remote control.
If the courtesy lighting is not switched off manually, it will be turned off automatically 5 minutes after the engine has
been switched off.
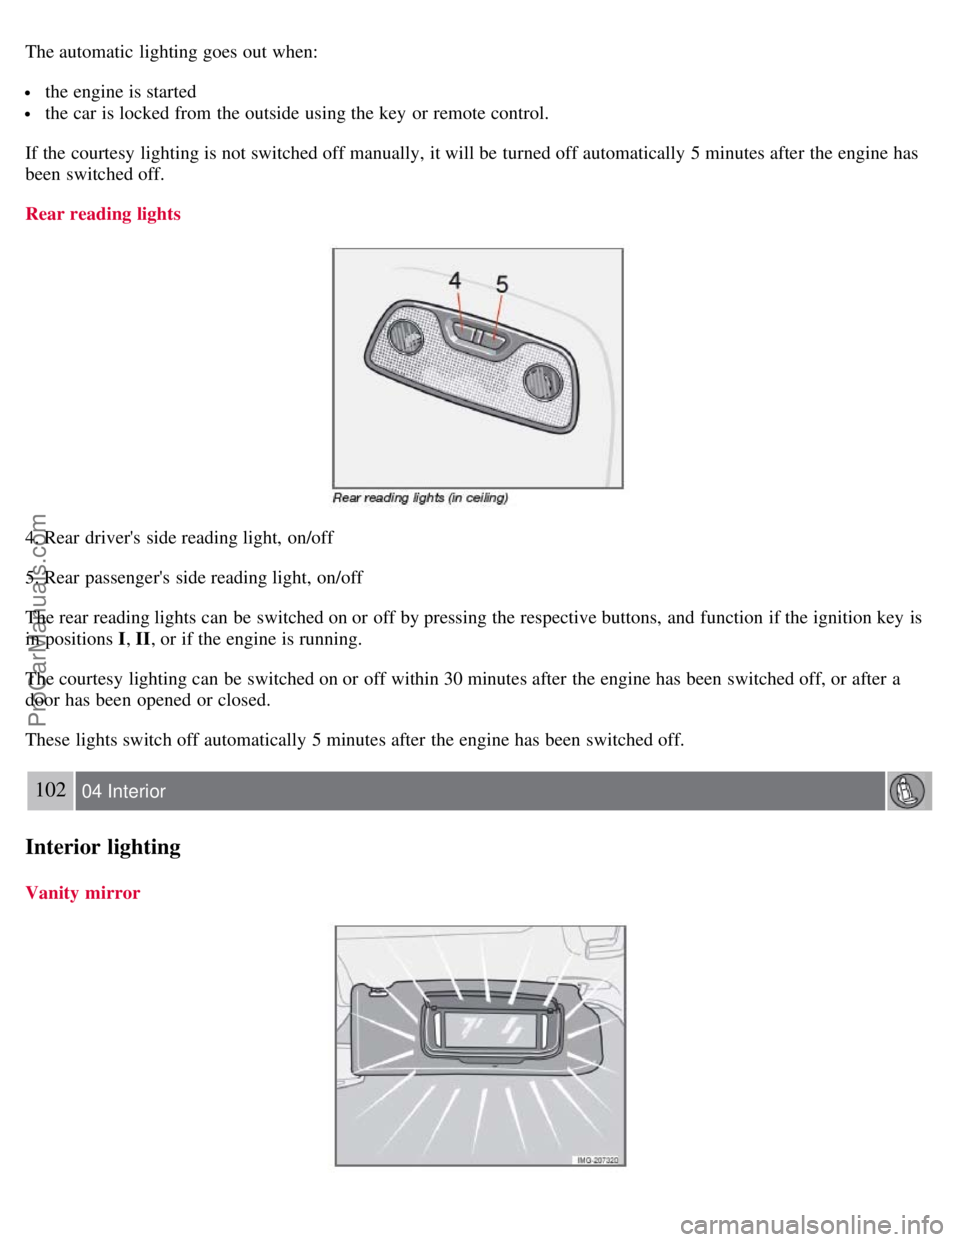
Rear reading lights
4. Rear driver's side reading light, on/off
5. Rear passenger's side reading light, on/off
The rear reading lights can be switched on or off by pressing the respective buttons, and function if the ignition key is
in positions I , II, or if the engine is running.
The courtesy lighting can be switched on or off within 30 minutes after the engine has been switched off, or after a
door has been opened or closed.
These lights switch off automatically 5 minutes after the engine has been switched off.
102 04 Interior
Interior lighting
Vanity mirror
ProCarManuals.com
Page 94 of 239
Raise the cover to switch on the light.
103 04 Interior
Storage compartments
104 04 Interior
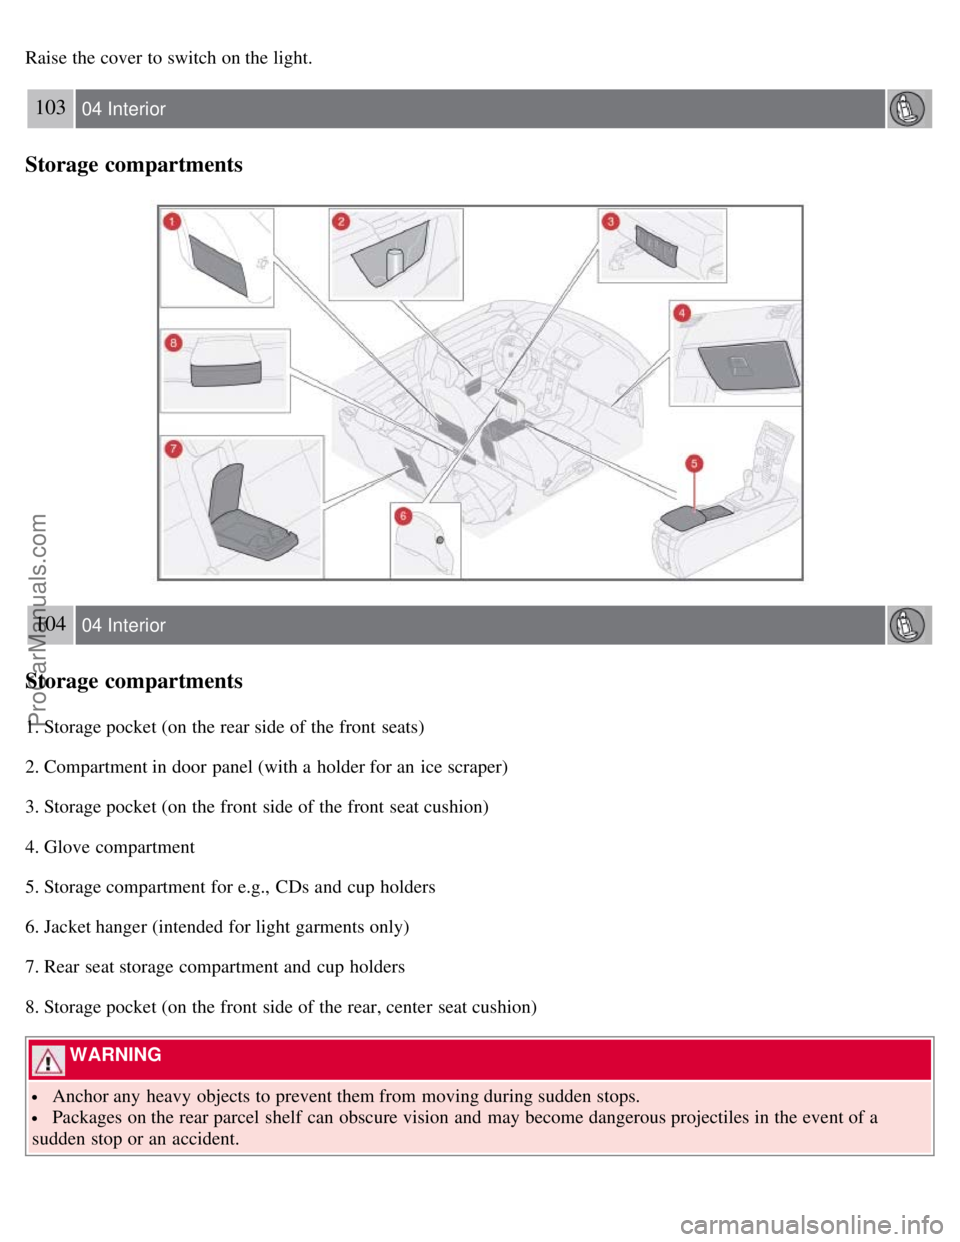
Storage compartments
1. Storage pocket (on the rear side of the front seats)
2. Compartment in door panel (with a holder for an ice scraper)
3. Storage pocket (on the front side of the front seat cushion)
4. Glove compartment
5. Storage compartment for e.g., CDs and cup holders
6. Jacket hanger (intended for light garments only)
7. Rear seat storage compartment and cup holders
8. Storage pocket (on the front side of the rear, center seat cushion)
WARNING
Anchor any heavy objects to prevent them from moving during sudden stops.
Packages on the rear parcel shelf can obscure vision and may become dangerous projectiles in the event of a
sudden stop or an accident.
ProCarManuals.com
Page 95 of 239
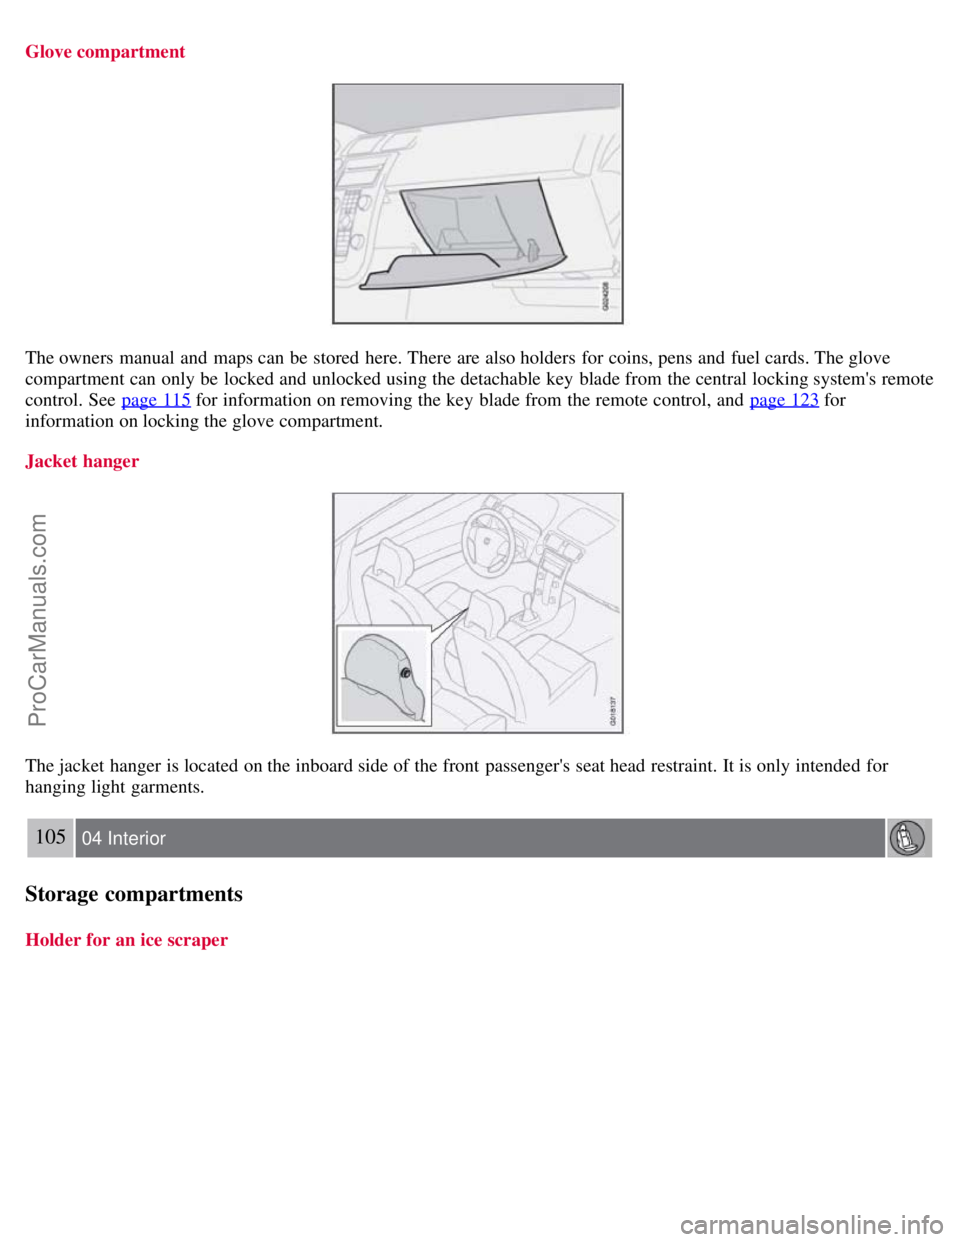
Glove compartment
The owners manual and maps can be stored here. There are also holders for coins, pens and fuel cards. The glove
compartment can only be locked and unlocked using the detachable key blade from the central locking system's remote
control. See page 115
for information on removing the key blade from the remote control, and page 123 for
information on locking the glove compartment.
Jacket hanger
The jacket hanger is located on the inboard side of the front passenger's seat head restraint. It is only intended for
hanging light garments.
105 04 Interior
Storage compartments
Holder for an ice scraper
ProCarManuals.com
Page 96 of 239
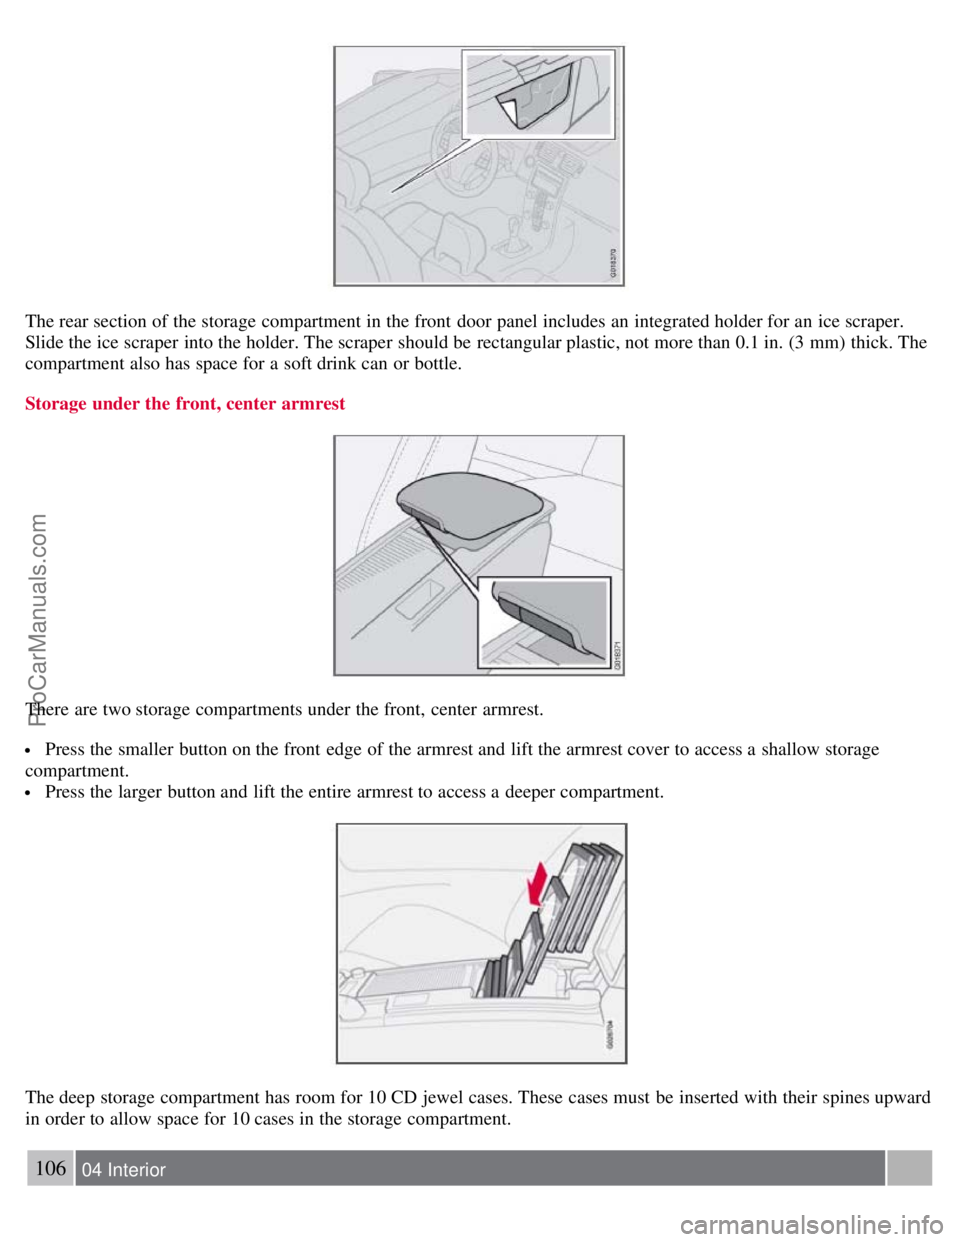
The rear section of the storage compartment in the front door panel includes an integrated holder for an ice scraper.
Slide the ice scraper into the holder. The scraper should be rectangular plastic, not more than 0.1 in. (3 mm) thick. The
compartment also has space for a soft drink can or bottle.
Storage under the front, center armrest
There are two storage compartments under the front, center armrest.
Press the smaller button on the front edge of the armrest and lift the armrest cover to access a shallow storage
compartment.
Press the larger button and lift the entire armrest to access a deeper compartment.
The deep storage compartment has room for 10 CD jewel cases. These cases must be inserted with their spines upward
in order to allow space for 10 cases in the storage compartment.
106 04 Interior
ProCarManuals.com
Page 97 of 239
Storage compartments
Cup holders in the center console
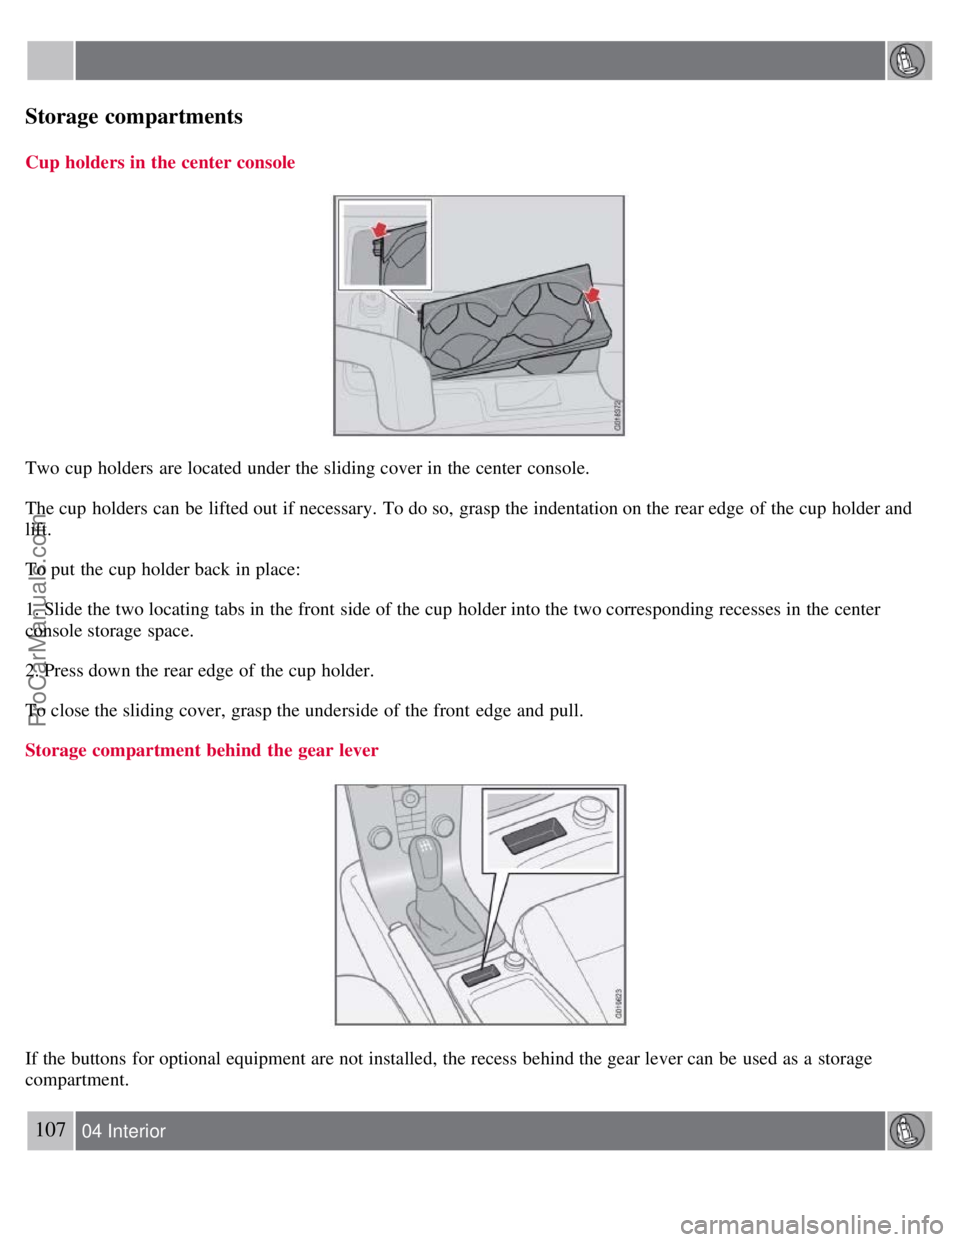
Two cup holders are located under the sliding cover in the center console.
The cup holders can be lifted out if necessary. To do so, grasp the indentation on the rear edge of the cup holder and
lift.
To put the cup holder back in place:
1. Slide the two locating tabs in the front side of the cup holder into the two corresponding recesses in the center
console storage space.
2. Press down the rear edge of the cup holder.
To close the sliding cover, grasp the underside of the front edge and pull.
Storage compartment behind the gear lever
If the buttons for optional equipment are not installed, the recess behind the gear lever can be used as a storage
compartment.
107 04 Interior
ProCarManuals.com
Page 98 of 239
Rear seat
Rear seat head restraints
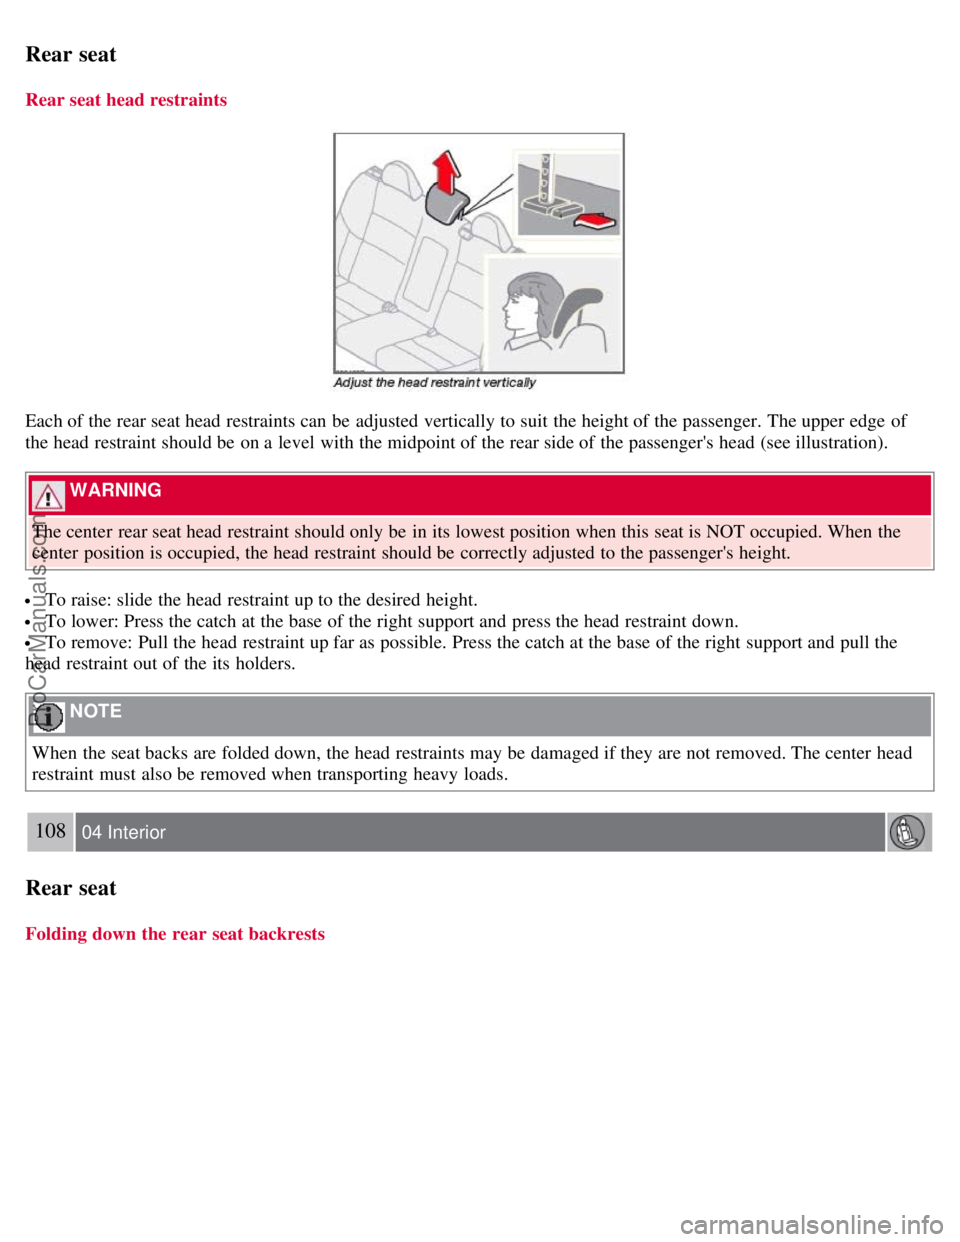
Each of the rear seat head restraints can be adjusted vertically to suit the height of the passenger. The upper edge of
the head restraint should be on a level with the midpoint of the rear side of the passenger's head (see illustration).
WARNING
The center rear seat head restraint should only be in its lowest position when this seat is NOT occupied. When the
center position is occupied, the head restraint should be correctly adjusted to the passenger's height.
To raise: slide the head restraint up to the desired height.
To lower: Press the catch at the base of the right support and press the head restraint down.
To remove: Pull the head restraint up far as possible. Press the catch at the base of the right support and pull the
head restraint out of the its holders.
NOTE
When the seat backs are folded down, the head restraints may be damaged if they are not removed. The center head
restraint must also be removed when transporting heavy loads.
108 04 Interior
Rear seat
Folding down the rear seat backrests
ProCarManuals.com
Page 99 of 239
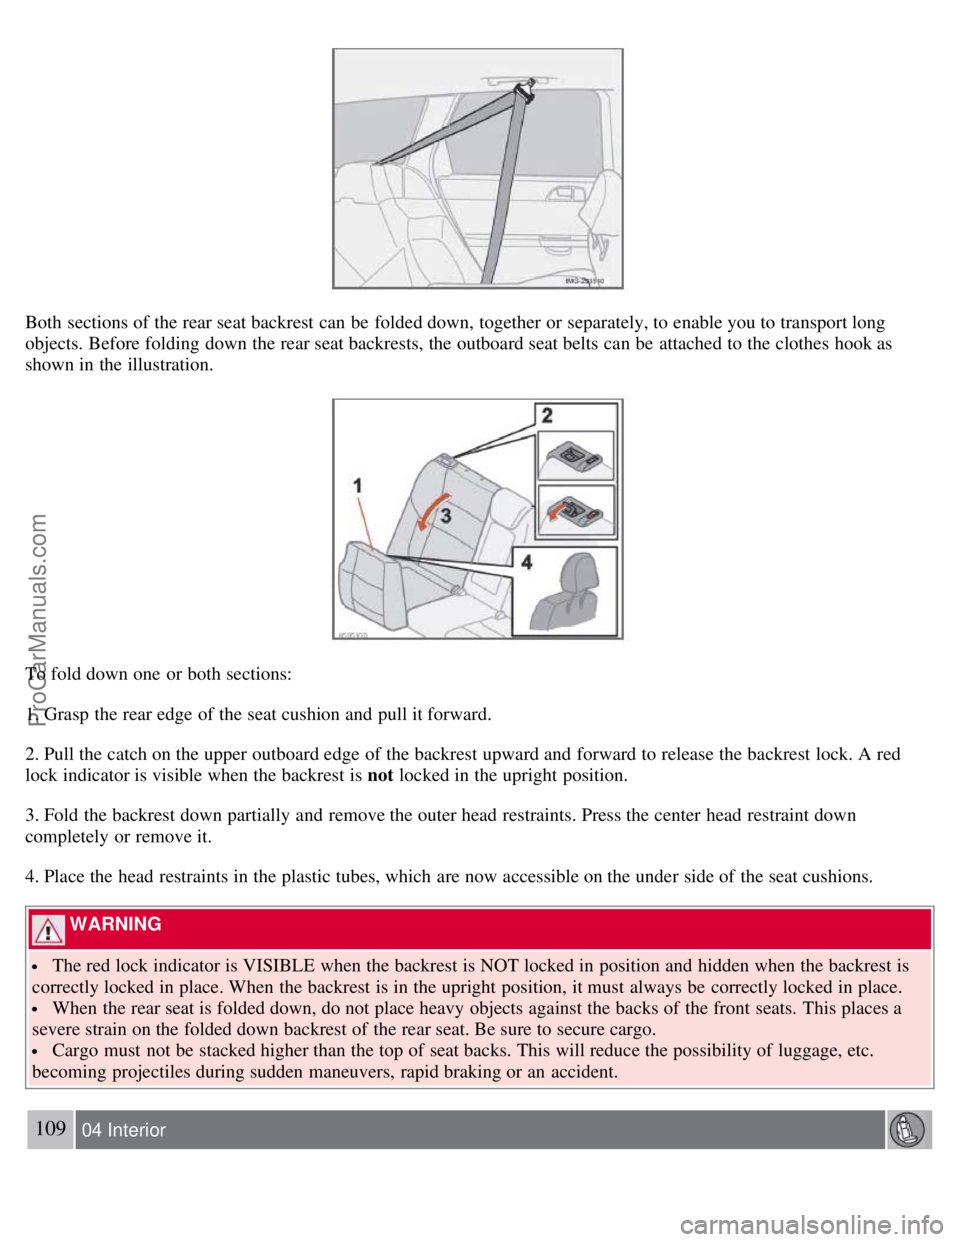
Both sections of the rear seat backrest can be folded down, together or separately, to enable you to transport long
objects. Before folding down the rear seat backrests, the outboard seat belts can be attached to the clothes hook as
shown in the illustration.
To fold down one or both sections:
1. Grasp the rear edge of the seat cushion and pull it forward.
2. Pull the catch on the upper outboard edge of the backrest upward and forward to release the backrest lock. A red
lock indicator is visible when the backrest is not locked in the upright position.
3. Fold the backrest down partially and remove the outer head restraints. Press the center head restraint down
completely or remove it.
4. Place the head restraints in the plastic tubes, which are now accessible on the under side of the seat cushions.
WARNING
The red lock indicator is VISIBLE when the backrest is NOT locked in position and hidden when the backrest is
correctly locked in place. When the backrest is in the upright position, it must always be correctly locked in place.
When the rear seat is folded down, do not place heavy objects against the backs of the front seats. This places a
severe strain on the folded down backrest of the rear seat. Be sure to secure cargo.
Cargo must not be stacked higher than the top of seat backs. This will reduce the possibility of luggage, etc.
becoming projectiles during sudden maneuvers, rapid braking or an accident.
109 04 Interior
ProCarManuals.com
Page 100 of 239
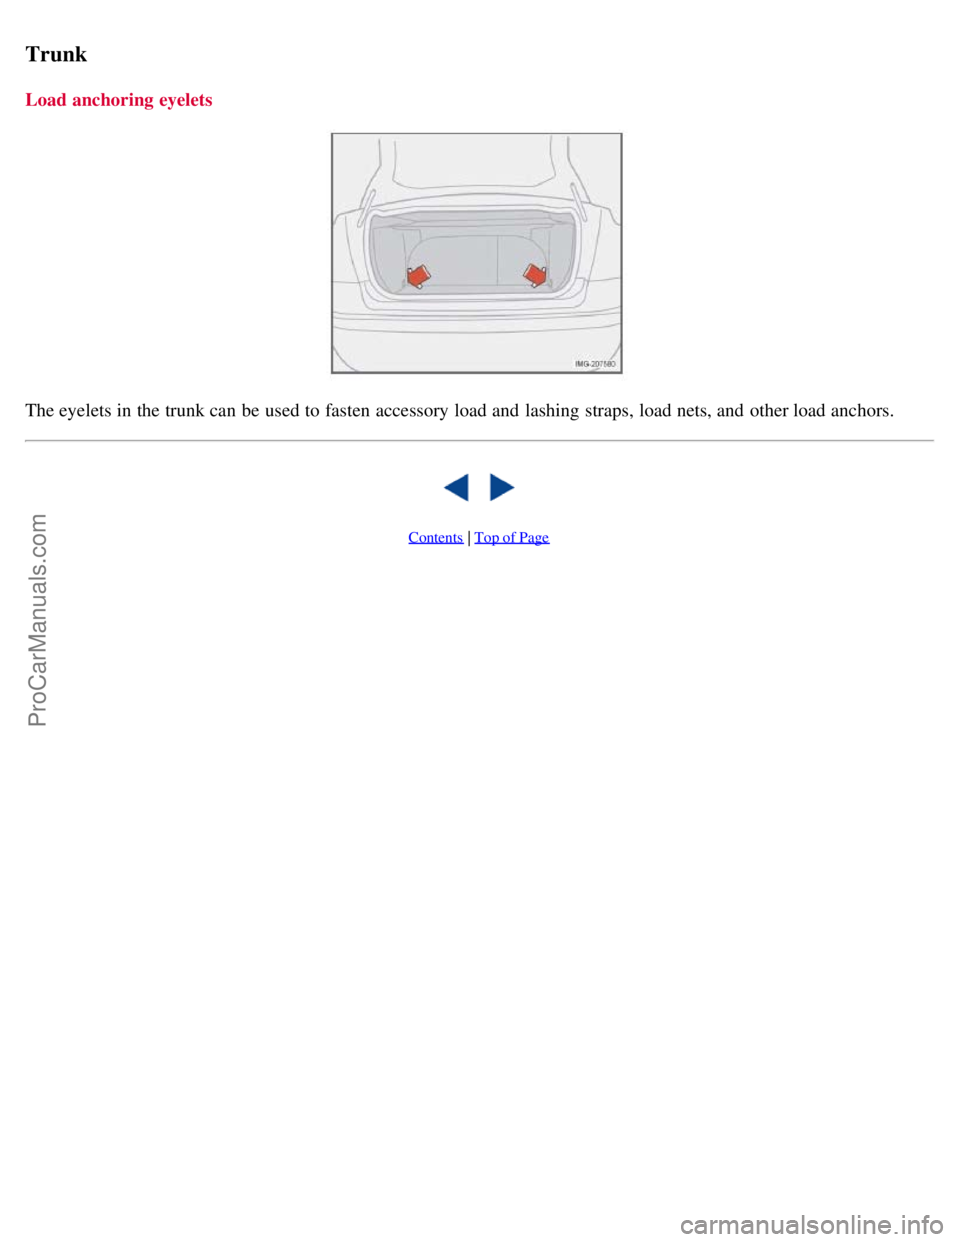
Trunk
Load anchoring eyelets
The eyelets in the trunk can be used to fasten accessory load and lashing straps, load nets, and other load anchors.
Contents | Top of Page
ProCarManuals.com