VOLVO S40 2008 Repair Manual
Manufacturer: VOLVO, Model Year: 2008, Model line: S40, Model: VOLVO S40 2008Pages: 239, PDF Size: 5.94 MB
Page 61 of 239
2. Adjust the steering wheel to a suitable position
3. Press the lever back into place to lock the steering wheel in the new position. If necessary, press the steering wheel
slightly while pressing the lever into the locked position.
Check that the steering wheel is locked in the new position.
WARNING
Never adjust the steering wheel while driving.
Hazard warning flashers
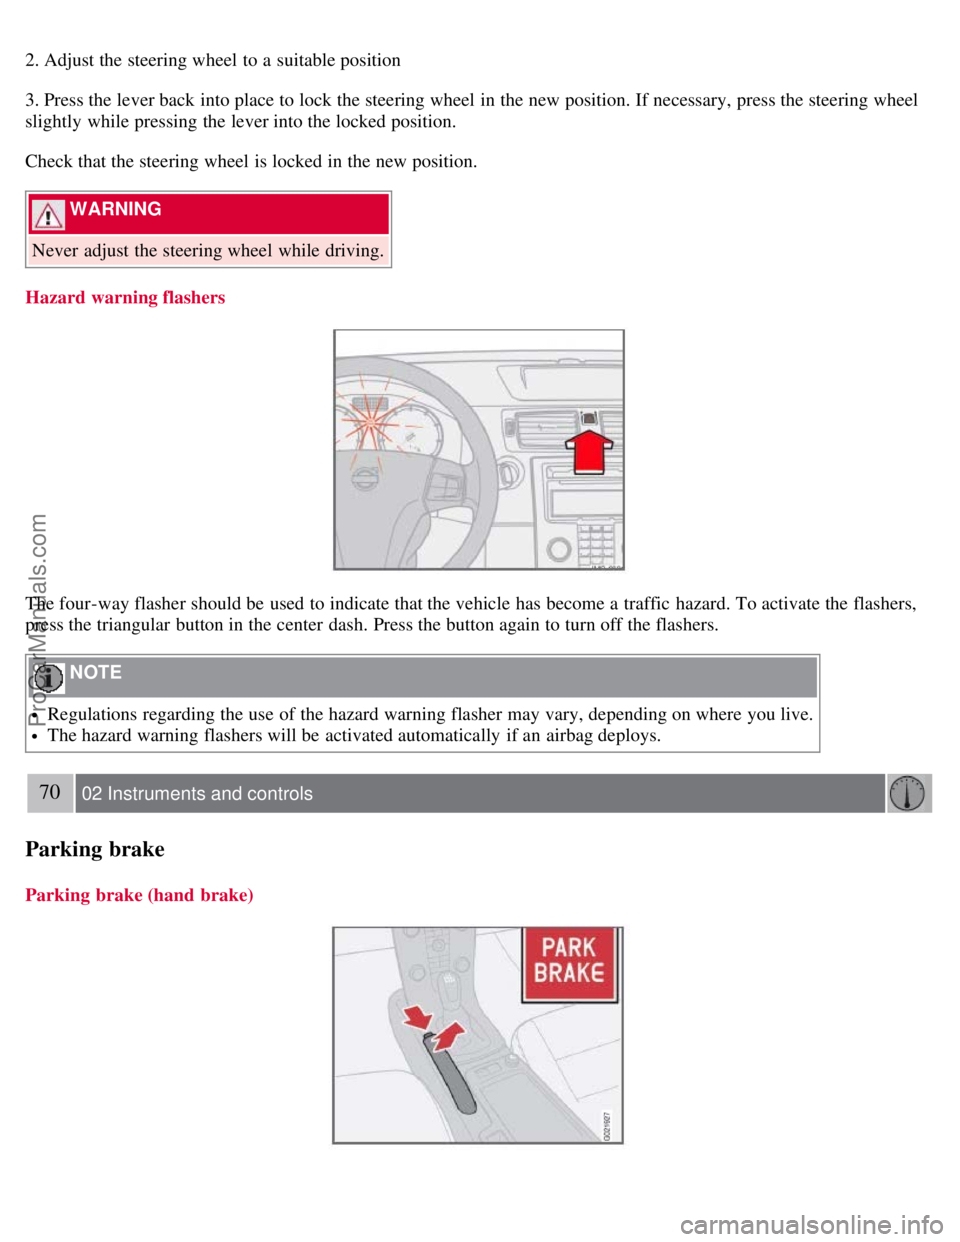
The four-way flasher should be used to indicate that the vehicle has become a traffic hazard. To activate the flashers,
press the triangular button in the center dash. Press the button again to turn off the flashers.
NOTE
Regulations regarding the use of the hazard warning flasher may vary, depending on where you live.
The hazard warning flashers will be activated automatically if an airbag deploys.
70 02 Instruments and controls
Parking brake
Parking brake (hand brake)
ProCarManuals.com
Page 62 of 239
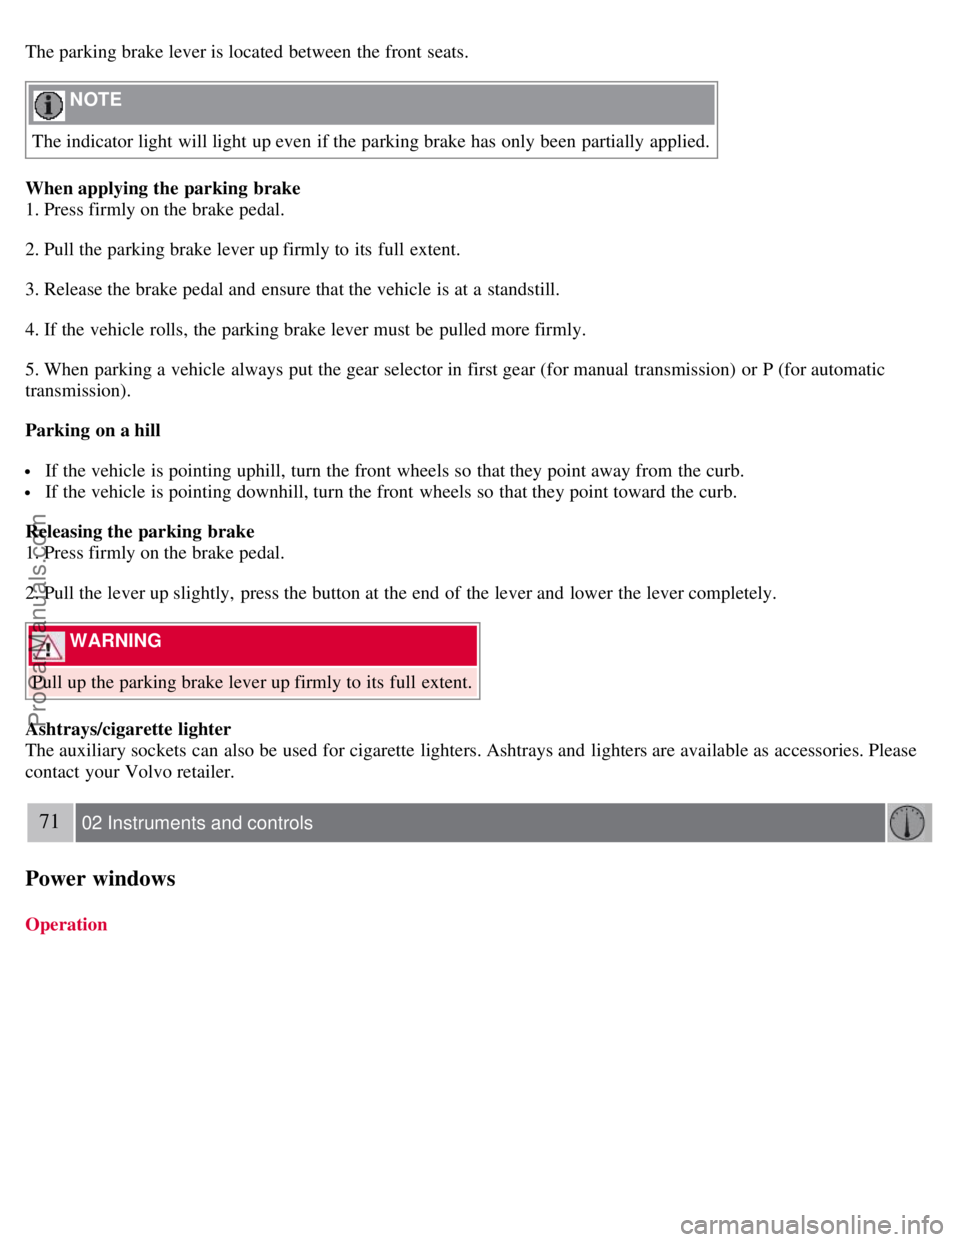
The parking brake lever is located between the front seats.
NOTE
The indicator light will light up even if the parking brake has only been partially applied.
When applying the parking brake
1. Press firmly on the brake pedal.
2. Pull the parking brake lever up firmly to its full extent.
3. Release the brake pedal and ensure that the vehicle is at a standstill.
4. If the vehicle rolls, the parking brake lever must be pulled more firmly.
5. When parking a vehicle always put the gear selector in first gear (for manual transmission) or P (for automatic
transmission).
Parking on a hill
If the vehicle is pointing uphill, turn the front wheels so that they point away from the curb.
If the vehicle is pointing downhill, turn the front wheels so that they point toward the curb.
Releasing the parking brake
1. Press firmly on the brake pedal.
2. Pull the lever up slightly, press the button at the end of the lever and lower the lever completely.
WARNING
Pull up the parking brake lever up firmly to its full extent.
Ashtrays/cigarette lighter
The auxiliary sockets can also be used for cigarette lighters. Ashtrays and lighters are available as accessories. Please
contact your Volvo retailer.
71 02 Instruments and controls
Power windows
Operation
ProCarManuals.com
Page 63 of 239
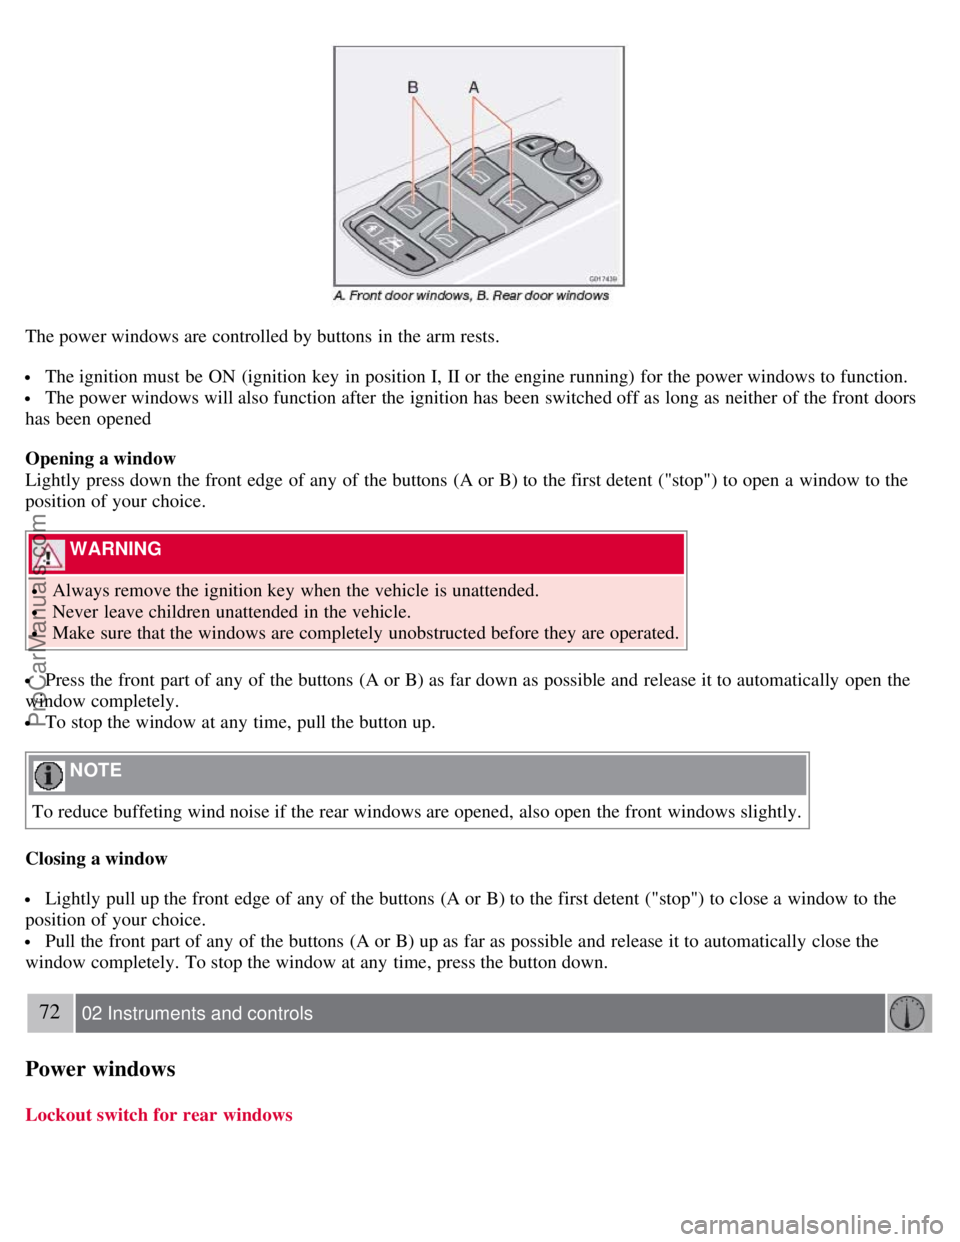
The power windows are controlled by buttons in the arm rests.
The ignition must be ON (ignition key in position I, II or the engine running) for the power windows to function.
The power windows will also function after the ignition has been switched off as long as neither of the front doors
has been opened
Opening a window
Lightly press down the front edge of any of the buttons (A or B) to the first detent ("stop") to open a window to the
position of your choice.
WARNING
Always remove the ignition key when the vehicle is unattended.
Never leave children unattended in the vehicle.
Make sure that the windows are completely unobstructed before they are operated.
Press the front part of any of the buttons (A or B) as far down as possible and release it to automatically open the
window completely.
To stop the window at any time, pull the button up.
NOTE
To reduce buffeting wind noise if the rear windows are opened, also open the front windows slightly.
Closing a window
Lightly pull up the front edge of any of the buttons (A or B) to the first detent ("stop") to close a window to the
position of your choice.
Pull the front part of any of the buttons (A or B) up as far as possible and release it to automatically close the
window completely. To stop the window at any time, press the button down.
72 02 Instruments and controls
Power windows
Lockout switch for rear windows
ProCarManuals.com
Page 64 of 239
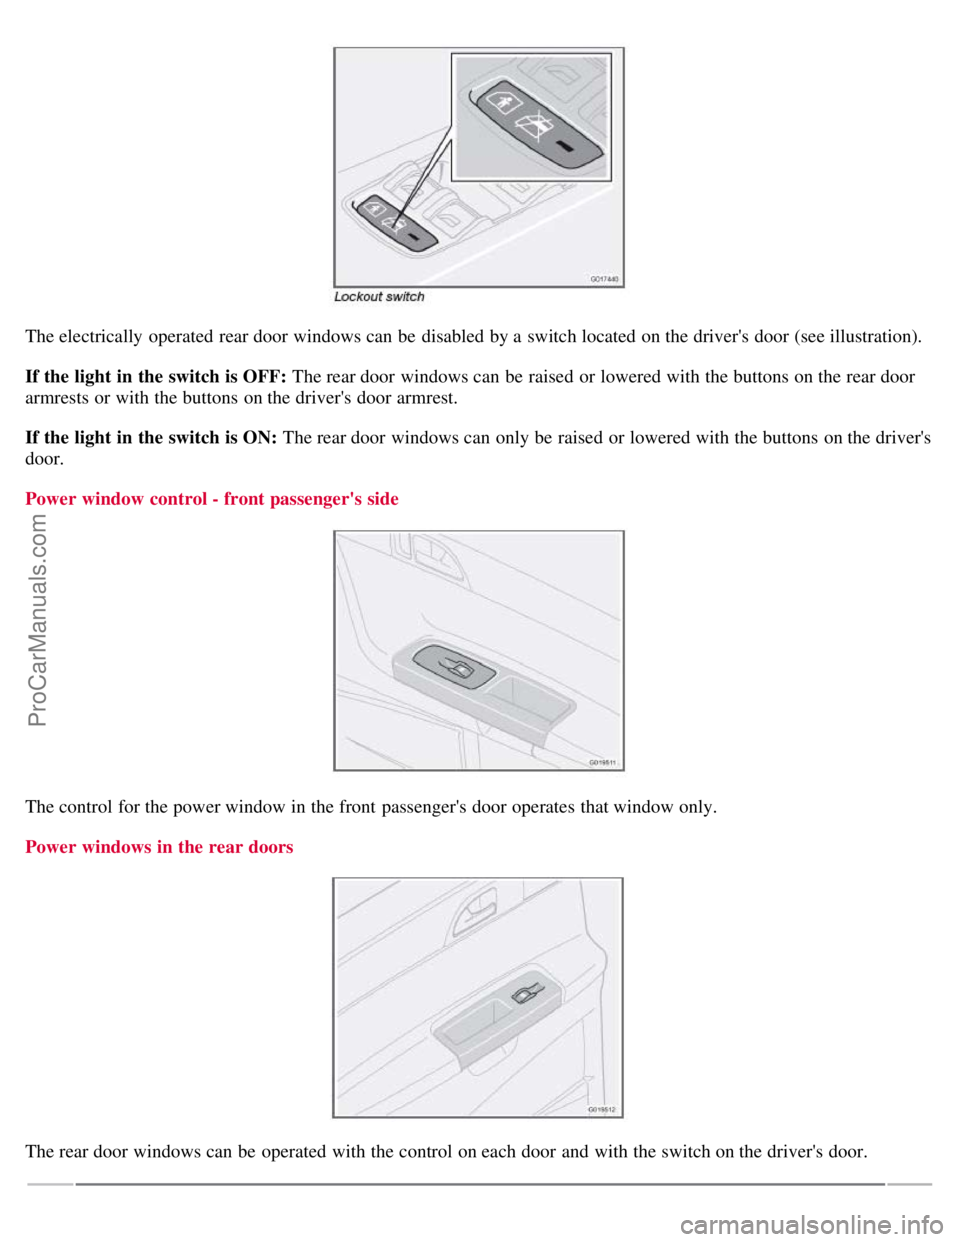
The electrically operated rear door windows can be disabled by a switch located on the driver's door (see illustration).
If the light in the switch is OFF: The rear door windows can be raised or lowered with the buttons on the rear door
armrests or with the buttons on the driver's door armrest.
If the light in the switch is ON: The rear door windows can only be raised or lowered with the buttons on the driver's
door.
Power window control - front passenger's side
The control for the power window in the front passenger's door operates that window only.
Power windows in the rear doors
The rear door windows can be operated with the control on each door and with the switch on the driver's door.
ProCarManuals.com
Page 65 of 239
73 02 Instruments and controls
Mirrors
Rearview mirror
Night position
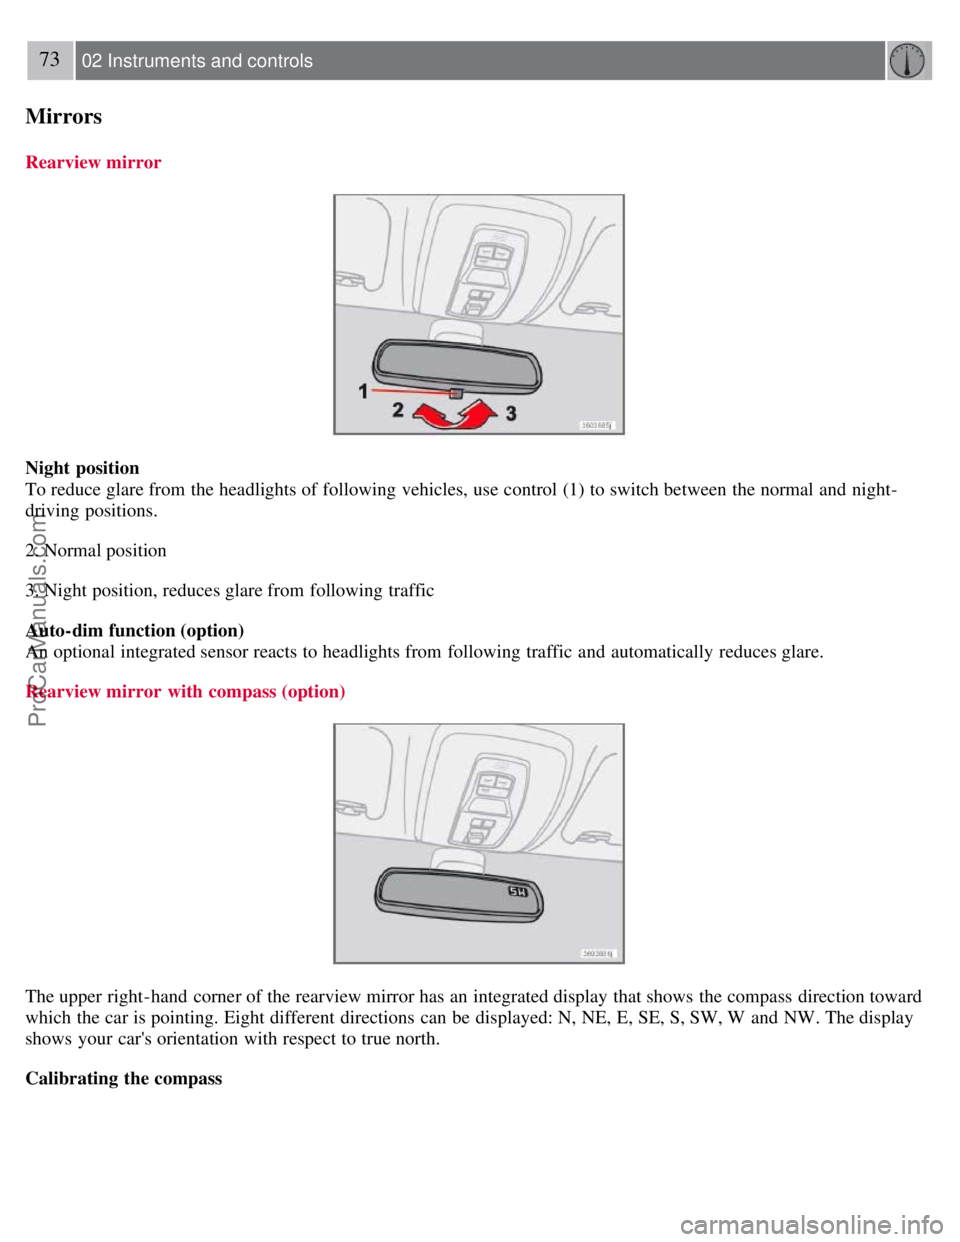
To reduce glare from the headlights of following vehicles, use control (1) to switch between the normal and night-
driving positions.
2. Normal position
3. Night position, reduces glare from following traffic
Auto-dim function (option)
An optional integrated sensor reacts to headlights from following traffic and automatically reduces glare.
Rearview mirror with compass (option)
The upper right-hand corner of the rearview mirror has an integrated display that shows the compass direction toward
which the car is pointing. Eight different directions can be displayed: N, NE, E, SE, S, SW, W and NW. The display
shows your car's orientation with respect to true north.
Calibrating the compass
ProCarManuals.com
Page 66 of 239
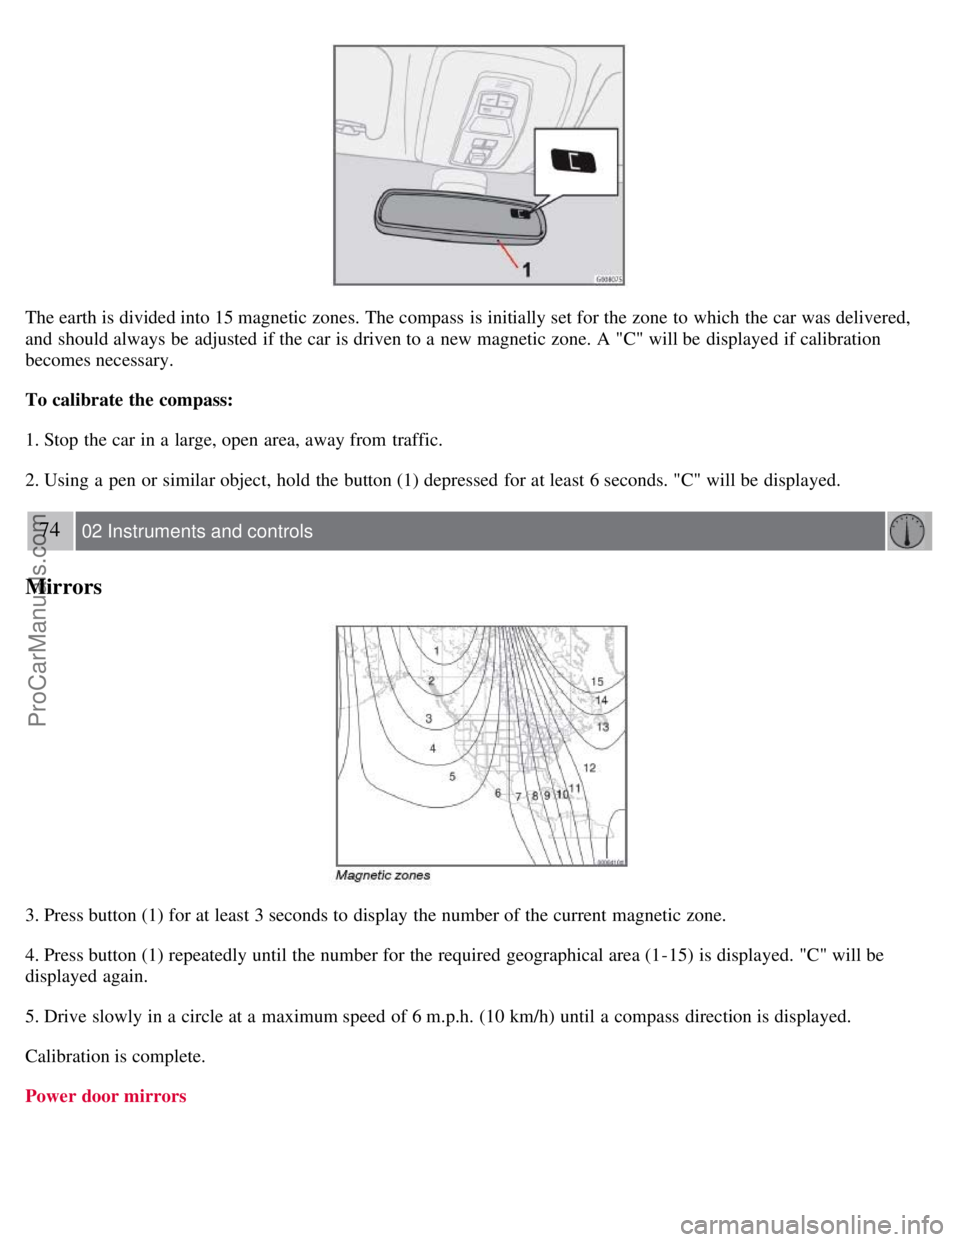
The earth is divided into 15 magnetic zones. The compass is initially set for the zone to which the car was delivered,
and should always be adjusted if the car is driven to a new magnetic zone. A "C" will be displayed if calibration
becomes necessary.
To calibrate the compass:
1. Stop the car in a large, open area, away from traffic.
2. Using a pen or similar object, hold the button (1) depressed for at least 6 seconds. "C" will be displayed.
74 02 Instruments and controls
Mirrors
3. Press button (1) for at least 3 seconds to display the number of the current magnetic zone.
4. Press button (1) repeatedly until the number for the required geographical area (1-15) is displayed. "C" will be
displayed again.
5. Drive slowly in a circle at a maximum speed of 6 m.p.h. (10 km/h) until a compass direction is displayed.
Calibration is complete.
Power door mirrors
ProCarManuals.com
Page 67 of 239
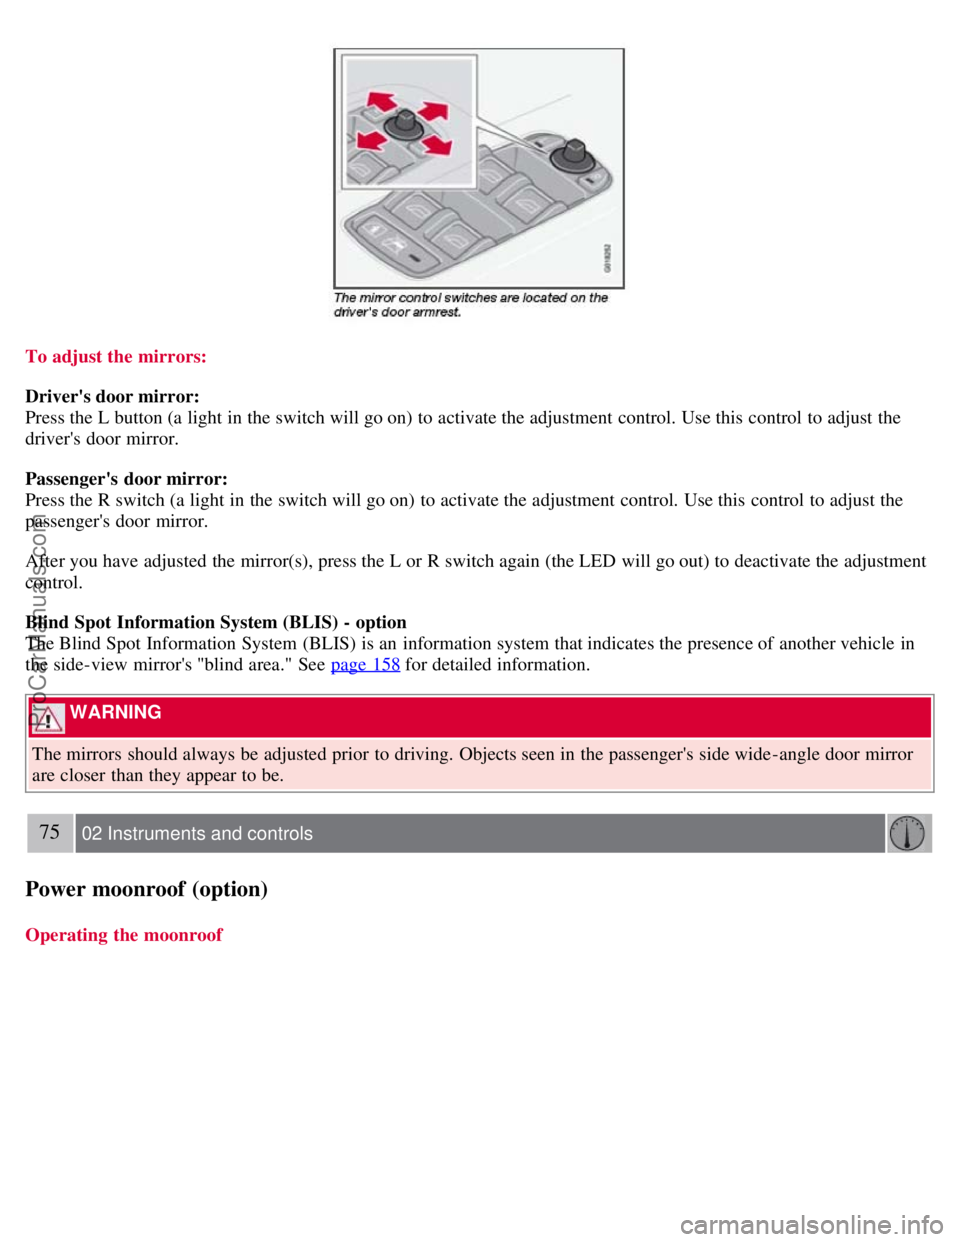
To adjust the mirrors:
Driver's door mirror:
Press the L button (a light in the switch will go on) to activate the adjustment control. Use this control to adjust the
driver's door mirror.
Passenger's door mirror:
Press the R switch (a light in the switch will go on) to activate the adjustment control. Use this control to adjust the
passenger's door mirror.
After you have adjusted the mirror(s), press the L or R switch again (the LED will go out) to deactivate the adjustment
control.
Blind Spot Information System (BLIS) - option
The Blind Spot Information System (BLIS) is an information system that indicates the presence of another vehicle in
the side-view mirror's "blind area." See page 158
for detailed information.
WARNING
The mirrors should always be adjusted prior to driving. Objects seen in the passenger's side wide -angle door mirror
are closer than they appear to be.
75 02 Instruments and controls
Power moonroof (option)
Operating the moonroof
ProCarManuals.com
Page 68 of 239
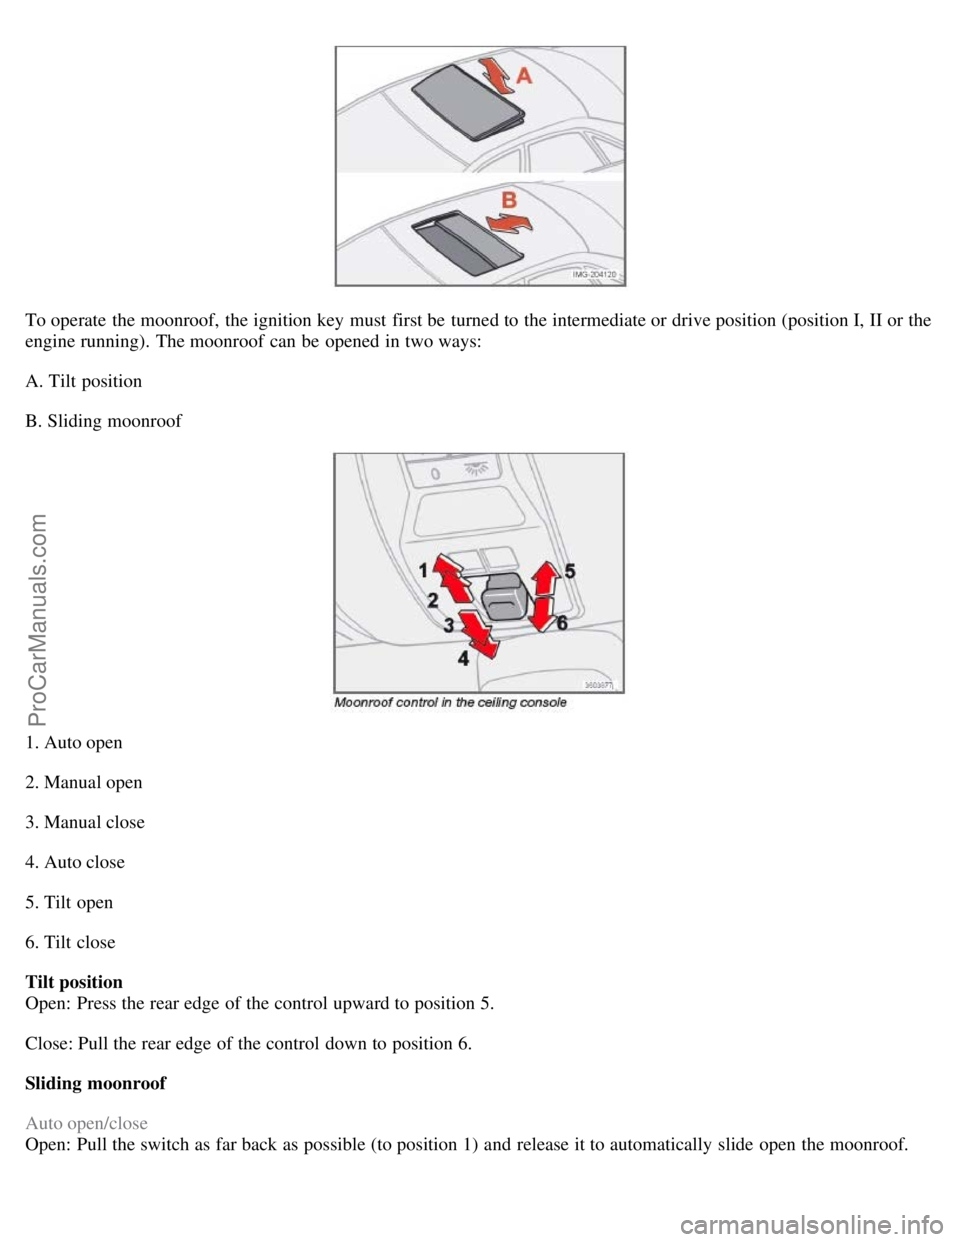
To operate the moonroof, the ignition key must first be turned to the intermediate or drive position (position I, II or the
engine running). The moonroof can be opened in two ways:
A. Tilt position
B. Sliding moonroof
1. Auto open
2. Manual open
3. Manual close
4. Auto close
5. Tilt open
6. Tilt close
Tilt position
Open: Press the rear edge of the control upward to position 5.
Close: Pull the rear edge of the control down to position 6.
Sliding moonroof
Auto open/close
Open: Pull the switch as far back as possible (to position 1) and release it to automatically slide open the moonroof.
ProCarManuals.com
Page 69 of 239
Close: Push the switch as far forward as possible (to position 4) and release it to automatically close the moonroof.
Manual open/close
Open: Pull the switch back to the first stop (position 2) and hold it until the moonroof has opened to the position of
your choice.
Close: Push the switch forward to the first stop (position 3) and hold it until the moonroof has closed to the position of
your choice, or has closed completely.
WARNING
If the moonroof is obstructed during auto-close operation, it will automatically reverse direction and return to its
starting position.
During manual closing, if the moonroof is obstructed, immediately open it again.
76 02 Instruments and controls
Power moonroof (option)
NOTE
If the moonroof is repeatedly obstructed during auto-close operation, an overload circuit breaker will temporarily halt
moonroof function. The moonroof will return to normal function after a brief cool-down period.
WARNING
Never open or close the moonroof if it is obstructed in any way.
Never allow a child to operate the moonroof.
Never extend any object or body part though the open moonroof, even if the vehicle's ignition is completely
switched off.
Never leave a child alone in a vehicle.
CAUTION
Remove ice and snow before opening the moonroof.
Do not operate the moonroof if it is frozen closed.
Never place heavy objects on the moonroof.
Visor
ProCarManuals.com
Page 70 of 239
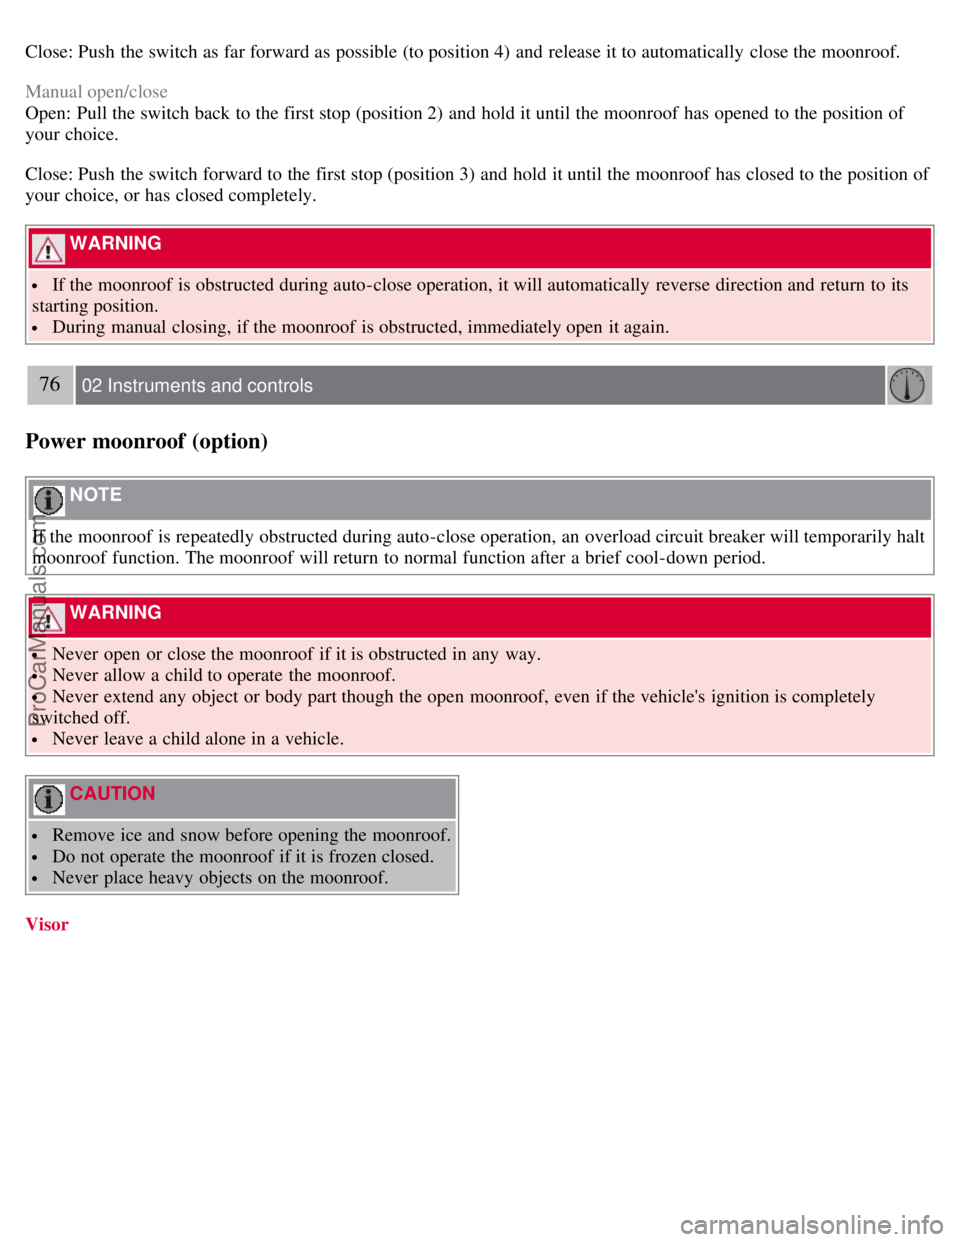
The optional moonroof features a sliding visor. The visor slides open automatically when the moonroof is opened, and
must be closed manually.
77 02 Instruments and controls
Personal settings
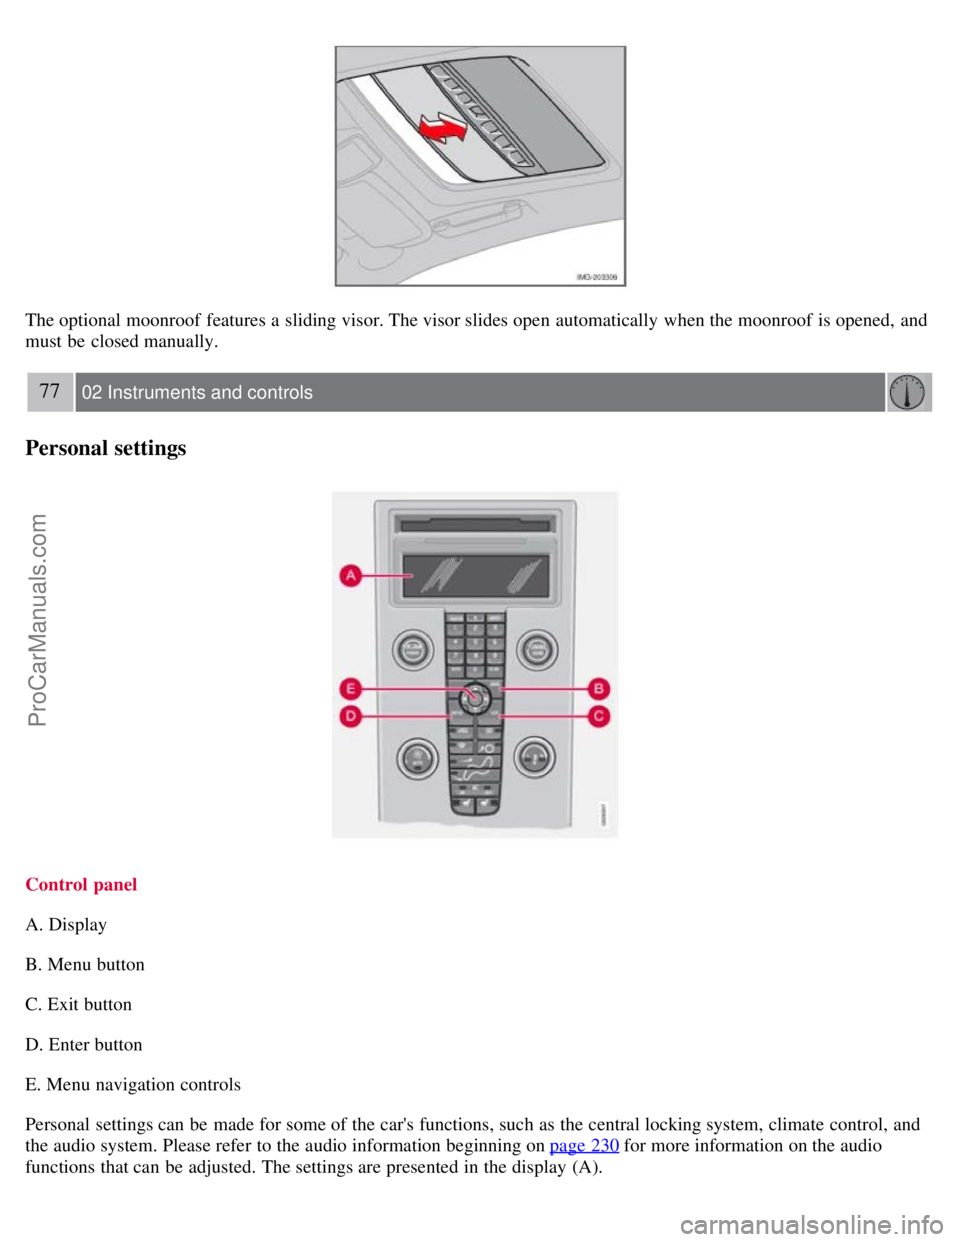
Control panel
A. Display
B. Menu button
C. Exit button
D. Enter button
E. Menu navigation controls
Personal settings can be made for some of the car's functions, such as the central locking system, climate control, and
the audio system. Please refer to the audio information beginning on page 230
for more information on the audio
functions that can be adjusted. The settings are presented in the display (A).
ProCarManuals.com