VOLVO S60 2003 Owner's Guide
Manufacturer: VOLVO, Model Year: 2003, Model line: S60, Model: VOLVO S60 2003Pages: 120, PDF Size: 2.43 MB
Page 31 of 120
Auxiliary sockets
These 12 volt sockets can be used to plug in certain accessories such as cellular telephones, etc. The key must be in
position I (or higher) for the auxiliary socket to function.
The auxiliary sockets can also be used for cigarette lighters, which are available at your Volvo retailer.
NOTE: The cover should be kept on when the auxiliary socket is not in use.
Ashtrays
Volvo cars in North America do not have an ashtray in the front seat as standard equipment. If you want to have an
ashtray in the front seat, please contact your Volvo retailer.
pg. 38 Instruments and controls
Electrically operated windows
Electrically operated windows
The electrically operated windows are controlled by buttons in the arm rests. The ignition switch must be ON *
(ignition key in position I, II or the engine running) for the electrically operated windows to function.
To lower: Press down the front edge of the button to the first detent ("stop").
To raise: Lightly pull up the front edge of the button to the first detent ("stop").
* The electrically operated windows will also function after the ignition has been switched off as long as neither of the
front doors has been opened.
Auto up/down function (front doors only):
Either front door window can be opened or closed automatically.
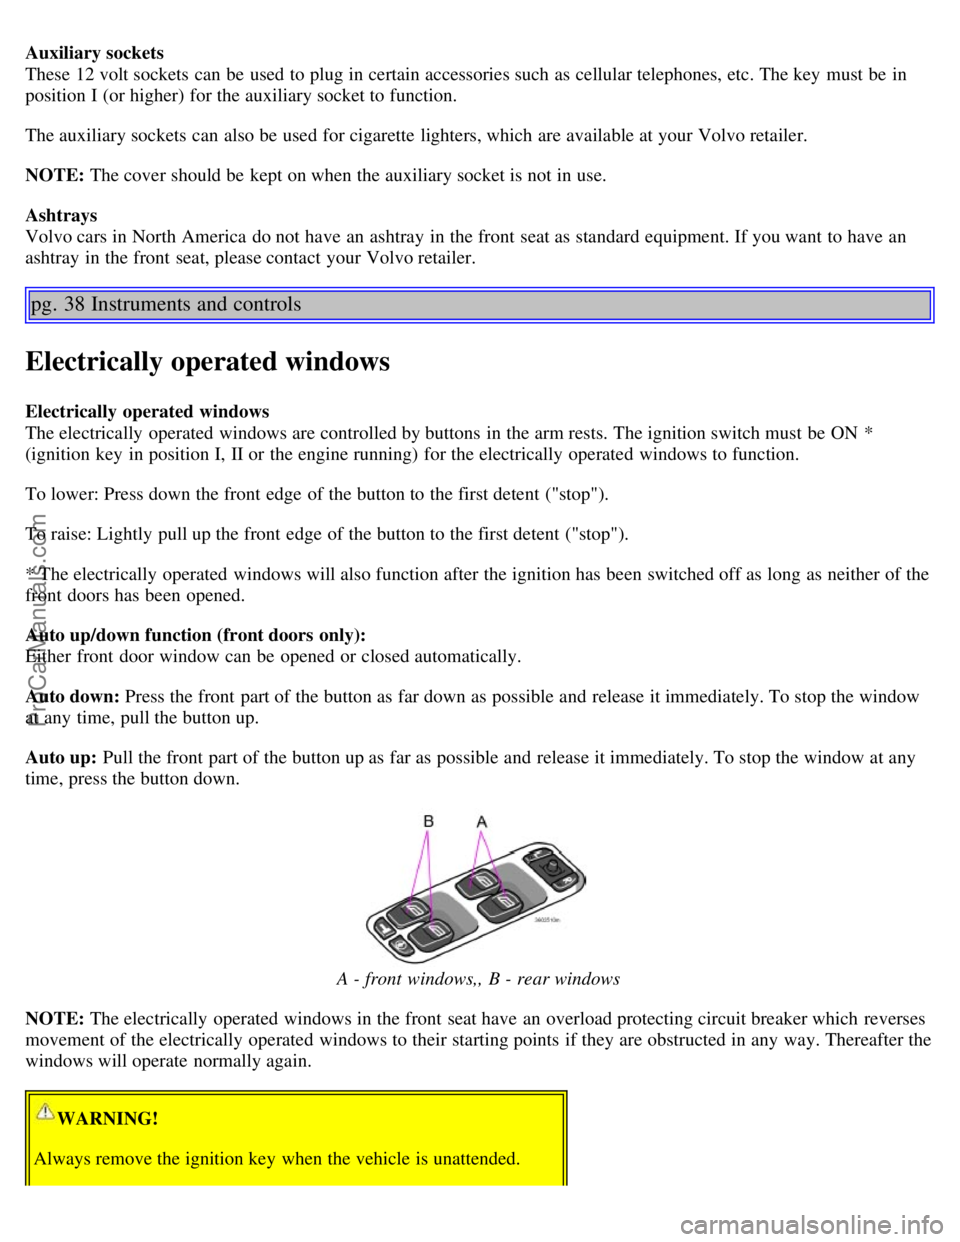
Auto down: Press the front part of the button as far down as possible and release it immediately. To stop the window
at any time, pull the button up.
Auto up: Pull the front part of the button up as far as possible and release it immediately. To stop the window at any
time, press the button down.
A - front windows,, B - rear windows
NOTE: The electrically operated windows in the front seat have an overload protecting circuit breaker which reverses
movement of the electrically operated windows to their starting points if they are obstructed in any way. Thereafter the
windows will operate normally again.
WARNING!
Always remove the ignition key when the vehicle is unattended.
ProCarManuals.com
Page 32 of 120
Make sure that childrens' hands are clear before raising the windows.
Never leave children unattended in the car.
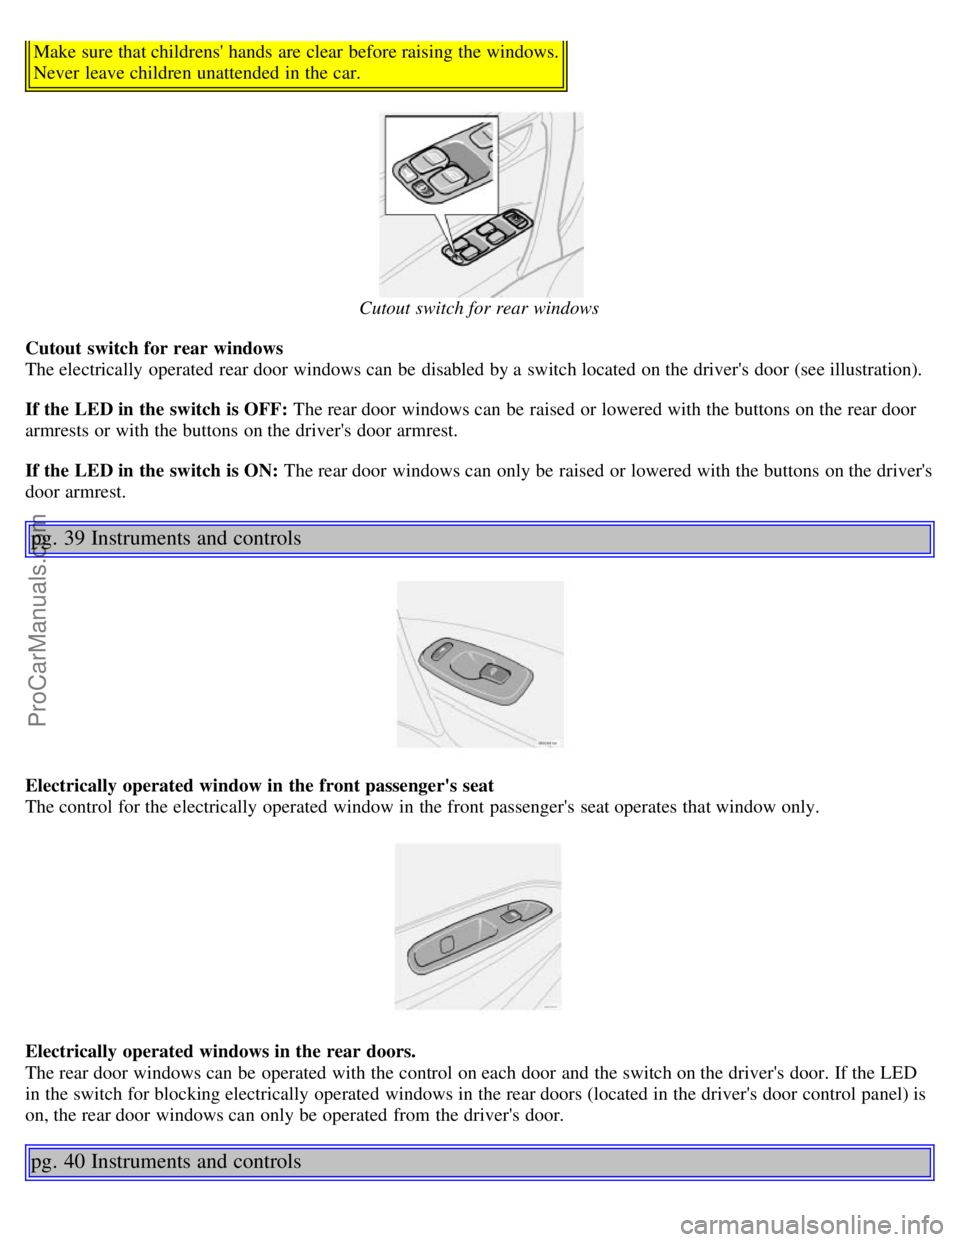
Cutout switch for rear windows
Cutout switch for rear windows
The electrically operated rear door windows can be disabled by a switch located on the driver's door (see illustration).
If the LED in the switch is OFF: The rear door windows can be raised or lowered with the buttons on the rear door
armrests or with the buttons on the driver's door armrest.
If the LED in the switch is ON: The rear door windows can only be raised or lowered with the buttons on the driver's
door armrest.
pg. 39 Instruments and controls
Electrically operated window in the front passenger's seat
The control for the electrically operated window in the front passenger's seat operates that window only.
Electrically operated windows in the rear doors.
The rear door windows can be operated with the control on each door and the switch on the driver's door. If the LED
in the switch for blocking electrically operated windows in the rear doors (located in the driver's door control panel) is
on, the rear door windows can only be operated from the driver's door.
pg. 40 Instruments and controls
ProCarManuals.com
Page 33 of 120
Rearview mirror/sideview mirrors
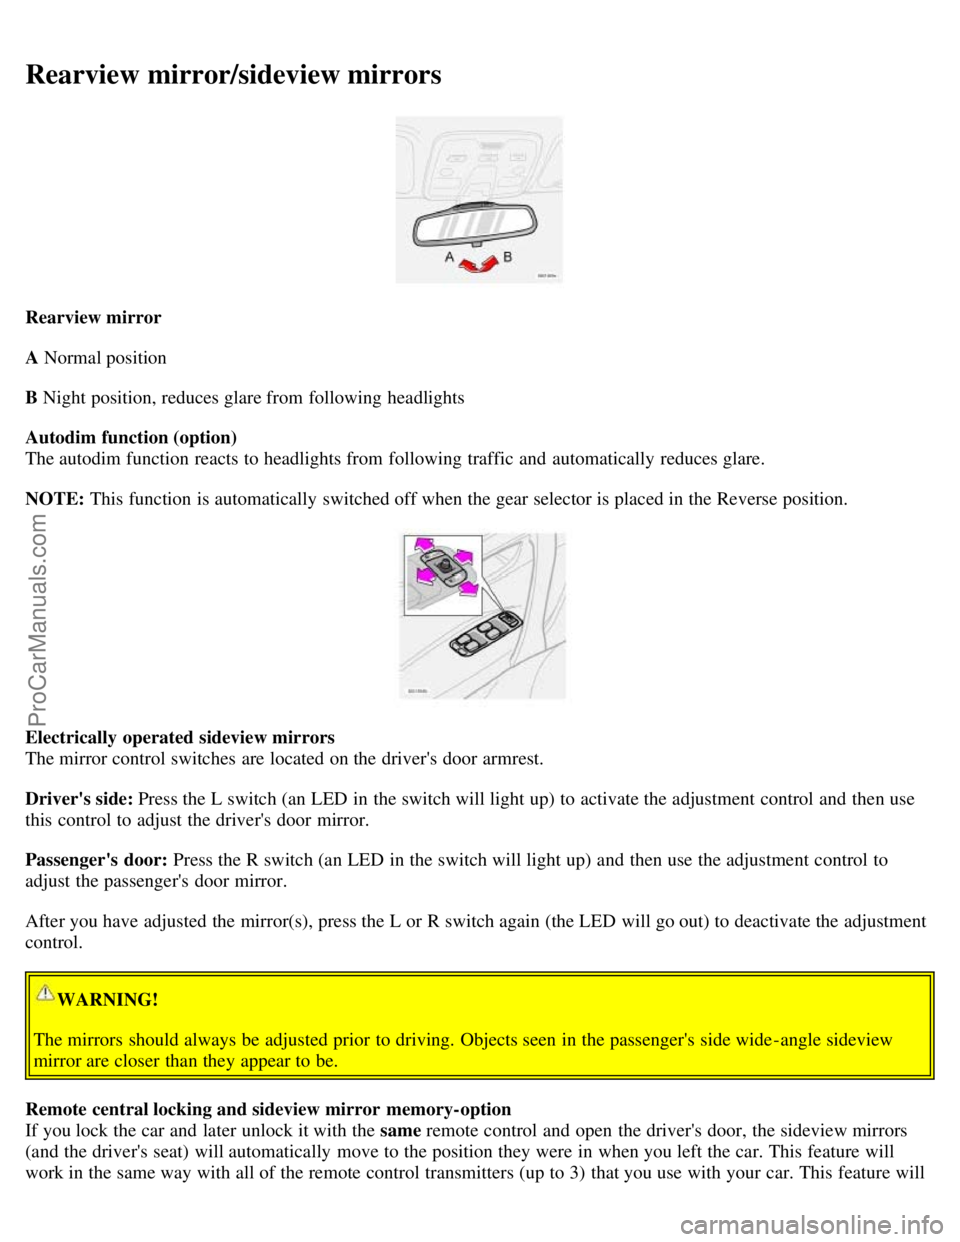
Rearview mirror
A Normal position
B Night position, reduces glare from following headlights
Autodim function (option)
The autodim function reacts to headlights from following traffic and automatically reduces glare.
NOTE: This function is automatically switched off when the gear selector is placed in the Reverse position.
Electrically operated sideview mirrors
The mirror control switches are located on the driver's door armrest.
Driver's side: Press the L switch (an LED in the switch will light up) to activate the adjustment control and then use
this control to adjust the driver's door mirror.
Passenger's door: Press the R switch (an LED in the switch will light up) and then use the adjustment control to
adjust the passenger's door mirror.
After you have adjusted the mirror(s), press the L or R switch again (the LED will go out) to deactivate the adjustment
control.
WARNING!
The mirrors should always be adjusted prior to driving. Objects seen in the passenger's side wide -angle sideview
mirror are closer than they appear to be.
Remote central locking and sideview mirror memory-option
If you lock the car and later unlock it with the same remote control and open the driver's door, the sideview mirrors
(and the driver's seat) will automatically move to the position they were in when you left the car. This feature will
work in the same way with all of the remote control transmitters (up to 3) that you use with your car. This feature will
ProCarManuals.com
Page 34 of 120
not function if you lock your car with the key.
pg. 41 Instruments and controls
Electrically operated sun roof (option)
Electrically operated sun roof
To operate the sun roof, the ignition key must first be turned to the intermediate or drive position (position I, II or the
engine running).
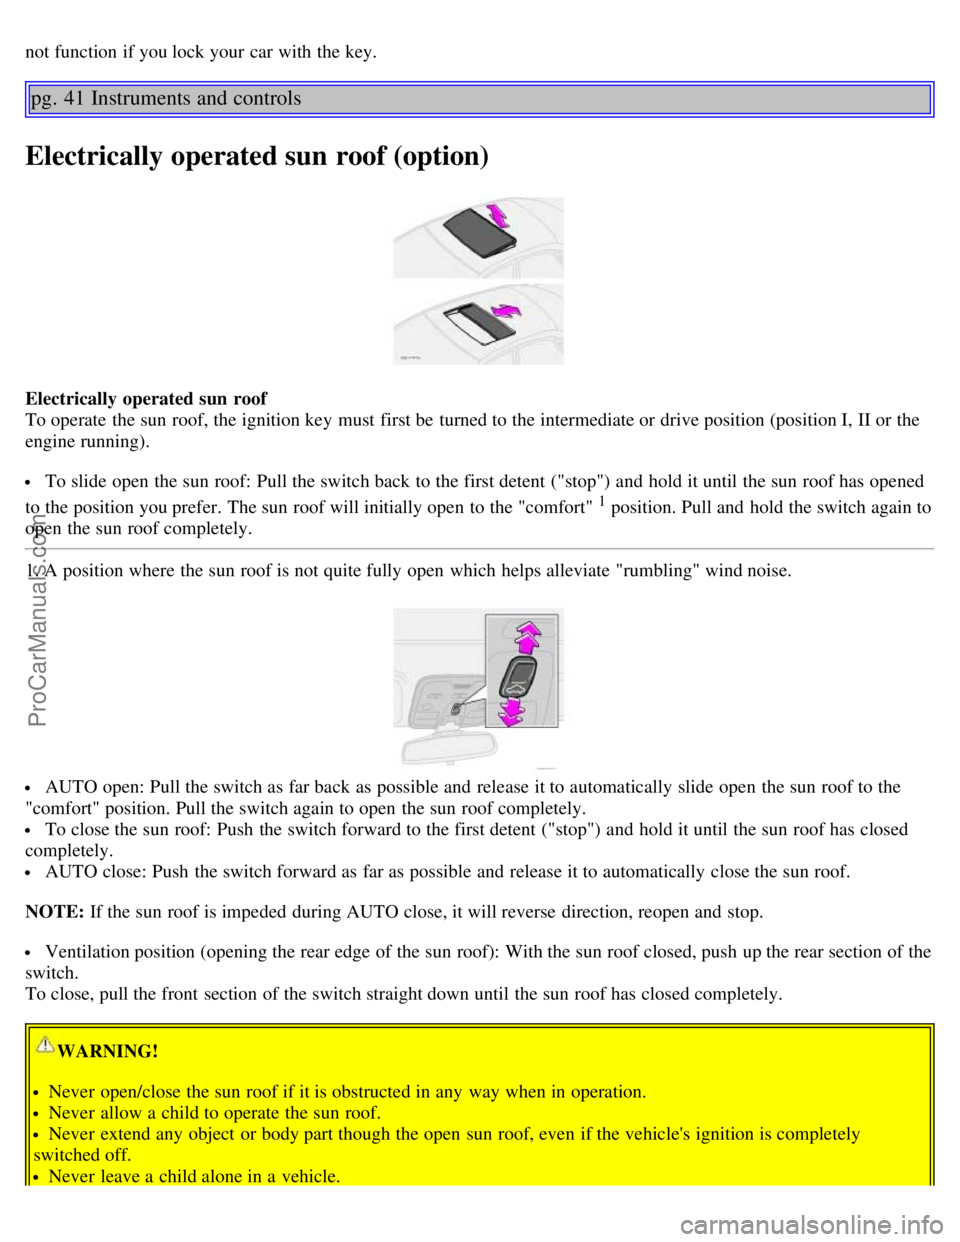
To slide open the sun roof: Pull the switch back to the first detent ("stop") and hold it until the sun roof has opened
to the position you prefer. The sun roof will initially open to the "comfort"
1 position. Pull and hold the switch again to
open the sun roof completely.
1. A position where the sun roof is not quite fully open which helps alleviate "rumbling" wind noise.
AUTO open: Pull the switch as far back as possible and release it to automatically slide open the sun roof to the
"comfort" position. Pull the switch again to open the sun roof completely.
To close the sun roof: Push the switch forward to the first detent ("stop") and hold it until the sun roof has closed
completely.
AUTO close: Push the switch forward as far as possible and release it to automatically close the sun roof.
NOTE: If the sun roof is impeded during AUTO close, it will reverse direction, reopen and stop.
Ventilation position (opening the rear edge of the sun roof): With the sun roof closed, push up the rear section of the
switch.
To close, pull the front section of the switch straight down until the sun roof has closed completely.
WARNING!
Never open/close the sun roof if it is obstructed in any way when in operation.
Never allow a child to operate the sun roof.
Never extend any object or body part though the open sun roof, even if the vehicle's ignition is completely
switched off.
Never leave a child alone in a vehicle.
ProCarManuals.com
Page 35 of 120
CAUTION:
Remove ice and snow before opening the sun roof.
Do not operate the sun roof if it is frozen closed.
Never place heavy objects on the sun roof.
pg. 42 Instruments and controls
Electrically operated sun roof (option) (contd)
Sun visor:
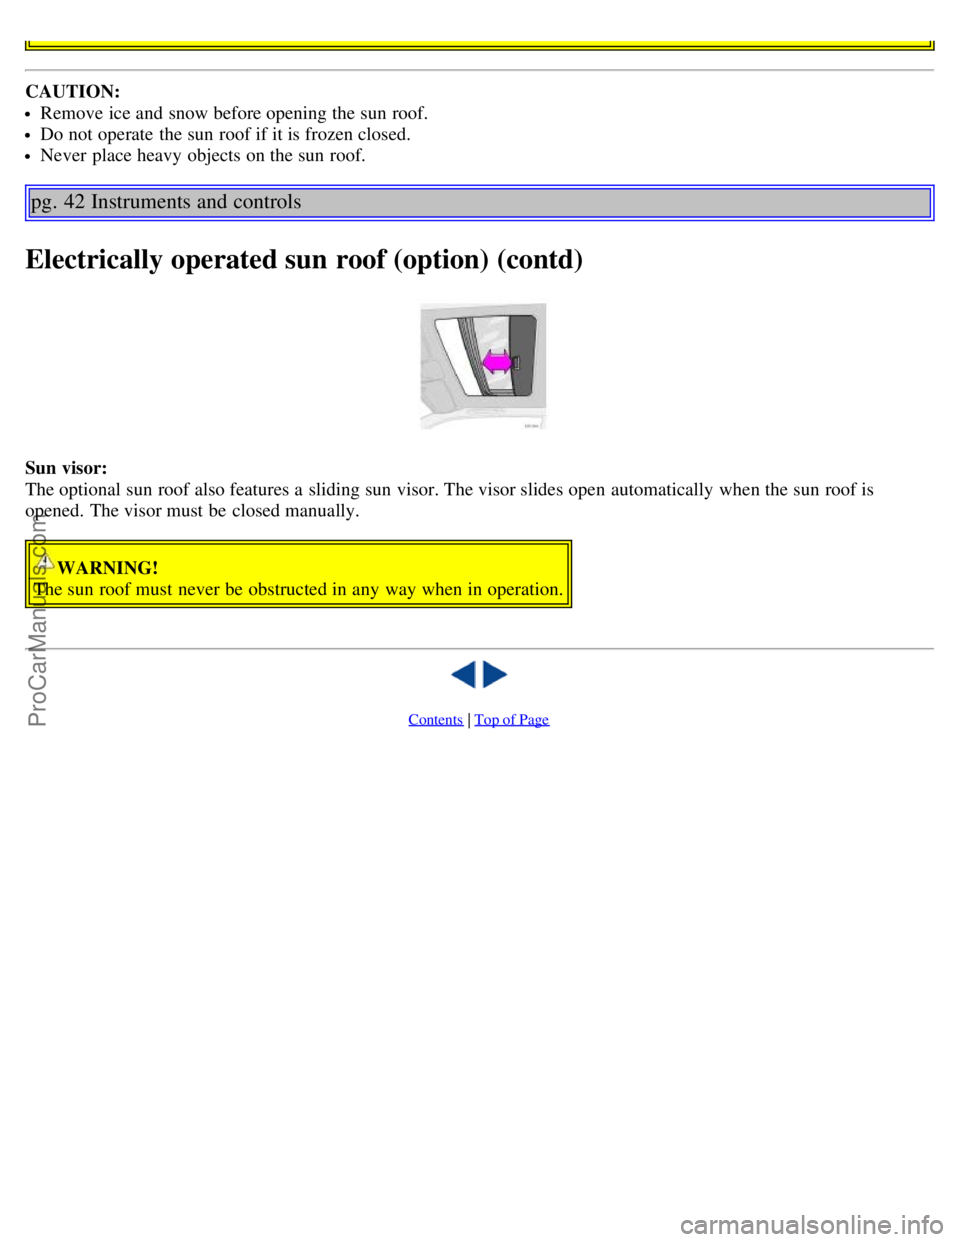
The optional sun roof also features a sliding sun visor. The visor slides open automatically when the sun roof is
opened. The visor must be closed manually.
WARNING!
The sun roof must never be obstructed in any way when in operation.
Contents | Top of Page
ProCarManuals.com
Page 36 of 120

2 0 0 3
VOLVO S60
Climate control
pg. 43 Climate control
Climate control systems - general information 44
Air distribution45
Electronic climate control, ECC (2.4T and T5)46
Manual climate control with air conditioning, (A/C)50
pg. 44 Climate control
Climate control systems - general information
Condensation on the inside of the windows
Keeping the insides of the windows clean will help reduce the amount of condensation that forms on the windows. Use
a commercial window cleaning agent to clean the windows.
Ice and snow
Always keep the air intake grille at the base of the windshield free of snow.
Cabin air filter
Replace the cabin air filter with a new one at the recommended intervals. The filter should be replaced more often
when driving under dirty and dusty conditions. The filter cannot be cleaned and therefore should always be replaced
with a new one.
Sensors
The sunlight sensor on the dashboard and passenger compartment temperature sensor in the ECC control panel should
not be covered in any way as this could cause incorrect information to be sent to the ECC system.
Parking the car in warm weather
If your car has been parked in the sun in warm weather, opening the windows and sun roof (option) for several
minutes before driving will help release the warm air from the passenger compartment. When the engine is running,
close the windows and sun roof and use the recirculation function for several minutes to enable the air conditioning to
cool the compartment as quickly as possible.
Windows and optional sun roof
The ECC system (2.4T and T5 models only) will function best if the windows and optional sun roof are closed. If you
drive with the sun roof open, we recommend that you manually adjust the temperature and blower control (the LED in
the AUTO switch should be off).
Acceleration
The air conditioning is momentarily disengaged during full-throttle acceleration.
Climate control maintenance
ProCarManuals.com
Page 37 of 120
All maintenance on the climate control systems should be carried out by an authorized Volvo service technician only.
Refrigerant
Volvo cares about the environment. The air conditioning system in your car contains a CFC-free refrigerant - R134a.
This substance will not deplete the ozone layer. The system contains 2.2 lbs (1000 g) R134a and uses PAG oil.
Passenger compartment blower
Approximately 50 minutes after the ignition is turned off, the blower may come on automatically, and run for seven
minutes, to remove condensation in the A/C evaporator.
pg. 45 Climate control
Air distribution
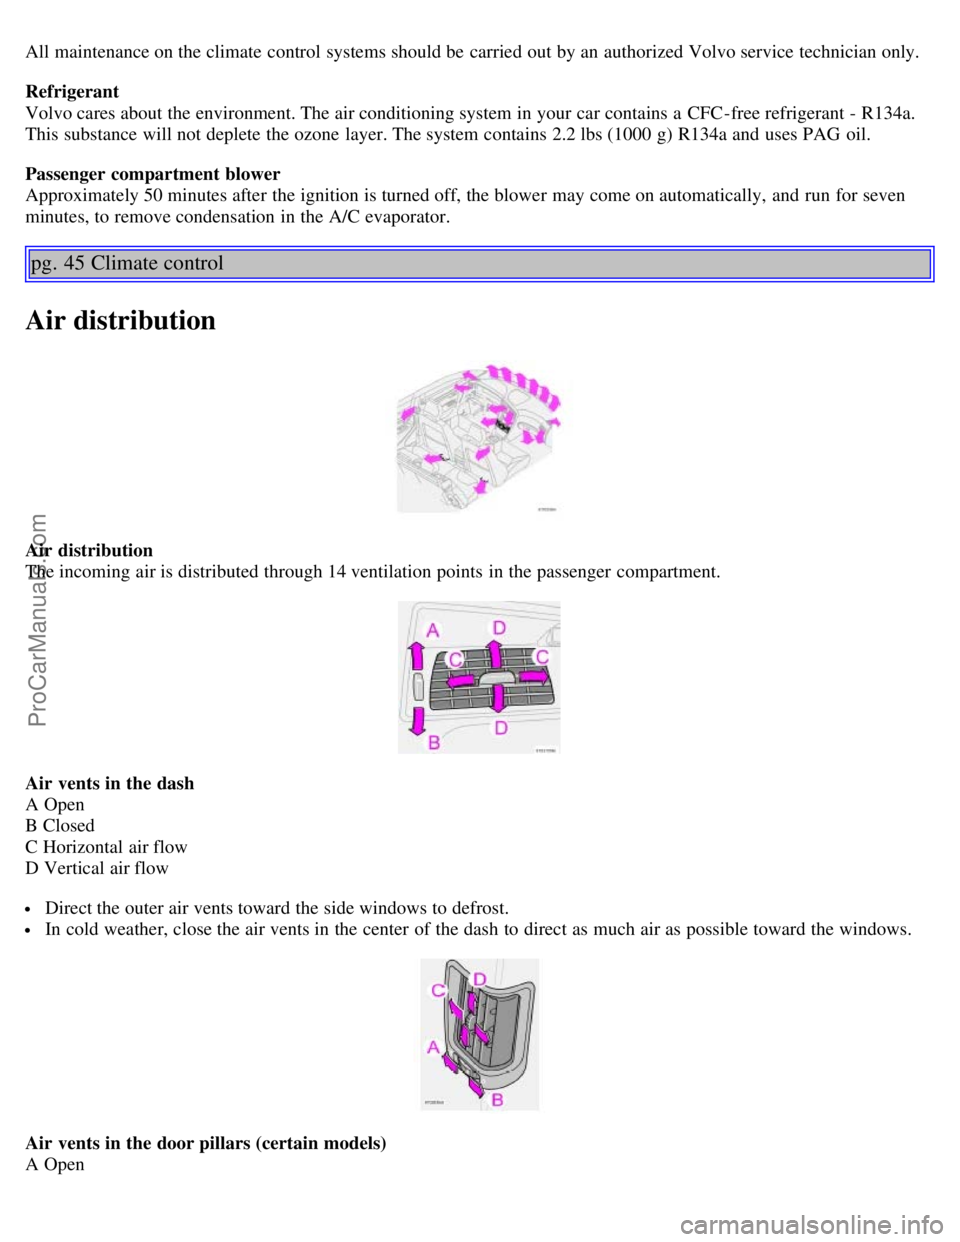
Air distribution
The incoming air is distributed through 14 ventilation points in the passenger compartment.
Air vents in the dash
A Open
B Closed
C Horizontal air flow
D Vertical air flow
Direct the outer air vents toward the side windows to defrost.
In cold weather, close the air vents in the center of the dash to direct as much air as possible toward the windows.
Air vents in the door pillars (certain models)
A Open
ProCarManuals.com
Page 38 of 120
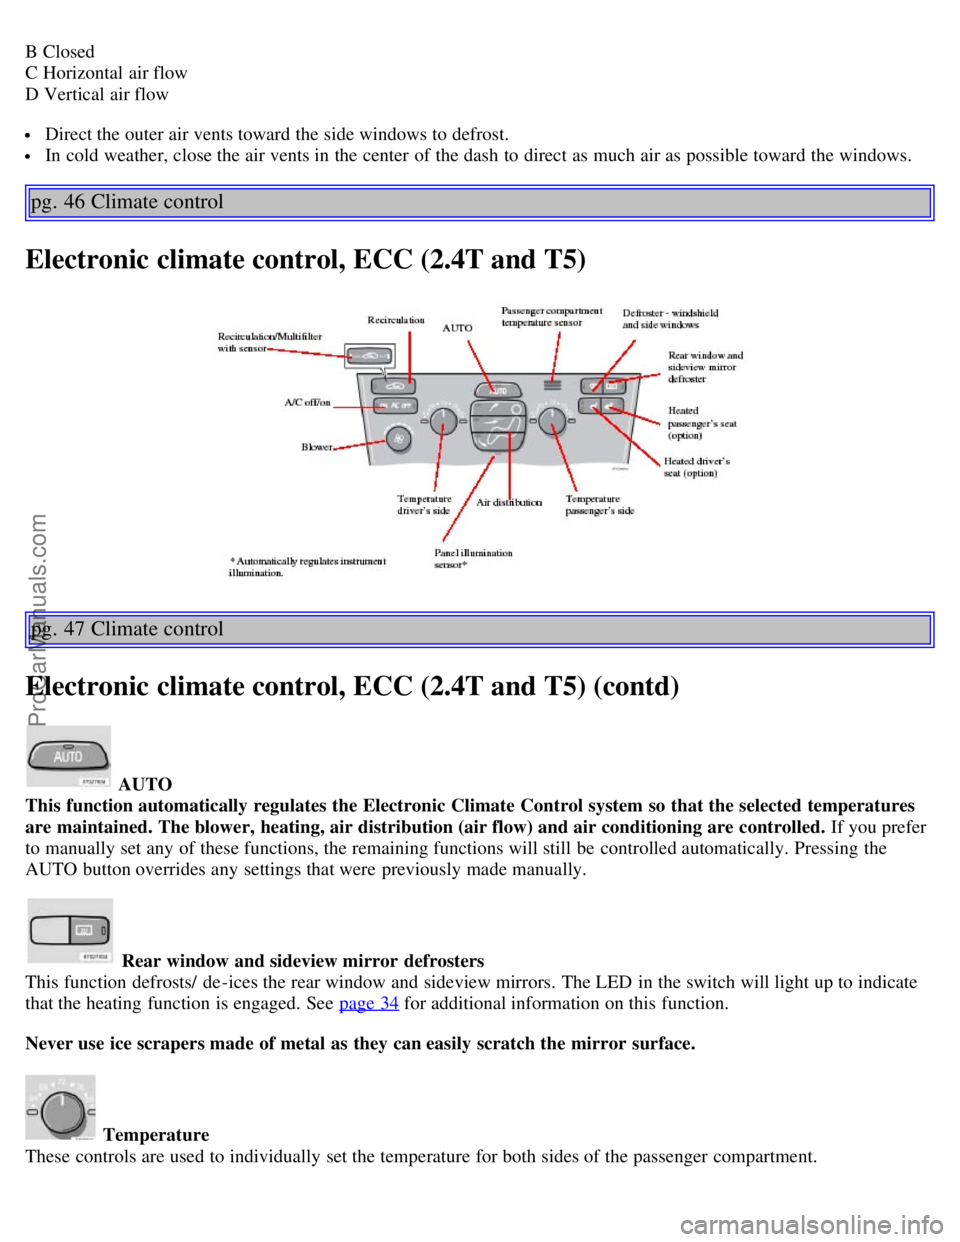
B Closed
C Horizontal air flow
D Vertical air flow
Direct the outer air vents toward the side windows to defrost.
In cold weather, close the air vents in the center of the dash to direct as much air as possible toward the windows.
pg. 46 Climate control
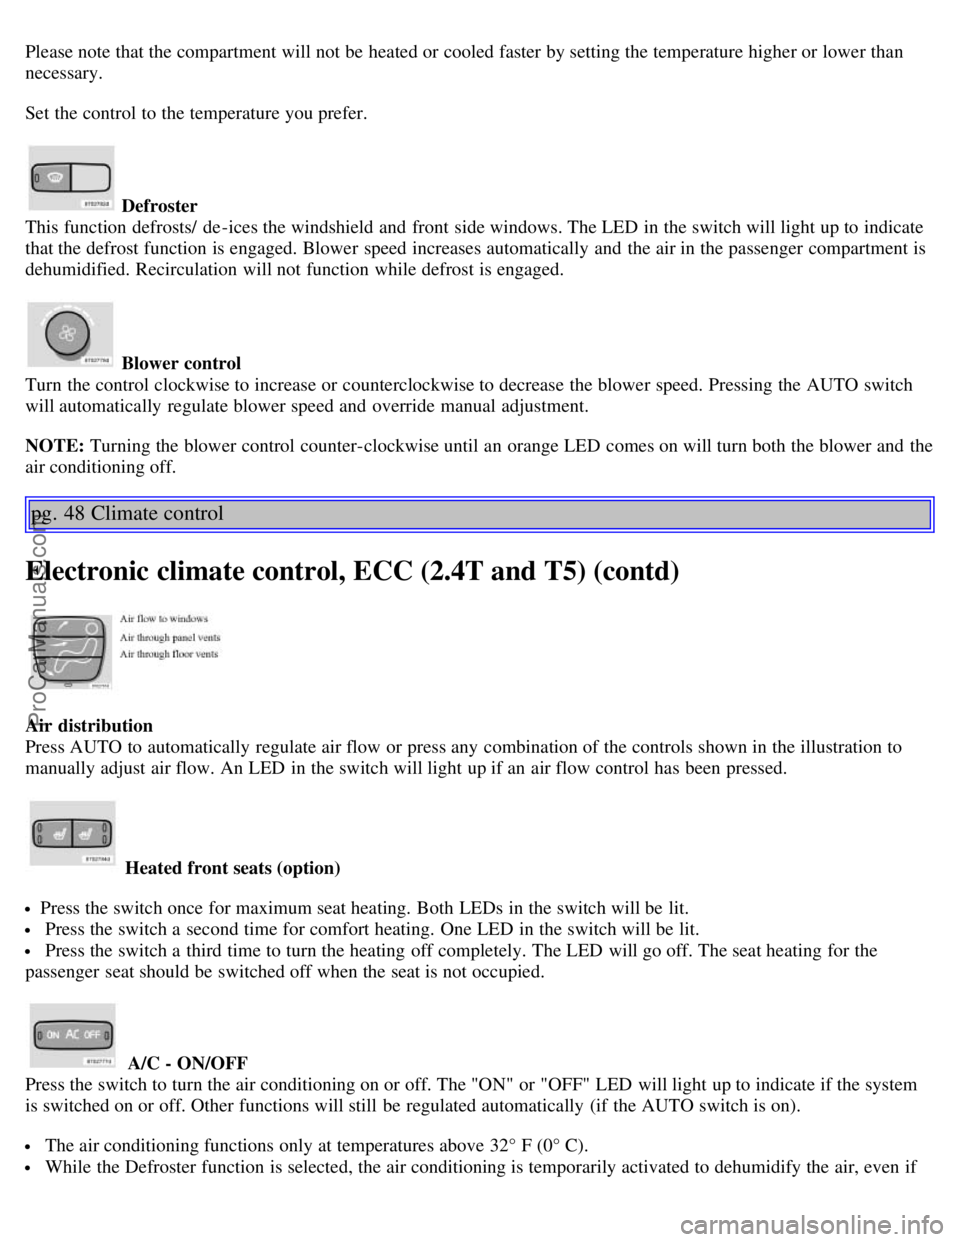
Electronic climate control, ECC (2.4T and T5)
pg. 47 Climate control
Electronic climate control, ECC (2.4T and T5) (contd)
AUTO
This function automatically regulates the Electronic Climate Control system so that the selected temperatures
are maintained. The blower, heating, air distribution (air flow) and air conditioning are controlled. If you prefer
to manually set any of these functions, the remaining functions will still be controlled automatically. Pressing the
AUTO button overrides any settings that were previously made manually.
Rear window and sideview mirror defrosters
This function defrosts/ de -ices the rear window and sideview mirrors. The LED in the switch will light up to indicate
that the heating function is engaged. See page 34
for additional information on this function.
Never use ice scrapers made of metal as they can easily scratch the mirror surface.
Temperature
These controls are used to individually set the temperature for both sides of the passenger compartment.
ProCarManuals.com
Page 39 of 120
Please note that the compartment will not be heated or cooled faster by setting the temperature higher or lower than
necessary.
Set the control to the temperature you prefer.
Defroster
This function defrosts/ de -ices the windshield and front side windows. The LED in the switch will light up to indicate
that the defrost function is engaged. Blower speed increases automatically and the air in the passenger compartment is
dehumidified. Recirculation will not function while defrost is engaged.
Blower control
Turn the control clockwise to increase or counterclockwise to decrease the blower speed. Pressing the AUTO switch
will automatically regulate blower speed and override manual adjustment.
NOTE: Turning the blower control counter-clockwise until an orange LED comes on will turn both the blower and the
air conditioning off.
pg. 48 Climate control
Electronic climate control, ECC (2.4T and T5) (contd)
Air distribution
Press AUTO to automatically regulate air flow or press any combination of the controls shown in the illustration to
manually adjust air flow. An LED in the switch will light up if an air flow control has been pressed.
Heated front seats (option)
Press the switch once for maximum seat heating. Both LEDs in the switch will be lit.
Press the switch a second time for comfort heating. One LED in the switch will be lit.
Press the switch a third time to turn the heating off completely. The LED will go off. The seat heating for the
passenger seat should be switched off when the seat is not occupied.
A/C - ON/OFF
Press the switch to turn the air conditioning on or off. The "ON" or "OFF" LED will light up to indicate if the system
is switched on or off. Other functions will still be regulated automatically (if the AUTO switch is on).
The air conditioning functions only at temperatures above 32° F (0° C).
While the Defroster function is selected, the air conditioning is temporarily activated to dehumidify the air, even if
ProCarManuals.com
Page 40 of 120
you have manually switched the air conditioning off. This will only function if the blower is not switched off.
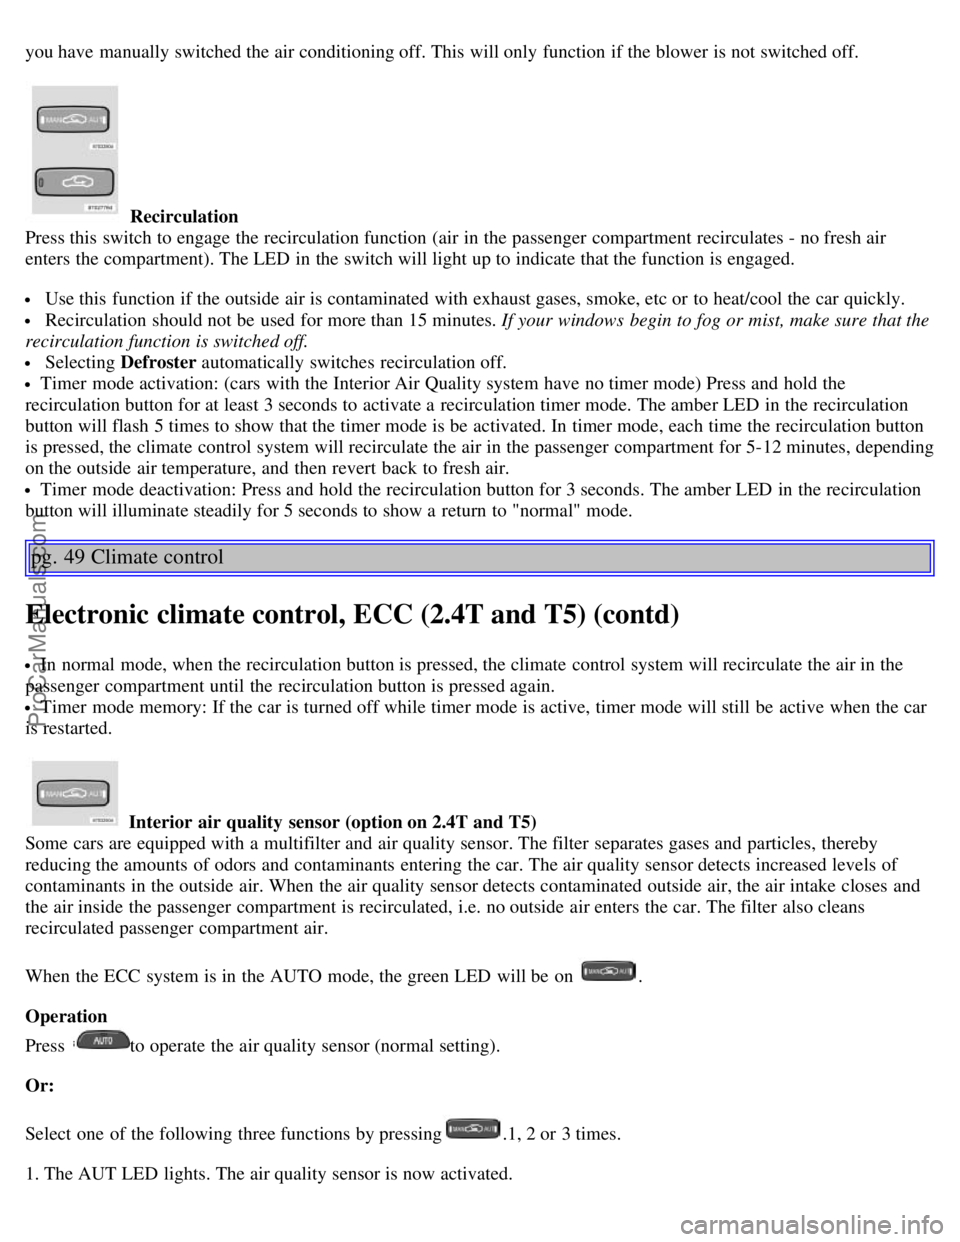
Recirculation
Press this switch to engage the recirculation function (air in the passenger compartment recirculates - no fresh air
enters the compartment). The LED in the switch will light up to indicate that the function is engaged.
Use this function if the outside air is contaminated with exhaust gases, smoke, etc or to heat/cool the car quickly.
Recirculation should not be used for more than 15 minutes. If your windows begin to fog or mist, make sure that the
recirculation function is switched off.
Selecting Defroster automatically switches recirculation off.
Timer mode activation: (cars with the Interior Air Quality system have no timer mode) Press and hold the
recirculation button for at least 3 seconds to activate a recirculation timer mode. The amber LED in the recirculation
button will flash 5 times to show that the timer mode is be activated. In timer mode, each time the recirculation button
is pressed, the climate control system will recirculate the air in the passenger compartment for 5-12 minutes, depending
on the outside air temperature, and then revert back to fresh air.
Timer mode deactivation: Press and hold the recirculation button for 3 seconds. The amber LED in the recirculation
button will illuminate steadily for 5 seconds to show a return to "normal" mode.
pg. 49 Climate control
Electronic climate control, ECC (2.4T and T5) (contd)
In normal mode, when the recirculation button is pressed, the climate control system will recirculate the air in the
passenger compartment until the recirculation button is pressed again.
Timer mode memory: If the car is turned off while timer mode is active, timer mode will still be active when the car
is restarted.
Interior air quality sensor (option on 2.4T and T5)
Some cars are equipped with a multifilter and air quality sensor. The filter separates gases and particles, thereby
reducing the amounts of odors and contaminants entering the car. The air quality sensor detects increased levels of
contaminants in the outside air. When the air quality sensor detects contaminated outside air, the air intake closes and
the air inside the passenger compartment is recirculated, i.e. no outside air enters the car. The filter also cleans
recirculated passenger compartment air.
When the ECC system is in the AUTO mode, the green LED will be on
.
Operation
Press
to operate the air quality sensor (normal setting).
Or:
Select one of the following three functions by pressing
.1, 2 or 3 times.
1. The AUT LED lights. The air quality sensor is now activated.
ProCarManuals.com